set clock FORD F650 2001 10.G Owners Manual
[x] Cancel search | Manufacturer: FORD, Model Year: 2001, Model line: F650, Model: FORD F650 2001 10.GPages: 240, PDF Size: 1.3 MB
Page 32 of 240
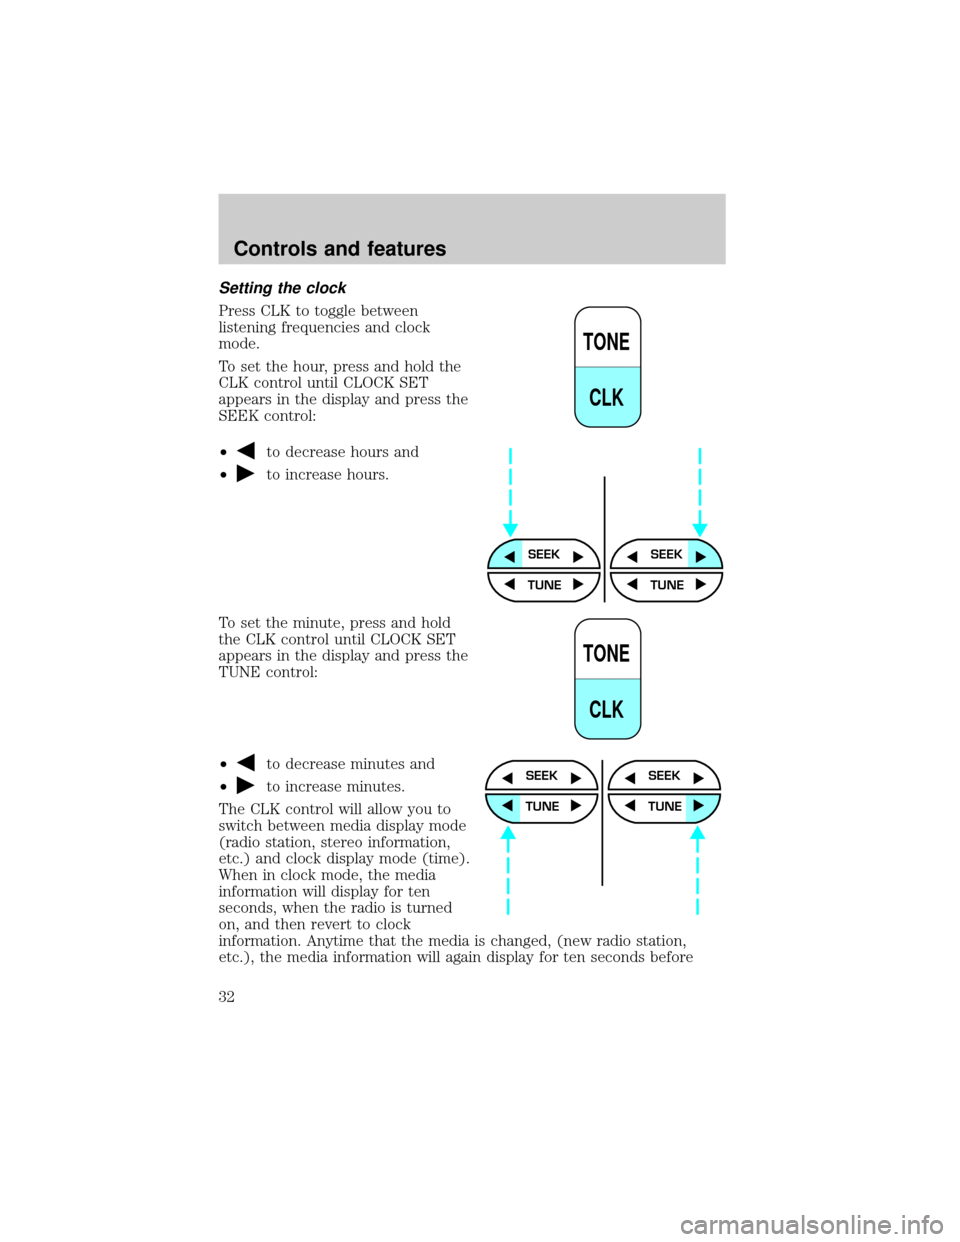
Setting the clock
Press CLK to toggle between
listening frequencies and clock
mode.
To set the hour, press and hold the
CLK control until CLOCK SET
appears in the display and press the
SEEK control:
┬▓
to decrease hours and
┬▓
to increase hours.
To set the minute, press and hold
the CLK control until CLOCK SET
appears in the display and press the
TUNE control:
┬▓
to decrease minutes and
┬▓
to increase minutes.
The CLK control will allow you to
switch between media display mode
(radio station, stereo information,
etc.) and clock display mode (time).
When in clock mode, the media
information will display for ten
seconds, when the radio is turned
on, and then revert to clock
information. Anytime that the media is changed, (new radio station,
etc.), the media information will again display for ten seconds before
TONE
CLK
SEEKSEEK
TUNE TUNE
TONE
CLK
SEEK
TUNE
SEEK
TUNE
Controls and features
32
Page 33 of 240
reverting back to the clock. In media mode, the media information will
always be displayed.
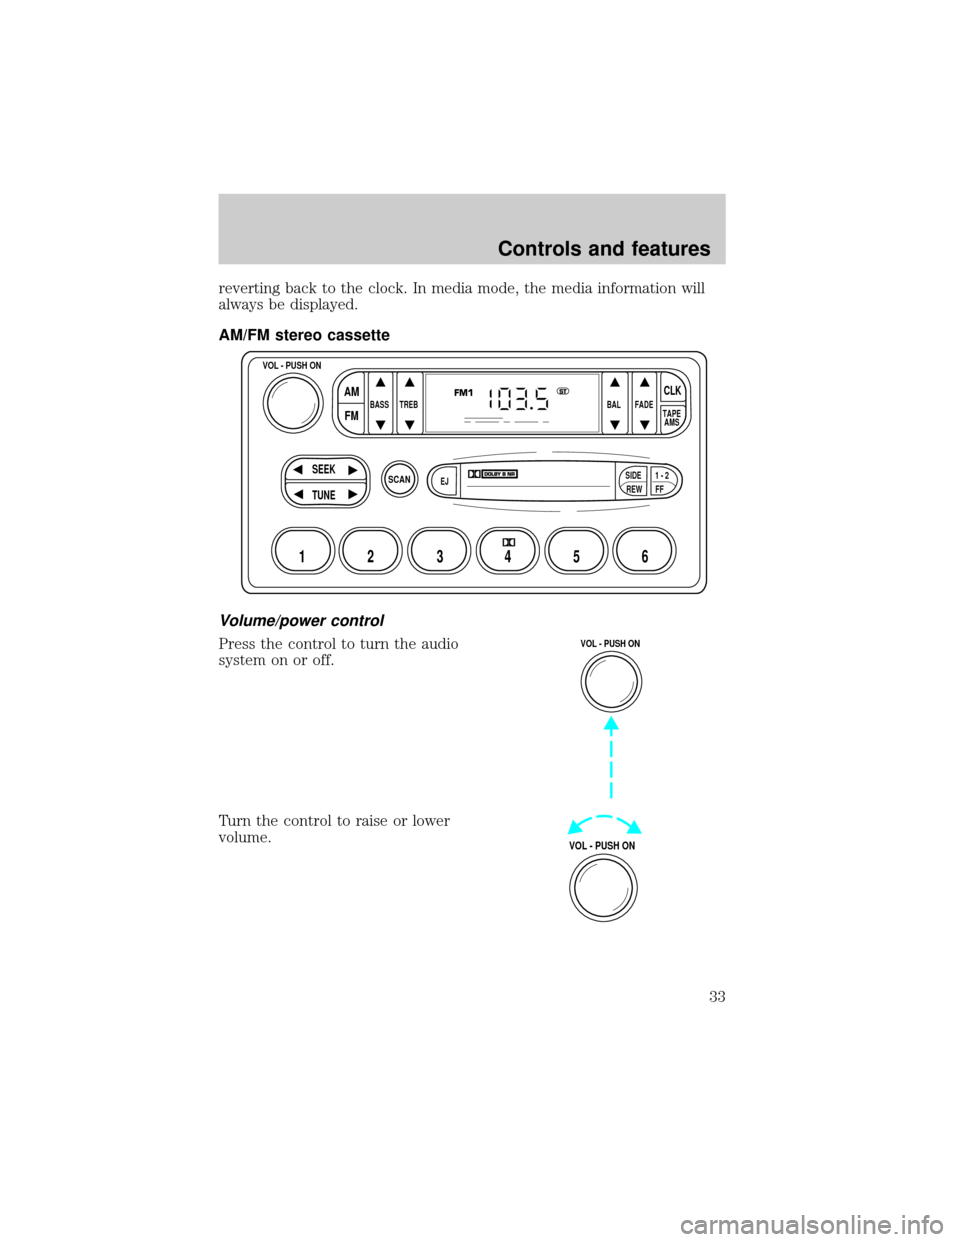
AM/FM stereo cassette
Volume/power control
Press the control to turn the audio
system on or off.
Turn the control to raise or lower
volume.
SCAN
BASS TREB BAL FADE
SIDE
EJ
REW FF1 - 2TAPE
AMS
VOL - PUSH ON
SEEK
TUNE
AM
FMCLK
12 3456
FM1ST
VOL - PUSH ON
VOL - PUSH ON
Controls and features
33
Page 39 of 240
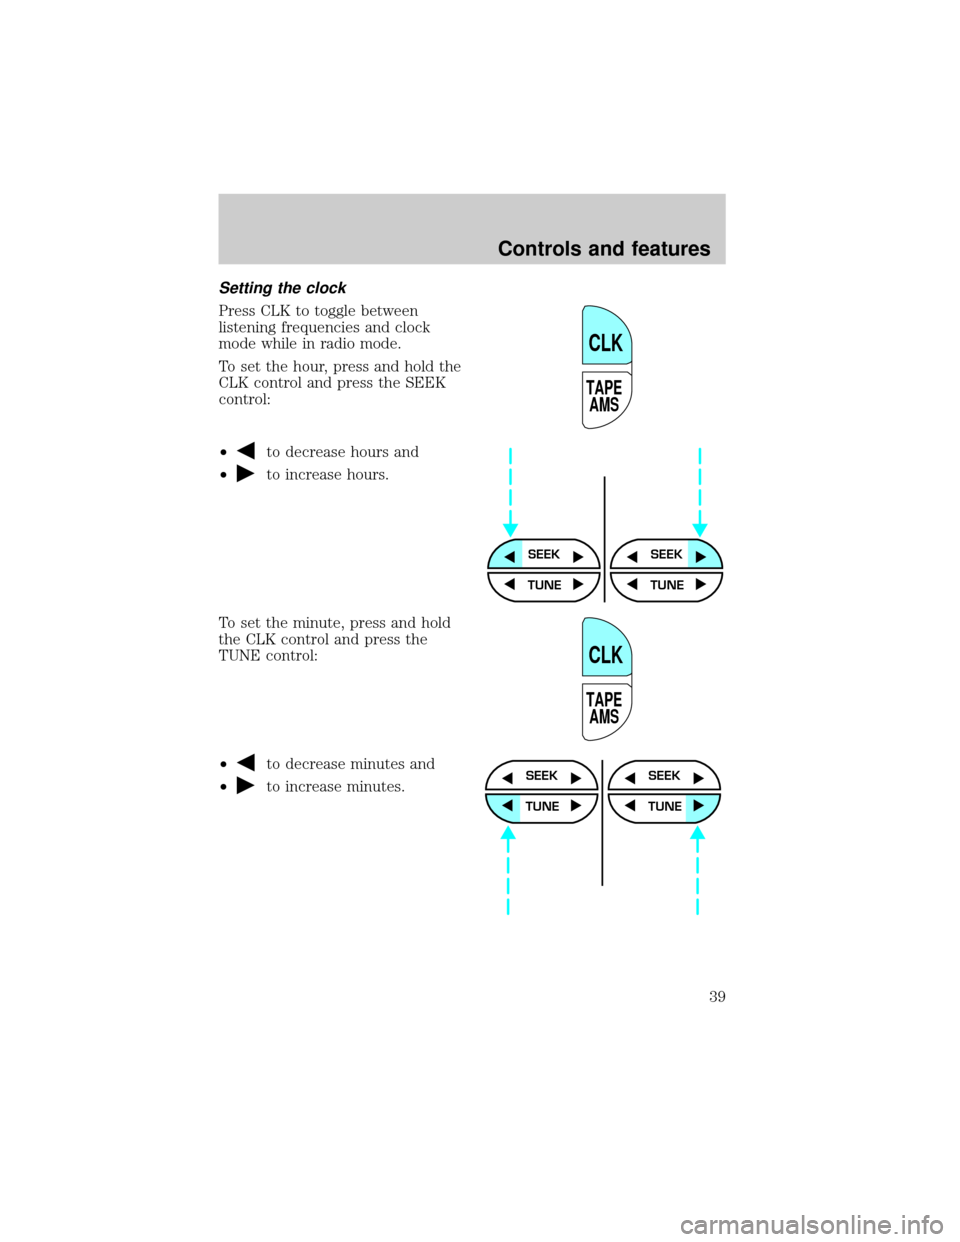
Setting the clock
Press CLK to toggle between
listening frequencies and clock
mode while in radio mode.
To set the hour, press and hold the
CLK control and press the SEEK
control:
┬▓
to decrease hours and
┬▓
to increase hours.
To set the minute, press and hold
the CLK control and press the
TUNE control:
┬▓
to decrease minutes and
┬▓
to increase minutes.
TAPE
AMS
CLK
SEEKSEEK
TUNE TUNE
TAPE
AMS
CLK
SEEK
TUNE
SEEK
TUNE
Controls and features
39
Page 40 of 240
The CLK control will allow you to switch between media display mode
(radio station, stereo information, etc.) and clock display mode (time).
When in clock mode, the media information will display for 10 seconds,
when the radio is turned on, and then revert to clock information.
Anytime that the media is changed, (new radio station, etc.), the media
information will again display for 10 seconds before reverting back to the
clock. In media mode, the media information will always be displayed.
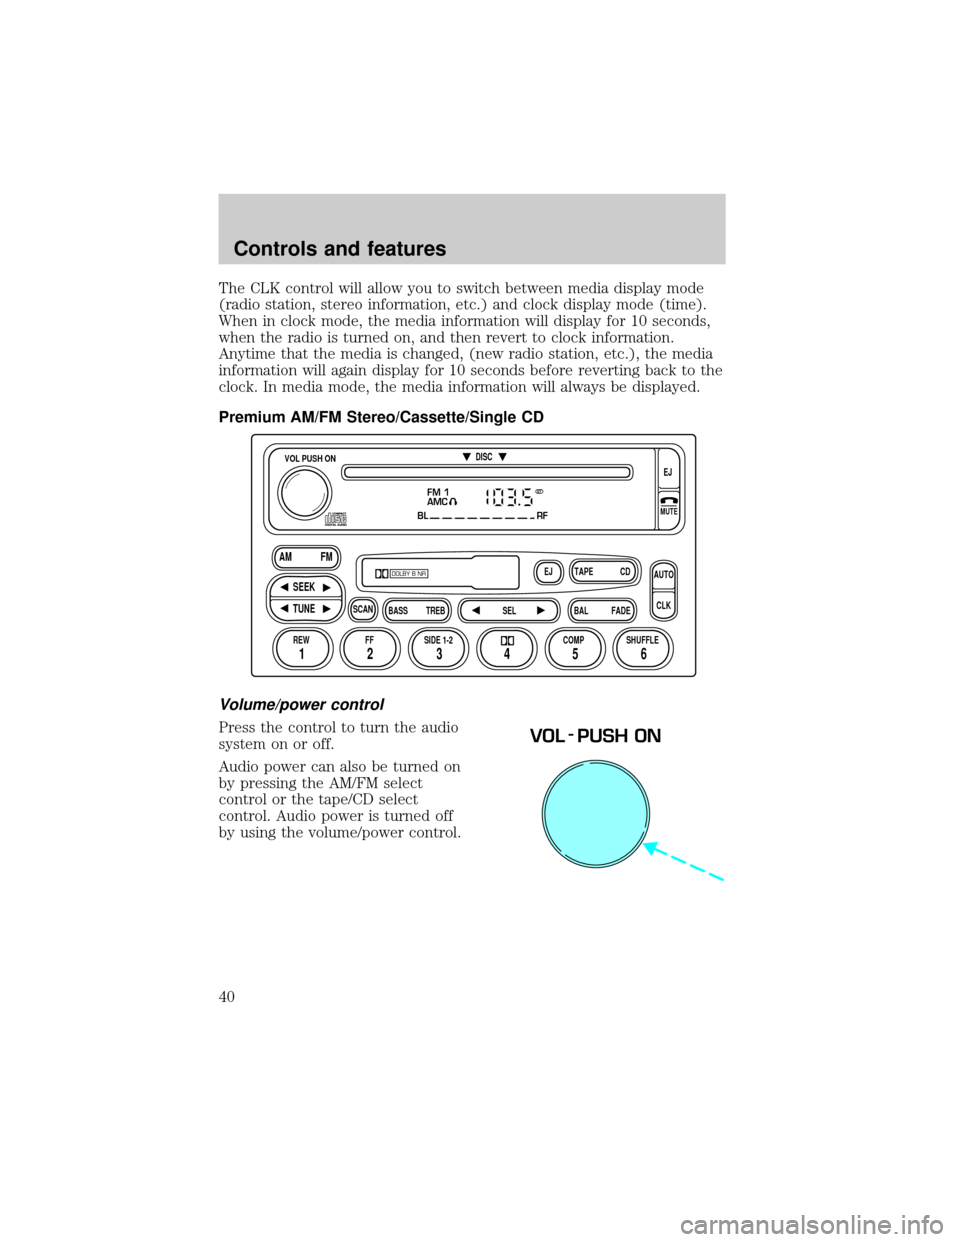
Premium AM/FM Stereo/Cassette/Single CD
Volume/power control
Press the control to turn the audio
system on or off.
Audio power can also be turned on
by pressing the AM/FM select
control or the tape/CD select
control. Audio power is turned off
by using the volume/power control.
FM 1
AMC
BL RF
REW FFSCAN
BASS TREB SEL BALTAPE DISC
EJ CD
FADEAUTO
CLK
SIDE 1-2 COMP SHUFFLEEJ
MUTE
VOL PUSH ON
SEEK
TUNE AM FM
12 3456
DOLBY B NR
ST
VOL - PUSH ON
Controls and features
40
Page 48 of 240
Setting the clock
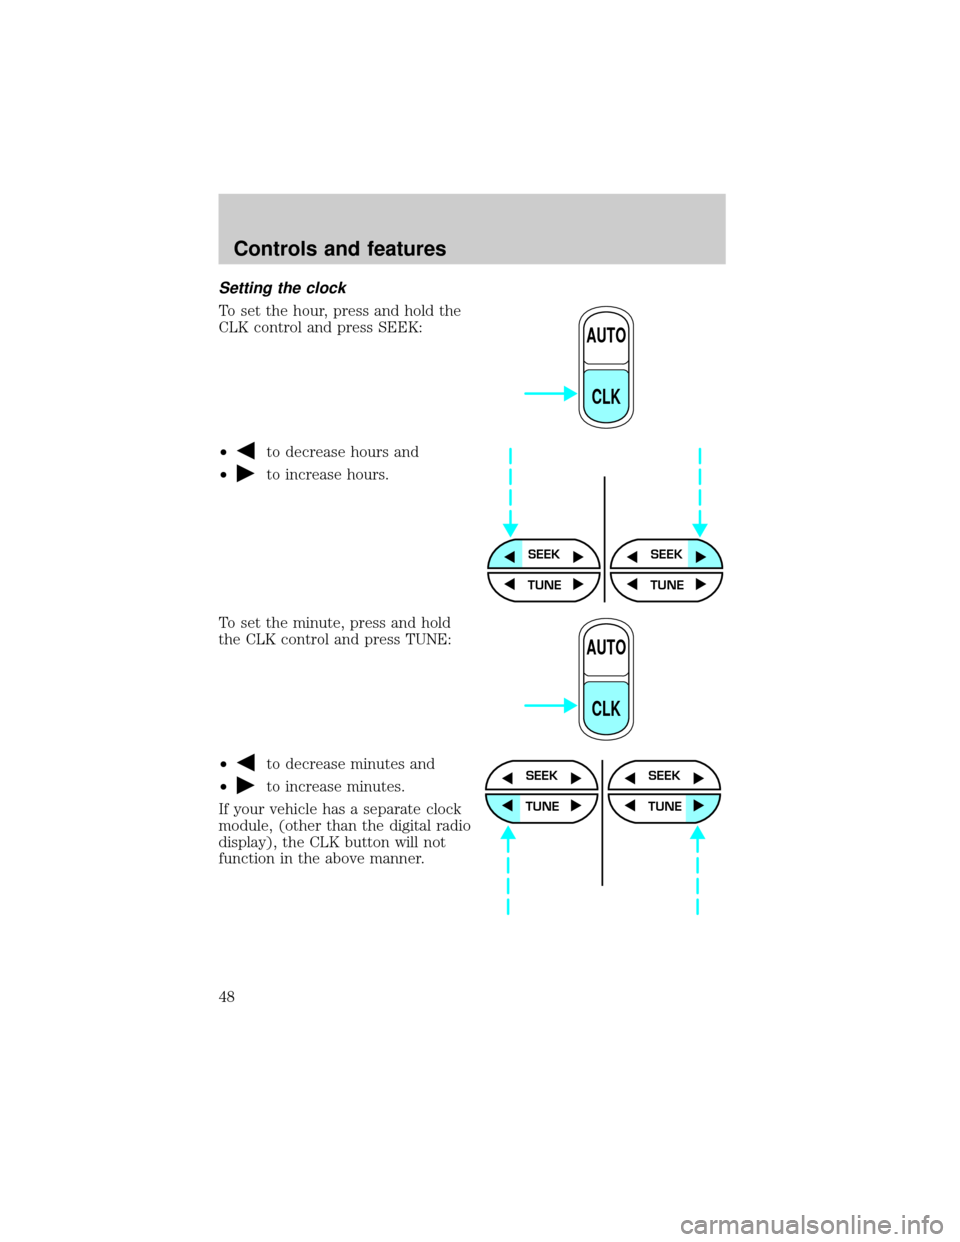
To set the hour, press and hold the
CLK control and press SEEK:
┬▓
to decrease hours and
┬▓
to increase hours.
To set the minute, press and hold
the CLK control and press TUNE:
┬▓
to decrease minutes and
┬▓
to increase minutes.
If your vehicle has a separate clock
module, (other than the digital radio
display), the CLK button will not
function in the above manner.
AUTO
CLK
SEEKSEEK
TUNE TUNE
AUTO
CLK
SEEK
TUNE
SEEK
TUNE
Controls and features
48
Page 58 of 240
Menu mode
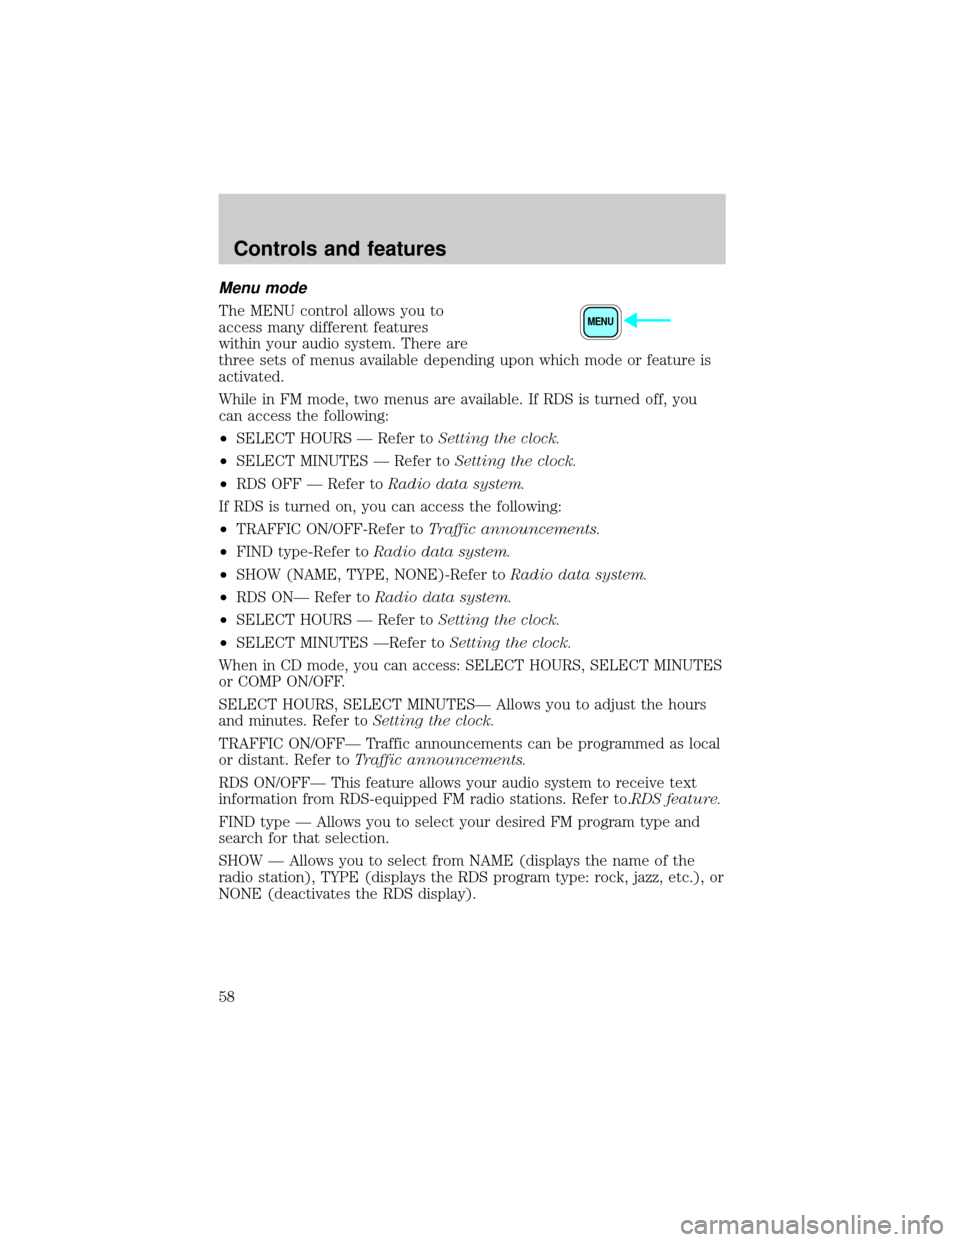
The MENU control allows you to
access many different features
within your audio system. There are
three sets of menus available depending upon which mode or feature is
activated.
While in FM mode, two menus are available. If RDS is turned off, you
can access the following:
²SELECT HOURS Ð Refer toSetting the clock.
²SELECT MINUTES Ð Refer toSetting the clock.
²RDS OFF Ð Refer toRadio data system.
If RDS is turned on, you can access the following:
┬▓TRAFFIC ON/OFF-Refer toTraffic announcements.
┬▓FIND type-Refer toRadio data system.
┬▓SHOW (NAME, TYPE, NONE)-Refer toRadio data system.
²RDS ONÐ Refer toRadio data system.
²SELECT HOURS Ð Refer toSetting the clock.
²SELECT MINUTES ÐRefer toSetting the clock.
When in CD mode, you can access: SELECT HOURS, SELECT MINUTES
or COMP ON/OFF.
SELECT HOURS, SELECT MINUTESÐ Allows you to adjust the hours
and minutes. Refer toSetting the clock.
TRAFFIC ON/OFFÐ Traffic announcements can be programmed as local
or distant. Refer toTraffic announcements.
RDS ON/OFFÐ This feature allows your audio system to receive text
information from RDS-equipped FM radio stations. Refer to.RDS feature.
FIND type Ð Allows you to select your desired FM program type and
search for that selection.
SHOW Ð Allows you to select from NAME (displays the name of the
radio station), TYPE (displays the RDS program type: rock, jazz, etc.), or
NONE (deactivates the RDS display).MENU
Controls and features
58
Page 62 of 240
²JAZZ CLUBÐjazz club with clearly reflected sounds
²HALLÐrectangular concert hall capacity of about 2 000
²CHURCHÐchurch with a high vault
²STADIUMÐoutdoor stadium with a capacity of about 30 000
Press the DSP control again to access the occupancy modes. Use the
SEL control to optimize the sound based upon the occupants in the
vehicle. The following occupancy modes can be selected:
┬▓ALL SEATS
┬▓DRIVER SEAT
┬▓REAR SEATS
Phone mode
This feature allows you to control
the factory-installed cellular phone
(if equipped) through the radio
controls.
┬▓Press the phone/mute control to enter phone mode. The playing media
will mute.
┬▓Use SEEK, TUNE or radio presets 1 through 6 to select a phone
number previously programmed in the phone.
┬▓Press the phone/mute control again to send and end calls.
This control will mute the playing media even if your vehicle is not
equipped with a factory-installed cellular phone.
Press the control again to return to the playing media.
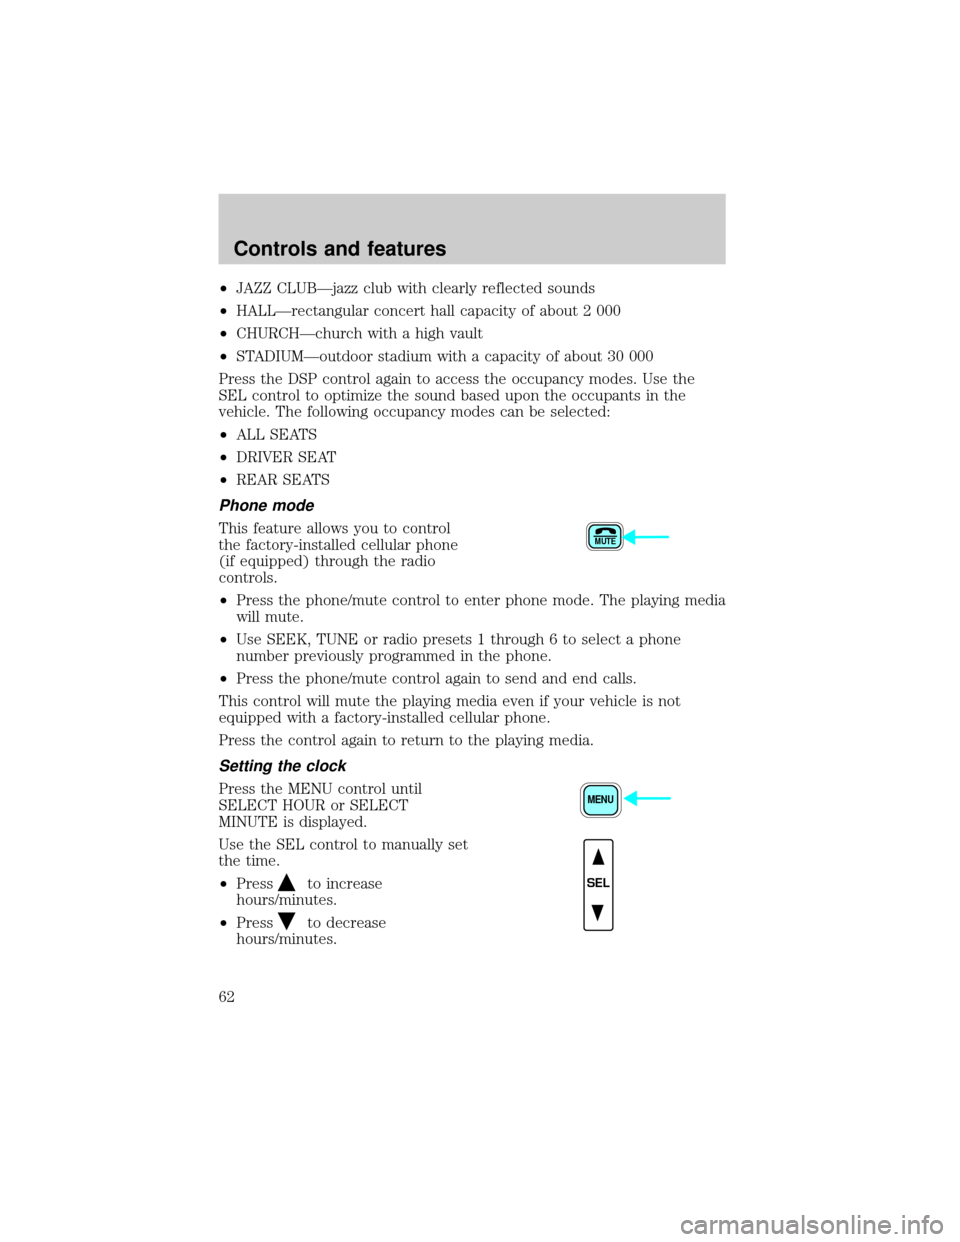
Setting the clock
Press the MENU control until
SELECT HOUR or SELECT
MINUTE is displayed.
Use the SEL control to manually set
the time.
┬▓Press
to increase
hours/minutes.
┬▓Press
to decrease
hours/minutes.
MUTE
MENU
SEL
Controls and features
62
Page 110 of 240
Parking brake
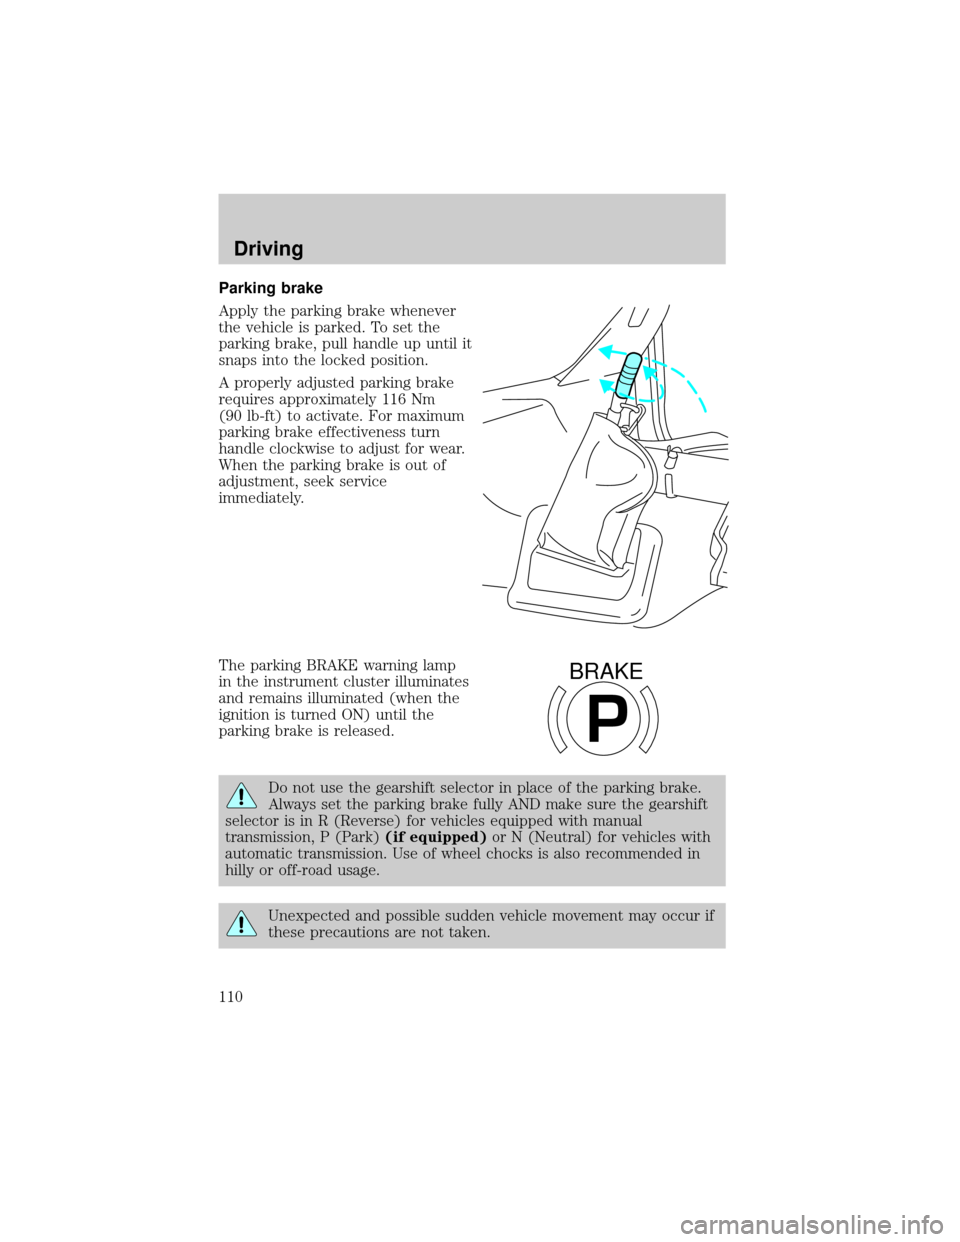
Apply the parking brake whenever
the vehicle is parked. To set the
parking brake, pull handle up until it
snaps into the locked position.
A properly adjusted parking brake
requires approximately 116 Nm
(90 lb-ft) to activate. For maximum
parking brake effectiveness turn
handle clockwise to adjust for wear.
When the parking brake is out of
adjustment, seek service
immediately.
The parking BRAKE warning lamp
in the instrument cluster illuminates
and remains illuminated (when the
ignition is turned ON) until the
parking brake is released.
Do not use the gearshift selector in place of the parking brake.
Always set the parking brake fully AND make sure the gearshift
selector is in R (Reverse) for vehicles equipped with manual
transmission, P (Park)(if equipped)or N (Neutral) for vehicles with
automatic transmission. Use of wheel chocks is also recommended in
hilly or off-road usage.
Unexpected and possible sudden vehicle movement may occur if
these precautions are not taken.
P
BRAKE
Driving
110
Page 176 of 240
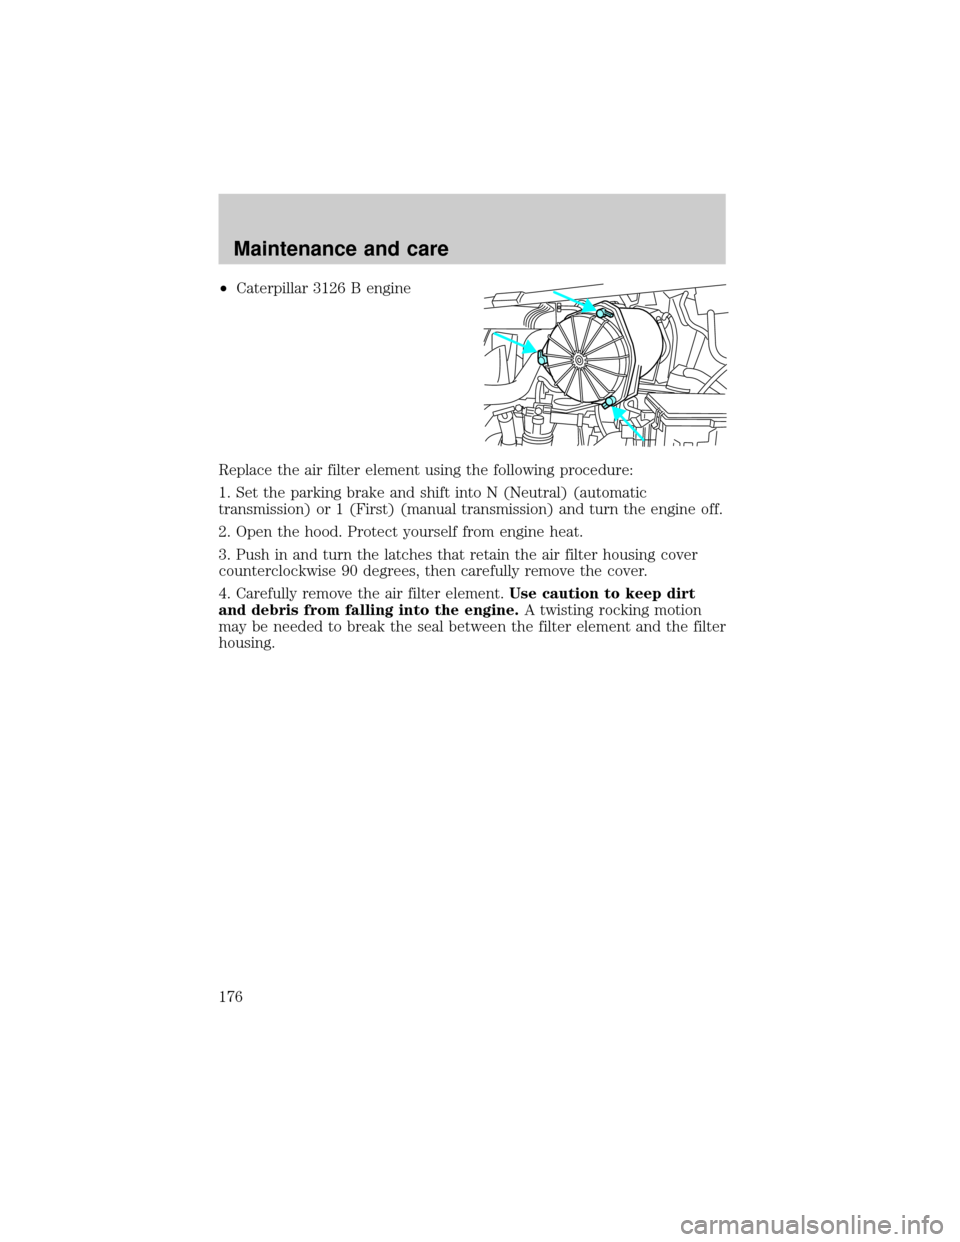
┬▓Caterpillar 3126 B engine
Replace the air filter element using the following procedure:
1. Set the parking brake and shift into N (Neutral) (automatic
transmission) or 1 (First) (manual transmission) and turn the engine off.
2. Open the hood. Protect yourself from engine heat.
3. Push in and turn the latches that retain the air filter housing cover
counterclockwise 90 degrees, then carefully remove the cover.
4. Carefully remove the air filter element.Use caution to keep dirt
and debris from falling into the engine.A twisting rocking motion
may be needed to break the seal between the filter element and the filter
housing.
Maintenance and care
176
Page 178 of 240
9. Push in on the cover latches, then turn the latches clockwise 90 degrees.
Make sure that all air filter cover latches are fully engaged.
10. Reset the air filter restriction indicator.
11. Inspect the air induction system for loose fitting, damaged or missing
components and repair as necessary.
WINDSHIELD WIPER BLADES
Check the wiper blades at least twice a year or when they seem less
effective. Substances such as tree sap and some hot wax treatments used
by commercial car washes reduce the effectiveness of wiper blades.
Checking the wiper blades
If the wiper blades do not wipe properly, clean both the windshield and
wiper blades using undiluted windshield wiper solution or a mild
detergent. Rinse thoroughly with clean water. To avoid damaging the
blades, do not use fuel, kerosene, paint thinner or other solvents.
Changing the wiper blades
To replace the wiper blades:
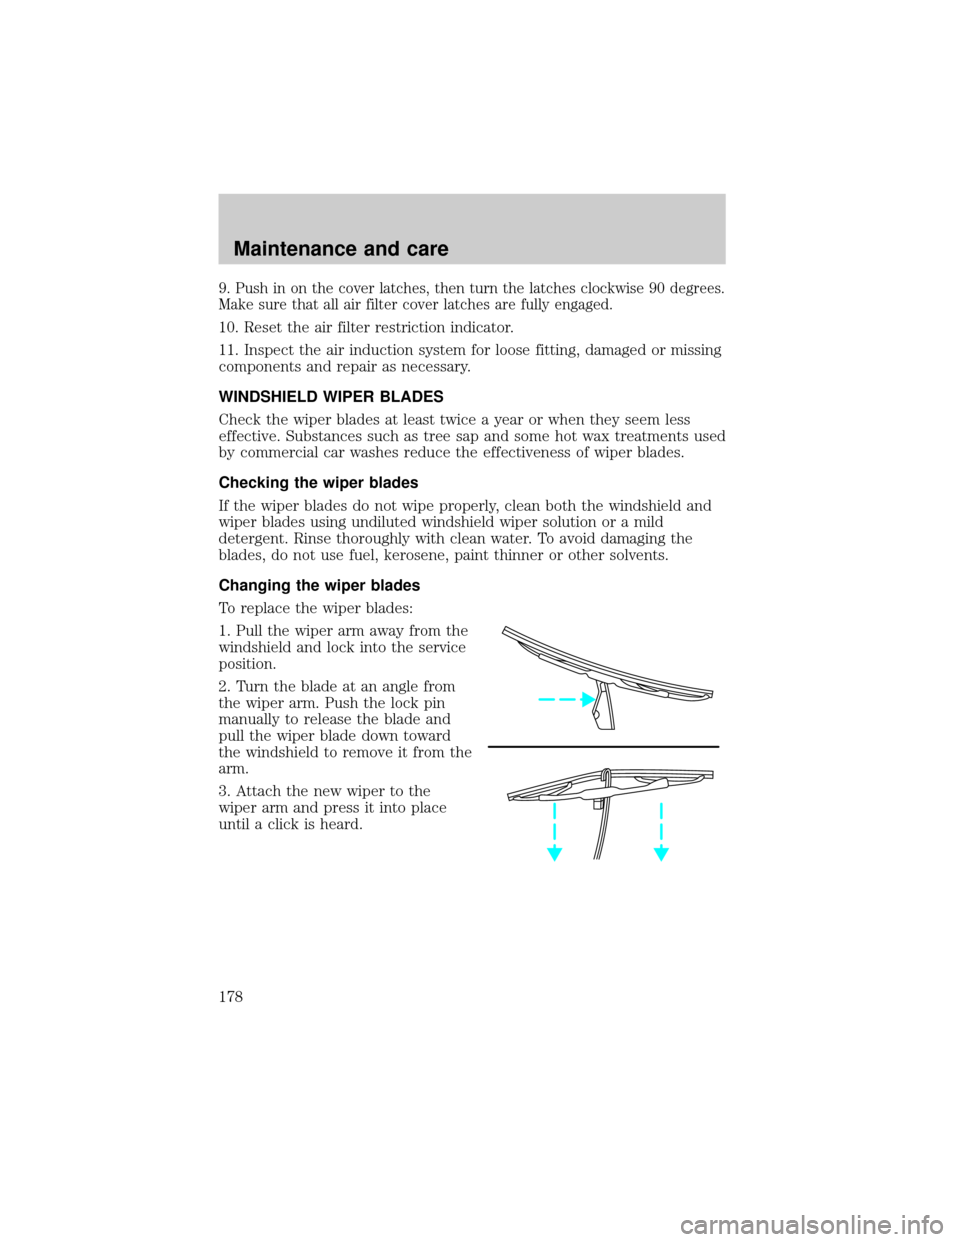
1. Pull the wiper arm away from the
windshield and lock into the service
position.
2. Turn the blade at an angle from
the wiper arm. Push the lock pin
manually to release the blade and
pull the wiper blade down toward
the windshield to remove it from the
arm.
3. Attach the new wiper to the
wiper arm and press it into place
until a click is heard.
Maintenance and care
178