check engine FORD F650 2002 10.G User Guide
[x] Cancel search | Manufacturer: FORD, Model Year: 2002, Model line: F650, Model: FORD F650 2002 10.GPages: 256, PDF Size: 1.75 MB
Page 181 of 256
OPENING THE HOOD
The hood and fenders are held in position by a latch located on each
fender.
The parking brake must be fully set before opening the hood or
possible personal injury may occur.
If you must leave the engine running while checking under the
hood, do not allow any loose clothing, jewelry, hair or other
items to get near moving engine components or possible personal
injury may occur.
To open the hood:
1. Set the parking brake, shift into N (Neutral) (automatic transmission)
or 1 (First) (manual transmission) and turn the engine off.
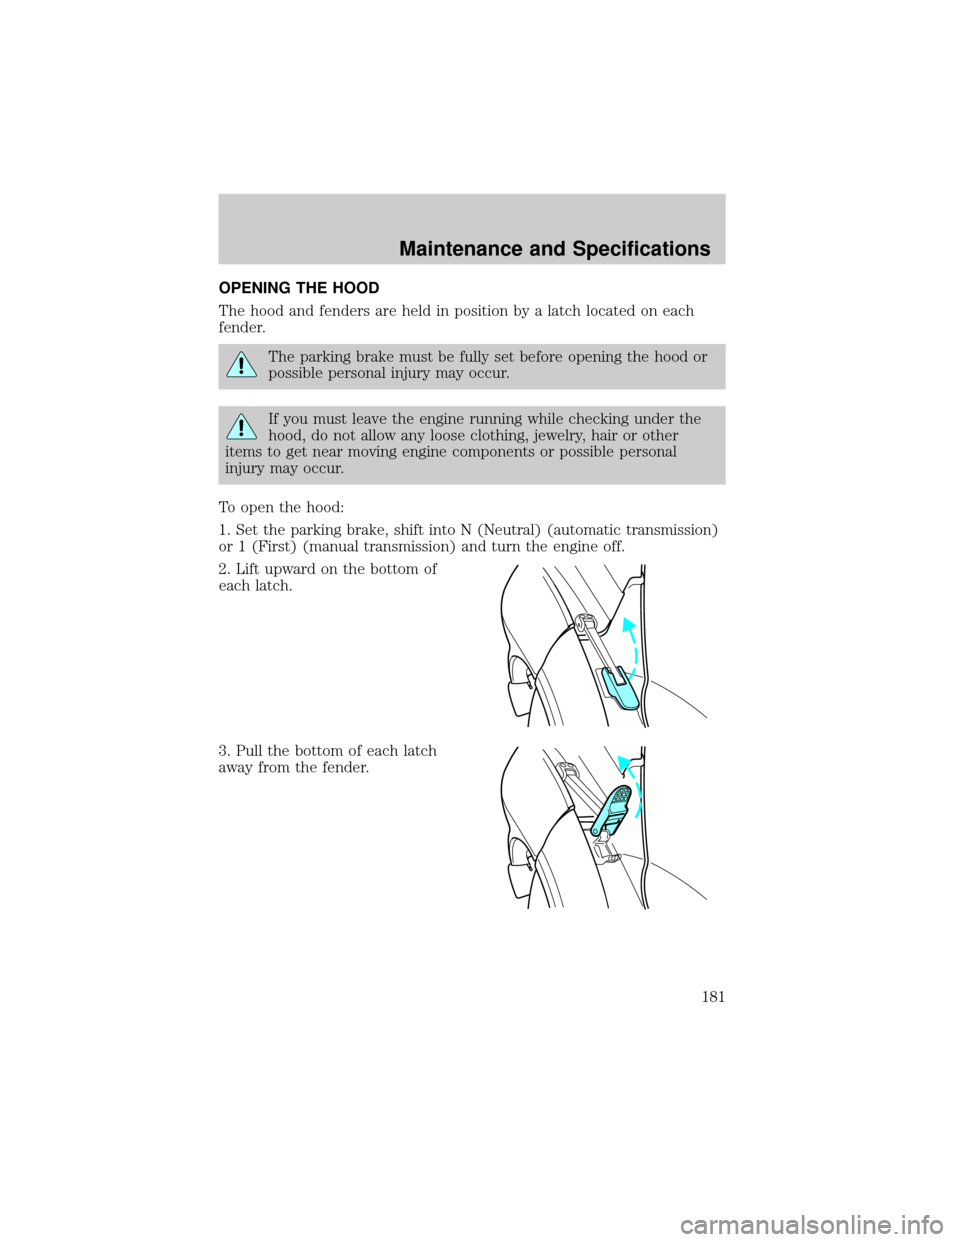
2. Lift upward on the bottom of
each latch.
3. Pull the bottom of each latch
away from the fender.
Maintenance and Specifications
181
Page 183 of 256
WINDSHIELD WASHER FLUID
Checking and adding washer fluid
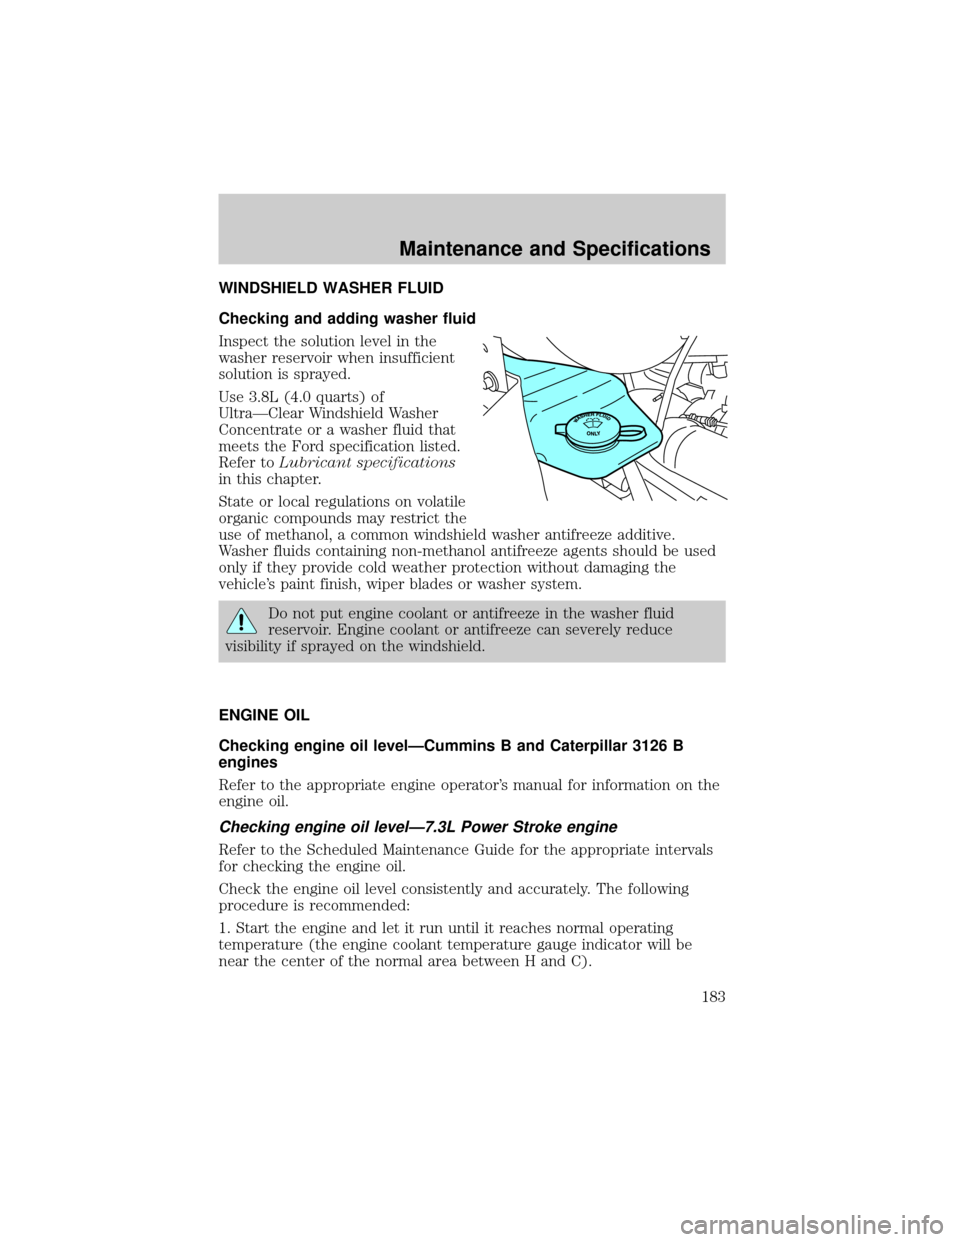
Inspect the solution level in the
washer reservoir when insufficient
solution is sprayed.
Use 3.8L (4.0 quarts) of
UltraÐClear Windshield Washer
Concentrate or a washer fluid that
meets the Ford specification listed.
Refer toLubricant specifications
in this chapter.
State or local regulations on volatile
organic compounds may restrict the
use of methanol, a common windshield washer antifreeze additive.
Washer fluids containing non-methanol antifreeze agents should be used
only if they provide cold weather protection without damaging the
vehicle's paint finish, wiper blades or washer system.
Do not put engine coolant or antifreeze in the washer fluid
reservoir. Engine coolant or antifreeze can severely reduce
visibility if sprayed on the windshield.
ENGINE OIL
Checking engine oil levelÐCummins B and Caterpillar 3126 B
engines
Refer to the appropriate engine operator's manual for information on the
engine oil.
Checking engine oil levelÐ7.3L Power Stroke engine
Refer to the Scheduled Maintenance Guide for the appropriate intervals
for checking the engine oil.
Check the engine oil level consistently and accurately. The following
procedure is recommended:
1. Start the engine and let it run until it reaches normal operating
temperature (the engine coolant temperature gauge indicator will be
near the center of the normal area between H and C).
Maintenance and Specifications
183
Page 189 of 256
Keep batteries out of reach of children. Batteries contain sulfuric
acid. Avoid contact with skin, eyes or clothing. Shield your eyes
when working near the battery to protect against possible splashing of
acid solution. In case of acid contact with skin or eyes, flush
immediately with water for a minimum of 15 minutes and get prompt
medical attention. If acid is swallowed, call a physician immediately.
Battery posts, terminals and related accessories contain lead and
lead compounds. Wash hands after handling.
ENGINE COOLANT
Checking engine coolant
The concentration and level of engine coolant should be checked at the
mileage intervals listed in the scheduled maintenance guide. The coolant
concentration should be maintained at 50/50 coolant and water, which
equates to a freeze point of -36É C (-34É F). Coolant concentration
testing is possible with a hydrometer or antifreeze tester (such as the
Rotunda Battery and Antifreeze Tester, 014±R1060). The level of coolant
should be maintained at the ªcold fullº of ªcold fill rangeº level in the
coolant reservoir. If the level falls below, add coolant per the instructions
in theAdding Engine Coolantsection.
Your vehicle was factory-filled with a 50/50 engine coolant and water
concentration. If the concentration of coolant falls below 40% or above
60%, the engine parts could become damaged or not work properly.A
50±50 mixture of coolant and water provides the following:
²freeze protection down to -36É C (-34É F).
²boiling protection up to 129É C (265É F).
²protection against rust and other forms of corrosion.
²enables calibrated guages to work properly.
When the engine is cold, check the level of the engine coolant in the
reservoir.
Maintenance and Specifications
189
Page 190 of 256
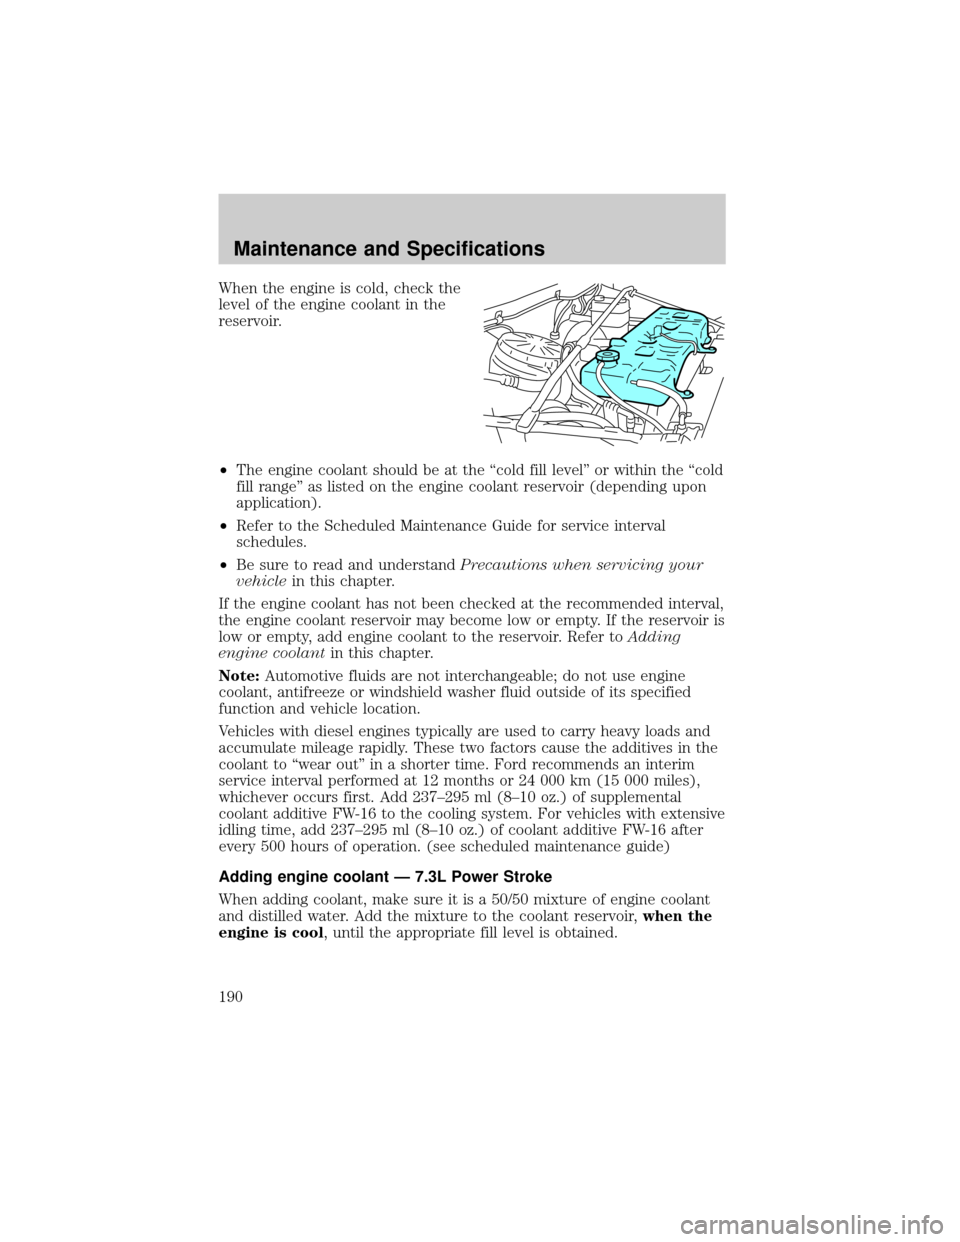
When the engine is cold, check the
level of the engine coolant in the
reservoir.
²The engine coolant should be at the ªcold fill levelº or within the ªcold
fill rangeº as listed on the engine coolant reservoir (depending upon
application).
²Refer to the Scheduled Maintenance Guide for service interval
schedules.
²Be sure to read and understandPrecautions when servicing your
vehiclein this chapter.
If the engine coolant has not been checked at the recommended interval,
the engine coolant reservoir may become low or empty. If the reservoir is
low or empty, add engine coolant to the reservoir. Refer toAdding
engine coolantin this chapter.
Note:Automotive fluids are not interchangeable; do not use engine
coolant, antifreeze or windshield washer fluid outside of its specified
function and vehicle location.
Vehicles with diesel engines typically are used to carry heavy loads and
accumulate mileage rapidly. These two factors cause the additives in the
coolant to ªwear outº in a shorter time. Ford recommends an interim
service interval performed at 12 months or 24 000 km (15 000 miles),
whichever occurs first. Add 237±295 ml (8±10 oz.) of supplemental
coolant additive FW-16 to the cooling system. For vehicles with extensive
idling time, add 237±295 ml (8±10 oz.) of coolant additive FW-16 after
every 500 hours of operation. (see scheduled maintenance guide)
Adding engine coolant Ð 7.3L Power Stroke
When adding coolant, make sure it is a 50/50 mixture of engine coolant
and distilled water. Add the mixture to the coolant reservoir,when the
engine is cool, until the appropriate fill level is obtained.
Maintenance and Specifications
190
Page 191 of 256
Do not add engine coolant when the engine is hot. Steam and
scalding liquids released from a hot cooling system can burn you
badly. Also, you can be burned if you spill coolant on hot engine parts.
Do not put engine coolant in the windshield washer fluid
container. If sprayed on the windshield, engine coolant could
make it difficult to see through the windshield.
The cooling system in your vehicle is filled with either green-colored
Motorcraft Premium Engine Coolant meeting Ford specification
ESE-M97B44±A or yellow-colored Motorcraft Premium Gold Engine
Coolant meeting Ford Specification WSS-M97B51±A1. To determine your
vehicle's coolant type (color), check your coolant reservoir.
²Add Motorcraft Premium Engine Coolant (green-colored),
VC-4±A (U.S.) or CXC-10 (Canada) or Motorcraft Premium
Gold Engine Coolant (yellow-colored), VC-7±A, depending on
the type of coolant originally equipped in your vehicle.If you
are unsure which type of coolant your vehicle requires, check your
coolant reservoir or contact your local dealer.
Note:Use of Motorcraft Cooling System Stop Leak Pellets, VC-6,
darkens the color of Motorcraft Premium Gold Engine Coolant from
yellow to golden tan.
²Do not add/mix an orange-colored, extended life coolant such
as Motorcraft Speciality Orange Engine Coolant, VC-2 (US) or
CXC-209 (Canada), meeting Ford specification WSS-M97B44±D
with the factory-filled coolant.Mixing Motorcraft Speciality Orange
Engine Coolant or any orange-colored extended life product with your
factory filled coolant can result in degraded corrosion protection.
²A large amount of water without engine coolant may be added, in case
of emergency, to reach a vehicle service location. In this instance, the
cooling system must be drained and refilled with a 50/50 mixture of
engine coolant and distilled water as soon as possible. Water alone
(without engine coolant) can cause engine damage from corrosion,
overheating or freezing.
²Do not use alcohol, methanol or brine or any engine coolants
mixed with alcohol or methanol antifreeze (coolant).Alcohol
and other liquids can cause engine damage from overheating or
freezing.
Maintenance and Specifications
191
Page 192 of 256
²Do not add extra inhibitors or additives to the coolant.These
can be harmful and compromise the corrosion protection of the engine
coolant.
²Do not mix with recycled coolant unless from a Ford-approved
recycling process (seeUse of Recycled Engine Coolantsection).
For vehicles with overflow coolant systems with a non-pressurized cap
on the coolant recovery system, add coolant to the coolant recovery
reservoir when the engine is cool. Add the proper mixture of coolant and
water to the ªcold fullº level. For all other vehicles, which have a coolant
degas system with a pressurized cap, or if it is necessary to remove the
coolant pressure relief cap on the radiator of a vehicle with an overflow
system, follow these steps to add engine coolant.
To avoid personal injury, make sure the engine is cool before
unscrewing the coolant pressure relief cap. The cooling system is
under pressure; steam and hot liquid can come out forcefully when the
cap is loosened slightly.
1. Before you begin, turn the engine off and let it cool.
2. When the engine is cool, wrap a thick cloth around the coolant
pressure relief cap on the coolant reservoir (an opaque plastic bottle).
Slowly turn cap counterclockwise (left) until pressure begins to release.
3. Step back while the pressure releases.
4. When you are sure that all the pressure has been released, use the
cloth to turn it counterclockwise and remove the cap.
5. Fill the coolant reservoir slowly with the proper coolant mixture (see
above), to within the ªcold fill rangeº or the ªcold fullº level on the
reservoir. If you removed the radiator cap in an overflow system, fill the
radiator until the coolant is visible and radiator is almost full.
6. Replace the cap. Turn until tightly installed. (Cap must be tightly
installed to prevent coolant loss.)
After any coolant has been added, check the coolant concentration see
Checking Engine Coolant section). If the concentration is not 50/50
(protection to ±34É F/±36É C), drain some coolant and adjust the
concentration. It may take several drains and additions to obtain a 50/50
coolant concentration.
Whenever coolant has been added, the coolant level in the coolant
reservoir should be checked the next few times you drive the vehicle. If
Maintenance and Specifications
192
Page 193 of 256
necessary, add enough 50/50 concentration of engine coolant and
distilled water to bring the liquid level to the proper level.
If you have to add more than 1.0 liter (1.0 quart) of engine coolant per
month, have your dealer check the engine cooling system. Your cooling
system may have a leak. Operating an engine with a low level of coolant
can result in engine overheating and possible engine damage.
Replacing coolant
A coolant mixture of 50% coolant concentrate and 50% water is
recommended to maintain best overall performance. To avoid damaging
the engine and radiator, the coolant concentrate should not exceed 60%.
When refilling the coolant system either as part of the regular
maintenance (refer to the scheduled maintenance guide), or due to
service performed, adhere to the following instructions:
1. Drain and flush the cooling system to remove dirt deposits, oil, rust
particles.
Note:When filling the system with Motorcraft Premium Engine Coolant
(green-colored) or equivalent meeting Ford specification
ESE-M97B44±A, a supplemental coolant additive is required. Refer to
Adding Coolantsection to determine the coolant type in your vehicle.
Add 1.89L (4 pints) of Motorcraft Heavy Duty Cooling System Additive
FW-16 or equivalent meeting Ford specification ESN-M99B169±A,
directly to the cooling system. An additional 237±295 ml (8±10 oz.) of
supplemental coolant additive FW-16 should be added at 24 000 km (15
000 mile) intervals to maintain proper concentration.Do not use this
additive with yellow-colored coolant meeting Ford specification
WSS-M97B51±A1.
2. Fill the coolant reservoir with the specified coolant/water mixture until
the level stabilizes at the top hose fitting. Replace and tighten cap. Fill
the coolant bottle to the cold fill mark.
3. Reinstall the coolant bottle cap.
4. Start and idle engine until the radiator upper hose is warm
(approximately 10±15 minutes). If the hose does not get warm then
repeat at a higher engine speed.
5. Immediately shut off engine. Cautiously remove coolant bottle cap and
add coolant to Cold Fill mark.
Maintenance and Specifications
193
Page 200 of 256
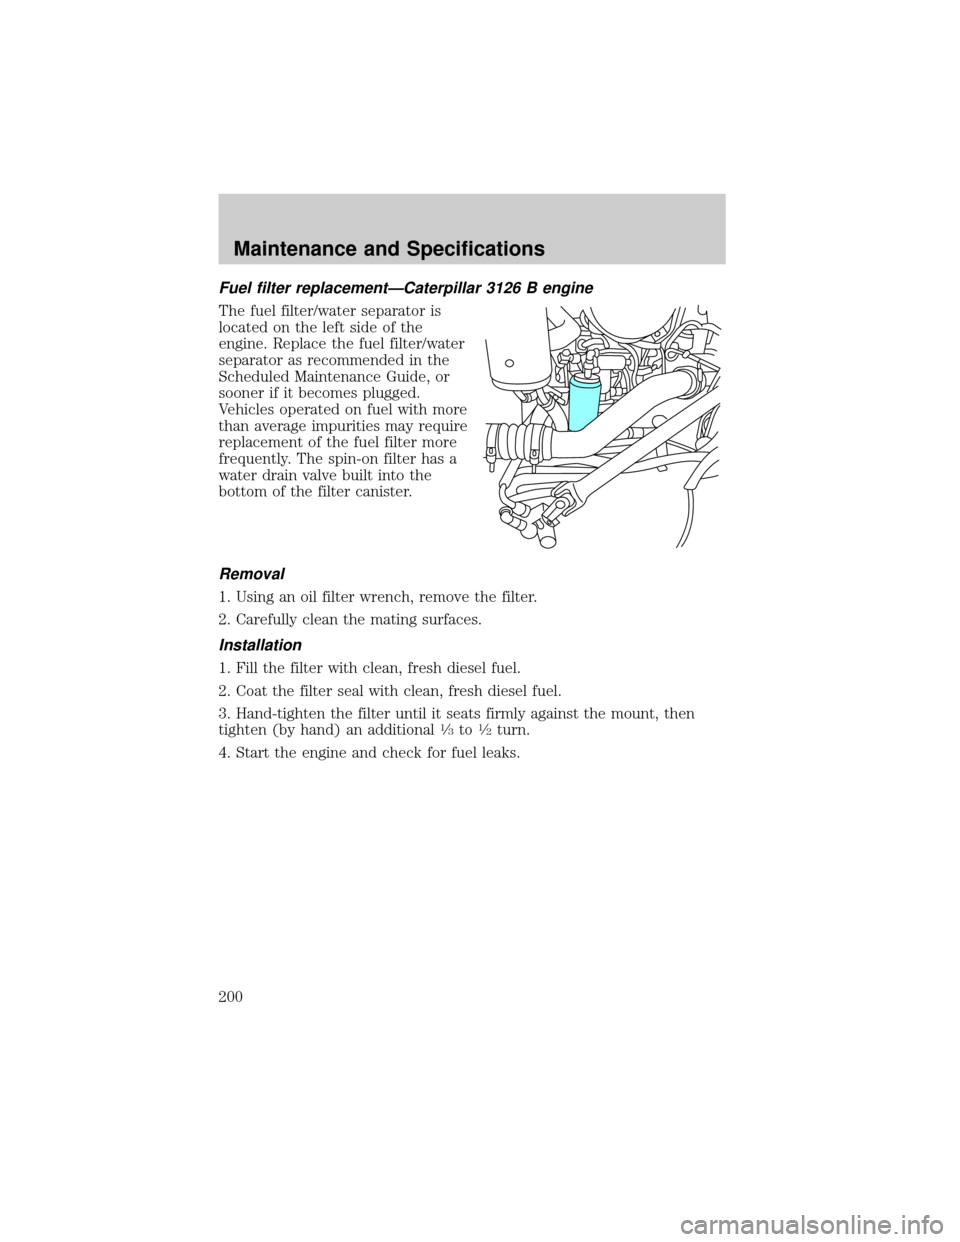
Fuel filter replacementÐCaterpillar 3126 B engine
The fuel filter/water separator is
located on the left side of the
engine. Replace the fuel filter/water
separator as recommended in the
Scheduled Maintenance Guide, or
sooner if it becomes plugged.
Vehicles operated on fuel with more
than average impurities may require
replacement of the fuel filter more
frequently. The spin-on filter has a
water drain valve built into the
bottom of the filter canister.
Removal
1. Using an oil filter wrench, remove the filter.
2. Carefully clean the mating surfaces.
Installation
1. Fill the filter with clean, fresh diesel fuel.
2. Coat the filter seal with clean, fresh diesel fuel.
3. Hand-tighten the filter until it seats firmly against the mount, then
tighten (by hand) an additional
1¤3to1¤2turn.
4. Start the engine and check for fuel leaks.
Maintenance and Specifications
200
Page 202 of 256
Installation
Note:The engine will not run properly if the fuel filter is not installed in
housing.
1. Apply a coating of clean diesel fuel to the new bevel gasket and install
it onto the fuel filter housing.
2. Install the new fuel filter element onto the cap. Place the new fuel
filter element and cap into the fuel filter housing. Allow fuel to soak into
the fuel filter element.
3. Tighten cap onto the fuel filter housing until cap contacts the housing.
4. Start the engine and check for fuel leaks.
After changing the fuel filter, the engine will purge the trapped air as it
runs. Engine may run roughly and smoke until the air is completely
eliminated.
Fuel filter replacementÐCummins B engine
Refer to your engine operator's manual for service intervals and
procedures.
ESSENTIALS OF GOOD FUEL ECONOMY
Measuring techniques
Your best source of information about actual fuel economy is you, the
driver. You must gather information as accurately and consistently as
possible. Fuel expense, frequency of fillups or fuel gauge readings are
NOT accurate as a measure of fuel economy. We do not recommend
taking fuel economy measurements during the first 1 600 km (1 000
miles) of driving (engine break-in period). You will get a more accurate
measurement after 3 000 km±5 000 km (2 000 miles-3 000 miles).
The advertised fuel capacity of the fuel tank(s) on your vehicle is equal
to the rated refill capacity of the fuel tank(s) as listed inFuel Tank
Capacitiesin this chapter. The advertised capacity is the amount of the
Indicated Capacity and the Empty Reserve combined. Indicated Capacity
is the difference in the amount of fuel in a full tank and a tank when the
fuel gauge indicates empty. Empty Reserve is the small amount of usable
fuel remaining in the fuel tank after the fuel gauge indicates empty.
The amount of Empty Reserve varies and should not be relied
upon to increase driving range. When refueling your vehicle after
the fuel gauge indicates empty, you might not be able to refuel
Maintenance and Specifications
202
Page 205 of 256
Also, your driving habits have a significant influence on use of fuel. By
following these suggestions, you can stretch your fuel use:
²Avoid changes in speed as much as possible.
²Anticipate changing traffic conditions. Sudden stops and fast
acceleration waste fuel.
²Avoid extensive idling.
²Do not drive with your foot resting on the brake pedal.
CHECKING AND ADDING POWER STEERING FLUID
Checking power steering fluid level
Check the power steering fluid level using the following procedure. Refer
to the scheduled maintenance guide for the recommended service
intervals. If adding fluid is necessary, use only MERCONtAT F.
1. Set the parking brake, shift into N
(Neutral) (automatic transmission)
or 1 (First) (manual transmission)
and turn the engine off.
2. Open the hood.
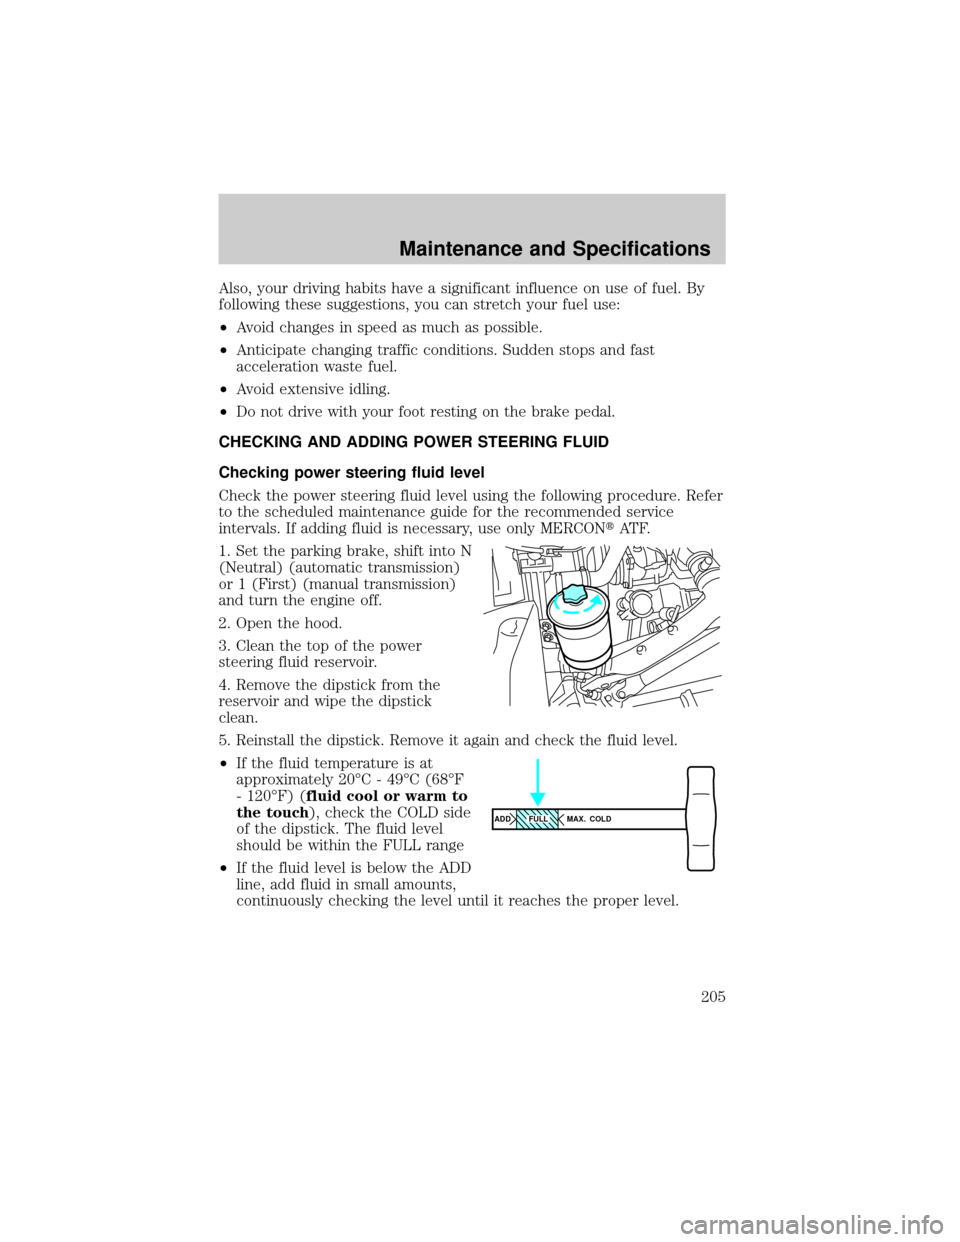
3. Clean the top of the power
steering fluid reservoir.
4. Remove the dipstick from the
reservoir and wipe the dipstick
clean.
5. Reinstall the dipstick. Remove it again and check the fluid level.
²If the fluid temperature is at
approximately 20ÉC - 49ÉC (68ÉF
- 120ÉF) (fluid cool or warm to
the touch), check the COLD side
of the dipstick. The fluid level
should be within the FULL range
²If the fluid level is below the ADD
line, add fluid in small amounts,
continuously checking the level until it reaches the proper level.
ADD MAX. COLDFULL
Maintenance and Specifications
205