key FORD F650 2011 12.G Owners Manual
[x] Cancel search | Manufacturer: FORD, Model Year: 2011, Model line: F650, Model: FORD F650 2011 12.GPages: 290, PDF Size: 1.96 MB
Page 1 of 290
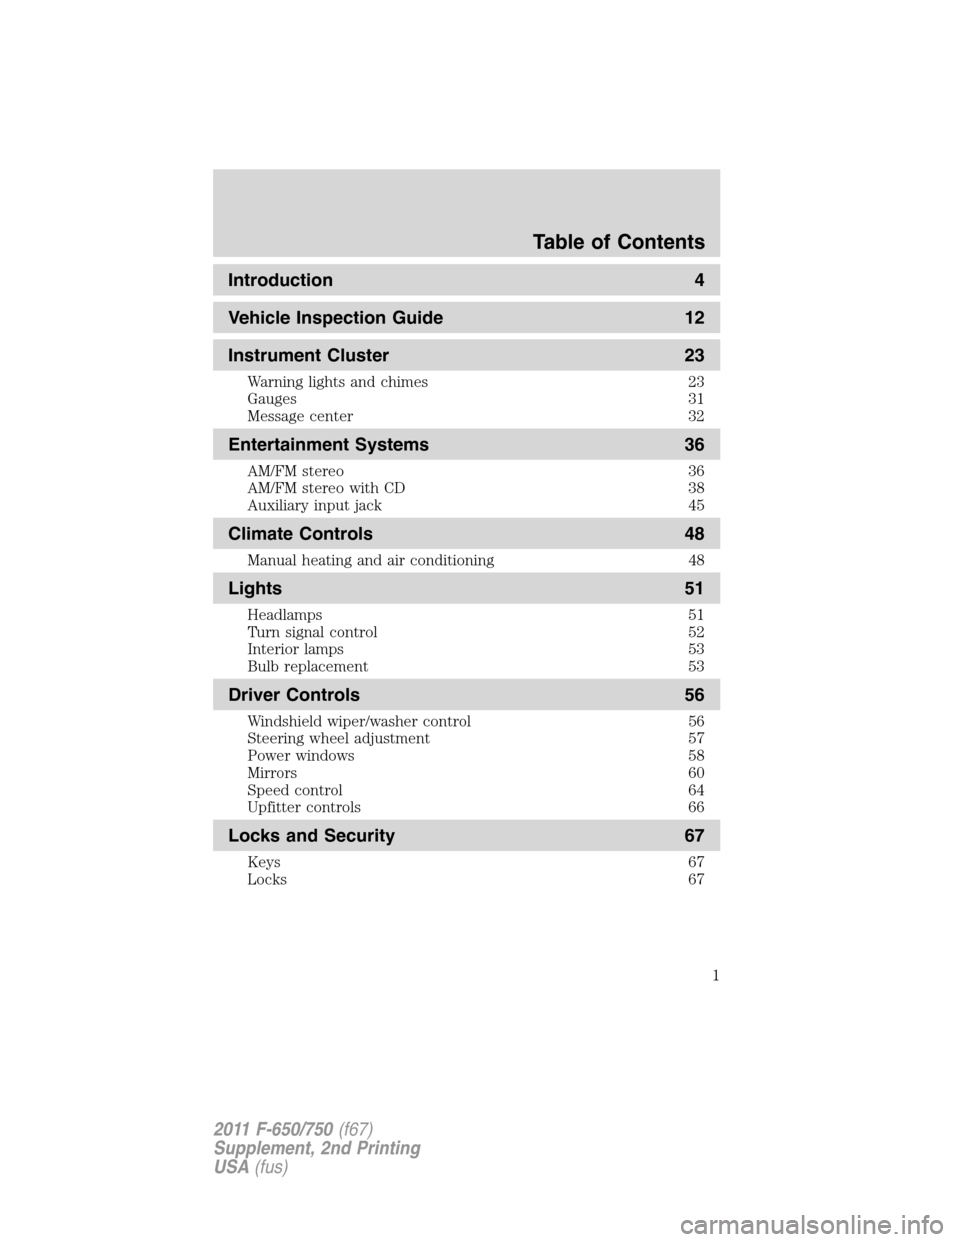
Introduction 4
Vehicle Inspection Guide 12
Instrument Cluster 23
Warning lights and chimes 23
Gauges 31
Message center 32
Entertainment Systems 36
AM/FM stereo 36
AM/FM stereo with CD 38
Auxiliary input jack 45
Climate Controls 48
Manual heating and air conditioning 48
Lights 51
Headlamps 51
Turn signal control 52
Interior lamps 53
Bulb replacement 53
Driver Controls 56
Windshield wiper/washer control 56
Steering wheel adjustment 57
Power windows 58
Mirrors 60
Speed control 64
Upfitter controls 66
Locks and Security 67
Keys 67
Locks 67
Table of Contents
1
2011 F-650/750(f67)
Supplement, 2nd Printing
USA(fus)
Page 14 of 290
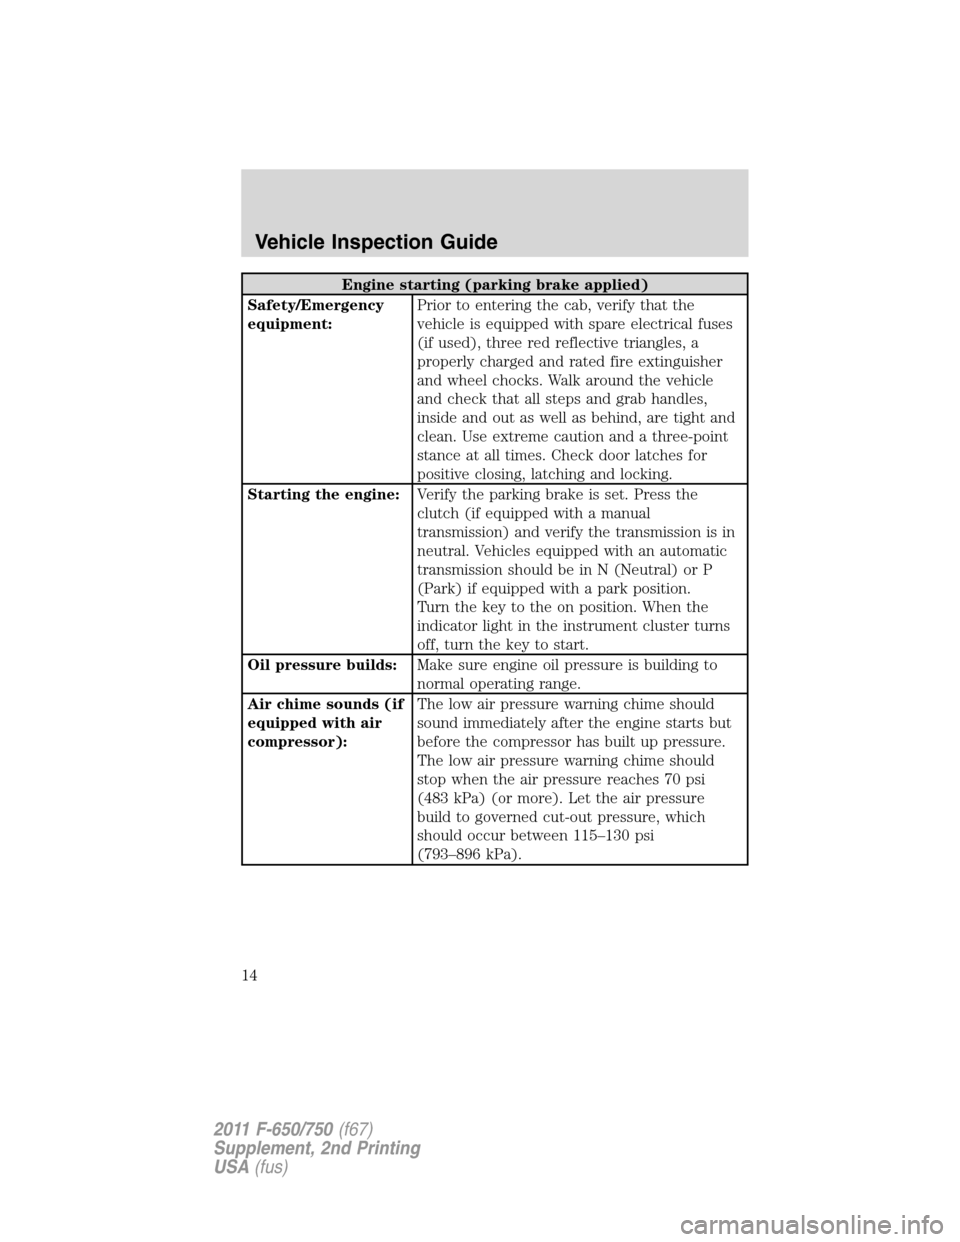
Engine starting (parking brake applied)
Safety/Emergency
equipment:Prior to entering the cab, verify that the
vehicle is equipped with spare electrical fuses
(if used), three red reflective triangles, a
properly charged and rated fire extinguisher
and wheel chocks. Walk around the vehicle
and check that all steps and grab handles,
inside and out as well as behind, are tight and
clean. Use extreme caution and a three-point
stance at all times. Check door latches for
positive closing, latching and locking.
Starting the engine:Verify the parking brake is set. Press the
clutch (if equipped with a manual
transmission) and verify the transmission is in
neutral. Vehicles equipped with an automatic
transmission should be in N (Neutral) or P
(Park) if equipped with a park position.
Turn the key to the on position. When the
indicator light in the instrument cluster turns
off, turn the key to start.
Oil pressure builds:Make sure engine oil pressure is building to
normal operating range.
Air chime sounds (if
equipped with air
compressor):The low air pressure warning chime should
sound immediately after the engine starts but
before the compressor has built up pressure.
The low air pressure warning chime should
stop when the air pressure reaches 70 psi
(483 kPa) (or more). Let the air pressure
build to governed cut-out pressure, which
should occur between 115–130 psi
(793–896 kPa).
Vehicle Inspection Guide
14
2011 F-650/750(f67)
Supplement, 2nd Printing
USA(fus)
Page 16 of 290
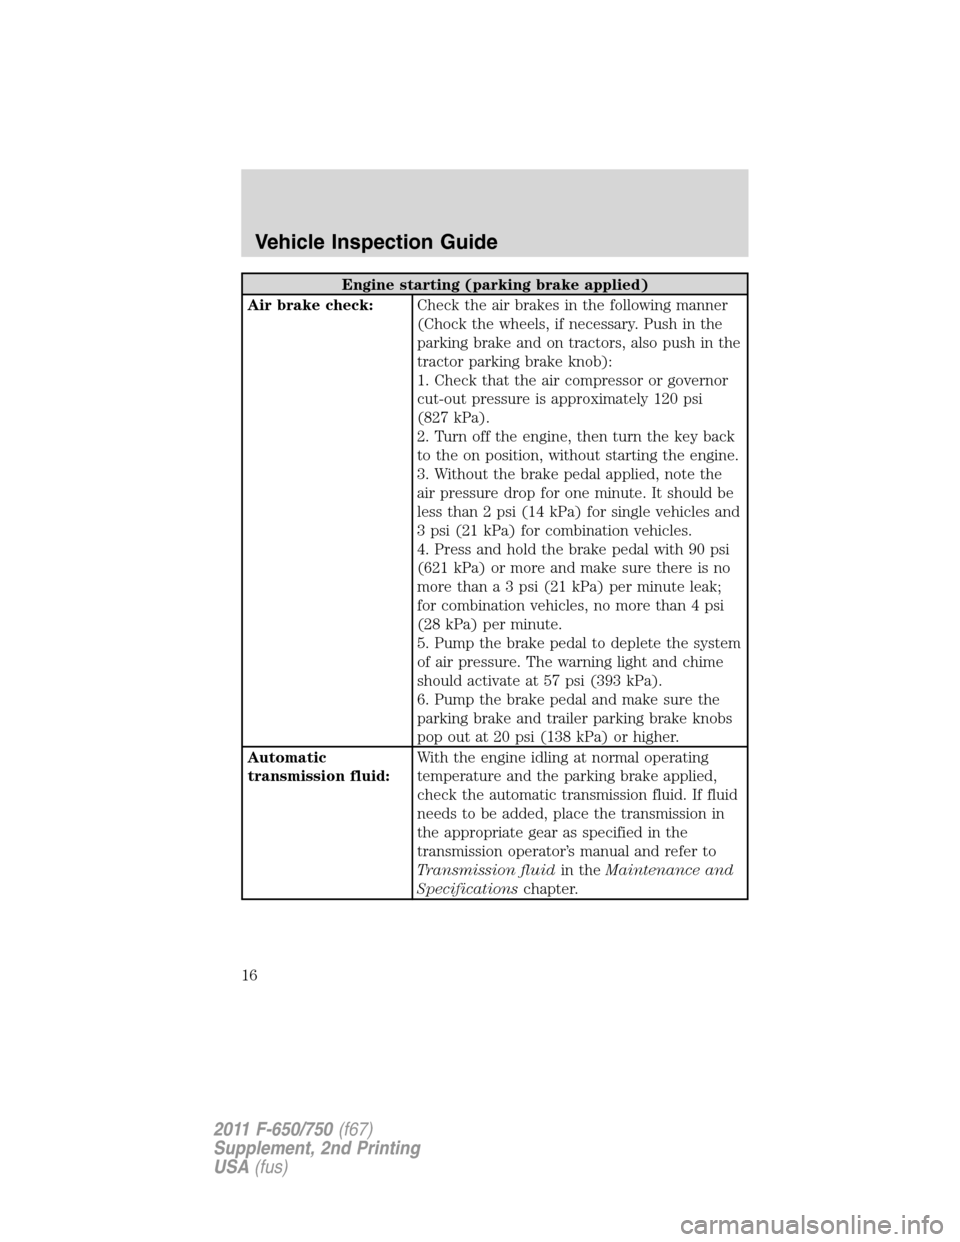
Engine starting (parking brake applied)
Air brake check:Check the air brakes in the following manner
(Chock the wheels, if necessary. Push in the
parking brake and on tractors, also push in the
tractor parking brake knob):
1. Check that the air compressor or governor
cut-out pressure is approximately 120 psi
(827 kPa).
2. Turn off the engine, then turn the key back
to the on position, without starting the engine.
3. Without the brake pedal applied, note the
air pressure drop for one minute. It should be
less than 2 psi (14 kPa) for single vehicles and
3 psi (21 kPa) for combination vehicles.
4. Press and hold the brake pedal with 90 psi
(621 kPa) or more and make sure there is no
more than a 3 psi (21 kPa) per minute leak;
for combination vehicles, no more than 4 psi
(28 kPa) per minute.
5. Pump the brake pedal to deplete the system
of air pressure. The warning light and chime
should activate at 57 psi (393 kPa).
6. Pump the brake pedal and make sure the
parking brake and trailer parking brake knobs
pop out at 20 psi (138 kPa) or higher.
Automatic
transmission fluid:With the engine idling at normal operating
temperature and the parking brake applied,
check the automatic transmission fluid. If fluid
needs to be added, place the transmission in
the appropriate gear as specified in the
transmission operator’s manual and refer to
Transmission fluidin theMaintenance and
Specificationschapter.
Vehicle Inspection Guide
16
2011 F-650/750(f67)
Supplement, 2nd Printing
USA(fus)
Page 17 of 290
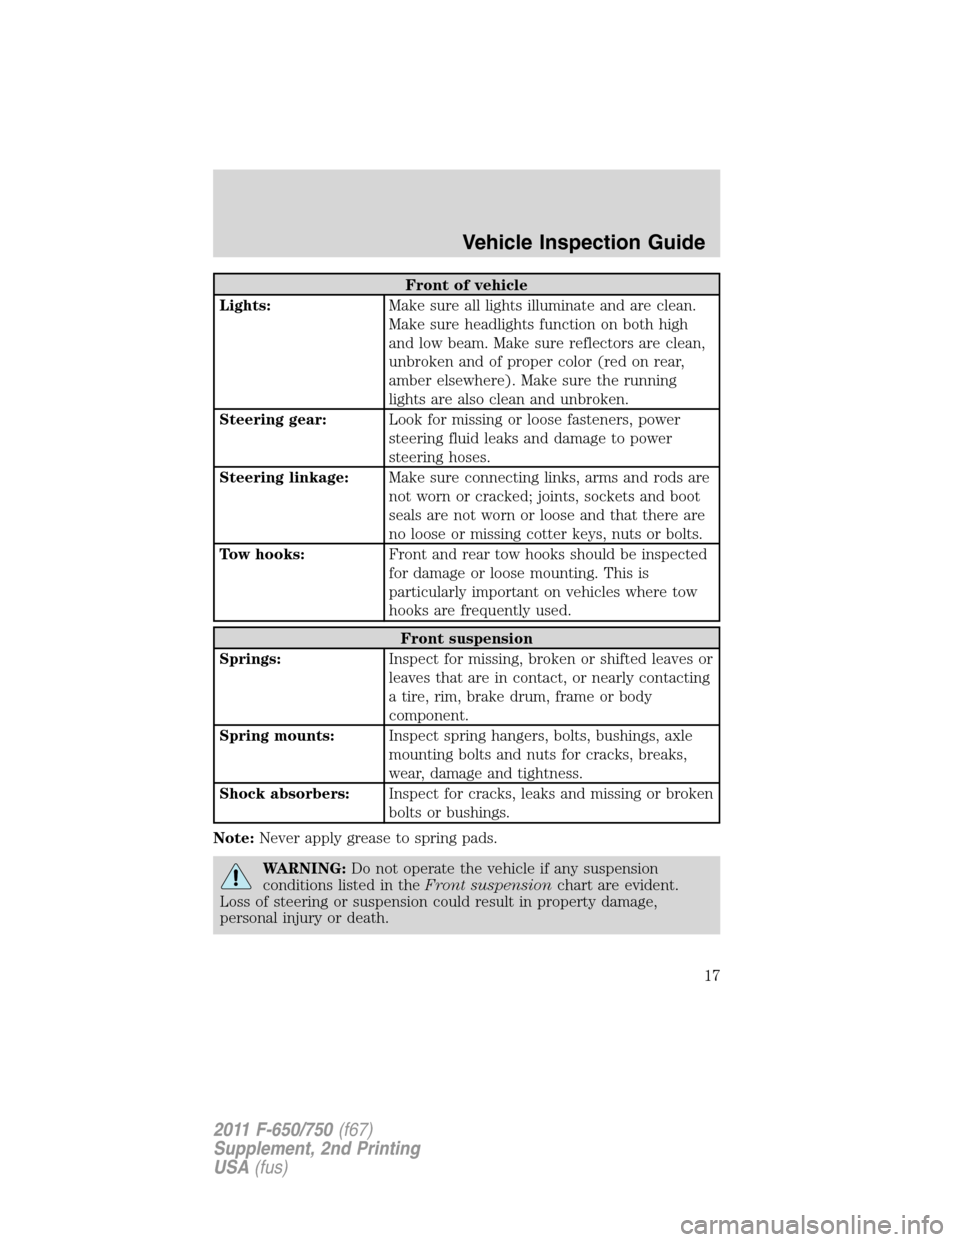
Front of vehicle
Lights:Make sure all lights illuminate and are clean.
Make sure headlights function on both high
and low beam. Make sure reflectors are clean,
unbroken and of proper color (red on rear,
amber elsewhere). Make sure the running
lights are also clean and unbroken.
Steering gear:Look for missing or loose fasteners, power
steering fluid leaks and damage to power
steering hoses.
Steering linkage:Make sure connecting links, arms and rods are
not worn or cracked; joints, sockets and boot
seals are not worn or loose and that there are
no loose or missing cotter keys, nuts or bolts.
Tow hooks:Front and rear tow hooks should be inspected
for damage or loose mounting. This is
particularly important on vehicles where tow
hooks are frequently used.
Front suspension
Springs:Inspect for missing, broken or shifted leaves or
leaves that are in contact, or nearly contacting
a tire, rim, brake drum, frame or body
component.
Spring mounts:Inspect spring hangers, bolts, bushings, axle
mounting bolts and nuts for cracks, breaks,
wear, damage and tightness.
Shock absorbers:Inspect for cracks, leaks and missing or broken
bolts or bushings.
Note:Never apply grease to spring pads.
WARNING:Do not operate the vehicle if any suspension
conditions listed in theFront suspensionchart are evident.
Loss of steering or suspension could result in property damage,
personal injury or death.
Vehicle Inspection Guide
17
2011 F-650/750(f67)
Supplement, 2nd Printing
USA(fus)
Page 30 of 290
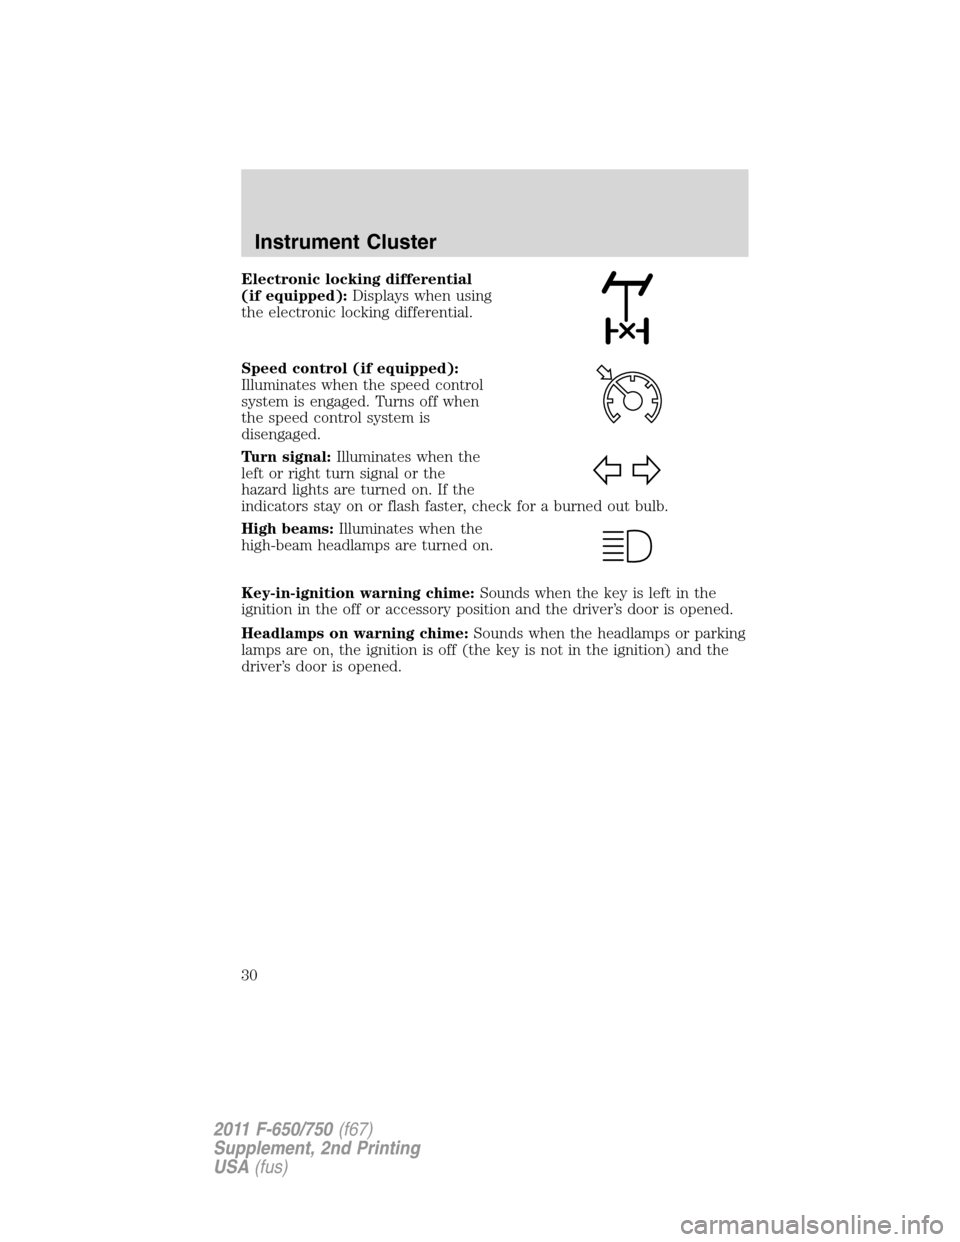
Electronic locking differential
(if equipped):Displays when using
the electronic locking differential.
Speed control (if equipped):
Illuminates when the speed control
system is engaged. Turns off when
the speed control system is
disengaged.
Turn signal:Illuminates when the
left or right turn signal or the
hazard lights are turned on. If the
indicators stay on or flash faster, check for a burned out bulb.
High beams:Illuminates when the
high-beam headlamps are turned on.
Key-in-ignition warning chime:Sounds when the key is left in the
ignition in the off or accessory position and the driver’s door is opened.
Headlamps on warning chime:Sounds when the headlamps or parking
lamps are on, the ignition is off (the key is not in the ignition) and the
driver’s door is opened.
Instrument Cluster
30
2011 F-650/750(f67)
Supplement, 2nd Printing
USA(fus)
Page 66 of 290
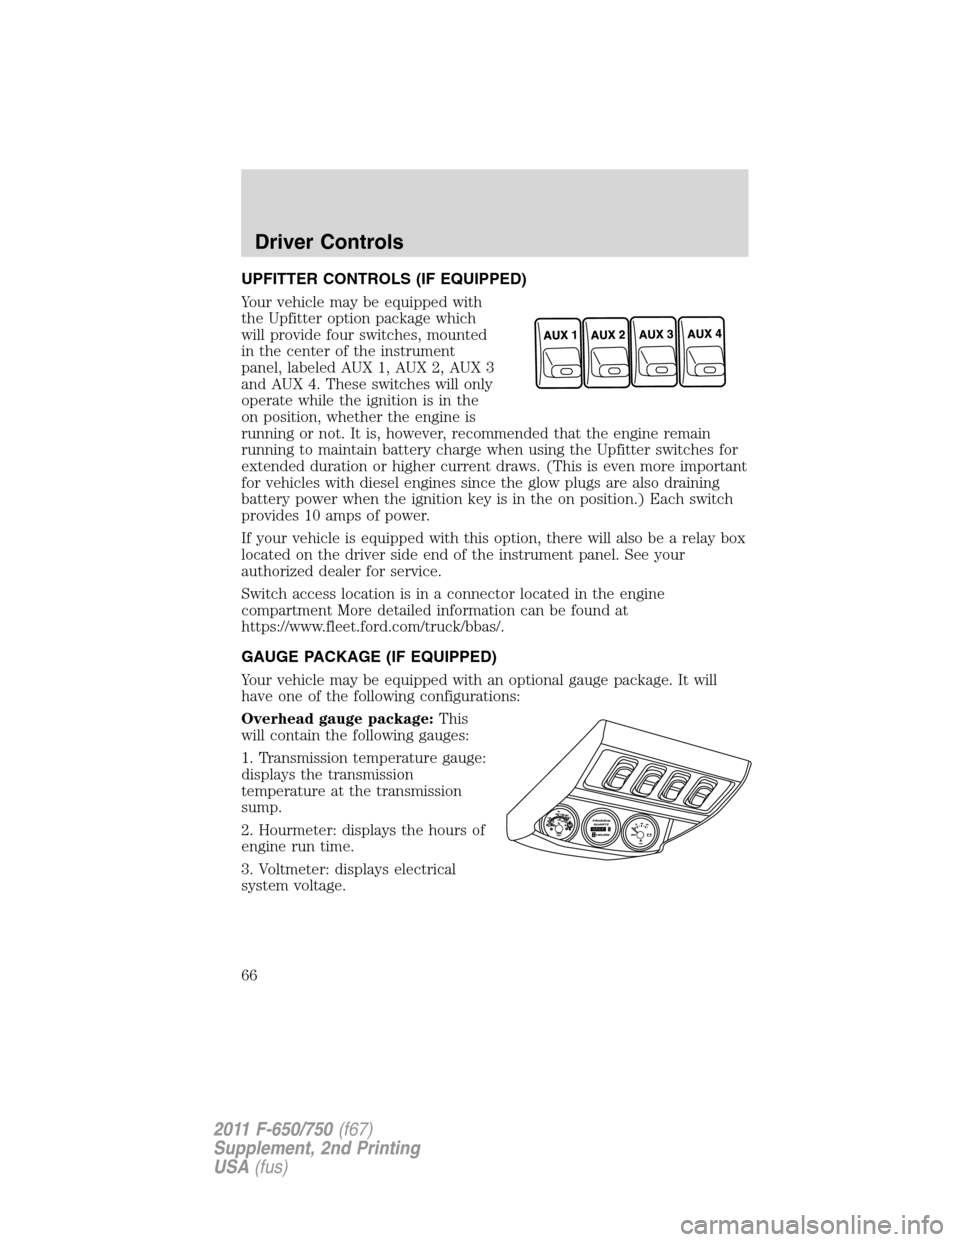
UPFITTER CONTROLS (IF EQUIPPED)
Your vehicle may be equipped with
the Upfitter option package which
will provide four switches, mounted
in the center of the instrument
panel, labeled AUX 1, AUX 2, AUX 3
and AUX 4. These switches will only
operate while the ignition is in the
on position, whether the engine is
running or not. It is, however, recommended that the engine remain
running to maintain battery charge when using the Upfitter switches for
extended duration or higher current draws. (This is even more important
for vehicles with diesel engines since the glow plugs are also draining
battery power when the ignition key is in the on position.) Each switch
provides 10 amps of power.
If your vehicle is equipped with this option, there will also be a relay box
located on the driver side end of the instrument panel. See your
authorized dealer for service.
Switch access location is in a connector located in the engine
compartment More detailed information can be found at
https://www.fleet.ford.com/truck/bbas/.
GAUGE PACKAGE (IF EQUIPPED)
Your vehicle may be equipped with an optional gauge package. It will
have one of the following configurations:
Overhead gauge package:This
will contain the following gauges:
1. Transmission temperature gauge:
displays the transmission
temperature at the transmission
sump.
2. Hourmeter: displays the hours of
engine run time.
3. Voltmeter: displays electrical
system voltage.
Driver Controls
66
2011 F-650/750(f67)
Supplement, 2nd Printing
USA(fus)
Page 67 of 290
KEYS
The key operates all locks on your vehicle. In case of loss, replacement
keys are available from your dealer.
You should always carry a second key with you in a safe place in case
you require it in an emergency.
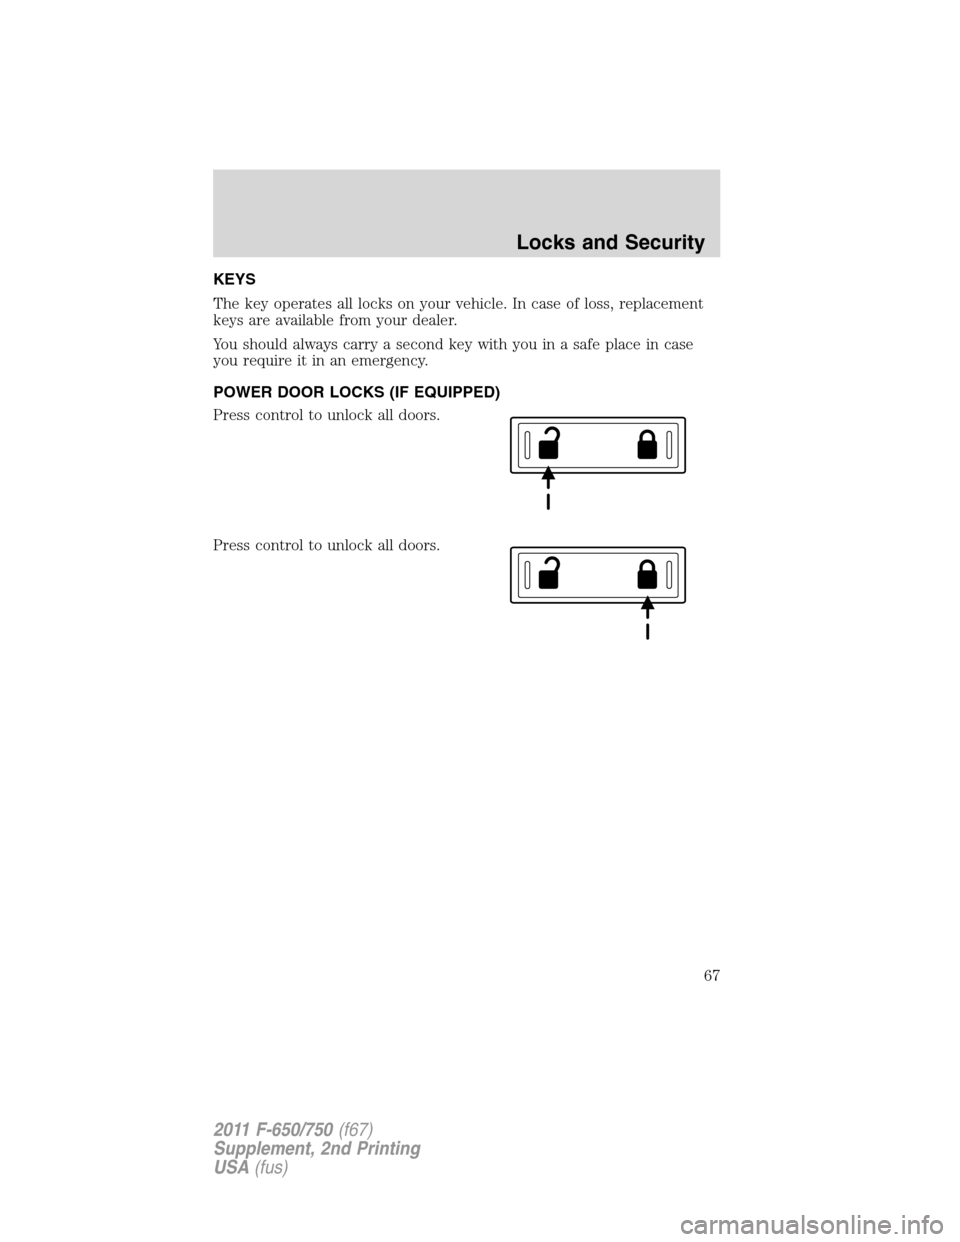
POWER DOOR LOCKS (IF EQUIPPED)
Press control to unlock all doors.
Press control to unlock all doors.
Locks and Security
67
2011 F-650/750(f67)
Supplement, 2nd Printing
USA(fus)
Page 104 of 290
STARTING
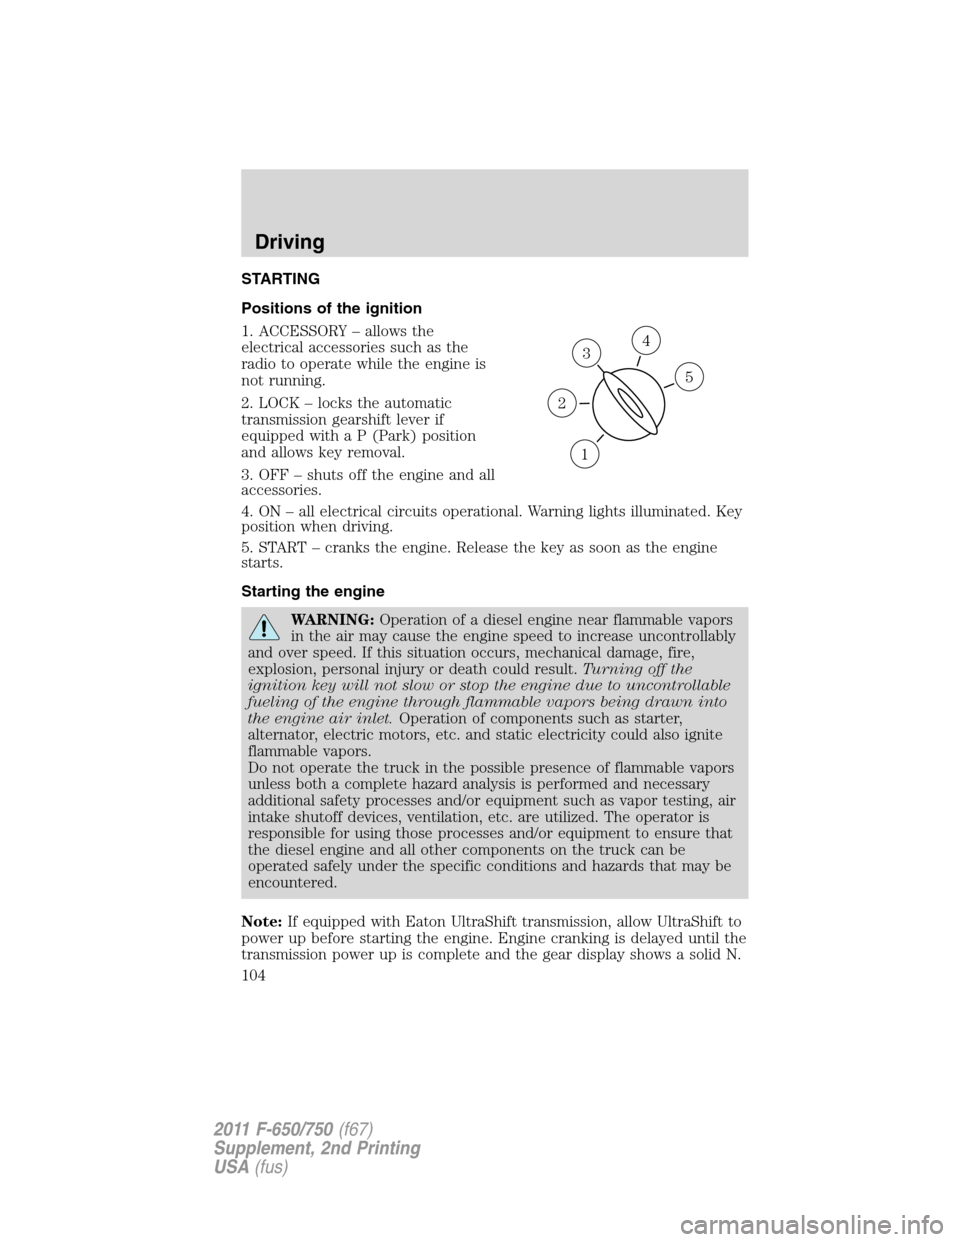
Positions of the ignition
1. ACCESSORY – allows the
electrical accessories such as the
radio to operate while the engine is
not running.
2. LOCK – locks the automatic
transmission gearshift lever if
equipped with a P (Park) position
and allows key removal.
3. OFF – shuts off the engine and all
accessories.
4. ON – all electrical circuits operational. Warning lights illuminated. Key
position when driving.
5. START – cranks the engine. Release the key as soon as the engine
starts.
Starting the engine
WARNING:Operation of a diesel engine near flammable vapors
in the air may cause the engine speed to increase uncontrollably
and over speed. If this situation occurs, mechanical damage, fire,
explosion, personal injury or death could result.Turning off the
ignition key will not slow or stop the engine due to uncontrollable
fueling of the engine through flammable vapors being drawn into
the engine air inlet.Operation of components such as starter,
alternator, electric motors, etc. and static electricity could also ignite
flammable vapors.
Do not operate the truck in the possible presence of flammable vapors
unless both a complete hazard analysis is performed and necessary
additional safety processes and/or equipment such as vapor testing, air
intake shutoff devices, ventilation, etc. are utilized. The operator is
responsible for using those processes and/or equipment to ensure that
the diesel engine and all other components on the truck can be
operated safely under the specific conditions and hazards that may be
encountered.
Note:If equipped with Eaton UltraShift transmission, allow UltraShift to
power up before starting the engine. Engine cranking is delayed until the
transmission power up is complete and the gear display shows a solid N.
3
1
2
5
4
Driving
104
2011 F-650/750(f67)
Supplement, 2nd Printing
USA(fus)
Page 105 of 290
Note:When starting the engine, do not press the accelerator as engine
damage may result.
1. Ensure headlamps and all accessories are turned off, the parking
brake is applied and the transmission is in the neutral position (or P
[Park] for Allison 2200 transmissions).
2. Turn the key to the on position, but do not start the engine.
In cooler weather, the air intake
heater may activate the WAIT TO
START light in the instrument
cluster. If the WAIT TO START light
illuminates,do notcrank the engine until the light goes off.
WARNING:If equipped with an air intake heater, DO NOT use
ether or any other starting fluids. The use of starting fluids
(ether) in an engine equipped with an air intake heater could cause an
explosion and result in property damage and/or personal injury.
3. When the WAIT TO START light turns off, turn the key to the start
position; when the engine starts, release the key.
If the engine does not start after 30 seconds of cranking, allow two
minutes for the starter to cool before trying again. Excessive cranking
may damage the starter.
After the engine starts:
•On some engines, the WAIT TO
START light should illuminate
after the engine starts. Allow the
engine to idle about three
minutes or until the engine coolant temperature gauge begins to rise.
Maintain idle speed until the WAIT TO START light cycles off to
indicate the air intake heater has shut off (approximately six
minutes). Operating the engine at higher speeds will reduce the
effectiveness of the air inlet heater.
•Do not increase engine speed until the oil pressure gauge indicates
normal pressure (as indicated by the arrows); this should be indicated
on the gauge within 15 seconds after starting.
•Idle the engine for three to five minutes before operating with a full
load.
•Try to limit engine idle to 10 minutes. Excessive idling reduces fuel
economy.
Driving
105
2011 F-650/750(f67)
Supplement, 2nd Printing
USA(fus)
Page 109 of 290
WARNING:When parking your vehicle, do not leave the
transmission in gear; if the key is in the on position and the
vehicle rolls, the engine could start. Failure to follow these instructions
could result in an unattended vehicle moving, possibly causing personal
injury or property damage.
Driving through water
If driving through deep or standing water is unavoidable, proceed very
slowly especially if the depth is not known. Never drive through water
that is higher than the bottom of the hubs. Traction or brake capability
may be limited and your vehicle may stall. Water may also enter your
engine’s air intake and severely damage your engine, drive axles or the
transmission (through the breather ports).
Once through the water, always dry the brakes by moving your vehicle
slowly while applying light pressure on the brake pedal. Wet brakes do
not stop the vehicle as quickly as dry brakes.
ENGINE IDLE SHUTDOWN (IF EQUIPPED)
Your vehicle may be equipped with an Engine Idle Shutdown system.
This system will automatically shut down your engine when it has been
idling in P (Park) or N (Neutral) for five minutes (parking brake set) or
15 minutes (parking brake not set). During the engine idle shutdown
process:
•TheService Engine Soonlight will flash, once per second, for the
final 30 seconds just prior to shutdown.
•Within the final 30 seconds, the timer can be reset by:
1. changing the position of the accelerator pedal, or
2. engaging or disengaging the brake pedal, clutch pedal or parking
brake.
•When the timer reaches zero, the engine will shut down.
•In this event, the key remains in the on position, and power
continues to be supplied to the accessories.
Battery power may be drained if the key is left in the on position
without the engine running.
Note:The engine idle shutdown timer will not start if:
•The engine is operating in power take-off (PTO) mode.
•The engine coolant temperature is below 60°F (16°C).
•The exhaust emission control system is regenerating the diesel
particulate filter (DPF).
Driving
109
2011 F-650/750(f67)
Supplement, 2nd Printing
USA(fus)