length FORD F650 2012 12.G Owners Manual
[x] Cancel search | Manufacturer: FORD, Model Year: 2012, Model line: F650, Model: FORD F650 2012 12.GPages: 306, PDF Size: 1.74 MB
Page 83 of 306

Lap belts
The front center and rear center lap belts do not adjust automatically.
WARNING:The lap belt should fit snugly and as low as possible
around the hips, not across the waist.
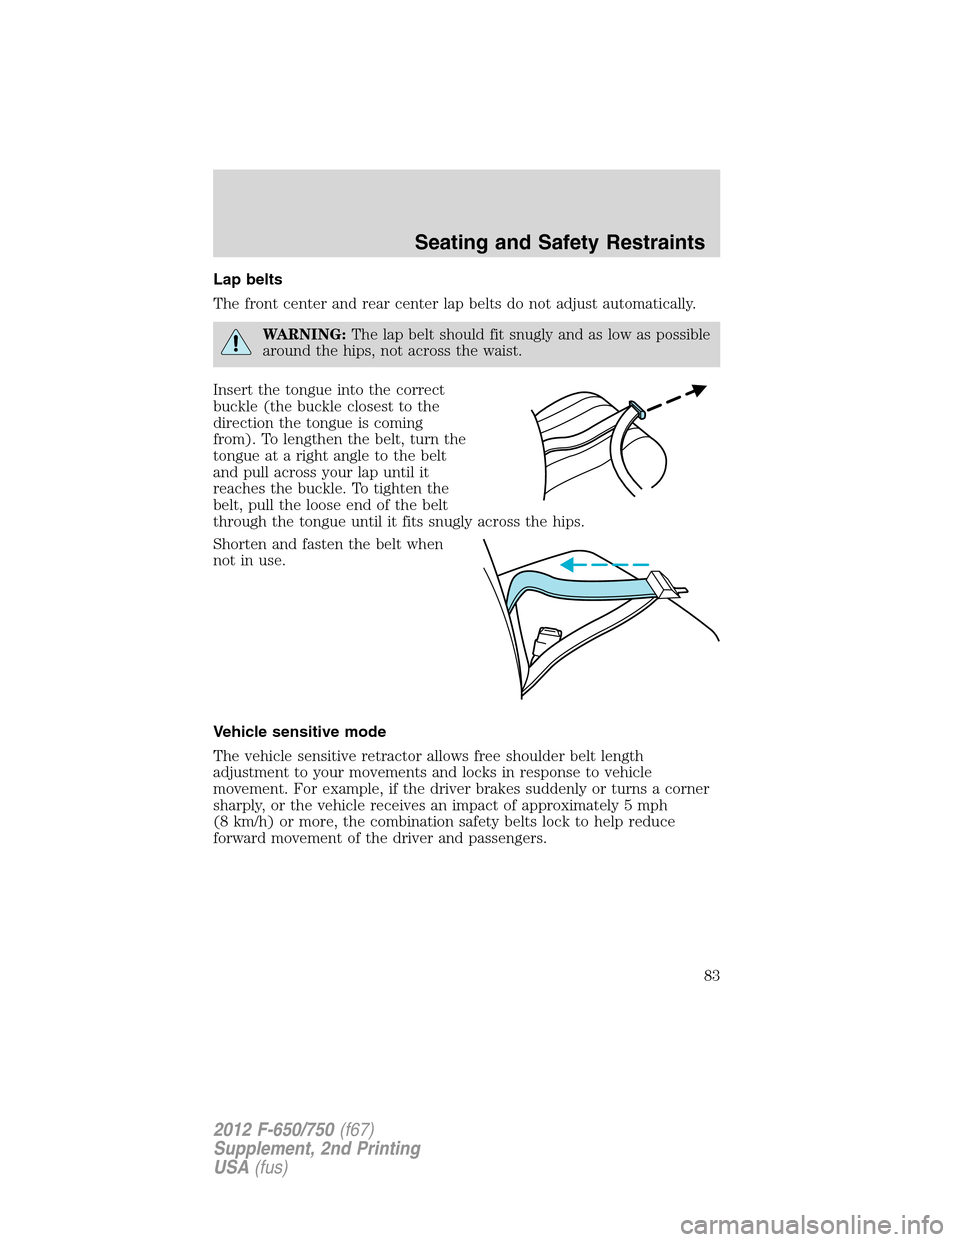
Insert the tongue into the correct
buckle (the buckle closest to the
direction the tongue is coming
from). To lengthen the belt, turn the
tongue at a right angle to the belt
and pull across your lap until it
reaches the buckle. To tighten the
belt, pull the loose end of the belt
through the tongue until it fits snugly across the hips.
Shorten and fasten the belt when
not in use.
Vehicle sensitive mode
The vehicle sensitive retractor allows free shoulder belt length
adjustment to your movements and locks in response to vehicle
movement. For example, if the driver brakes suddenly or turns a corner
sharply, or the vehicle receives an impact of approximately 5 mph
(8 km/h) or more, the combination safety belts lock to help reduce
forward movement of the driver and passengers.
Seating and Safety Restraints
83
2012 F-650/750(f67)
Supplement, 2nd Printing
USA(fus)
Page 95 of 306

Installing child safety seats in the lap belt seating positions
1. Lengthen the lap belt. To lengthen the belt, hold the tongue so that its
bottom is perpendicular to the direction of webbing while sliding the
tongue up the webbing.
2. Place the child safety seat in the center seating position.
3. Route the tongue and webbing through the child seat according to the
child seat manufacturer’s instructions.
4. Insert the belt tongue into the proper buckle for the center seating
position until you hear a snap and feel it latch. Make sure the tongue is
securely fastened to the buckle by pulling on tongue.
5. Push down on the child seat while pulling on the loose end of the lap
belt webbing to remove slack from and tighten the belt.
6. Before placing the child into the child seat, forcibly tilt the child seat
from side to side and in forward direction to make sure that the seat is
securely held in place. To check this, grab the seat at the belt path and
attempt to move it side to side and forward and back. There should be
no more than one inch of movement for proper installation.
7. Ford recommends checking with a NHTSA Certified Child Passenger
Safety Technician (CPST) to make certain the child restraint is properly
installed.
Attaching child safety seats with LATCH (Lower Anchors and
Tethers for CHildren) attachments
The LATCH system is composed of three vehicle anchor points: two (2)
lower anchors located where the vehicle seat back and seat cushion meet
(called the “seat bight”) and one (1) top tether anchor located behind
that seating position. This vehicle is not LATCH compatible. The vehicle
is notequipped with the two (2) lower anchors in the seat bight. For
forward-facing child seats, the top tether strap must also be attached to
the proper top tether anchor, if a top tether strap has been provided
with your child seat. Ford Motor Company recommends the use of a
child safety seat having a top tether strap. SeeAttaching child safety
seats with tether strapsandRecommendations for attaching safety
restraints for childrenin this chapter for more information.
Seating and Safety Restraints
95
2012 F-650/750(f67)
Supplement, 2nd Printing
USA(fus)
Page 172 of 306

In the case of 1 or 2 above, the consumer must also notify the
manufacturer of the need for the repair of the nonconformity at the
following address:
Ford Motor Company
16800 Executive Plaza Drive
Mail Drop 3NE-B
Dearborn, MI 48126
UTILIZING THE MEDIATION/ARBITRATION PROGRAM
(CANADA ONLY)
For vehicles delivered to authorized Canadian dealers. In those cases
where you continue to feel that the efforts by Ford of Canada and the
authorized dealer to resolve a factory-related vehicle service concern
have been unsatisfactory, Ford of Canada participates in an impartial
third party mediation/arbitration program administered by the Canadian
Motor Vehicle Arbitration Plan (CAMVAP).
The CAMVAP program is a straight forward and relatively speedy alternative
to resolve a disagreement when all other efforts to produce a settlement
have failed. This procedure is without cost to you and is designed to
eliminate the need for lengthy and expensive legal proceedings.
In the CAMVAP program, impartial third-party arbitrators conduct
hearings at mutually convenient times and places in an informal
environment. These impartial arbitrators review the positions of the
parties, make decisions and, when appropriate, render awards to resolve
disputes. CAMVAP decisions are fast, fair, and final as the arbitrator’s
award is binding on both you and Ford of Canada.
CAMVAP services are available in all Canadian territories and provinces.
For more information, without charge or obligation, call your CAMVAP
Provincial Administrator directly at 1-800-207-0685 or visit www.camvap.ca.
GETTING ASSISTANCE OUTSIDE THE U.S AND CANADA
Before exporting your vehicle to a foreign country, contact the
appropriate foreign embassy or consulate. These officials can inform you
of local vehicle registration regulations and where to find diesel fuel.
If you cannot find diesel fuel or can only get fuel with an anti-knock
index lower than is recommended for your vehicle, contact a regional
office or owner relations/customer relationship office.
The use of low quality diesel fuel may affect your emissions control
system and may cause engine damage. Ford Motor Company/Ford of
Canada is not responsible for any damage caused by use of improper
Customer Assistance
172
2012 F-650/750(f67)
Supplement, 2nd Printing
USA(fus)
Page 185 of 306

Periodic checking of push rod travel or brake adjustment is essential for
effective braking. Check push rod travel every service interval to determine
if adjustment is correct. Brake chamber push rods on original equipment
chambers now incorporate an orange paint marker near the base of the
push rod as a stroke indicator to aid in adjustment checks. If the push rod
is clean and the brakes are out of adjustment, the orange marker can be
seen protruding from the chamber when the brakes are applied.
WARNING:Do not manually adjust the automatic slack
adjusters to correct excessive push rod stroke as it may result in
reduced brake effectiveness and a vehicle crash. Excessive push rod
stroke indicates that a problem exists with the automatic adjuster, with
the installation of the adjuster, or with foundation brake components
that manual adjustment does not remedy. Seek service from a qualified
facility for excessive push rod stroke.
Inspect the brake lining every maintenance interval. When brake lining or
blocks are worn to within 1/16 inch (1.6 mm) of rivets, replace the brake
linings. This inspection or adjustment should only be performed by a
qualified technician and must be in accordance with instructions
provided by the service manual.
Do not back off or disconnect the front brakes so that they are less
effective, letting the rear brakes do all the stopping of the vehicle. Do
not overlook the brakes on the trailer, either. Brake condition on the
trailer is just as important as the tractor. Proper brake balance on trucks
and tractor-trailers is essential for effective braking.
Once a year, the entire brake system must be inspected. Check the
following:
•Any rubber components for deterioration. These components should
be inspected by a qualified technician and replaced as necessary.
Replacement intervals vary according to the severity and length of
vehicle service.
•Condition of brake drums, brake chambers and slack adjusters.
•System for air leaks.
•Hose or pipes for rust, damage and deterioration.
•Operation of service and parking brakes.
Some parts such as air brake chamber diaphragm, air compressor and air
cleaner should be inspected periodically and replaced if considered
unserviceable.
Maintenance and Specifications
185
2012 F-650/750(f67)
Supplement, 2nd Printing
USA(fus)