window FORD F650/750 2019 Owners Manual
[x] Cancel search | Manufacturer: FORD, Model Year: 2019, Model line: F650/750, Model: FORD F650/750 2019Pages: 387, PDF Size: 4.78 MB
Page 4 of 387
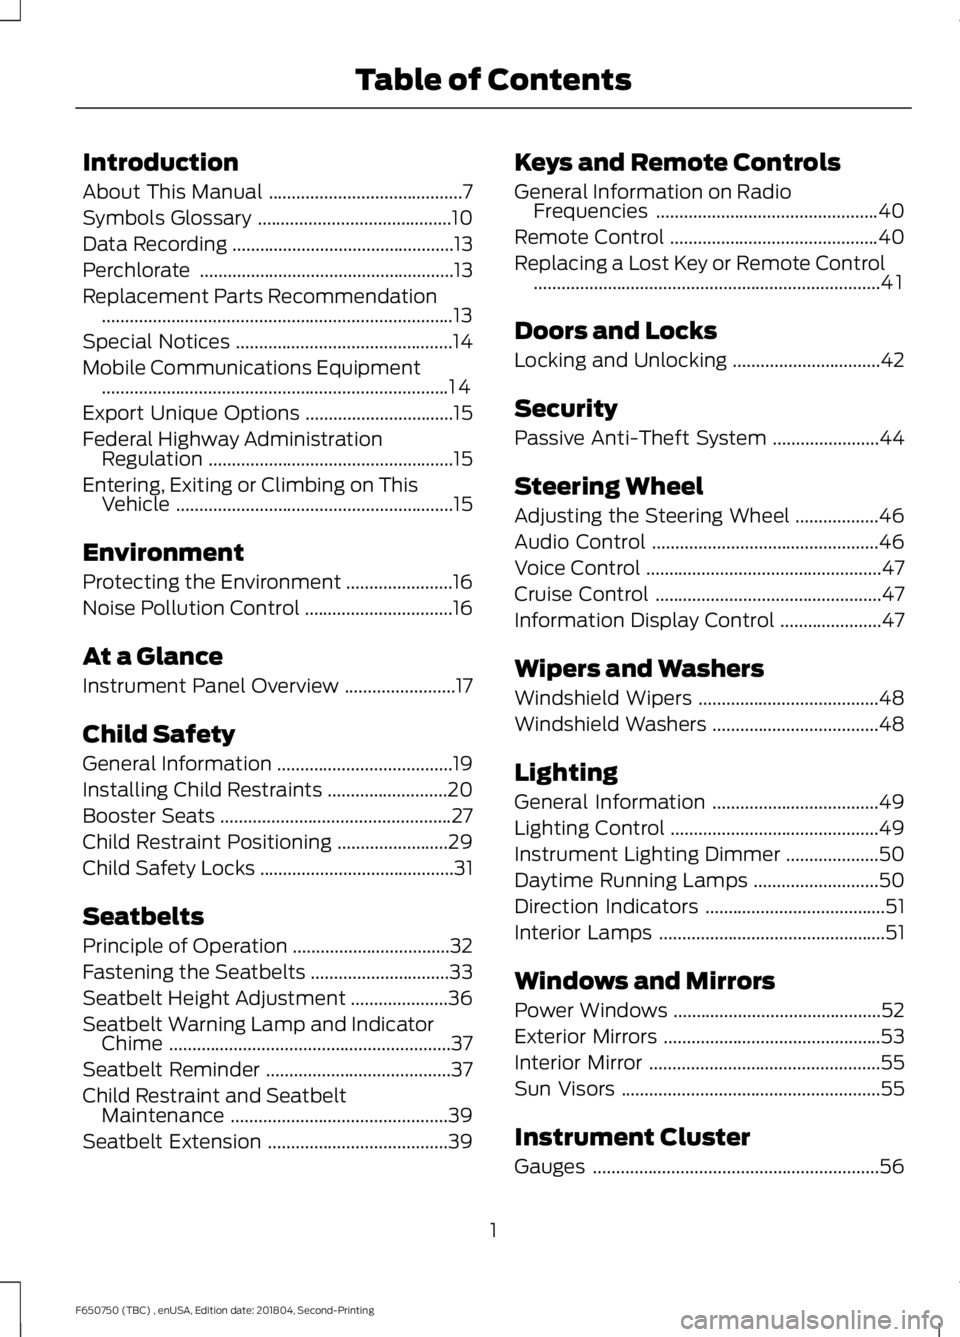
Introduction
About This Manual
..........................................7
Symbols Glossary ..........................................
10
Data Recording ................................................
13
Perchlorate .......................................................
13
Replacement Parts Recommendation ........................................................................\
....
13
Special Notices ...............................................
14
Mobile Communications Equipment ........................................................................\
...
14
Export Unique Options ................................
15
Federal Highway Administration Regulation .....................................................
15
Entering, Exiting or Climbing on This Vehicle ............................................................
15
Environment
Protecting the Environment .......................
16
Noise Pollution Control ................................
16
At a Glance
Instrument Panel Overview ........................
17
Child Safety
General Information ......................................
19
Installing Child Restraints ..........................
20
Booster Seats ..................................................
27
Child Restraint Positioning ........................
29
Child Safety Locks ..........................................
31
Seatbelts
Principle of Operation ..................................
32
Fastening the Seatbelts ..............................
33
Seatbelt Height Adjustment .....................
36
Seatbelt Warning Lamp and Indicator Chime .............................................................
37
Seatbelt Reminder ........................................
37
Child Restraint and Seatbelt Maintenance ...............................................
39
Seatbelt Extension .......................................
39Keys and Remote Controls
General Information on Radio
Frequencies ................................................
40
Remote Control .............................................
40
Replacing a Lost Key or Remote Control ........................................................................\
...
41
Doors and Locks
Locking and Unlocking ................................
42
Security
Passive Anti-Theft System .......................
44
Steering Wheel
Adjusting the Steering Wheel ..................
46
Audio Control .................................................
46
Voice Control ...................................................
47
Cruise Control .................................................
47
Information Display Control ......................
47
Wipers and Washers
Windshield Wipers .......................................
48
Windshield Washers ....................................
48
Lighting
General Information ....................................
49
Lighting Control .............................................
49
Instrument Lighting Dimmer ....................
50
Daytime Running Lamps ...........................
50
Direction Indicators .......................................
51
Interior Lamps .................................................
51
Windows and Mirrors
Power Windows .............................................
52
Exterior Mirrors ...............................................
53
Interior Mirror ..................................................
55
Sun Visors ........................................................
55
Instrument Cluster
Gauges ..............................................................
56
1
F650750 (TBC) , enUSA, Edition date: 201804, Second-Printing Table of Contents
Page 7 of 387
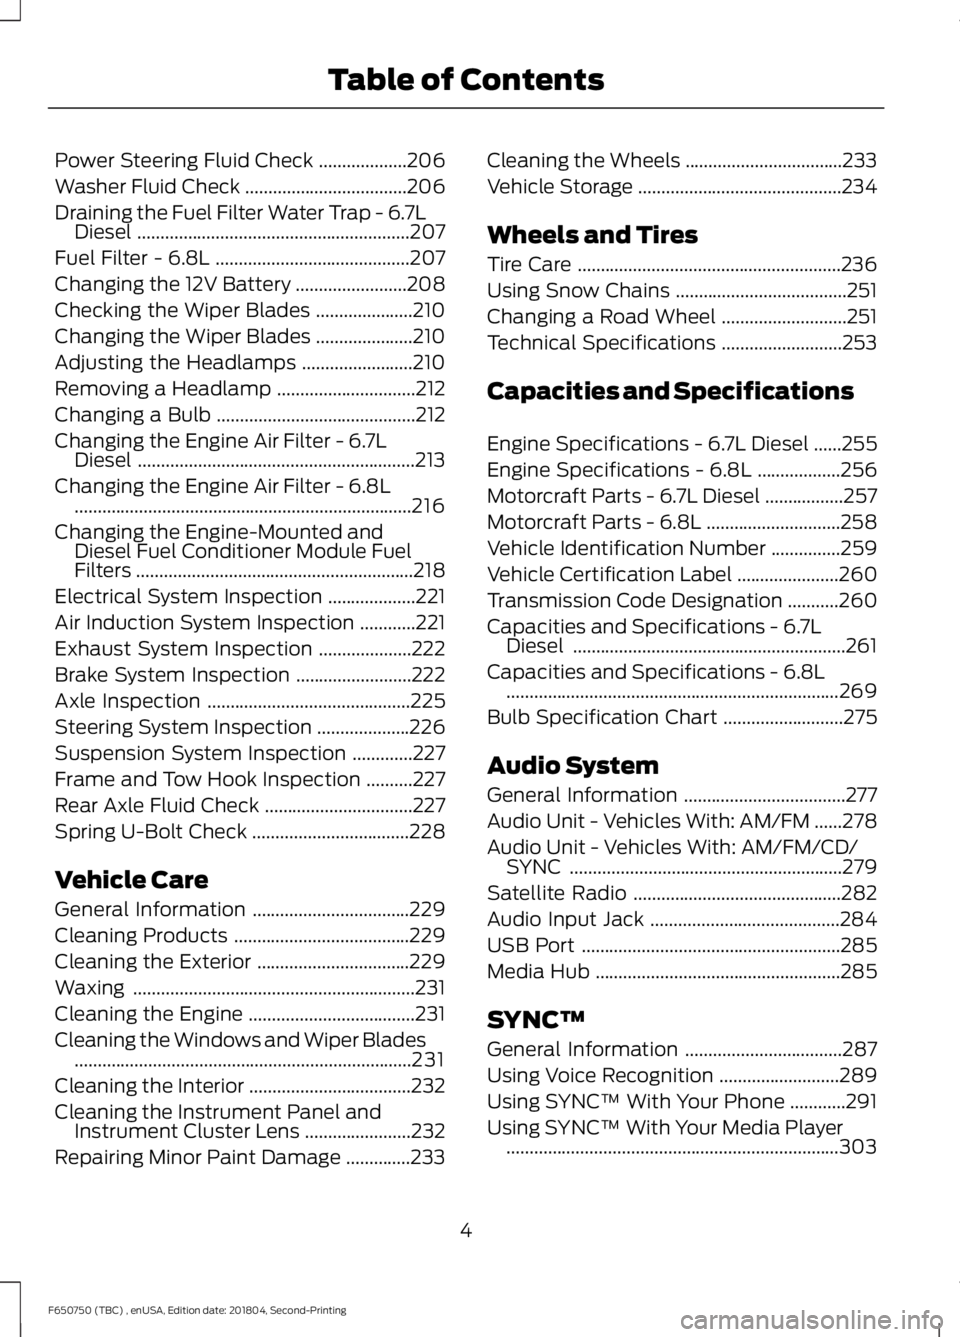
Power Steering Fluid Check
...................206
Washer Fluid Check ...................................
206
Draining the Fuel Filter Water Trap - 6.7L Diesel ...........................................................
207
Fuel Filter - 6.8L ..........................................
207
Changing the 12V Battery ........................
208
Checking the Wiper Blades .....................
210
Changing the Wiper Blades .....................
210
Adjusting the Headlamps ........................
210
Removing a Headlamp ..............................
212
Changing a Bulb ...........................................
212
Changing the Engine Air Filter - 6.7L Diesel ............................................................
213
Changing the Engine Air Filter - 6.8L ........................................................................\
.
216
Changing the Engine-Mounted and Diesel Fuel Conditioner Module Fuel
Filters ............................................................
218
Electrical System Inspection ...................
221
Air Induction System Inspection ............
221
Exhaust System Inspection ....................
222
Brake System Inspection .........................
222
Axle Inspection ............................................
225
Steering System Inspection ....................
226
Suspension System Inspection .............
227
Frame and Tow Hook Inspection ..........
227
Rear Axle Fluid Check ................................
227
Spring U-Bolt Check ..................................
228
Vehicle Care
General Information ..................................
229
Cleaning Products ......................................
229
Cleaning the Exterior .................................
229
Waxing .............................................................
231
Cleaning the Engine ....................................
231
Cleaning the Windows and Wiper Blades ........................................................................\
.
231
Cleaning the Interior ...................................
232
Cleaning the Instrument Panel and Instrument Cluster Lens .......................
232
Repairing Minor Paint Damage ..............
233Cleaning the Wheels
..................................
233
Vehicle Storage ............................................
234
Wheels and Tires
Tire Care .........................................................
236
Using Snow Chains .....................................
251
Changing a Road Wheel ...........................
251
Technical Specifications ..........................
253
Capacities and Specifications
Engine Specifications - 6.7L Diesel ......
255
Engine Specifications - 6.8L ..................
256
Motorcraft Parts - 6.7L Diesel .................
257
Motorcraft Parts - 6.8L .............................
258
Vehicle Identification Number ...............
259
Vehicle Certification Label ......................
260
Transmission Code Designation ...........
260
Capacities and Specifications - 6.7L Diesel ...........................................................
261
Capacities and Specifications - 6.8L ........................................................................\
269
Bulb Specification Chart ..........................
275
Audio System
General Information ...................................
277
Audio Unit - Vehicles With: AM/FM ......
278
Audio Unit - Vehicles With: AM/FM/CD/ SYNC ...........................................................
279
Satellite Radio .............................................
282
Audio Input Jack .........................................
284
USB Port ........................................................
285
Media Hub .....................................................
285
SYNC™
General Information ..................................
287
Using Voice Recognition ..........................
289
Using SYNC™ With Your Phone ............
291
Using SYNC™ With Your Media Player ........................................................................\
303
4
F650750 (TBC) , enUSA, Edition date: 201804, Second-Printing Table of Contents
Page 14 of 387
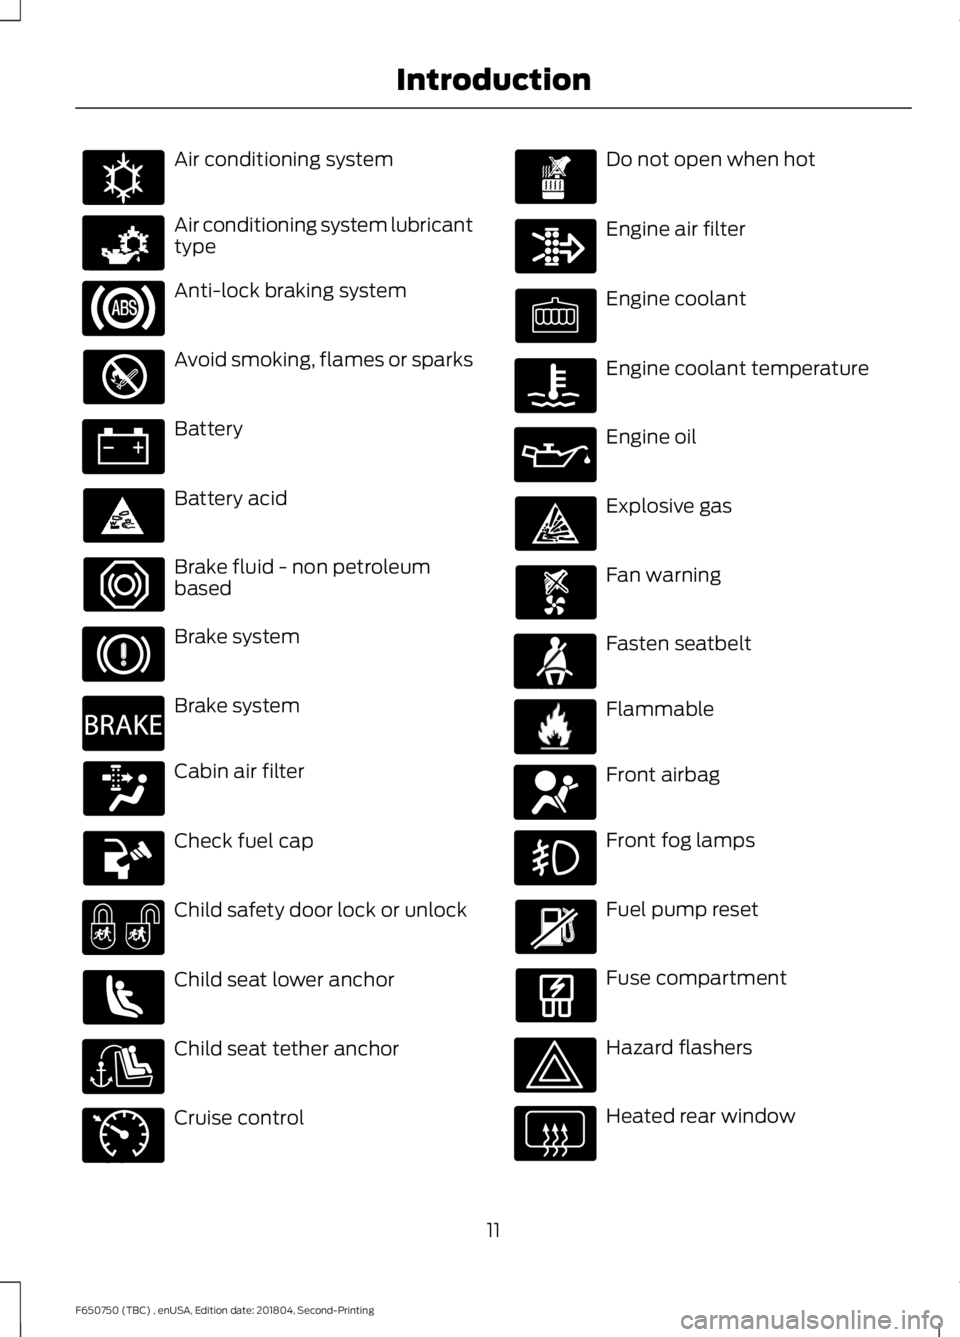
Air conditioning system
Air conditioning system lubricant
type
Anti-lock braking system
Avoid smoking, flames or sparks
Battery
Battery acid
Brake fluid - non petroleum
based
Brake system
Brake system
Cabin air filter
Check fuel cap
Child safety door lock or unlock
Child seat lower anchor
Child seat tether anchor
Cruise control Do not open when hot
Engine air filter
Engine coolant
Engine coolant temperature
Engine oil
Explosive gas
Fan warning
Fasten seatbelt
Flammable
Front airbag
Front fog lamps
Fuel pump reset
Fuse compartment
Hazard flashers
Heated rear window
11
F650750 (TBC) , enUSA, Edition date: 201804, Second-Printing IntroductionE162384 E231157 E270480 E71340 E71880 E231160 E67017
Page 15 of 387
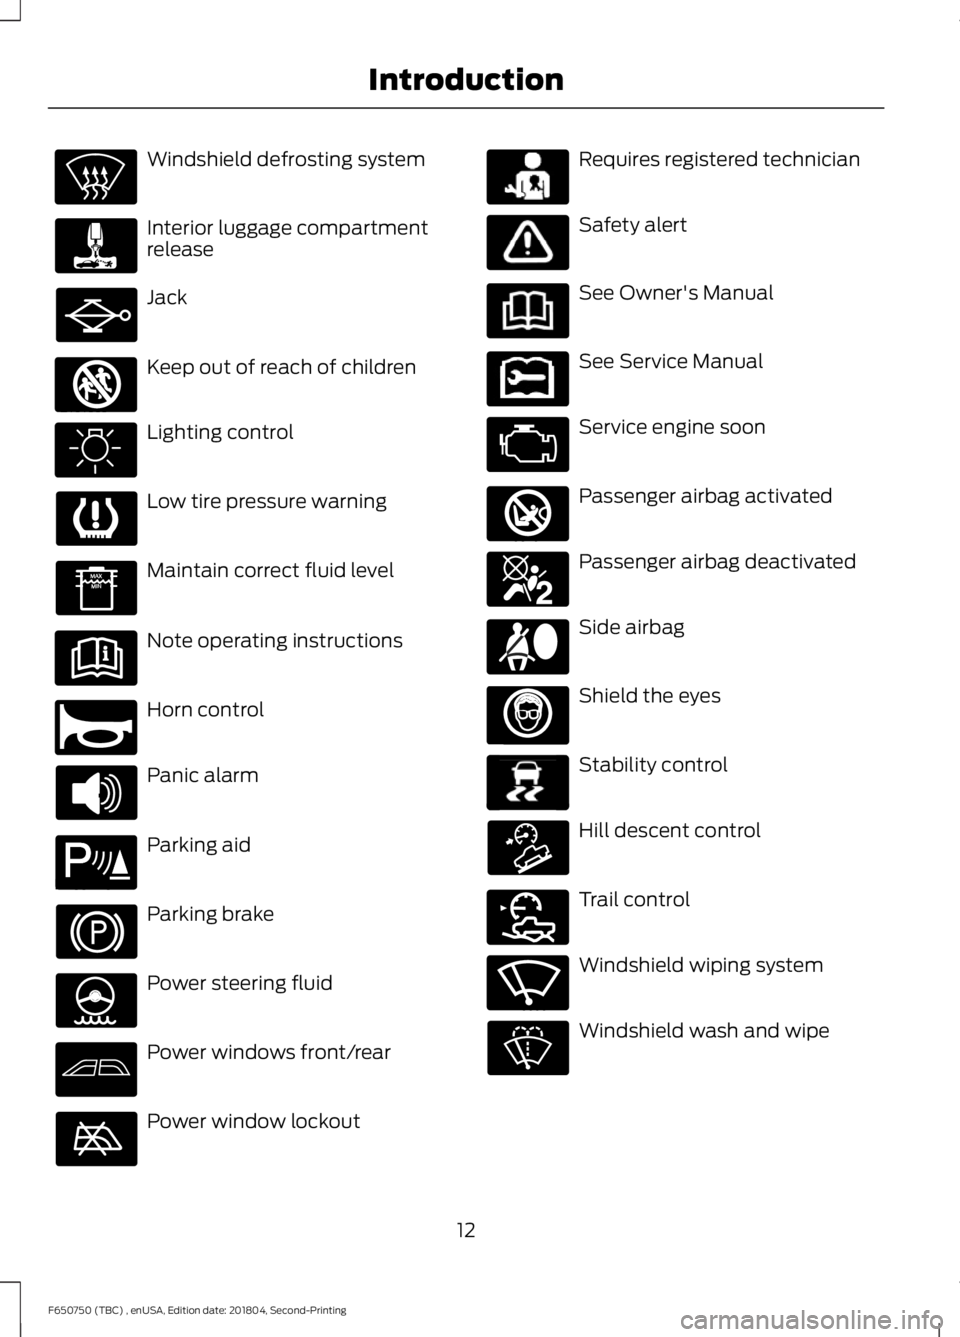
Windshield defrosting system
Interior luggage compartment
release
Jack
Keep out of reach of children
Lighting control
Low tire pressure warning
Maintain correct fluid level
Note operating instructions
Horn control
Panic alarm
Parking aid
Parking brake
Power steering fluid
Power windows front/rear
Power window lockout Requires registered technician
Safety alert
See Owner's Manual
See Service Manual
Service engine soon
Passenger airbag activated
Passenger airbag deactivated
Side airbag
Shield the eyes
Stability control
Hill descent control
Trail control
Windshield wiping system
Windshield wash and wipe
12
F650750 (TBC) , enUSA, Edition date: 201804, Second-Printing Introduction E161353 E270945 E139213 E231159 E231158 E270849 E270850 E167012 E138639 E163957 E272858 E270969
Page 55 of 387
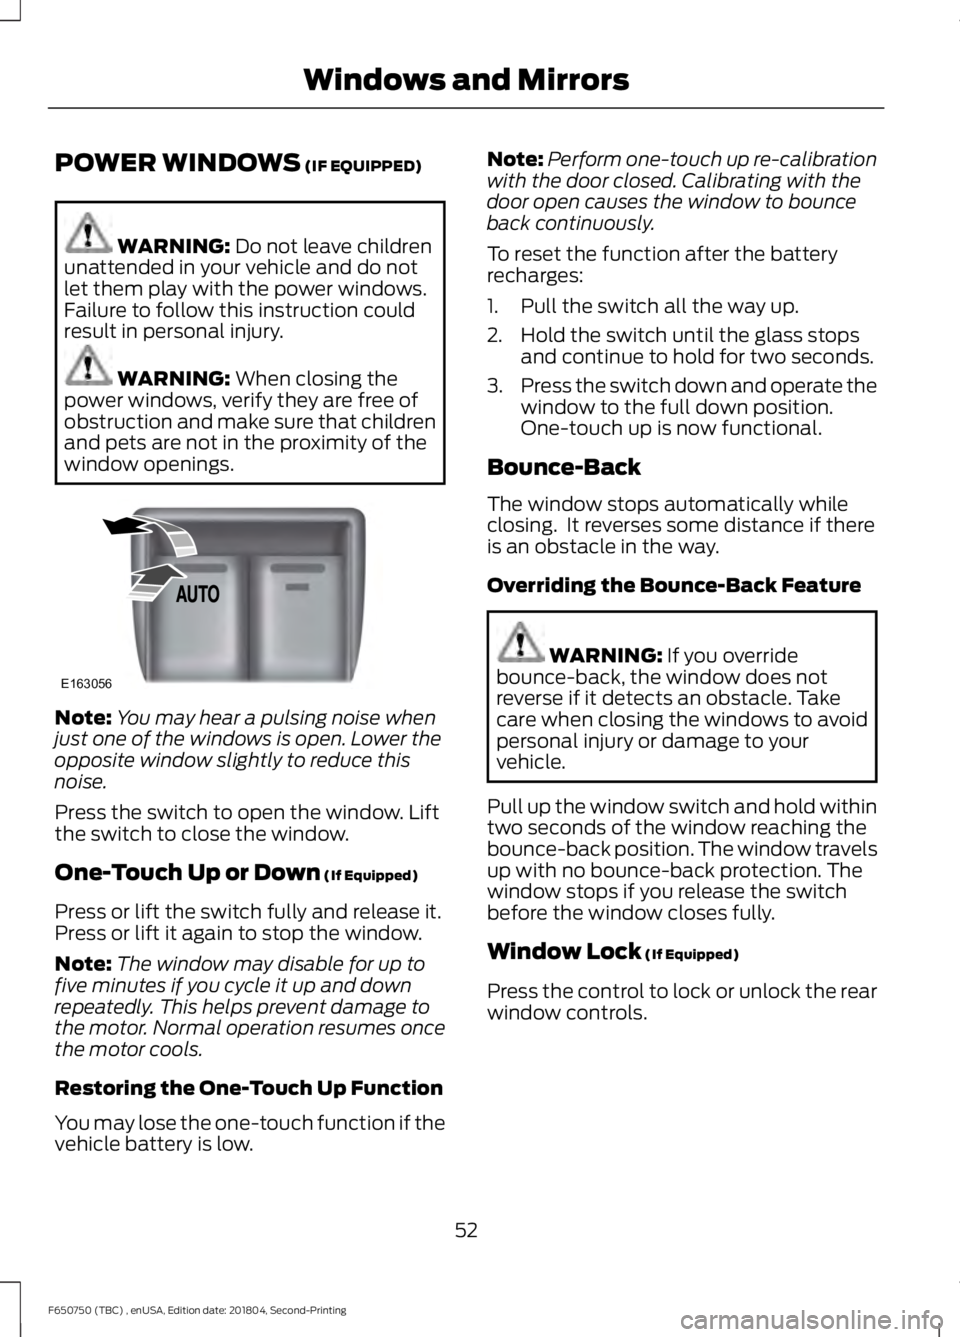
POWER WINDOWS (IF EQUIPPED)
WARNING:
Do not leave children
unattended in your vehicle and do not
let them play with the power windows.
Failure to follow this instruction could
result in personal injury. WARNING:
When closing the
power windows, verify they are free of
obstruction and make sure that children
and pets are not in the proximity of the
window openings. Note:
You may hear a pulsing noise when
just one of the windows is open. Lower the
opposite window slightly to reduce this
noise.
Press the switch to open the window. Lift
the switch to close the window.
One-Touch Up or Down
(If Equipped)
Press or lift the switch fully and release it.
Press or lift it again to stop the window.
Note: The window may disable for up to
five minutes if you cycle it up and down
repeatedly. This helps prevent damage to
the motor. Normal operation resumes once
the motor cools.
Restoring the One-Touch Up Function
You may lose the one-touch function if the
vehicle battery is low. Note:
Perform one-touch up re-calibration
with the door closed. Calibrating with the
door open causes the window to bounce
back continuously.
To reset the function after the battery
recharges:
1. Pull the switch all the way up.
2. Hold the switch until the glass stops and continue to hold for two seconds.
3. Press the switch down and operate the
window to the full down position.
One-touch up is now functional.
Bounce-Back
The window stops automatically while
closing. It reverses some distance if there
is an obstacle in the way.
Overriding the Bounce-Back Feature WARNING:
If you override
bounce-back, the window does not
reverse if it detects an obstacle. Take
care when closing the windows to avoid
personal injury or damage to your
vehicle.
Pull up the window switch and hold within
two seconds of the window reaching the
bounce-back position. The window travels
up with no bounce-back protection. The
window stops if you release the switch
before the window closes fully.
Window Lock
(If Equipped)
Press the control to lock or unlock the rear
window controls.
52
F650750 (TBC) , enUSA, Edition date: 201804, Second-Printing Windows and MirrorsE163056
Page 56 of 387
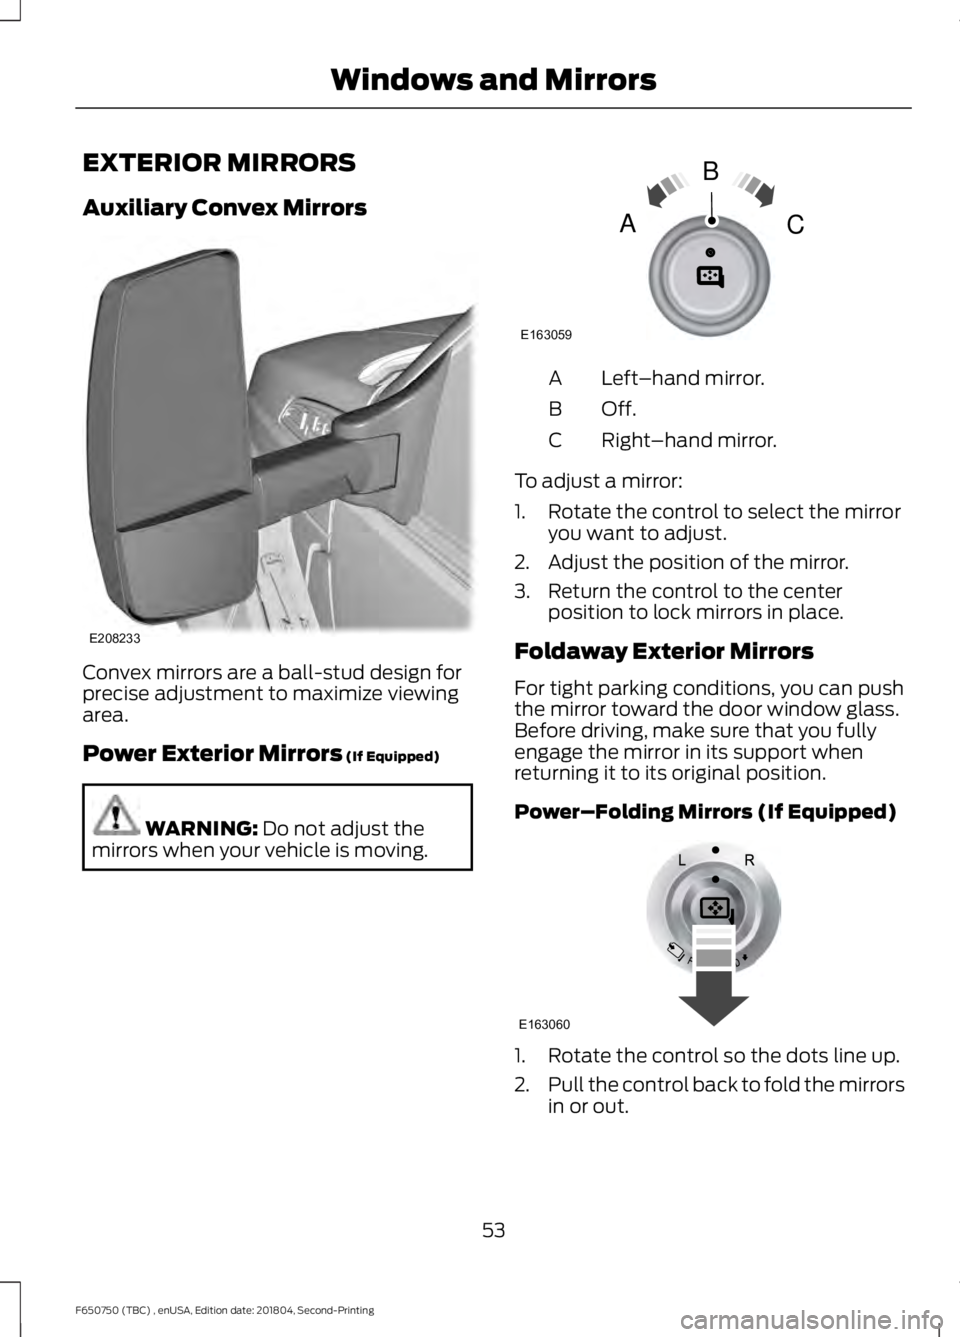
EXTERIOR MIRRORS
Auxiliary Convex Mirrors
Convex mirrors are a ball-stud design for
precise adjustment to maximize viewing
area.
Power Exterior Mirrors (If Equipped)
WARNING:
Do not adjust the
mirrors when your vehicle is moving. Left
–hand mirror.
A
Off.B
Right–hand mirror.
C
To adjust a mirror:
1. Rotate the control to select the mirror you want to adjust.
2. Adjust the position of the mirror.
3. Return the control to the center position to lock mirrors in place.
Foldaway Exterior Mirrors
For tight parking conditions, you can push
the mirror toward the door window glass.
Before driving, make sure that you fully
engage the mirror in its support when
returning it to its original position.
Power–Folding Mirrors (If Equipped) 1. Rotate the control so the dots line up.
2.
Pull the control back to fold the mirrors
in or out.
53
F650750 (TBC) , enUSA, Edition date: 201804, Second-Printing Windows and MirrorsE208233 E163059
B
AC E163060
Page 57 of 387
Note:
If you repeatedly fold and unfold the
mirrors several times within one minute, the
system may disable to protect the motors
from overheating. It resets to normal
function automatically within three to five
minutes.
You can also fold a mirror manually by
pushing it toward the door window glass.
After you manually adjust the mirror, you
need to reset it.
To reset the power –folding mirror system
and return it to its normal function:
• Fold the mirror manually by pushing it
toward the door window glass.
• Use the power –fold control to fold and
unfold the mirror two or three times.
The mirror makes a sound as it resets.
Heated Exterior Mirrors (If Equipped)
See
Heated Exterior Mirrors (page 74).
Signal Indicator Mirrors
(If Equipped)
The outer portion of the appropriate mirror
housing blinks when you use the direction
indicator.
Clearance Lamps
(If Equipped)
The lower, outer part of the mirror housings
light when you switch on the headlamps
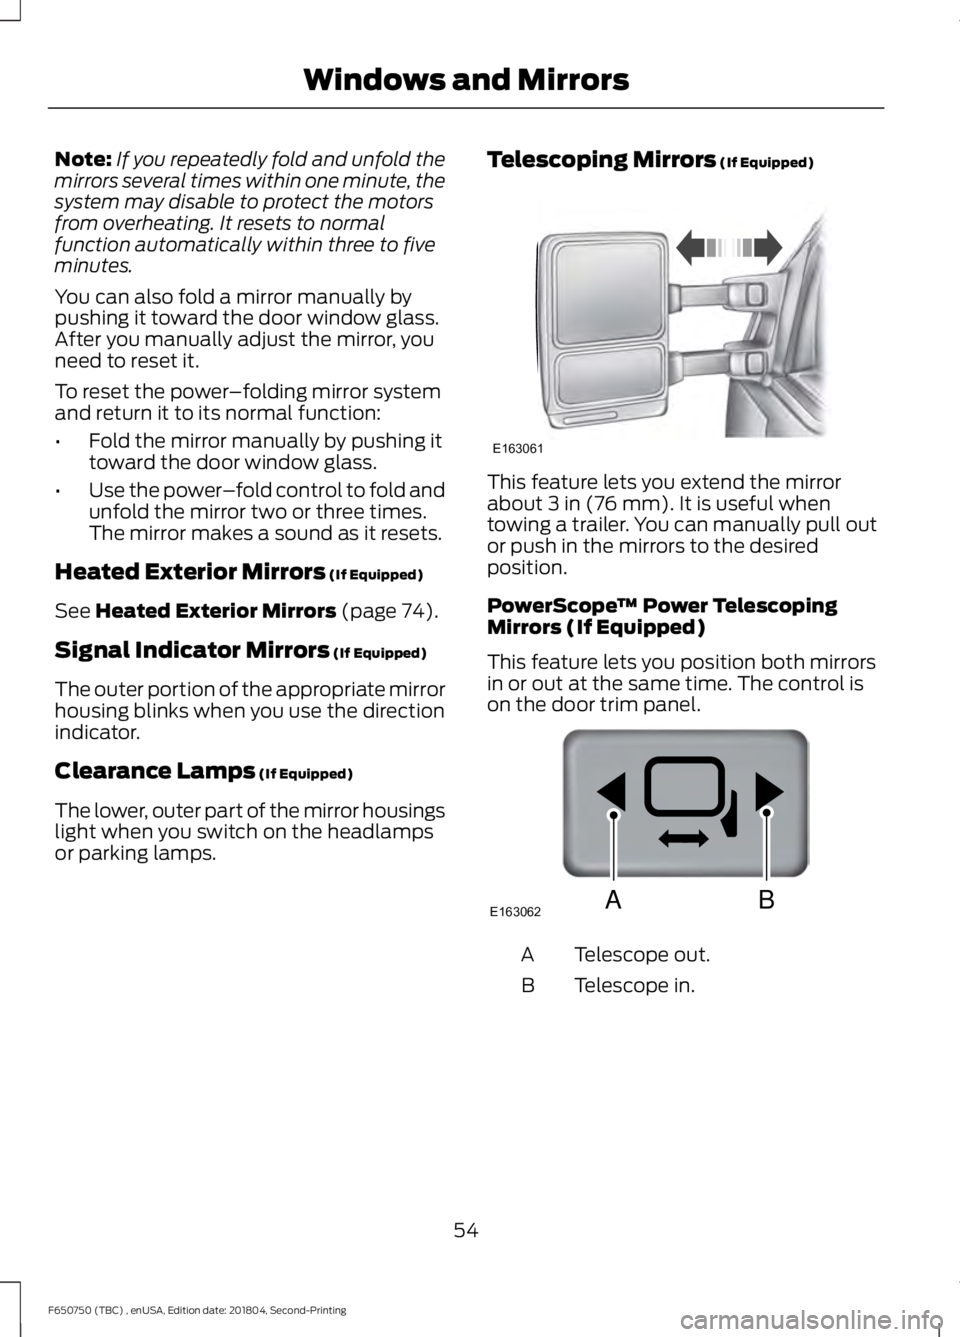
or parking lamps. Telescoping Mirrors
(If Equipped) This feature lets you extend the mirror
about
3 in (76 mm). It is useful when
towing a trailer. You can manually pull out
or push in the mirrors to the desired
position.
PowerScope ™ Power Telescoping
Mirrors (If Equipped)
This feature lets you position both mirrors
in or out at the same time. The control is
on the door trim panel. Telescope out.
A
Telescope in.
B
54
F650750 (TBC) , enUSA, Edition date: 201804, Second-Printing Windows and MirrorsE163061 E163062BA
Page 58 of 387
To adjust the mirrors:
•
Press and hold the control.
• When you position the mirrors in or out,
the motors run as long as you hold the
control. The running motors allow you
to make adjustments as needed.
• After positioning the mirrors, return the
control to the center position to help
protect the motors from overheating.
INTERIOR MIRROR WARNING: Do not adjust the
mirror when your vehicle is moving.
Note: Do not clean the housing or glass of
any mirror with harsh abrasives, fuel or other
petroleum or ammonia-based cleaning
products
You can adjust the interior mirror to your
preference. Some mirrors also have a
second pivot point. This lets you move the
mirror head up or down and from side to
side.
Pull the tab below the mirror toward you
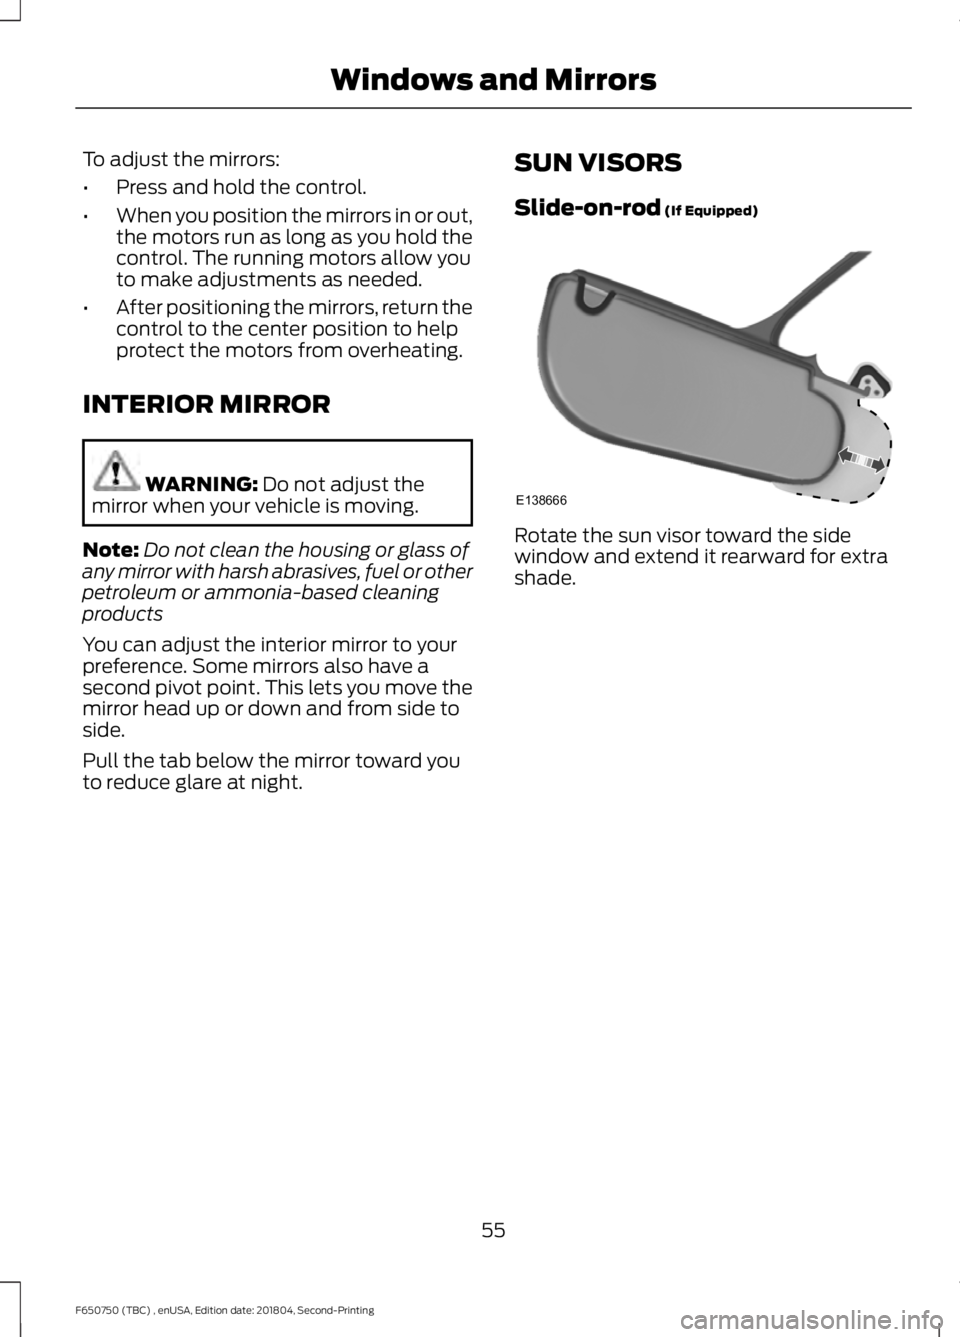
to reduce glare at night. SUN VISORS
Slide-on-rod
(If Equipped) Rotate the sun visor toward the side
window and extend it rearward for extra
shade.
55
F650750 (TBC) , enUSA, Edition date: 201804, Second-Printing Windows and MirrorsE138666
Page 69 of 387
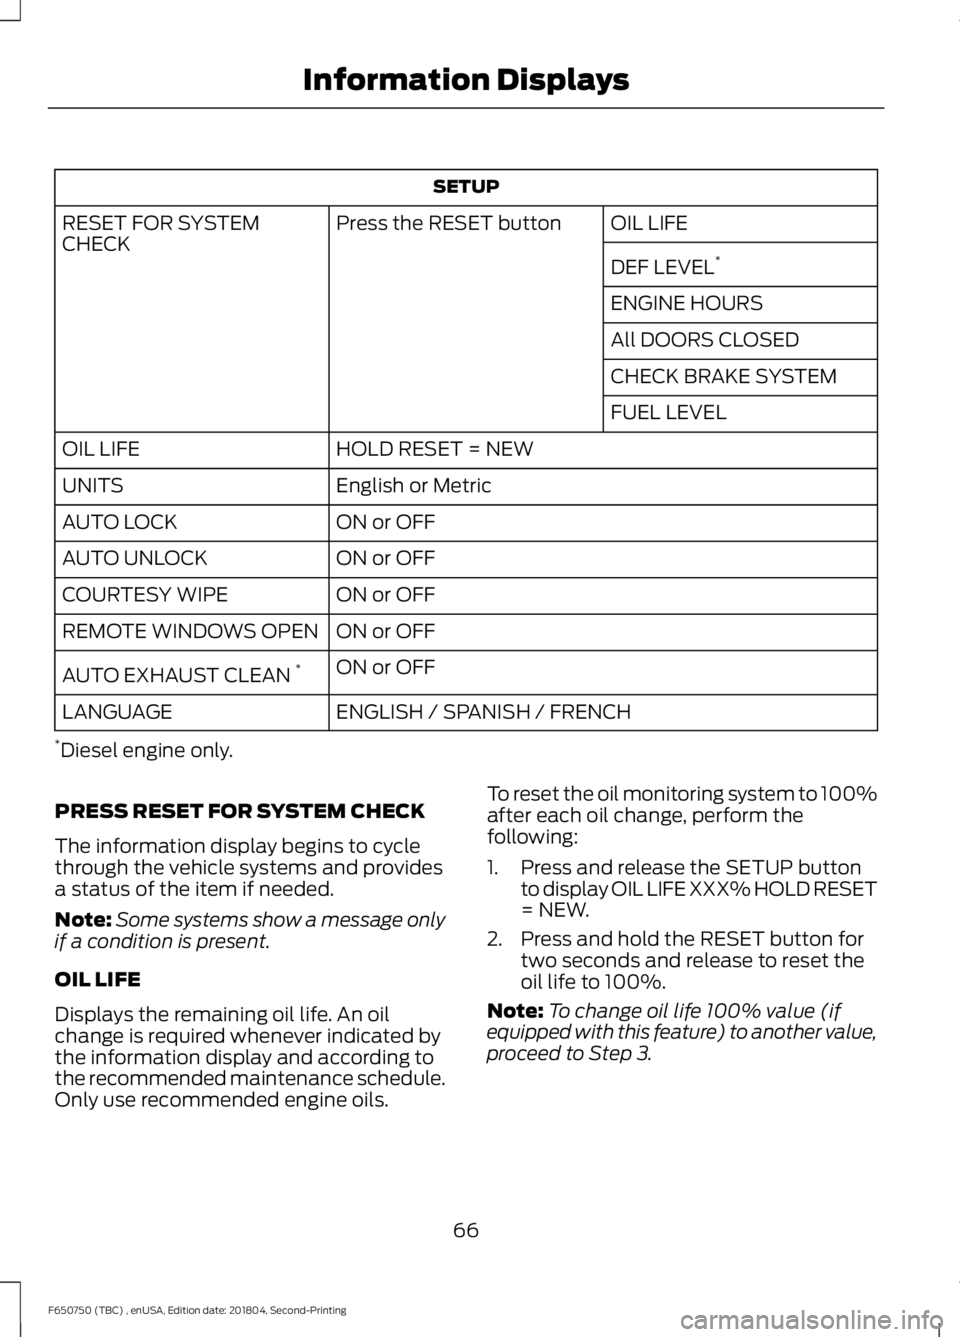
SETUP
OIL LIFE
Press the RESET button
RESET FOR SYSTEM
CHECK
DEF LEVEL*
ENGINE HOURS
All DOORS CLOSED
CHECK BRAKE SYSTEM
FUEL LEVEL
HOLD RESET = NEW
OIL LIFE
English or Metric
UNITS
ON or OFF
AUTO LOCK
ON or OFF
AUTO UNLOCK
ON or OFF
COURTESY WIPE
ON or OFF
REMOTE WINDOWS OPEN
ON or OFF
AUTO EXHAUST CLEAN *
ENGLISH / SPANISH / FRENCH
LANGUAGE
* Diesel engine only.
PRESS RESET FOR SYSTEM CHECK
The information display begins to cycle
through the vehicle systems and provides
a status of the item if needed.
Note: Some systems show a message only
if a condition is present.
OIL LIFE
Displays the remaining oil life. An oil
change is required whenever indicated by
the information display and according to
the recommended maintenance schedule.
Only use recommended engine oils. To reset the oil monitoring system to 100%
after each oil change, perform the
following:
1. Press and release the SETUP button
to display OIL LIFE XXX% HOLD RESET
= NEW.
2. Press and hold the RESET button for two seconds and release to reset the
oil life to 100%.
Note: To change oil life 100% value (if
equipped with this feature) to another value,
proceed to Step 3.
66
F650750 (TBC) , enUSA, Edition date: 201804, Second-Printing Information Displays
Page 76 of 387
Air directed to the instrument panel and
footwell air vents turns off. You can also
use this setting to defog and clear the
windshield of a thin covering of ice.
Switching Maximum Air
Conditioning On and Off
Press and release the button for
maximum cooling.
The left-hand and right-hand settings set
to LO, recirculated air flows through the
instrument panel air vents, air conditioning
turns on and the blower motor adjusts to
the highest speed.
Switching Recirculated Air On and
Off Press and release the button to
switch between outside air and
recirculated air.
The air currently in the passenger
compartment recirculates. This may
reduce the time needed to cool the interior
(when used with A/C) and reduce
unwanted odors from entering your vehicle.
Note: Recirculated air may turn off (or
prevent you from switching on) in all air flow
modes except MAX A/C to reduce the risk
of fogging. Recirculation may also turn on
and off in various air distribution control
combinations during hot weather in order
to improve cooling efficiency.
HINTS ON CONTROLLING THE
INTERIOR CLIMATE
General Hints
Note: Prolonged use of recirculated air may
cause the windows to fog up.
Note: You may feel a small amount of air
from the footwell air vents regardless of the
air distribution setting. Note:
To reduce humidity build-up inside
your vehicle, do not drive with the system
switched off or with recirculated air always
switched on.
Note: Do not place objects under the front
seats as this may interfere with the airflow
to the rear seats.
Note: Remove any snow, ice or leaves from
the air intake area at the base of the
windshield.
Note: To improve the time to reach a
comfortable temperature in hot weather,
drive with the windows open until you feel
cold air through the air vents.
Quickly Heating the Interior
1. Adjust the blower motor speed to the highest speed setting.
2. Adjust the temperature control to the highest setting.
3. Direct air to the footwell air vents.
Recommended Settings for
Heating
1. Adjust the blower motor speed to the center setting.
2. Adjust the temperature control to the midway point of the hot settings.
3. Direct air to the footwell air vents.
Quickly Cooling the Interior
1. Select MAX A/C.
2. Drive with the windows open for a short
period of time.
Recommended Settings for
Cooling
1. Adjust the blower motor speed to the center setting.
2. Adjust the temperature control to the midway point of the cold settings.
73
F650750 (TBC) , enUSA, Edition date: 201804, Second-Printing Climate Control