low beam FORD F650/750 2021 Owners Manual
[x] Cancel search | Manufacturer: FORD, Model Year: 2021, Model line: F650/750, Model: FORD F650/750 2021Pages: 390, PDF Size: 5.16 MB
Page 59 of 390
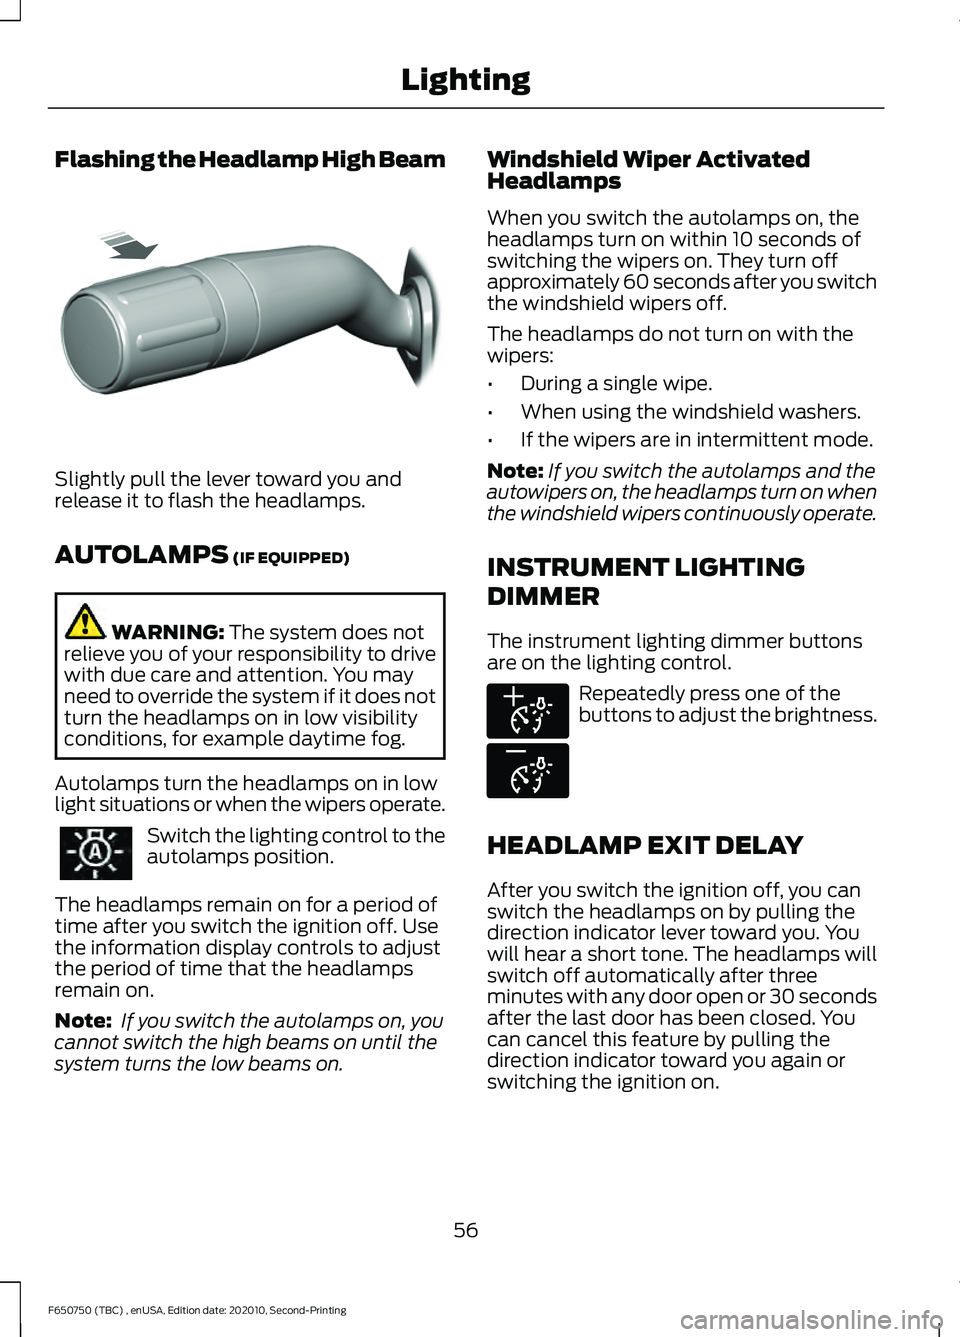
Flashing the Headlamp High Beam
Slightly pull the lever toward you and
release it to flash the headlamps.
AUTOLAMPS (IF EQUIPPED)
WARNING:
The system does not
relieve you of your responsibility to drive
with due care and attention. You may
need to override the system if it does not
turn the headlamps on in low visibility
conditions, for example daytime fog.
Autolamps turn the headlamps on in low
light situations or when the wipers operate. Switch the lighting control to the
autolamps position.
The headlamps remain on for a period of
time after you switch the ignition off. Use
the information display controls to adjust
the period of time that the headlamps
remain on.
Note: If you switch the autolamps on, you
cannot switch the high beams on until the
system turns the low beams on. Windshield Wiper Activated
Headlamps
When you switch the autolamps on, the
headlamps turn on within 10 seconds of
switching the wipers on. They turn off
approximately 60 seconds after you switch
the windshield wipers off.
The headlamps do not turn on with the
wipers:
•
During a single wipe.
• When using the windshield washers.
• If the wipers are in intermittent mode.
Note: If you switch the autolamps and the
autowipers on, the headlamps turn on when
the windshield wipers continuously operate.
INSTRUMENT LIGHTING
DIMMER
The instrument lighting dimmer buttons
are on the lighting control. Repeatedly press one of the
buttons to adjust the brightness.
HEADLAMP EXIT DELAY
After you switch the ignition off, you can
switch the headlamps on by pulling the
direction indicator lever toward you. You
will hear a short tone. The headlamps will
switch off automatically after three
minutes with any door open or 30 seconds
after the last door has been closed. You
can cancel this feature by pulling the
direction indicator toward you again or
switching the ignition on.
56
F650750 (TBC) , enUSA, Edition date: 202010, Second-Printing LightingE311233 E291299 E296433
Page 60 of 390
DAYTIME RUNNING LAMPS (IF
EQUIPPED) WARNING:
The daytime running
lamps system does not activate the rear
lamps and may not provide adequate
lighting during low visibility driving
conditions. Make sure you switch the
headlamps on, as appropriate, during all
low visibility conditions. Failure to do so
may result in a crash.
The system turns the lamps on in daylight
conditions.
To switch the system on, switch the
lighting control to any position except
headlamps.
AUTOMATIC HIGH BEAM
CONTROL
(IF EQUIPPED) WARNING:
The system does not
relieve you of your responsibility to drive
with due care and attention. You may
need to override the system if it does not
turn the high beams on or off.
The system turns on high beams if it is dark
enough and no other traffic is present. If it
detects an approaching vehicle ’s
headlamps or tail lamps, or street lighting
ahead, the system turns off high beams
before they can distract other road users.
Low beams remain on.
Note: The system may not operate properly
if the sensor is blocked. Keep the windshield
free from obstruction or damage.
Note: The system may not operate properly
in cold or inclement conditions. You can
switch on the high beams by overriding the
system. Note:
If the system detects a blockage, for
example bird droppings, bug splatter, snow
or ice, the system goes into low beam mode
until you clear the blockage. A message may
appear in the information display if the
camera is blocked.
Note: Using much larger tires or equipping
vehicle accessories such as snowplows can
modify your vehicle's ride height and
degrade automatic high beam control
performance.
A camera sensor, centrally mounted
behind the windshield of your vehicle,
continuously monitors conditions to turn
the high beams on and off.
Once the system is active, the high beams
turn on if:
• The ambient light level is low enough.
• There is no traffic in front of your
vehicle.
• The vehicle speed is greater than
approximately
32 mph (51 km/h).
The system turns the high beams off if:
• The ambient light level is high enough
that high beams are not required.
• The system detects an approaching
vehicle's headlamps or tail lamps.
• The vehicle speed falls below
approximately
27 mph (44 km/h).
• The system detects severe rain, snow
or fog.
• The camera is blocked.
Switching the System On and Off
Switch the system on using the information
display. See Information Displays (page
70
).
57
F650750 (TBC) , enUSA, Edition date: 202010, Second-Printing Lighting
Page 61 of 390
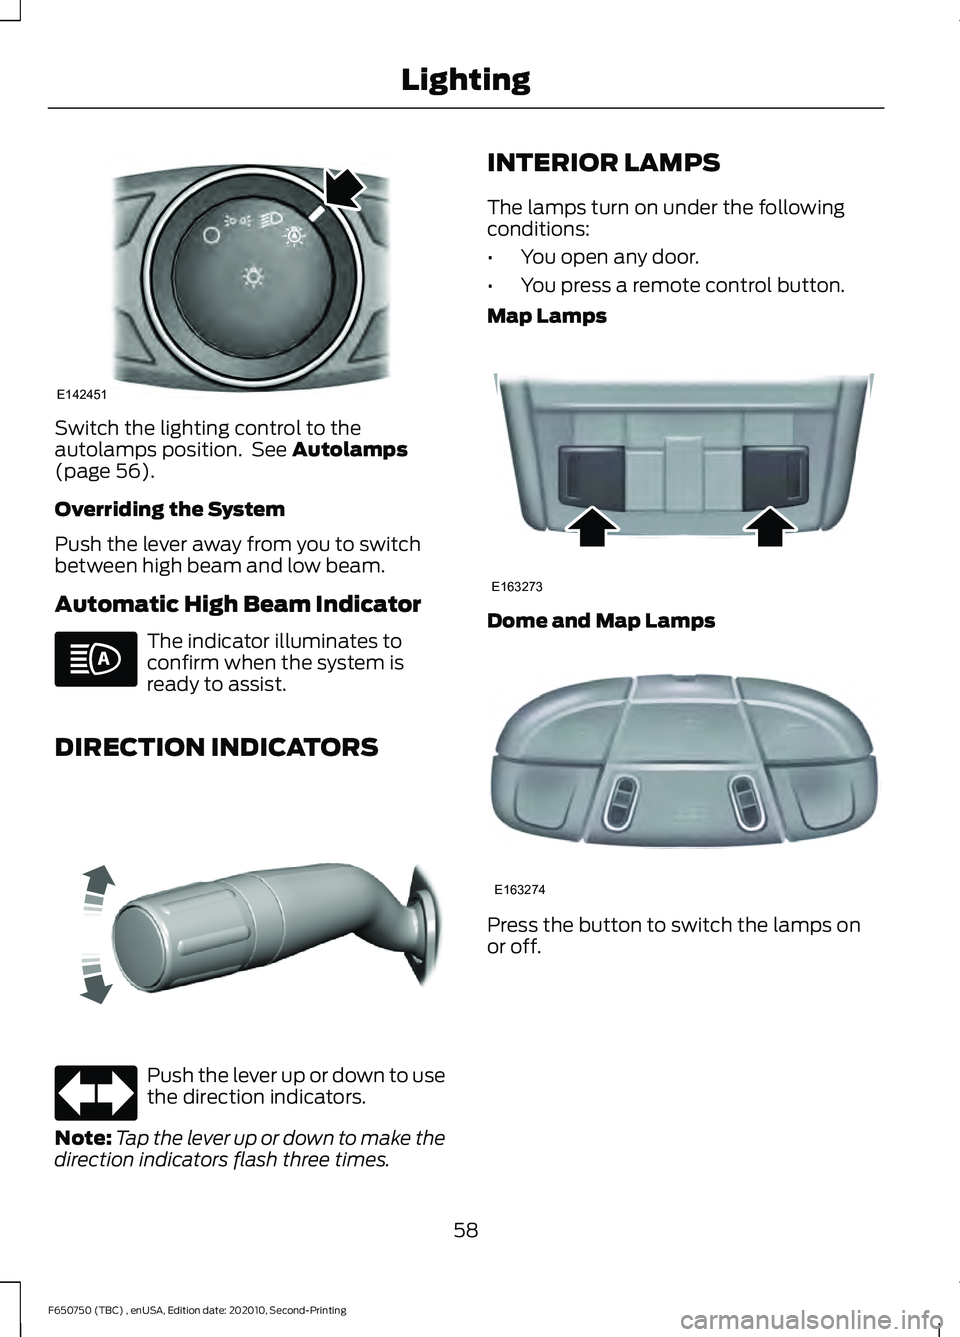
Switch the lighting control to the
autolamps position. See Autolamps
(page 56).
Overriding the System
Push the lever away from you to switch
between high beam and low beam.
Automatic High Beam Indicator The indicator illuminates to
confirm when the system is
ready to assist.
DIRECTION INDICATORS Push the lever up or down to use
the direction indicators.
Note: Tap the lever up or down to make the
direction indicators flash three times. INTERIOR LAMPS
The lamps turn on under the following
conditions:
•
You open any door.
• You press a remote control button.
Map Lamps Dome and Map Lamps
Press the button to switch the lamps on
or off.
58
F650750 (TBC) , enUSA, Edition date: 202010, Second-Printing LightingE142451 E311431 E163273 E163274
Page 70 of 390
Door Ajar
Displays when the ignition is on
and any door is not completely
closed.
Electronic Locking Differential (If
Equipped) Illuminates when using the
electronic locking differential.
Engine Coolant Temperature If it illuminates when your vehicle
is moving, this indicates that the
engine is overheating. Stop your
vehicle as soon as it is safe to do so and
switch the engine off. Have your vehicle
checked as soon as possible. See Engine
Coolant Check
(page 226). idk
Engine Oil Pressure If it illuminates with the engine
running, or when you are driving,
this indicates a malfunction.
Stop your vehicle as soon as it is safe to
do so and switch off the engine. Check the
engine oil level.
Note: Do not resume your journey if it
illuminates despite the level being correct.
Have the system checked as soon as
possible.
Exhaust Brake On
(If Equipped) The exhaust brake indicator light
illuminates when you switch the
exhaust brake on.
Fasten Seatbelt Illuminates and a tone sounds
to remind you to fasten your
seatbelt. High Beam Illuminates when you switch on
the high beam headlamps. It
flashes when you use the
headlamp flasher.
Hydromax Illuminates to indicate normal
hydromax booster reserve
system activation when the
engine is off and the service brake pedal is
applied. This light may also illuminate
momentarily if the engine is running and
the driver turns the steering wheel fully in
one direction while braking. If the light
remains on while the engine is running, this
indicates inadequate hydraulic booster
pressure or reserve pump system failure.
Stop the vehicle as soon as possible and
seek service immediately by your
authorized dealer.
Parking Lamps Illuminates when you switch the
parking lamps on.
Low Fuel Level
(If Equipped) Illuminates when the fuel level
is low or the fuel tank is nearly
empty. Refuel as soon as
possible.
Parking Brake Warning Illuminates briefly when you
switch the ignition to the on
position, with the engine off. It
also illuminates when you apply the
parking brake. If the park brake lamp does
not illuminate at these times, seek service
immediately. Vehicles with the power
parking brake option: If the park brake
warning lamp begins to blink after setting
67
F650750 (TBC) , enUSA, Edition date: 202010, Second-Printing Instrument Cluster E163170 E171217 E71880 E146190 E208810
Page 71 of 390
the parking brake, this may indicate a
failure in the parking brake system. Have
the system checked as soon as possible.
Driving extended distances with the
parking brake engaged can cause brake
failure and the risk of personal injury.
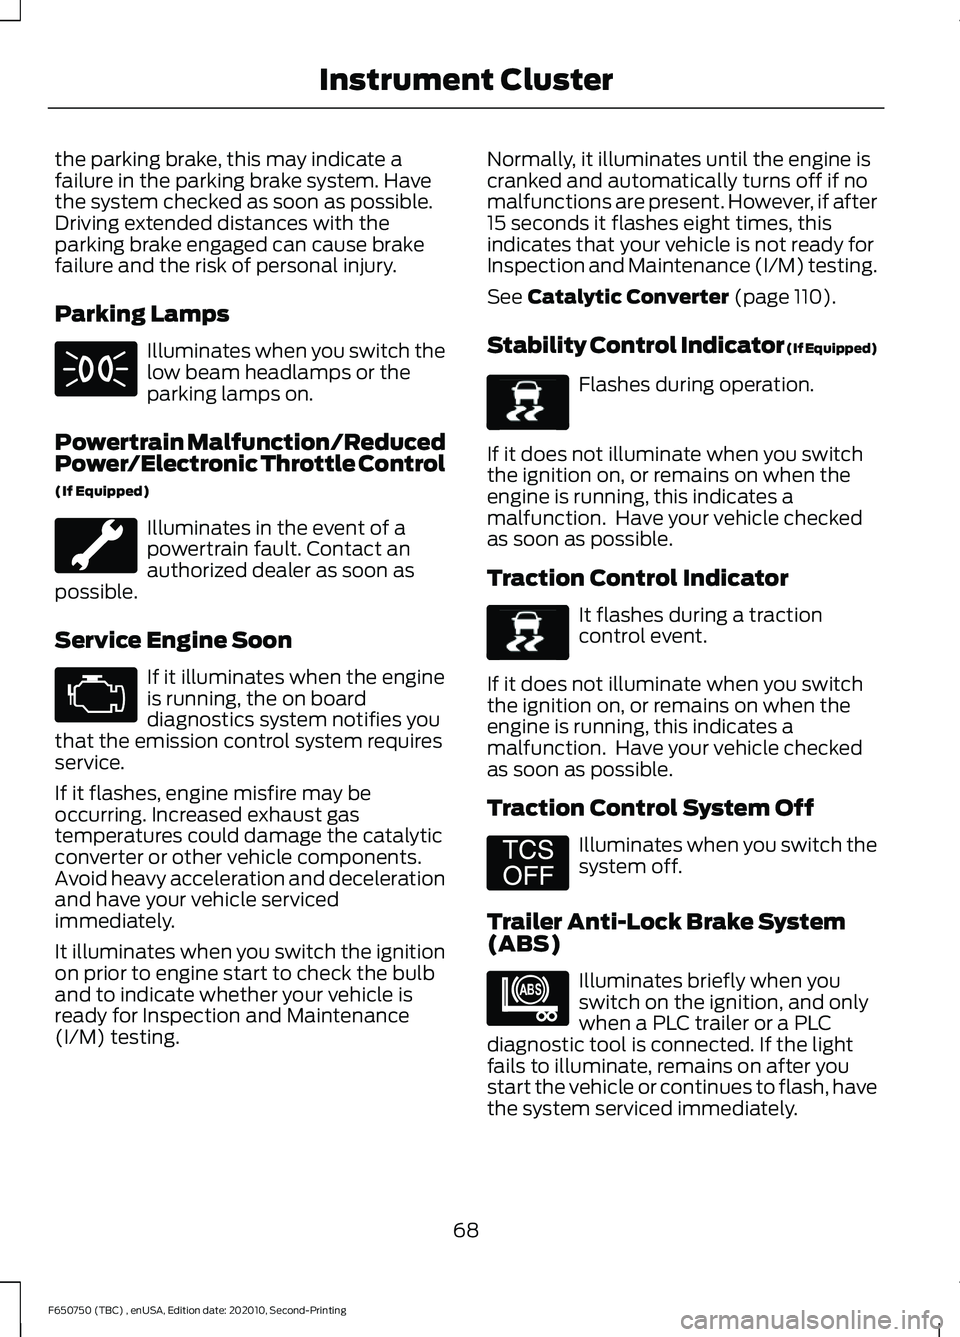
Parking Lamps
Illuminates when you switch the
low beam headlamps or the
parking lamps on.
Powertrain Malfunction/Reduced
Power/Electronic Throttle Control
(If Equipped) Illuminates in the event of a
powertrain fault. Contact an
authorized dealer as soon as
possible.
Service Engine Soon If it illuminates when the engine
is running, the on board
diagnostics system notifies you
that the emission control system requires
service.
If it flashes, engine misfire may be
occurring. Increased exhaust gas
temperatures could damage the catalytic
converter or other vehicle components.
Avoid heavy acceleration and deceleration
and have your vehicle serviced
immediately.
It illuminates when you switch the ignition
on prior to engine start to check the bulb
and to indicate whether your vehicle is
ready for Inspection and Maintenance
(I/M) testing. Normally, it illuminates until the engine is
cranked and automatically turns off if no
malfunctions are present. However, if after
15 seconds it flashes eight times, this
indicates that your vehicle is not ready for
Inspection and Maintenance (I/M) testing.
See Catalytic Converter (page 110).
Stability Control Indicator (If Equipped) Flashes during operation.
If it does not illuminate when you switch
the ignition on, or remains on when the
engine is running, this indicates a
malfunction. Have your vehicle checked
as soon as possible.
Traction Control Indicator It flashes during a traction
control event.
If it does not illuminate when you switch
the ignition on, or remains on when the
engine is running, this indicates a
malfunction. Have your vehicle checked
as soon as possible.
Traction Control System Off Illuminates when you switch the
system off.
Trailer Anti-Lock Brake System
(ABS) Illuminates briefly when you
switch on the ignition, and only
when a PLC trailer or a PLC
diagnostic tool is connected. If the light
fails to illuminate, remains on after you
start the vehicle or continues to flash, have
the system serviced immediately.
68
F650750 (TBC) , enUSA, Edition date: 202010, Second-Printing Instrument Cluster E138639 E138639 E194301 E209040
Page 151 of 390
USING ADAPTIVE CRUISE
CONTROL
WARNING: You are responsible for
controlling your vehicle at all times. The
system is designed to be an aid and does
not relieve you of your responsibility to
drive with due care and attention. Failure
to follow this instruction could result in
the loss of control of your vehicle,
personal injury or death. WARNING: Pay close attention to
changing road conditions such as
entering or leaving a highway, on roads
with intersections or roundabouts, roads
without visible lanes of travel, roads that
are winding, slippery, unpaved, or steep
slopes. WARNING:
Do not use the system
in poor visibility, for example fog, heavy
rain, spray or snow. WARNING:
Do not use the system
when towing a trailer that has
aftermarket electronic trailer brake
controls. Failure to follow this instruction
could result in the loss of control of your
vehicle, personal injury or death. WARNING:
Do not use tire sizes
other than those recommended because
this can affect the normal operation of
the system. Failure to do so may result
in a loss of vehicle control, which could
result in serious injury. WARNING:
The system may not
detect stationary or slow moving
vehicles below
6 mph (10 km/h). WARNING:
The system does not
detect pedestrians or objects in the road. WARNING:
The system does not
detect oncoming vehicles in the same
lane. WARNING:
The system is not a
crash warning or avoidance system. WARNING:
Do not use the system
with a snow plow blade installed.
The system adjusts your vehicle speed to
maintain the set gap between you and the
vehicle in front of you in the same lane.
You can select four gap settings.
The system uses a radar sensor that
projects a beam directly in front of your
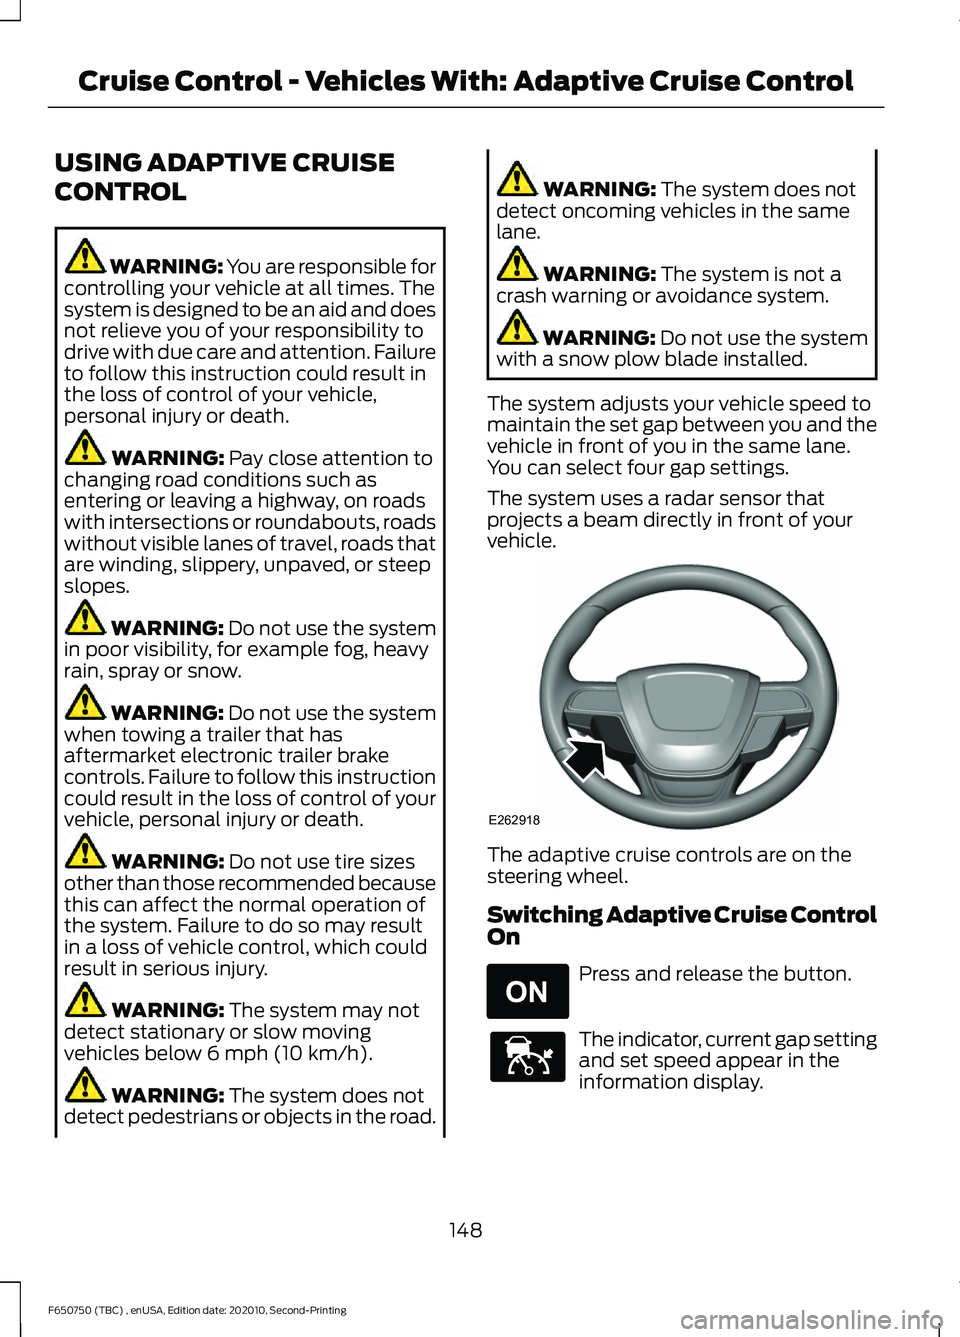
vehicle. The adaptive cruise controls are on the
steering wheel.
Switching Adaptive Cruise Control
On
Press and release the button.
The indicator, current gap setting
and set speed appear in the
information display.
148
F650750 (TBC) , enUSA, Edition date: 202010, Second-Printing Cruise Control - Vehicles With: Adaptive Cruise ControlE262918 E265296 E144529
Page 208 of 390
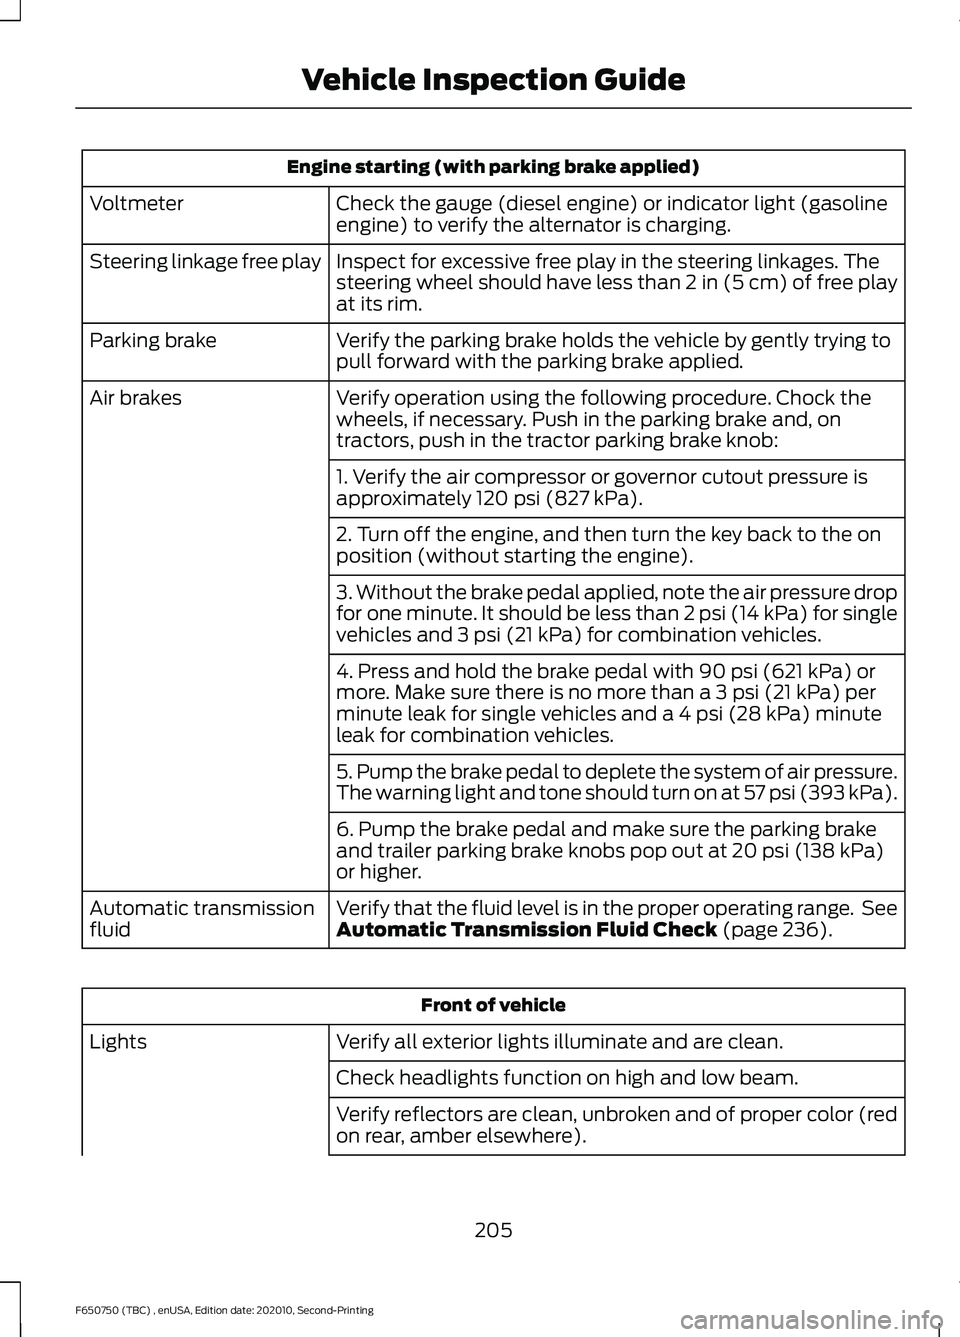
Engine starting (with parking brake applied)
Check the gauge (diesel engine) or indicator light (gasoline
engine) to verify the alternator is charging.
Voltmeter
Inspect for excessive free play in the steering linkages. The
steering wheel should have less than 2 in (5 cm) of free play
at its rim.
Steering linkage free play
Verify the parking brake holds the vehicle by gently trying to
pull forward with the parking brake applied.
Parking brake
Verify operation using the following procedure. Chock the
wheels, if necessary. Push in the parking brake and, on
tractors, push in the tractor parking brake knob:
Air brakes
1. Verify the air compressor or governor cutout pressure is
approximately 120 psi (827 kPa).
2. Turn off the engine, and then turn the key back to the on
position (without starting the engine).
3. Without the brake pedal applied, note the air pressure drop
for one minute. It should be less than 2 psi (14 kPa) for single
vehicles and
3 psi (21 kPa) for combination vehicles.
4. Press and hold the brake pedal with
90 psi (621 kPa) or
more. Make sure there is no more than a 3 psi (21 kPa) per
minute leak for single vehicles and a 4 psi (28 kPa) minute
leak for combination vehicles.
5. Pump the brake pedal to deplete the system of air pressure.
The warning light and tone should turn on at 57 psi (393 kPa).
6. Pump the brake pedal and make sure the parking brake
and trailer parking brake knobs pop out at
20 psi (138 kPa)
or higher.
Verify that the fluid level is in the proper operating range. See
Automatic Transmission Fluid Check
(page 236).
Automatic transmission
fluid Front of vehicle
Verify all exterior lights illuminate and are clean.
Lights
Check headlights function on high and low beam.
Verify reflectors are clean, unbroken and of proper color (red
on rear, amber elsewhere).
205
F650750 (TBC) , enUSA, Edition date: 202010, Second-Printing Vehicle Inspection Guide
Page 244 of 390
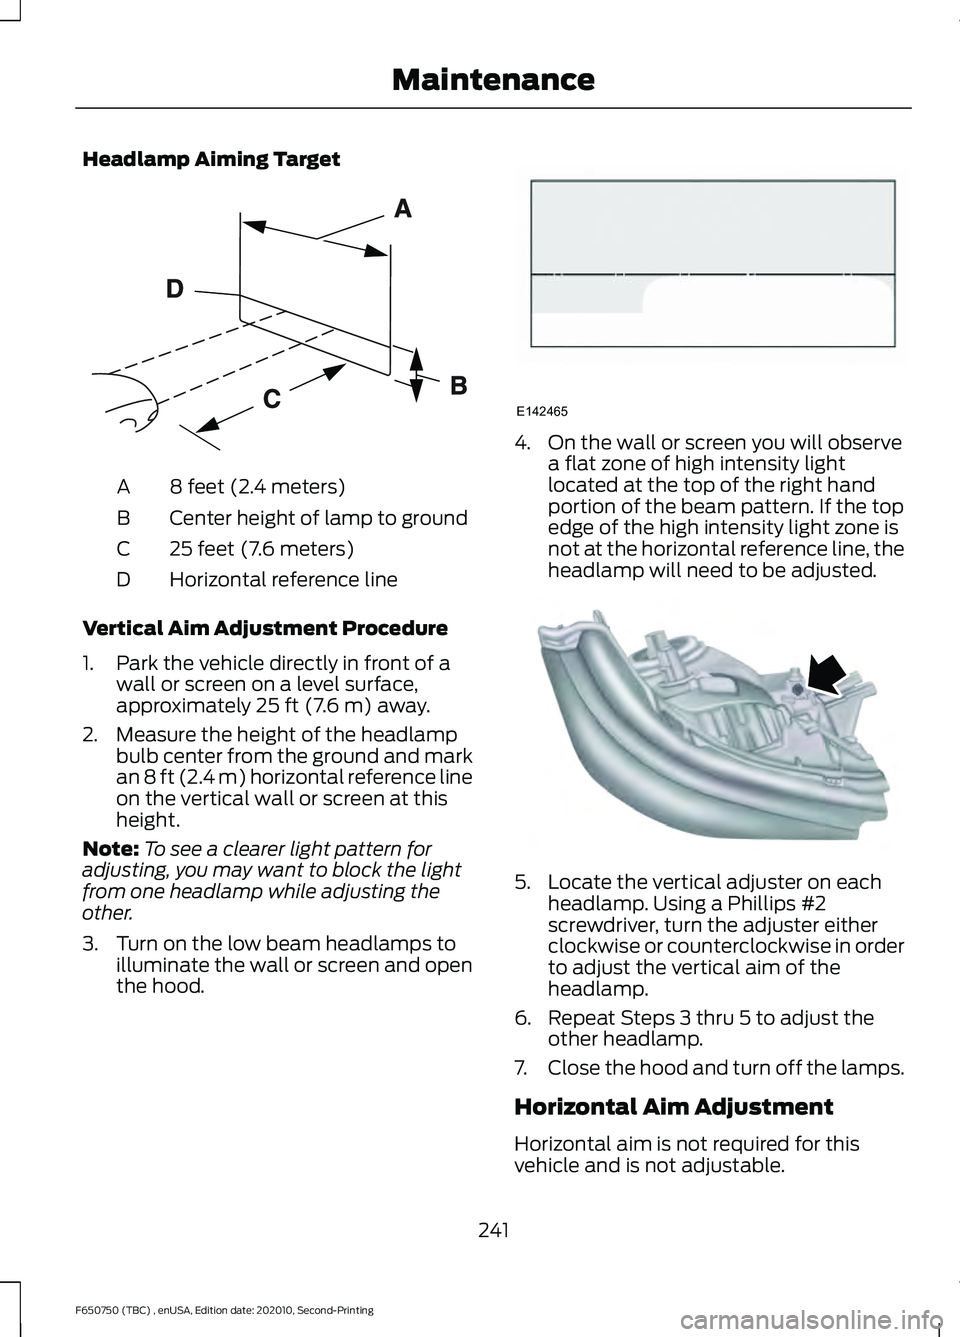
Headlamp Aiming Target
8 feet (2.4 meters)
A
Center height of lamp to ground
B
25 feet (7.6 meters)
C
Horizontal reference line
D
Vertical Aim Adjustment Procedure
1. Park the vehicle directly in front of a wall or screen on a level surface,
approximately 25 ft (7.6 m) away.
2. Measure the height of the headlamp bulb center from the ground and mark
an
8 ft (2.4 m) horizontal reference line
on the vertical wall or screen at this
height.
Note: To see a clearer light pattern for
adjusting, you may want to block the light
from one headlamp while adjusting the
other.
3. Turn on the low beam headlamps to illuminate the wall or screen and open
the hood. 4. On the wall or screen you will observe
a flat zone of high intensity light
located at the top of the right hand
portion of the beam pattern. If the top
edge of the high intensity light zone is
not at the horizontal reference line, the
headlamp will need to be adjusted. 5. Locate the vertical adjuster on each
headlamp. Using a Phillips #2
screwdriver, turn the adjuster either
clockwise or counterclockwise in order
to adjust the vertical aim of the
headlamp.
6. Repeat Steps 3 thru 5 to adjust the other headlamp.
7. Close the hood and turn off the lamps.
Horizontal Aim Adjustment
Horizontal aim is not required for this
vehicle and is not adjustable.
241
F650750 (TBC) , enUSA, Edition date: 202010, Second-Printing MaintenanceE142592 E142465 E163806
Page 385 of 390
Head Restraints..............................................82
Adjusting the Head Restraint.......................... 83
Heated Exterior Mirrors.................................81
Heating See: Climate Control........................................... 79
Hill Start Assist..............................................134 Switching the System On and Off...............134
Using Hill Start Assist....................................... 134
Hints on Controlling the Interior Climate...........................................................80
Defogging the Side Windows in Cold Weather............................................................... 81
General Hints........................................................ 80
Quickly Cooling the Interior............................. 80
Quickly Heating the Interior............................. 80
Recommended Settings for Cooling............80
Recommended Settings for Heating...........80
Vehicle Stationary for Extended Periods During Extreme High Ambient
Temperatures.................................................... 81
Hints on Driving With Anti-Lock Brakes..............................................................131
Hood Lock See: Opening and Closing the Hood...........213
Horn
.....................................................................53
I
Ignition Switch
................................................93
In California (U.S. Only).............................188
Information Display Control.......................53
Information Displays
.....................................70
General Information............................................ 70
Information Messages
..................................73
Diesel Messages.................................................... 74
Engine........................................................................\
77
Fuel........................................................................\
..... 77
Key........................................................................\
...... 77
Maintenance........................................................... 77
Park Brake............................................................... 78
Installing Child Restraints...........................26 Child Restraints..................................................... 26
Tether Strap Attachment................................... 31
Using Cinch Tongue Lap and Shoulder Belts (All Front Center, Super Cab and Crew
Cab Rear Center Positions)......................... 28
Using Lap and Shoulder Belts......................... 26Using Lower Anchors and Tethers for
CHildren (LATCH)........................................... 30
Using Tether Straps............................................ 30
Instrument Cluster
.........................................63
Instrument Lighting Dimmer.....................56
Instrument Panel............................................22
Interior Lamps
.................................................58
Interior Mirror...................................................62
Introduction.........................................................7
J
Jump Starting the Vehicle.........................183 Connecting the Jumper Cables..................... 183
Jump Starting...................................................... 184
Preparing Your Vehicle..................................... 183
Removing the Jumper Cables........................ 184
K
Keys and Remote Controls.........................45
L
Lane Keeping System..................................157 Switching the System On and Off...............158
System Display.................................................... 158
System Settings.................................................. 158
Troubleshooting.................................................. 159
Lighting Control
..............................................55
Flashing the Headlamp High Beam..............56
Headlamp High Beam........................................ 55
Lighting..............................................................55 General Information............................................ 55
Load Carrying.................................................168
Load Limit.......................................................168 Unloaded or Lightly Loaded Vehicles.........168
Locating the USB Ports
................................91
Charge Only USB Ports....................................... 91
Data Transfer USB Ports.................................... 91
Locking and Unlocking.................................49 Autolock.................................................................. 49
Battery Saver......................................................... 50
Illuminated Entry.................................................. 50
Power Door Locks................................................ 49
Remote Control.................................................... 49
Smart Unlocks...................................................... 49
382
F650750 (TBC) , enUSA, Edition date: 202010, Second-Printing Index
Page 389 of 390
Blocked Sensor....................................................
152
Canceling the Set Speed................................. 150
Changing the Set Speed................................. 150
Detection Issues................................................... 151
Following a Vehicle............................................ 149
Hilly Condition and Trailer Tow Usage.........151
Overriding the Set Speed................................ 150
Resuming the Set Speed.................................. 151
Setting the Adaptive Cruise Speed.............149
Setting the Gap Distance................................ 150
Switching Adaptive Cruise Control Off........................................................................\
. 151
Switching Adaptive Cruise Control On........................................................................\
148
System Not Available........................................ 152
Using Snow Chains......................................277
Using Stability Control...............................146
Using Traction Control - Vehicles With: Air Brakes
......................................................142
System Indicator Light...................................... 142
Using Traction Control - Vehicles With: Hydraulic Brakes........................................142
System Indicator Light...................................... 143
Using Voice Recognition............................313 Phone Voice Service.......................................... 313
V
Vehicle Care
...................................................255
General Information......................................... 255
Vehicle Identification Number
...............286
Vehicle Inspection Guide..........................203
Vehicle Inspection Information..............203
Trailer...................................................................... 210
Transmission........................................................ 210
Vehicle Storage............................................260 Body....................................................................... 260
Brakes..................................................................... 261
Cooling system................................................... 260
Disconnecting Your 12 Volt Battery............260
Engine.................................................................... 260
Fuel system......................................................... 260
General.................................................................. 260
Miscellaneous...................................................... 261
Removing Vehicle From Storage.................. 261
Tires........................................................................\
. 261
Ventilation See: Climate Control........................................... 79VIN
See: Vehicle Identification Number............286
W
Warning Lamps and Indicators................66 Anti-Lock Braking System................................ 66
Automatic Regeneration Control................... 66
Battery..................................................................... 66
Brake System........................................................ 66
Check Suspension............................................... 66
Cruise Control....................................................... 66
Diesel Exhaust Fluid........................................... 66
Direction Indicator............................................... 66
Door Ajar.................................................................. 67
Electronic Locking Differential........................ 67
Engine Coolant Temperature........................... 67
Engine Oil Pressure.............................................. 67
Exhaust Brake On................................................. 67
Fasten Seatbelt..................................................... 67
High Beam............................................................... 67
Hydromax................................................................ 67
Low Fuel Level....................................................... 67
Parking Brake Warning....................................... 67
Parking Lamps....................................................... 67
Powertrain Malfunction/Reduced Power/Electronic Throttle Control...........68
Service Engine Soon........................................... 68
Stability Control Indicator................................ 68
Traction Control Indicator................................. 68
Traction Control System Off........................... 68
Trailer Anti-Lock Brake System (ABS) ................................................................... 68
Transmission Tow/Haul.................................... 69
Two Speed Axle.................................................... 69
Wait to Start.......................................................... 69
Water in Fuel.......................................................... 69
Washer Fluid Check....................................242
Washers See: Cleaning the Exterior.............................. 256
See: Wipers and Washers................................. 54
Waxing..............................................................257
What Is Cruise Control................................154 Requirements.......................................................154
Wheel Nuts See: Changing a Road Wheel........................ 277
Wheels and Tires
.........................................262
Technical Specifications................................. 279
386
F650750 (TBC) , enUSA, Edition date: 202010, Second-Printing Index