stop start FORD F650/750 2024 User Guide
[x] Cancel search | Manufacturer: FORD, Model Year: 2024, Model line: F650/750, Model: FORD F650/750 2024Pages: 386, PDF Size: 8.7 MB
Page 116 of 386
RUNNING OUT OF FUEL -
DIESEL
Avoid running out of fuel. This allows air toenter the fuel system and may make itdifficult to restart your vehicle.
If your vehicle runs out of fuel:
•Normally adding 4–5 gal (15–19 L) offuel is enough to restart the engine. Ifyour vehicle is out of fuel and on asteep grade, more than 5 gal (19 L)may be required.
•You must purge trapped air from thesystem before restarting the engine.
Purging Air From the System
Switch the ignition on for 30 seconds andthen switch the ignition off. Repeat thisoperation six times in a row to purge anytrapped air from the fuel system.
Any remaining air in the system self-purgeswhen the engine starts. The engine mayrun rough or produce white smoke whenair remains in the fuel system. This isnormal and stops after a short period. Ifthe engine continues to run rough, haveyour vehicle checked as soon as possible.
Starting the Engine
Do not crank the engine for more than 10seconds as starter damage may occur. Ifthe engine fails to start, switch the ignitionoff and wait 30 seconds before crankingthe engine again. See Starting a DieselEngine (page 103).
RUNNING OUT OF FUEL -
GASOLINE
Avoid running out of fuel because thissituation may have an adverse effect onpowertrain components.
If you run out of fuel:
•You may need to switch the ignitionfrom off to on several times afterrefueling to allow the fuel system topump the fuel from the tank to theengine. When restarting, cranking timetakes a few seconds longer thannormal. With keyless ignition, just startthe engine. Crank time will be longerthan usual.
•Normally, adding 1 gal (3.8 L) of fuel isenough to restart the engine. If thevehicle is out of fuel and on a steepgrade, more than 1 gal (3.8 L) may berequired.
•The service engine soon indicator maycome on. See Warning Lamps andIndicators (page 67).
REFUELING - DIESEL
WARNING: Fuel vapor burnsviolently and a fuel fire can cause severeinjuries.
WARNING: Read and follow all theinstructions on the pump island.
WARNING: When refueling alwaysshut the engine off and never allowsparks or open flames near the fuel tankfiller valve. Never smoke or use a cellphone while refueling. Fuel vapor isextremely hazardous under certainconditions. Avoid inhaling excess fumes.
WARNING: Stay outside yourvehicle and do not leave the fuel pumpunattended when refueling your vehicle.
WARNING: Keep children awayfrom the fuel pump. Never let childrenpump fuel.
112
2024 F-650/750 (TBC) , enUSA, Edition date: 202210, First-PrintingFuel and Refueling
Page 119 of 386
1.When your vehicle has stopped, shiftinto neutral (N) or park (P).
2.Apply the parking brake and switch theignition off.
3.Turn the fuel filler capcounterclockwise and remove it.
4.Refuel your vehicle as required.
5.Replace the fuel filler cap, turn itclockwise until you feel a strongresistance.
If the fuel cap warning lamp or a warningmessage appears in the instrument cluster,you may not have installed the fuel fillercap correctly.
If the fuel cap warning lamp remains on,at the next opportunity, safely pull off ofthe road, remove the fuel filler cap, alignthe cap properly and reinstall it. The checkfuel cap warning lamp or warning messagemay not reset immediately. It may takeseveral driving cycles for the indicators toturn off. A driving cycle consists of anengine start-up (after four or more hourswith the engine off) followed by normalcity and highway driving.
FUEL CONSUMPTION
The advertised capacity is the maximumamount of fuel that you can add to the fueltank after running out of fuel. Included inthe advertised capacity is an emptyreserve. The empty reserve is anunspecified amount of fuel that remainsin the fuel tank when the fuel gaugeindicates empty.
Note:The amount of fuel in the emptyreserve varies and should not be relied uponto increase driving range.
Filling the Fuel Tank
For consistent results when refueling:
•Turn the ignition off before fueling; aninaccurate reading results if the engineis left running.
•Use the same fill rate(low-medium-high) each time the tankis filled.
•Allow no more than one automaticshut-off when refueling.
Results are most accurate when the fillingmethod is consistent.
Calculating Fuel Economy
Do not measure fuel economy during thefirst 1,000 mi (1,600 km) of driving (this isyour engine’s break-in period). A moreaccurate measurement is obtained after2,000 mi (3,200 km) to 3,000 mi(4,800 km). Also, fuel expense, frequencyof fill ups or fuel gauge readings are notaccurate ways to measure fuel economy.
1.Fill the fuel tank completely and recordthe initial odometer reading.
2.Each time you fill the fuel tank, recordthe amount of fuel added.
3.After at least three fill ups, fill the fueltank and record the current odometerreading.
4.Subtract your initial odometer readingfrom the current odometer reading.
To calculate L/100 km (liters per 100kilometers) fuel consumption, multiply theliters used by 100, then divide by kilometerstraveled. To calculate MPG (miles pergallon) fuel consumption, divide milestraveled by gallons used.
115
2024 F-650/750 (TBC) , enUSA, Edition date: 202210, First-PrintingFuel and Refueling
Page 124 of 386
Your vehicle may not pass the I/M test ifthe service engine soon indicator is on ornot working properly (bulb is burned out),or if the OBD-II system has determinedthat some of the emission control systemshave not been properly checked. In thiscase, the vehicle is not ready for I/Mtesting.
If the vehicle’s engine or transmission hasjust been serviced, or the battery hasrecently run down or been replaced, theOBD-II system may indicate that thevehicle is not ready for I/M testing. Todetermine if the vehicle is ready for I/Mtesting, turn the ignition key to the onposition for 15 seconds without crankingthe engine. If the service engine soonindicator blinks eight times, it means thatthe vehicle is not ready for I/M testing; ifthe service engine soon indicator stays onsolid, it means that your vehicle is readyfor I/M testing.
The OBD-II system checks the emissioncontrol system during normal driving. Acomplete check may take several days.
If the vehicle is not ready for I/M testing,you can perform the following driving cycleconsisting of mixed city and highwaydriving:
1.15 minutes of steady driving on anexpressway or highway followed by 20minutes of stop-and-go driving with atleast four 30-second idle periods.
2.Allow your vehicle to sit for at leasteight hours with the ignition off. Then,start the vehicle and complete theabove driving cycle. The vehicle mustwarm up to its normal operatingtemperature. Once started, do not turnoff the vehicle until the above drivingcycle is complete.
If the vehicle is still not ready for I/Mtesting, you need to repeat the abovedriving cycle.
SELECTIVE CATALYTIC
REDUCTANT SYSTEM - DIESEL
Your vehicle may have a selective catalyticreduction system. This system helpsreduce emission levels of oxides ofnitrogen from the exhaust system. Thesystem automatically injects dieselexhaust fluid into the exhaust system toenable correct selective catalytic reductionsystem function.
Note:Selective catalytic reduction systemsare not fitted to vehicles in markets whereonly high-sulfur diesel fuel is available.
Diesel Exhaust Fluid Level
In order for the system to operate correctlyyou must maintain the diesel exhaust fluidlevel.
The system has a sensor to monitor fluidlevel and quality/concentration. A warningmessage appears in the informationdisplay when the diesel exhaust fluid levelis low. If a warning message appears, refillthe diesel exhaust fluid tank as soon aspossible. See Information Messages(page 75).
Filling the Diesel Exhaust FluidTank
WARNING: Keep diesel exhaustfluid out of reach of children. Avoidcontact with skin, eyes or clothing. Incase of contact with your eyes, flushimmediately with water and get promptmedical attention. In case of contactwith your skin, clean immediately withsoap and water. If you swallow anydiesel exhaust fluid, drink plenty ofwater, call a physician immediately.
120
2024 F-650/750 (TBC) , enUSA, Edition date: 202210, First-PrintingEngine Emission Control
Page 134 of 386
AUTOMATIC TRANSMISSION
WARNING: Apply the parkingbrake, shift into park (P), switch theignition off and remove the key beforeyou leave your vehicle. Failure to followthis instruction could result in personalinjury or death.
WARNING: Do not apply the brakepedal and accelerator pedalsimultaneously. Applying both pedalssimultaneously for more than a fewseconds limits vehicle performance,which may result in difficulty maintainingspeed in traffic and could lead to seriousinjury.
Understanding the Shift Positionsof Your Automatic Transmission
6-Speed Transmissions
10-Speed Transmissions
Putting your vehicle in or out of gear:
1.Fully press the brake pedal.
2.Move the gearshift lever into thepreferred gear.
3.When you finish driving, come to acomplete stop.
4.Move the gearshift lever and securelylatch it in park (P) or neutral (N).
The instrument cluster displays the currentgear.
Park (P)
If your transmission has a park (P) position,this position locks the transmission andprevents the rear wheels from turning.
Reverse (R)
With the gearshift lever in reverse (R), yourvehicle moves backward. Always come toa complete stop before shifting into andout of reverse (R).
Neutral (N)
With the gearshift lever in neutral (N), youcan start your vehicle and it is free to roll.Hold the brake pedal down when in thisposition.
Drive (D)
Drive (D) is the normal driving position forthe best fuel economy. The overdrivefunction allows automatic upshifts anddownshifts through gears one through six.
Manual (M)
With the gearshift lever in manual (M), thedriver can change gears up or down aspreferred. By moving the gearshift leverfrom drive (D) to manual (M), you nowhave control of selecting the gear youprefer using the buttons on the shift lever.See Understanding Your SelectShiftAutomatic™ Transmission later in thissection.
130
2024 F-650/750 (TBC) , enUSA, Edition date: 202210, First-PrintingTransmissionE163183 E308145
Page 139 of 386
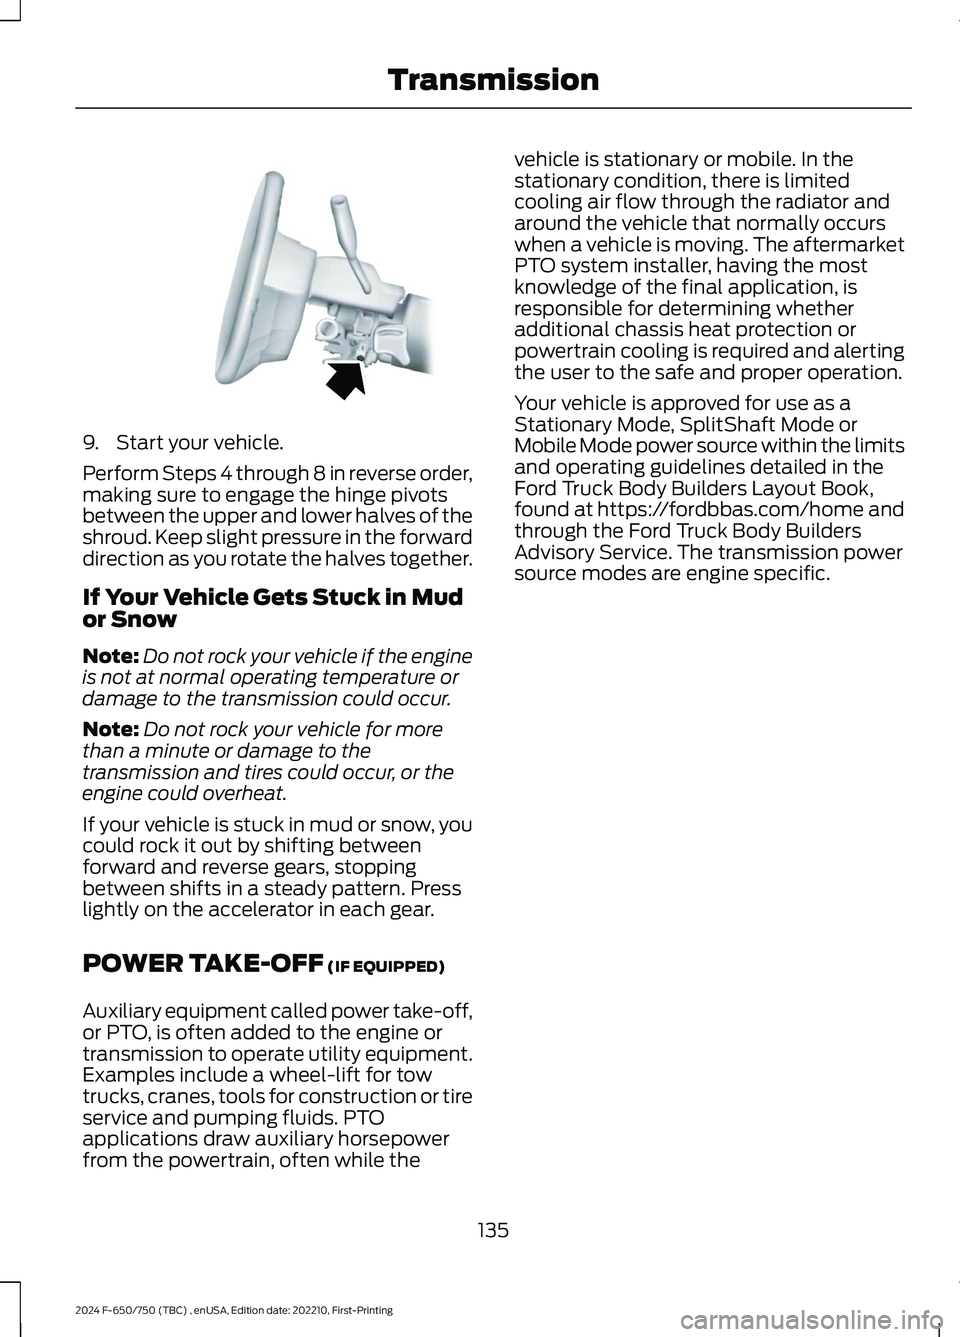
9.Start your vehicle.
Perform Steps 4 through 8 in reverse order,making sure to engage the hinge pivotsbetween the upper and lower halves of theshroud. Keep slight pressure in the forwarddirection as you rotate the halves together.
If Your Vehicle Gets Stuck in Mudor Snow
Note:Do not rock your vehicle if the engineis not at normal operating temperature ordamage to the transmission could occur.
Note:Do not rock your vehicle for morethan a minute or damage to thetransmission and tires could occur, or theengine could overheat.
If your vehicle is stuck in mud or snow, youcould rock it out by shifting betweenforward and reverse gears, stoppingbetween shifts in a steady pattern. Presslightly on the accelerator in each gear.
POWER TAKE-OFF (IF EQUIPPED)
Auxiliary equipment called power take-off,or PTO, is often added to the engine ortransmission to operate utility equipment.Examples include a wheel-lift for towtrucks, cranes, tools for construction or tireservice and pumping fluids. PTOapplications draw auxiliary horsepowerfrom the powertrain, often while the
vehicle is stationary or mobile. In thestationary condition, there is limitedcooling air flow through the radiator andaround the vehicle that normally occurswhen a vehicle is moving. The aftermarketPTO system installer, having the mostknowledge of the final application, isresponsible for determining whetheradditional chassis heat protection orpowertrain cooling is required and alertingthe user to the safe and proper operation.
Your vehicle is approved for use as aStationary Mode, SplitShaft Mode orMobile Mode power source within the limitsand operating guidelines detailed in theFord Truck Body Builders Layout Book,found at https://fordbbas.com/home andthrough the Ford Truck Body BuildersAdvisory Service. The transmission powersource modes are engine specific.
135
2024 F-650/750 (TBC) , enUSA, Edition date: 202210, First-PrintingTransmissionE163186
Page 141 of 386
WHAT IS THE PNEUMATIC
LOCKING DIFFERENTIAL
The pneumatic locking differential can lockor unlock the differential when the vehicleis moving or stopped. The differential lockprovides full power to both wheels whenextra traction is required.
HOW DOES THE PNEUMATIC
LOCKING DIFFERENTIAL
WORK
If your vehicle is equipped with apneumatic locking differential:
•Power is transmitted to the oppositewheel should one of the wheels beginto slip.
•Raise both wheels off the ground if itbecomes necessary to operate onewheel with the vehicle stationary.
The differential can be locked or unlockedwhen the vehicle is moving at a constantspeed of less than 25 mph (40 km/h) andwhile the wheels are not slipping. Do notlock the differential when the vehicle istraveling down steep grades and tractionis minimal.
Note:Do not use the differential lock atvehicle speeds above 25 mph (40 km/h).
When the differential is locked, thevehicle’s turning radius increases causingundersteer.
The differential lock and differential locklight automatically disengage at speedsabove 25 mph (40 km/h). The differentiallock remains off until the vehicle isrestarted or the differential lock switch isturned off then back on.
PNEUMATIC LOCKING
DIFFERENTIAL PRECAUTIONS
WARNING: Exceeding any vehicleweight rating can adversely affect theperformance and handling of yourvehicle, cause vehicle damage and canresult in the loss of control of yourvehicle, serious personal injury or death.
WARNING: Failure to raise all drivewheels with this type of differential couldcause the vehicle to move unexpectedly,resulting in property damage, personalinjury or death.
WARNING: Sudden accelerationon slippery surfaces could cause thewheels to spin, the vehicle to turnsideways on a crowned road surface orin a turn, possibly resulting in loss ofvehicle control and personal injury.
SWITCHING THE PNEUMATIC
LOCKING DIFFERENTIAL ON
AND OFF
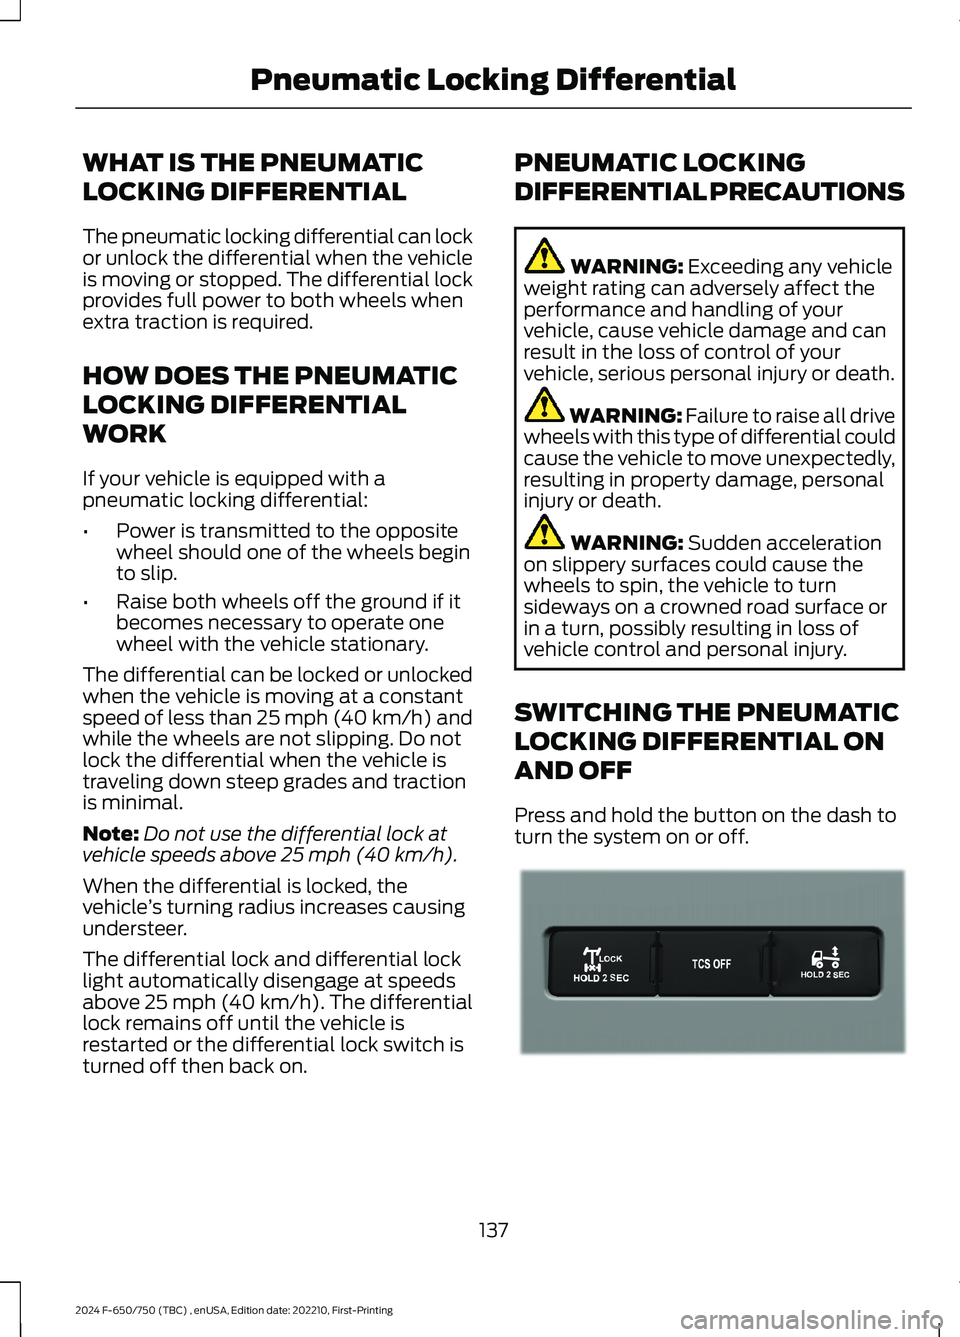
Press and hold the button on the dash toturn the system on or off.
137
2024 F-650/750 (TBC) , enUSA, Edition date: 202210, First-PrintingPneumatic Locking DifferentialE366571
Page 143 of 386
GENERAL INFORMATION
Note: Occasional brake noise is normal. Ifa metal-to-metal, continuous grinding orcontinuous squeal sound is present, thebrake linings may be worn-out. Have thesystem checked as soon as possible. If thevehicle has continuous vibration or shudderin the steering wheel while braking, have thesystem checked as soon as possible.
All standard equipment brakes areself-adjusting. Automatic adjustment,when required, occurs whenever you applyand release the brakes during forward orreverse operation.
Know the required stopping distances forall driving conditions you may encounter.For longer brake lining life, take fulladvantage of engine braking power whencoming to a stop.
Wet brakes result in reduced brakingefficiency. Gently press the brake pedal afew times when driving from a car wash orstanding water to dry the brakes.
If the brakes do not grip well:
•Check brake adjustment.
•Check the brake linings for excessivewear.
•Check the system air pressure onvehicles with air brakes.
•Let the brakes cool if you have beenusing them excessively, as in mountaindriving or after several fast, high-speedstops.
•If you have been driving through deepwater, gently apply the brakes severaltimes while your vehicle is movingslowly.
Brake Over Accelerator
In the event the accelerator pedalbecomes stuck or entrapped, apply steadyand firm pressure to the brake pedal toslow the vehicle and reduce engine power.If you experience this condition, apply thebrakes and bring your vehicle to a safestop. Move the transmission to park (P),switch the engine off and apply the parkingbrake. Inspect the accelerator pedal forany interference. If none are found and thecondition persists, have your vehicle towedto the nearest authorized dealer
Anti-lock Brake System
This system helps you maintain steeringcontrol during emergency stops by keepingthe brakes from locking.
If the light does not illuminateduring start up, remains on orflashes, the system may bedisabled. It also momentarily illuminateswhen you switch the ignition on to confirmthe lamp is functional. If it does notilluminate when you switch the ignition on,or begins to flash at any time, have thesystem checked.
If you connect a PLC trailer withthe ignition on, the trailer ABSlight also illuminates. If the lightfails to illuminate, if it remains on after youstart the vehicle or continues to flash, havethe system serviced immediately.
See Warning Lamps and Indicators(page 67).
139
2024 F-650/750 (TBC) , enUSA, Edition date: 202210, First-PrintingBrakesE67020 E210335
Page 148 of 386
Vehicles with Automatic Transmission
When you switch the ignition on, thesystem automatically turns on. You cannotturn the system on or off.
AIR BRAKES
WARNING: Failure to maintainproper air brake adjustment can resultin reduction or loss of braking ability.
WARNING: Do not drive or continueto drive if the low air pressure buzzer issounding or the brake warning light is lit.These warnings indicate that air pressureis not to normal operating level.Continued use of the vehicle could resultin loss of braking ability.
WARNING: Avoid repeated lightapplication of the brake pedal. Thisdepletes air pressure faster and couldresult in loss of braking capability.
WARNING: Do not move thevehicle when the air pressure isinsufficient because the brake systemmay be inoperative.
After starting the engine, allow time for theair compressor to build air pressure to60 psi (414 kPa) before moving yourvehicle.
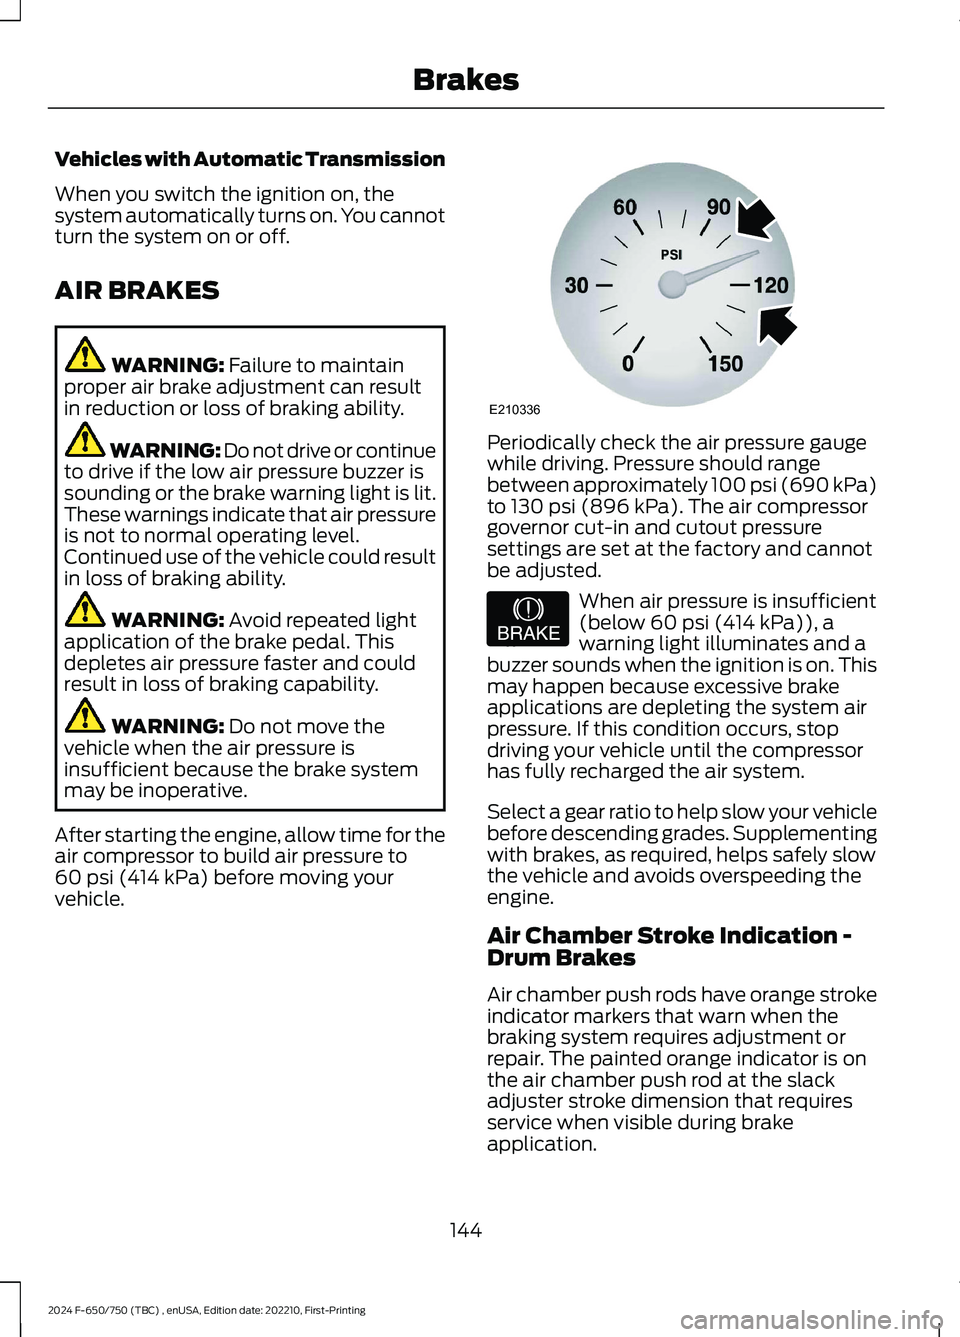
Periodically check the air pressure gaugewhile driving. Pressure should rangebetween approximately 100 psi (690 kPa)to 130 psi (896 kPa). The air compressorgovernor cut-in and cutout pressuresettings are set at the factory and cannotbe adjusted.
When air pressure is insufficient(below 60 psi (414 kPa)), awarning light illuminates and abuzzer sounds when the ignition is on. Thismay happen because excessive brakeapplications are depleting the system airpressure. If this condition occurs, stopdriving your vehicle until the compressorhas fully recharged the air system.
Select a gear ratio to help slow your vehiclebefore descending grades. Supplementingwith brakes, as required, helps safely slowthe vehicle and avoids overspeeding theengine.
Air Chamber Stroke Indication -Drum Brakes
Air chamber push rods have orange strokeindicator markers that warn when thebraking system requires adjustment orrepair. The painted orange indicator is onthe air chamber push rod at the slackadjuster stroke dimension that requiresservice when visible during brakeapplication.
144
2024 F-650/750 (TBC) , enUSA, Edition date: 202210, First-PrintingBrakesE210336 E206772
Page 187 of 386
ESSENTIAL TOWING CHECKS
See Load limits in the Load Carryingchapter for load specification terms foundon the tire label and Safety Compliancelabel and instructions on calculating yourvehicle's load.
Remember to account for the trailertongue weight as part of your vehicle loadwhen calculating the total vehicle weight.
Hitches
Do not use a hitch that either clamps ontothe bumper or attaches to the axle. Youmust distribute the load in your trailer sothat 10-15% of the total weight of thetrailer is on the tongue.
Safety Chains
Note:Do not attach safety chains to thebumper.
Always connect the safety chains to theframe or hook retainers of your vehiclehitch.
To connect the safety chains, cross thechains under the trailer tongue and allowenough slack for turning tight corners. Donot allow the chains to drag on the ground.
Trailer Brakes
WARNING: Do not connect atrailer's hydraulic brake system directlyto your vehicle's brake system. Yourvehicle may not have enough brakingpower and your chances of having acollision greatly increase.
Electric brakes and manual, automatic orsurge-type trailer brakes are safe if youinstall them properly and adjust them tothe manufacturer's specifications. Thetrailer brakes must meet local and federalregulations.
The rating for the tow vehicle's brakingsystem operation is at the gross vehicleweight rating, not the gross combinedweight rating.
Trailer Lamps
WARNING: Never connect anytrailer lamp wiring to the vehicle's taillamp wiring; this may damage theelectrical system resulting in fire. Contactyour authorized dealer as soon aspossible for assistance in proper trailertow wiring installation. Additionalelectrical equipment may be required.
Trailer lamps are required on most towedvehicles. Make sure all running lights, brakelights, turn signals and hazard lights areworking.
Before Towing a Trailer
Practice turning, stopping and backing upto get the feel of your vehicle-trailercombination before starting on a trip.When turning, make wider turns so thetrailer wheels clear curbs and otherobstacles.
When Towing a Trailer
•Check your hitch, electrical connectionsand trailer wheel lug nuts thoroughlyafter you have traveled 50 mph(80 km/h).
•When stopped in congested or heavytraffic during hot weather, place thetransmission in park (P) or neutral (N)to aid engine and transmission coolingand to help air conditioningperformance.
•Turn off the speed control with heavyloads or in hilly terrain. The speedcontrol may turn off automaticallywhen you are towing on long, steepgrades.
183
2024 F-650/750 (TBC) , enUSA, Edition date: 202210, First-PrintingTowing
Page 190 of 386

GENERAL DRIVING POINTS
General Information
•Accelerate smoothly and evenly. Rapidacceleration increases fuelconsumption without increasing engineperformance.
•When approaching a hill, press theaccelerator smoothly to start theincline at full power, and then shiftdown as needed to maintain vehiclespeed.
•When going down a hill, or long steepgrades, prevent overspeeding of theengine. Normally, choose the samegear to descend the hill that you use toascend the hill. The engine governorhas no control over engine speed whenit is being pushed by a loaded vehicle.
•Do not operate in a gear that permitsan engine speed more than themaximum governed speed or high-idleRPM (no load).
•Always shift to a lower gear at highaltitudes to prevent engine smoking.
Backing Up
WARNING: All vehicles have blindspots. To reduce the risk of severe injuryor property damage, never move yourvehicle to the side or rear or change laneswithout being sure your way is clear onboth sides and to your rear.
WARNING: To reduce the risk ofthe possibility of personal injury whilebacking up the vehicle, always be sureyour vehicle’s path is clear.
Before backing up your vehicle, be sure youcan do so safely. If anything behind the cablimits your view, do not rely on mirrorsalone to make sure that your intended pathis clear. If other people are in the vicinity,have someone standing well behind yourvehicle and outside of your intended path(visible through an exterior mirror) guideyou as you back up.
Although OSHA or some governmentalregulations may require the use of anelectrical or mechanical back up alarm towarn bystanders, such an alarm does notguarantee that the intended path is clear.When in doubt, get out of your vehicle andvisually check the intended path is clear.Back up slowly as to allow others time tomove, if necessary.
If you install an electrical back up alarm,connect it to the backup lamp circuit.
Parking
WARNING: When parking yourvehicle, do not leave the transmission ingear; if the key is in the on position andthe vehicle rolls, the engine could start.Failure to follow these instructions couldresult in an unattended vehicle moving,possibly causing personal injury orproperty damage.
Always use the parking brake. Whenparking on a grade, block the wheels andturn the front wheels to one side so that ifyour vehicle rolls, the front tires act againstthe curb to stop your vehicle. The frontwheels are more effective at stopping arolling vehicle than the rear wheels.
186
2024 F-650/750 (TBC) , enUSA, Edition date: 202210, First-PrintingDriving Hints