display FORD F650/750 2024 Service Manual
[x] Cancel search | Manufacturer: FORD, Model Year: 2024, Model line: F650/750, Model: FORD F650/750 2024Pages: 386, PDF Size: 8.7 MB
Page 129 of 386
automatically and require no actions fromthe driver. During either one of theseregeneration methods, you may notice achange in exhaust tone. At certain times,various messages related to the dieselparticulate filter appear in the informationdisplays.
Oxidation Catalytic Converter andDiesel Particulate Filter System (If
Equipped)
WARNING: The normal operatingtemperature of the exhaust system isvery high. Never work around or attemptto repair any part of the exhaust systemuntil it has cooled. Use special care whenworking around the diesel oxidationcatalytic converter or the dieselparticulate filter. The diesel oxidationcatalytic converter and the dieselparticulate filter heat up to very hightemperatures after only a short periodof engine operation and remain hot afteryou switch the engine off.
Diesel Particulate Filter Maintenance
You must properly maintain your vehicle'sdiesel particulate filter in order for it tofunction properly.
Do not disregard maintenance messagesthat appear in the information display.Failure to follow the instructions of aninformation message may degrade vehicleperformance and could lead to enginedamage that may not be covered by thevehicle Warranty.
Failure to perform active or operatorcommanded regeneration when instructedcould result in a clogged diesel particulatefilter. If the diesel particulate filter fillsbeyond the regeneration threshold, yourvehicle disables the ability for active andoperator commanded regeneration. Thiscould result in irreversible damage to thediesel particulate filter requiringreplacement that may not be covered bythe vehicle Warranty.
Passive Regeneration
In passive regeneration, the exhaustsystem temperature and constituentsautomatically clean the filter by oxidizingthe soot. Cleaning automatically occursduring normal vehicle operating conditionsdue to driving patterns.
Active Regeneration
Once the diesel particulate filter is full ofexhaust particles, the engine controlmodule commands the exhaust system toclean the filter through active regeneration.Active regeneration requires the enginecomputer to raise the exhaust temperatureto eliminate the particles. During cleaning,the particles convert to harmless gasses.Once cleaned the diesel particulate filtercontinues trapping exhaust particles.
The regeneration process operates moreefficiently when you drive your vehicle ata constant speed above 30 mph(48 km/h) and at a steady engine speedfor approximately 20 minutes. Thefrequency and duration of regenerationfluctuates by how you drive your vehicle,outside air temperature and altitude. Formost driving, regeneration frequency variesfrom 100–500 mi (160–805 km) betweenoccurrences and each occurrence lasts9–35 minutes. You can usually reduce theduration of regeneration if you maintain aconstant speed above 30 mph (48 km/h).
125
2024 F-650/750 (TBC) , enUSA, Edition date: 202210, First-PrintingEngine Emission Control
Page 130 of 386
When the engine control module detectsthat the diesel particulate filter is nearlyfull of particulates and you are notoperating your vehicle in a manner to alloweffective automatic regeneration,messages appear in the informationdisplay as a reminder for you to drive yourvehicle in order to clean the dieselparticulate filter. If you drive your vehiclein a manner to allow effective automaticregeneration, the information displayshows a cleaning exhaust filter message,which is the normal regeneration process.You can also choose operator commandedregeneration to clean the exhaust systemat this point. See Information Messages(page 75).
If you are not able to drive in a manner thatallows effective automatic activeregeneration or you choose to performregeneration of the diesel particulate filterwhile at idle, then operator commandedregeneration would need to be performed.
Operator Commanded Regeneration(If Equipped)
If your vehicle is operated with significantstationary operation, low speed drivecycles less than 25 mph (40 km/h), shortdrive cycles, a drive time is less than 10 -15 minutes or the vehicle does not fullywarm up, passive and active regenerationmay not sufficiently clean the dieselparticulate filter system. Operatorcommanded regeneration allows you tomanually start regeneration of the dieselparticulate filter at idle to clean the filteronly when the diesel particulate filter is full(100%). If you are not sure whether yourvehicle has this feature, contact anauthorized dealer.
When to Carry Out Operator CommandedRegeneration
You can use the operator commandedregeneration feature when a messageappears in the information display only.When viewing the Exhaust Filter Statusmessage - Exhaust Filter XX% and thediesel particulate filter message indicatesFULL, and you are not able to drive in amanner that allows effective automaticactive regeneration, or if you choose tomanually start the regeneration of thediesel particulate filter manually while thevehicle is idle. See InformationMessages (page 75).
How to Run Multiple Regeneration Cycles
1.Park the vehicle in an outdoor location.
2.Fully raise the vehicle hood. The hoodshould remain up for the entireregeneration process.
3.Start the DPF Service Regenerationprocedure on the vehicle. The DPFregeneration cycle should takeapproximately 30 minutes tocomplete.
126
2024 F-650/750 (TBC) , enUSA, Edition date: 202210, First-PrintingEngine Emission Control
Page 131 of 386
4.After the DPF Service Regenerationprocedure completes:
•If the vehicle’s soot level is at anacceptable level, close the hood.The vehicle is ready to be driven.
•If the vehicle’s soot level remainshigher than desired, let the vehicleidle for a minimum of 30 minutes(hood remains fully open). Afterthe 30 minutes have passed,initiate the second DPFregeneration procedure. It is veryunlikely that more than 2regeneration cycles will be required,but if additional cycles arenecessary, allow for a 30-minutevehicle idle (hood up) to occurbetween regeneration cycles.
5.Once all DPF regeneration cycles arecomplete, close the hood. The vehicleis ready to be driven.
Operator Commanded RegenerationPrecautions and Safe Exhaust Position
WARNING: Do not park or idle yourvehicle over dry leaves, dry grass or othercombustible materials. The regenerationprocess creates very high exhaust gastemperatures and the exhaust willradiate a considerable amount of heatduring and after regeneration and afteryou have switched the engine off. This isa potential fire hazard.
WARNING: Stay clear of theexhaust tailpipe during regeneration. Hotexhaust gases can burn you badly.
Make sure that the louvers located at thetip of the exhaust are clear of anyobstructions as they are used to introducefresh air into the tailpipe to cool theexhaust gases as they leave the exhaustsystem.
Before you start operator commandedregeneration, do the following:
•Shift into park (P) or if you have anRNDM selector shift into neutral (N)and apply the parking and or air brake,on stable, level ground.
•Park your vehicle outside of anystructure.
•Park your vehicle 10–15 ft (3–5 m)away from any obstructions and awayfrom materials that can easily combustor melt, for example paper, leaves,petroleum products, fuels, plastics andother dry organic material.
•Make sure there is a minimum of 1/8tank of fuel.
•Make sure all fluids are at proper levels.
How to Start Operator CommandedRegeneration
WARNING: Stay clear of theexhaust tailpipe during regeneration. Hotexhaust gases can burn you badly.
Note:You cannot use the operatorcommanded regeneration until the dieselparticulate filter load percentage hasreached 100%. The diesel particulate filterload percentage fluctuates up and downwhen driving your vehicle due to active andpassive regenerations.
Note:During the use of operatorcommanded regeneration, you may observea light amount of white smoke. This isnormal.
You may not be able to useoperator commandedregeneration if the service enginesoon warning lamp appears in theinformation display
127
2024 F-650/750 (TBC) , enUSA, Edition date: 202210, First-PrintingEngine Emission ControlE67028
Page 132 of 386
Information Display Procedure
Start your vehicle engine and when it hasreached the normal operating temperature,arrow through the display to get to theDiesel Particulate Filter Status on theTruck Info tab. Exhaust Filter XX%/FULLdisplays. Operator commandedregeneration can only be initiated whenFULL See Information Display Control(page 53). If a message advising that theexhaust filter is full appears in theinformation display, press and hold the OKbutton to initiate Exhaust Cleaning. Ifsuccessful, a second prompt appearsregarding exhaust position required toinitiate operator commanded regeneration.Be sure to understand each prompt. If youare not sure what is being asked by eachprompt, contact an authorized dealer. Ifthe exhaust system meets the positionrequirements then press and hold the OKbutton to fully activate the OperatorCommanded Regeneration. The displayconfirms the operation has started andwhen it has finished.
You can also drive to clean the filter.
When the system is at the pointof oversaturation, the serviceengine warning lamp illuminatesand a message appears in the informationdisplay. You cannot initiate filter cleaning.You must have your vehicle checked assoon as possible.
Once operator commanded regenerationstarts, engine speed increases toapproximately 1200 rpm and the coolingfan speed may increase. You will hear achange in audible sound due to enginespeed and cooling fan speed increases.
It is not necessary to open the hood on theengine compartment. Once operatorcommanded regeneration completes, theengine speed returns to normal idling. Theexhaust system remains very hot forseveral minutes even after regeneration is
complete. Do not reposition the vehicleover materials that could burn until theexhaust system has had sufficient time tocool. Depending on the amount of sootcollected by the diesel particulate filter,ambient temperature and altitude,operator commanded regeneration lastsapproximately 30 minutes.
Operator Commanded Regenerationwith Automatic Regeneration Control(If Equipped)
If your vehicle is operated with significantstationary operation, low speed drivecycles less than 25 mph (40 km/h), shortdrive cycles, drive time less than 15 minutesor the vehicle does not fully warm up,passive and active regeneration may notsufficiently clean the diesel particulatefilter system. You can switch off automaticregeneration until better driving conditionsare available, for example steady highspeed driving. You can then switchautomatic regeneration back on to cleanthe diesel particulate filter.
Switching Automatic RegenerationControl On and Off
To switch operator commandedregeneration on and off, use theinformation display control on the steeringwheel. See Information Display Control(page 53). Scroll through the Settings tabto ensure there is a check in the box nextto Auto Regeneration, this means it isactive. To deactivate Auto Regeneration,uncheck the box. A message appears “AutoExhaust Cleaning Off” along with an iconindicating that Auto Exhaust Cleaning isdisabled. The icon stays illuminated untilyou switch Auto Exhaust Cleaning back onby checking the box.
128
2024 F-650/750 (TBC) , enUSA, Edition date: 202210, First-PrintingEngine Emission ControlE67028
Page 133 of 386
How to Interrupt or Cancel OperatorCommanded Regeneration
If you need to cancel the operatorcommanded regeneration, pressing thebrake, accelerator or switching the engineoff stops the procedure. Depending on theamount of time you allowed the operatorcommanded regeneration to operate, sootmay not have had sufficient time to be fullyeliminated, but the exhaust system andexhaust gas may still be hot. If you shutyour vehicle off during operatorcommanded regeneration, you may noticeturbo flutter. This is a normal consequencecaused by shutting off a diesel engineduring boosted operation and is considerednormal.
Filter Service and Maintenance
Over time, a slight amount of ash buildsup in the diesel particulate filter, which isnot removed during the regenerationprocess. The filter may need to be replacedwith a new or remanufactured part atapproximately 250,000 mi (400,000 km).Actual mileage varies depending on engineand vehicle operating conditions.
If filter service is required, theengine control system warninglamp illuminates in theinformation display.
If there are any issues with thediesel particulate filter system,the engine control systemwarning lamp and a serviceengine soon warning lampilluminate to inform you thatyour vehicle requires service. Have yourvehicle checked as soon as possible.
Resonator and Tailpipe AssemblyMaintenance
Aftermarket devices or modifications tothe exhaust system may reduce theeffectiveness of the exhaust system aswell as cause damage to the exhaustsystem or engine. This may also degradevehicle performance and could lead toengine damage that may not be coveredby the vehicle Warranty.
129
2024 F-650/750 (TBC) , enUSA, Edition date: 202210, First-PrintingEngine Emission Control E67028
Page 134 of 386
AUTOMATIC TRANSMISSION
WARNING: Apply the parkingbrake, shift into park (P), switch theignition off and remove the key beforeyou leave your vehicle. Failure to followthis instruction could result in personalinjury or death.
WARNING: Do not apply the brakepedal and accelerator pedalsimultaneously. Applying both pedalssimultaneously for more than a fewseconds limits vehicle performance,which may result in difficulty maintainingspeed in traffic and could lead to seriousinjury.
Understanding the Shift Positionsof Your Automatic Transmission
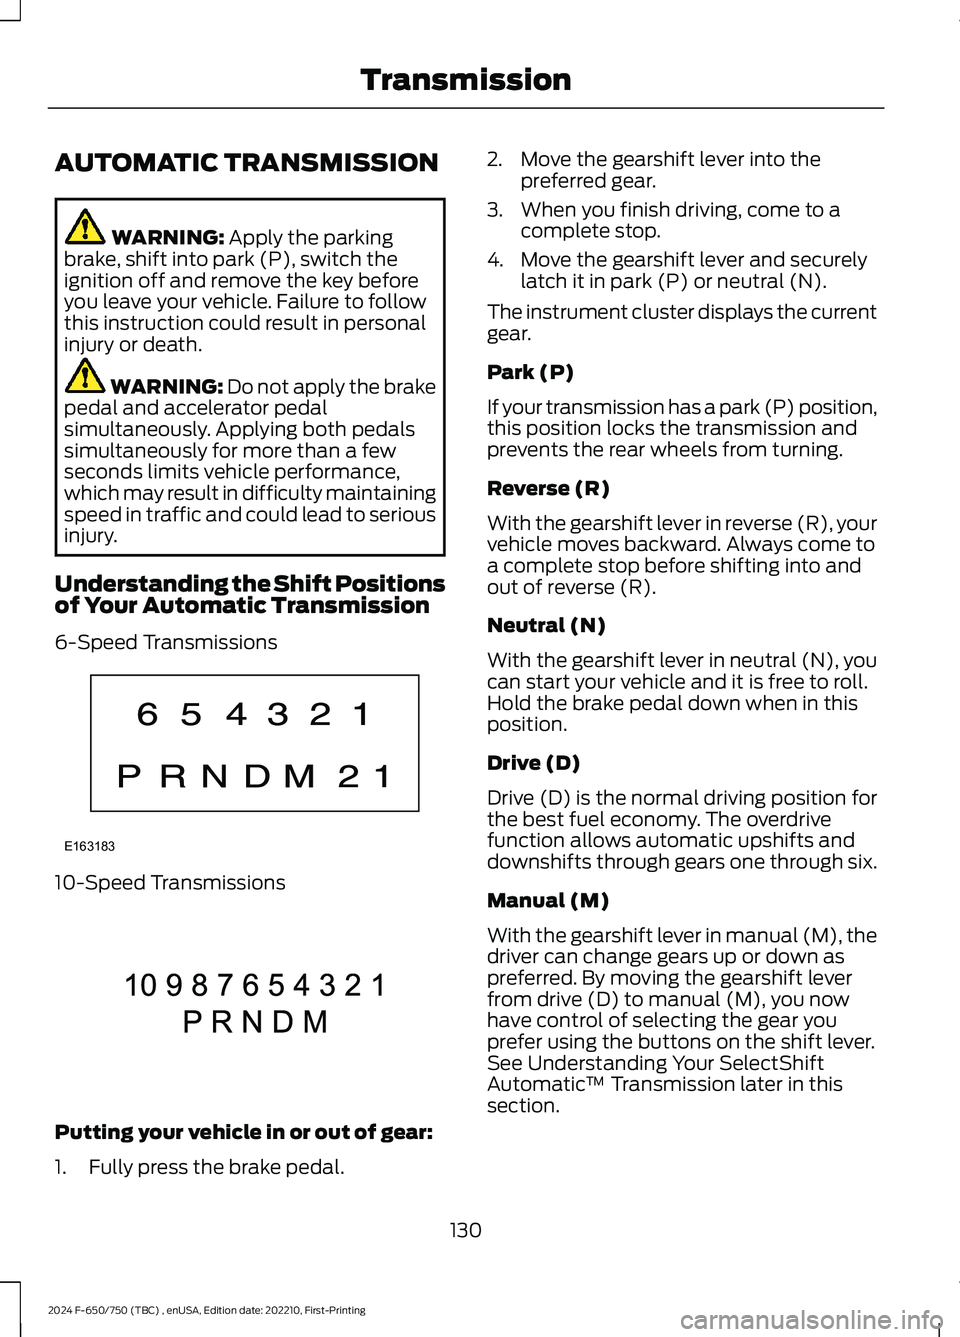
6-Speed Transmissions
10-Speed Transmissions
Putting your vehicle in or out of gear:
1.Fully press the brake pedal.
2.Move the gearshift lever into thepreferred gear.
3.When you finish driving, come to acomplete stop.
4.Move the gearshift lever and securelylatch it in park (P) or neutral (N).
The instrument cluster displays the currentgear.
Park (P)
If your transmission has a park (P) position,this position locks the transmission andprevents the rear wheels from turning.
Reverse (R)
With the gearshift lever in reverse (R), yourvehicle moves backward. Always come toa complete stop before shifting into andout of reverse (R).
Neutral (N)
With the gearshift lever in neutral (N), youcan start your vehicle and it is free to roll.Hold the brake pedal down when in thisposition.
Drive (D)
Drive (D) is the normal driving position forthe best fuel economy. The overdrivefunction allows automatic upshifts anddownshifts through gears one through six.
Manual (M)
With the gearshift lever in manual (M), thedriver can change gears up or down aspreferred. By moving the gearshift leverfrom drive (D) to manual (M), you nowhave control of selecting the gear youprefer using the buttons on the shift lever.See Understanding Your SelectShiftAutomatic™ Transmission later in thissection.
130
2024 F-650/750 (TBC) , enUSA, Edition date: 202210, First-PrintingTransmissionE163183 E308145
Page 136 of 386
Understanding Your SelectShift™Automatic Transmission
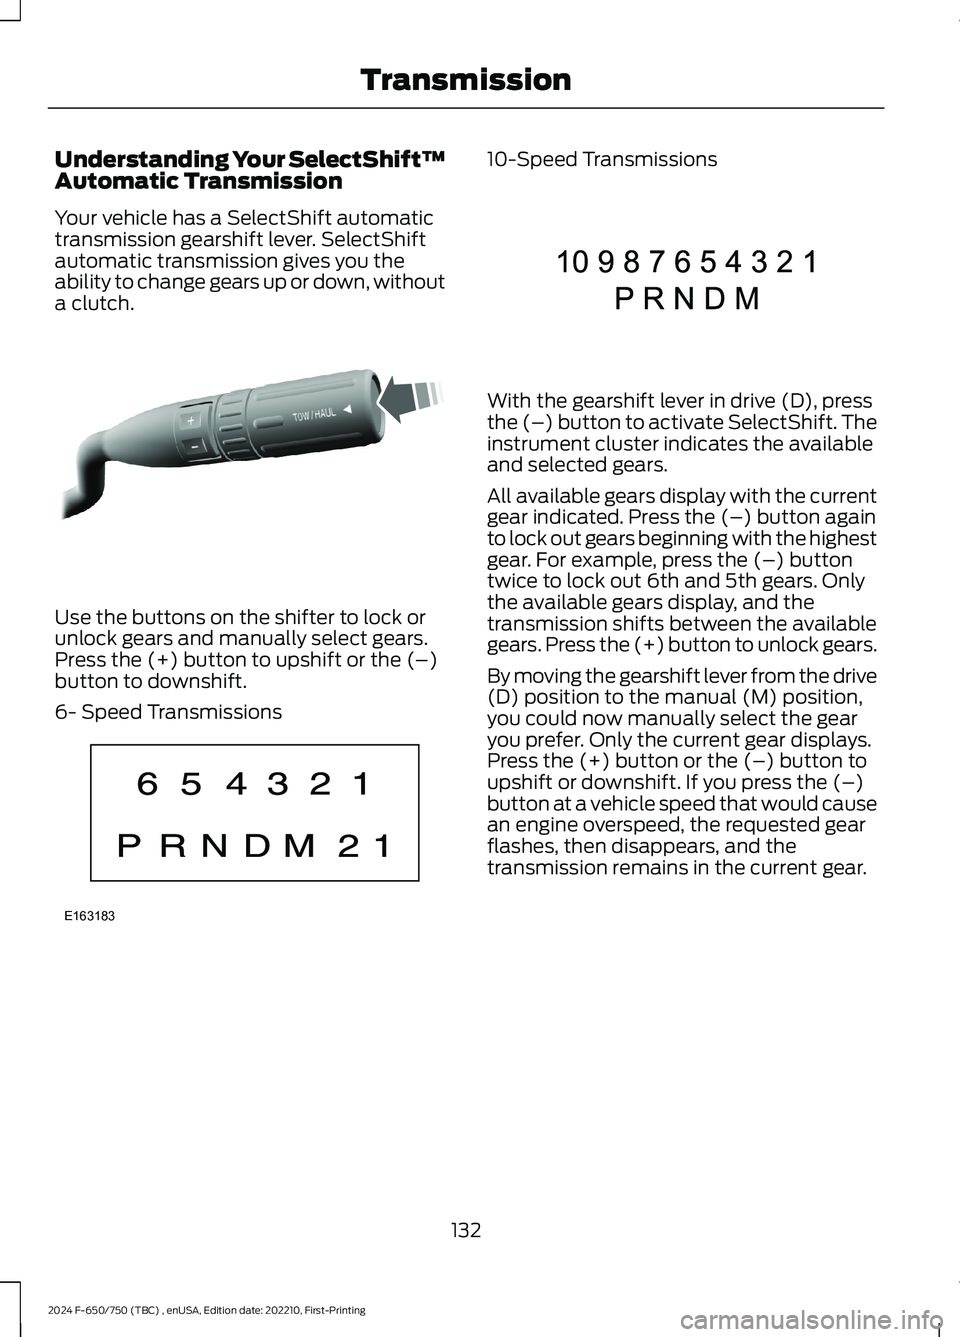
Your vehicle has a SelectShift automatictransmission gearshift lever. SelectShiftautomatic transmission gives you theability to change gears up or down, withouta clutch.
Use the buttons on the shifter to lock orunlock gears and manually select gears.Press the (+) button to upshift or the (–)button to downshift.
6- Speed Transmissions
10-Speed Transmissions
With the gearshift lever in drive (D), pressthe (–) button to activate SelectShift. Theinstrument cluster indicates the availableand selected gears.
All available gears display with the currentgear indicated. Press the (–) button againto lock out gears beginning with the highestgear. For example, press the (–) buttontwice to lock out 6th and 5th gears. Onlythe available gears display, and thetransmission shifts between the availablegears. Press the (+) button to unlock gears.
By moving the gearshift lever from the drive(D) position to the manual (M) position,you could now manually select the gearyou prefer. Only the current gear displays.Press the (+) button or the (–) button toupshift or downshift. If you press the (–)button at a vehicle speed that would causean engine overspeed, the requested gearflashes, then disappears, and thetransmission remains in the current gear.
132
2024 F-650/750 (TBC) , enUSA, Edition date: 202210, First-PrintingTransmissionE318028 E163183 E308145
Page 137 of 386
Recommended shift speeds
Upshifts when accelerating (recommended for best fuel economy) 6-Speed
Gasoline enginesShift from:
15 mph (24 km/h)1 – 2
25 mph (40 km/h)2 – 3
40 mph (64 km/h)3 – 4
45 mph (72 km/h)4 – 5
50 mph (80 km/h)5 – 6
Upshifts when Accelerating(Recommended for Best FuelEconomy) 10-Speed
Diesel enginesShift from:
10 mph (16 km/h)1 - 2
15 mph (24 km/h)2 - 3
19 mph (31 km/h)3 - 4
22 mph (35 km/h)4 - 5
25 mph (40 km/h)5 - 6
31 mph (50 km/h)6 - 7
36 mph (58 km/h)7 - 8
45 mph (72 km/h)8 - 9
49 mph (79 km/h)9 - 10
To prevent the engine from running at toolow an RPM, which could cause it to stall,SelectShift still makes some downshiftsif it has determined that you have notdownshifted in time. Although SelectShiftmakes some downshifts for you, it stillallows you to downshift at any time if theSelectShift determines that there is nodamage to the engine from over-revving.
SelectShift does not automatically upshift,even if the engine is approaching the RPMlimit. Shift manually by pressing the (+)button.
Note:Engine damage could occur if you revthe engine excessively and hold it withoutshifting.
Progressive Range Selection (If
Equipped)
Progressive range selection gives you theability to lockout gears from the automaticshifting range. This could provide you withan improved driving experience, forexample, in slippery conditions or whenexperiencing a steep slope.
With the gearshift lever in drive (D), pressthe (–) button to activate progressiverange selection. The instrument clusterindicates the available and selected gears.
All available gears display with the currentgear indicated. Press the (–) button againto lock out gears beginning with the highestgear. For example, press the (–) buttontwice to lock out 6th and 5th gears. Onlythe available gears display, and thetransmission shifts between the availablegears. Press the (+) button to unlock gearsto allow the transmission to shift to highergears. The transmission shifts within thegear range you select.
133
2024 F-650/750 (TBC) , enUSA, Edition date: 202210, First-PrintingTransmission
Page 147 of 386
5.Tighten the nut until the spring is fullycaged and brakes released. Do notloosen or remove the release stud andnut unless you completely assembleand securely clamp the brake chamber.
6.After restoring the air pressure,unscrew and remove the release studand install in the carrying pocket. Installthe access plug.
HILL START ASSIST -
VEHICLES WITH: HYDRAULIC
BRAKES
WARNING: The system does notreplace the parking brake. When youleave your vehicle, always apply theparking brake.
WARNING: You must remain inyour vehicle when the system turns on.At all times you are responsible forcontrolling your vehicle, supervising thesystem, and intervening if required.Failure to follow this instruction couldresult in the loss of control of yourvehicle, personal injury or death.
WARNING: The system will turnoff if a malfunction is apparent or if yourev the engine excessively. Failure to takecare may result in the loss of control ofyour vehicle, serious personal injury ordeath.
The system makes it easier to pull awaywhen your vehicle is on a slope withoutneeding to use the parking brake.
When the system is active, your vehicleremains stationary on the slope for two tothree seconds after you release the brakepedal. This allows time to move your footfrom the brake to the accelerator pedal.The brakes release when the engine has
developed sufficient torque to prevent yourvehicle from rolling down the slope. Thisis an advantage when pulling away on aslope, for example from a car park ramp,traffic lights or when reversing uphill intoa parking space.
When the vehicle is on a slope, the systemwill turn on automatically to preventvehicle rollback.
Note:There is no warning light to indicatethe system is either on or off.
Using Hill Start Assist
1.Press the brake pedal to bring yourvehicle to a complete standstill. Keepthe brake pedal pressed and shift intogear when facing uphill or reverse (R)when facing downhill.
2.If the sensors detect that your vehicleis on a slope, the system automaticallyactivates.
3.When you remove your foot from thebrake pedal, your vehicle remains onthe slope without rolling away forabout two to three seconds. This holdtime automatically extends if you arein the process of driving off.
4.Drive off in the normal manner. Thesystem releases the brakesautomatically.
Note:When you remove your foot from thebrake pedal and press the pedal again whenthe system is active, you will experiencesignificantly reduced brake pedal travel. Thisis normal.
Switching the System On and Off
Vehicles with Manual Transmission
You can switch this feature on or off in theinformation display. The systemremembers the last setting when you startyour vehicle.
143
2024 F-650/750 (TBC) , enUSA, Edition date: 202210, First-PrintingBrakes
Page 161 of 386
REAR VIEW CAMERA (IF EQUIPPED)
WARNING: The rear view camerasystem is a reverse aid supplementdevice that still requires the driver to useit in conjunction with the interior andexterior mirrors for maximum coverage.
WARNING: Objects that are closeto either corner of the bumper or underthe bumper, might not be seen on thescreen due to the limited coverage of thecamera system.
WARNING: Use caution when therear cargo door is ajar. If the rear cargodoor is ajar, the camera will be out ofposition and the video image could beincorrect. All guide lines disappear whenthe rear cargo door is ajar. Failure tofollow this instruction could result inpersonal injury.
WARNING: Reverse your vehicleslowly. Failure to follow this instructioncould result in the loss of control of yourvehicle, personal injury or death.
WARNING: Use caution whenturning camera features on or off whenthe transmission is not in park (P). Makesure your vehicle is not moving.
The rear view camera system provides avideo image of the area behind yourvehicle.
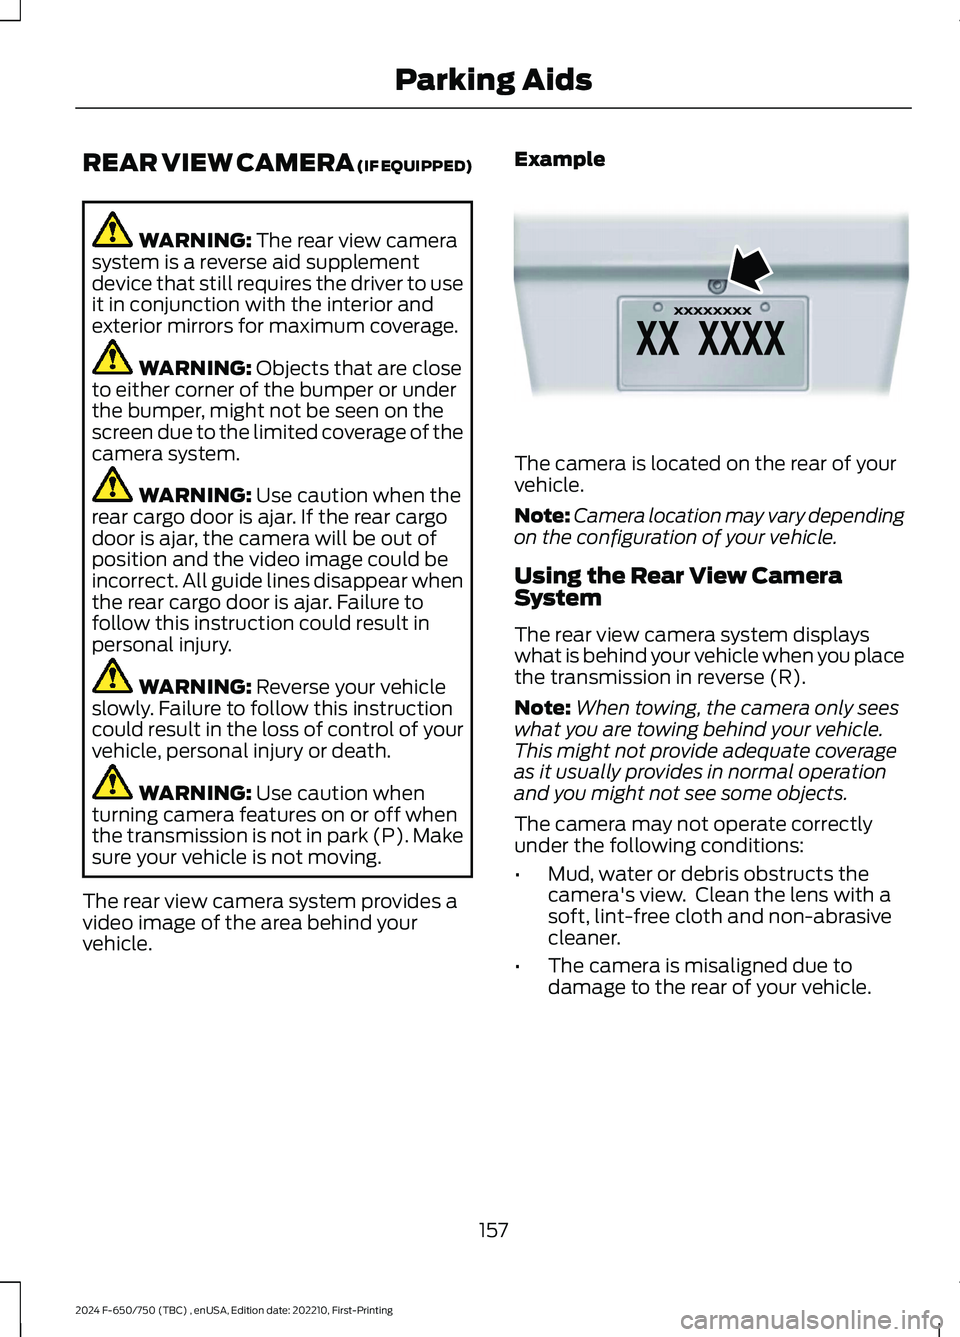
Example
The camera is located on the rear of yourvehicle.
Note:Camera location may vary dependingon the configuration of your vehicle.
Using the Rear View CameraSystem
The rear view camera system displayswhat is behind your vehicle when you placethe transmission in reverse (R).
Note:When towing, the camera only seeswhat you are towing behind your vehicle.This might not provide adequate coverageas it usually provides in normal operationand you might not see some objects.
The camera may not operate correctlyunder the following conditions:
•Mud, water or debris obstructs thecamera's view. Clean the lens with asoft, lint-free cloth and non-abrasivecleaner.
•The camera is misaligned due todamage to the rear of your vehicle.
157
2024 F-650/750 (TBC) , enUSA, Edition date: 202210, First-PrintingParking AidsE142435