set clock FORD F650/750 2024 Owners Manual
[x] Cancel search | Manufacturer: FORD, Model Year: 2024, Model line: F650/750, Model: FORD F650/750 2024Pages: 386, PDF Size: 8.7 MB
Page 119 of 386

1.When your vehicle has stopped, shiftinto neutral (N) or park (P).
2.Apply the parking brake and switch theignition off.
3.Turn the fuel filler capcounterclockwise and remove it.
4.Refuel your vehicle as required.
5.Replace the fuel filler cap, turn itclockwise until you feel a strongresistance.
If the fuel cap warning lamp or a warningmessage appears in the instrument cluster,you may not have installed the fuel fillercap correctly.
If the fuel cap warning lamp remains on,at the next opportunity, safely pull off ofthe road, remove the fuel filler cap, alignthe cap properly and reinstall it. The checkfuel cap warning lamp or warning messagemay not reset immediately. It may takeseveral driving cycles for the indicators toturn off. A driving cycle consists of anengine start-up (after four or more hourswith the engine off) followed by normalcity and highway driving.
FUEL CONSUMPTION
The advertised capacity is the maximumamount of fuel that you can add to the fueltank after running out of fuel. Included inthe advertised capacity is an emptyreserve. The empty reserve is anunspecified amount of fuel that remainsin the fuel tank when the fuel gaugeindicates empty.
Note:The amount of fuel in the emptyreserve varies and should not be relied uponto increase driving range.
Filling the Fuel Tank
For consistent results when refueling:
•Turn the ignition off before fueling; aninaccurate reading results if the engineis left running.
•Use the same fill rate(low-medium-high) each time the tankis filled.
•Allow no more than one automaticshut-off when refueling.
Results are most accurate when the fillingmethod is consistent.
Calculating Fuel Economy
Do not measure fuel economy during thefirst 1,000 mi (1,600 km) of driving (this isyour engine’s break-in period). A moreaccurate measurement is obtained after2,000 mi (3,200 km) to 3,000 mi(4,800 km). Also, fuel expense, frequencyof fill ups or fuel gauge readings are notaccurate ways to measure fuel economy.
1.Fill the fuel tank completely and recordthe initial odometer reading.
2.Each time you fill the fuel tank, recordthe amount of fuel added.
3.After at least three fill ups, fill the fueltank and record the current odometerreading.
4.Subtract your initial odometer readingfrom the current odometer reading.
To calculate L/100 km (liters per 100kilometers) fuel consumption, multiply theliters used by 100, then divide by kilometerstraveled. To calculate MPG (miles pergallon) fuel consumption, divide milestraveled by gallons used.
115
2024 F-650/750 (TBC) , enUSA, Edition date: 202210, First-PrintingFuel and Refueling
Page 232 of 386

Do not use supplemental engine oiladditives because they are unnecessaryand could lead to engine damage that thevehicle warranty may not cover.
1.Clean the area surrounding the engineoil filler cap before you remove it.
2.Remove the engine oil filler cap.
3.Add engine oil that meets ourspecifications. See Capacities andSpecifications (page 291).
4.Reinstall the engine oil filler cap. Turnit clockwise until you feel a strongresistance.
Note: Do not add oil further than themaximum mark. Oil levels above themaximum mark may cause engine damage.
Note:Immediately soak up any oil spillagewith an absorbent cloth.
Engine Oil Pressure Warning Lamp
WARNING: If it illuminates whenyou are driving do not continue yourjourney, even if the oil level is correct.Have your vehicle checked.
It illuminates when you switchthe ignition on.
If it illuminates when the engineis running this indicates a malfunction.Stop your vehicle as soon as it is safe todo so and switch the engine off. Check theengine oil level. If the oil level is sufficient,this indicates a system malfunction. Haveyour vehicle checked as soon as possible.
CHANGING THE ENGINE OIL
AND OIL FILTER
WARNING: Do not add engine oilwhen the engine is hot. Failure to followthis instruction could result in personalinjury.
Your vehicle has an Intelligent Oil LifeMonitor™ that calculates the proper oilchange service interval. When theinformation display indicates: OIL CHANGEREQUIRED, change the engine oil and oilfilter. See Information Displays (page71).
The engine oil filter protects your engineby filtering harmful, abrasive or sludgeparticles and particles significantly smallerthan most available will-fit filters. SeeMotorcraft Parts (page 293).
1.Unscrew the oil filter and oil pan drainplug and wait for the oil to drain.
2.Replace the filter.
3.Reinstall the oil pan drain plug.
4.Refill the engine with new oil. SeeEngine Oil Capacity andSpecification (page 299).
5.Reset the Intelligent Oil Life Monitor™.See Information Displays (page 71).
Engine Lubrication for SevereService Operation
The following conditions define severeoperation:
•Frequent or extended idling such asover 10 minutes per hour of normaldriving.
•Low-speed operation or stationary use.
•If the vehicle is operated in sustained,ambient temperatures below -9°F(-23°C) or above 100°F (38°C).
228
2024 F-650/750 (TBC) , enUSA, Edition date: 202210, First-PrintingMaintenanceE67022
Page 251 of 386

Note:Battery posts, terminals and relatedaccessories contain lead and leadcompounds. Wash hands after handling.
Note:Electrical or electronic accessoriesor components added to the vehicle by thedealer or the owner may adversely affectbattery performance and durability.
Your vehicle is equipped with a Motorcraftmaintenance-free battery which normallydoes not require additional water duringits life of service.
For longer, trouble-free operation, keep thetop of the battery clean and dry. Also,make certain the battery cables are alwaystightly fastened to the battery terminals.
If you see any corrosion on the battery orterminals, remove the cables from theterminals and clean with a wire brush. Youcan neutralize the acid with a solution ofbaking soda and water.
It is recommended that the negativebattery cable terminal be disconnectedfrom the battery if you plan to store yourvehicle for an extended period of time.
Because your vehicle’s engine iselectronically controlled by a computer,some control conditions are maintainedby power from the battery. When thebattery is disconnected or a new batteryis installed, the engine must relearn its idleand fuel trim strategy for optimumdriveability and performance. To begin thisprocess
1.With the vehicle at a complete stop,set the parking brake.
2.Put the gearshift in park (P) or neutral(N) and turn off all accessories.
3.Start the engine. Run the engine untilit reaches normal operatingtemperature.
4.Allow the engine to idle for at least oneminute.
5.Turn the air conditioning (if equipped)on and allow the engine to idle for atleast one minute.
6.Release the parking brake. With yourfoot on the brake pedal and with theair conditioning on, put the vehicle indrive (D) and allow the engine to idlefor at least one minute.
•If you do not allow the engine torelearn its idle trim, the idle qualityof your vehicle may be adverselyaffected until the idle trim iseventually relearned.
7.Drive the vehicle to complete therelearning process
•The vehicle may need to be driven10 mi (16 km) or more to relearn theidle and fuel trim strategy alongwith the ethanol content for flexiblefuel vehicles.
If the battery has been disconnected or anew battery has been installed, the clockand radio settings must be reset once thebattery is reconnected.
Always dispose of automotivebatteries in a responsible manner.Follow your local authorized standardsfor disposal. Call your local authorizedrecycling center to find out more aboutrecycling automotive batteries.
Battery Management System (IfEquipped)
The battery management system (BMS)monitors battery conditions and takesactions to extend battery life. If excessivebattery drain is detected, the system maytemporarily disable certain electricalfeatures to protect the battery. Thoseelectrical accessories affected include therear defrost, heated/cooled seats, climatecontrol fan, heated steering wheel, audioand navigation system. A message may beshown in the information displays to alert
247
2024 F-650/750 (TBC) , enUSA, Edition date: 202210, First-PrintingMaintenance
Page 292 of 386

WARNING: Do not attempt tochange a tire on the side of the vehicleclose to moving traffic. Pull far enoughoff the road to not obstruct the flow oftraffic and avoid the danger of being hitwhen operating the jack or changing thewheel.
Note:Passengers should not remain in thevehicle when the vehicle is being jacked.
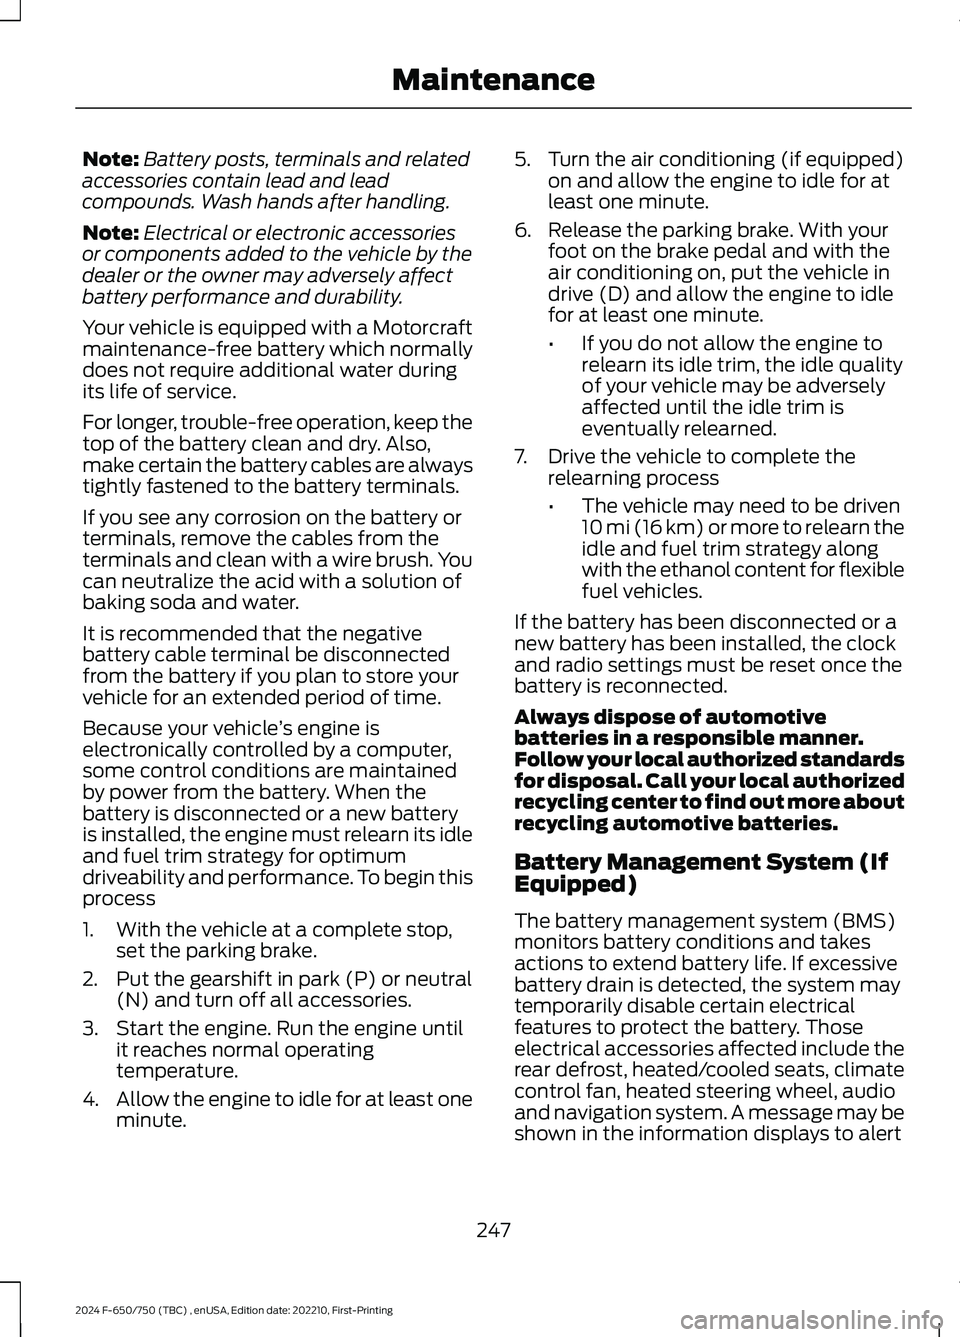
Park on a level surface, set the parkingbrake and activate the hazard flashers.
1.Turn the engine off and block the wheelthat is diagonally opposite of the flattire using a wheel chock.
2.Loosen each wheel lug nut ½ turncounterclockwise, but do not removethem until the wheel is raised off theground.
3.Replace the flat tire with the spare tire,making sure the valve stem is facingoutward on all front and inboard rearwheels. If you are replacing theoutboard wheel, the valve stem mustbe facing inward. Reinstall the lug nutsuntil the wheel is snug against the hub.Do not fully tighten the lug nuts untilthe wheel has been lowered.
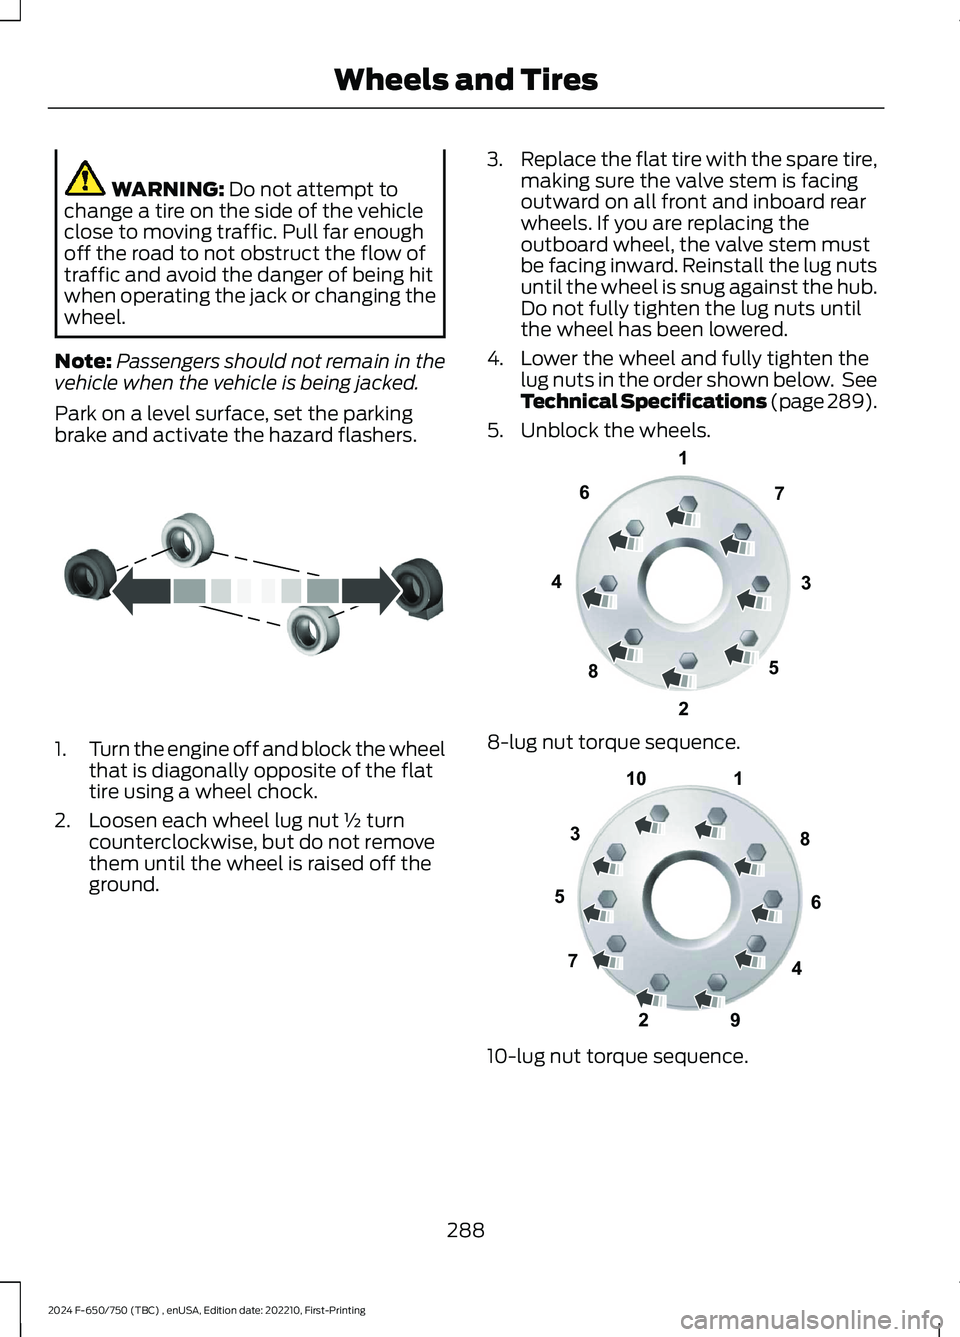
4.Lower the wheel and fully tighten thelug nuts in the order shown below. SeeTechnical Specifications (page 289).
5.Unblock the wheels.
8-lug nut torque sequence.
10-lug nut torque sequence.
288
2024 F-650/750 (TBC) , enUSA, Edition date: 202210, First-PrintingWheels and TiresE142551 13427658E161441 12345678910E169375