steering FORD F750 2002 10.G User Guide
[x] Cancel search | Manufacturer: FORD, Model Year: 2002, Model line: F750, Model: FORD F750 2002 10.GPages: 256, PDF Size: 1.75 MB
Page 151 of 256
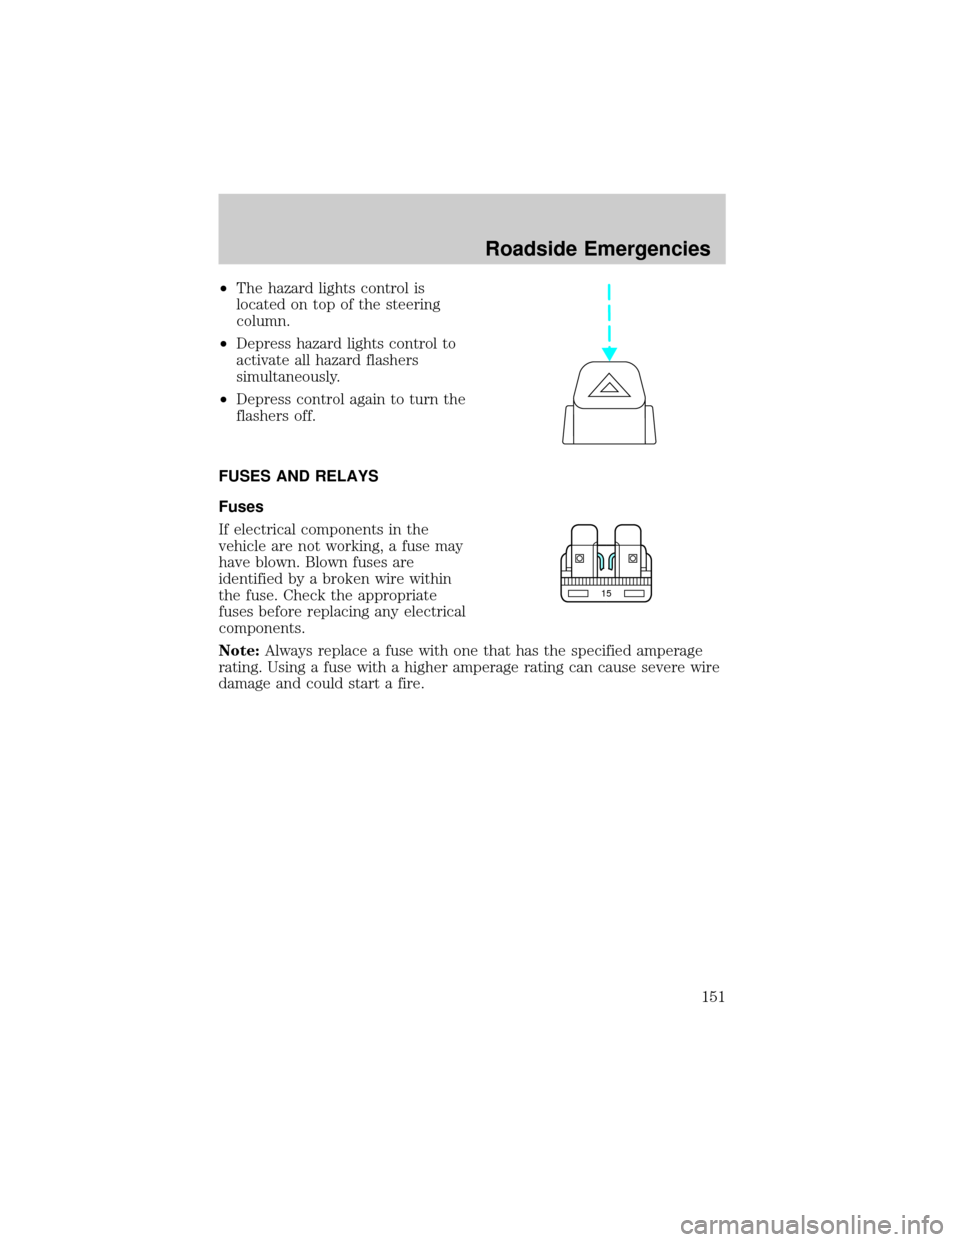
²The hazard lights control is
located on top of the steering
column.
²Depress hazard lights control to
activate all hazard flashers
simultaneously.
²Depress control again to turn the
flashers off.
FUSES AND RELAYS
Fuses
If electrical components in the
vehicle are not working, a fuse may
have blown. Blown fuses are
identified by a broken wire within
the fuse. Check the appropriate
fuses before replacing any electrical
components.
Note:Always replace a fuse with one that has the specified amperage
rating. Using a fuse with a higher amperage rating can cause severe wire
damage and could start a fire.
15
Roadside Emergencies
151
Page 152 of 256

Standard fuse amperage rating and color
COLOR
Fuse
ratingMini
fusesStandard
fusesMaxi
fusesCartridge
maxi
fusesFuse link
cartridge
2A Grey Grey Ð Ð Ð
3A Violet Violet Ð Ð Ð
4A Pink Pink Ð Ð Ð
5A Tan Tan Ð Ð Ð
7.5A Brown Brown Ð Ð Ð
10A Red Red Ð Ð Ð
15A Blue Blue Ð Ð Ð
20A Yellow Yellow Yellow Blue Blue
25A Natural Natural Ð Ð Ð
30A Green Green Green Pink Pink
40A Ð Ð Orange Green Green
50A Ð Ð Red Red Red
60A Ð Ð Blue Ð Yellow
70A Ð Ð Tan Ð Brown
80A Ð Ð Natural Ð Black
Passenger compartment fuse panel
The fuse panel is located below and to the left of the steering wheel by
the brake pedal. Remove the panel cover to access the fuses.
To remove a fuse use the fuse puller tool provided on the fuse panel
cover.
Roadside Emergencies
152
Page 164 of 256
²To tow a vehicle on the front wheels,the steering wheel must be
in the straight ahead position. Secure the steering wheel with a
holding device (such as provided by a towing company).
²To tow a vehicle on the rear wheels,it will be necessary to remove
the drive axles or disconnect the driveshaft. If the drive axles are
removed, the ends of the axle housing must be sealed to prevent the
loss of axle lubricant during towing.
²To tow a vehicle with an inoperative rear axle,the rear wheels
must be raised onto a dolly or tow the vehicle on the front wheels.
²If your vehicle is equipped with tow hooks,chains must be
fastened directly to the tow hooks on the vehicle.
²If your vehicle is not equipped with tow hooks,chains must be
routed under the bottom edge of the bumper with a protection bar to
protect the bumper, and attached to the vehicle chassis. Under no
circumstances is the vehicle to be lifted or towed by attaching chains
directly to the bumper.
Raising the vehicle
Never lift the vehicle by the bumper. When raising the vehicle, attach
chains to or place the jack(s) directly beneath the main structural
members of the vehicle.
Push-starting your vehicle
Avoid attempting to start a vehicle by pushing. Instead, use jumper
cables as described underJump starting your vehiclein this chapter.
Vehicles with an automatic transmission cannot be started by pushing.
Roadside Emergencies
164
Page 178 of 256
Do not use chemical solvents or strong detergents when cleaning
the steering wheel or instrument panel to avoid contamination of
the air bag system.
Cleaning the instrument cluster lens
Wipe the cluster area with a soft, damp cotton towel. Dry the area with a
clean, dry towel.
CLEANING THE INTERIOR FABRIC, CARPETS AND CLOTH SEATS
Remove dust and loose dirt with a vacuum cleaner. Remove light stains
and soil with Extra Strength Upholstery Cleaner (E8AZ-19523±AA).
Never saturate the seat covers with cleaning solution.
Do not use household cleaning products or glass cleaners, which
can stain and discolor the fabric and affect the flame retardent
abilities of the seat materials.
If grease or tar is present on the material, spot-clean the area first with
Spot and Stain Remover (F3AZ-19521±WA). Follow up by recleaning the
area with Extra Strength Upholstery Cleaner (E8AZ-19523±AA).
CLEANING LEATHER SEATS (IF EQUIPPED)
All Ford, Lincoln and Mercury vehicles with leather seating surfaces have
a clear, protective coating over the leather.
To clean the leather seats, simply use a soft cloth with Deluxe Leather
and Vinyl Cleaner (F2AZ-19521±WA). Dry the area with a soft cloth.
It is recommended that you use the Deluxe Leather Care Kit
(F8AZ-19G253±AA), available from your authorized Ford, Lincoln or
Mercury dealer. The mild cleaner and special pad available in the kit
cleans the leather and maintains its natural beauty. For best results,
follow the instructions printed on the cleaner label. Regular cleaning of
your leather upholstery helps maintain its resiliency and color.
Do not use household cleaning products, alcohol solutions,
solvents or cleaners intended for rubber, vinyl and plastics, or
oil/petroleum-based leather conditioners. These products may
cause premature wearing of the clear, protective coating.
Cleaning
178
Page 205 of 256
Also, your driving habits have a significant influence on use of fuel. By
following these suggestions, you can stretch your fuel use:
²Avoid changes in speed as much as possible.
²Anticipate changing traffic conditions. Sudden stops and fast
acceleration waste fuel.
²Avoid extensive idling.
²Do not drive with your foot resting on the brake pedal.
CHECKING AND ADDING POWER STEERING FLUID
Checking power steering fluid level
Check the power steering fluid level using the following procedure. Refer
to the scheduled maintenance guide for the recommended service
intervals. If adding fluid is necessary, use only MERCONtAT F.
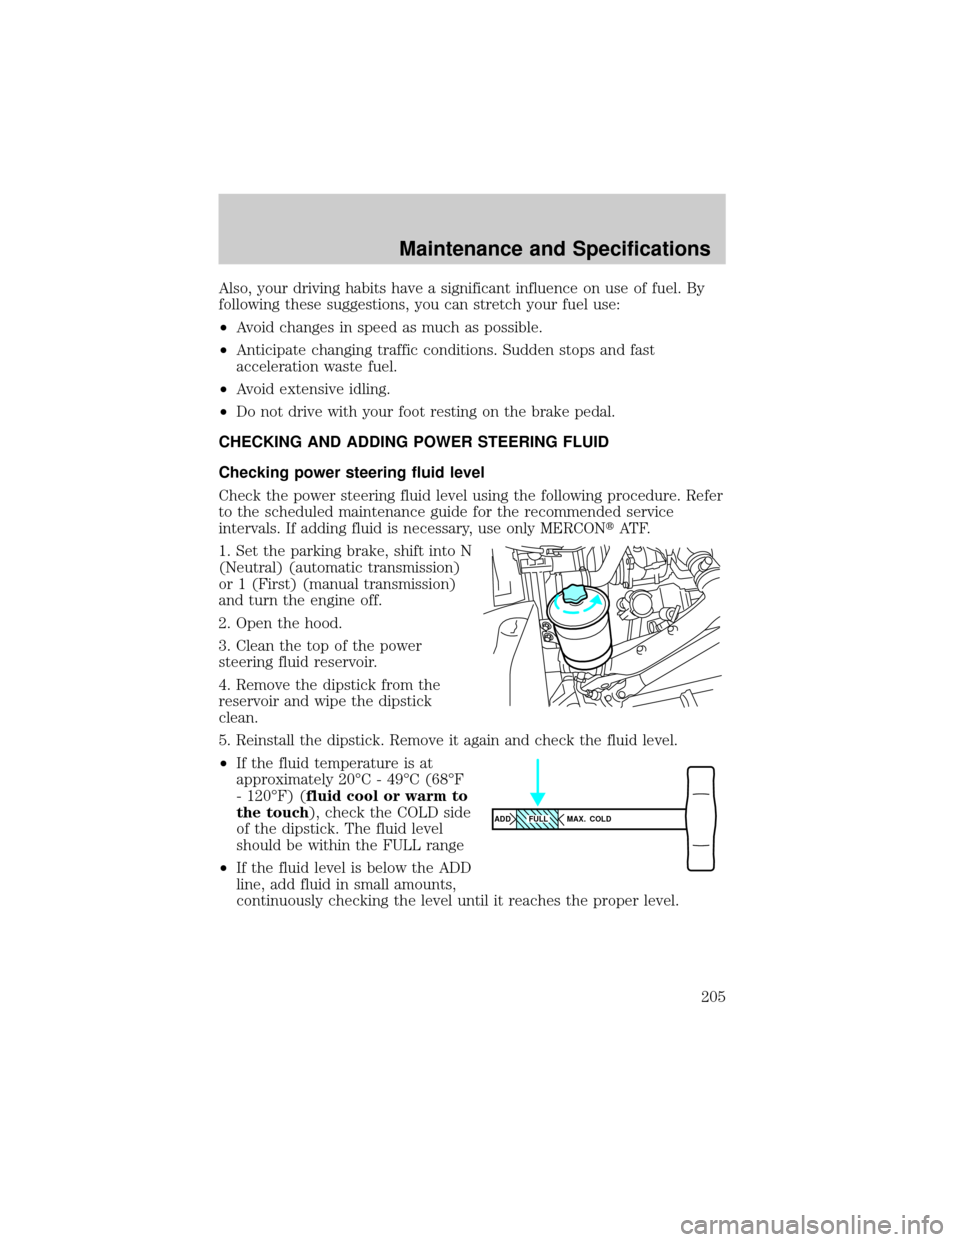
1. Set the parking brake, shift into N
(Neutral) (automatic transmission)
or 1 (First) (manual transmission)
and turn the engine off.
2. Open the hood.
3. Clean the top of the power
steering fluid reservoir.
4. Remove the dipstick from the
reservoir and wipe the dipstick
clean.
5. Reinstall the dipstick. Remove it again and check the fluid level.
²If the fluid temperature is at
approximately 20ÉC - 49ÉC (68ÉF
- 120ÉF) (fluid cool or warm to
the touch), check the COLD side
of the dipstick. The fluid level
should be within the FULL range
²If the fluid level is below the ADD
line, add fluid in small amounts,
continuously checking the level until it reaches the proper level.
ADD MAX. COLDFULL
Maintenance and Specifications
205
Page 206 of 256
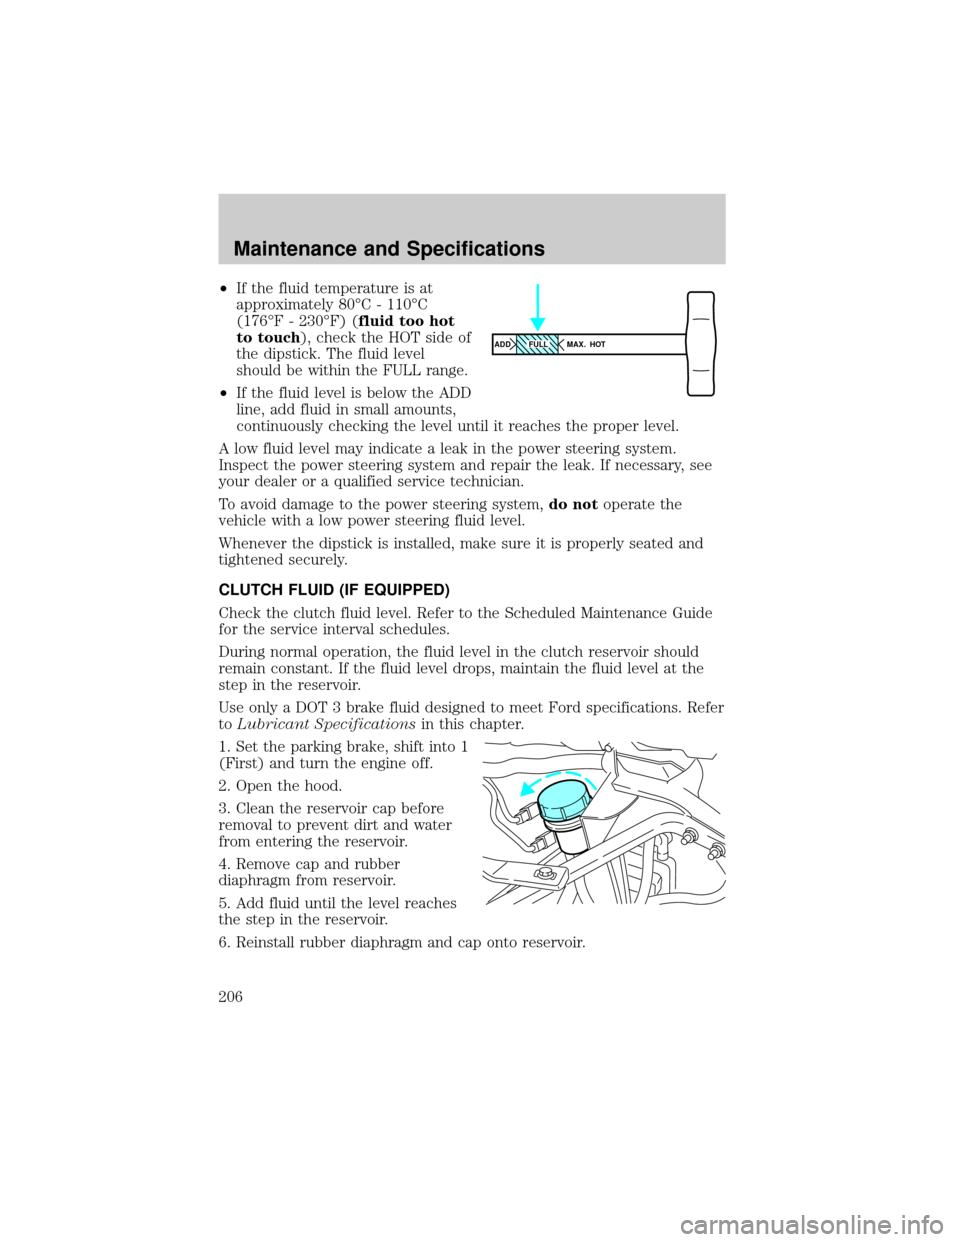
²If the fluid temperature is at
approximately 80ÉC - 110ÉC
(176ÉF - 230ÉF) (fluid too hot
to touch), check the HOT side of
the dipstick. The fluid level
should be within the FULL range.
²If the fluid level is below the ADD
line, add fluid in small amounts,
continuously checking the level until it reaches the proper level.
A low fluid level may indicate a leak in the power steering system.
Inspect the power steering system and repair the leak. If necessary, see
your dealer or a qualified service technician.
To avoid damage to the power steering system,do notoperate the
vehicle with a low power steering fluid level.
Whenever the dipstick is installed, make sure it is properly seated and
tightened securely.
CLUTCH FLUID (IF EQUIPPED)
Check the clutch fluid level. Refer to the Scheduled Maintenance Guide
for the service interval schedules.
During normal operation, the fluid level in the clutch reservoir should
remain constant. If the fluid level drops, maintain the fluid level at the
step in the reservoir.
Use only a DOT 3 brake fluid designed to meet Ford specifications. Refer
toLubricant Specificationsin this chapter.
1. Set the parking brake, shift into 1
(First) and turn the engine off.
2. Open the hood.
3. Clean the reservoir cap before
removal to prevent dirt and water
from entering the reservoir.
4. Remove cap and rubber
diaphragm from reservoir.
5. Add fluid until the level reaches
the step in the reservoir.
6. Reinstall rubber diaphragm and cap onto reservoir.
ADD MAX. HOTFULL
Maintenance and Specifications
206
Page 218 of 256
install a new cap. Refer toTire/Wheel Rim Selection and Inflation
Pressuresor theVehicle Certification Labelin this chapter.
An inflated tire and rim can be very dangerous if improperly
used, serviced or maintained. To avoid serious injury, never
attempt to re-inflate a tire which has been run flat or seriously
under-inflated without first removing the tire from the wheel assembly
for inspection. Do not attempt to add air to tires or replace tires or
wheels without first taking precautions to protect persons and
property.
Refer to the Ford Service Manual or the regulations of the Occupational
Safety and Health Administration (OSHA) for appropriate procedures
and cautions.
Tire inflation pressure must not exceed the recommendations of
the axle, tire and/or wheel rim manufacturer for the specific
load, speed and application. The inflation pressures on the tire sidewall
do not take the wheel rim capabilities into consideration.
Never use a rim of different manufacture or any different size or
type than original rims.
Try to replace tires in pairs on the same axle shaft. Tires larger or
smaller than originally installed may affect the accuracy of the
speedometer. Consult your dealer about the need to change the switch
setting on the back of the speedometer.
Front wheel alignment
If abnormal tire wear or ride and handling characteristics such as vehicle
lead or wander are experienced with properly inflated tires, the front
end alignment should be checked.
Wheel bearing care
Front and rear wheel bearings are adjustable to correct for bearing and
spindle wear. Long bearing life depends upon proper adjustment and
correct lubrication. If bearings are adjusted too tightly (preloaded) they
will overheat and wear rapidly. Loose adjustment will cause pounding
and will contribute to uneven tire wear, steering difficulties and
inefficient brake operation.
Maintenance and Specifications
218
Page 221 of 256

POWER STEERING FLUID CAPACITIES
GVWR Axle application System capacity
11 794/13 608 kg (26
000/30 000 lb.)3 856/4 082 kg (8
000/9 000 lb.)4.3L (4.5 quarts)
14 969 kg (33 000 lb.) 5 443 kg (12 000 lb.) 4.5L (4.7 quarts)
TRANSMISSION REFILL CAPACITIES
Type and make Approximate capacity
5-speed (Eaton FS-4205A)1, 25.4L (5.75 quarts)
5-speed (Eaton FS-5205A)1, 25.9L (6.25 quarts)
6-speed (Eaton FS-5306A and
FS-6306A)
1, 29.2L (9.75 quarts)
7-speed (Spicer ES52-7B and
ES066-7B)
1, 210.4L (11.0 quarts)
Allison AT-545
318.9L (20.0 quarts)
2000/2400 Series-Standard sump 10.0L (10.6 quarts)4
2000/2400 Series-Shallow sump 7.0L (7.4 quarts)5
MD series327.4L (29.0 quarts)
1Quantity shown is nominal; fluid level should be at lower edge of fill
hole.
2Fill plug is located on the right side of the transmission and the drain
plug on the rear of the transmission.
3Fluid level should be checked by your dealer or a qualified service
technician.
4Approximate quantites only, does not include external lines and cooler
hose.
5Approximate quantites only, does not include external lines and cooler
hose.
Maintenance and Specifications
221
Page 223 of 256

Item Ford Part NameFord Part
NumberFord
Specification
Front axle
spindle pins,
steering
linkage, front
and rear
spring shackle
pins, steering
column
U-joints,
steering shaft
slip yoke and
universal joint,
steering shaft
pillow block
bearing,
clutch linkage
fittings.Premium Long
Life GreaseXG-1-C or
XG-1-KESA-M1C75-B
Maintenance and Specifications
223
Page 224 of 256
Item Ford Part NameFord Part
NumberFord
Specification
Bushings,
front wheel
bearings
(grease
packed
type)and
seals, fuel
shut-off
solenoid
linkage, air
brake control
valve, linkage,
treadle hinge
and roller,
transmission
and
transmission
cables, clutch
release
bearing hub,
transmission
shift lever
pivot.Premium Long
Life GreaseXG-1-C or
XG-1-KESA-M1C75-B
Door
weatherstripsSilicone Lubricant F7AZ-19G208-BA
and
F5AZ-19553-AAESR-M13P4-A
Driveshaft
U-joints and
slip splines,
power
steering gear
output shaft.High Temperature
4 x 4 Front Axle
and Wheel
Bearing GreaseE8TZ-19590-A ESA-M1C198-A
Maintenance and Specifications
224