check oil FORD F750 2003 10.G Owners Manual
[x] Cancel search | Manufacturer: FORD, Model Year: 2003, Model line: F750, Model: FORD F750 2003 10.GPages: 248, PDF Size: 2.54 MB
Page 7 of 248
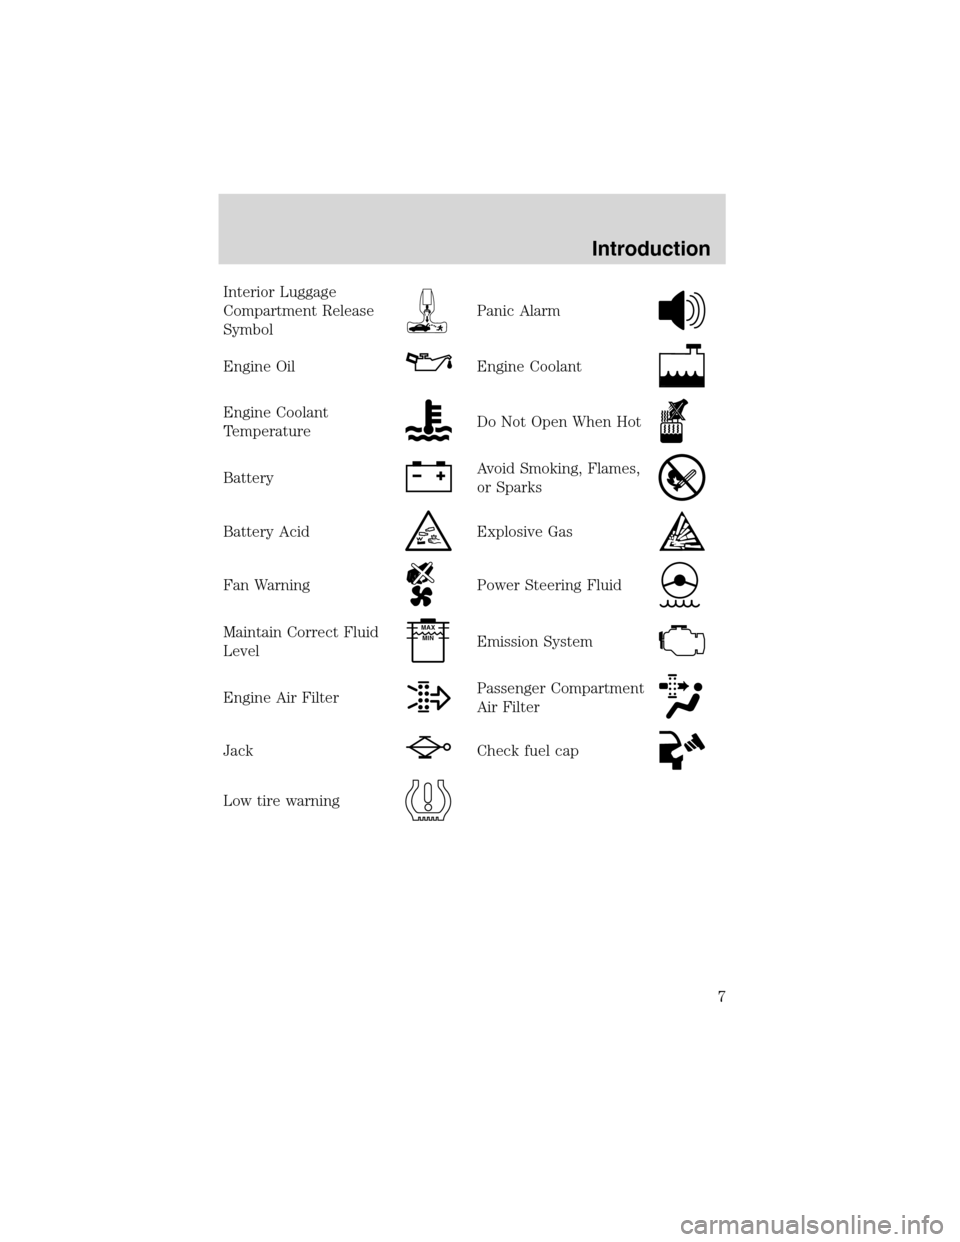
Interior Luggage
Compartment Release
Symbol
Panic Alarm
Engine OilEngine Coolant
Engine Coolant
TemperatureDo Not Open When Hot
BatteryAvoid Smoking, Flames,
or Sparks
Battery AcidExplosive Gas
Fan WarningPower Steering Fluid
Maintain Correct Fluid
LevelMAX
MIN
Emission System
Engine Air FilterPassenger Compartment
Air Filter
JackCheck fuel cap
Low tire warning
Introduction
7
Page 16 of 248
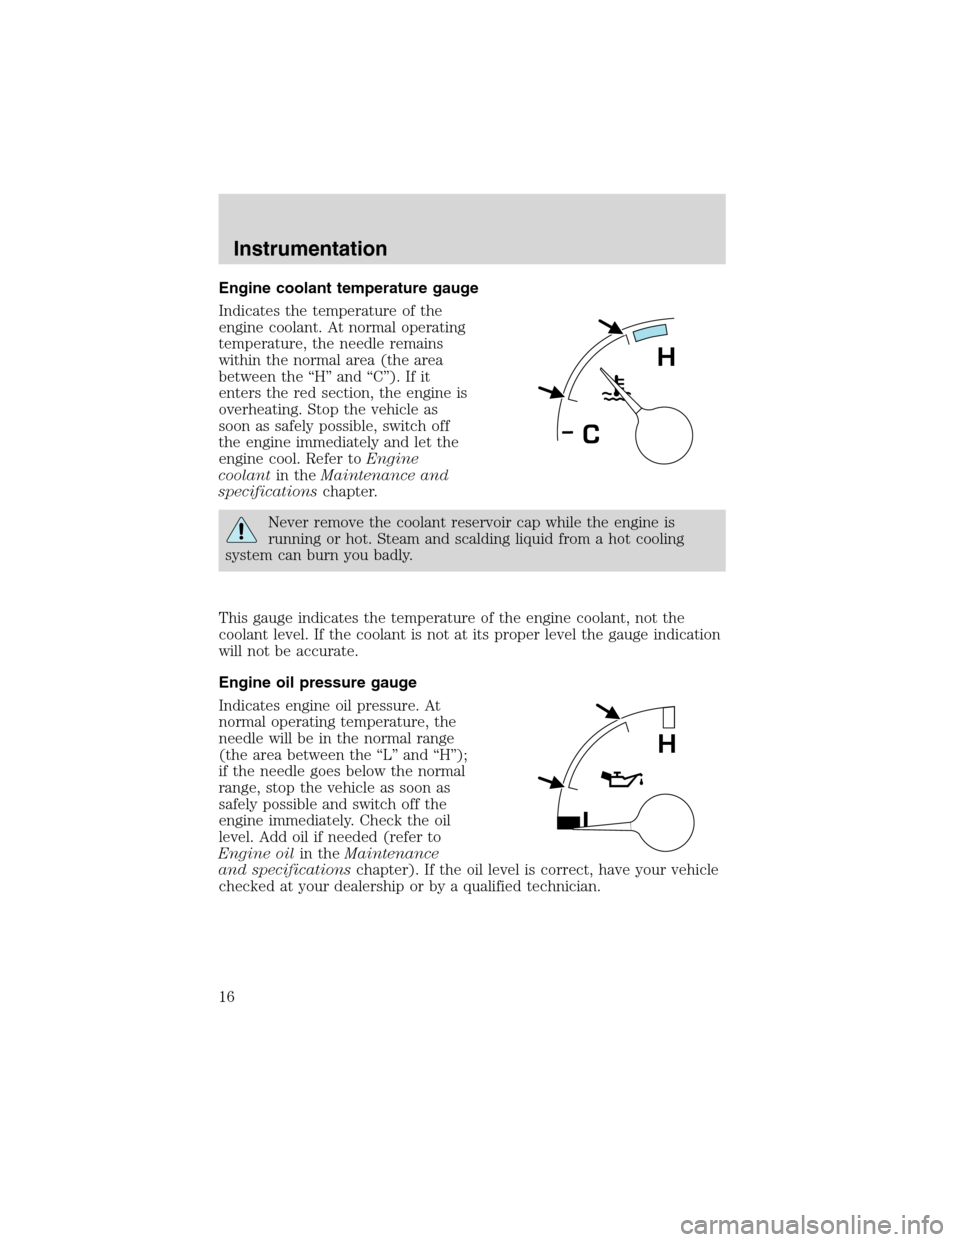
Engine coolant temperature gauge
Indicates the temperature of the
engine coolant. At normal operating
temperature, the needle remains
within the normal area (the area
between the“H”and“C”). If it
enters the red section, the engine is
overheating. Stop the vehicle as
soon as safely possible, switch off
the engine immediately and let the
engine cool. Refer toEngine
coolantin theMaintenance and
specificationschapter.
Never remove the coolant reservoir cap while the engine is
running or hot. Steam and scalding liquid from a hot cooling
system can burn you badly.
This gauge indicates the temperature of the engine coolant, not the
coolant level. If the coolant is not at its proper level the gauge indication
will not be accurate.
Engine oil pressure gauge
Indicates engine oil pressure. At
normal operating temperature, the
needle will be in the normal range
(the area between the“L”and“H”);
if the needle goes below the normal
range, stop the vehicle as soon as
safely possible and switch off the
engine immediately. Check the oil
level. Add oil if needed (refer to
Engine oilin theMaintenance
and specificationschapter). If the oil level is correct, have your vehicle
checked at your dealership or by a qualified technician.
H
C
L
H
Instrumentation
16
Page 111 of 248
To prevent electrical shock, do not use your heater with
ungrounded electrical systems or two-pronged (cheater)
adapters.
Operating the engine
Do not operate the engine at full throttle below peak torque engine
speed (RPM) for more than one minute at a time (peak torque RPM
varies from 1200-1500 RPM depending on engine rated speed).
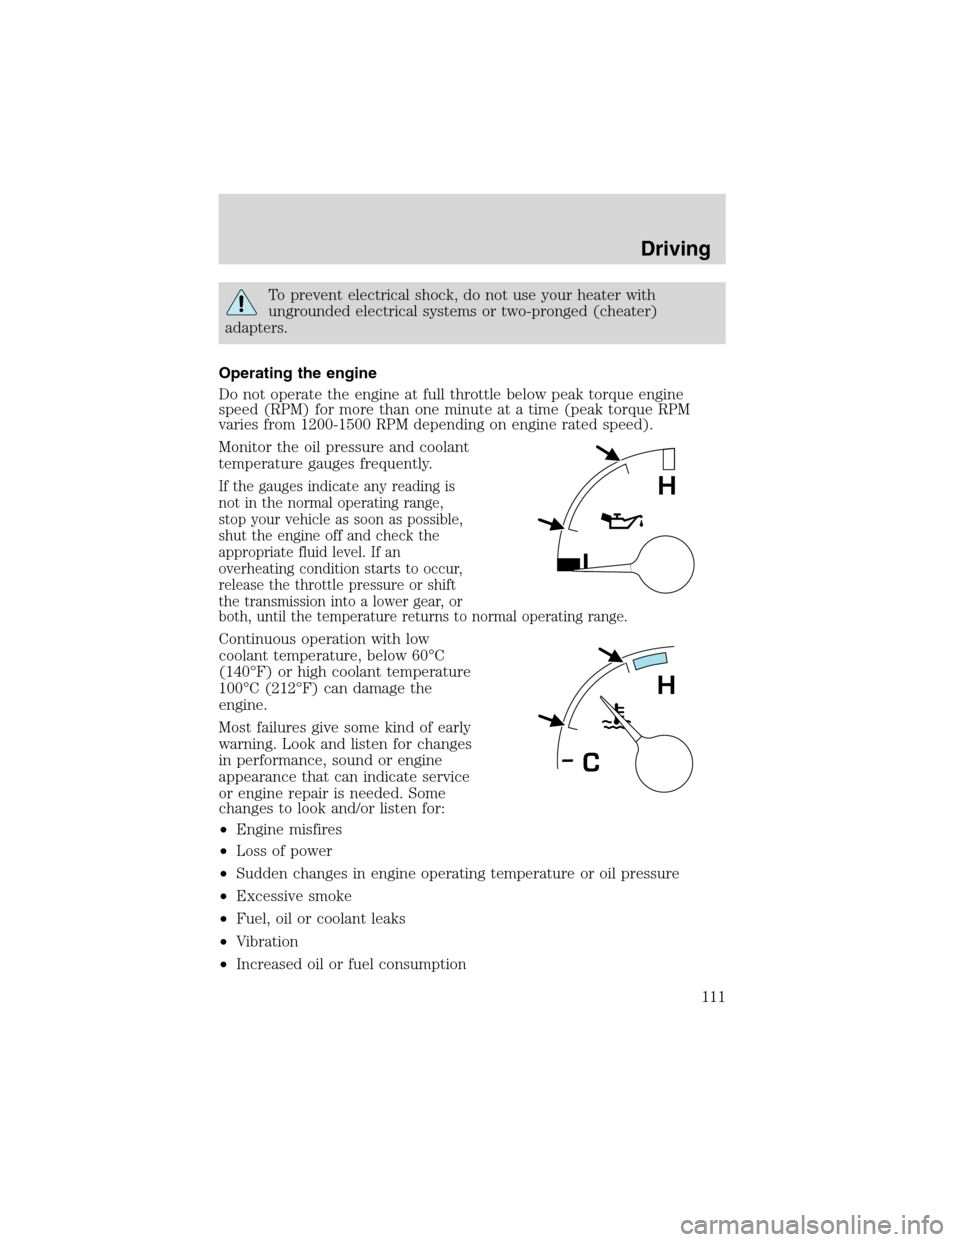
Monitor the oil pressure and coolant
temperature gauges frequently.
If the gauges indicate any reading is
not in the normal operating range,
stop your vehicle as soon as possible,
shut the engine off and check the
appropriate fluid level. If an
overheating condition starts to occur,
release the throttle pressure or shift
the transmission into a lower gear, or
both, until the temperature returns to normal operating range.
Continuous operation with low
coolant temperature, below 60°C
(140°F) or high coolant temperature
100°C (212°F) can damage the
engine.
Most failures give some kind of early
warning. Look and listen for changes
in performance, sound or engine
appearance that can indicate service
or engine repair is needed. Some
changes to look and/or listen for:
•Engine misfires
•Loss of power
•Sudden changes in engine operating temperature or oil pressure
•Excessive smoke
•Fuel, oil or coolant leaks
•Vibration
•Increased oil or fuel consumption
L
H
H
C
Driving
111
Page 112 of 248
Excessive full throttle operation below peak torque RPM will shorten
engine life to overhaul and can cause serious engine damage. Operation
of the engine below peak torque RPM can occur during gear shifting due
to difference of gear ratios.
Engine shutdown system (if equipped)
This system is designed to help prevent engine damage that could result
from operating the engine during a prolonged period of low engine oil
pressure, high engine coolant temperature or low coolant level. If any of
these conditions occur, a warning light will illuminate and a chime will
sound warning the operator that the engine will shutdown in 30 seconds.
This is to allow time for the operator to move the vehicle off the road. If
additional time is required, the engine can be restarted and run each
time for approximately 30 seconds.
Do not attempt to use this restarting feature to drive the vehicle, serious
engine damage could result.
Exhaust fumes
Never idle the engine in closed areas. Never sit in a parked or
stopped vehicle for any amount of time with engine running.
If you ever smell exhaust fumes of any kind inside your vehicle,
have your dealer inspect and fix your vehicle immediately. Do
not drive if you smell exhaust fumes. These fumes are harmful and
could kill you.
In order to guard against fumes entering your vehicle, the exhaust
system and body ventilation system should be checked by a qualified
technician:
•Each time the vehicle is raised for service.
•Whenever a change in exhaust system noise is noted.
•Whenever the vehicle has been damaged by impact from another
vehicle, object or road obstruction.
In order to afford proper operation, all air inlet vents should be kept
clear of snow, leaves and other debris.
If you run the engine while stopped (idled) in an unconfined area, open
the windows at least 2.5 cm (one inch) and adjust the heating or air
conditioning to draw outside air into the vehicle as follows:
•If your vehicle has outside air control vents, open them fully.
Driving
112
Page 180 of 248
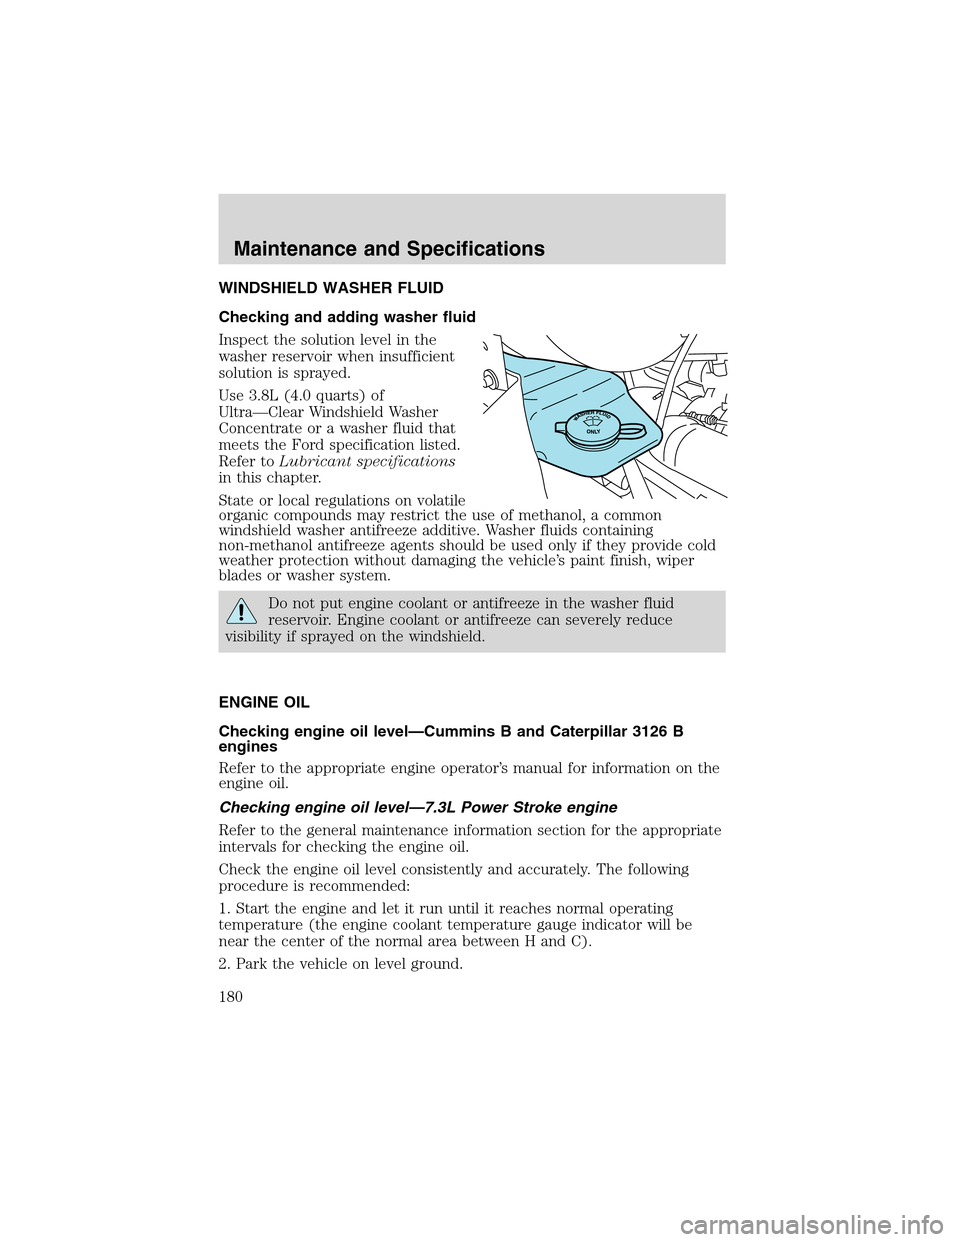
WINDSHIELD WASHER FLUID
Checking and adding washer fluid
Inspect the solution level in the
washer reservoir when insufficient
solution is sprayed.
Use 3.8L (4.0 quarts) of
Ultra—Clear Windshield Washer
Concentrate or a washer fluid that
meets the Ford specification listed.
Refer toLubricant specifications
in this chapter.
State or local regulations on volatile
organic compounds may restrict the use of methanol, a common
windshield washer antifreeze additive. Washer fluids containing
non-methanol antifreeze agents should be used only if they provide cold
weather protection without damaging the vehicle’s paint finish, wiper
blades or washer system.
Do not put engine coolant or antifreeze in the washer fluid
reservoir. Engine coolant or antifreeze can severely reduce
visibility if sprayed on the windshield.
ENGINE OIL
Checking engine oil level—Cummins B and Caterpillar 3126 B
engines
Refer to the appropriate engine operator’s manual for information on the
engine oil.
Checking engine oil level—7.3L Power Stroke engine
Refer to the general maintenance information section for the appropriate
intervals for checking the engine oil.
Check the engine oil level consistently and accurately. The following
procedure is recommended:
1. Start the engine and let it run until it reaches normal operating
temperature (the engine coolant temperature gauge indicator will be
near the center of the normal area between H and C).
2. Park the vehicle on level ground.
Maintenance and Specifications
180
Page 186 of 248
Battery posts, terminals and related accessories contain lead and
lead compounds. Wash hands after handling.
ENGINE COOLANT
Checking engine coolant
The concentration and level of engine coolant should be checked at the
mileage intervals listed in the general maintenance information section.
The coolant concentration should be maintained at 50/50 coolant and
water, which equates to a freeze point of -36°C (-34°F). Coolant
concentration testing is possible with a hydrometer or antifreeze tester
(such as the Rotunda Battery and Antifreeze Tester, 014–R1060). The
level of coolant should be maintained at the“cold full”of“cold fill range”
level in the coolant reservoir. If the level falls below, add coolant per the
instructions in theAdding Engine Coolantsection.
Your vehicle was factory-filled with a 50/50 engine coolant and water
concentration. If the concentration of coolant falls below 40% or above
60%, the engine parts could become damaged or not work properly.A
50–50 mixture of coolant and water provides the following:
•freeze protection down to -36°C (-34°F).
•boiling protection up to 129°C (265°F).
•protection against rust and other forms of corrosion.
•enables calibrated guages to work properly.
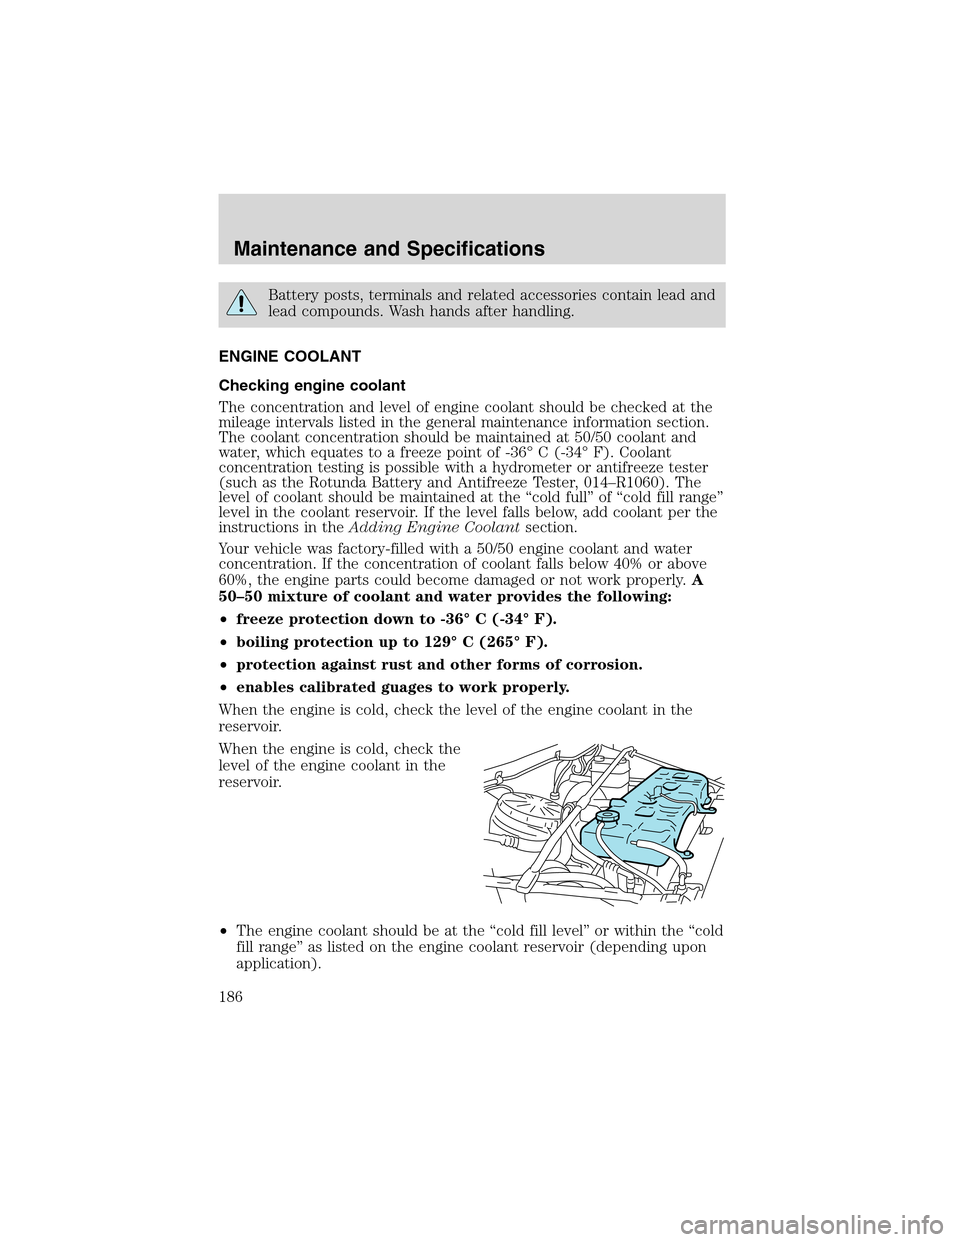
When the engine is cold, check the level of the engine coolant in the
reservoir.
When the engine is cold, check the
level of the engine coolant in the
reservoir.
•The engine coolant should be at the“cold fill level”or within the“cold
fill range”as listed on the engine coolant reservoir (depending upon
application).
Maintenance and Specifications
186
Page 189 of 248
1. Before you begin, turn the engine off and let it cool.
2. When the engine is cool, wrap a thick cloth around the coolant
pressure relief cap on the coolant reservoir (an opaque plastic bottle).
Slowly turn cap counterclockwise (left) until pressure begins to release.
3. Step back while the pressure releases.
4. When you are sure that all the pressure has been released, use the
cloth to turn it counterclockwise and remove the cap.
5. Fill the coolant reservoir slowly with the proper coolant mixture (see
above), to within the“cold fill range”or the“cold full”level on the
reservoir. If you removed the radiator cap in an overflow system, fill the
radiator until the coolant is visible and radiator is almost full.
6. Replace the cap. Turn until tightly installed. (Cap must be tightly
installed to prevent coolant loss.)
After any coolant has been added, check the coolant concentration see
Checking Engine Coolant section). If the concentration is not 50/50
(protection to–34°F/–36°C), drain some coolant and adjust the
concentration. It may take several drains and additions to obtain a 50/50
coolant concentration.
Whenever coolant has been added, the coolant level in the coolant
reservoir should be checked the next few times you drive the vehicle. If
necessary, add enough 50/50 concentration of engine coolant and
distilled water to bring the liquid level to the proper level.
If you have to add more than 1.0 liter (1.0 quart) of engine coolant per
month, have your dealer check the engine cooling system. Your cooling
system may have a leak. Operating an engine with a low level of coolant
can result in engine overheating and possible engine damage.
Replacing coolant
A coolant mixture of 50% coolant concentrate and 50% water is
recommended to maintain best overall performance. To avoid damaging
the engine and radiator, the coolant concentrate should not exceed 60%.
When refilling the coolant system either as part of the regular
maintenance (refer to the general maintenance information section), or
due to service performed, adhere to the following instructions:
1. Drain and flush the cooling system to remove dirt deposits, oil, rust
particles.
Note:
When filling the system with Motorcraft Premium Engine Coolant
(green-colored) or equivalent meeting Ford specification ESE-M97B44–A, a
supplemental coolant additive is required. Refer toAdding Coolantsection
Maintenance and Specifications
189
Page 196 of 248
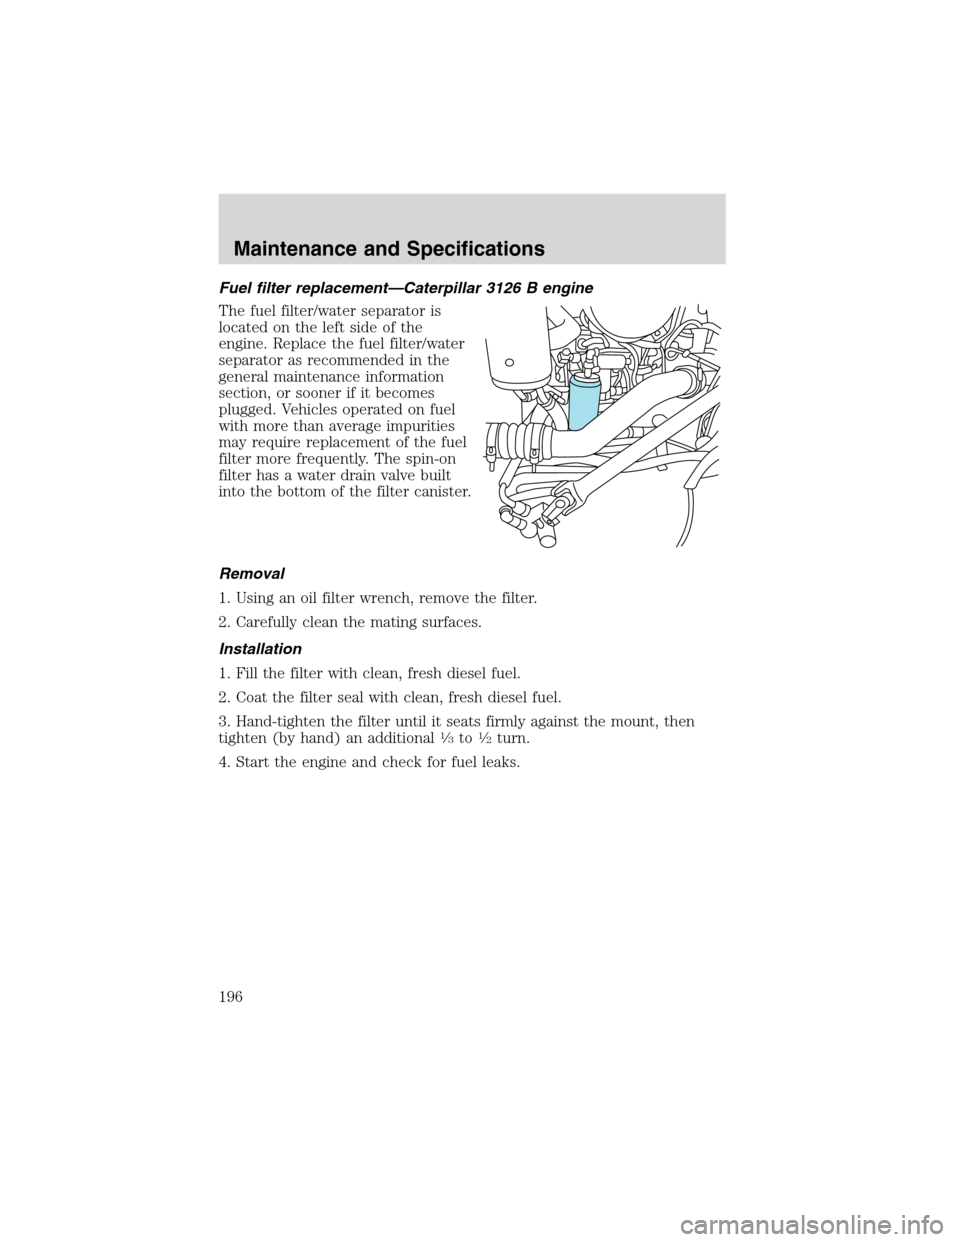
Fuel filter replacement—Caterpillar 3126 B engine
The fuel filter/water separator is
located on the left side of the
engine. Replace the fuel filter/water
separator as recommended in the
general maintenance information
section, or sooner if it becomes
plugged. Vehicles operated on fuel
with more than average impurities
may require replacement of the fuel
filter more frequently. The spin-on
filter has a water drain valve built
into the bottom of the filter canister.
Removal
1. Using an oil filter wrench, remove the filter.
2. Carefully clean the mating surfaces.
Installation
1. Fill the filter with clean, fresh diesel fuel.
2. Coat the filter seal with clean, fresh diesel fuel.
3. Hand-tighten the filter until it seats firmly against the mount, then
tighten (by hand) an additional
1⁄3to1⁄2turn.
4. Start the engine and check for fuel leaks.
Maintenance and Specifications
196
Page 210 of 248
11. Inspect the air induction system for loose fitting, damaged or missing
components and repair as necessary.
SERVICING YOUR WHEELS AND TIRES
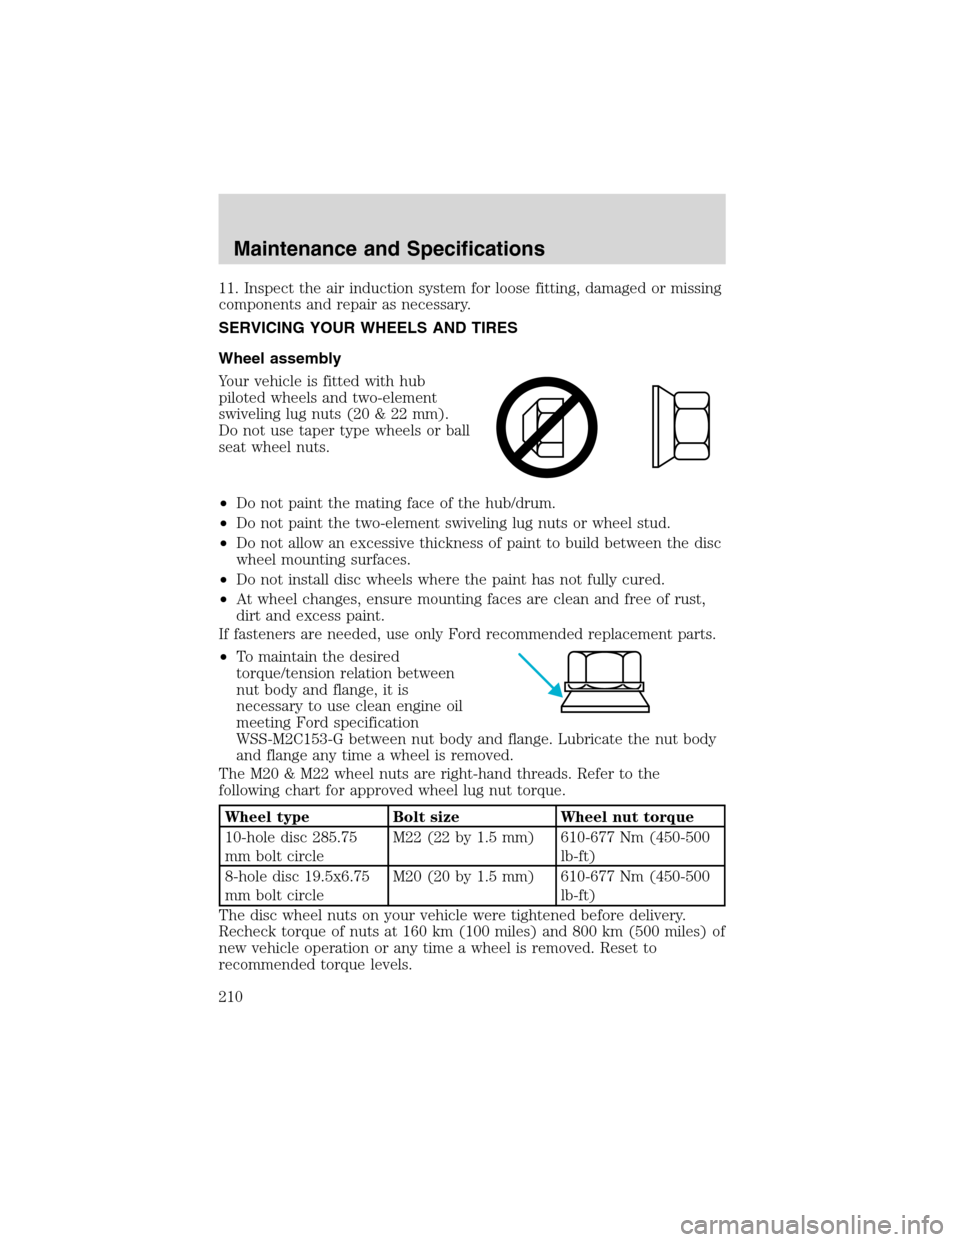
Wheel assembly
Your vehicle is fitted with hub
piloted wheels and two-element
swiveling lug nuts (20 & 22 mm).
Do not use taper type wheels or ball
seat wheel nuts.
•Do not paint the mating face of the hub/drum.
•Do not paint the two-element swiveling lug nuts or wheel stud.
•Do not allow an excessive thickness of paint to build between the disc
wheel mounting surfaces.
•Do not install disc wheels where the paint has not fully cured.
•At wheel changes, ensure mounting faces are clean and free of rust,
dirt and excess paint.
If fasteners are needed, use only Ford recommended replacement parts.
•To maintain the desired
torque/tension relation between
nut body and flange, it is
necessary to use clean engine oil
meeting Ford specification
WSS-M2C153-G between nut body and flange. Lubricate the nut body
and flange any time a wheel is removed.
The M20 & M22 wheel nuts are right-hand threads. Refer to the
following chart for approved wheel lug nut torque.
Wheel type Bolt size Wheel nut torque
10-hole disc 285.75
mm bolt circleM22 (22 by 1.5 mm) 610-677 Nm (450-500
lb-ft)
8-hole disc 19.5x6.75
mm bolt circleM20 (20 by 1.5 mm) 610-677 Nm (450-500
lb-ft)
The disc wheel nuts on your vehicle were tightened before delivery.
Recheck torque of nuts at 160 km (100 miles) and 800 km (500 miles) of
new vehicle operation or any time a wheel is removed. Reset to
recommended torque levels.
Maintenance and Specifications
210
Page 213 of 248
An inflated tire and rim can be very dangerous if improperly
used, serviced or maintained. To avoid serious injury, never
attempt to re-inflate a tire which has been run flat or seriously
under-inflated without first removing the tire from the wheel assembly
for inspection. Do not attempt to add air to tires or replace tires or
wheels without first taking precautions to protect persons and
property.
Refer to the Ford Service Manual or the regulations of the Occupational
Safety and Health Administration (OSHA) for appropriate procedures
and cautions.
Tire inflation pressure must not exceed the recommendations of
the axle, tire and/or wheel rim manufacturer for the specific
load, speed and application. The inflation pressures on the tire sidewall
do not take the wheel rim capabilities into consideration.
Never use a rim of different manufacture or any different size or
type than original rims.
Try to replace tires in pairs on the same axle shaft. Tires larger or
smaller than originally installed may affect the accuracy of the
speedometer. Consult your dealer about the need to change the switch
setting on the back of the speedometer.
Front wheel alignment
If abnormal tire wear or ride and handling characteristics such as vehicle
lead or wander are experienced with properly inflated tires, the front
end alignment should be checked.
Wheel bearing care
Front and rear wheel bearings are adjustable to correct for bearing and
spindle wear. Long bearing life depends upon proper adjustment and
correct lubrication. If bearings are adjusted too tightly (preloaded) they
will overheat and wear rapidly. Loose adjustment will cause pounding
and will contribute to uneven tire wear, steering difficulties and
inefficient brake operation.
Refer to the Ford Service Manual applicable to your vehicle for proper
tightening procedures and torque specifications.
Periodically check the oil level on oil filled front bearing hubs. If
necessary, add oil through the filler plug so the oil level is between the
Maintenance and Specifications
213