lock FORD F750 2005 11.G User Guide
[x] Cancel search | Manufacturer: FORD, Model Year: 2005, Model line: F750, Model: FORD F750 2005 11.GPages: 272, PDF Size: 1.5 MB
Page 53 of 272
Changing the wiper blades
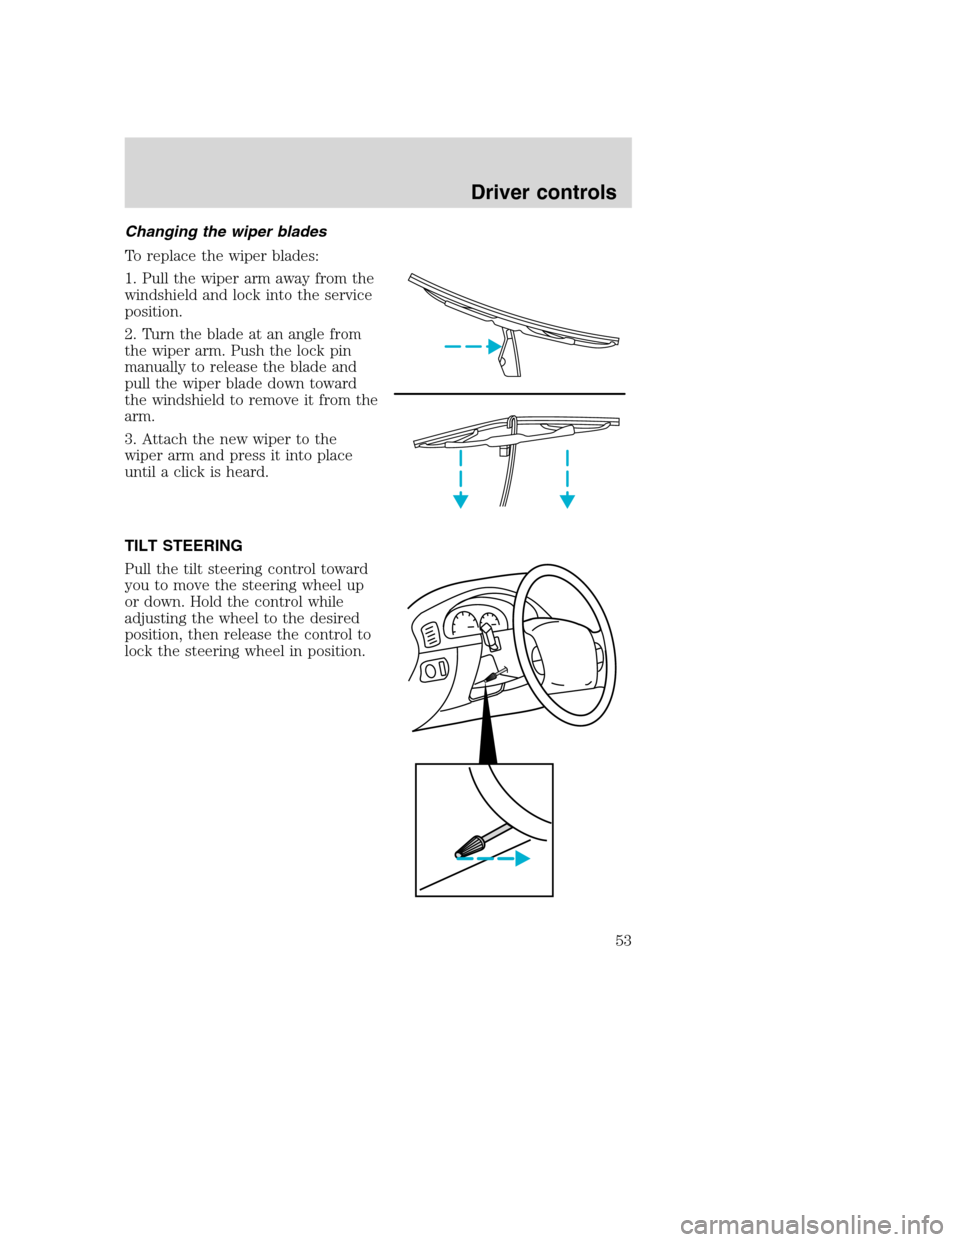
To replace the wiper blades:
1. Pull the wiper arm away from the
windshield and lock into the service
position.
2. Turn the blade at an angle from
the wiper arm. Push the lock pin
manually to release the blade and
pull the wiper blade down toward
the windshield to remove it from the
arm.
3. Attach the new wiper to the
wiper arm and press it into place
until a click is heard.
TILT STEERING
Pull the tilt steering control toward
you to move the steering wheel up
or down. Hold the control while
adjusting the wheel to the desired
position, then release the control to
lock the steering wheel in position.
Driver controls
53
Page 56 of 272
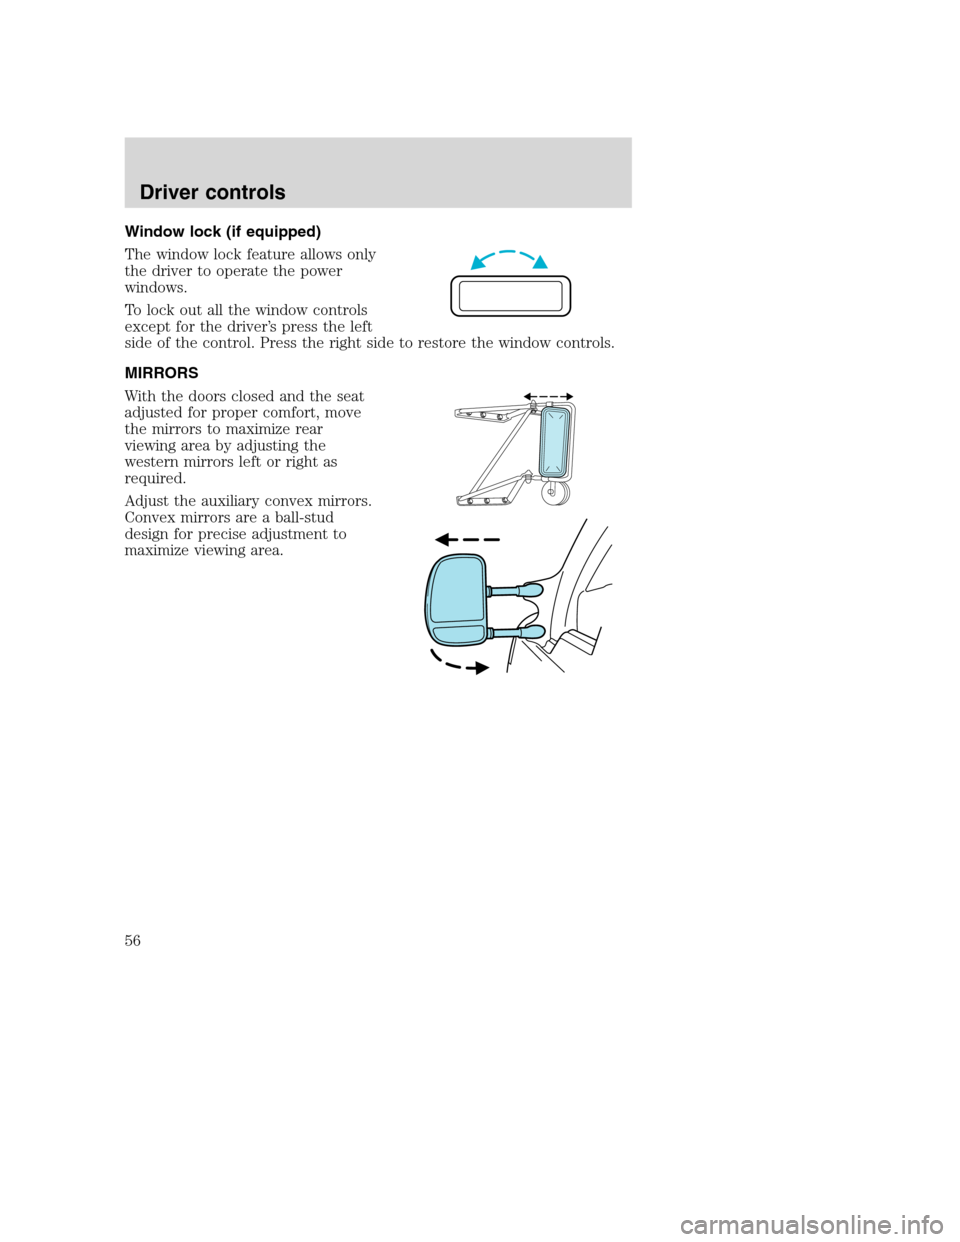
Window lock (if equipped)
The window lock feature allows only
the driver to operate the power
windows.
To lock out all the window controls
except for the driver’s press the left
side of the control. Press the right side to restore the window controls.
MIRRORS
With the doors closed and the seat
adjusted for proper comfort, move
the mirrors to maximize rear
viewing area by adjusting the
western mirrors left or right as
required.
Adjust the auxiliary convex mirrors.
Convex mirrors are a ball-stud
design for precise adjustment to
maximize viewing area.
Driver controls
56
Page 57 of 272
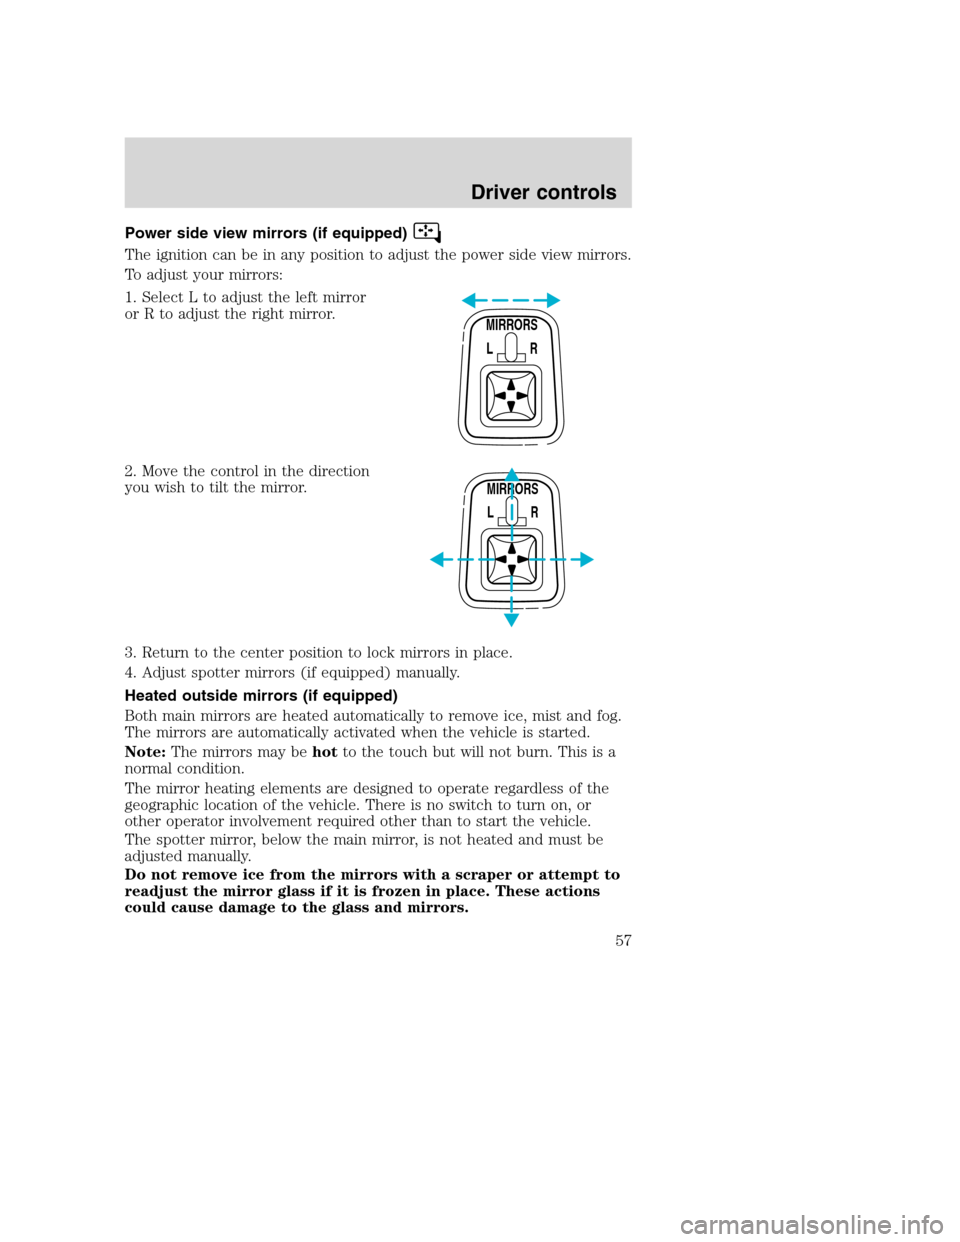
Power side view mirrors (if equipped)
The ignition can be in any position to adjust the power side view mirrors.
To adjust your mirrors:
1. Select L to adjust the left mirror
or R to adjust the right mirror.
2. Move the control in the direction
you wish to tilt the mirror.
3. Return to the center position to lock mirrors in place.
4. Adjust spotter mirrors (if equipped) manually.
Heated outside mirrors (if equipped)
Both main mirrors are heated automatically to remove ice, mist and fog.
The mirrors are automatically activated when the vehicle is started.
Note:The mirrors may behotto the touch but will not burn. This is a
normal condition.
The mirror heating elements are designed to operate regardless of the
geographic location of the vehicle. There is no switch to turn on, or
other operator involvement required other than to start the vehicle.
The spotter mirror, below the main mirror, is not heated and must be
adjusted manually.
Do not remove ice from the mirrors with a scraper or attempt to
readjust the mirror glass if it is frozen in place. These actions
could cause damage to the glass and mirrors.
MIRRORS
L R
MIRRORS
L R
Driver controls
57
Page 64 of 272

KEYS
The key operates all locks on your vehicle. In case of loss, replacement
keys are available from your dealer.
You should always carry a second key with you in a safe place in case
you require it in an emergency.
POWER DOOR LOCKS (IF EQUIPPED)
Press U to unlock all doors and L to
lock all doors.
U L
Locks and security
Locks and security
64
Page 70 of 272

REAR FLIP-UP SEAT (IF EQUIPPED)
Flipping-up the seat
The rear seatback has a split 60/40
seat. Each seat cushion can be
flipped-up into the seatback
position.
1. Pull the control to release the
seat cushion.
2. Rotate the seat cushion up until it
locks into the vertical storage
position.
Returning the seat to horizontal position
Always latch the vehicle seat to the floor, whether the seat is
occupied or empty. If not latched, the seat may cause injury
during a sudden stop.
Make sure the safety belts are accessible and not trapped behind
the seat when the seat is returned to its horizontal position.
1. Pull the control on the side of the seat to release the seat cushion
from its storage position.
2. Push the seat cushion down until it locks into the horizontal position.
SAFETY RESTRAINTS
Safety restraints precautions
Always drive and ride with your seatback upright and the lap
belt snug and low across the hips.
To reduce the risk of injury, make sure children sit where they
can be properly restrained.
All occupants of the vehicle, including the driver, should always
properly wear their safety belts.
Seating and safety restraints
70
Page 72 of 272
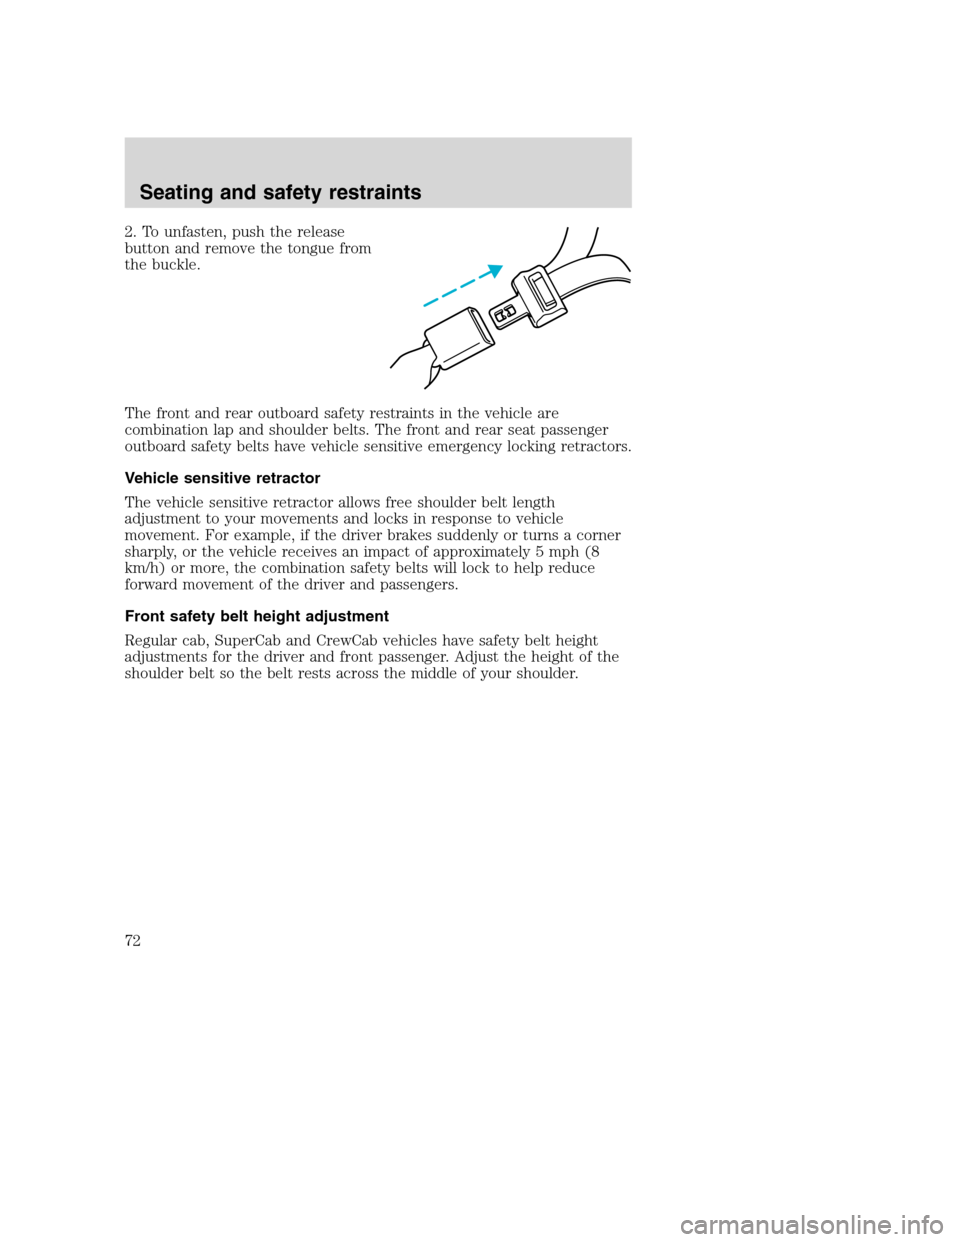
2. To unfasten, push the release
button and remove the tongue from
the buckle.
The front and rear outboard safety restraints in the vehicle are
combination lap and shoulder belts. The front and rear seat passenger
outboard safety belts have vehicle sensitive emergency locking retractors.
Vehicle sensitive retractor
The vehicle sensitive retractor allows free shoulder belt length
adjustment to your movements and locks in response to vehicle
movement. For example, if the driver brakes suddenly or turns a corner
sharply, or the vehicle receives an impact of approximately 5 mph (8
km/h) or more, the combination safety belts will lock to help reduce
forward movement of the driver and passengers.
Front safety belt height adjustment
Regular cab, SuperCab and CrewCab vehicles have safety belt height
adjustments for the driver and front passenger. Adjust the height of the
shoulder belt so the belt rests across the middle of your shoulder.
Seating and safety restraints
72
Page 74 of 272
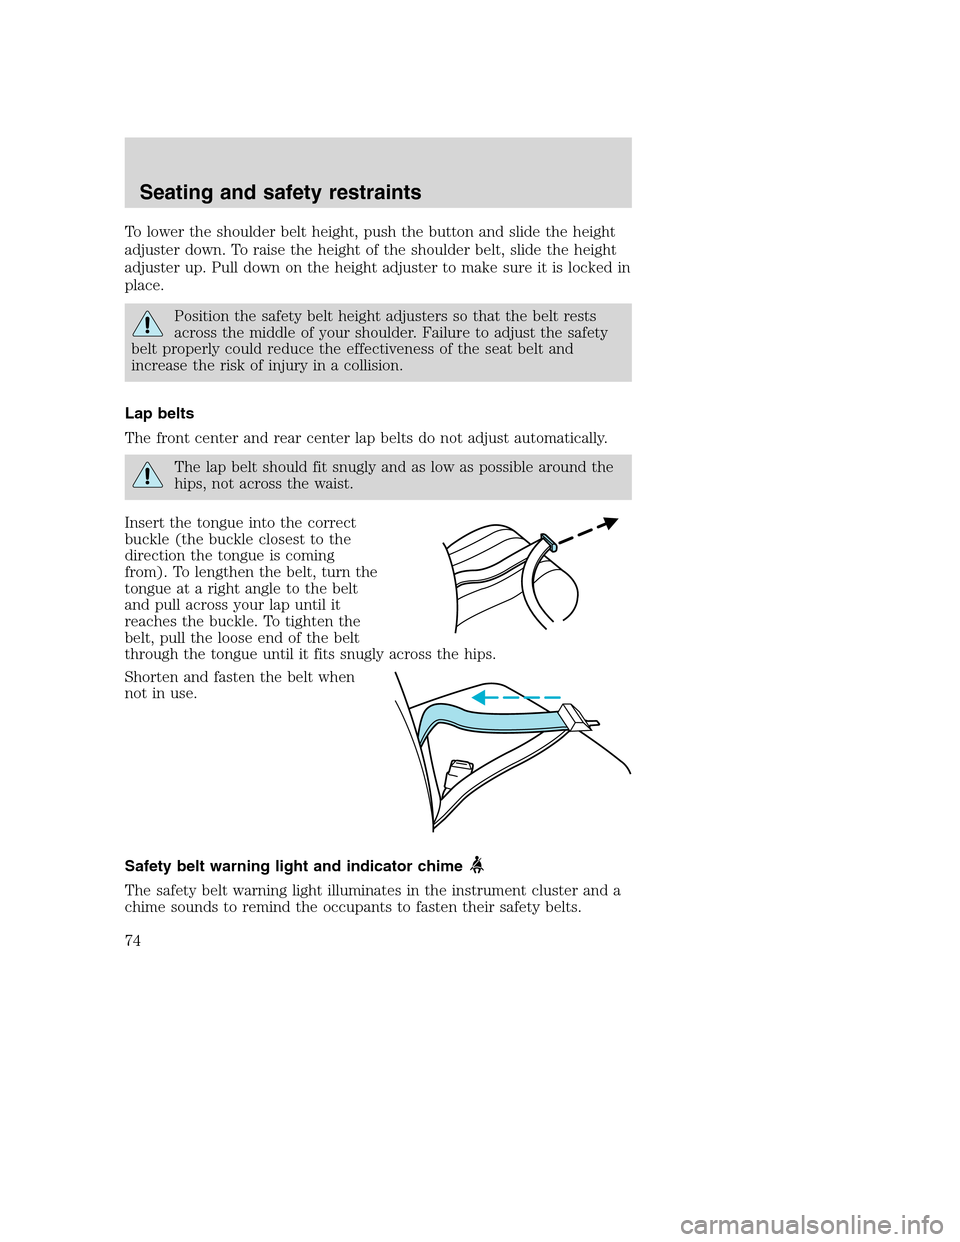
To lower the shoulder belt height, push the button and slide the height
adjuster down. To raise the height of the shoulder belt, slide the height
adjuster up. Pull down on the height adjuster to make sure it is locked in
place.
Position the safety belt height adjusters so that the belt rests
across the middle of your shoulder. Failure to adjust the safety
belt properly could reduce the effectiveness of the seat belt and
increase the risk of injury in a collision.
Lap belts
The front center and rear center lap belts do not adjust automatically.
The lap belt should fit snugly and as low as possible around the
hips, not across the waist.
Insert the tongue into the correct
buckle (the buckle closest to the
direction the tongue is coming
from). To lengthen the belt, turn the
tongue at a right angle to the belt
and pull across your lap until it
reaches the buckle. To tighten the
belt, pull the loose end of the belt
through the tongue until it fits snugly across the hips.
Shorten and fasten the belt when
not in use.
Safety belt warning light and indicator chime
The safety belt warning light illuminates in the instrument cluster and a
chime sounds to remind the occupants to fasten their safety belts.
Seating and safety restraints
74
Page 85 of 272

3. Buckle the seat belt. Push down
on the child seat and pull on the
shoulder portion of the belt to snug
the lap belt. Hold the lap and
shoulder belts next to the tongue
and unbuckle the belt.
4. Install a locking clip over both lap
and shoulder belt portions next to
the sliding tongue. Rebuckle the
belt. Obtain the locking clip kit (part
number FO3Z-5461248–A) at no
charge from an authorized Ford or
Lincoln-Mercury dealer.
5. Before placing the child in the seat, forcibly tilt the seat forward and
back to make sure the seat is securely held in place. To check this, grab
the seat at the belt path and attempt to move it side to side and forward
and back. There should be no more than one inch of movement for
proper installation.
6. If the child seat is not tight enough, unbuckle the seat belt, move the
tongue and locking clip to shorten the lap portion and push down hard
on the child seat while you rebuckle the belt.
7. Check to make sure the child seat is properly secured before each
use.
Seating and safety restraints
85
Page 89 of 272
•If your vehicle is equipped with a water-fuel separator, drain it daily.
Fill the fuel tank at the end of daily operation to prevent condensation
in the fuel system.
•Make sure you use proper cold weather engine oil and that it is at its
proper level.
•At temperatures of–4°F(–20°C) or below, it is recommended that you
use a crankcase-mounted coolant heater to improve cold engine
starting.
•If operating in arctic temperatures of -20°F(–29°C) or lower, consult
your truck dealer for information about special cold weather
equipment and precautions.
Note:Idling in cold weather will not heat the engine to its normal
operating temperature. Long periods of idling in cold weather can cause
a buildup of heavy deposits of carbon and rust on valve stems causing
them to stick which, in turn, can cause valvetrain damage.
The following cold weather idling guidelines must be followed:
•Avoid idling the engine for more than 10 minutes at a time.
•Use a minimum of 45 Cetane Diesel fuel or use Cetane Index
improvers from a reputable manufacturer.
•Maintain a minimum idle of 1250 RPM by using the hand throttle.
Always make sure that the parking brake is applied and the
transmission is in neutral before applying the hand throttle.
•Maintain the engine cooling system properly.
•Do not shut the engine down after an extensive idling period (10
minutes or more). Drive the vehicle under load for several miles at
normal operating temperatures to burn off any accumulated carbon
and varnish.
•Consider using an engine block heater, approved winter fronts and/or
radiator shutters where conditions warrant.
Winter fronts
The use of winter fronts, or other air-restrictive devices mounted in front
of the radiator on vehicles with chassis-mounted charge air coolers, are
not recommended unless extremely cold weather conditions exist. Air
flow restriction can cause high exhaust temperatures, power loss,
excessive fan usage and a reduction in fuel economy. If you must use a
winter front, the device should have a permanent opening of at least 120
sq in. (774 sq. cm) directly in line with the fan hub.
Driving
89
Page 92 of 272
Backing up
To reduce the risk of the possibility of personal injury while
backing the vehicle, always be sure your vehicle’s path is clear.
Before backing your vehicle, be sure you can do so safely. If anything
behind the cab limits your view, do not rely on mirrors alone to assure
that your intended path is clear. If other people are in the vicinity, have
someone standing well behind your vehicle and outside of your intended
path (visible through an exterior mirror) guide you as you back up.
Although OSHA or some governmental regulations may require the use
of an electrical or mechanical back-up alarm to warn bystanders, such an
alarm does not assure that the intended path is clear. When in doubt, get
out of the vehicle and visually check the intended path is clear; back-up
slowly as to allow others time to move, if necessary.
If an electrical back-up alarm is installed, it should be connected to the
back-up lamp circuit.
Parking your vehicle
Always use the parking brake. When parking on a grade, block the
wheels and turn the front wheels to one side so that if the vehicle rolls,
the front tires will act against the curb to stop the vehicle. The front
wheels will be more effective at stopping a rolling vehicle than the rear
wheels.
When parking your vehicle, do not leave the transmission in
gear; if the key is in the ON position and the vehicle rolls, the
engine could start. Failure to follow these instructions could result in
an unattended vehicle moving, possibly causing personal injury or
property damage.
Driving through water
If driving through deep or standing water is unavoidable, proceed very
slowly especially if the depth is not known. Never drive through water
that is higher than the bottom of the hubs (for trucks) or the bottom of
the wheel rims (for cars). Traction or brake capability may be limited
and your vehicle may stall. Water may also enter your engine’s air intake
and severely damage your engine, drive axles or the transmisison
(through the breather ports).
Once through the water, always dry the brakes by moving your vehicle
slowly while applying light pressure on the brake pedal. Wet brakes do
not stop the vehicle as quickly as dry brakes.
Driving
92