automatic transmission FORD F750 2011 12.G Owner's Manual
[x] Cancel search | Manufacturer: FORD, Model Year: 2011, Model line: F750, Model: FORD F750 2011 12.GPages: 290, PDF Size: 1.96 MB
Page 145 of 290
TWO-SPEED REAR AXLE (IF EQUIPPED)
A two-speed rear axle allows the
driver to select a LO range for
greater pulling power and a HI
range for greater road speed and
fuel economy. These ranges can also
be used to provide additional steps
between transmission shifts when
driving on steep grades and/or fuel
economy may be factors.
Note:Do not shift between ranges
when the speed control is on.
WARNING:Never shift a two-speed axle when descending a
steep grade as this may cause loss of vehicle control and result
in personal injury.
Axle shifting
Manual transmissions:
•To downshift,select the next lower gear, release and press the
accelerator pedal rapidly, or while holding the accelerator pedal down,
release and engage the clutch rapidly.Note:The clutch method is
recommended when driving at slower speeds.
•To upshift,keep the accelerator pedal down, select the next higher
gear, release the accelerator and pause until the axle upshifts.Note:
De-clutch for smoother axle upshifts when driving at slower speeds.
Automatic transmissions:
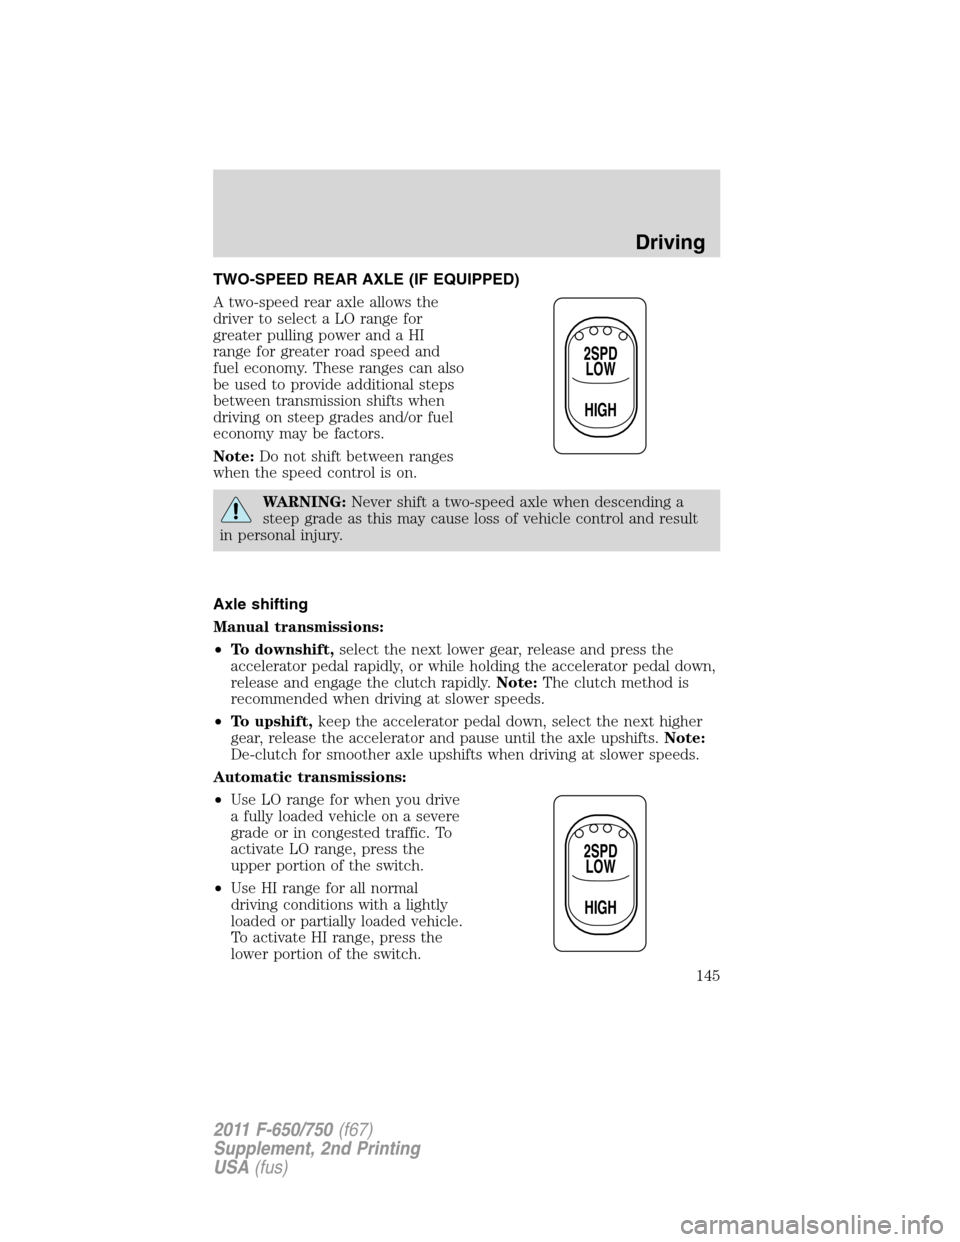
•Use LO range for when you drive
a fully loaded vehicle on a severe
grade or in congested traffic. To
activate LO range, press the
upper portion of the switch.
•Use HI range for all normal
driving conditions with a lightly
loaded or partially loaded vehicle.
To activate HI range, press the
lower portion of the switch.
2SPD
LOW
HIGH
2SPD
LOW
HIGH
Driving
145
2011 F-650/750(f67)
Supplement, 2nd Printing
USA(fus)
Page 146 of 290
Note:You cannot split-shift with an automatic transmission. Also,
downshifting above 40 mph (64 km/h) may result in transmission or axle
damage.
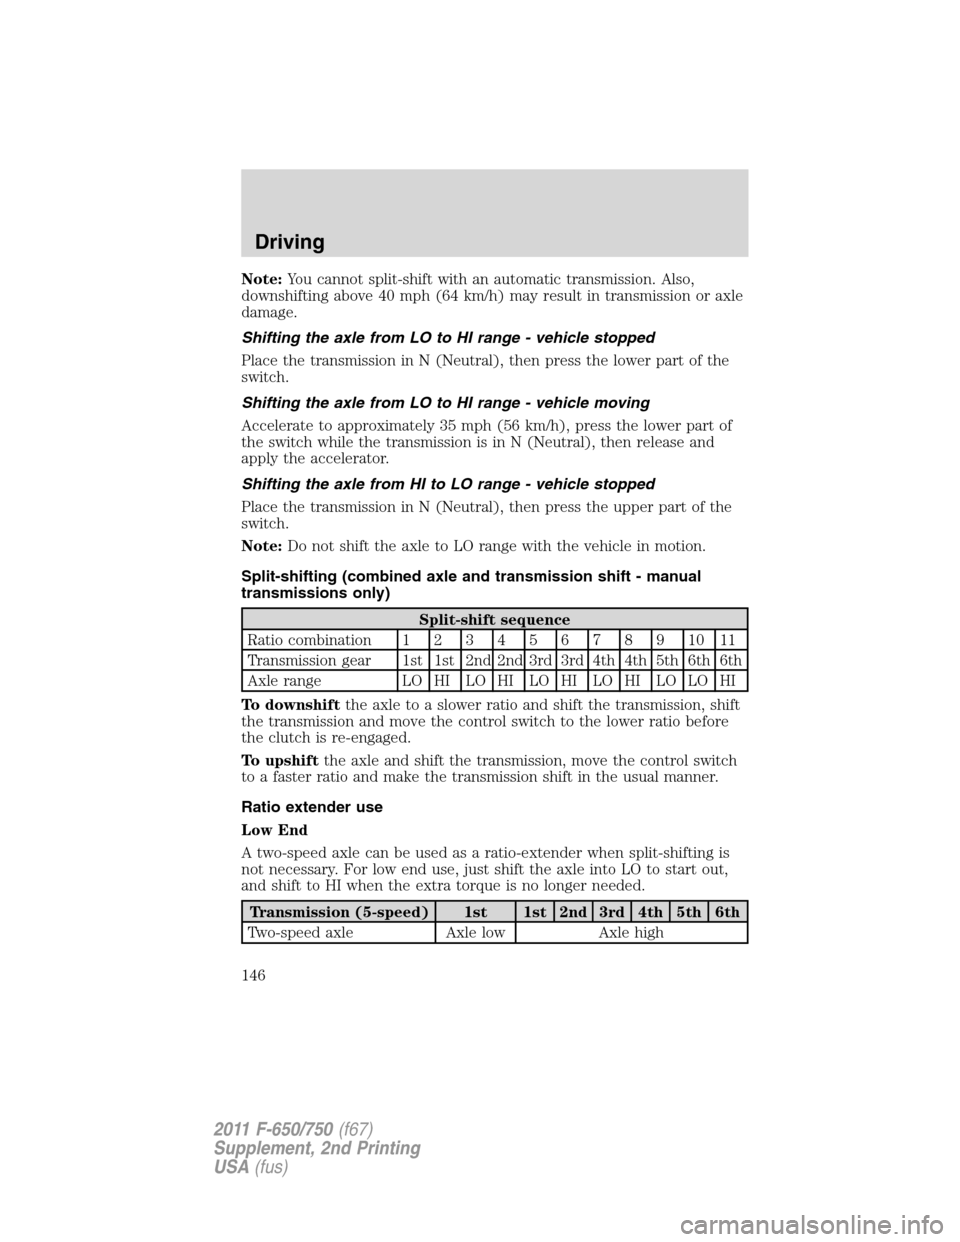
Shifting the axle from LO to HI range - vehicle stopped
Place the transmission in N (Neutral), then press the lower part of the
switch.
Shifting the axle from LO to HI range - vehicle moving
Accelerate to approximately 35 mph (56 km/h), press the lower part of
the switch while the transmission is in N (Neutral), then release and
apply the accelerator.
Shifting the axle from HI to LO range - vehicle stopped
Place the transmission in N (Neutral), then press the upper part of the
switch.
Note:Do not shift the axle to LO range with the vehicle in motion.
Split-shifting (combined axle and transmission shift - manual
transmissions only)
Split-shift sequence
Ratio combination1234567891011
Transmission gear 1st 1st 2nd 2nd 3rd 3rd 4th 4th 5th 6th 6th
Axle range LO HI LO HI LO HI LO HI LO LO HI
To downshiftthe axle to a slower ratio and shift the transmission, shift
the transmission and move the control switch to the lower ratio before
the clutch is re-engaged.
To upshiftthe axle and shift the transmission, move the control switch
to a faster ratio and make the transmission shift in the usual manner.
Ratio extender use
Low End
A two-speed axle can be used as a ratio-extender when split-shifting is
not necessary. For low end use, just shift the axle into LO to start out,
and shift to HI when the extra torque is no longer needed.
Transmission (5-speed) 1st 1st 2nd 3rd 4th 5th 6th
Two-speed axle Axle low Axle high
Driving
146
2011 F-650/750(f67)
Supplement, 2nd Printing
USA(fus)
Page 149 of 290

Model Maximum
GVWR - lb (kg)Maximum
GCWR
F-650 Pro-Loader (Kick-Up
Frame)20500–26000
(9299–11792)*
F-650 Pro-Loader (Straight
Frame)/F-650 Straight Frame20500–29000
(9299–13154)*
F-750 25999–37000
(11793–16783)*
* Specific GCWR and maximum trailer weight applicable to a given
F–650/750 model is dependent on many variables including
transmission capability. Check with your sales consultant for the exact
rating on your vehicle.
Preparing to tow
Use the proper equipment for towing a trailer and make sure it is
properly attached to your vehicle. See your dealer or a reliable trailer
dealer if you require assistance.
Hitches
Do not use hitches that clamp onto the vehicle’s bumper or attach to the
axle. You must distribute the load in your trailer so that 10–15% of the
total weight of the trailer is on the tongue.
Safety chains
Always connect the trailer’s safety chains to the frame or hook retainers
of the vehicle hitch. To connect the trailer’s safety chains, cross the
chains under the trailer tongue and allow slack for turning corners.
If you use a rental trailer, follow the instructions that the rental agency
gives to you.
Do not attach safety chains to the bumper.
Trailer brakes
Electric brakes and manual, automatic or surge-type trailer brakes are
safe if installed properly and adjusted to the manufacturer’s
specifications. The trailer brakes must meet local and Federal
regulations.
Driving
149
2011 F-650/750(f67)
Supplement, 2nd Printing
USA(fus)
Page 150 of 290
WARNING:Do not connect a trailer’s hydraulic brake system
directly to your vehicle’s brake system. Your vehicle may not
have enough braking power and your chances of having a collision
greatly increase.
Trailer lamps
Trailer lamps are required on most towed vehicles. Your vehicle may be
equipped with one of two possible trailer wiring designs. Make sure all
running lights, brake lights, turn signals and hazard lights are working.
See your dealer or trailer rental agency for proper instructions and
equipment for hooking up trailer lamps.
Driving while you tow
When towing a trailer:
•Do not drive faster than 70 mph (113 km/h) during the first 500 miles
(800 km) of trailer towing and don’t make full-throttle starts.
•Turn off the speed control. The speed control may shut off
automatically when you are towing on long, steep grades.
•Use a lower gear to eliminate excessive shifting and assist in
transmission cooling.
•Allow more distance for stopping with a trailer attached; anticipate
stops and brake gradually.
Servicing after towing
If you tow a trailer for long distances, your vehicle will require more
frequent service intervals. Refer to theScheduled Maintenance Guide
chapter for more information.
Trailer towing tips
•Practice turning, stopping and backing up before starting on a trip to
get the feel of the vehicle trailer combination. When turning, make
wider turns so the trailer wheels will clear curbs and other obstacles.
•Allow more distance for stopping with a trailer attached.
•If you are driving down a long or steep hill, shift to a lower gear. Do
not apply the brakes continuously, as they may overheat and become
less effective.
•The trailer tongue weight should be 10–15% of the loaded trailer
weight.
Driving
150
2011 F-650/750(f67)
Supplement, 2nd Printing
USA(fus)
Page 151 of 290
•If you will be towing a trailer frequently in hot weather, hilly
conditions, at GCW, or any combination of these factors, consider
refilling your rear axle with synthetic gear lube if not already so
equipped. Refer toLubricant specificationsin theMaintenance and
Specificationschapter for the lubricant specification. Remember that
regardless of the rear axle lube used, do not tow a trailer for the first
500 miles (800 km) of a new vehicle, and that the first 500 miles
(800 km) of towing be done at no faster than 70 mph (112 km/h) with
no full throttle starts.
•After you have traveled 50 miles (80 km), thoroughly check your
hitch, electrical connections and trailer wheel lug nuts.
•To aid in engine/transmission cooling and A/C efficiency during hot
weather while stopped in traffic, place the gearshift lever in P (Park)
(if available on your automatic transmission) or N (Neutral) (manual
transmissions and automatic transmissions without a P [Park]
position).
•Vehicles with trailers should not be parked on a grade. If you must
park on a grade, place wheel chocks under the trailer’s wheels.
FIFTH-WHEEL OPERATION
WARNING:Failure to follow the fifth-wheel manufacturer’s
instructions for hooking and unhooking as well as sliding the
fifth-wheel could result in an accident, personal injury or death.
WARNING:When the tractor and trailer are parked unattended,
the trailer brake hand control should never be used to apply the
brake, since air may leak from the system, allowing vehicle movement,
resulting in possible property damage, personal injury or death.
Before hook-up, make sure:
•The fifth-wheel jaws are fully opened.
•The fifth-wheel is fully tilted back to prevent body damage when the
tractor is backed under a trailer.
•The trailer wheels are blocked and the trailer spring brakes are
adjusted and applied. Never chase a trailer.
•The brake hoses and light cords are clear of the fifth-wheel.
Driving
151
2011 F-650/750(f67)
Supplement, 2nd Printing
USA(fus)
Page 162 of 290
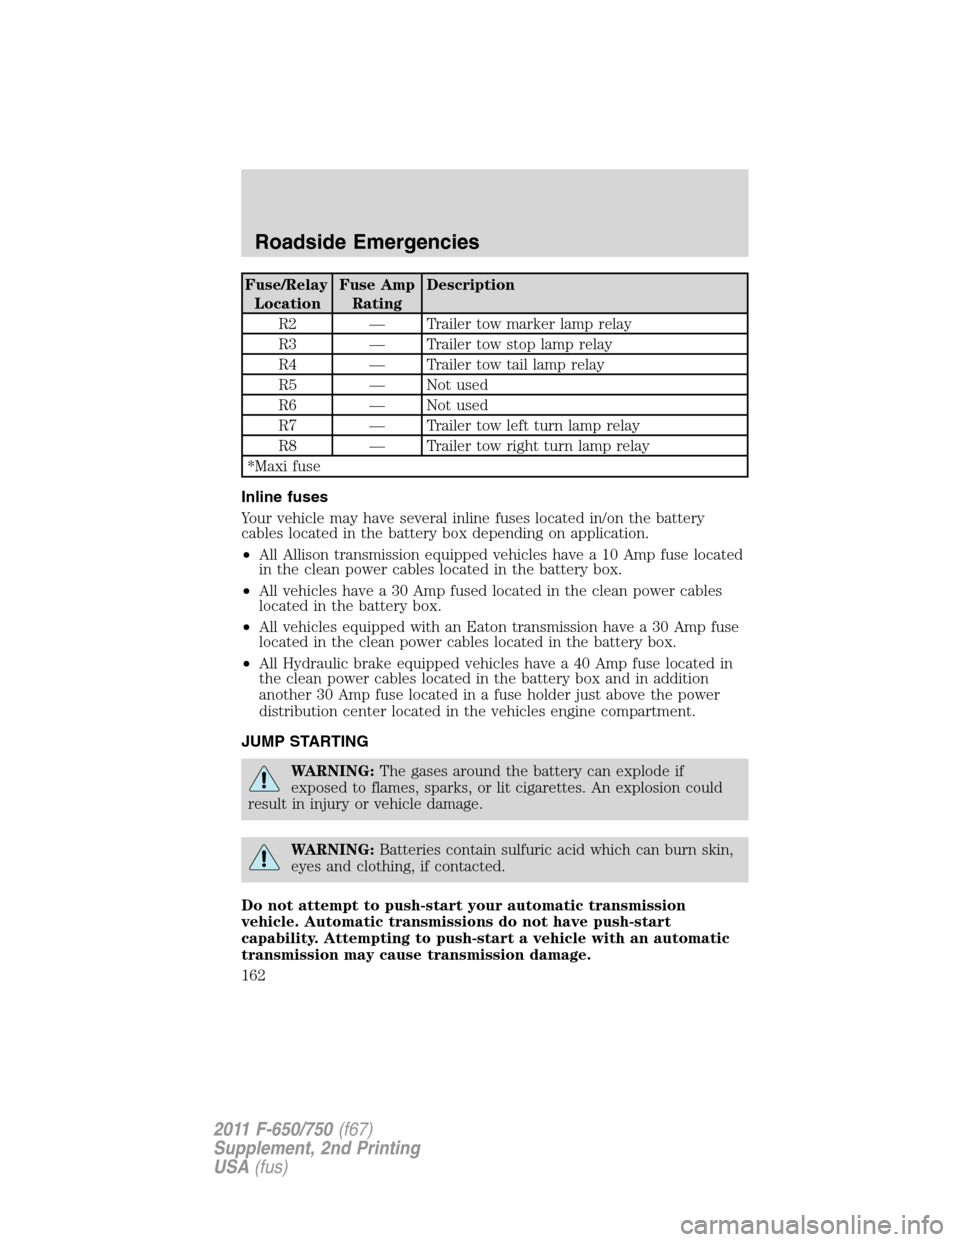
Fuse/Relay
LocationFuse Amp
RatingDescription
R2 — Trailer tow marker lamp relay
R3 — Trailer tow stop lamp relay
R4 — Trailer tow tail lamp relay
R5 — Not used
R6 — Not used
R7 — Trailer tow left turn lamp relay
R8 — Trailer tow right turn lamp relay
*Maxi fuse
Inline fuses
Your vehicle may have several inline fuses located in/on the battery
cables located in the battery box depending on application.
•All Allison transmission equipped vehicles have a 10 Amp fuse located
in the clean power cables located in the battery box.
•All vehicles have a 30 Amp fused located in the clean power cables
located in the battery box.
•All vehicles equipped with an Eaton transmission have a 30 Amp fuse
located in the clean power cables located in the battery box.
•All Hydraulic brake equipped vehicles have a 40 Amp fuse located in
the clean power cables located in the battery box and in addition
another 30 Amp fuse located in a fuse holder just above the power
distribution center located in the vehicles engine compartment.
JUMP STARTING
WARNING:The gases around the battery can explode if
exposed to flames, sparks, or lit cigarettes. An explosion could
result in injury or vehicle damage.
WARNING:Batteries contain sulfuric acid which can burn skin,
eyes and clothing, if contacted.
Do not attempt to push-start your automatic transmission
vehicle. Automatic transmissions do not have push-start
capability. Attempting to push-start a vehicle with an automatic
transmission may cause transmission damage.
Roadside Emergencies
162
2011 F-650/750(f67)
Supplement, 2nd Printing
USA(fus)
Page 191 of 290

To open the hood:
1. Set the parking brake, shift into N (Neutral) (automatic transmission)
or 1 (First) (manual transmission) and turn the engine off.
2. Lift upward on the bottom of
each latch.
3. Pull the bottom of each latch
away from the fender.
4. Tilt the hood forward until
stopped by the retaining cables.
Maintenance and Specifications
191
2011 F-650/750(f67)
Supplement, 2nd Printing
USA(fus)
Page 212 of 290

1. Bring the vehicle to a complete stop on level ground and safely off the
road with the exhaust system away from people, flammable materials,
vapors or structures. Ford recommends that you perform a walk-around
to check before commencing parked regeneration.
2. If your vehicle is equipped with an automatic transmission and a
steering column shift lever, place transmission in P (Park). Otherwise,
place the transmission in N (Neutral).
3. Remove feet from the accelerator pedal and clutch pedal (if
equipped).
4. Set the parking brake.
5.Within 5 seconds of setting the parking brake,remove foot from
the service brake pedal.
The engine speed may increase slightly. To allow parked regeneration to
continue uninterrupted:
1. The vehicle must remain parked
2. The transmission must remain in P (Park) or N (Neutral) (as
previously described in Step 2).
3. The accelerator pedal, service brake pedal, and clutch pedal (if
equipped) must not be pressed
4. The parking brake must remain set
On average (depending on filter level and other factors), the process will
take 20–30 minutes to complete. The DPF lamp will turn off when the
process is complete. Repeat Steps 1–5, if parked regeneration is
interrupted.
To discontinue parked regeneration
Press any of the floor pedals to discontinue parked regeneration.
Diesel particulate filter maintenance and service
The DPF is designed to retain a relatively large amount of residual ash
and provide many miles and hours of maintenance-free operation. At
some point, generally beyond 150,000 miles (240,000 km) or 5,000 hours
of operation (whichever comes first), the DPF will require professional
cleaning to remove the accumulated ash
The exact number of miles or hours of operation will vary greatly
depending upon vehicle/engine loading and operating conditions, ash
content of the engine oil, and quality of the diesel fuel used in your
truck. Adhering to your engine manufacturer’s recommended oil and fuel
Maintenance and Specifications
212
2011 F-650/750(f67)
Supplement, 2nd Printing
USA(fus)
Page 214 of 290

Cooling System
•Check the fan for damage to blades; replace, if damaged, with the
recommended parts. Inspect for fan to shroud interference, and any
damage to shroud such as cracks and holes.
•The fan ratio should not be changed and the fan spacer dimensions
and positions should not be altered.
•Inspect the fan clutch for proper operation, make sure that the fan is
disengaged when cooling of the engine is not required.
•Check for proper operation of radiator shutters, if equipped. The
shutters should be open during normal operating temperatures.
Engine and Driveline System
•Transmission Enclosure:inspect for cracks, holes, and tears. Clean
any deposits such as oil, dirt, and stones.
•Engine valve covers and block covers are made to damp out engine
mechanical noise and, if needed, should be replaced with
recommended parts. Check for mechanical isolations.
Exhaust System
•Inspect the exhaust system for leaks at various joint connections and
tighten the clamps.
•Do a visual inspection for cracks or holes in the muffler and tail pipe.
•Always use the recommended parts when items need to be replaced.
•The tail pipe elbow or offset tail pipe orientation must not be changed
from the standard position as originally received.
•To avoid abnormal changes in vehicle sound levels, it is necessary for
the owner to perform inspections and necessary maintenance at the
intervals shown in theScheduled Maintenance Guidechapter.
POWER STEERING FLUID
Check the power steering fluid level using the following procedure. If
adding fluid is necessary, refer toLubricant Specificationsin this
chapter for the proper fluid type. Refer to theScheduled Maintenance
Guidechapter for the recommended service intervals.
1. Set the parking brake, shift into N (Neutral) (automatic transmission)
or 1 (First) (manual transmission) and turn the engine off.
2. Open the hood.
3. Clean the top of the power steering fluid reservoir.
Maintenance and Specifications
214
2011 F-650/750(f67)
Supplement, 2nd Printing
USA(fus)
Page 218 of 290

TRANSMISSION FLUID
Always dispose of used automotive fluids in a responsible manner.
Follow your community’s standards for disposing of these types of fluids.
Call your recycling center to find out about recycling automotive fluids.
Automatic transmission fluid
Refer to your Allison Automatic Transmission Operator’s Manual for
scheduled intervals for transmission fluid checks and changes. Your
transmission does not consume fluid. However, the fluid level should be
checked if the transmission is not working properly, i.e., if the
transmission slips or shifts slowly or if you notice some sign of fluid
leakage.
Automatic transmission fluid expands when warmed. To obtain an
accurate fluid check, drive the vehicle until it is warmed up
(approximately 20 miles [30 km]). If your vehicle has been operated for
an extended period at high speeds, in city traffic or during hot weather,
the vehicle should be turned off for about 30 minutes to allow fluid to
cool before checking.
1. Drive the vehicle 20 miles (30 km) or until it reaches normal operating
temperature.
2. Park the vehicle on a level surface and engage the parking brake.
3. With the parking brake engaged and your foot on the brake pedal,
start the engine and move the gearshift lever through all of the gear
ranges. Allow sufficient time for each gear to engage.
4. Place the gearshift lever in N (Neutral) or P (Park) and leave the
engine running.
5. Remove the dipstick, wiping it clean with a clean, dry, lint-free rag.
6. Install the dipstick making sure it is fully seated in the filler tube.
7. Remove the dipstick and inspect the fluid level.
If you must add transmission fluid, make sure the correct type of fluid is
being used. The type of fluid used is indicated in your Allison Automatic
Transmission Operator’s Manual.
Fluid levels above the safe range may result in transmission failure; an
overfill condition of transmission fluid may cause shift and/or
engagement concerns and/or possible damage.
Use of a non-approved automatic transmission fluid may cause
internal transmission component damage.
Maintenance and Specifications
218
2011 F-650/750(f67)
Supplement, 2nd Printing
USA(fus)