trailer FORD F750 2017 13.G Owners Manual
[x] Cancel search | Manufacturer: FORD, Model Year: 2017, Model line: F750, Model: FORD F750 2017 13.GPages: 382, PDF Size: 5.18 MB
Page 5 of 382
Warning Lamps and Indicators................58
Audible Warnings and Indicators..............61
Information Displays
General Information......................................62
Information Messages.................................64
Climate Control
Manual Climate Control
..............................70
Hints on Controlling the Interior Climate............................................................71
Heated Exterior Mirrors
.................................72
Seats
Sitting in the Correct Position....................73
Head Restraints
...............................................73
Manual Seats
...................................................75
Power Seats
.....................................................76
Rear Seats
.........................................................78
Front Seat Armrest........................................79
Rear Seat Armrest.........................................80
Auxiliary Power Points
Auxiliary Power Points..................................81
Storage Compartments
Overhead Console
.........................................83
Starting and Stopping the Engine
General Information
.....................................84
Ignition Switch
................................................84
Starting a Gasoline Engine.........................85
Starting a Diesel Engine..............................86
Diesel Particulate Filter................................87
Switching Off the Engine............................88
Engine Idle Shutdown..................................88
Engine Block Heater
.....................................88 Fuel and Refueling
Safety Precautions
........................................90
Fuel Quality - Gasoline.................................91
Fuel Quality - Diesel......................................92
Running Out of Fuel - Gasoline................95
Running Out of Fuel - Diesel......................95
Selective Catalytic Reduction System - Diesel..............................................................95
Refueling - Gasoline
...................................100
Refueling - Diesel..........................................101
Fuel Consumption.......................................102
Emission Control System - Gasoline.....103
Emission Control System - Diesel..........105
Fuel Tank Selector Switch
...........................111
Transmission
Automatic Transmission
.............................112
Power Take-Off
..............................................116
Rear Axle
General Information
......................................117
Limited Slip Differential...............................117
Electronic Locking Differential
..................117
2-Speed Rear Axle........................................118
Brakes
General Information
.....................................119
Hints on Driving With Anti-Lock Brakes...........................................................120
Parking Brake.................................................120
Full Power Brake...........................................123
Air Brakes.........................................................123
Exhaust Brake
................................................124
Trailer Brakes
..................................................126
Traction Control
Principle of Operation.................................130
Using Traction Control - Vehicles With: Air Brakes....................................................130
2
F-650/750 (TBC) , enUSA, First Printing Table of Contents
Page 6 of 382
Using Traction Control - Vehicles With:
Hydraulic Brakes.......................................130
Cruise Control
Principle of Operation.................................132
Using Cruise Control....................................132
Driving Aids
Steering............................................................134
Load Carrying
Load Limit
........................................................135
Air Suspension
...............................................136
Towing
Towing a Trailer.............................................138
Recommended Towing Weights............139
Essential Towing Checks...........................140
Fifth Wheel Operation
.................................141
Driving Hints
Breaking-In......................................................143
General Driving Points
................................143
Economical Driving......................................144
Cold Weather Precautions........................145
Driving Through Water................................147
Roadside Emergencies
Roadside Assistance
...................................148
Hazard Warning Flashers
..........................149
Fuel Shutoff
...................................................149
Jump Starting the Vehicle.........................150
Transporting the Vehicle
............................153
Customer Assistance
Getting the Services You Need................155
In California (U.S. Only).............................156
The Better Business Bureau (BBB) Auto Line Program (U.S. Only).......................157 Utilizing the Mediation/Arbitration
Program (Canada Only).........................157
Getting Assistance Outside the U.S. and Canada.........................................................158
Ordering Additional Owner's Literature.....................................................159
Reporting Safety Defects (U.S. Only).............................................................159
Reporting Safety Defects (Canada Only).............................................................160
Fuses
Fuse Specification Chart
............................161
Changing a Fuse...........................................169
Vehicle Inspection Guide
Vehicle Inspection Information.................171
Maintenance
General Information....................................180
Opening and Closing the Hood................181
Under Hood Overview - 6.8L...................183
Under Hood Overview - 6.7L Diesel......184
Engine Oil Dipstick - 6.8L..........................185
Engine Oil Dipstick - 6.7L Diesel.............185
Engine Oil Check - 6.8L
..............................185
Engine Oil Check - 6.7L Diesel.................186
Changing the Engine Oil and Oil Filter...............................................................187
Changing the Coalescer Filter Element.......................................................188
Oil Change Indicator Reset.......................189
Engine Coolant Check - 6.8L...................189
Engine Coolant Check - 6.7L Diesel......194
Automatic Transmission Fluid Check............................................................198
Brake Fluid Check.......................................200
Power Steering Fluid Check
.....................201
Washer Fluid Check
.....................................201
Draining the Fuel Filter Water Trap - 6.7L Diesel...........................................................202
3
F-650/750 (TBC) , enUSA, First Printing Table of Contents
Page 13 of 382
•
The gearshift lever must be in P (Park)
or N (Neutral) in order for the starter
to operate.
• Try operating the starter switch several
times. This operation may clean
potentially corroded contacts or make
the switch temporarily operable until
you can reach the dealer.
• If all electrical connections are tight
and you need assistance to start, See
Jump Starting the Vehicle (page 150).
If engine cranks but won ’t start
Prolonged starter cranking (in excess of 10
seconds) could cause damage to the
starter motor or the high-pressure fuel
pump.
• Check the fuel gauge. You may be out
of fuel. If the gauge shows that there
is fuel in the tank, the trouble may be
in the electrical system or the fuel
system. If equipped with an auxiliary
tank, be sure that the tank control
switch is set for the tank with fuel and
not on an empty tank.
• Leaving your ignition key turned to on
for over two minutes without starting
may make starting difficult because
the glow plugs will cease activation.
Reset the system by turning the ignition
key to off and then back to on again.
Note: If the system is out of fuel and the
engine will not start, do not continue
cranking the engine. Continued cranking can
damage the high-pressure fuel pump.
If the engine runs hot
The following could cause the engine to
overheat:
• Lack of coolant
• Dirty cooling system.
• Plugged radiator fins, A/C condenser
and/or oil cooler
• Malfunctioning fan drive •
Driving with frozen coolant
• Sticking thermostat
• Overloading or pulling heavy trailers
during hot weather
• Grill or radiator air blockage
• Slipping or missing drive belt
• Plugged or very dirty air filter
If fuses burn out WARNING
Replacement fuses and circuit
breakers must always be the same
rating as the original equipment
shown. Never replace a fuse or circuit
breaker with one of a higher rating. Higher
rated fuses or circuit breakers could allow
circuit overloading in the event of a circuit
malfunction, resulting in severe vehicle
damage or personal injury due to fire. Burned-out or blown fuses usually indicate
an electrical short-circuit, although a fuse
may occasionally burn out from vibration.
Insert a second fuse. If this fuse
immediately burns out and you cannot
locate the cause, return your vehicle to
your dealer for a circuit check. See
Changing a Fuse
(page 169).
Selective catalytic reduction system
speed limit and Idle-only modes
If the vehicle ’s speed is limited or in an
idle-only mode, the selective catalytic
reduction system may be limiting the
vehicle ’s functions due to low or
contaminated DEF. Check the DEF. See
Selective Catalytic Reduction System
(page
95).
SYMBOLS GLOSSARY
These are some of the symbols you may
see on your vehicle.
10
F-650/750 (TBC) , enUSA, First Printing Introduction
Page 18 of 382
recommendations and specifications that
are unique to your vehicle. This Owner
’s
Manual is written primarily for the U.S. and
Canadian Markets. Features or equipment
listed as standard may be different on units
built for Export. Refer to this Owner ’s
Manual for all other required
information and warnings.
FEDERAL HIGHWAY
ADMINISTRATION
REGULATION
Regulations such as those issued by the
Federal Highway Administration or issued
pursuant to the Occupational Safety and
Health Act (OSHA), and state and local
laws and regulations may require
additional equipment for the way you
intend to use your vehicle. It is the
responsibility of the registered owner to
determine the applicability of such laws
and regulations to your intended use for
the vehicle, and to arrange for the
installation of required equipment. The
dealer has information about the
availability of equipment which can be
ordered for your vehicle.
ENTERING, EXITING OR
CLIMBING ON THIS VEHICLE WARNING
Do not carry items while entering,
exiting or climbing. Make sure you
keep a firm grip. Always face the
vehicle step and handle system while
climbing up and down. Do not climb behind
the cab unless you have three point
contact with a step and handle system at
all times. You must be careful and deliberate to
minimize the possibility of personal injury
from a slip and fall when entering, exiting
or climbing on your vehicle. Always use
the steps and assist handles before
climbing. Do not skip any steps or assist
handles. Use three point contact at all
times with at least two feet and one hand
or two hands and one foot firmly placed
during all phases of entering, exiting or
climbing. Always keep your shoe soles and
hands clean. Keep the steps and assist
handles free of snow, ice, oil, grease,
substances or debris. Be sure to take extra
care in bad weather. Avoid wearing thick
gloves. Always perform trailer hook-up
while standing on the ground.
15
F-650/750 (TBC) , enUSA, First Printing Introduction
Page 55 of 382
Note:
If you repeatedly fold and unfold the
mirrors several times within one minute, the
system may disable to protect the motors
from overheating. It resets to normal
function automatically within three to five
minutes.
You can also fold a mirror manually by
pushing it toward the door window glass.
After you manually adjust the mirror, you
need to reset it.
To reset the power –folding mirror system
and return it to its normal function:
• Fold the mirror manually by pushing it
toward the door window glass.
• Use the power –fold control to fold and
unfold the mirror two or three times.
The mirror makes a sound as it resets.
Heated Exterior Mirrors (If Equipped)
See
Heated Exterior Mirrors (page 72).
Signal Indicator Mirrors
(If Equipped)
The outer portion of the appropriate mirror
housing blinks when you use the direction
indicator.
Clearance Lamps
(If Equipped)
The lower, outer part of the mirror housings
light when you switch on the headlamps
or parking lamps. Telescoping Mirrors
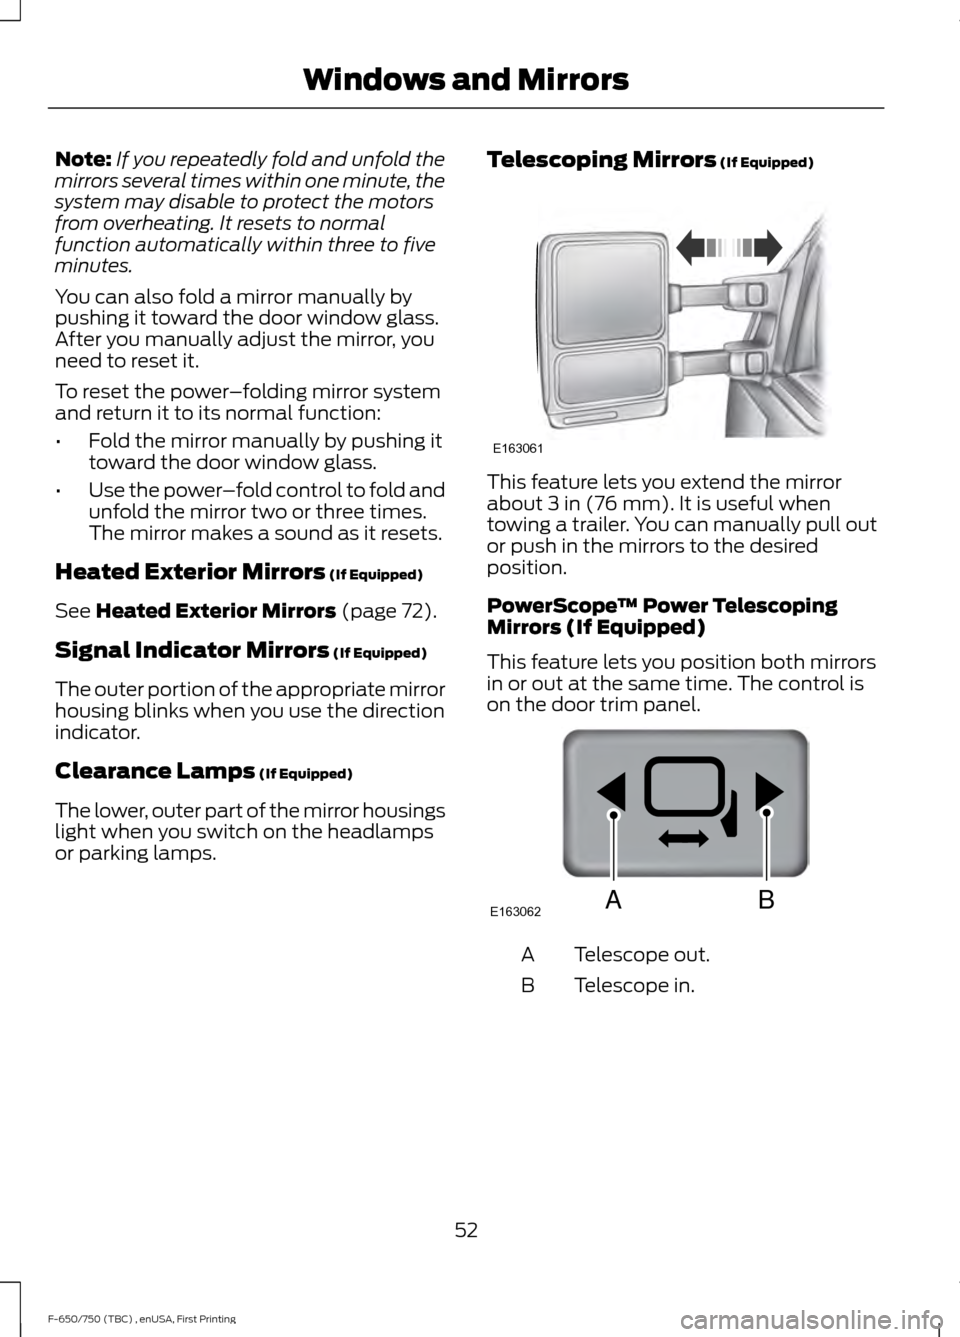
(If Equipped) This feature lets you extend the mirror
about
3 in (76 mm). It is useful when
towing a trailer. You can manually pull out
or push in the mirrors to the desired
position.
PowerScope ™ Power Telescoping
Mirrors (If Equipped)
This feature lets you position both mirrors
in or out at the same time. The control is
on the door trim panel. Telescope out.
A
Telescope in.
B
52
F-650/750 (TBC) , enUSA, First Printing Windows and MirrorsE163061 E163062BA
Page 63 of 382
brake warning lamp begins to blink after
setting the parking brake, this may indicate
a failure in the parking brake system. Seek
service from an authorized dealer
immediately. Driving extended distances
with the parking brake engaged can cause
brake failure and the risk of personal injury.
Powertrain Malfunction/Reduced
Power/Electronic Throttle Control
(Gasoline Engine Only)
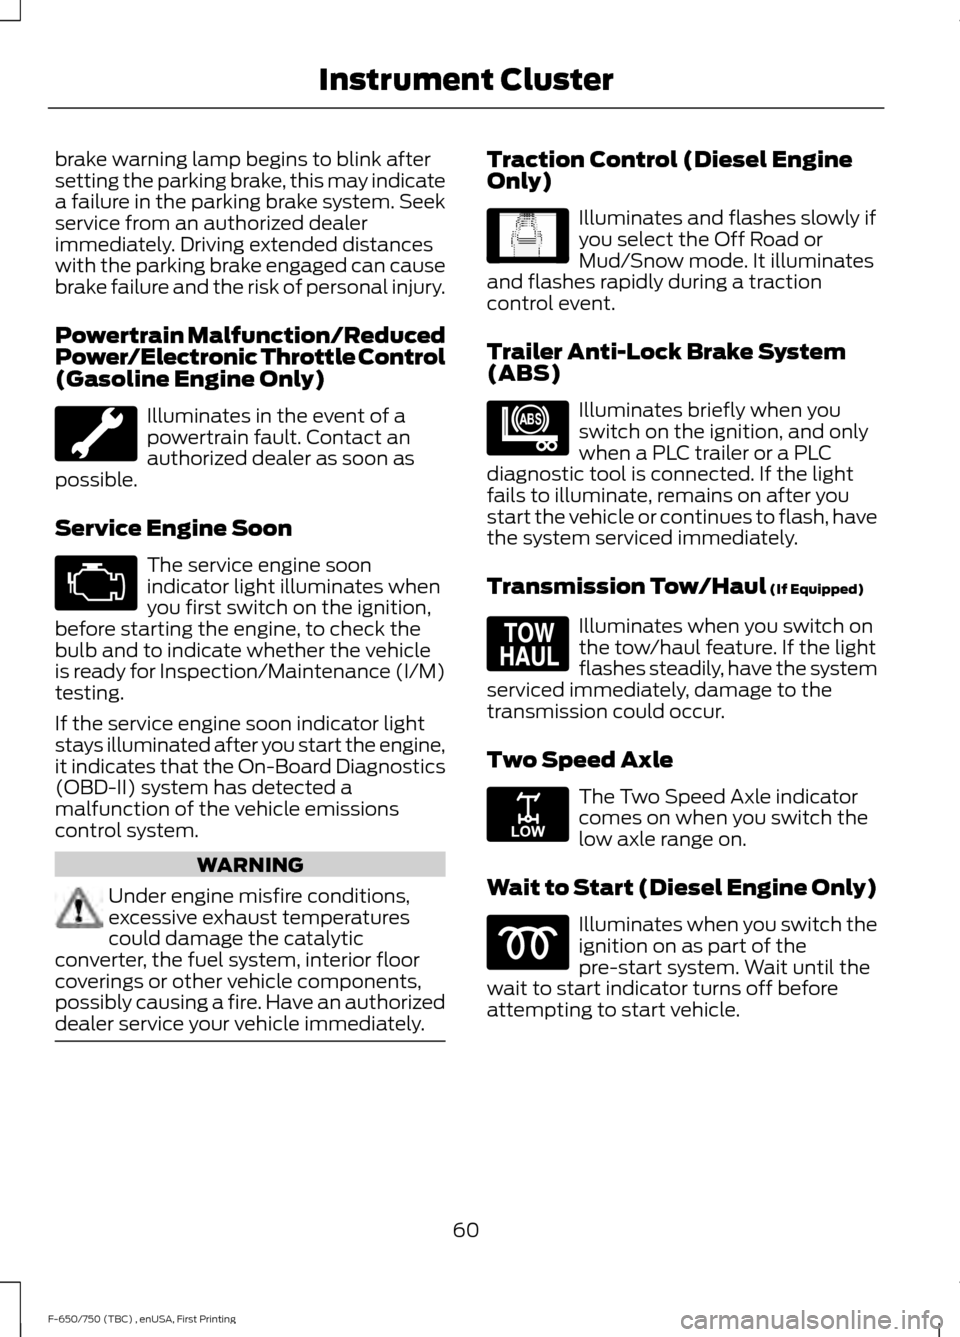
Illuminates in the event of a
powertrain fault. Contact an
authorized dealer as soon as
possible.
Service Engine Soon The service engine soon
indicator light illuminates when
you first switch on the ignition,
before starting the engine, to check the
bulb and to indicate whether the vehicle
is ready for Inspection/Maintenance (I/M)
testing.
If the service engine soon indicator light
stays illuminated after you start the engine,
it indicates that the On-Board Diagnostics
(OBD-II) system has detected a
malfunction of the vehicle emissions
control system. WARNING
Under engine misfire conditions,
excessive exhaust temperatures
could damage the catalytic
converter, the fuel system, interior floor
coverings or other vehicle components,
possibly causing a fire. Have an authorized
dealer service your vehicle immediately. Traction Control (Diesel Engine
Only)
Illuminates and flashes slowly if
you select the Off Road or
Mud/Snow mode. It illuminates
and flashes rapidly during a traction
control event.
Trailer Anti-Lock Brake System
(ABS) Illuminates briefly when you
switch on the ignition, and only
when a PLC trailer or a PLC
diagnostic tool is connected. If the light
fails to illuminate, remains on after you
start the vehicle or continues to flash, have
the system serviced immediately.
Transmission Tow/Haul (If Equipped) Illuminates when you switch on
the tow/haul feature. If the light
flashes steadily, have the system
serviced immediately, damage to the
transmission could occur.
Two Speed Axle The Two Speed Axle indicator
comes on when you switch the
low axle range on.
Wait to Start (Diesel Engine Only) Illuminates when you switch the
ignition on as part of the
pre-start system. Wait until the
wait to start indicator turns off before
attempting to start vehicle.
60
F-650/750 (TBC) , enUSA, First Printing Instrument Cluster E138639 E209040 E161509 E208809
Page 106 of 382
1.
Fill the fuel tank completely and record
the initial odometer reading.
2. Each time you fill the fuel tank, record the amount of fuel added.
3. After at least three fill ups, fill the fuel tank and record the current odometer
reading.
4. Subtract your initial odometer reading from the current odometer reading.
5. Calculate fuel economy by dividing miles traveled by gallons used (For
Metric: Multiply liters used by 100, then
divide by kilometers traveled).
Keep a record for at least one month and
record the type of driving (city or highway).
This provides an accurate estimate of your
vehicle ’s fuel economy under current
driving conditions. Keeping records during
summer and winter will show how
temperature impacts fuel economy. In
general, your vehicle will use more fuel in
cold temperatures.
Conditions That Affect Fuel Economy
• Heavily loading your vehicle or towing
a trailer may reduce fuel economy at
any speed.
• Carrying unnecessary weight in your
vehicle may reduce fuel economy.
• Adding certain accessories to your
vehicle such as bug deflectors, rollbars
or light bars, running boards and ski
racks may reduce fuel economy.
• Using fuel blended with alcohol may
lower fuel economy.
• Fuel economy may decrease with lower
temperatures.
• You will get better fuel economy when
driving on flat terrain than when driving
on hilly terrain. •
Transmissions give their best fuel
economy when operated in the top
cruise gear and with steady pressure
on the accelerator pedal.
• Close the windows for high-speed
driving.
EMISSION CONTROL SYSTEM
- GASOLINE WARNINGS
Do not park, idle or drive your vehicle
on dry grass or other dry ground
cover. The emission system heats up
the engine compartment and exhaust
system, creating the risk of fire. Exhaust leaks may result in entry of
harmful and potentially lethal fumes
into the passenger compartment. If
you smell exhaust fumes inside your
vehicle, have your vehicle inspected
immediately. Do not drive if you smell
exhaust fumes. Your vehicle has various emission control
components and a catalytic converter that
enables it to comply with applicable
exhaust emission standards.
To make sure that the catalytic converter
and other emission control components
continue to work properly:
•
Use only the specified fuel listed.
• Avoid running out of fuel.
• Do not turn off the ignition while your
vehicle is moving, especially at high
speeds.
• Have the items listed in scheduled
maintenance information performed
according to the specified schedule.
The scheduled maintenance items listed
in scheduled maintenance information are
essential to the life and performance of
your vehicle and to its emissions system.
103
F-650/750 (TBC) , enUSA, First Printing Fuel and Refueling
Page 116 of 382
Forced downshifts
•
Allowed in drive (D) with the tow/haul
feature on or off.
• Press the accelerator to the floor.
• Allows transmission to select an
appropriate gear.
Tow/Haul Mode To activate tow/haul, press the
button on the gearshift lever
once. The TOW HAUL indicator
light illuminates in the instrument cluster.
The tow/haul feature:
• Delays upshifts to reduce the frequency
of transmission shifting.
• Provides engine braking in all forward
gears, which slows your vehicle and
assists you in controlling your vehicle
when descending a grade.
• Depending on driving conditions and
load conditions, may downshift the
transmission, slow your vehicle and
control your vehicle speed when
descending a hill, without pressing the
accelerator pedal. The amount of
downshift braking provided will vary
based upon the amount you press the
brake pedal.
The tow/haul feature improves
transmission operation when towing a
trailer or a heavy load. All transmission
gear ranges are available when using
tow/haul.
To deactivate the tow/haul feature and
return to normal driving mode, press the
button on the gearshift lever twice. The
TOW HAUL light deactivates. Tow/haul
also deactivates when you power down
your vehicle. WARNING
Do not use the tow/haul feature
when driving in icy or slippery
conditions as the increased engine
braking can cause the rear wheels to slide
and your vehicle to swing around with the
possible loss of vehicle control. Understanding your SelectShift™
Automatic transmission (If Equipped)
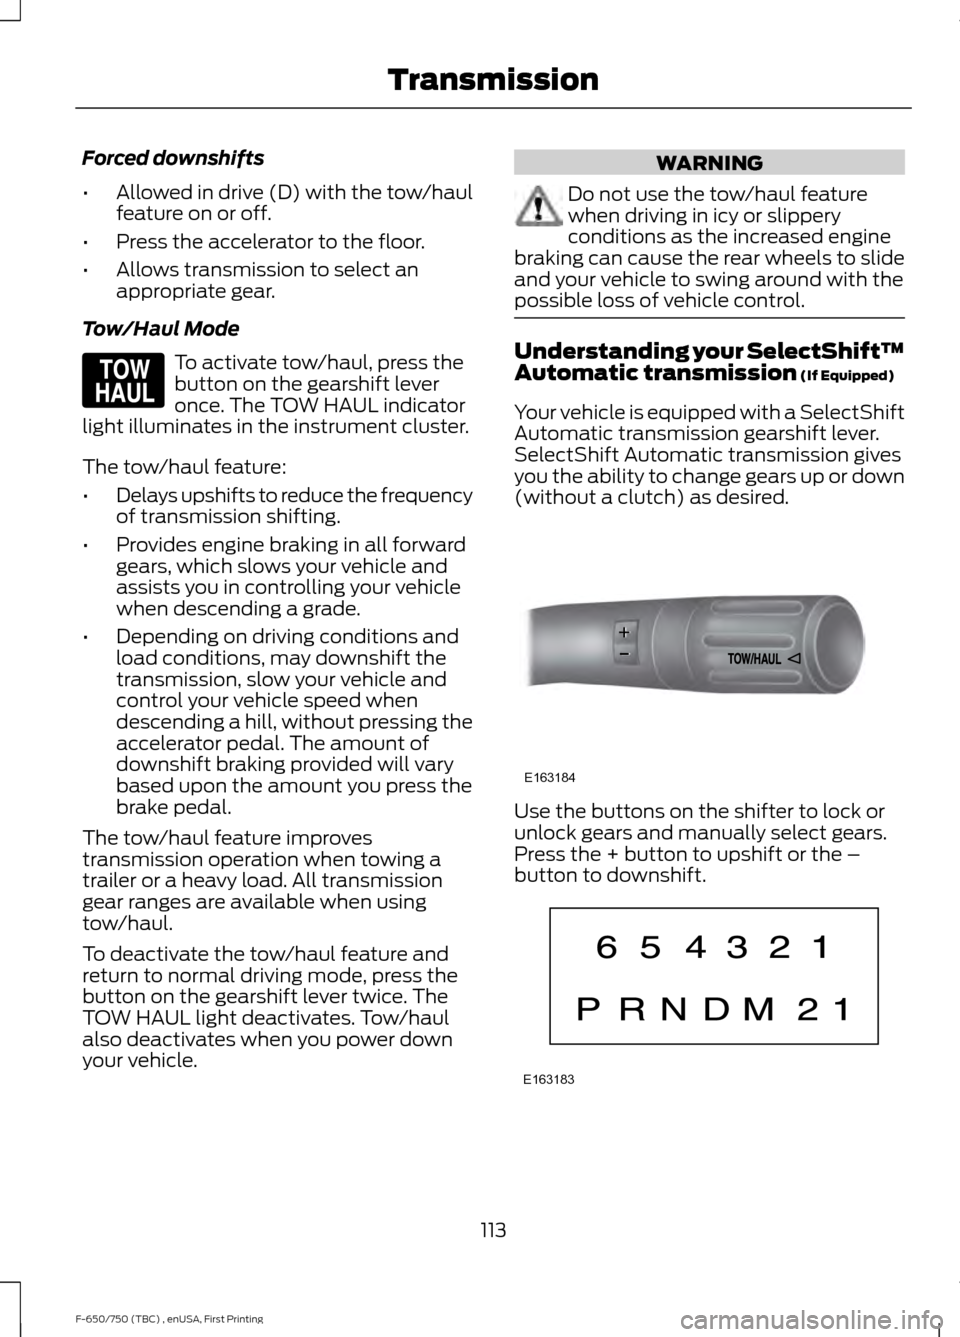
Your vehicle is equipped with a SelectShift
Automatic transmission gearshift lever.
SelectShift Automatic transmission gives
you the ability to change gears up or down
(without a clutch) as desired. Use the buttons on the shifter to lock or
unlock gears and manually select gears.
Press the + button to upshift or the –
button to downshift.
113
F-650/750 (TBC) , enUSA, First Printing TransmissionE161509 E163184 E163183
Page 123 of 382
If you connect a PLC trailer with
the ignition on, the trailer ABS
light also illuminates. If the light
fails to illuminate, if it remains on after you
start the vehicle or continues to flash, have
the system serviced immediately.
HINTS ON DRIVING WITH
ANTI-LOCK BRAKES
Note: When the system is operating, the
brake pedal may pulse and may travel
further. Maintain pressure on the brake
pedal. You may also hear a noise from the
system. This is normal.
The anti-lock braking system will not
eliminate the risks when:
• You drive too closely to the vehicle in
front of you.
• Your vehicle is hydroplaning.
• You take corners too fast.
• The road surface is poor.
PARKING BRAKE
Hydraulic Brakes WARNINGS
Always set the parking brake and
leave your vehicle with the
transmission in park (P).
When doing this procedure, you need
to take the transmission out of park
(P) which means your vehicle can
roll freely. To avoid unwanted vehicle
movement, always fully set the parking
brake prior to doing this procedure. Use
wheels chocks if appropriate. Unexpected and possibly sudden
vehicle movement may occur if you
do not take these precautions. WARNINGS
If the parking brake is fully released,
but the brake warning lamp remains
illuminated, the brakes may not be
working properly. Have your vehicle
checked as soon as possible. Apply the parking brake whenever the
vehicle is parked. To set the parking brake,
pull the handle up until it snaps into the
locked position.
When the parking brake is out of
adjustment, seek service immediately.
The parking brake warning lamp
in the instrument cluster
illuminates, and remains
illuminated (when you switch on the
ignition), until you release the parking
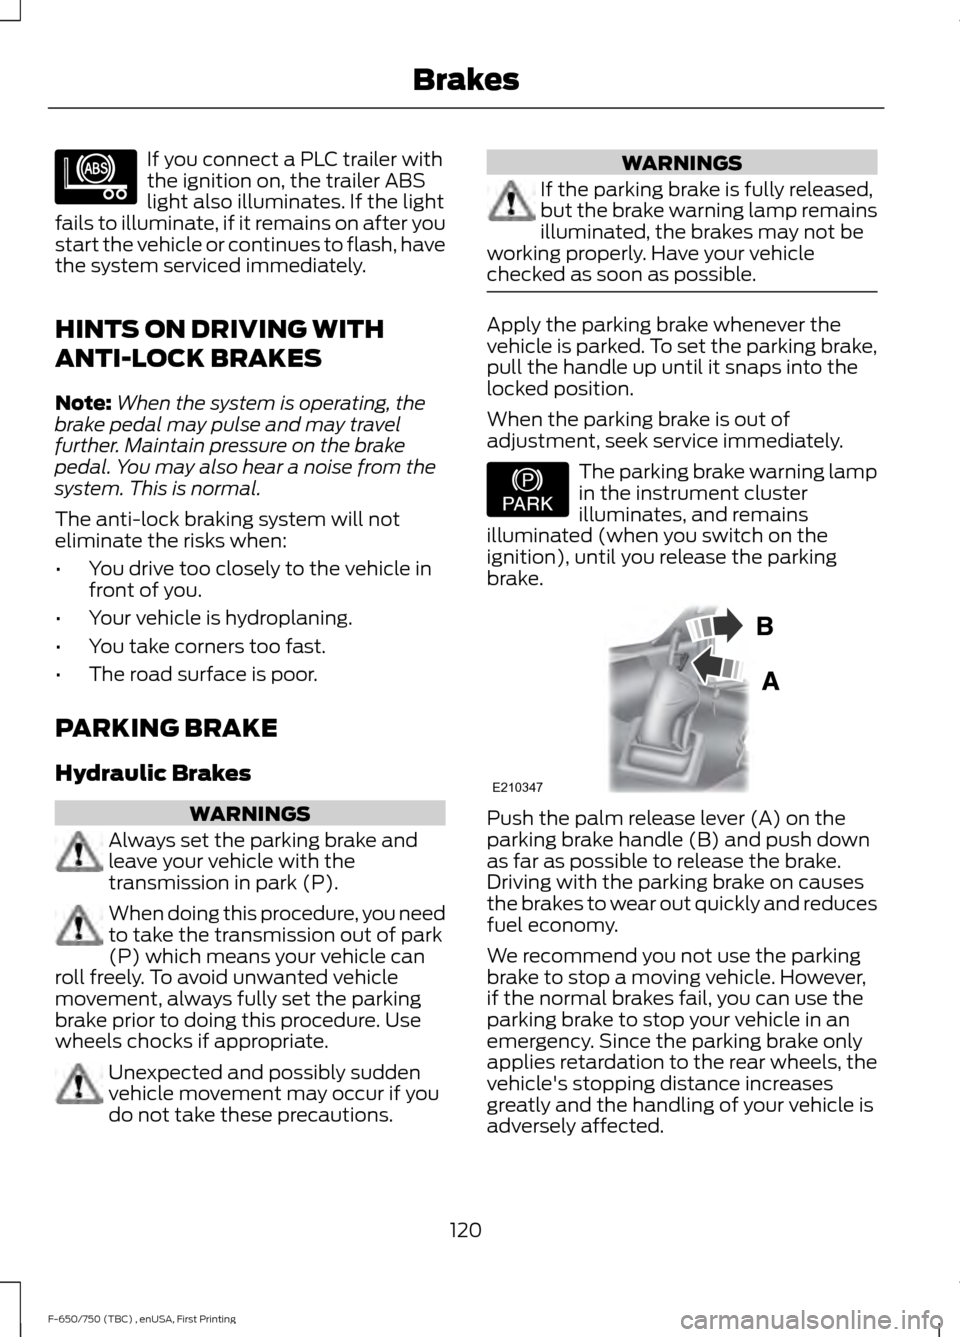
brake. Push the palm release lever (A) on the
parking brake handle (B) and push down
as far as possible to release the brake.
Driving with the parking brake on causes
the brakes to wear out quickly and reduces
fuel economy.
We recommend you not use the parking
brake to stop a moving vehicle. However,
if the normal brakes fail, you can use the
parking brake to stop your vehicle in an
emergency. Since the parking brake only
applies retardation to the rear wheels, the
vehicle's stopping distance increases
greatly and the handling of your vehicle is
adversely affected.
120
F-650/750 (TBC) , enUSA, First Printing BrakesE210335 E208810 E210347
Page 129 of 382
Make sure the engine speed does not
exceed the maximum allowable engine
RPM. Exceeding the maximum allowable
engine RPM can result in damage to the
engine. Apply the service brakes to reduce
the engine RPM or make a slower descent
by using a lower gear.
While going down the grade, use a low
enough gear to descend safely with a
minimum application of the service brakes.
As a general guideline, use the same gear
as you use to ascend the hill.
Exhaust Brake Operating
Characteristics
The exhaust brake turns on when you
remove your feet from both the accelerator
and clutch pedals and the exhaust brake
switch is in the on position. The following
conditions exist if the brake is operating
properly:
•
A slight change in engine sound when
the exhaust brake turns on.
• A smooth braking effect. Do not expect
a retarding effect similar to sudden,
hard application of the service brakes.
• The retarding force possibly felt acting
against your body during brake
application (depending on the grade
and vehicle load). This force is actually
preventing the vehicle from going much
faster.
• Engine temperature remaining in the
normal operating range.
• The tachometer showing a drop in
engine RPM (depending on grade and
vehicle load) during a descent.
• A decrease in road speed when
applying the exhaust brake during a
descent, except when your vehicle is
carrying a heavy load or the grade is
extremely steep. In these instances,
you may need to apply the service
brakes occasionally. TRAILER BRAKES
Trailer Brake Hand Control (If Equipped) WARNING
The hand control should never be
used to apply the brakes when the
tractor and trailer are parked
unattended. Air may leak from the system
and the vehicle could possibly move,
resulting in possible property damage,
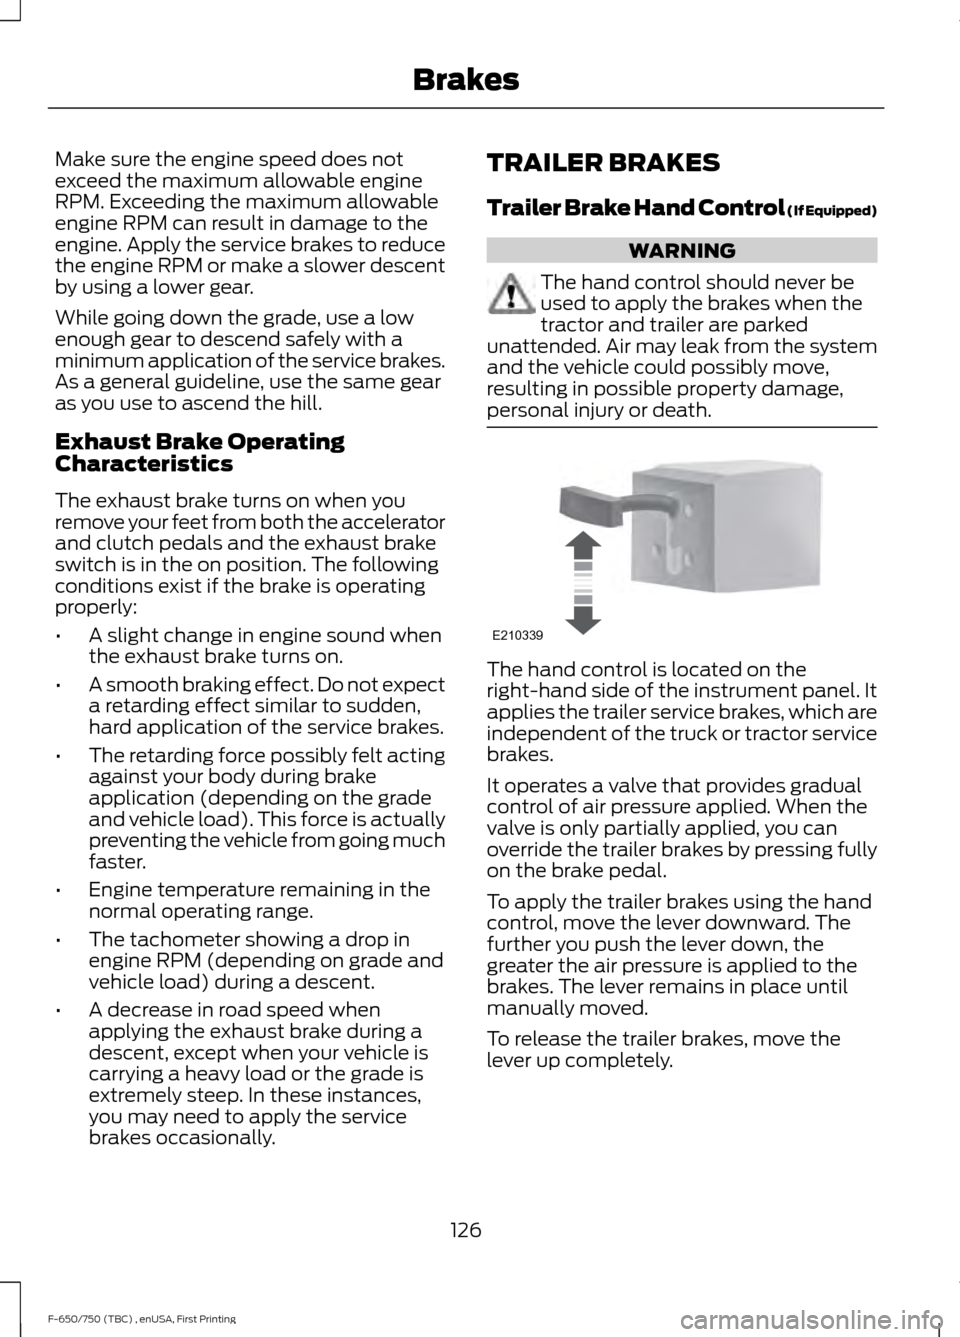
personal injury or death. The hand control is located on the
right-hand side of the instrument panel. It
applies the trailer service brakes, which are
independent of the truck or tractor service
brakes.
It operates a valve that provides gradual
control of air pressure applied. When the
valve is only partially applied, you can
override the trailer brakes by pressing fully
on the brake pedal.
To apply the trailer brakes using the hand
control, move the lever downward. The
further you push the lever down, the
greater the air pressure is applied to the
brakes. The lever remains in place until
manually moved.
To release the trailer brakes, move the
lever up completely.
126
F-650/750 (TBC) , enUSA, First Printing BrakesE210339