FORD FLEX 2016 1.G Owners Manual
Manufacturer: FORD, Model Year: 2016, Model line: FLEX, Model: FORD FLEX 2016 1.GPages: 417, PDF Size: 4.52 MB
Page 181 of 417
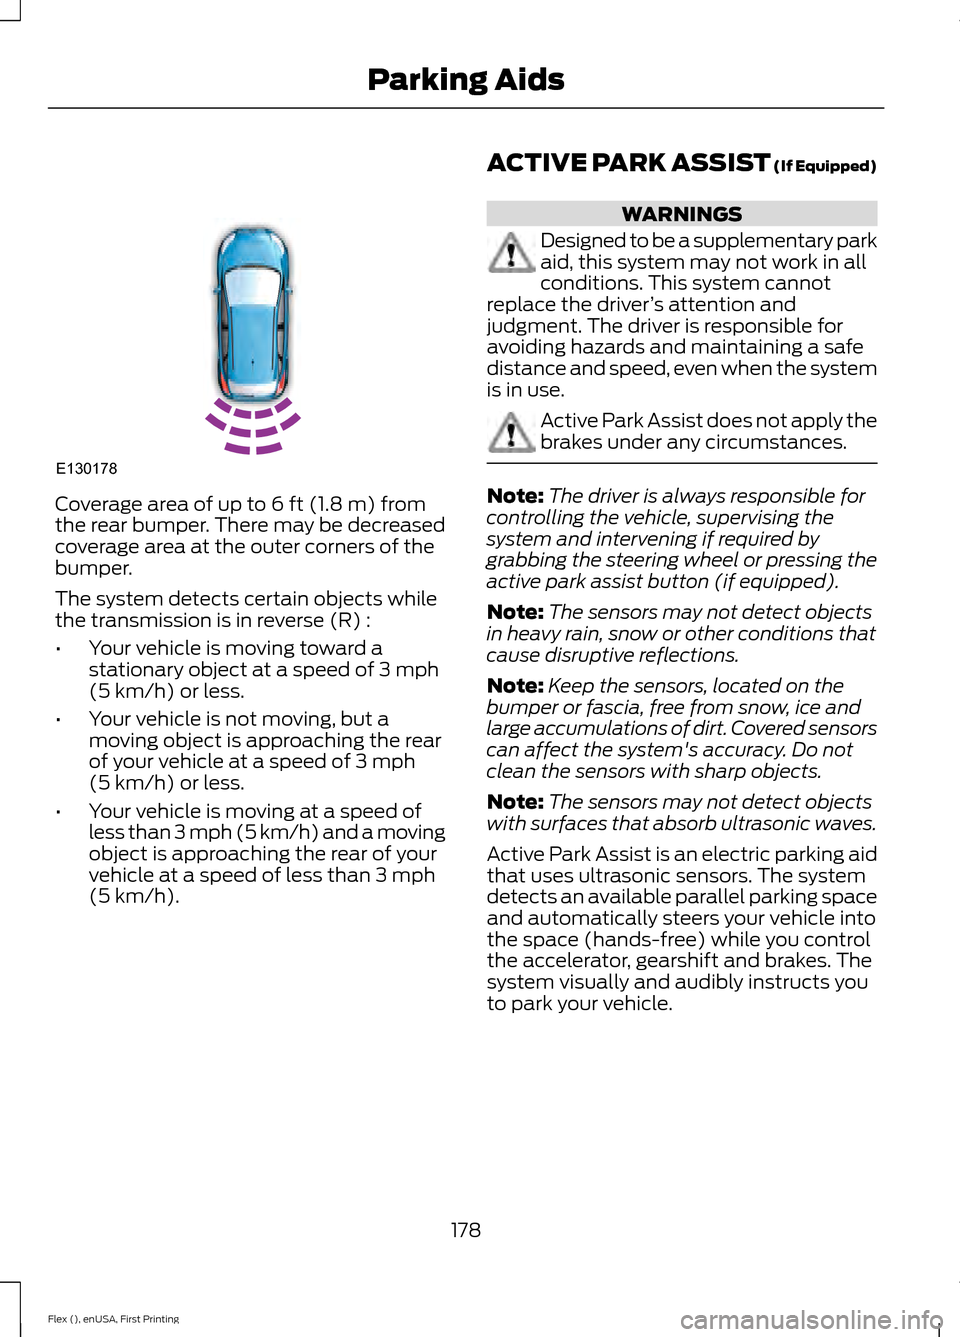
Coverage area of up to 6 ft (1.8 m) from
the rear bumper. There may be decreased
coverage area at the outer corners of the
bumper.
The system detects certain objects while
the transmission is in reverse (R) :
• Your vehicle is moving toward a
stationary object at a speed of
3 mph
(5 km/h) or less.
• Your vehicle is not moving, but a
moving object is approaching the rear
of your vehicle at a speed of
3 mph
(5 km/h) or less.
• Your vehicle is moving at a speed of
less than 3 mph (5 km/h) and a moving
object is approaching the rear of your
vehicle at a speed of less than
3 mph
(5 km/h). ACTIVE PARK ASSIST (If Equipped) WARNINGS
Designed to be a supplementary park
aid, this system may not work in all
conditions. This system cannot
replace the driver ’s attention and
judgment. The driver is responsible for
avoiding hazards and maintaining a safe
distance and speed, even when the system
is in use. Active Park Assist does not apply the
brakes under any circumstances.
Note:
The driver is always responsible for
controlling the vehicle, supervising the
system and intervening if required by
grabbing the steering wheel or pressing the
active park assist button (if equipped).
Note: The sensors may not detect objects
in heavy rain, snow or other conditions that
cause disruptive reflections.
Note: Keep the sensors, located on the
bumper or fascia, free from snow, ice and
large accumulations of dirt. Covered sensors
can affect the system's accuracy. Do not
clean the sensors with sharp objects.
Note: The sensors may not detect objects
with surfaces that absorb ultrasonic waves.
Active Park Assist is an electric parking aid
that uses ultrasonic sensors. The system
detects an available parallel parking space
and automatically steers your vehicle into
the space (hands-free) while you control
the accelerator, gearshift and brakes. The
system visually and audibly instructs you
to park your vehicle.
178
Flex (), enUSA, First Printing Parking AidsE130178
Page 182 of 417
The system may not function correctly if
something passes between the front
bumper and the parking space (a
pedestrian or cyclist) or if the edge of the
neighboring parked vehicle is high off the
ground (for example, a bus, tow truck or
flatbed truck). If you are uncomfortable
with the proximity to any vehicle or object,
you may choose to override the system.
The system may not operate correctly in
any of the following conditions:
•
You use a spare tire or a tire
significantly worn more than the other
tires.
• One or more tires are improperly
inflated.
• You try to park on a tight curve.
Do not use the system if:
• You have attached a bike rack, trailer
or similar object to the front or rear of
your vehicle, close to the sensors.
• You have attached an overhanging
object (surfboard) to the roof. •
The front bumper or side sensors are
damaged or obstructed (front bumper
cover).
• The correct tire size is not in use on your
vehicle (for example, a mini-spare tire).
Using Active Park Assist Press the button to turn the
system on or off.
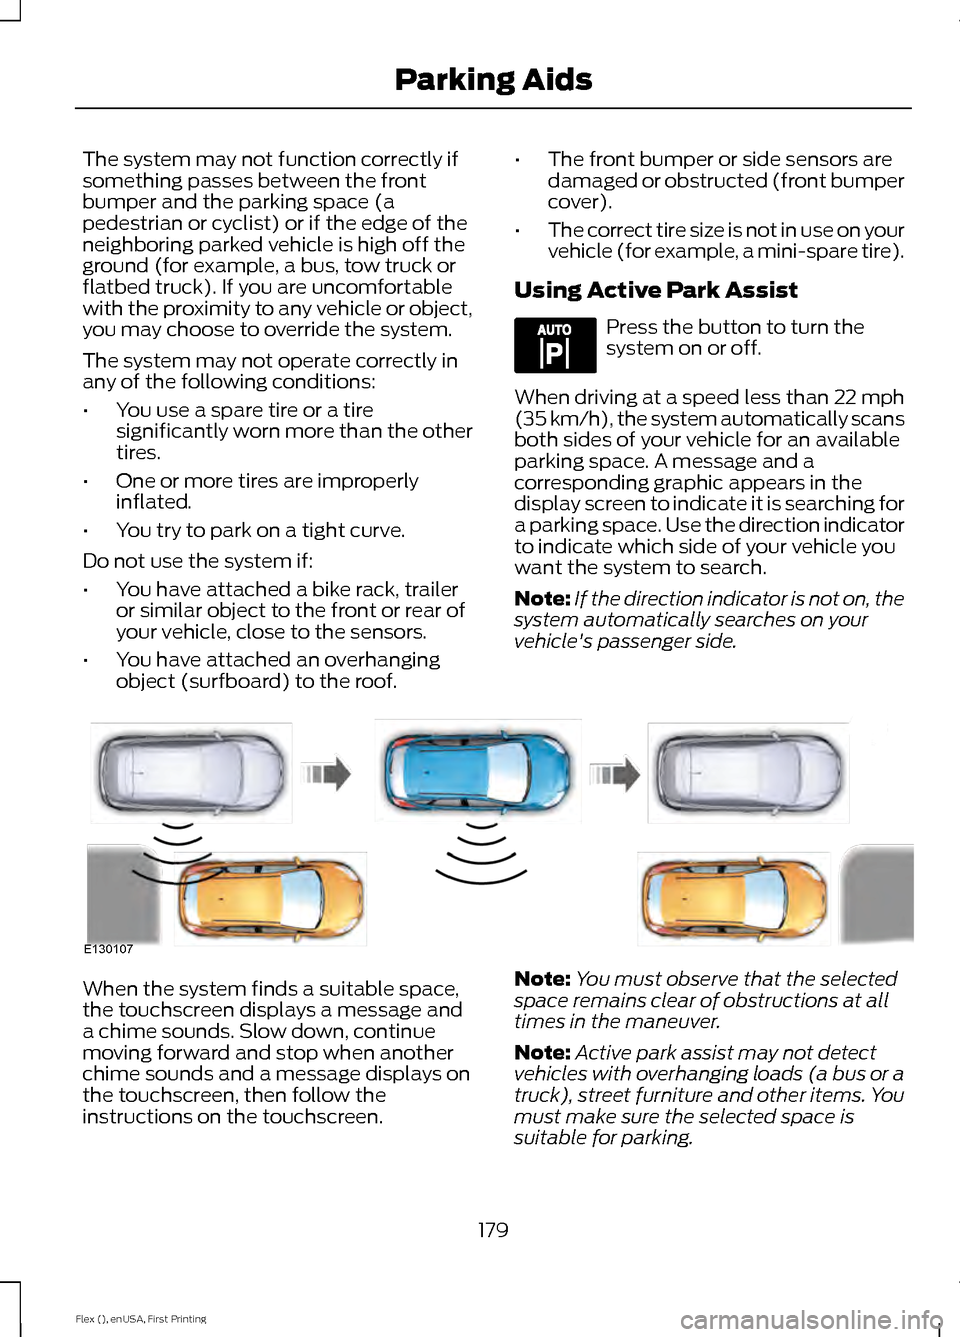
When driving at a speed less than 22 mph
(35 km/h), the system automatically scans
both sides of your vehicle for an available
parking space. A message and a
corresponding graphic appears in the
display screen to indicate it is searching for
a parking space. Use the direction indicator
to indicate which side of your vehicle you
want the system to search.
Note: If the direction indicator is not on, the
system automatically searches on your
vehicle's passenger side. When the system finds a suitable space,
the touchscreen displays a message and
a chime sounds. Slow down, continue
moving forward and stop when another
chime sounds and a message displays on
the touchscreen, then follow the
instructions on the touchscreen.
Note:
You must observe that the selected
space remains clear of obstructions at all
times in the maneuver.
Note: Active park assist may not detect
vehicles with overhanging loads (a bus or a
truck), street furniture and other items. You
must make sure the selected space is
suitable for parking.
179
Flex (), enUSA, First Printing Parking AidsE144525 E130107
Page 183 of 417
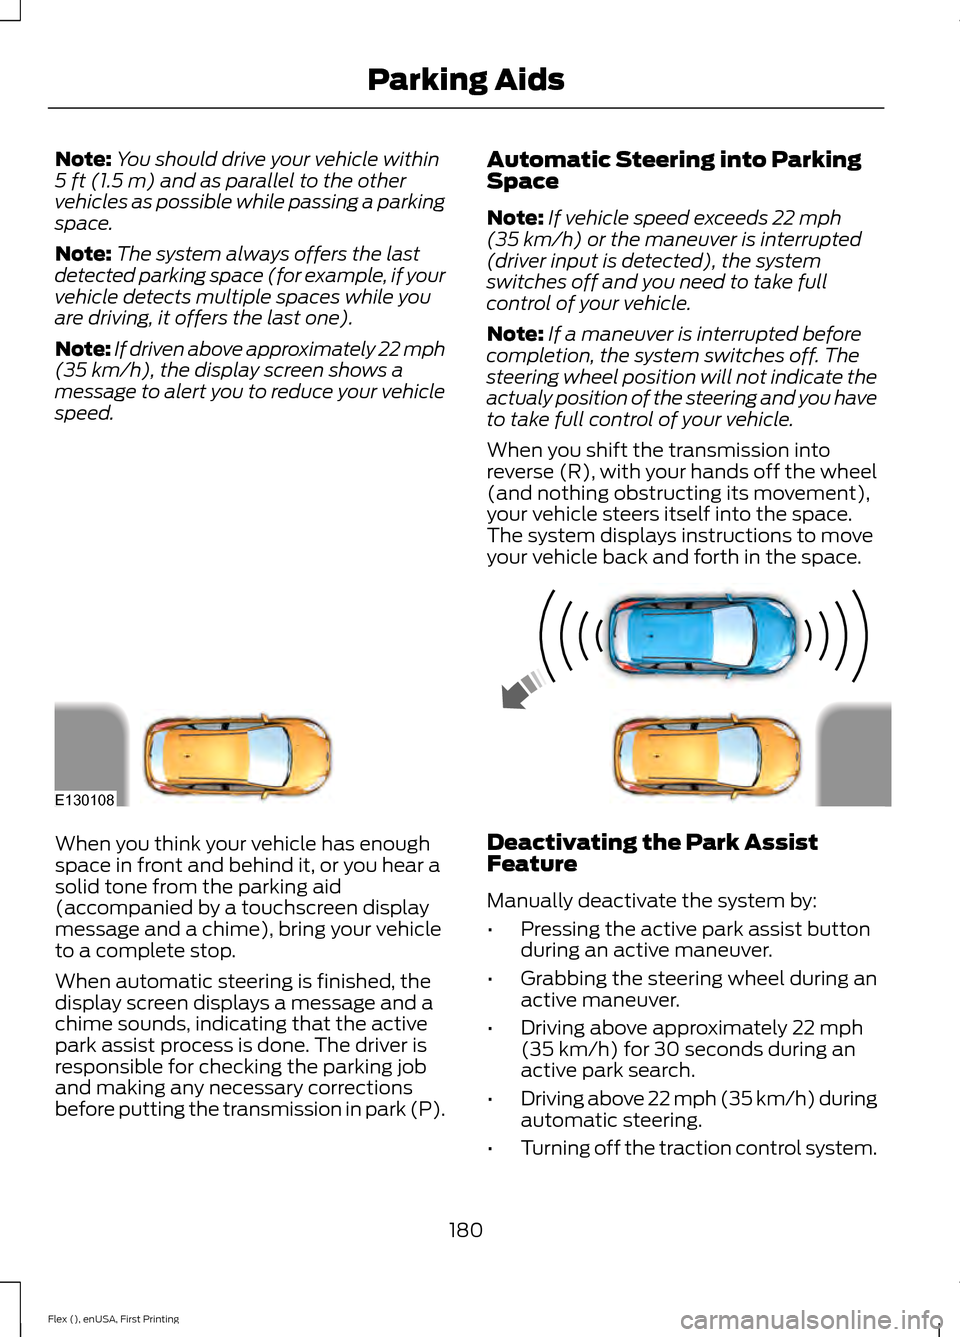
Note:
You should drive your vehicle within
5 ft (1.5 m) and as parallel to the other
vehicles as possible while passing a parking
space.
Note: The system always offers the last
detected parking space (for example, if your
vehicle detects multiple spaces while you
are driving, it offers the last one).
Note: If driven above approximately 22 mph
(35 km/h)
, the display screen shows a
message to alert you to reduce your vehicle
speed. Automatic Steering into Parking
Space
Note:
If vehicle speed exceeds
22 mph
(35 km/h) or the maneuver is interrupted
(driver input is detected), the system
switches off and you need to take full
control of your vehicle.
Note: If a maneuver is interrupted before
completion, the system switches off. The
steering wheel position will not indicate the
actualy position of the steering and you have
to take full control of your vehicle.
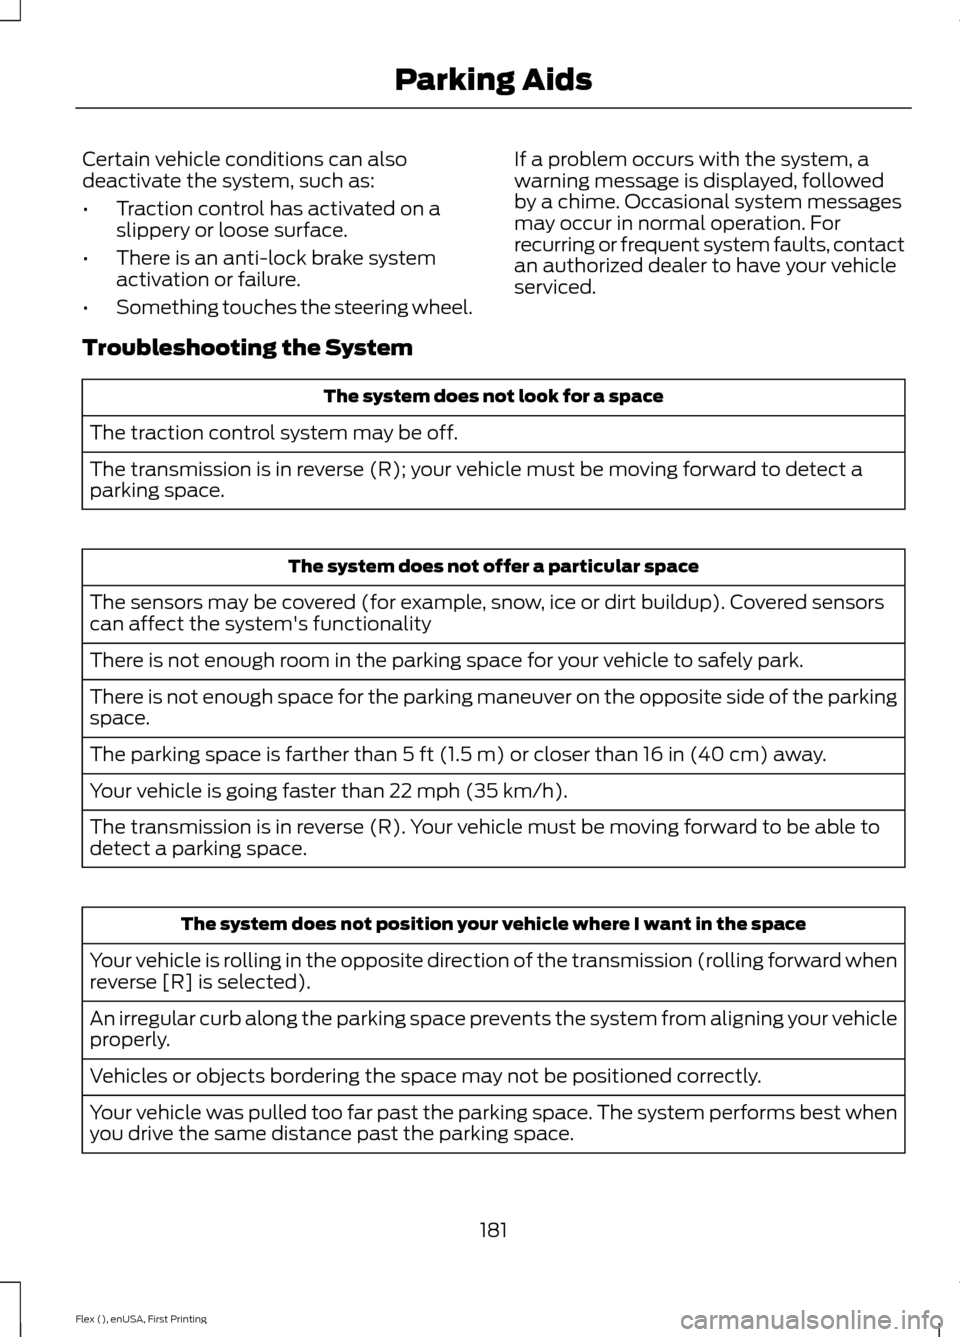
When you shift the transmission into
reverse (R), with your hands off the wheel
(and nothing obstructing its movement),
your vehicle steers itself into the space.
The system displays instructions to move
your vehicle back and forth in the space. When you think your vehicle has enough
space in front and behind it, or you hear a
solid tone from the parking aid
(accompanied by a touchscreen display
message and a chime), bring your vehicle
to a complete stop.
When automatic steering is finished, the
display screen displays a message and a
chime sounds, indicating that the active
park assist process is done. The driver is
responsible for checking the parking job
and making any necessary corrections
before putting the transmission in park (P).
Deactivating the Park Assist
Feature
Manually deactivate the system by:
•
Pressing the active park assist button
during an active maneuver.
• Grabbing the steering wheel during an
active maneuver.
• Driving above approximately
22 mph
(35 km/h) for 30 seconds during an
active park search.
• Driving above 22 mph (35 km/h) during
automatic steering.
• Turning off the traction control system.
180
Flex (), enUSA, First Printing Parking AidsE130108
Page 184 of 417
Certain vehicle conditions can also
deactivate the system, such as:
•
Traction control has activated on a
slippery or loose surface.
• There is an anti-lock brake system
activation or failure.
• Something touches the steering wheel. If a problem occurs with the system, a
warning message is displayed, followed
by a chime. Occasional system messages
may occur in normal operation. For
recurring or frequent system faults, contact
an authorized dealer to have your vehicle
serviced.
Troubleshooting the System The system does not look for a space
The traction control system may be off.
The transmission is in reverse (R); your vehicle must be moving forward to detect a
parking space. The system does not offer a particular space
The sensors may be covered (for example, snow, ice or dirt buildup). Covered sensors
can affect the system's functionality
There is not enough room in the parking space for your vehicle to safely park.
There is not enough space for the parking maneuver on the opposite side of the parking
space.
The parking space is farther than 5 ft (1.5 m) or closer than 16 in (40 cm) away.
Your vehicle is going faster than
22 mph (35 km/h).
The transmission is in reverse (R). Your vehicle must be moving forward to be able to
detect a parking space. The system does not position your vehicle where I want in the space
Your vehicle is rolling in the opposite direction of the transmission (rolling forward when
reverse [R] is selected).
An irregular curb along the parking space prevents the system from aligning your vehicle
properly.
Vehicles or objects bordering the space may not be positioned correctly.
Your vehicle was pulled too far past the parking space. The system performs best when
you drive the same distance past the parking space.
181
Flex (), enUSA, First Printing Parking Aids
Page 185 of 417
The system does not position your vehicle where I want in the space
The tires may not be installed or maintained correctly (not inflated correctly, improper
size, or of different sizes).
A repair or alteration has changed detection capabilities.
A parked vehicle has a high attachment (salt sprayer, snowplow, moving truck bed,
etc).
The parking space length or position of parked objects changed after your vehicle passed.
The temperature around your vehicle changes quickly (driving from a heated garage
into the cold, or after leaving a car wash).
You didn't wait for the steering to complete its rotation after a gear change. The system
performs best when the steering wheel is allowed to finish rotating before accelerating.
REAR VIEW CAMERA WARNINGS
The rear view camera system is a
reverse aid supplement device that
still requires the driver to use it in
conjunction with the interior and exterior
mirrors for maximum coverage. Objects that are close to either
corner of the bumper or under the
bumper, might not be seen on the
screen due to the limited coverage of the
camera system. Back up as slow as possible since
higher speeds might limit your
reaction time to stop your vehicle.
Use caution when using the rear
video camera and the luggage
compartment door is ajar. If the
luggage compartment door is ajar, the
camera will be out of position and the
video image may be incorrect. All
guidelines disappear when the luggage
compartment door is ajar. Use caution when turning camera
features on or off. Make sure your
vehicle is not moving. The rear view camera system provides a
video image of the area behind your
vehicle.
During operation, lines appear in the
display which represent your vehicle
’s path
and proximity to objects behind your
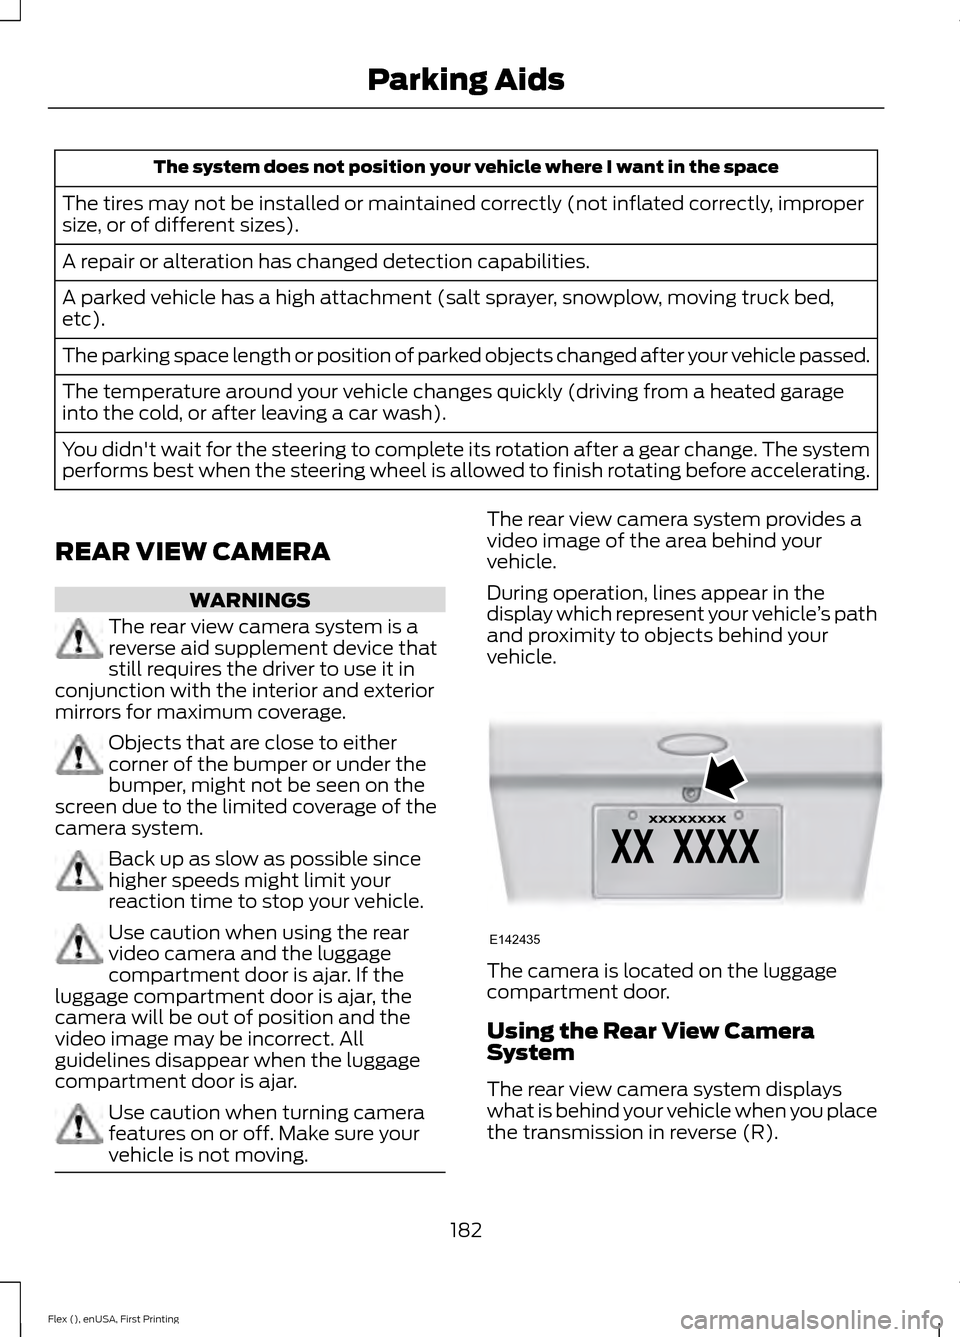
vehicle. The camera is located on the luggage
compartment door.
Using the Rear View Camera
System
The rear view camera system displays
what is behind your vehicle when you place
the transmission in reverse (R).
182
Flex (), enUSA, First Printing Parking AidsE142435
Page 186 of 417
Note:
The reverse sensing system is not
effective at speeds above 3 mph (5 km/h)
and may not detect certain angular or
moving objects.
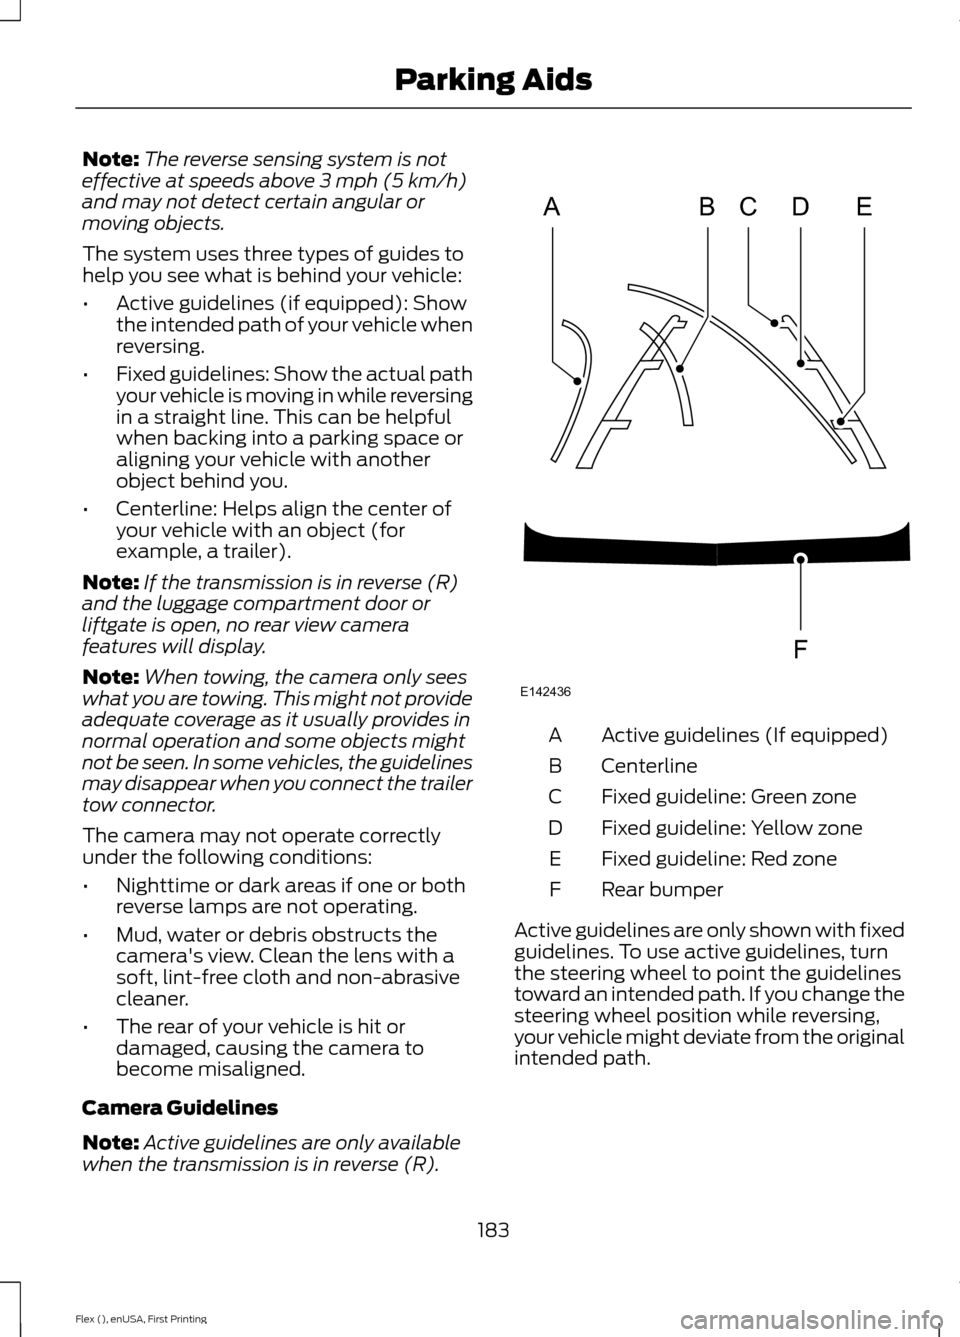
The system uses three types of guides to
help you see what is behind your vehicle:
• Active guidelines (if equipped): Show
the intended path of your vehicle when
reversing.
• Fixed guidelines: Show the actual path
your vehicle is moving in while reversing
in a straight line. This can be helpful
when backing into a parking space or
aligning your vehicle with another
object behind you.
• Centerline: Helps align the center of
your vehicle with an object (for
example, a trailer).
Note: If the transmission is in reverse (R)
and the luggage compartment door or
liftgate is open, no rear view camera
features will display.
Note: When towing, the camera only sees
what you are towing. This might not provide
adequate coverage as it usually provides in
normal operation and some objects might
not be seen. In some vehicles, the guidelines
may disappear when you connect the trailer
tow connector.
The camera may not operate correctly
under the following conditions:
• Nighttime or dark areas if one or both
reverse lamps are not operating.
• Mud, water or debris obstructs the
camera's view. Clean the lens with a
soft, lint-free cloth and non-abrasive
cleaner.
• The rear of your vehicle is hit or
damaged, causing the camera to
become misaligned.
Camera Guidelines
Note: Active guidelines are only available
when the transmission is in reverse (R). Active guidelines (If equipped)
A
Centerline
B
Fixed guideline: Green zone
C
Fixed guideline: Yellow zone
D
Fixed guideline: Red zone
E
Rear bumper
F
Active guidelines are only shown with fixed
guidelines. To use active guidelines, turn
the steering wheel to point the guidelines
toward an intended path. If you change the
steering wheel position while reversing,
your vehicle might deviate from the original
intended path.
183
Flex (), enUSA, First Printing Parking AidsABCD
F
E
E142436
Page 187 of 417
The fixed and active guidelines fade in and
out depending on the steering wheel
position. The active guidelines do not
display when the steering wheel position
is straight.
Always use caution while reversing.
Objects in the red zone are closest to your
vehicle and objects in the green zone are
farther away. Objects are getting closer to
your vehicle as they move from the green
zone to the yellow or red zones. Use the
side view mirrors and rear view mirror to
get better coverage on both sides and rear
of the vehicle.
Manual Zoom
WARNING
When manual zoom is on, the full
area behind your vehicle may not
show. Be aware of your surroundings
when using the manual zoom feature. Note:
Manual zoom is only available when
the transmission is in reverse (R).
Note: When you enable manual zoom, only
the centerline is shown.
Selectable settings for this feature are
Zoom in (+) and Zoom out (-). Press the
symbol in the camera screen to change the
view. The default setting is Zoom OFF.
This allows you to get a closer view of an
object behind your vehicle. The zoomed
image keeps the bumper in the image to
provide a reference. The zoom is only
active while the transmission is in reverse
(R).
Camera System Settings
The rear view camera system settings can
be accessed through the display screen.
Enhanced Park Aids or Park Pilot
Selectable settings for this feature are ON
and OFF. The system uses red, yellow and green
highlights that appear on top of the video
image when any of the sensing systems
detect an object.
Rear Camera Delay
Selectable settings for this feature are ON
and OFF.
The default setting for the rear camera
delay is OFF.
When shifting the transmission out of
reverse (R) and into any gear other than
park (P), the camera image remains in the
display until:
•
Your vehicle speed reaches
approximately 5 mph (8 km/h).
• You shift your vehicle into park (P).
184
Flex (), enUSA, First Printing Parking Aids
Page 188 of 417
PRINCIPLE OF OPERATION
Cruise control lets you maintain a set
speed without keeping your foot on the
accelerator pedal. You can use cruise
control when your vehicle speed is greater
than 20 mph (30 km/h).
USING CRUISE CONTROL WARNINGS
Do not use cruise control on winding
roads, in heavy traffic or when the
road surface is slippery. This could
result in loss of vehicle control, serious
injury or death. When you are going downhill, your
vehicle speed may increase above
the set speed. The system will not
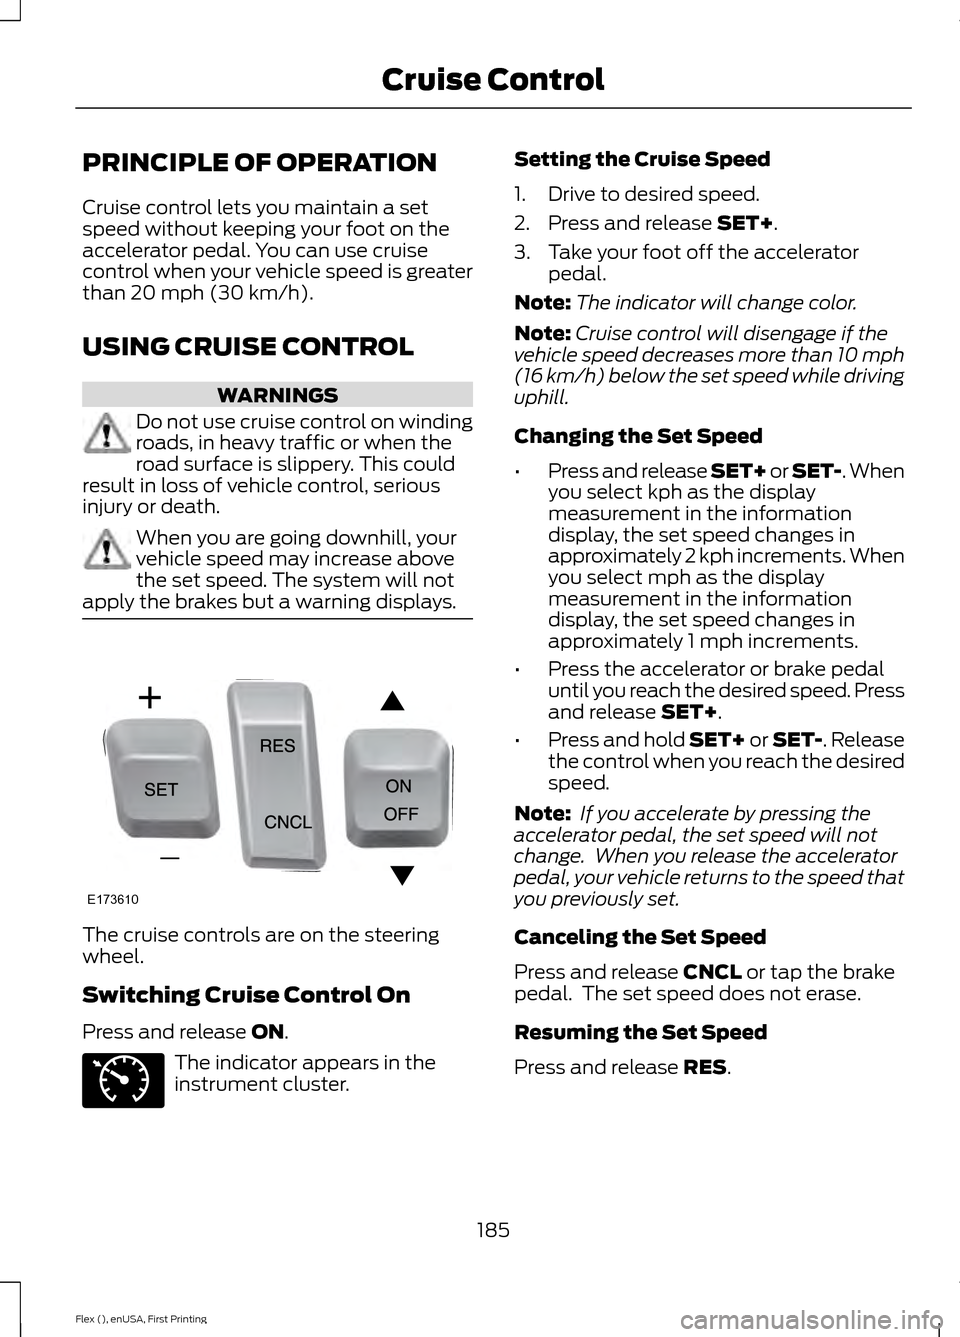
apply the brakes but a warning displays. The cruise controls are on the steering
wheel.
Switching Cruise Control On
Press and release
ON.
The indicator appears in the
instrument cluster. Setting the Cruise Speed
1. Drive to desired speed.
2. Press and release
SET+.
3. Take your foot off the accelerator pedal.
Note: The indicator will change color.
Note: Cruise control will disengage if the
vehicle speed decreases more than 10 mph
(16 km/h) below the set speed while driving
uphill.
Changing the Set Speed
• Press and release SET+ or SET-. When
you select kph as the display
measurement in the information
display, the set speed changes in
approximately 2 kph increments. When
you select mph as the display
measurement in the information
display, the set speed changes in
approximately 1 mph increments.
• Press the accelerator or brake pedal
until you reach the desired speed. Press
and release
SET+.
• Press and hold SET+ or SET-. Release
the control when you reach the desired
speed.
Note: If you accelerate by pressing the
accelerator pedal, the set speed will not
change. When you release the accelerator
pedal, your vehicle returns to the speed that
you previously set.
Canceling the Set Speed
Press and release
CNCL or tap the brake
pedal. The set speed does not erase.
Resuming the Set Speed
Press and release
RES.
185
Flex (), enUSA, First Printing Cruise ControlE173610 E71340
Page 189 of 417
Switching Cruise Control Off
Press and release OFF when the system
is in stand by mode or switch the ignition
off.
Note: You erase the set speed when you
switch the system off.
USING ADAPTIVE CRUISE
CONTROL
(If Equipped) WARNINGS
Always pay close attention to
changing road conditions when using
adaptive cruise control. The system
does not replace attentive driving. Failing
to pay attention to the road may result in
a crash, serious injury or death. Adaptive cruise control is not a crash
warning or avoidance system.
Adaptive cruise control does not
detect stationary or slow moving
vehicles below
6 mph (10 km/h).
Adaptive cruise control does not
detect pedestrians or objects in the
road.
Adaptive cruise control does not
detect oncoming vehicles in the
same lane.
Do not use adaptive cruise control
on winding roads, in heavy traffic or
when the road surface is slippery.
This could result in loss of vehicle control,
serious injury or death. Do not use adaptive cruise control
when towing a trailer that has trailer
brakes. The auto-brake component
of the adaptive cruise control system does
not operate the trailer brakes. Using
adaptive cruise control when towing a
trailer that has trailer brakes may result in
the loss of vehicle control, which could
result in serious injury. WARNINGS
Do not use tire sizes other than those
recommended because this can
affect the normal operation of the
system. Failing to do so may result in a loss
of vehicle control, which could result in
serious injury. The system adjusts your vehicle speed to
maintain the set gap between you and the
vehicle in front of you in the same lane.
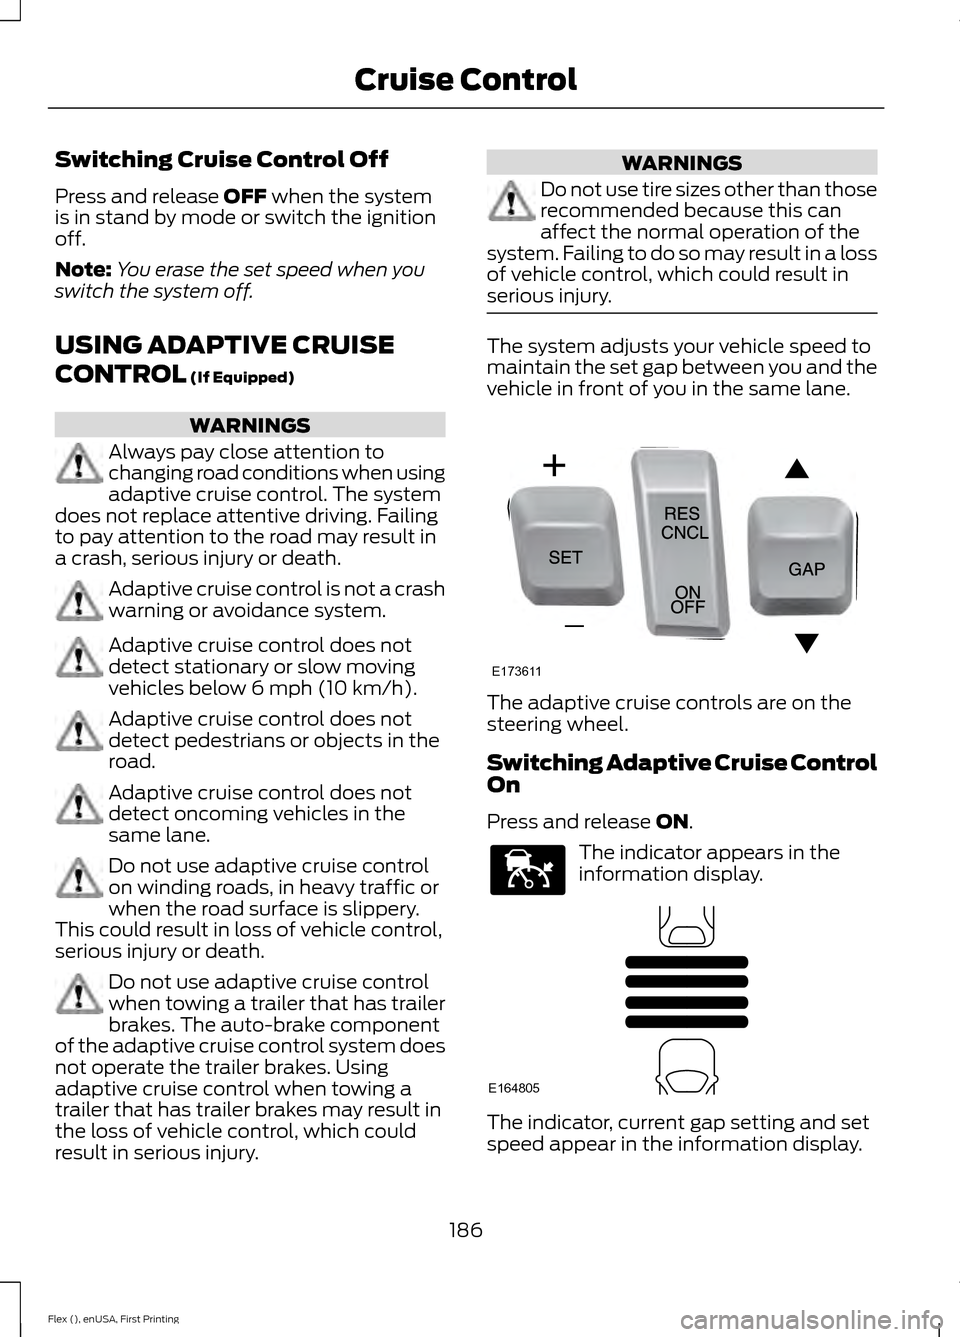
The adaptive cruise controls are on the
steering wheel.
Switching Adaptive Cruise Control
On
Press and release
ON.
The indicator appears in the
information display.
The indicator, current gap setting and set
speed appear in the information display.
186
Flex (), enUSA, First Printing Cruise ControlE173611 E144529 E164805
Page 190 of 417
Setting the Adaptive Cruise Speed
1. Drive to desired speed.
2. Press and release SET+.
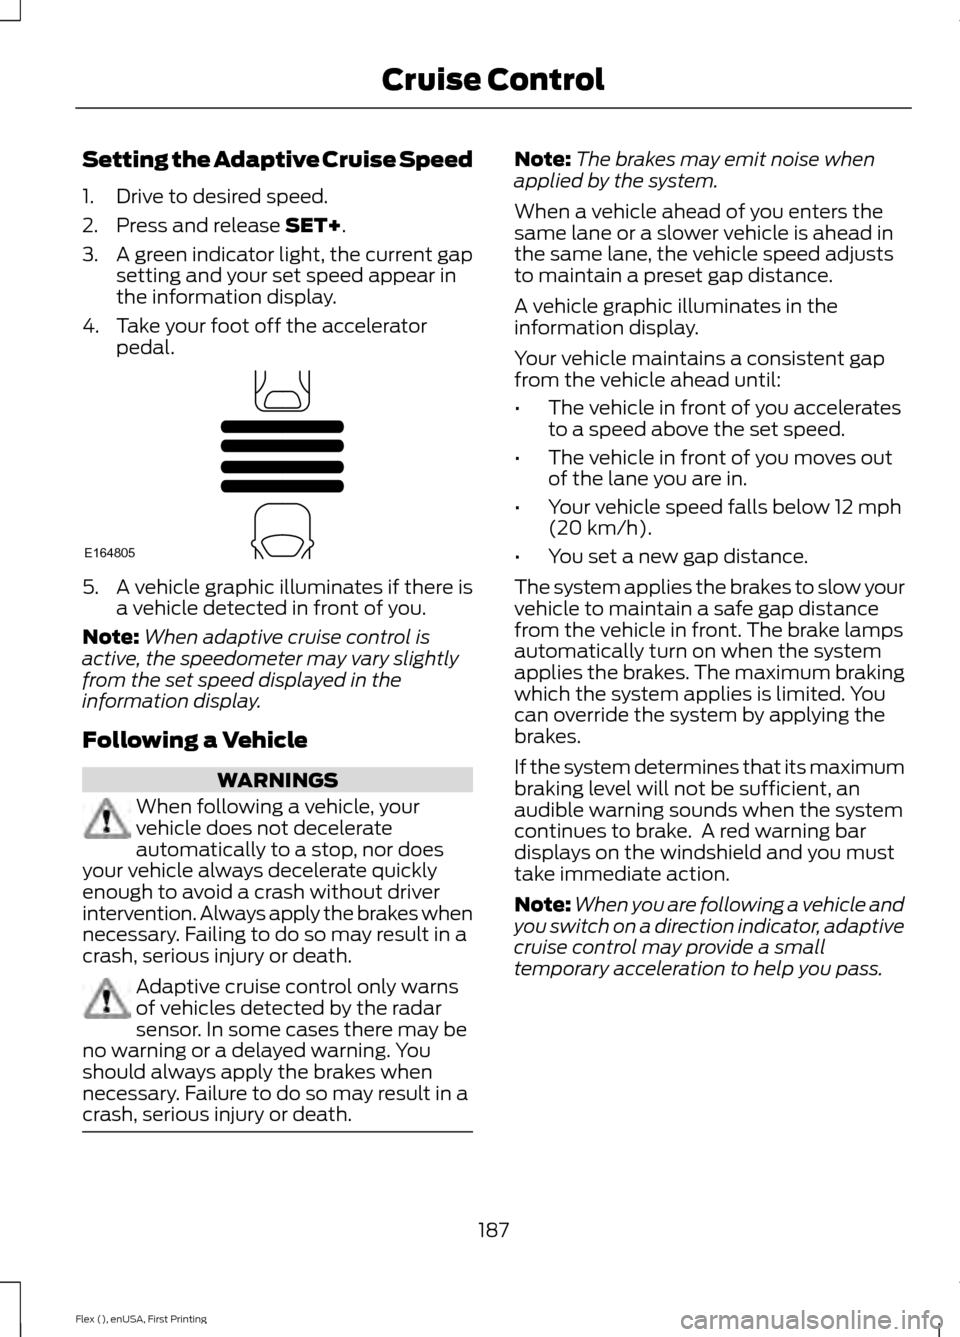
3. A green indicator light, the current gap
setting and your set speed appear in
the information display.
4. Take your foot off the accelerator pedal. 5. A vehicle graphic illuminates if there is
a vehicle detected in front of you.
Note: When adaptive cruise control is
active, the speedometer may vary slightly
from the set speed displayed in the
information display.
Following a Vehicle WARNINGS
When following a vehicle, your
vehicle does not decelerate
automatically to a stop, nor does
your vehicle always decelerate quickly
enough to avoid a crash without driver
intervention. Always apply the brakes when
necessary. Failing to do so may result in a
crash, serious injury or death. Adaptive cruise control only warns
of vehicles detected by the radar
sensor. In some cases there may be
no warning or a delayed warning. You
should always apply the brakes when
necessary. Failure to do so may result in a
crash, serious injury or death. Note:
The brakes may emit noise when
applied by the system.
When a vehicle ahead of you enters the
same lane or a slower vehicle is ahead in
the same lane, the vehicle speed adjusts
to maintain a preset gap distance.
A vehicle graphic illuminates in the
information display.
Your vehicle maintains a consistent gap
from the vehicle ahead until:
• The vehicle in front of you accelerates
to a speed above the set speed.
• The vehicle in front of you moves out
of the lane you are in.
• Your vehicle speed falls below
12 mph
(20 km/h).
• You set a new gap distance.
The system applies the brakes to slow your
vehicle to maintain a safe gap distance
from the vehicle in front. The brake lamps
automatically turn on when the system
applies the brakes. The maximum braking
which the system applies is limited. You
can override the system by applying the
brakes.
If the system determines that its maximum
braking level will not be sufficient, an
audible warning sounds when the system
continues to brake. A red warning bar
displays on the windshield and you must
take immediate action.
Note: When you are following a vehicle and
you switch on a direction indicator, adaptive
cruise control may provide a small
temporary acceleration to help you pass.
187
Flex (), enUSA, First Printing Cruise ControlE164805