headlamp FORD FOCUS 2003 1.G User Guide
[x] Cancel search | Manufacturer: FORD, Model Year: 2003, Model line: FOCUS, Model: FORD FOCUS 2003 1.GPages: 216, PDF Size: 4.15 MB
Page 47 of 216
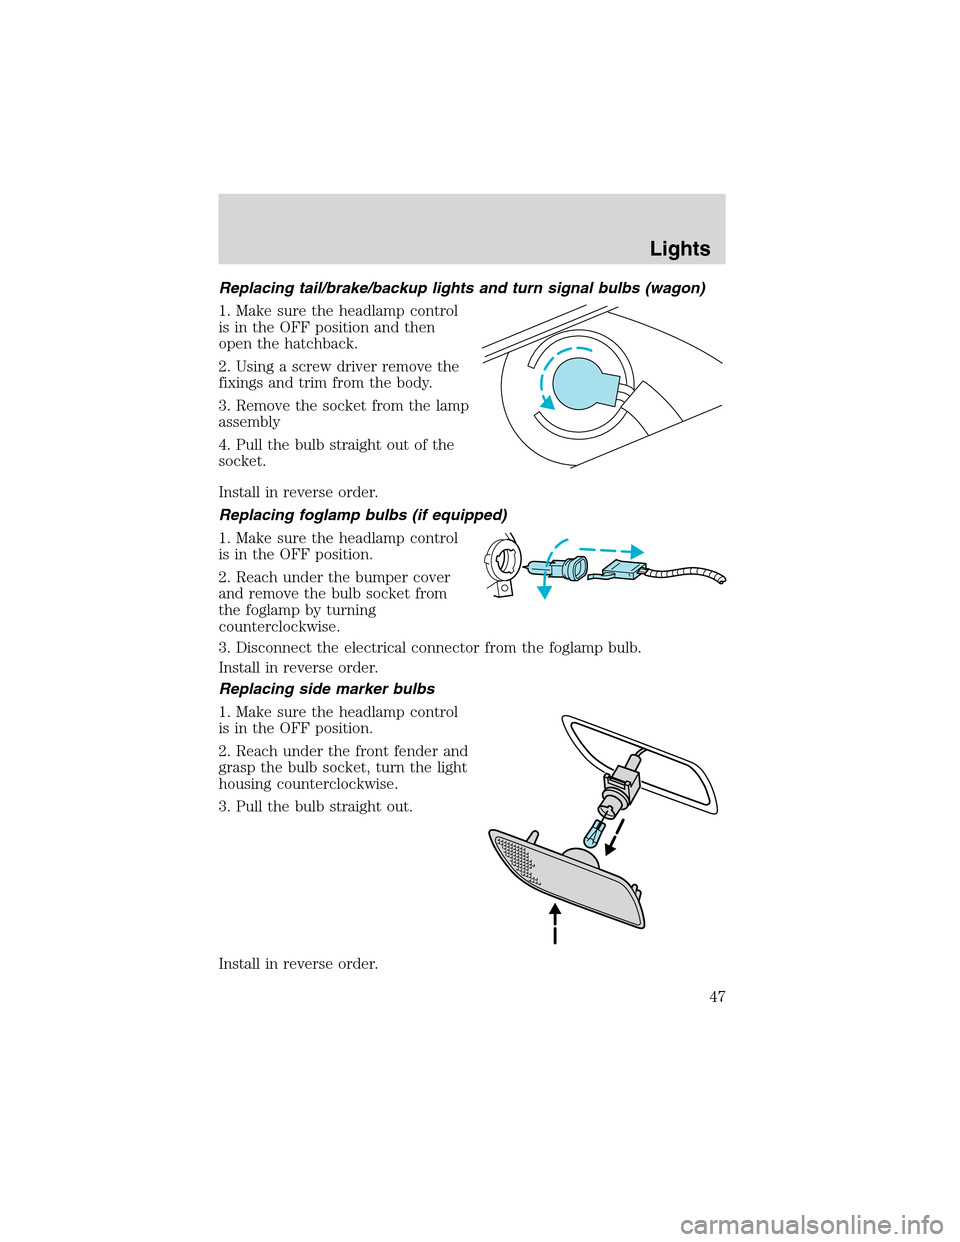
Replacing tail/brake/backup lights and turn signal bulbs (wagon)
1. Make sure the headlamp control
is in the OFF position and then
open the hatchback.
2. Using a screw driver remove the
fixings and trim from the body.
3. Remove the socket from the lamp
assembly
4. Pull the bulb straight out of the
socket.
Install in reverse order.
Replacing foglamp bulbs (if equipped)
1. Make sure the headlamp control
is in the OFF position.
2. Reach under the bumper cover
and remove the bulb socket from
the foglamp by turning
counterclockwise.
3. Disconnect the electrical connector from the foglamp bulb.
Install in reverse order.
Replacing side marker bulbs
1. Make sure the headlamp control
is in the OFF position.
2. Reach under the front fender and
grasp the bulb socket, turn the light
housing counterclockwise.
3. Pull the bulb straight out.
Install in reverse order.
Lights
47
Page 48 of 216
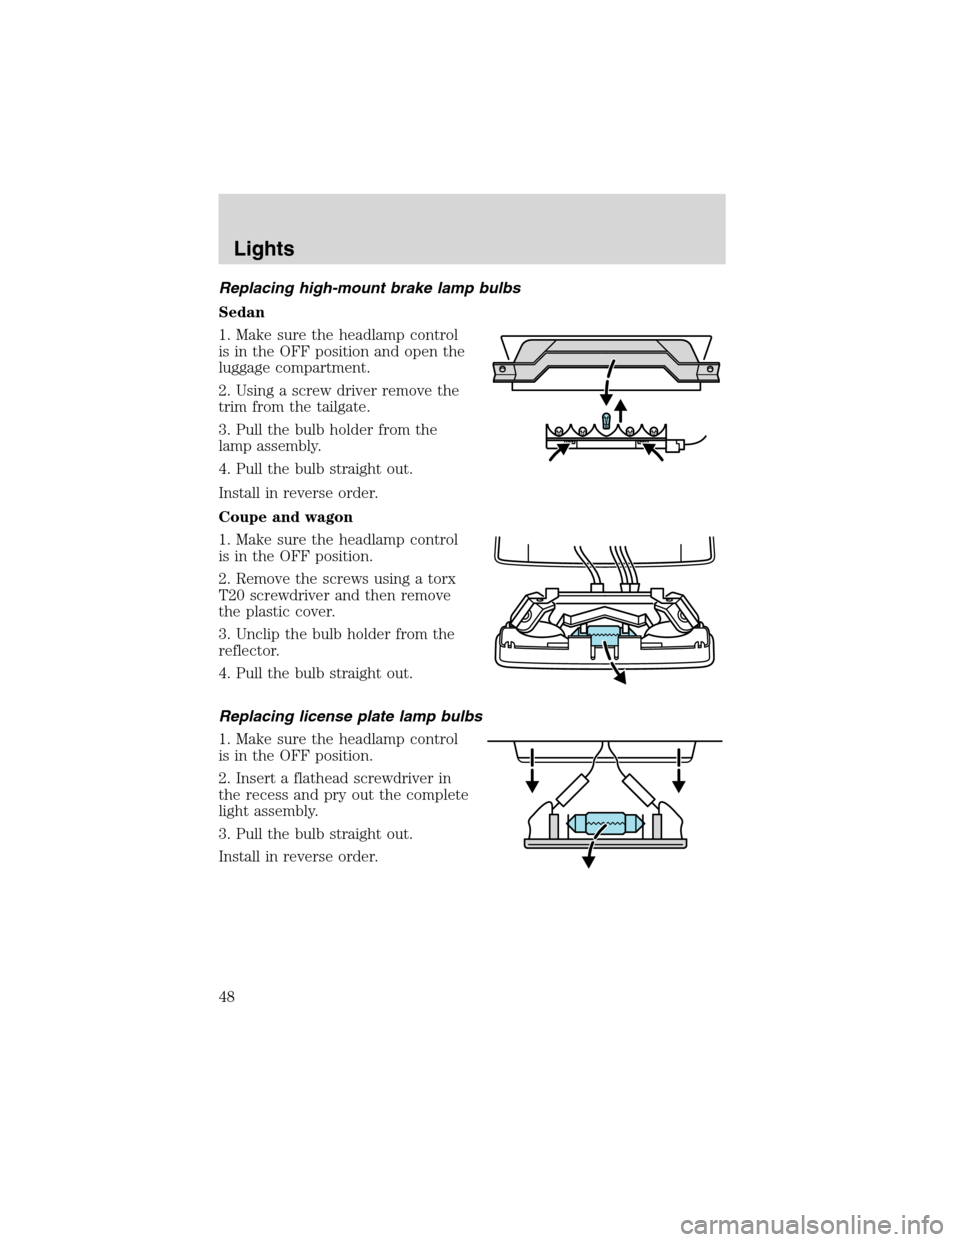
Replacing high-mount brake lamp bulbs
Sedan
1. Make sure the headlamp control
is in the OFF position and open the
luggage compartment.
2. Using a screw driver remove the
trim from the tailgate.
3. Pull the bulb holder from the
lamp assembly.
4. Pull the bulb straight out.
Install in reverse order.
Coupe and wagon
1. Make sure the headlamp control
is in the OFF position.
2. Remove the screws using a torx
T20 screwdriver and then remove
the plastic cover.
3. Unclip the bulb holder from the
reflector.
4. Pull the bulb straight out.
Replacing license plate lamp bulbs
1. Make sure the headlamp control
is in the OFF position.
2. Insert a flathead screwdriver in
the recess and pry out the complete
light assembly.
3. Pull the bulb straight out.
Install in reverse order.
Lights
48
Page 49 of 216
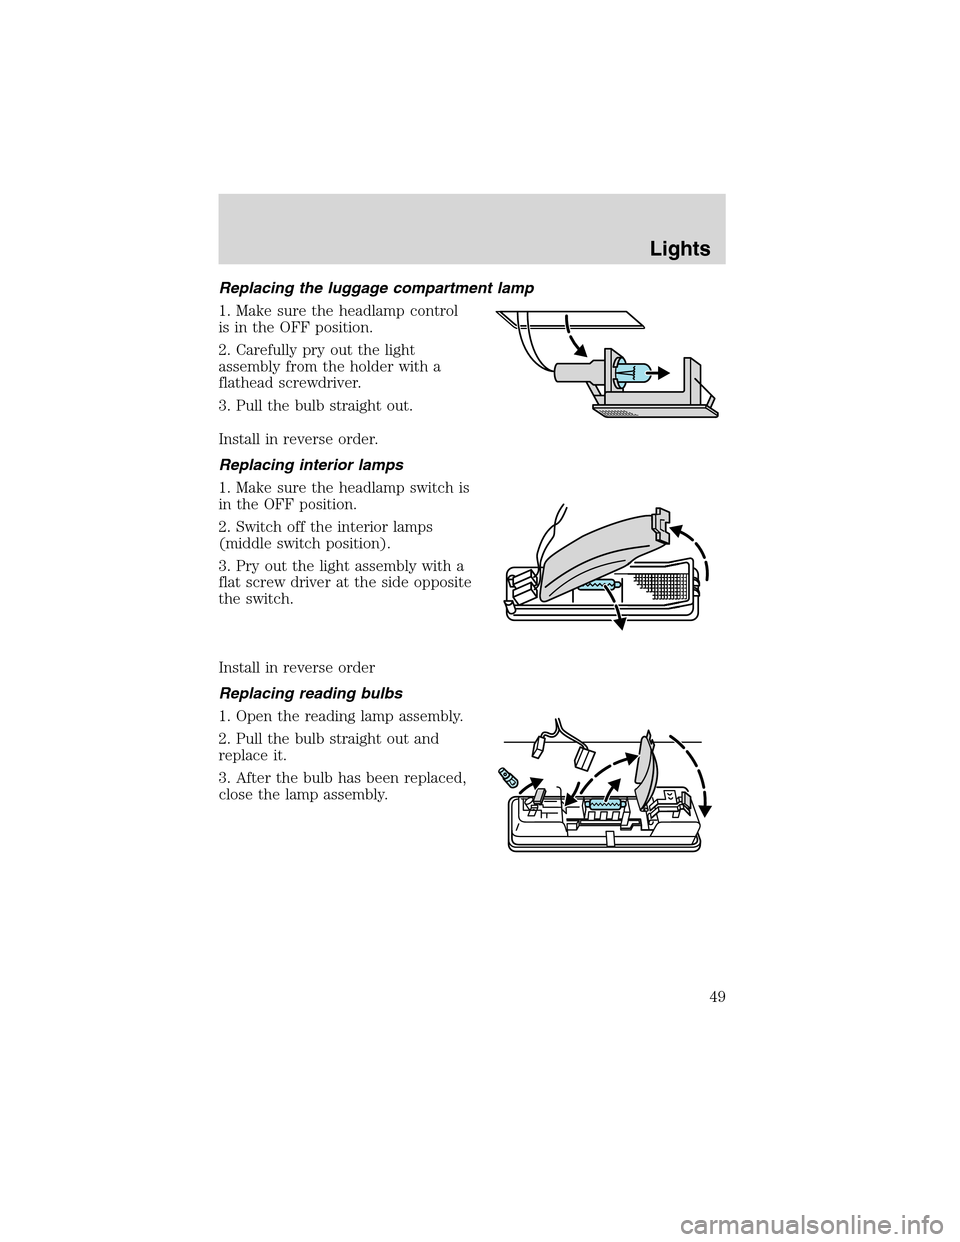
Replacing the luggage compartment lamp
1. Make sure the headlamp control
is in the OFF position.
2. Carefully pry out the light
assembly from the holder with a
flathead screwdriver.
3. Pull the bulb straight out.
Install in reverse order.
Replacing interior lamps
1. Make sure the headlamp switch is
in the OFF position.
2. Switch off the interior lamps
(middle switch position).
3. Pry out the light assembly with a
flat screw driver at the side opposite
the switch.
Install in reverse order
Replacing reading bulbs
1. Open the reading lamp assembly.
2. Pull the bulb straight out and
replace it.
3. After the bulb has been replaced,
close the lamp assembly.
Lights
49
Page 87 of 216
One time disable
Any time the safety belt is buckled and then unbuckled during an
ignition ON cycle, the BeltMinder will be disabled for that ignition cycle
only.
Deactivating/activating the BeltMinder feature
Read steps1-9thoroughly before proceeding with the
deactivation/activation programming procedure.
The BeltMinder feature can be deactivated/activated by performing the
following procedure:
Before following the procedure, ensure that the following conditions are
met:
•The parking brake is set.
•The gearshift is in P (Park) (automatic transmission) or the neutral
position (manual transmission).
•The ignition switch is in the OFF position.
•All vehicle doors are closed.
•The driver’s safety belt is unbuckled.
•The parklamps/headlamps are in OFF position (If vehicle is equipped
with Autolamps, this will not affect the procedure).
To reduce the risk of injury, do not deactivate/activate the Belt
Minder feature while driving the vehicle.
BeltMinder activation and deactivation procedure
1. Turn the ignition switch to the RUN (or ON) position. (DO NOT
START THE ENGINE.)
2. Wait until the safety belt warning light turns off. (Approximately 1–2
minutes.)
•Steps 3–5 must be completed within 60 seconds or the procedure will
have to be repeated.
3. Buckle then unbuckle the safety belt three times, ending with the
safety belt unbuckled. This can be done before or during BeltMinder
warning activation.
4. Turn on the parklamps/headlamps, turn off the parklamps/headlamps.
5. Buckle then unbuckle the safety belt three times, ending with the
safety belt unbuckled.
Seating and Safety Restraints
87
Page 108 of 216
If you smell exhaust fumes inside your vehicle, have your dealer
inspect your vehicle immediately. Do not drive if you smell
exhaust fumes.
Make sure the corresponding lights illuminate or illuminate briefly. If a
light fails to illuminate, have the vehicle serviced.
•If the driver’s safety belt is fastened, the
light may not illuminate.
Important safety precautions
When the engine starts, the idle RPM runs faster to warm the engine. If
the engine idle speed does not slow down automatically, have the vehicle
checked.
Before starting the vehicle:
1. Make sure all occupants buckle their safety belts. For more
information on safety belts and their proper usage, refer to theSeating
and safety restraintschapter.
2. Make sure the headlamps and electrical accessories are off.
If starting a vehicle with an automatic transaxle:
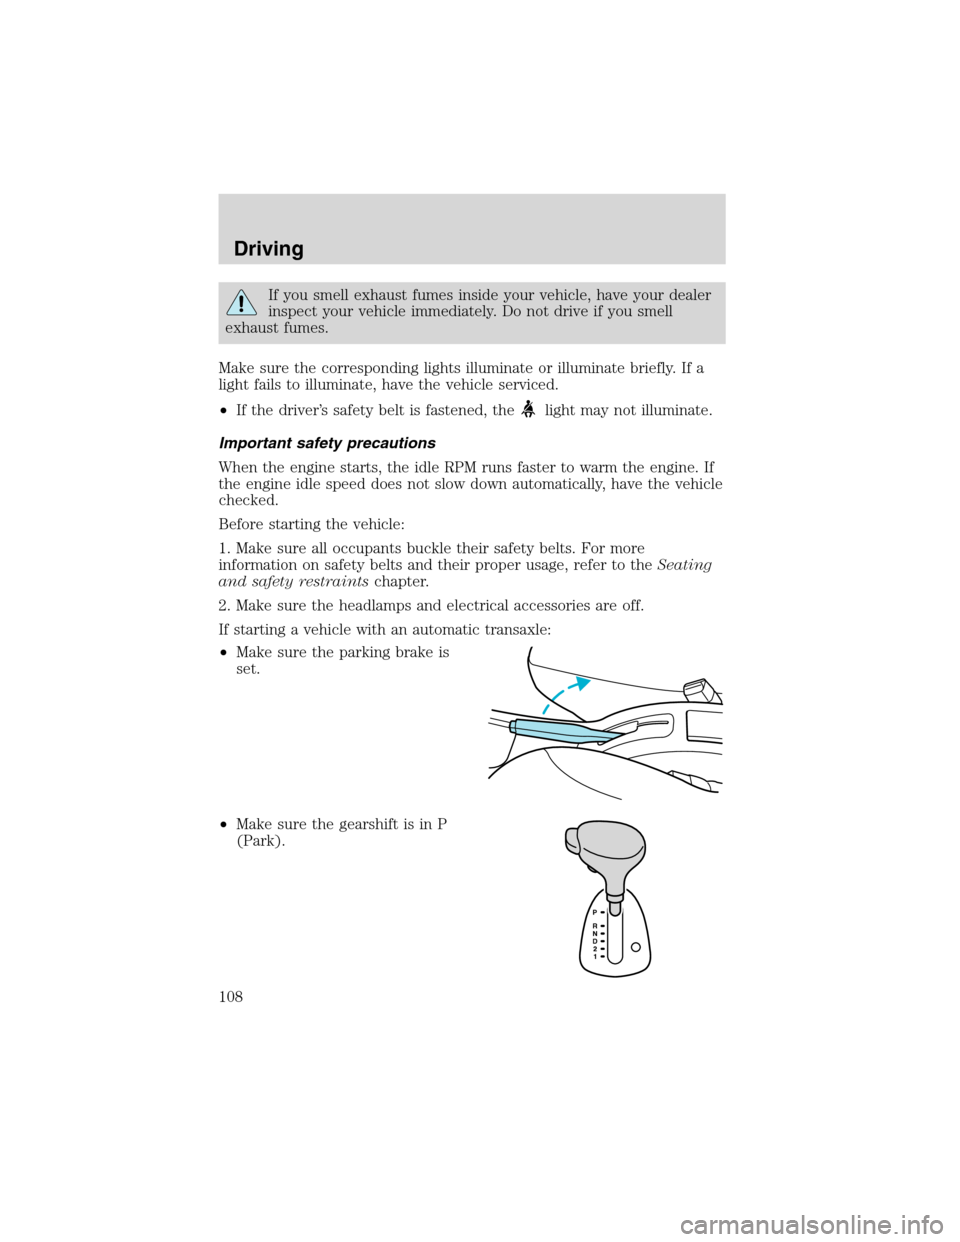
•Make sure the parking brake is
set.
•Make sure the gearshift is in P
(Park).
Driving
108
Page 131 of 216
Fuse/Relay
LocationFuse Amp
RatingPassenger Compartment Fuse
Panel Description
48 10A Data link connector
49 25A Rear defroster
50 7.5A Heated mirror, Heated backlite
indicator
51—Not used
52 15A Heated seats
53 10A Backup lamps (manual transaxle)
54 25A Rear power windows
55 25A Front power windows
56 20A Front wipers
57 7.5A Position and side lights (right)
58 7.5A Position and side lights (left)
59 7.5A Light switch (headlamps)
60 7.5A Air bag module
61 7.5A PATS modules, Instrument cluster
62 7.5A License plate lamp
63 20A Power locks (GEM)
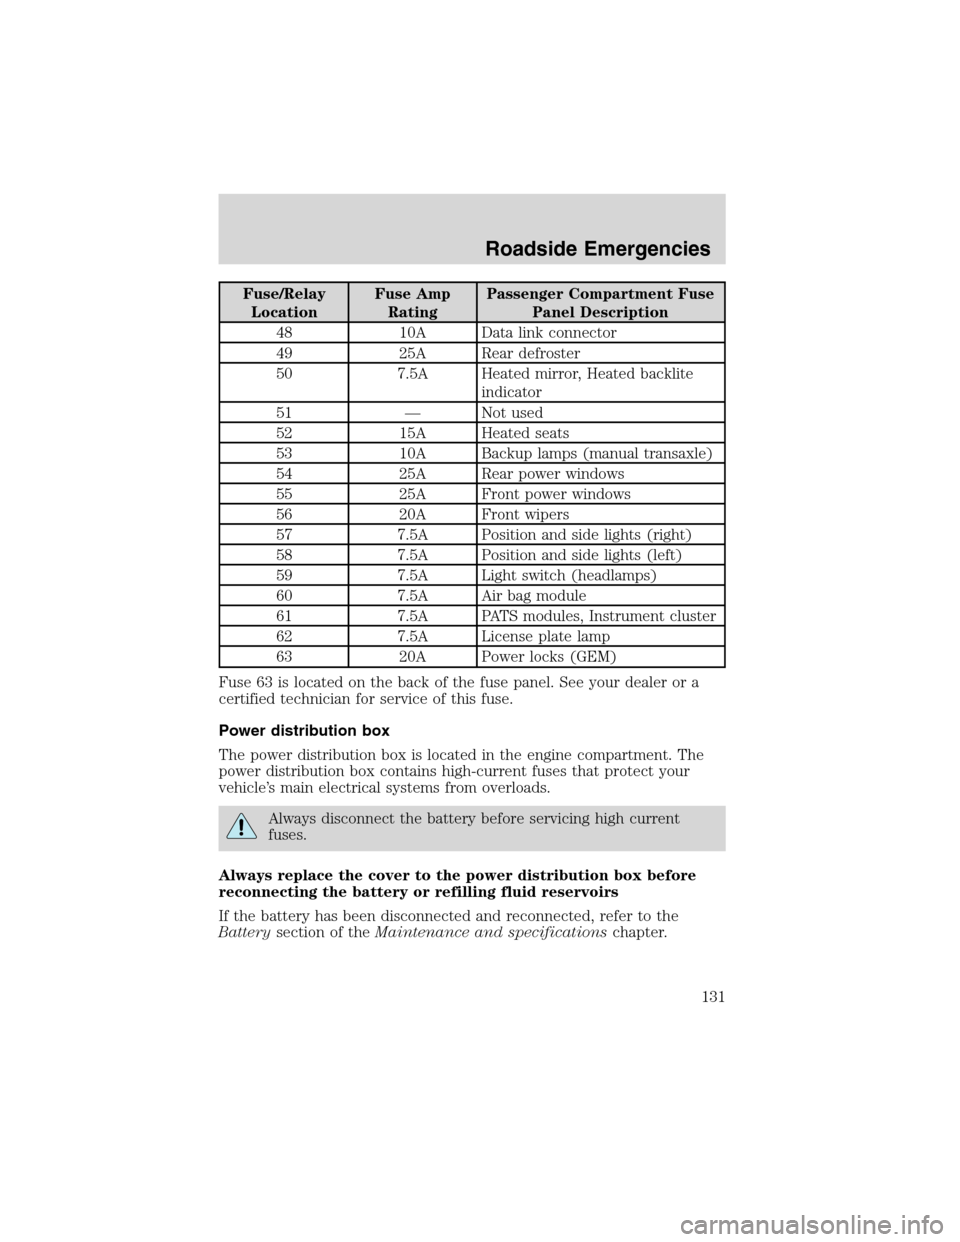
Fuse 63 is located on the back of the fuse panel. See your dealer or a
certified technician for service of this fuse.
Power distribution box
The power distribution box is located in the engine compartment. The
power distribution box contains high-current fuses that protect your
vehicle’s main electrical systems from overloads.
Always disconnect the battery before servicing high current
fuses.
Always replace the cover to the power distribution box before
reconnecting the battery or refilling fluid reservoirs
If the battery has been disconnected and reconnected, refer to the
Batterysection of theMaintenance and specificationschapter.
Roadside Emergencies
131
Page 133 of 216
Fuse/Relay
LocationFuse Amp
RatingPower Distribution Box
Description
10 10A (2.0L engine
only)Battery voltage sensor
1A (2.3L engine
only)
11 30A Anti-lock Brake System (ABS)
12 15A Fuel pump
13—Not used
14—Not used
15 10A A/C clutch solenoid
16 10A Low beam (left side -
conventional headlamps)
15A Low beam (left side - HID
headlamps)
17 10A Low beam (right side -
conventional headlamps)
15A Low beam (right side - HID
headlamps)
18 10A (2.0L engine
only)Heated oxygen sensors
15A (2.3L engine
only)
19—Not used
20 10A Engine module
21 20A ABS
22 20A Low beam (DRL)
23—Not used
24 30A Subwoofer
25—Not used
26 10A High beam (left)
27 10A High beam (right)
28—Not used
29—Not used
Roadside Emergencies
133
Page 206 of 216
Travel equipment
Automatic headlamp system
Daytime running lights (DRL)
First aid kit
Fog lights
Highway safety kit
Luggage/cargo basket
Navigation system
Removable luggage rack
Removable luggage rack adapters (bike, ski and snowboard)
Speed control
Protection and appearance equipment
Car cover
Carpet floor mats
Chrome exhaust trim
Door edge guards
Door sill scuff plates
Exterior B-pillar trim
Flat splash guards
Front end covers (full and mini)
Ground effects kit
Hood Deflectors
Leather wrap steering wheel
Molded splash guards
Molded vinyl floor mats
Projector headlamps
Side window deflector
Spoilers
Accessories
206
Page 210 of 216
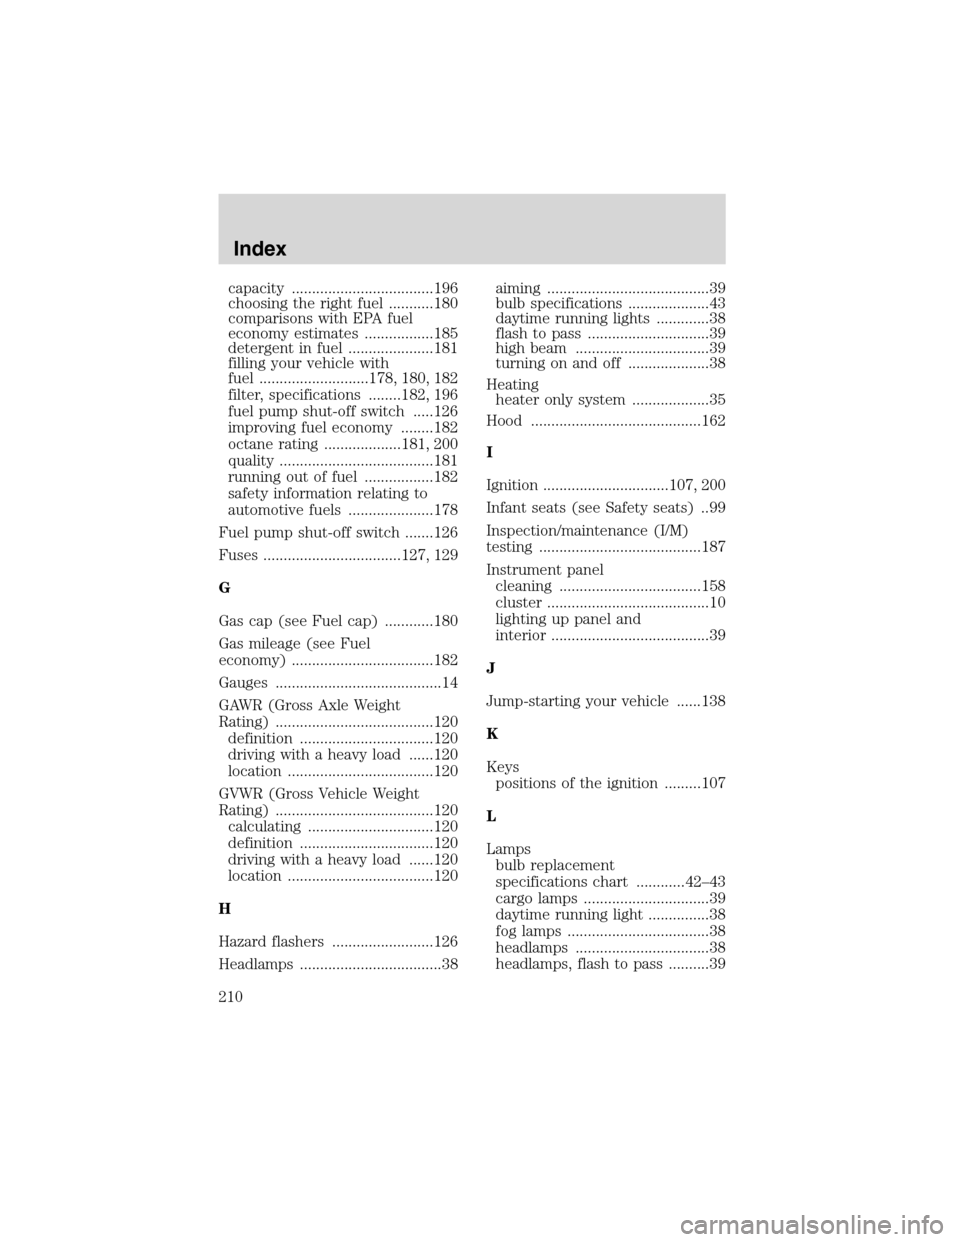
capacity ...................................196
choosing the right fuel ...........180
comparisons with EPA fuel
economy estimates .................185
detergent in fuel .....................181
filling your vehicle with
fuel ...........................178, 180, 182
filter, specifications ........182, 196
fuel pump shut-off switch .....126
improving fuel economy ........182
octane rating ...................181, 200
quality ......................................181
running out of fuel .................182
safety information relating to
automotive fuels .....................178
Fuel pump shut-off switch .......126
Fuses ..................................127, 129
G
Gas cap (see Fuel cap) ............180
Gas mileage (see Fuel
economy) ...................................182
Gauges .........................................14
GAWR (Gross Axle Weight
Rating) .......................................120
definition .................................120
driving with a heavy load ......120
location ....................................120
GVWR (Gross Vehicle Weight
Rating) .......................................120
calculating ...............................120
definition .................................120
driving with a heavy load ......120
location ....................................120
H
Hazard flashers .........................126
Headlamps ...................................38aiming ........................................39
bulb specifications ....................43
daytime running lights .............38
flash to pass ..............................39
high beam .................................39
turning on and off ....................38
Heating
heater only system ...................35
Hood ..........................................162
I
Ignition ...............................107, 200
Infant seats (see Safety seats) ..99
Inspection/maintenance (I/M)
testing ........................................187
Instrument panel
cleaning ...................................158
cluster ........................................10
lighting up panel and
interior .......................................39
J
Jump-starting your vehicle ......138
K
Keys
positions of the ignition .........107
L
Lamps
bulb replacement
specifications chart ............42–43
cargo lamps ...............................39
daytime running light ...............38
fog lamps ...................................38
headlamps .................................38
headlamps, flash to pass ..........39
Index
210