FORD FREESTAR 2004 1.G Owners Manual
FREESTAR 2004 1.G
FORD
FORD
https://www.carmanualsonline.info/img/11/5167/w960_5167-0.png
FORD FREESTAR 2004 1.G Owners Manual
Trending: tire pressure reset, cruise control, automatic transmission fluid, relay, transmission oil, brake, brake light
Page 111 of 280
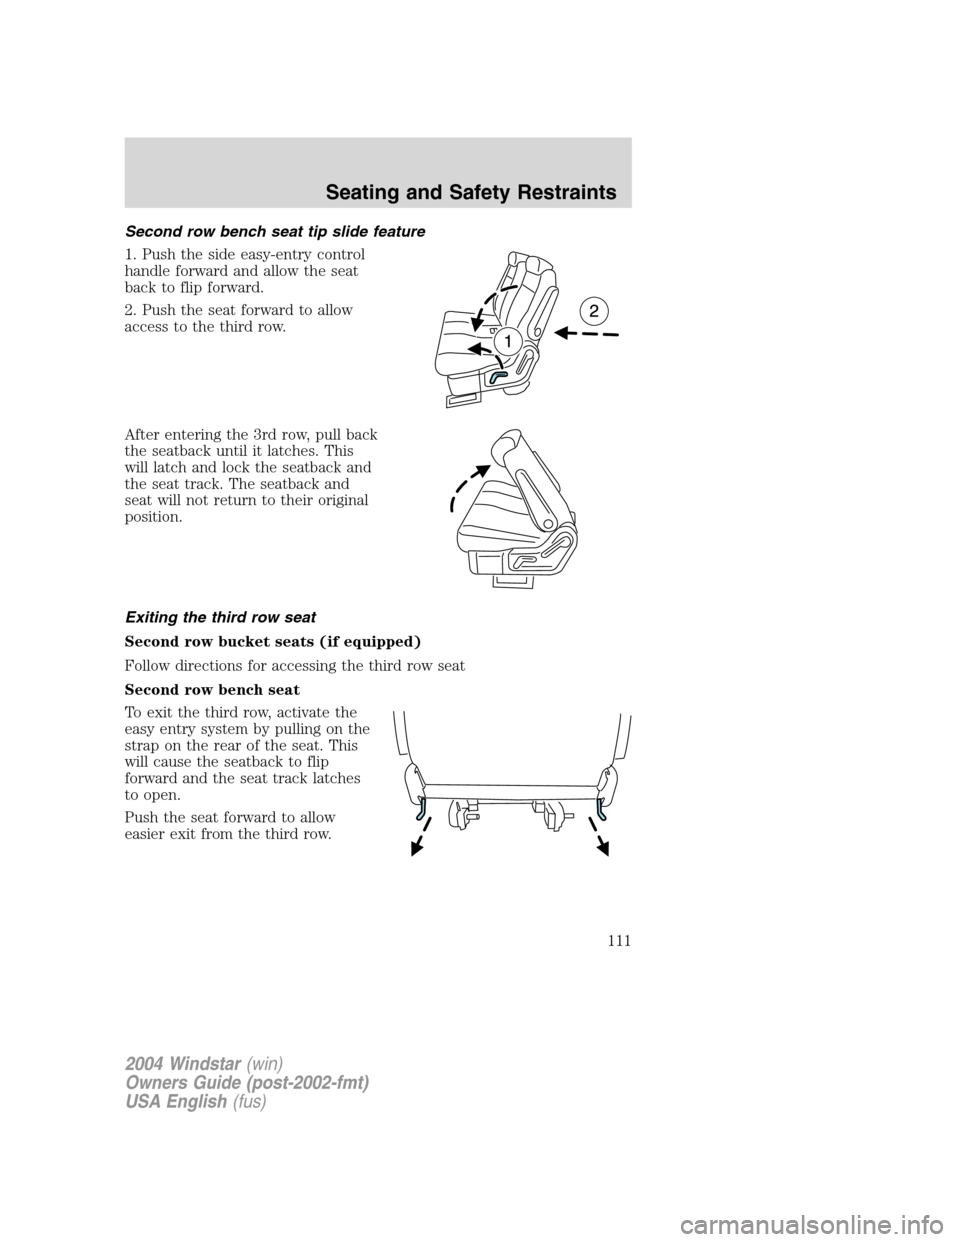
Second row bench seat tip slide feature
1. Push the side easy-entry control
handle forward and allow the seat
back to flip forward.
2. Push the seat forward to allow
access to the third row.
After entering the 3rd row, pull back
the seatback until it latches. This
will latch and lock the seatback and
the seat track. The seatback and
seat will not return to their original
position.
Exiting the third row seat
Second row bucket seats (if equipped)
Follow directions for accessing the third row seat
Second row bench seat
To exit the third row, activate the
easy entry system by pulling on the
strap on the rear of the seat. This
will cause the seatback to flip
forward and the seat track latches
to open.
Push the seat forward to allow
easier exit from the third row.
2004 Windstar(win)
Owners Guide (post-2002-fmt)
USA English(fus)
Seating and Safety Restraints
111
Page 112 of 280
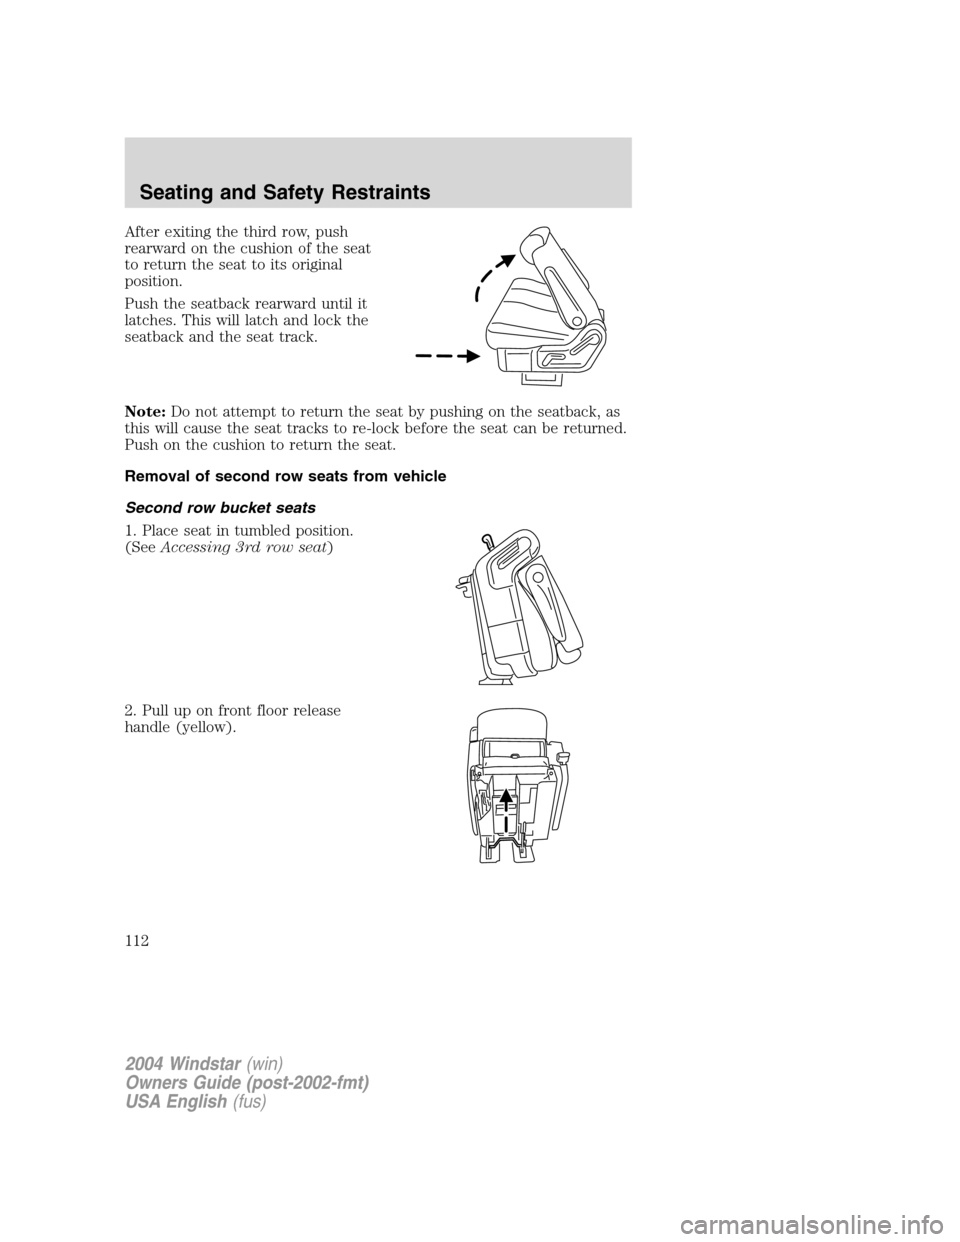
After exiting the third row, push
rearward on the cushion of the seat
to return the seat to its original
position.
Push the seatback rearward until it
latches. This will latch and lock the
seatback and the seat track.
Note:Do not attempt to return the seat by pushing on the seatback, as
this will cause the seat tracks to re-lock before the seat can be returned.
Push on the cushion to return the seat.
Removal of second row seats from vehicle
Second row bucket seats
1. Place seat in tumbled position.
(SeeAccessing 3rd row seat)
2. Pull up on front floor release
handle (yellow).
2004 Windstar(win)
Owners Guide (post-2002-fmt)
USA English(fus)
Seating and Safety Restraints
112
Page 113 of 280
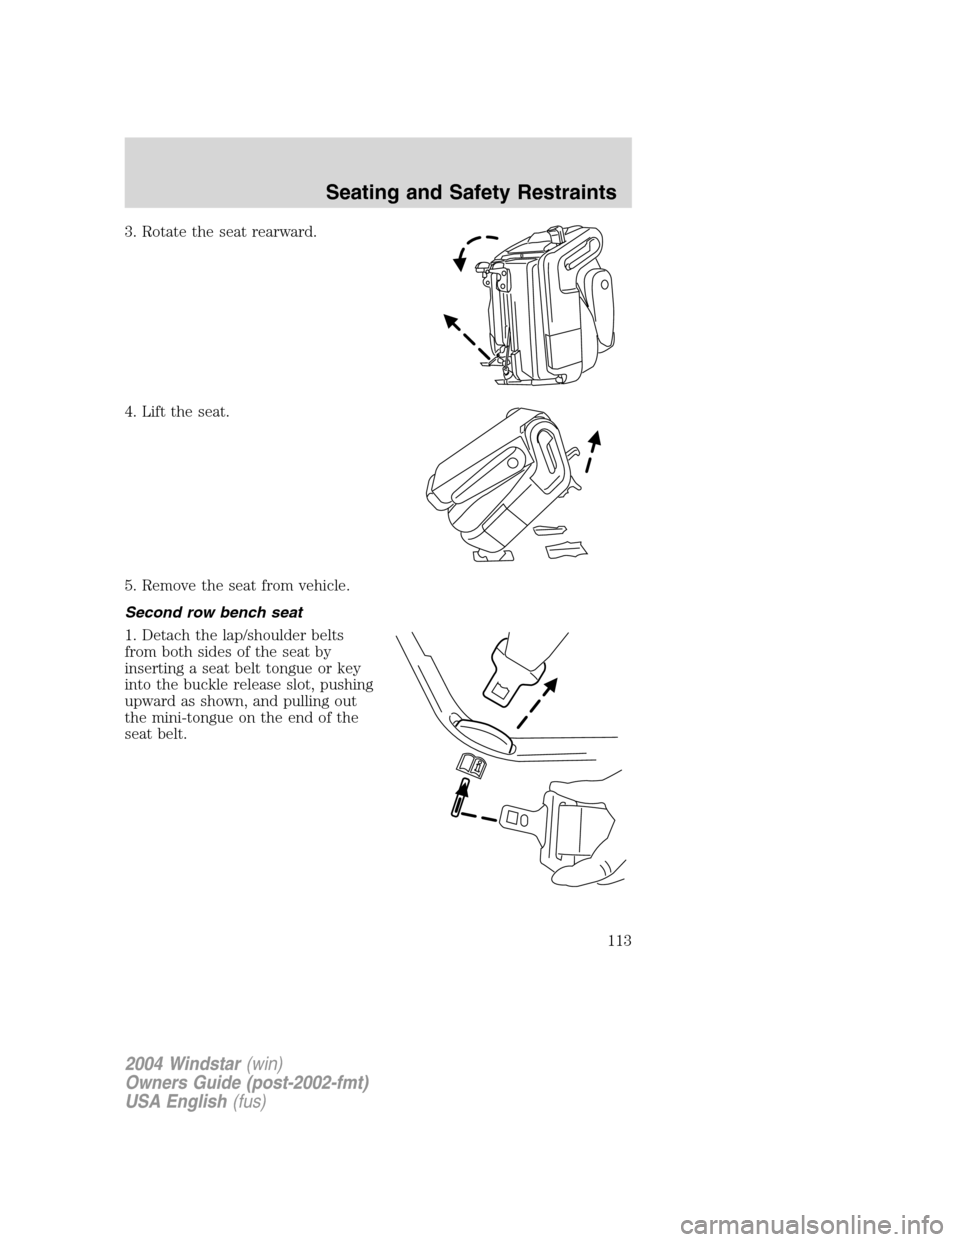
3. Rotate the seat rearward.
4. Lift the seat.
5. Remove the seat from vehicle.
Second row bench seat
1. Detach the lap/shoulder belts
from both sides of the seat by
inserting a seat belt tongue or key
into the buckle release slot, pushing
upward as shown, and pulling out
the mini-tongue on the end of the
seat belt.
2004 Windstar(win)
Owners Guide (post-2002-fmt)
USA English(fus)
Seating and Safety Restraints
113
Page 114 of 280
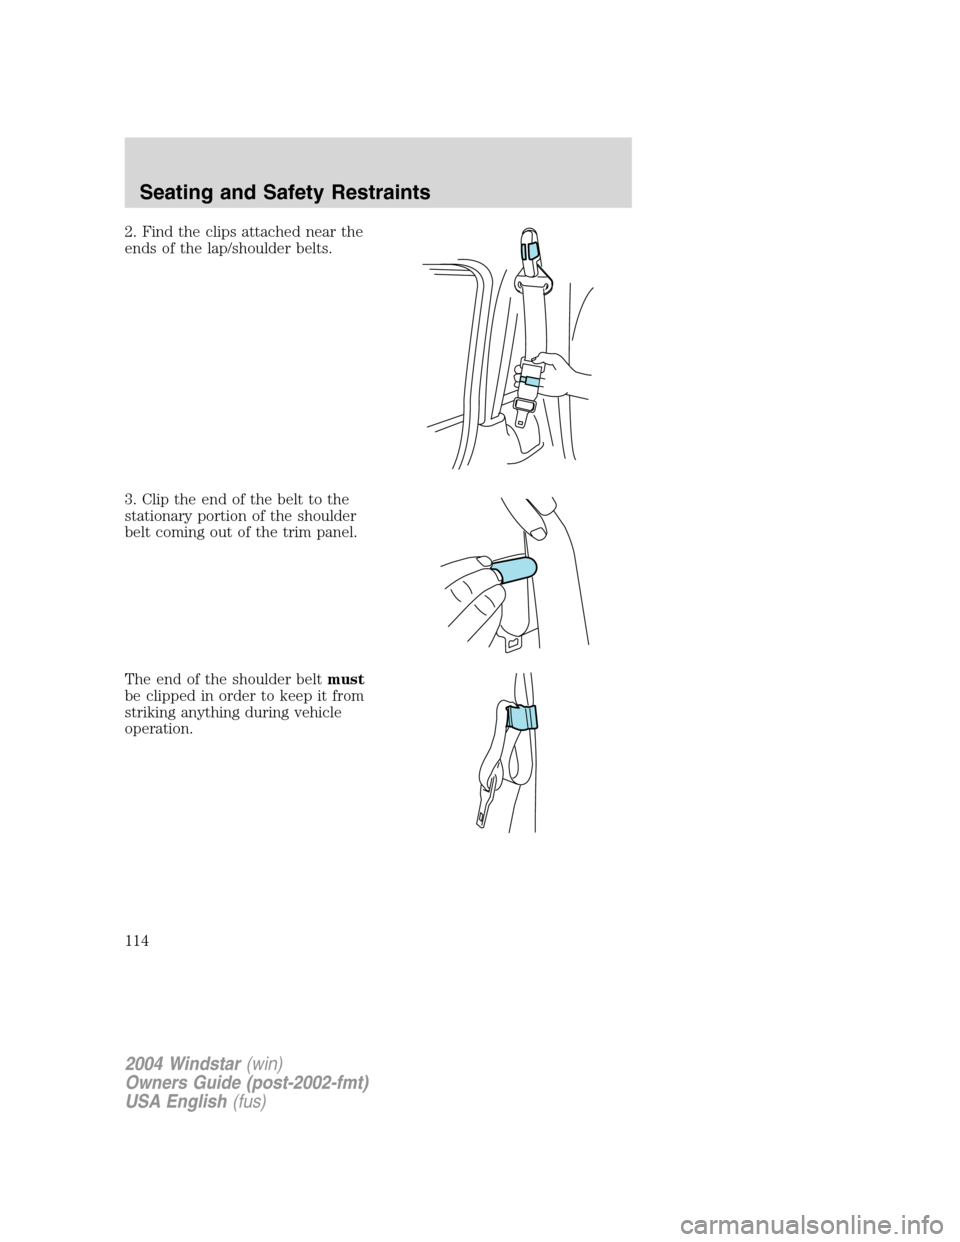
2. Find the clips attached near the
ends of the lap/shoulder belts.
3. Clip the end of the belt to the
stationary portion of the shoulder
belt coming out of the trim panel.
The end of the shoulder beltmust
be clipped in order to keep it from
striking anything during vehicle
operation.
2004 Windstar(win)
Owners Guide (post-2002-fmt)
USA English(fus)
Seating and Safety Restraints
114
Page 115 of 280
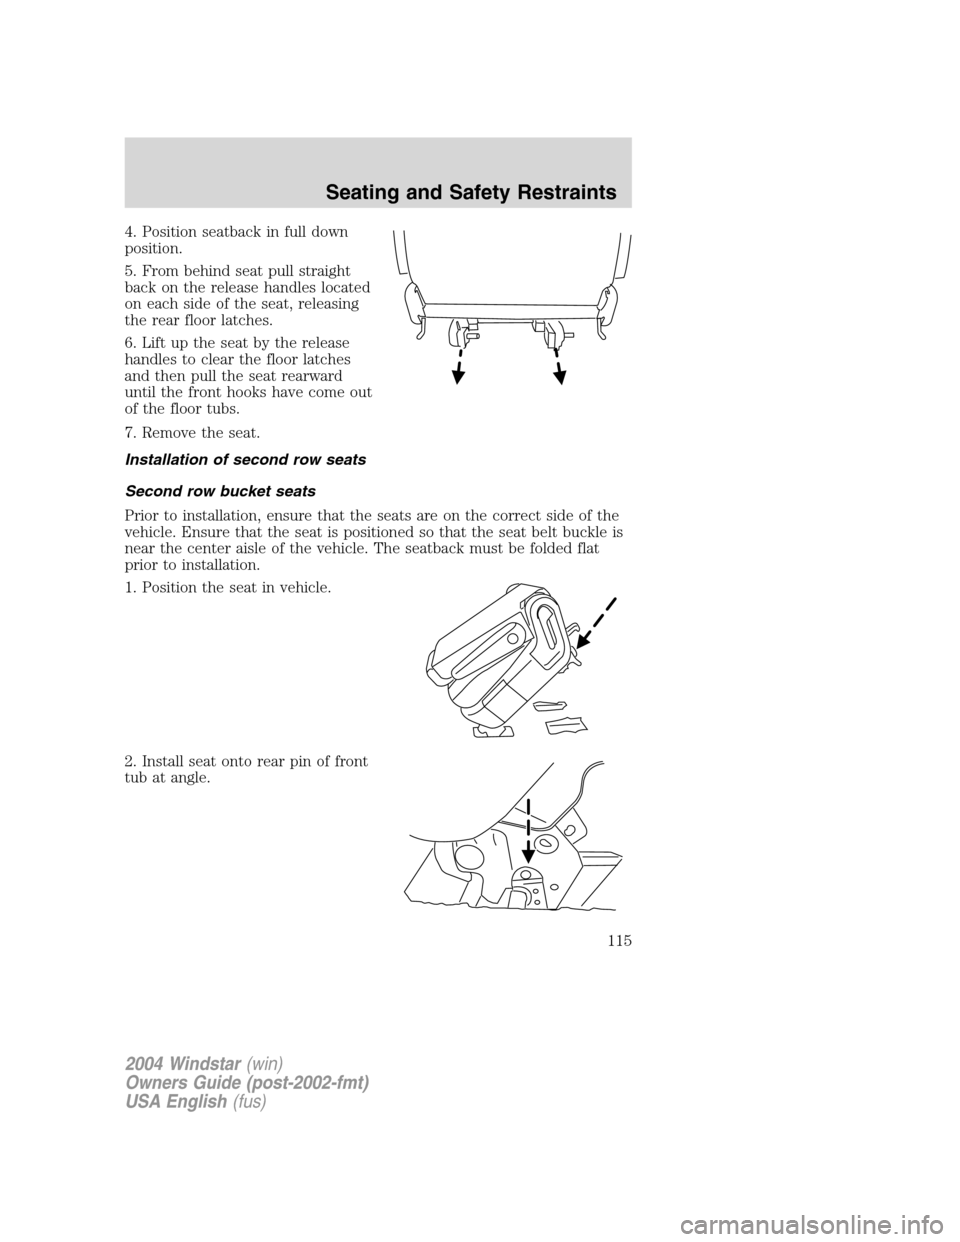
4. Position seatback in full down
position.
5. From behind seat pull straight
back on the release handles located
on each side of the seat, releasing
the rear floor latches.
6. Lift up the seat by the release
handles to clear the floor latches
and then pull the seat rearward
until the front hooks have come out
of the floor tubs.
7. Remove the seat.
Installation of second row seats
Second row bucket seats
Prior to installation, ensure that the seats are on the correct side of the
vehicle. Ensure that the seat is positioned so that the seat belt buckle is
near the center aisle of the vehicle. The seatback must be folded flat
prior to installation.
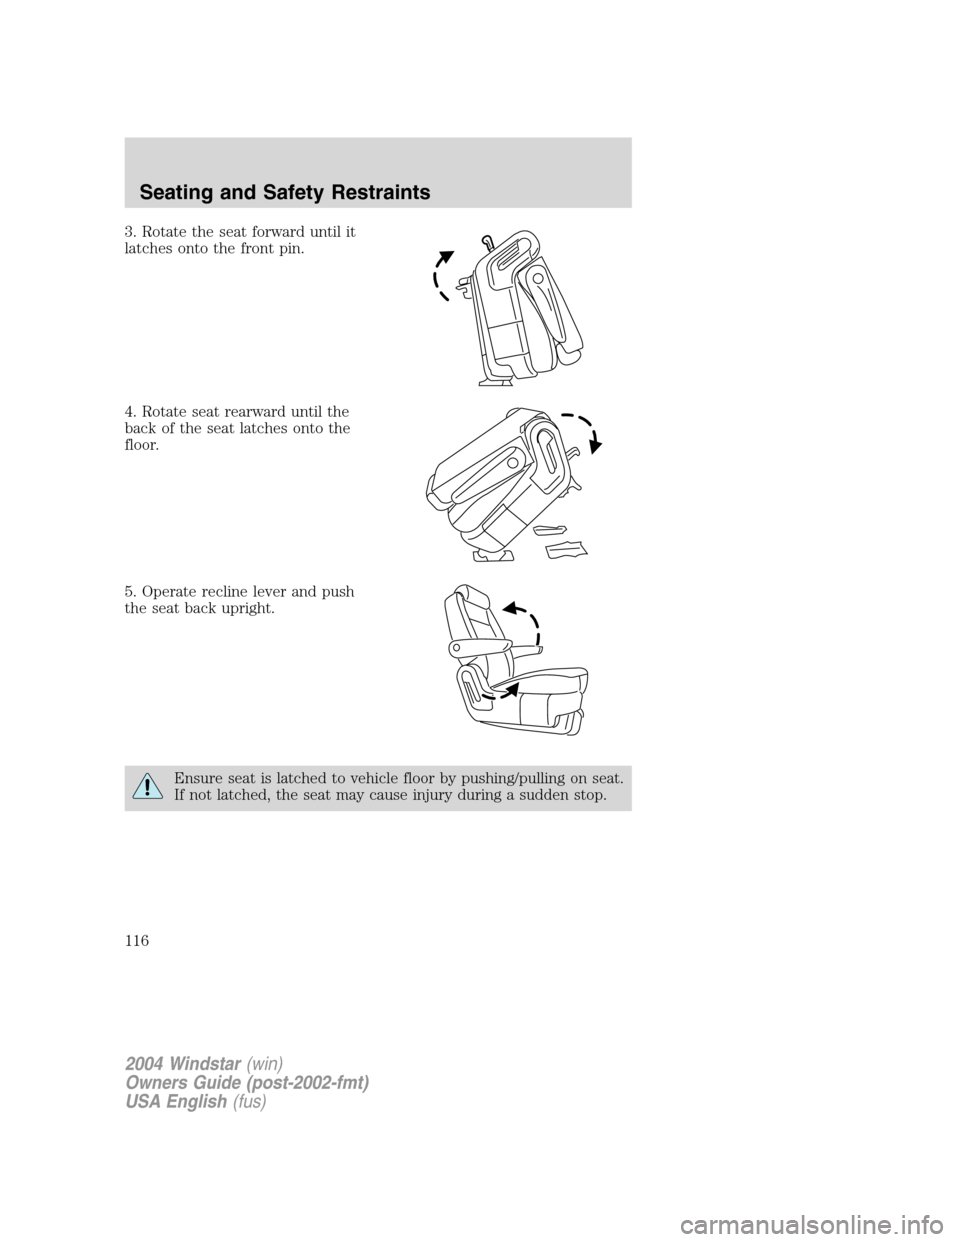
1. Position the seat in vehicle.
2. Install seat onto rear pin of front
tub at angle.
2004 Windstar(win)
Owners Guide (post-2002-fmt)
USA English(fus)
Seating and Safety Restraints
115
Page 116 of 280
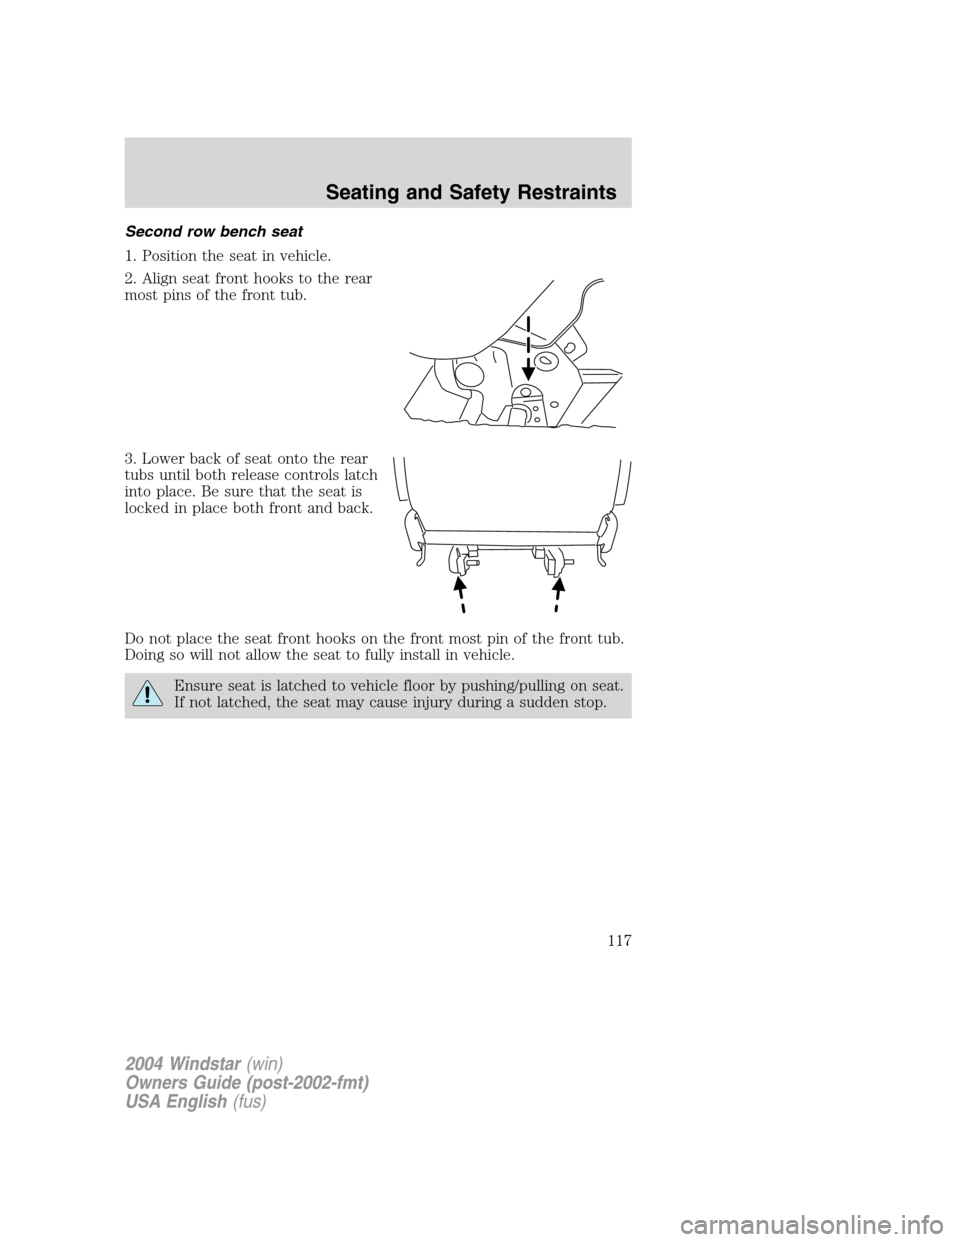
3. Rotate the seat forward until it
latches onto the front pin.
4. Rotate seat rearward until the
back of the seat latches onto the
floor.
5. Operate recline lever and push
the seat back upright.
Ensure seat is latched to vehicle floor by pushing/pulling on seat.
If not latched, the seat may cause injury during a sudden stop.
2004 Windstar(win)
Owners Guide (post-2002-fmt)
USA English(fus)
Seating and Safety Restraints
116
Page 117 of 280
Second row bench seat
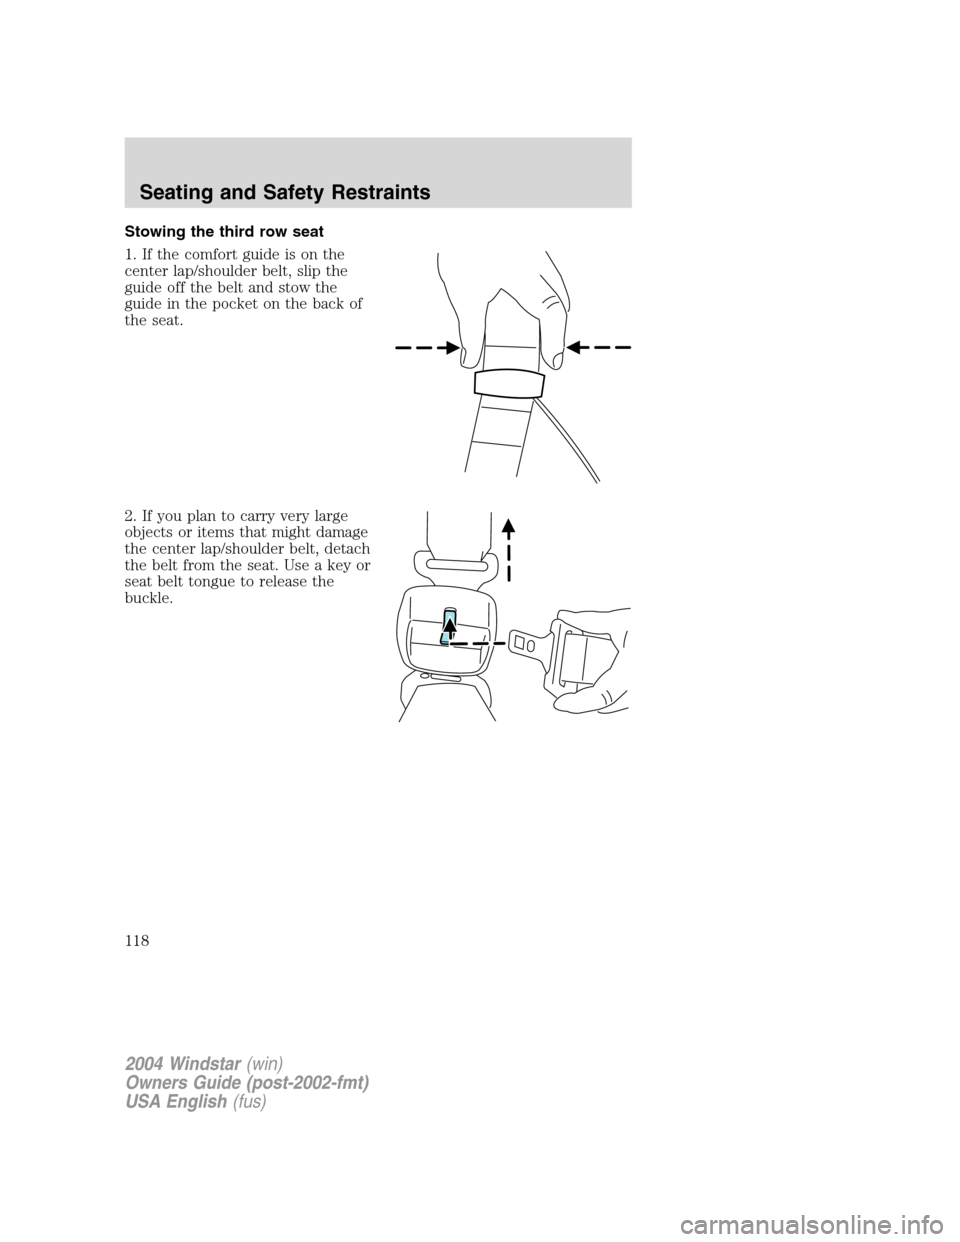
1. Position the seat in vehicle.
2. Align seat front hooks to the rear
most pins of the front tub.
3. Lower back of seat onto the rear
tubs until both release controls latch
into place. Be sure that the seat is
locked in place both front and back.
Do not place the seat front hooks on the front most pin of the front tub.
Doing so will not allow the seat to fully install in vehicle.
Ensure seat is latched to vehicle floor by pushing/pulling on seat.
If not latched, the seat may cause injury during a sudden stop.
2004 Windstar(win)
Owners Guide (post-2002-fmt)
USA English(fus)
Seating and Safety Restraints
117
Page 118 of 280
Stowing the third row seat
1. If the comfort guide is on the
center lap/shoulder belt, slip the
guide off the belt and stow the
guide in the pocket on the back of
the seat.
2. If you plan to carry very large
objects or items that might damage
the center lap/shoulder belt, detach
the belt from the seat. Use a key or
seat belt tongue to release the
buckle.
2004 Windstar(win)
Owners Guide (post-2002-fmt)
USA English(fus)
Seating and Safety Restraints
118
Page 119 of 280
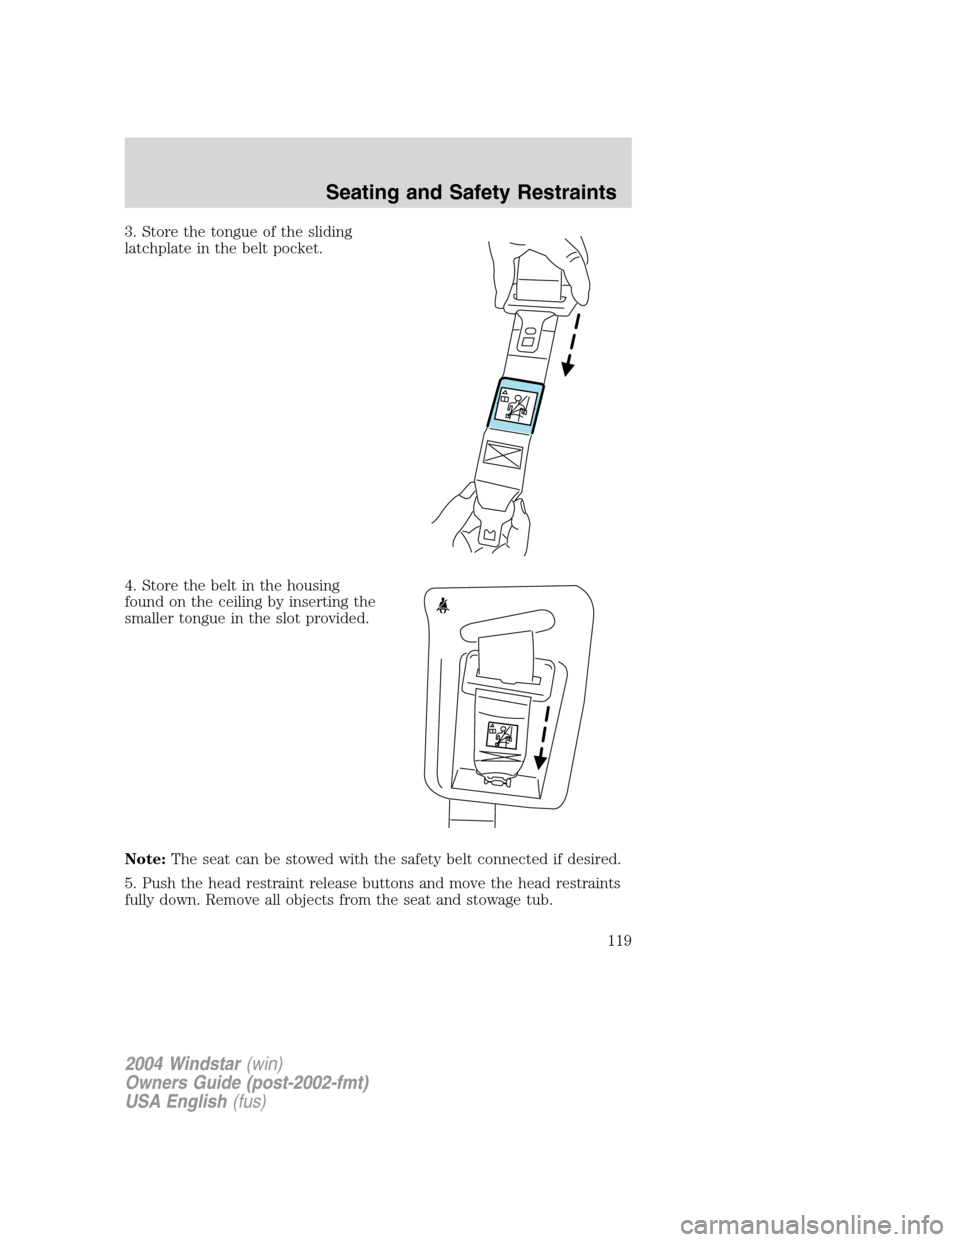
3. Store the tongue of the sliding
latchplate in the belt pocket.
4. Store the belt in the housing
found on the ceiling by inserting the
smaller tongue in the slot provided.
Note:The seat can be stowed with the safety belt connected if desired.
5. Push the head restraint release buttons and move the head restraints
fully down. Remove all objects from the seat and stowage tub.
2004 Windstar(win)
Owners Guide (post-2002-fmt)
USA English(fus)
Seating and Safety Restraints
119
Page 120 of 280
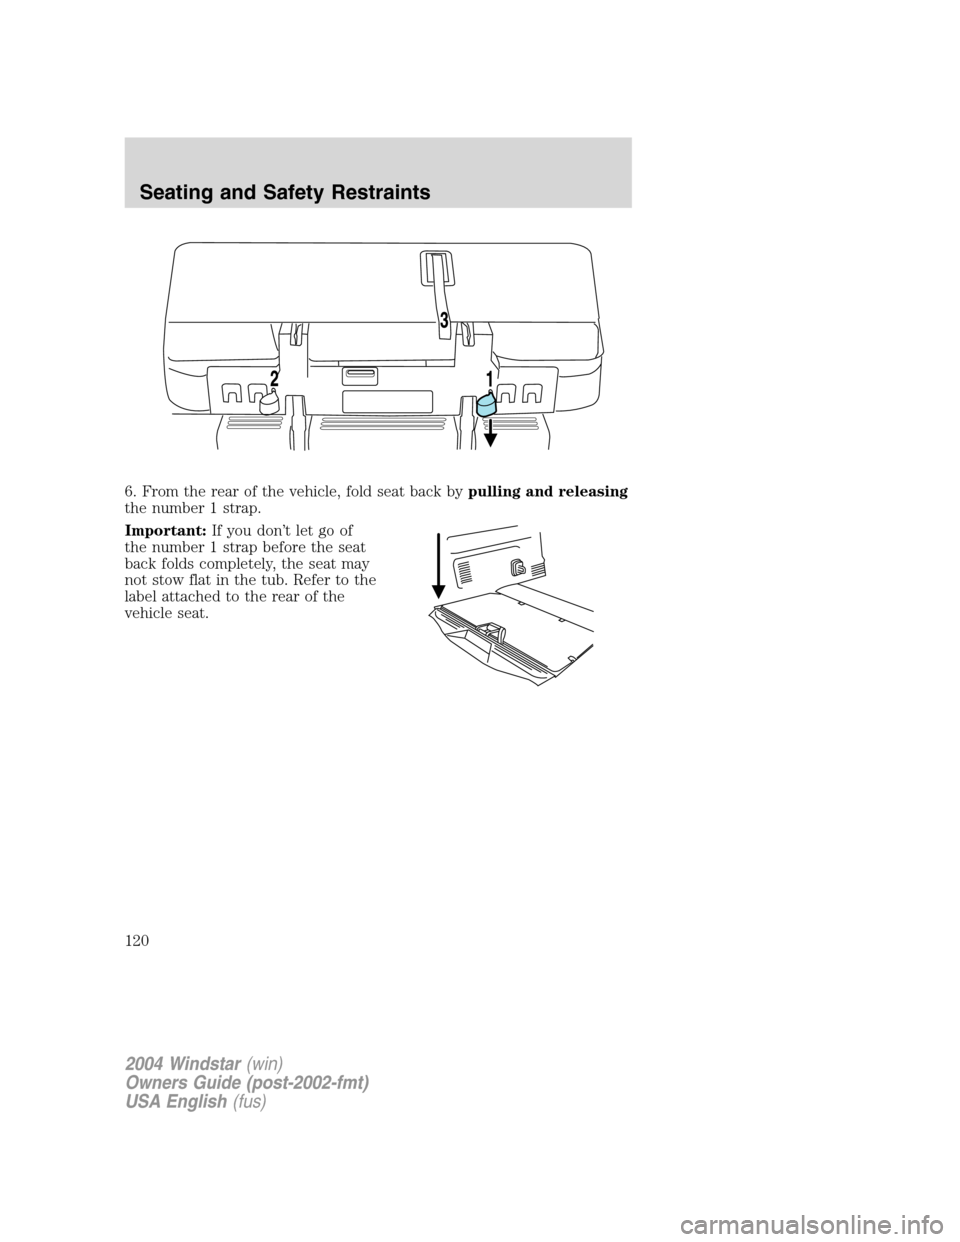
6. From the rear of the vehicle, fold seat back bypulling and releasing
the number 1 strap.
Important:If you don’t let go of
the number 1 strap before the seat
back folds completely, the seat may
not stow flat in the tub. Refer to the
label attached to the rear of the
vehicle seat.
2004 Windstar(win)
Owners Guide (post-2002-fmt)
USA English(fus)
Seating and Safety Restraints
120
Trending: ignition, steering wheel, clock reset, lock, towing capacity, battery replacement, wheel torque
