ignition FORD FREESTAR 2005 1.G User Guide
[x] Cancel search | Manufacturer: FORD, Model Year: 2005, Model line: FREESTAR, Model: FORD FREESTAR 2005 1.GPages: 312, PDF Size: 3.96 MB
Page 45 of 312
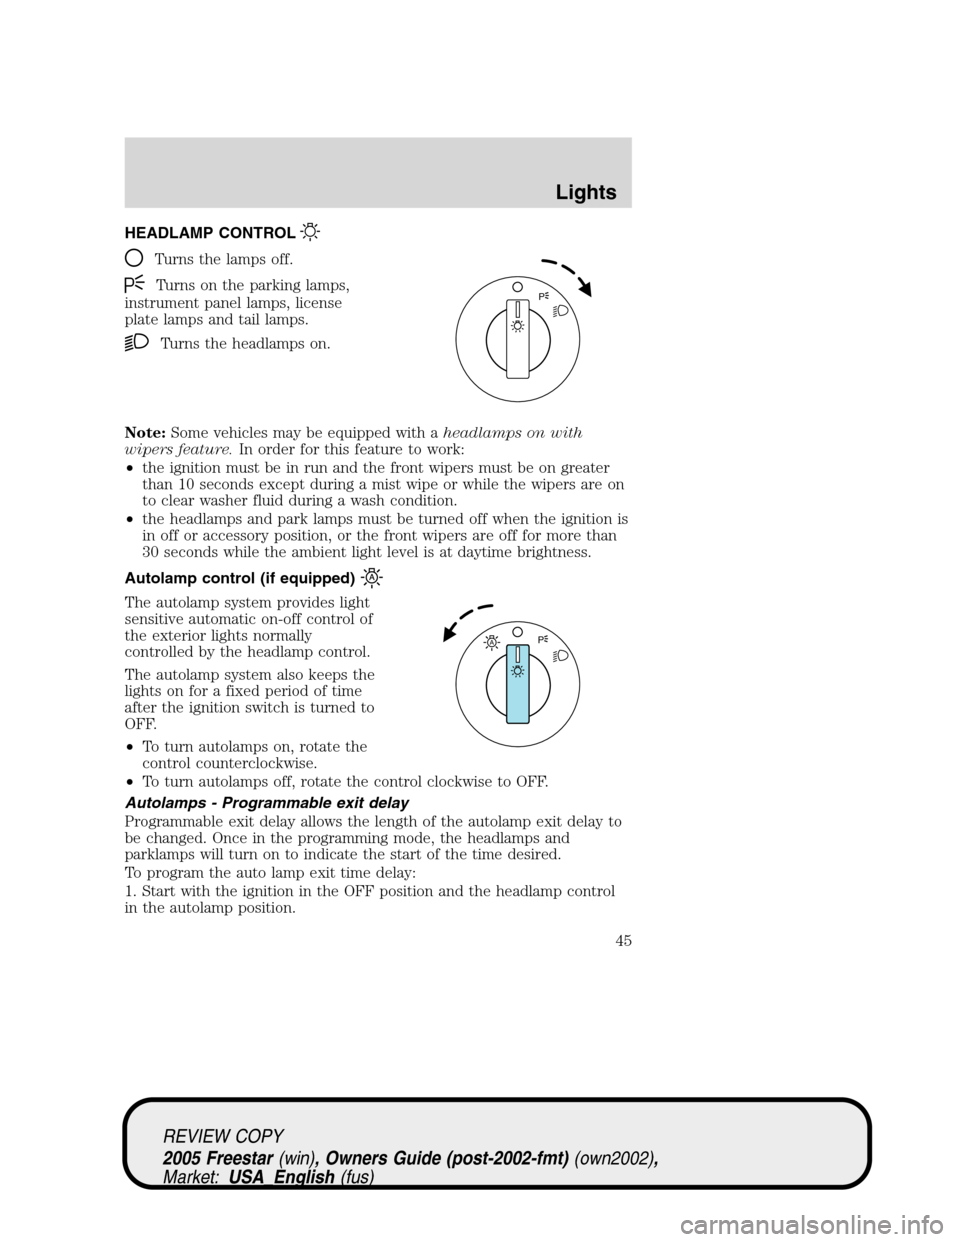
HEADLAMP CONTROL
Turns the lamps off.
Turns on the parking lamps,
instrument panel lamps, license
plate lamps and tail lamps.
Turns the headlamps on.
Note:Some vehicles may be equipped with aheadlamps on with
wipers feature.In order for this feature to work:
•the ignition must be in run and the front wipers must be on greater
than 10 seconds except during a mist wipe or while the wipers are on
to clear washer fluid during a wash condition.
•the headlamps and park lamps must be turned off when the ignition is
in off or accessory position, or the front wipers are off for more than
30 seconds while the ambient light level is at daytime brightness.
Autolamp control (if equipped)
The autolamp system provides light
sensitive automatic on-off control of
the exterior lights normally
controlled by the headlamp control.
The autolamp system also keeps the
lights on for a fixed period of time
after the ignition switch is turned to
OFF.
•To turn autolamps on, rotate the
control counterclockwise.
•To turn autolamps off, rotate the control clockwise to OFF.
Autolamps - Programmable exit delay
Programmable exit delay allows the length of the autolamp exit delay to
be changed. Once in the programming mode, the headlamps and
parklamps will turn on to indicate the start of the time desired.
To program the auto lamp exit time delay:
1. Start with the ignition in the OFF position and the headlamp control
in the autolamp position.
P
AP
REVIEW COPY
2005 Freestar(win), Owners Guide (post-2002-fmt)(own2002),
Market:USA_English(fus)
Lights
Lights
45
Page 46 of 312
2. Deselect the auto lamps.
3. Put the ignition in RUN.
4. Put the ignition in OFF.
5. Select the autolamps.
•Note:Steps 2 through 5 must be performed within a 10 second
period.
•At this point, the headlamps and park lamps will turn on.
6. Deselect the auto lamps after the desired auto lamp delay time
(maximum of 3 minutes).
•At this point, the headlamps and park lamps will turn off.
Daytime running lamps (DRL) (if equipped)
Turns the lowbeam headlamps on with a reduced output. To activate:
•the key must be in the ON position,
•the headlamp control is in the OFF, parking lamps or autolamp
position,
•and the transmission must be out of PARK.
Always remember to turn on your headlamps at dusk or during
inclement weather. The Daytime Running Light (DRL) System
does not activate your tail lamps and generally may not provide
adequate lighting during these conditions. Failure to activate your
headlamps under these conditions may result in a collision.
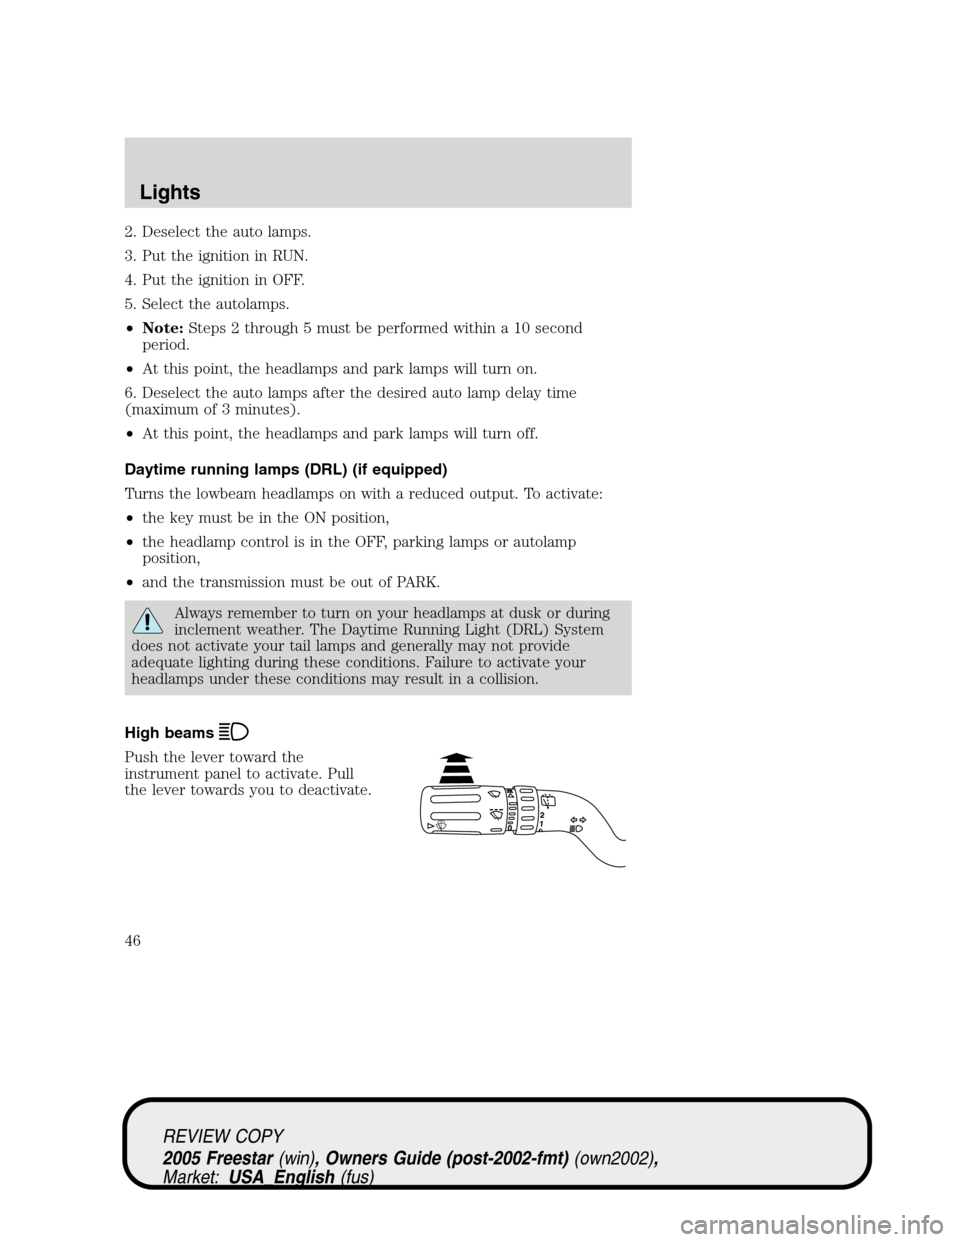
High beams
Push the lever toward the
instrument panel to activate. Pull
the lever towards you to deactivate.
REVIEW COPY
2005 Freestar(win), Owners Guide (post-2002-fmt)(own2002),
Market:USA_English(fus)
Lights
46
Page 47 of 312
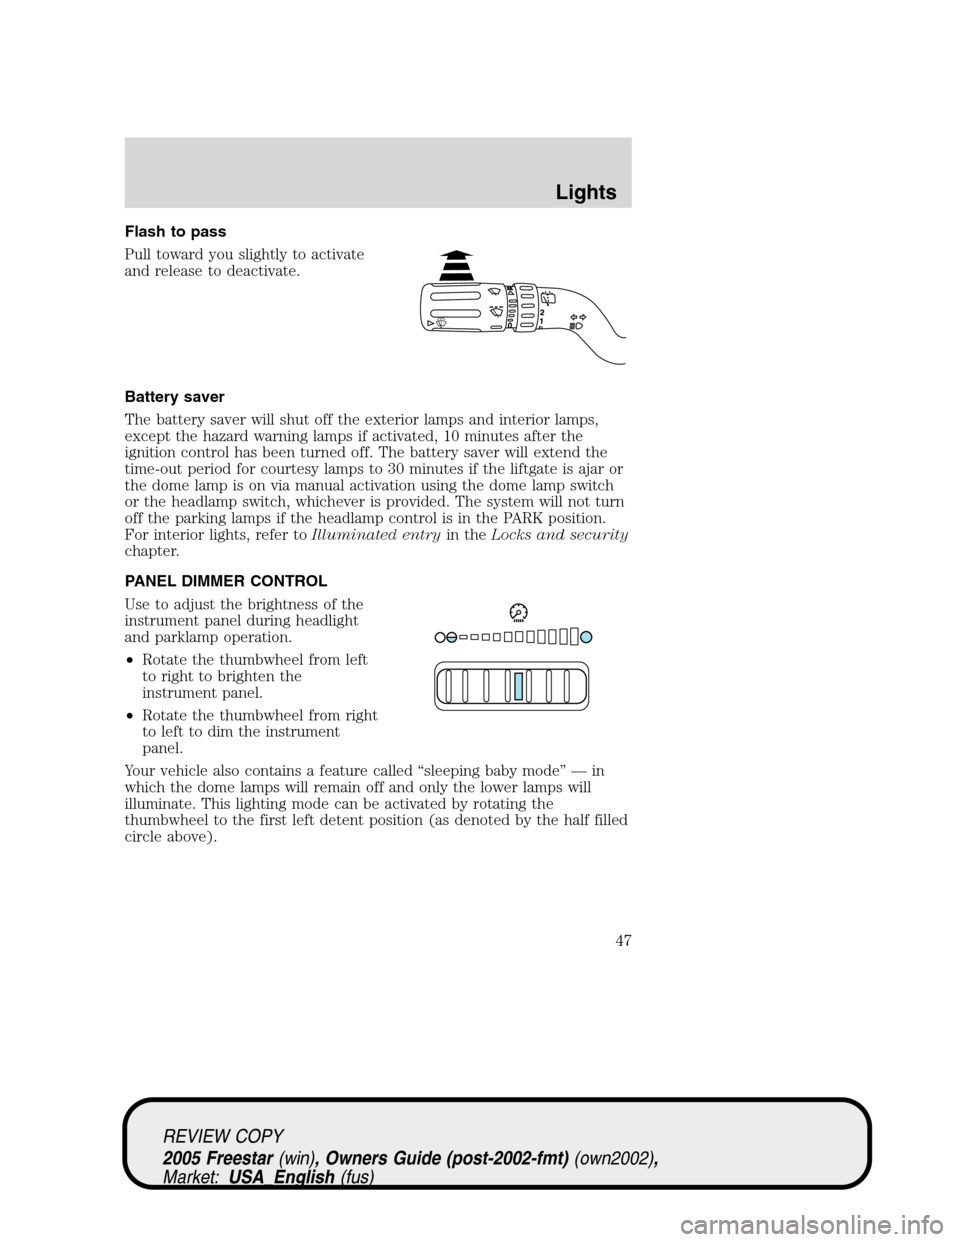
Flash to pass
Pull toward you slightly to activate
and release to deactivate.
Battery saver
The battery saver will shut off the exterior lamps and interior lamps,
except the hazard warning lamps if activated, 10 minutes after the
ignition control has been turned off. The battery saver will extend the
time-out period for courtesy lamps to 30 minutes if the liftgate is ajar or
the dome lamp is on via manual activation using the dome lamp switch
or the headlamp switch, whichever is provided. The system will not turn
off the parking lamps if the headlamp control is in the PARK position.
For interior lights, refer toIlluminated entryin theLocks and security
chapter.
PANEL DIMMER CONTROL
Use to adjust the brightness of the
instrument panel during headlight
and parklamp operation.
•Rotate the thumbwheel from left
to right to brighten the
instrument panel.
•Rotate the thumbwheel from right
to left to dim the instrument
panel.
Your vehicle also contains a feature called“sleeping baby mode”—in
which the dome lamps will remain off and only the lower lamps will
illuminate. This lighting mode can be activated by rotating the
thumbwheel to the first left detent position (as denoted by the half filled
circle above).
REVIEW COPY
2005 Freestar(win), Owners Guide (post-2002-fmt)(own2002),
Market:USA_English(fus)
Lights
47
Page 49 of 312
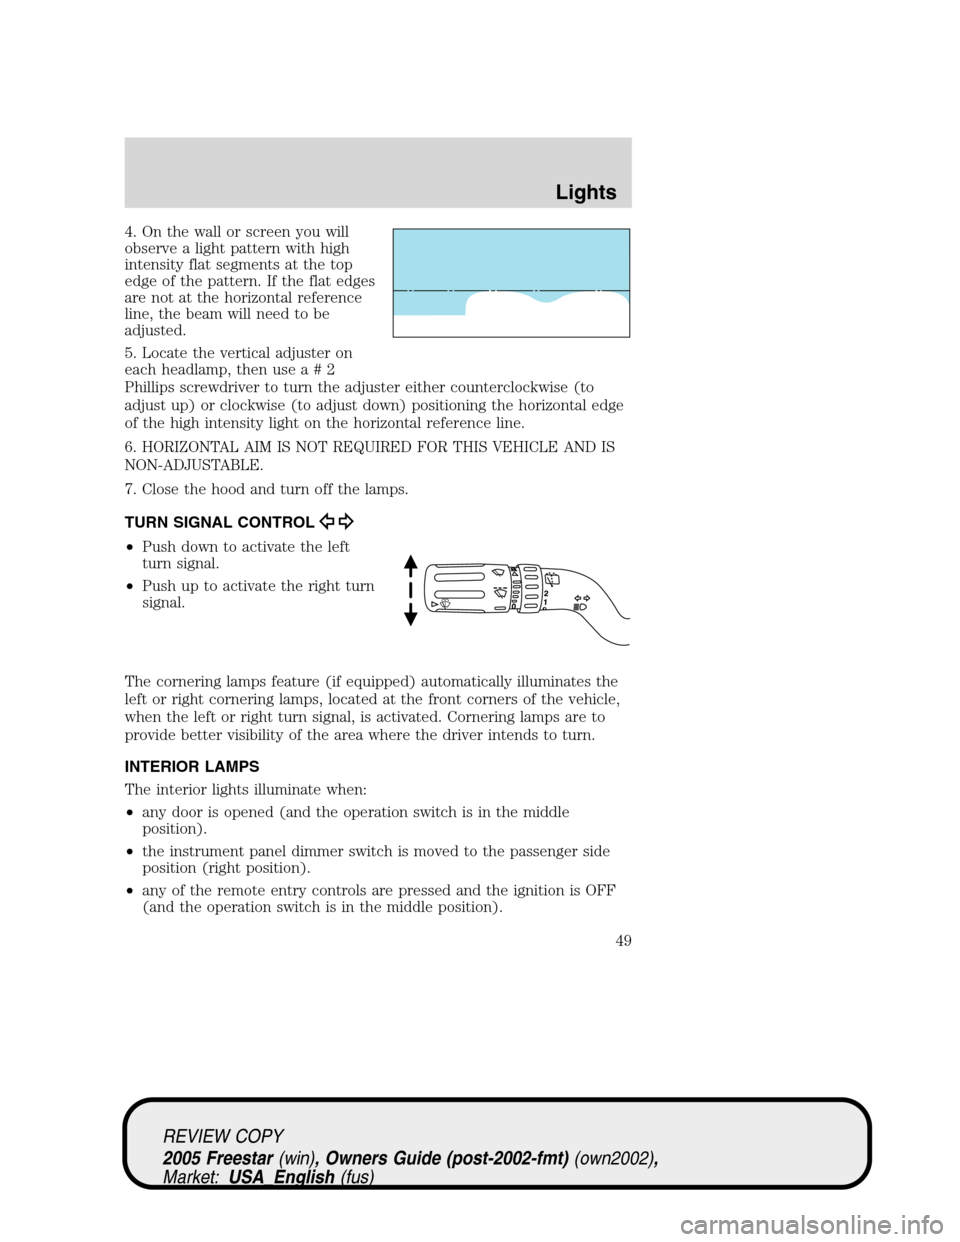
4. On the wall or screen you will
observe a light pattern with high
intensity flat segments at the top
edge of the pattern. If the flat edges
are not at the horizontal reference
line, the beam will need to be
adjusted.
5. Locate the vertical adjuster on
each headlamp, then usea#2
Phillips screwdriver to turn the adjuster either counterclockwise (to
adjust up) or clockwise (to adjust down) positioning the horizontal edge
of the high intensity light on the horizontal reference line.
6. HORIZONTAL AIM IS NOT REQUIRED FOR THIS VEHICLE AND IS
NON-ADJUSTABLE.
7. Close the hood and turn off the lamps.
TURN SIGNAL CONTROL
•Push down to activate the left
turn signal.
•Push up to activate the right turn
signal.
The cornering lamps feature (if equipped) automatically illuminates the
left or right cornering lamps, located at the front corners of the vehicle,
when the left or right turn signal, is activated. Cornering lamps are to
provide better visibility of the area where the driver intends to turn.
INTERIOR LAMPS
The interior lights illuminate when:
•any door is opened (and the operation switch is in the middle
position).
•the instrument panel dimmer switch is moved to the passenger side
position (right position).
•any of the remote entry controls are pressed and the ignition is OFF
(and the operation switch is in the middle position).
REVIEW COPY
2005 Freestar(win), Owners Guide (post-2002-fmt)(own2002),
Market:USA_English(fus)
Lights
49
Page 51 of 312
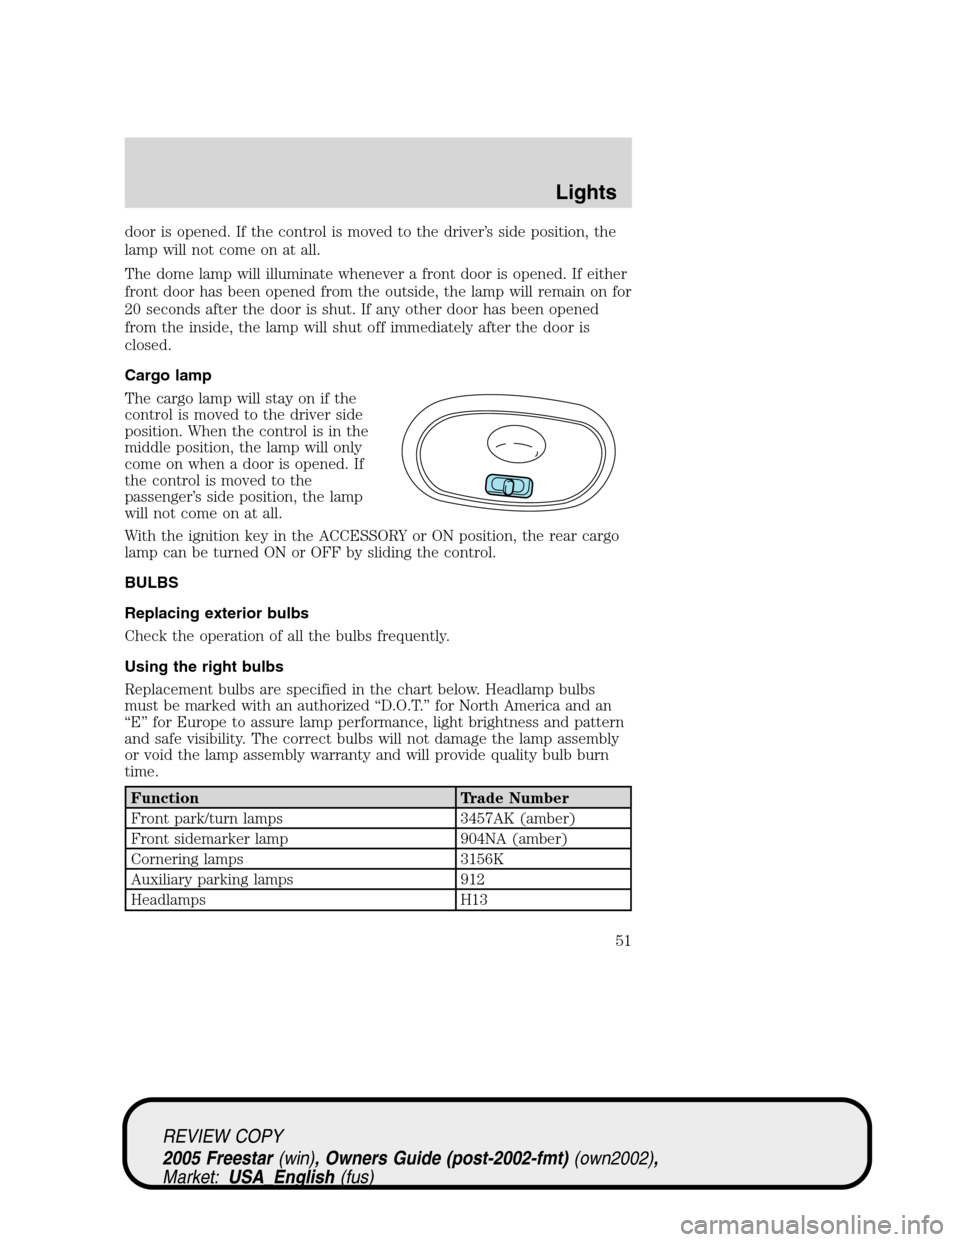
door is opened. If the control is moved to the driver’s side position, the
lamp will not come on at all.
The dome lamp will illuminate whenever a front door is opened. If either
front door has been opened from the outside, the lamp will remain on for
20 seconds after the door is shut. If any other door has been opened
from the inside, the lamp will shut off immediately after the door is
closed.
Cargo lamp
The cargo lamp will stay on if the
control is moved to the driver side
position. When the control is in the
middle position, the lamp will only
come on when a door is opened. If
the control is moved to the
passenger’s side position, the lamp
will not come on at all.
With the ignition key in the ACCESSORY or ON position, the rear cargo
lamp can be turned ON or OFF by sliding the control.
BULBS
Replacing exterior bulbs
Check the operation of all the bulbs frequently.
Using the right bulbs
Replacement bulbs are specified in the chart below. Headlamp bulbs
must be marked with an authorized“D.O.T.”for North America and an
“E”for Europe to assure lamp performance, light brightness and pattern
and safe visibility. The correct bulbs will not damage the lamp assembly
or void the lamp assembly warranty and will provide quality bulb burn
time.
Function Trade Number
Front park/turn lamps 3457AK (amber)
Front sidemarker lamp 904NA (amber)
Cornering lamps 3156K
Auxiliary parking lamps 912
Headlamps H13
REVIEW COPY
2005 Freestar(win), Owners Guide (post-2002-fmt)(own2002),
Market:USA_English(fus)
Lights
51
Page 59 of 312
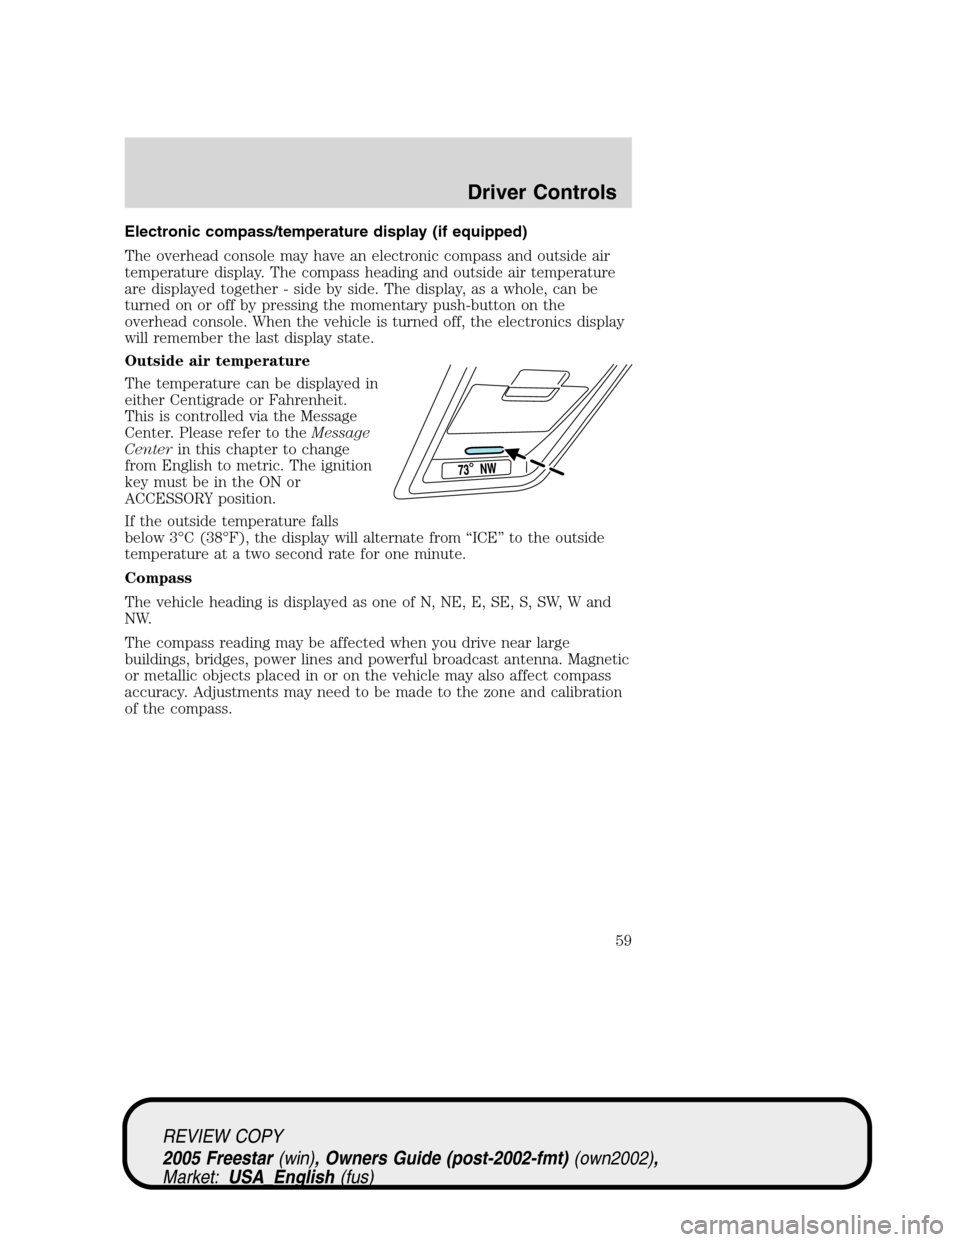
Electronic compass/temperature display (if equipped)
The overhead console may have an electronic compass and outside air
temperature display. The compass heading and outside air temperature
are displayed together - side by side. The display, as a whole, can be
turned on or off by pressing the momentary push-button on the
overhead console. When the vehicle is turned off, the electronics display
will remember the last display state.
Outside air temperature
The temperature can be displayed in
either Centigrade or Fahrenheit.
This is controlled via the Message
Center. Please refer to theMessage
Centerin this chapter to change
from English to metric. The ignition
key must be in the ON or
ACCESSORY position.
If the outside temperature falls
below 3°C (38°F), the display will alternate from“ICE”to the outside
temperature at a two second rate for one minute.
Compass
The vehicle heading is displayed as one of N, NE, E, SE, S, SW, W and
NW.
The compass reading may be affected when you drive near large
buildings, bridges, power lines and powerful broadcast antenna. Magnetic
or metallic objects placed in or on the vehicle may also affect compass
accuracy. Adjustments may need to be made to the zone and calibration
of the compass.
REVIEW COPY
2005 Freestar(win), Owners Guide (post-2002-fmt)(own2002),
Market:USA_English(fus)
Driver Controls
59
Page 60 of 312
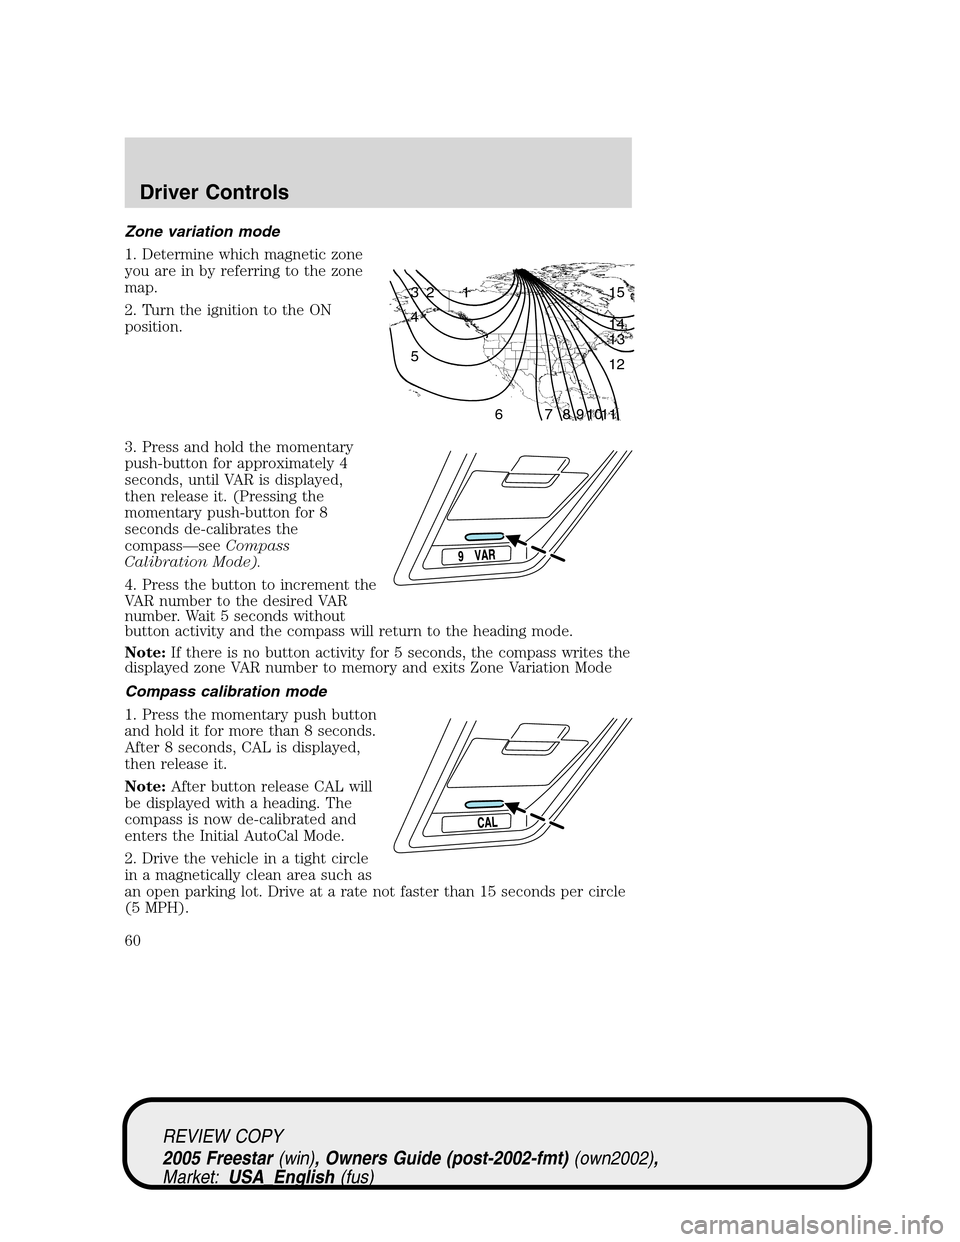
Zone variation mode
1. Determine which magnetic zone
you are in by referring to the zone
map.
2. Turn the ignition to the ON
position.
3. Press and hold the momentary
push-button for approximately 4
seconds, until VAR is displayed,
then release it. (Pressing the
momentary push-button for 8
seconds de-calibrates the
compass—seeCompass
Calibration Mode).
4. Press the button to increment the
VAR number to the desired VAR
number. Wait 5 seconds without
button activity and the compass will return to the heading mode.
Note:If there is no button activity for 5 seconds, the compass writes the
displayed zone VAR number to memory and exits Zone Variation Mode
Compass calibration mode
1. Press the momentary push button
and hold it for more than 8 seconds.
After 8 seconds, CAL is displayed,
then release it.
Note:After button release CAL will
be displayed with a heading. The
compass is now de-calibrated and
enters the Initial AutoCal Mode.
2. Drive the vehicle in a tight circle
in a magnetically clean area such as
an open parking lot. Drive at a rate not faster than 15 seconds per circle
(5 MPH).
1 2 3
4
5
6 7 8 9 101112 13 14 15
REVIEW COPY
2005 Freestar(win), Owners Guide (post-2002-fmt)(own2002),
Market:USA_English(fus)
Driver Controls
60
Page 62 of 312
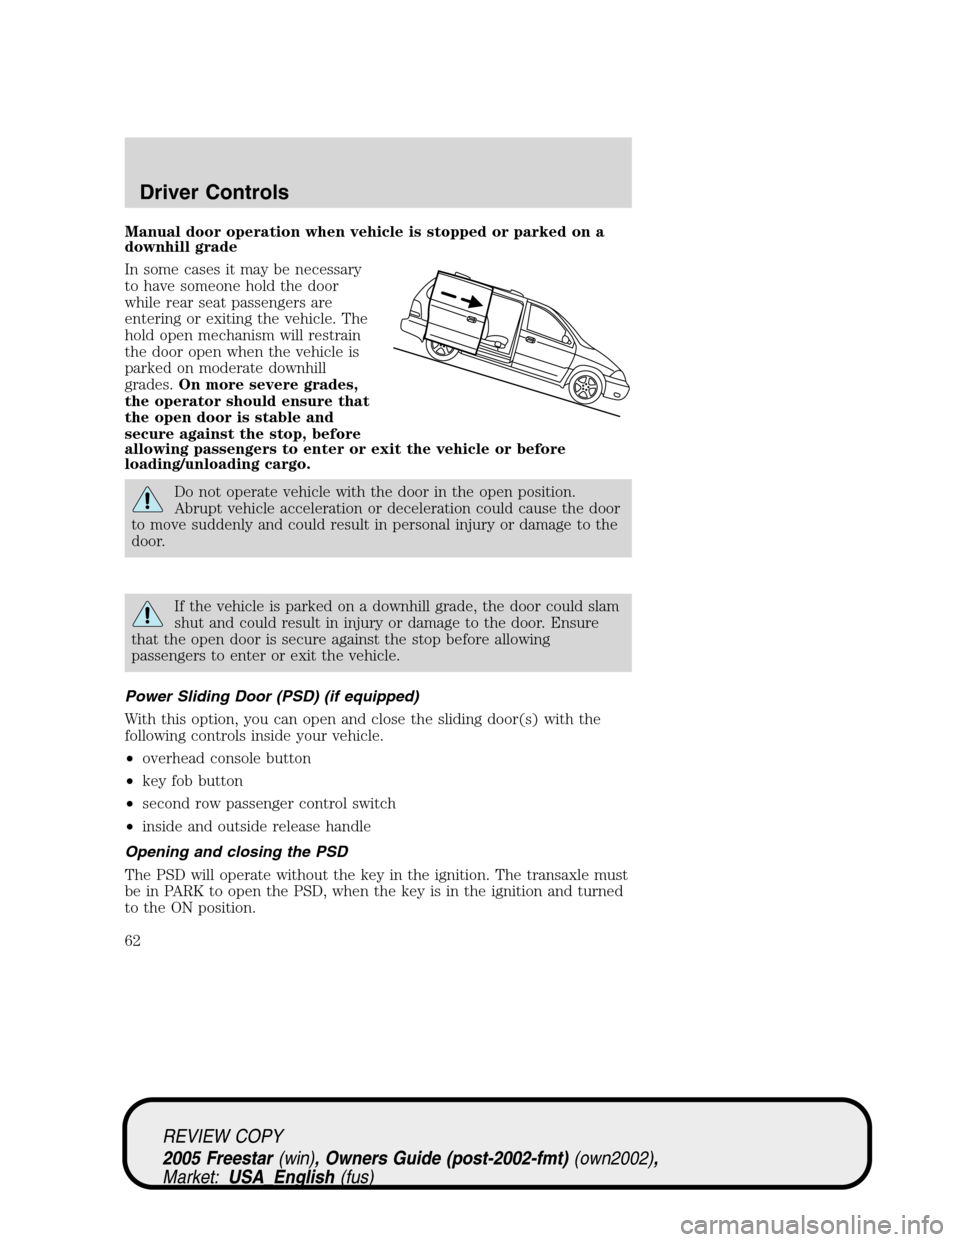
Manual door operation when vehicle is stopped or parked on a
downhill grade
In some cases it may be necessary
to have someone hold the door
while rear seat passengers are
entering or exiting the vehicle. The
hold open mechanism will restrain
the door open when the vehicle is
parked on moderate downhill
grades.On more severe grades,
the operator should ensure that
the open door is stable and
secure against the stop, before
allowing passengers to enter or exit the vehicle or before
loading/unloading cargo.
Do not operate vehicle with the door in the open position.
Abrupt vehicle acceleration or deceleration could cause the door
to move suddenly and could result in personal injury or damage to the
door.
If the vehicle is parked on a downhill grade, the door could slam
shut and could result in injury or damage to the door. Ensure
that the open door is secure against the stop before allowing
passengers to enter or exit the vehicle.
Power Sliding Door (PSD) (if equipped)
With this option, you can open and close the sliding door(s) with the
following controls inside your vehicle.
•overhead console button
•key fob button
•second row passenger control switch
•inside and outside release handle
Opening and closing the PSD
The PSD will operate without the key in the ignition. The transaxle must
be in PARK to open the PSD, when the key is in the ignition and turned
to the ON position.
REVIEW COPY
2005 Freestar(win), Owners Guide (post-2002-fmt)(own2002),
Market:USA_English(fus)
Driver Controls
62
Page 65 of 312
Resetting the PSD
The power sliding door may operate incorrectly or not at all because of
the following conditions:
•a low voltage or dead battery
•the door is left opened for more than 6 hours
•the battery is disconnected
•the PSD Passenger compartment fuse panel fuse (fuse #11) is
removed or blown. Refer toFuses and relaysin theRoadside
Emergencieschapter.
If any of the above conditions has occurred, perform the following steps
to reset the PSD so that electronics can relearn the open and closed
positions:
1. Check to see if PSD is securely closed.
2. Make sure the gearshift is in (P) Park.
3. Push the PSD control on the overhead console to open the door.
4. Wait five (5) seconds and close the door by pressing the PSD control
on the overhead console.
5. Wait five (5) seconds and repeat Steps 3 and 4 then go on to step 6.
6. Repeat steps 3–5 for opposite door.
If the door still does not operate correctly:
7. Ensure the ignition is in the OFF position
8. Remove the PSD fuse (fuse #11) from the passenger fuse panel and
leave it out for thirty (30) seconds. Refer to the chapter on Fuses and
Relays. Refer toFuses and relaysin theRoadside emergencies
chapter.
9. Reinstall the fuse and wait ten (10) seconds.
10. Repeat steps 1–6 above.
If the door still does not operate correctly, see your dealer for service.
Sliding Door Child Safety Lock
Your vehicle is equipped with a sliding door child safety lock that helps
prevent passengers from operating the sliding door by using the inside
door handle, refer to theChild safety lockssection in this chapter.
REVIEW COPY
2005 Freestar(win), Owners Guide (post-2002-fmt)(own2002),
Market:USA_English(fus)
Driver Controls
65
Page 68 of 312

POWER WINDOWS
Do not leave children unattended in the vehicle and do not let
children play with the power windows. They may seriously injure
themselves.
When closing the power windows, you should verify they are free
of obstructions and ensure that children and/or pets are not in
the proximity of the window openings.
Press and hold the bottom part of
the rocker switch to open the
window. Press and hold the top part
of the rocker switch to close the
window.
One touch down
Allows the driver’s window to open
fully without holding the control
down. Press completely down on
the bottom part of the rocker switch
and release quickly. Press the top
part of the rocker switch to stop.
Accessory delay
With accessory delay, the window switches and radio may be used for up
to ten minutes after the ignition switch is turned to the OFF position or
until any door or trunk is opened.
REVIEW COPY
2005 Freestar(win), Owners Guide (post-2002-fmt)(own2002),
Market:USA_English(fus)
Driver Controls
68