oil FORD FREESTAR 2005 1.G User Guide
[x] Cancel search | Manufacturer: FORD, Model Year: 2005, Model line: FREESTAR, Model: FORD FREESTAR 2005 1.GPages: 312, PDF Size: 3.96 MB
Page 88 of 312
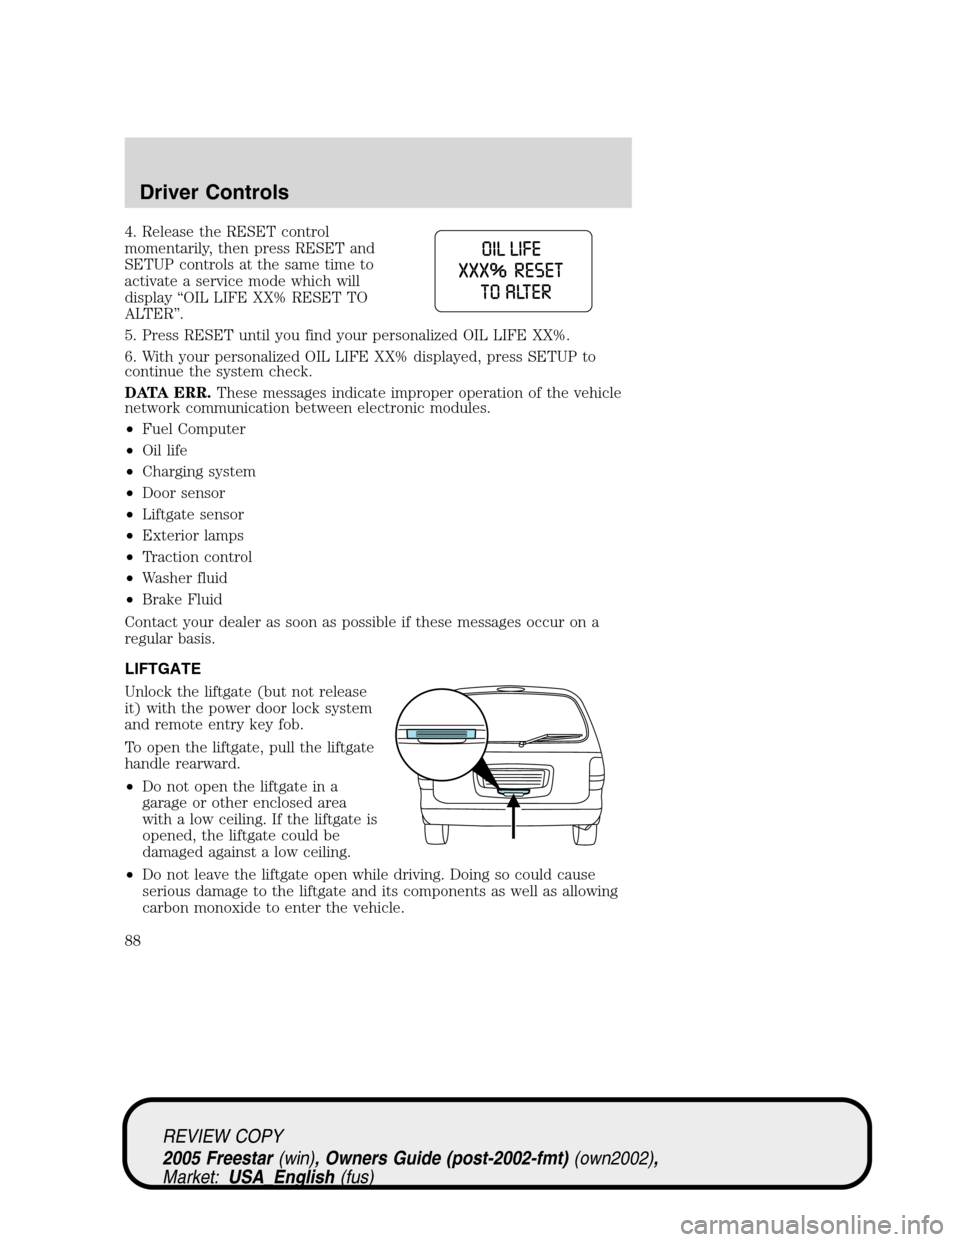
4. Release the RESET control
momentarily, then press RESET and
SETUP controls at the same time to
activate a service mode which will
display“OIL LIFE XX% RESET TO
ALTER”.
5. Press RESET until you find your personalized OIL LIFE XX%.
6. With your personalized OIL LIFE XX% displayed, press SETUP to
continue the system check.
DATA ERR.These messages indicate improper operation of the vehicle
network communication between electronic modules.
•Fuel Computer
•Oil life
•Charging system
•Door sensor
•Liftgate sensor
•Exterior lamps
•Traction control
•Washer fluid
•Brake Fluid
Contact your dealer as soon as possible if these messages occur on a
regular basis.
LIFTGATE
Unlock the liftgate (but not release
it) with the power door lock system
and remote entry key fob.
To open the liftgate, pull the liftgate
handle rearward.
•Do not open the liftgate in a
garage or other enclosed area
with a low ceiling. If the liftgate is
opened, the liftgate could be
damaged against a low ceiling.
•Do not leave the liftgate open while driving. Doing so could cause
serious damage to the liftgate and its components as well as allowing
carbon monoxide to enter the vehicle.
REVIEW COPY
2005 Freestar(win), Owners Guide (post-2002-fmt)(own2002),
Market:USA_English(fus)
Driver Controls
88
Page 206 of 312
interference, and (2) This device must accept any interference received,
including interference that may cause undesired operation.
The Tire Pressure Monitoring System is NOT a substitute for
manually checking tire pressure. The tire pressure should be
checked periodically (at least monthly) using a tire gauge, see
Inspecting and inflating your tiresin this chapter. Failure to
properly maintain your tire pressure could increase the risk of tire
failure, loss of control, vehicle rollover and personal injury.
Low tire warning—indirect (if equipped)
The low tire warning system is designed to detect a significant loss of
inflation inany one of your tireson your vehicle. The system uses the
Anti-lock brake wheel speed sensors to detect a change in wheel speed
due to tire deflation.
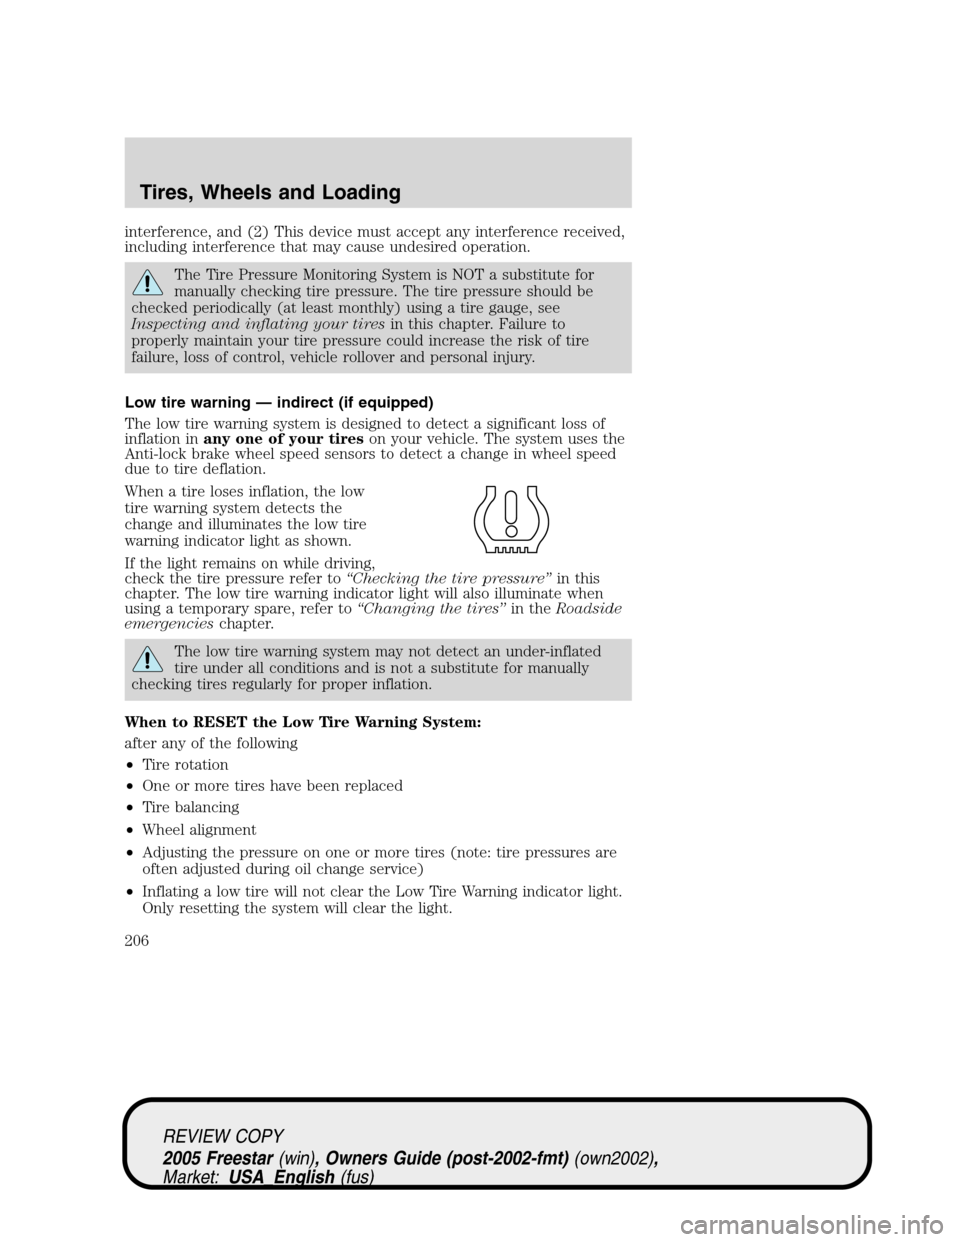
When a tire loses inflation, the low
tire warning system detects the
change and illuminates the low tire
warning indicator light as shown.
If the light remains on while driving,
check the tire pressure refer to“Checking the tire pressure”in this
chapter. The low tire warning indicator light will also illuminate when
using a temporary spare, refer to“Changing the tires”in theRoadside
emergencieschapter.
The low tire warning system may not detect an under-inflated
tire under all conditions and is not a substitute for manually
checking tires regularly for proper inflation.
When to RESET the Low Tire Warning System:
after any of the following
•Tire rotation
•One or more tires have been replaced
•Tire balancing
•Wheel alignment
•Adjusting the pressure on one or more tires (note: tire pressures are
often adjusted during oil change service)
•Inflating a low tire will not clear the Low Tire Warning indicator light.
Only resetting the system will clear the light.
REVIEW COPY
2005 Freestar(win), Owners Guide (post-2002-fmt)(own2002),
Market:USA_English(fus)
Tires, Wheels and Loading
206
Page 213 of 312
TRAILER TOWING
Your vehicle is capable either of towing Class I trailers or up to Class II
trailers when equipped with the optional trailer tow package.
If your vehicle does not have the optional trailer tow package your
vehicle is partially prepped for trailer tow lamp wiring but you will also
need to install electrical kit 3F2Z-15A416-A. This kit contains fuses and
relays to isolate the vehicle lighting circuitry from the trailer lighting and
an adapter wiring harness containing the standard 4-pin trailer plug.
Refer to theTrailer lamps section in this chapter for additional
information. Do not tow above 2,000 lbs. (907 kg) without the
manufacturer-installed trailer tow package.
If your vehicle has the optional trailer tow package it comes with heavy
duty cooling fans, auxiliary transmission fluid cooler, an auxiliary engine
oil cooler (4.2L engine only), heavy duty battery, trailer tow wiring
(including fuses and relays to isolate the vehicle lighting circuitry from
the trailer lighting) and a kit (in a cardboard box) that includes an
adapter wiring harness that contains the standard 4-pin trailer plug.
Trailer towing puts additional loads on your vehicle ’s engine, transmission,
axle, brakes, tires, and suspension. For your safety and to maximize vehicle
performance, be sure to use the proper equipment while towing.
Follow these guidelines to ensure safe towing procedure:
• Stay within your vehicle ’s load limits. If exceeded, cargo should be
removed from the trailer and/or the vehicle until all weights are within
specified limits.
• Thoroughly prepare your vehicle for towing. Refer to Preparing to
tow in this chapter.
• Use extra caution when driving while trailer towing. Refer to Driving
while you tow in this chapter.
• Service your vehicle more frequently if you tow a trailer. Refer to
Special Operating Conditions in the scheduled maintenance guide.
•
Do not tow a trailer until your vehicle has been driven at least 500 miles
(800 km).
• Refer to the instructions included with towing accessories for the
proper installation and adjustment specifications.
REVIEW COPY
2005 Freestar (win), Owners Guide (post-2002-fmt) (own2002),
Market: USA_English (fus)
Tires, Wheels and Loading
213
Page 238 of 312
Fuse/Relay
LocationFuse Amp
RatingPower Distribution Box Description
5 30A** Right-hand power sliding door
6 30A** SJB accessory #2 (driver power
window)
7 30A** Auxiliary blower motor
8 40A** Anti-lock Brake System (ABS) #2 (coil
power)
9 30A** Power liftgate
10 30A** SJB accessory #1 (passenger window,
radio, vent windows)
11 30A** Left power seat/heated seat
12 40A** ABS #1 (pump motor)
13 40A** Rear defroster
14 30A** Front climate control system blower
motor
15 30A** Right power seat/heated seat
16 30A** Left-hand power sliding door
20 Mini relay Powertrain Control Module (PCM)
power
21 Mini relay Horn
22 Micro relay A/C clutch
23 Micro relay High beams
24 Mini relay Starter
25 Micro relay Fuel pump
26—Not used
27—Not used
28 Mini relay Auxiliary blower
29 Micro relay Trailer park lamps
30 Micro relay Left trailer stop/turn lamps
31 Micro relay Right trailer stop/turn lamps
32 Mini relay Rear defroster
REVIEW COPY
2005 Freestar(win), Owners Guide (post-2002-fmt)(own2002),
Market:USA_English(fus)
Roadside Emergencies
238
Page 239 of 312
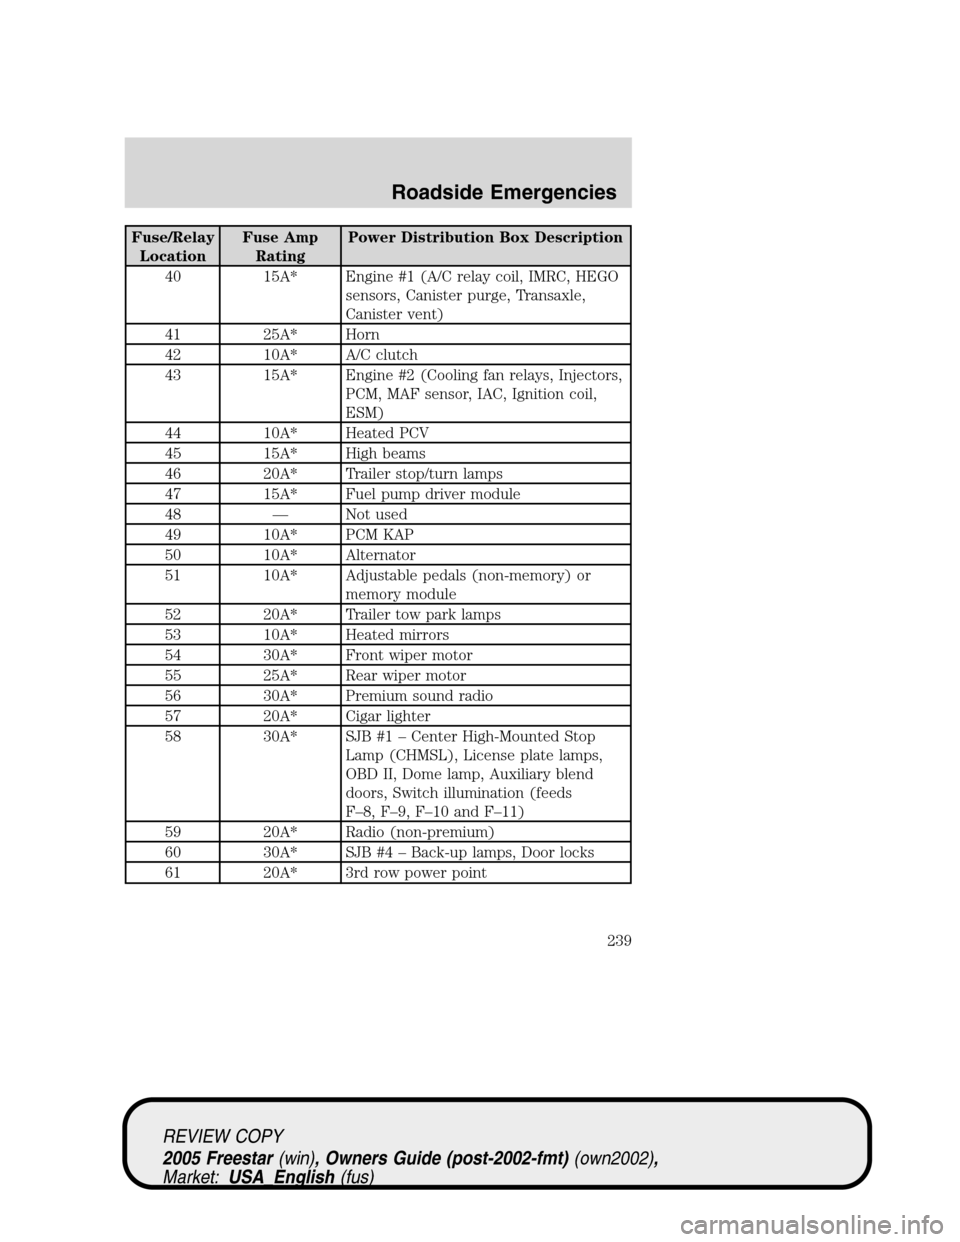
Fuse/Relay
LocationFuse Amp
RatingPower Distribution Box Description
40 15A* Engine #1 (A/C relay coil, IMRC, HEGO
sensors, Canister purge, Transaxle,
Canister vent)
41 25A* Horn
42 10A* A/C clutch
43 15A* Engine #2 (Cooling fan relays, Injectors,
PCM, MAF sensor, IAC, Ignition coil,
ESM)
44 10A* Heated PCV
45 15A* High beams
46 20A* Trailer stop/turn lamps
47 15A* Fuel pump driver module
48—Not used
49 10A* PCM KAP
50 10A* Alternator
51 10A* Adjustable pedals (non-memory) or
memory module
52 20A* Trailer tow park lamps
53 10A* Heated mirrors
54 30A* Front wiper motor
55 25A* Rear wiper motor
56 30A* Premium sound radio
57 20A* Cigar lighter
58 30A* SJB #1–Center High-Mounted Stop
Lamp (CHMSL), License plate lamps,
OBD II, Dome lamp, Auxiliary blend
doors, Switch illumination (feeds
F–8, F–9, F–10 and F–11)
59 20A* Radio (non-premium)
60 30A* SJB #4–Back-up lamps, Door locks
61 20A* 3rd row power point
REVIEW COPY
2005 Freestar(win), Owners Guide (post-2002-fmt)(own2002),
Market:USA_English(fus)
Roadside Emergencies
239
Page 260 of 312
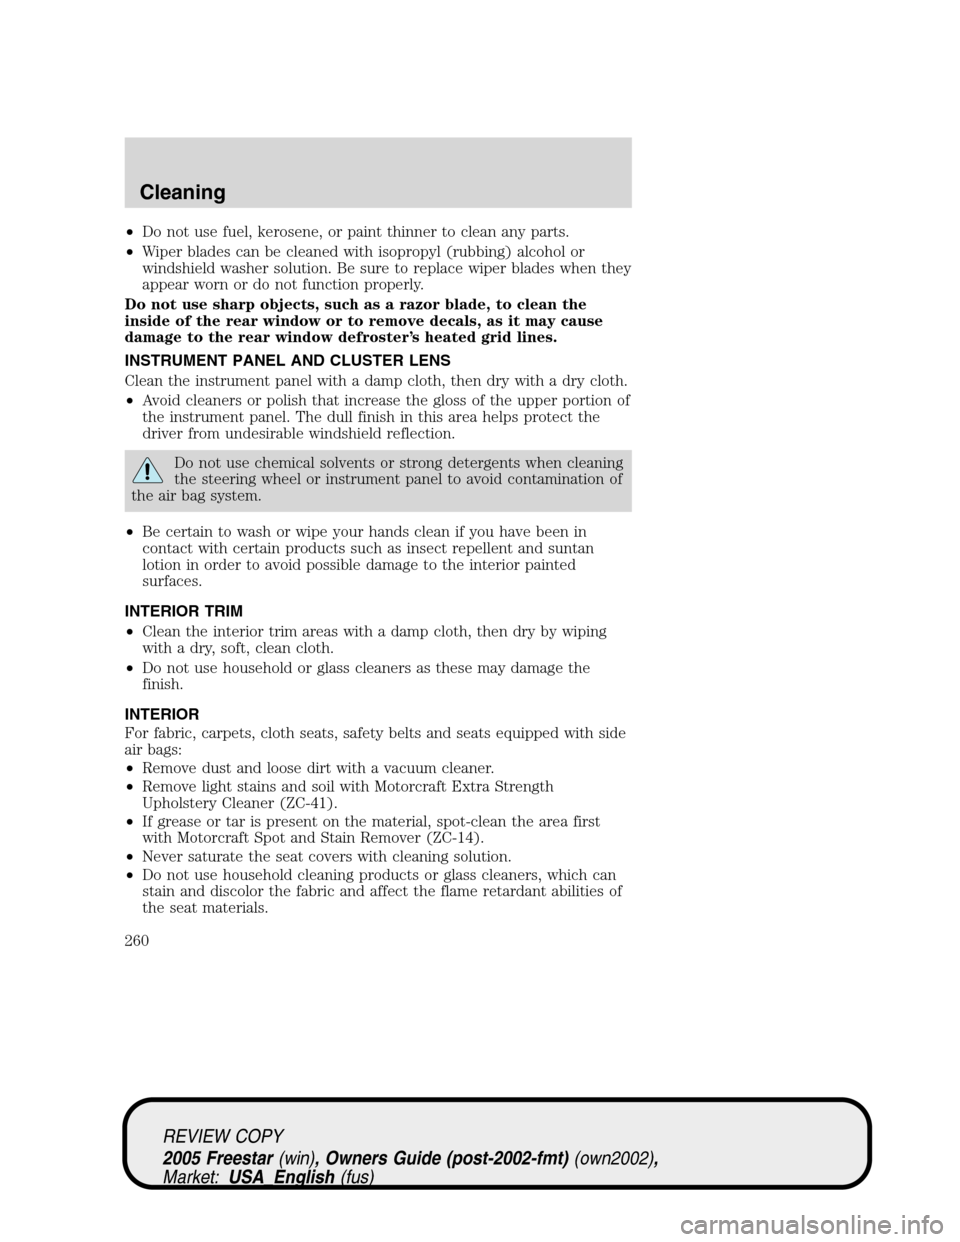
•Do not use fuel, kerosene, or paint thinner to clean any parts.
•Wiper blades can be cleaned with isopropyl (rubbing) alcohol or
windshield washer solution. Be sure to replace wiper blades when they
appear worn or do not function properly.
Do not use sharp objects, such as a razor blade, to clean the
inside of the rear window or to remove decals, as it may cause
damage to the rear window defroster’s heated grid lines.
INSTRUMENT PANEL AND CLUSTER LENS
Clean the instrument panel with a damp cloth, then dry with a dry cloth.
•Avoid cleaners or polish that increase the gloss of the upper portion of
the instrument panel. The dull finish in this area helps protect the
driver from undesirable windshield reflection.
Do not use chemical solvents or strong detergents when cleaning
the steering wheel or instrument panel to avoid contamination of
the air bag system.
•Be certain to wash or wipe your hands clean if you have been in
contact with certain products such as insect repellent and suntan
lotion in order to avoid possible damage to the interior painted
surfaces.
INTERIOR TRIM
•Clean the interior trim areas with a damp cloth, then dry by wiping
with a dry, soft, clean cloth.
•Do not use household or glass cleaners as these may damage the
finish.
INTERIOR
For fabric, carpets, cloth seats, safety belts and seats equipped with side
air bags:
•Remove dust and loose dirt with a vacuum cleaner.
•Remove light stains and soil with Motorcraft Extra Strength
Upholstery Cleaner (ZC-41).
•If grease or tar is present on the material, spot-clean the area first
with Motorcraft Spot and Stain Remover (ZC-14).
•Never saturate the seat covers with cleaning solution.
•Do not use household cleaning products or glass cleaners, which can
stain and discolor the fabric and affect the flame retardant abilities of
the seat materials.
REVIEW COPY
2005 Freestar(win), Owners Guide (post-2002-fmt)(own2002),
Market:USA_English(fus)
Cleaning
260
Page 261 of 312

Do not use cleaning solvents, bleach or dye on the vehicle’s
safety belts, as these actions may weaken the belt webbing.
Do not use chemical solvents or strong detergents when cleaning
the seat-mounted side air bag. Such products could contaminate
the side air bag system and affect performance of the side air bag in a
collision.
LEATHER SEATS (IF EQUIPPED)
Your leather seating surfaces have a clear, protective coating over the
leather.
•To clean, use a soft cloth with Motorcraft Deluxe Leather and Vinyl
Cleaner (ZC-11–A). Dry the area with a soft cloth.
•To help maintain its resiliency and color, use the Motorcraft Deluxe
Leather Care Kit (ZC-11–D), available from your authorized dealer.
•Do not use household cleaning products, alcohol solutions, solvents or
cleaners intended for rubber, vinyl and plastics, or oil/petroleum-based
leather conditioners. These products may cause premature wearing of
the clear, protective coating.
Note:In some instances, color or dye transfer can occur when wet
clothing comes in contact with leather upholstery. If this occurs, the
leather should be cleaned immediately to avoid permanent staining.
UNDERBODY
Flush the complete underside of your vehicle frequently. Keep body and
door drain holes free from packed dirt.
REVIEW COPY
2005 Freestar(win), Owners Guide (post-2002-fmt)(own2002),
Market:USA_English(fus)
Cleaning
261
Page 265 of 312
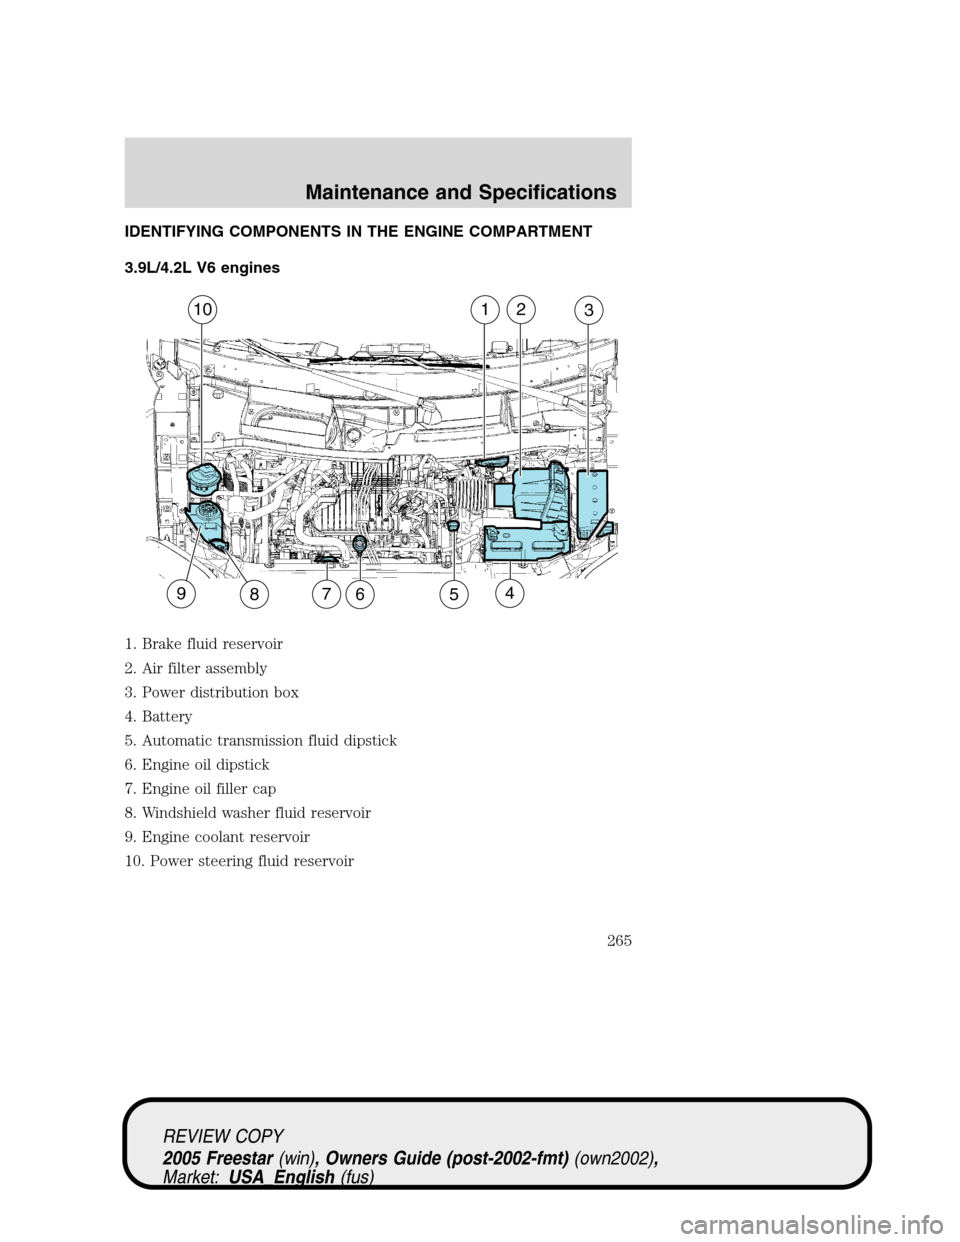
IDENTIFYING COMPONENTS IN THE ENGINE COMPARTMENT
3.9L/4.2L V6 engines
1. Brake fluid reservoir
2. Air filter assembly
3. Power distribution box
4. Battery
5. Automatic transmission fluid dipstick
6. Engine oil dipstick
7. Engine oil filler cap
8. Windshield washer fluid reservoir
9. Engine coolant reservoir
10. Power steering fluid reservoir
576894
10321
REVIEW COPY
2005 Freestar(win), Owners Guide (post-2002-fmt)(own2002),
Market:USA_English(fus)
Maintenance and Specifications
265
Page 266 of 312

WINDSHIELD WASHER FLUID
Add fluid to fill the reservoir if the
level is low. In very cold weather, do
not fill the reservoir completely.
Only use a washer fluid that meets
Ford specification WSB-M8B16–A2.
Refer toLubricant specifications
in this chapter.
State or local regulations on volatile organic compounds may restrict the
use of methanol, a common windshield washer antifreeze additive.
Washer fluids containing non-methanol antifreeze agents should be used
only if they provide cold weather protection without damaging the
vehicle’s paint finish, wiper blades or washer system.
If you operate your vehicle in temperatures below 40°F (4.5°C),
use washer fluid with antifreeze protection. Failure to use
washer fluid with antifreeze protection in cold weather could result in
impaired windshield vision and increase the risk of injury or accident.
Note:Do not put washer fluid in the engine coolant reservoir. Washer
fluid placed in the cooling system may harm engine and cooling system
components.
Checking and adding washer fluid for the liftgate
Washer fluid for the liftgate is supplied by the same reservoir as the
windshield.
ENGINE OIL
Checking the engine oil
Refer to the scheduled maintenance guide for the appropriate intervals
for checking the engine oil.
1. Make sure the vehicle is on level ground.
2. Turn the engine off and wait a few minutes for the oil to drain into the
oil pan.
3. Set the parking brake and ensure the gearshift is securely latched in P
(Park).
REVIEW COPY
2005 Freestar(win), Owners Guide (post-2002-fmt)(own2002),
Market:USA_English(fus)
Maintenance and Specifications
266
Page 267 of 312

4. Open the hood. Protect yourself from engine heat.
5. Locate and carefully remove the
engine oil level indicator (dipstick).
6. Wipe the indicator clean. Insert the indicator fully, then remove it
again.
•If the oil level isbetween the MIN and MAX marks,the oil level is
acceptable.DO NOT ADD OIL.
•If the oil level is below the MIN
mark, add enough oil to raise the
level within the MIN-MAX range.
•Oil levels above the MAX mark may cause engine damage. Some oil
must be removed from the engine by a service technician.
7. Put the indicator back in and ensure it is fully seated.
Adding engine oil
1. Check the engine oil. For instructions, refer toChecking the engine
oilin this chapter.
2. If the engine oil level is not within the normal range, add only certified
engine oil of the recommended viscosity. Remove the engine oil filler cap
and use a funnel to pour the engine oil into the opening.
REVIEW COPY
2005 Freestar(win), Owners Guide (post-2002-fmt)(own2002),
Market:USA_English(fus)
Maintenance and Specifications
267