seats FORD FREESTAR 2005 1.G Owners Manual
[x] Cancel search | Manufacturer: FORD, Model Year: 2005, Model line: FREESTAR, Model: FORD FREESTAR 2005 1.GPages: 312, PDF Size: 3.96 MB
Page 7 of 312
Special instructions
For your added safety, your vehicle is fitted with sophisticated electronic
controls.
Please read the sectionSupplemental restraint system (SRS)
in theSeating and Safety Restraintschapter. Failure to follow
the specific warnings and instructions could result in personal injury.
Front seat mounted rear-facing child or infant seats should
NEVERbe placed in front of an active passenger air bag.
MIDDLE EAST/NORTH AFRICA VEHICLE SPECIFIC INFORMATION
For your particular global region, your vehicle may be equipped with
features and options that are different from the ones that are described
in thisOwner’s Guide;therefore, a supplement has been supplied that
complements this book. By referring to the pages in the provided
supplement, you can properly identify those features, recommendations
and specifications that are unique to your vehicle.Refer to this
Owner’s Guide for all other required information and warnings.
REVIEW COPY
2005 Freestar(win), Owners Guide (post-2002-fmt)(own2002),
Market:USA_English(fus)
Introduction
7
Page 35 of 312
Operating tips
•To reduce fog build up on the windshield during humid weather, place
the air flow selector in the
position.
•To reduce humidity build up inside the vehicle: do not drive with the
airflow selector in the OFF or with recirculated air engaged.
•Do not put objects under the front seats that will interfere with the
airflow to the back seats.
•Remove any snow, ice or leaves from the air intake area at the base of
the windshield.
•For maximum cooling performance (MAX A/C):
In the MAX A/C mode:
•Move the temperature control selector to the coldest setting.
•Set the fan to the highest speed initially, then adjust to maintain
passenger comfort.
In the
andmodes:
•Move the temperature control selector to the coldest setting.
•Select A/C and recirculated air
. Usewith A/C to provide
colder airflow.
•Set the fan to the highest speed initially, then adjust to maintain
passenger comfort.
For maximum heating performance, turn the auxiliary climate control
system (if equipped) on, set the temperature setting to the warmest
setting and set the fan to the highest blower speed.
To aid in side window defogging/demisting in cold weather:
1. Select
.
2. Select A/C.
3. Set the temperature control to full heat.
4. Set the fan speed to the highest setting.
5. Direct the outer instrument panel vents towards the side windows.
Do not place objects on top of the instrument panel as these
objects may become projectiles in a collision or sudden stop.
REVIEW COPY
2005 Freestar(win), Owners Guide (post-2002-fmt)(own2002),
Market:USA_English(fus)
Climate Controls
35
Page 37 of 312
will be warmer or cooler than the driver airflow temperature setting
when more than one rear temperature light (
REAR)is
illuminated.
5.
RRear defrost:Press to activate/deactivate rear window defrost.
Refer toRear window defrosterlater in this chapter for more
information.
6.
Recirculated air:Press to activate/deactivate air recirculation
in cabin. Recirculated air may reduce the amount of time to cool down
the interior of the vehicle and may also help reduce undesired odors
from reaching the interior of the vehicle. Recirculation engages
automatically with selection of MAX A/C or can be engaged manually in
any other airflow selection except
. Recirculation may turn off
automatically in all airflow selections except MAX A/C.
7.A/C:Press to activate/deactivate air conditioning. Use with
recirculated air to improve cooling performance and efficiency. Engages
automatically in MAX A/C,
and.
8.Fan speed adjustment:Controls the volume of air circulated in the
vehicle.
9.Left temperature selection:Controls the temperature of the airflow
to the driver in the front of the vehicle.
10.Right temperature selection:Controls the temperature of the
airflow to the passenger in the front of the vehicle.
Operating tips
•To reduce fog build up on the windshield during humid weather, place
the air flow selector in the
position.
•To reduce humidity build up inside the vehicle: do not drive with the
airflow selector in the OFF or with recirculated air engaged.
•Do not put objects under the front seats that will interfere with the
airflow to the back seats.
•Remove any snow, ice or leaves from the air intake area at the base of
the windshield.
•For maximum cooling performance (MAX A/C):
In the MAX A/C mode:
•Move the temperature control selector to the coldest setting.
•Set the fan to the highest speed initially, then adjust to maintain
passenger comfort.
REVIEW COPY
2005 Freestar(win), Owners Guide (post-2002-fmt)(own2002),
Market:USA_English(fus)
Climate Controls
37
Page 41 of 312
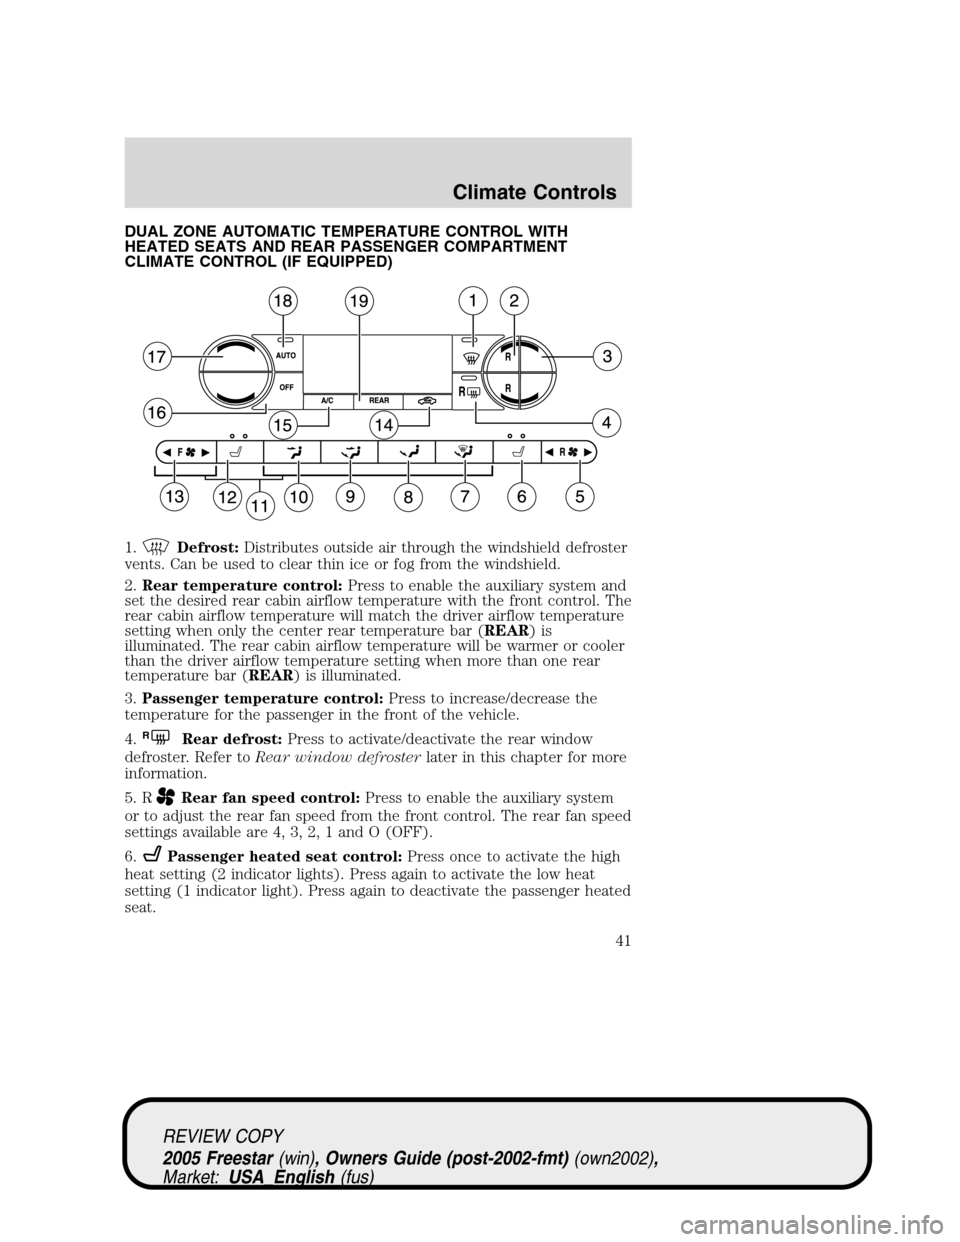
DUAL ZONE AUTOMATIC TEMPERATURE CONTROL WITH
HEATED SEATS AND REAR PASSENGER COMPARTMENT
CLIMATE CONTROL (IF EQUIPPED)
1.
Defrost:Distributes outside air through the windshield defroster
vents. Can be used to clear thin ice or fog from the windshield.
2.Rear temperature control:Press to enable the auxiliary system and
set the desired rear cabin airflow temperature with the front control. The
rear cabin airflow temperature will match the driver airflow temperature
setting when only the center rear temperature bar (REAR)is
illuminated. The rear cabin airflow temperature will be warmer or cooler
than the driver airflow temperature setting when more than one rear
temperature bar (REAR) is illuminated.
3.Passenger temperature control:Press to increase/decrease the
temperature for the passenger in the front of the vehicle.
4.
RRear defrost:Press to activate/deactivate the rear window
defroster. Refer toRear window defrosterlater in this chapter for more
information.
5. R
Rear fan speed control:Press to enable the auxiliary system
or to adjust the rear fan speed from the front control. The rear fan speed
settings available are 4, 3, 2, 1 and O (OFF).
6.
Passenger heated seat control:Press once to activate the high
heat setting (2 indicator lights). Press again to activate the low heat
setting (1 indicator light). Press again to deactivate the passenger heated
seat.
REVIEW COPY
2005 Freestar(win), Owners Guide (post-2002-fmt)(own2002),
Market:USA_English(fus)
Climate Controls
41
Page 43 of 312
19.REAR:Press to enable the control located in the rear seat. Press
again to turn the auxiliary system off.
OPERATING TIPS
•To reduce fog build up on the windshield during humid weather, place
the air flow selector in the
position.
•To reduce humidity build up inside the vehicle: do not drive with the
airflow selector in the OFF or with recirculated air engaged.
•Do not put objects under the front seats that will interfere with the
airflow to the back seats.
•Remove any snow, ice or leaves from the air intake area at the base of
the windshield.
•For maximum cooling performance (MAX A/C):
In AUTO mode, press AUTO control and set to desired temperature.
In manual override control, select
or, A/C and recirculated
air
and set the temperature to 60°F (16°C). Set the fan to the
highest speed initially, then adjust to maintain passenger comfort.
•To improve the A/C cool down, drive with the windows slightly open
for 2–3 minutes after starting the vehicle or until the vehicle has
“aired out.”
For maximum heating performance, turn the auxiliary climate control
system (if equipped) on, set the temperature setting to the warmest
setting and set the fan to the highest blower speed.
To aid in side window defogging/demisting in cold weather:
1. Select
.
2. Select A/C.
3. Modulate the temperature control to maintain comfort.
4. Set the fan to the highest speed.
5. Direct the outer instrument panel vents towards the side windows.
Do not place objects on top of the instrument panel as these
objects may become projectiles in a collision or sudden stop.
REVIEW COPY
2005 Freestar(win), Owners Guide (post-2002-fmt)(own2002),
Market:USA_English(fus)
Climate Controls
43
Page 50 of 312
Map lamps (if equipped)
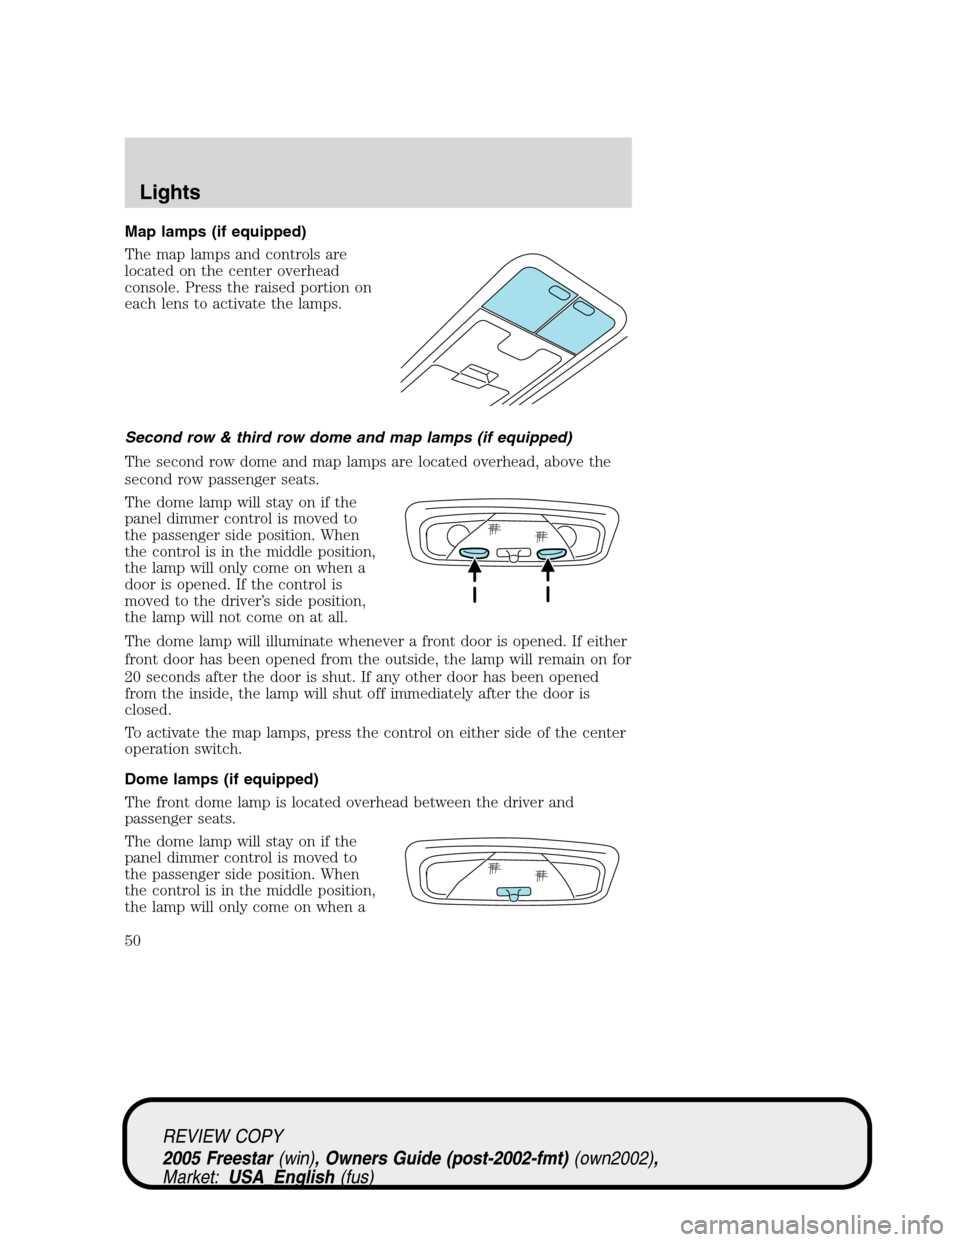
The map lamps and controls are
located on the center overhead
console. Press the raised portion on
each lens to activate the lamps.
Second row & third row dome and map lamps (if equipped)
The second row dome and map lamps are located overhead, above the
second row passenger seats.
The dome lamp will stay on if the
panel dimmer control is moved to
the passenger side position. When
the control is in the middle position,
the lamp will only come on when a
door is opened. If the control is
moved to the driver’s side position,
the lamp will not come on at all.
The dome lamp will illuminate whenever a front door is opened. If either
front door has been opened from the outside, the lamp will remain on for
20 seconds after the door is shut. If any other door has been opened
from the inside, the lamp will shut off immediately after the door is
closed.
To activate the map lamps, press the control on either side of the center
operation switch.
Dome lamps (if equipped)
The front dome lamp is located overhead between the driver and
passenger seats.
The dome lamp will stay on if the
panel dimmer control is moved to
the passenger side position. When
the control is in the middle position,
the lamp will only come on when a
REVIEW COPY
2005 Freestar(win), Owners Guide (post-2002-fmt)(own2002),
Market:USA_English(fus)
Lights
50
Page 114 of 312
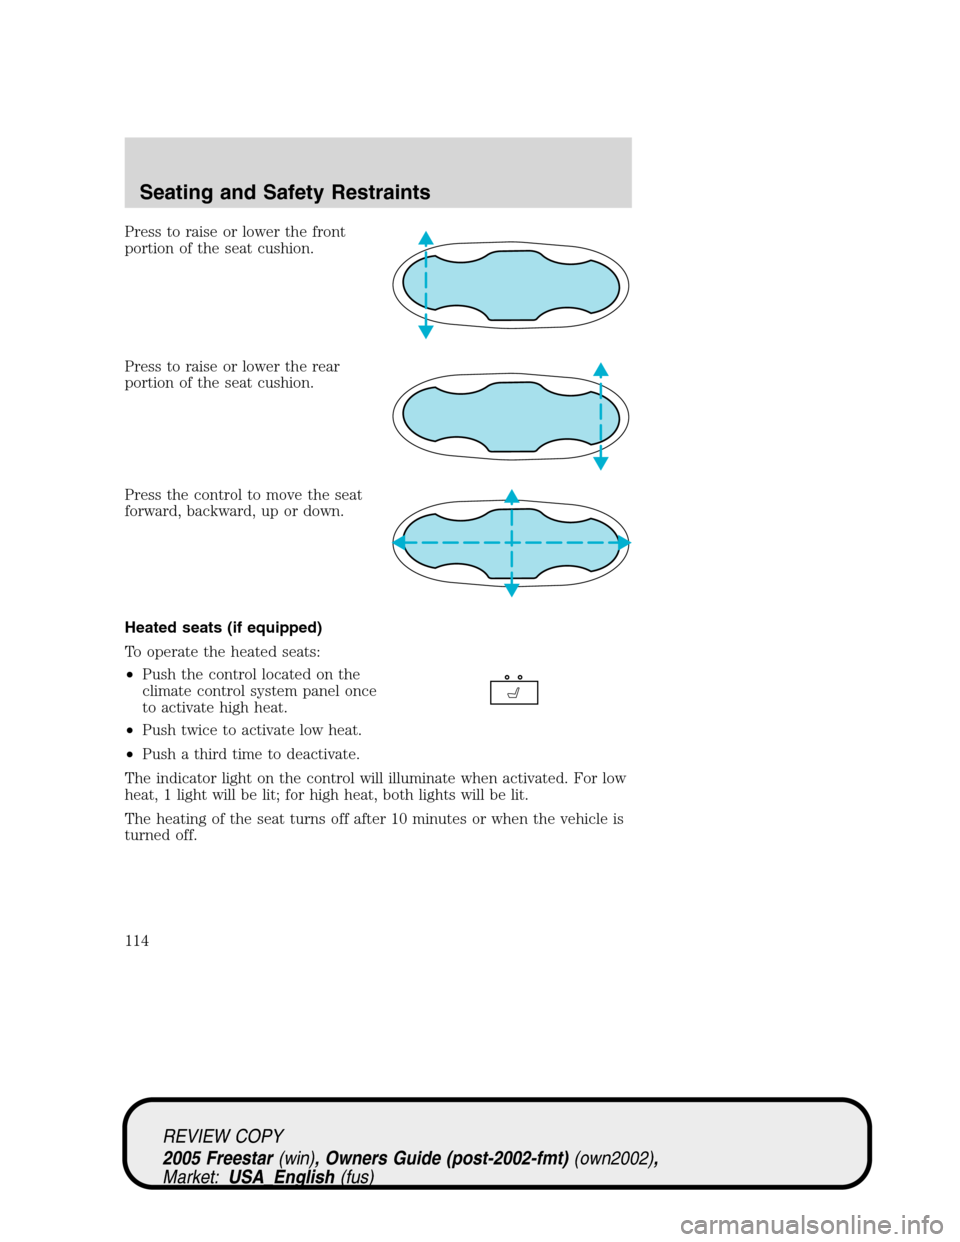
Press to raise or lower the front
portion of the seat cushion.
Press to raise or lower the rear
portion of the seat cushion.
Press the control to move the seat
forward, backward, up or down.
Heated seats (if equipped)
To operate the heated seats:
•Push the control located on the
climate control system panel once
to activate high heat.
•Push twice to activate low heat.
•Push a third time to deactivate.
The indicator light on the control will illuminate when activated. For low
heat, 1 light will be lit; for high heat, both lights will be lit.
The heating of the seat turns off after 10 minutes or when the vehicle is
turned off.
REVIEW COPY
2005 Freestar(win), Owners Guide (post-2002-fmt)(own2002),
Market:USA_English(fus)
Seating and Safety Restraints
114
Page 115 of 312
Using the manual lumbar support (if equipped)
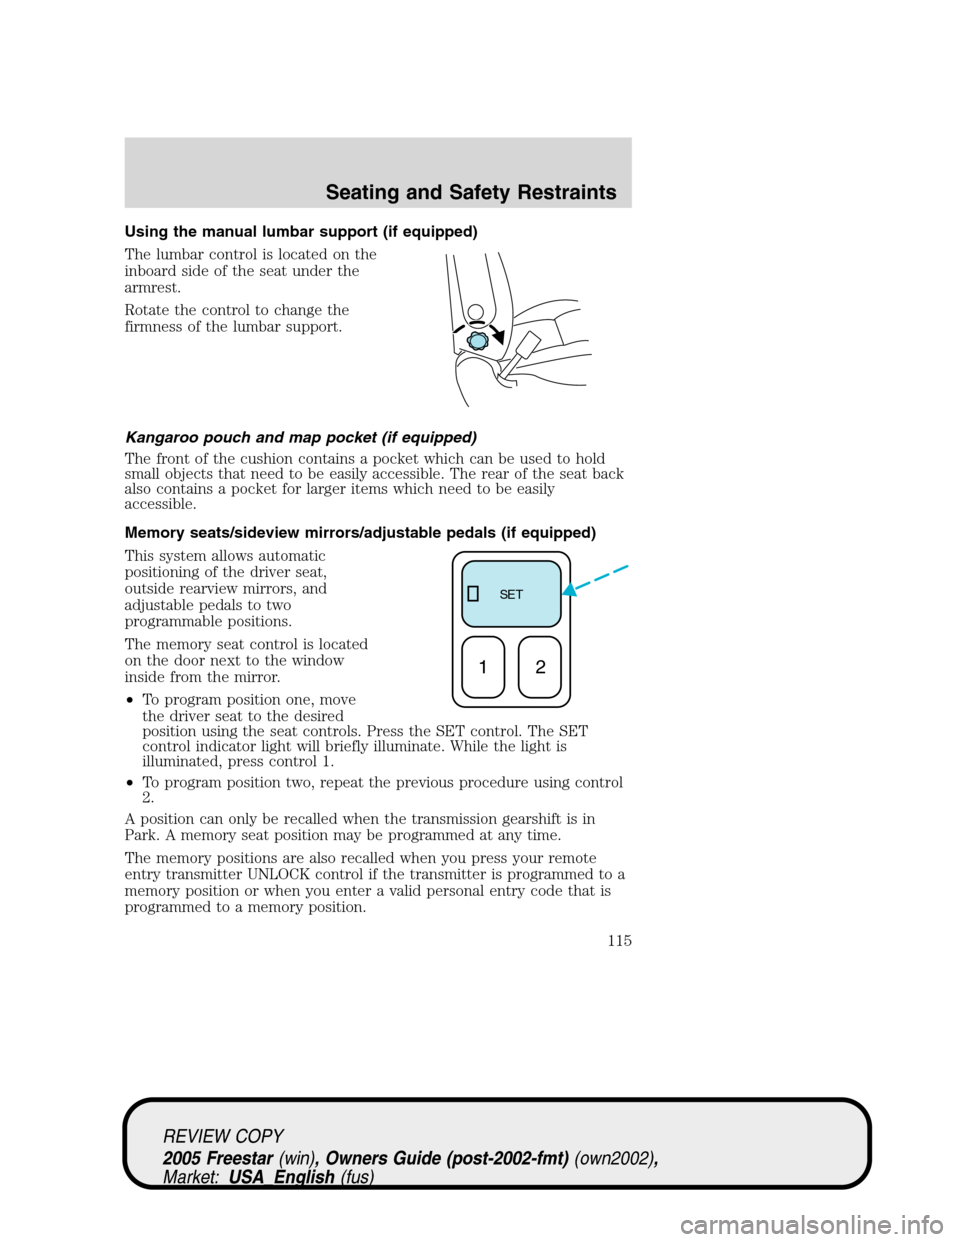
The lumbar control is located on the
inboard side of the seat under the
armrest.
Rotate the control to change the
firmness of the lumbar support.
Kangaroo pouch and map pocket (if equipped)
The front of the cushion contains a pocket which can be used to hold
small objects that need to be easily accessible. The rear of the seat back
also contains a pocket for larger items which need to be easily
accessible.
Memory seats/sideview mirrors/adjustable pedals (if equipped)
This system allows automatic
positioning of the driver seat,
outside rearview mirrors, and
adjustable pedals to two
programmable positions.
The memory seat control is located
on the door next to the window
inside from the mirror.
•To program position one, move
the driver seat to the desired
position using the seat controls. Press the SET control. The SET
control indicator light will briefly illuminate. While the light is
illuminated, press control 1.
•To program position two, repeat the previous procedure using control
2.
A position can only be recalled when the transmission gearshift is in
Park. A memory seat position may be programmed at any time.
The memory positions are also recalled when you press your remote
entry transmitter UNLOCK control if the transmitter is programmed to a
memory position or when you enter a valid personal entry code that is
programmed to a memory position.
SE T
12
REVIEW COPY
2005 Freestar(win), Owners Guide (post-2002-fmt)(own2002),
Market:USA_English(fus)
Seating and Safety Restraints
115
Page 116 of 312
To program the memory feature to a remote entry transmitter and for
more information on how to use the keypad, refer toRemote entry
systemin theLocks and securitychapter.
REAR SEATS
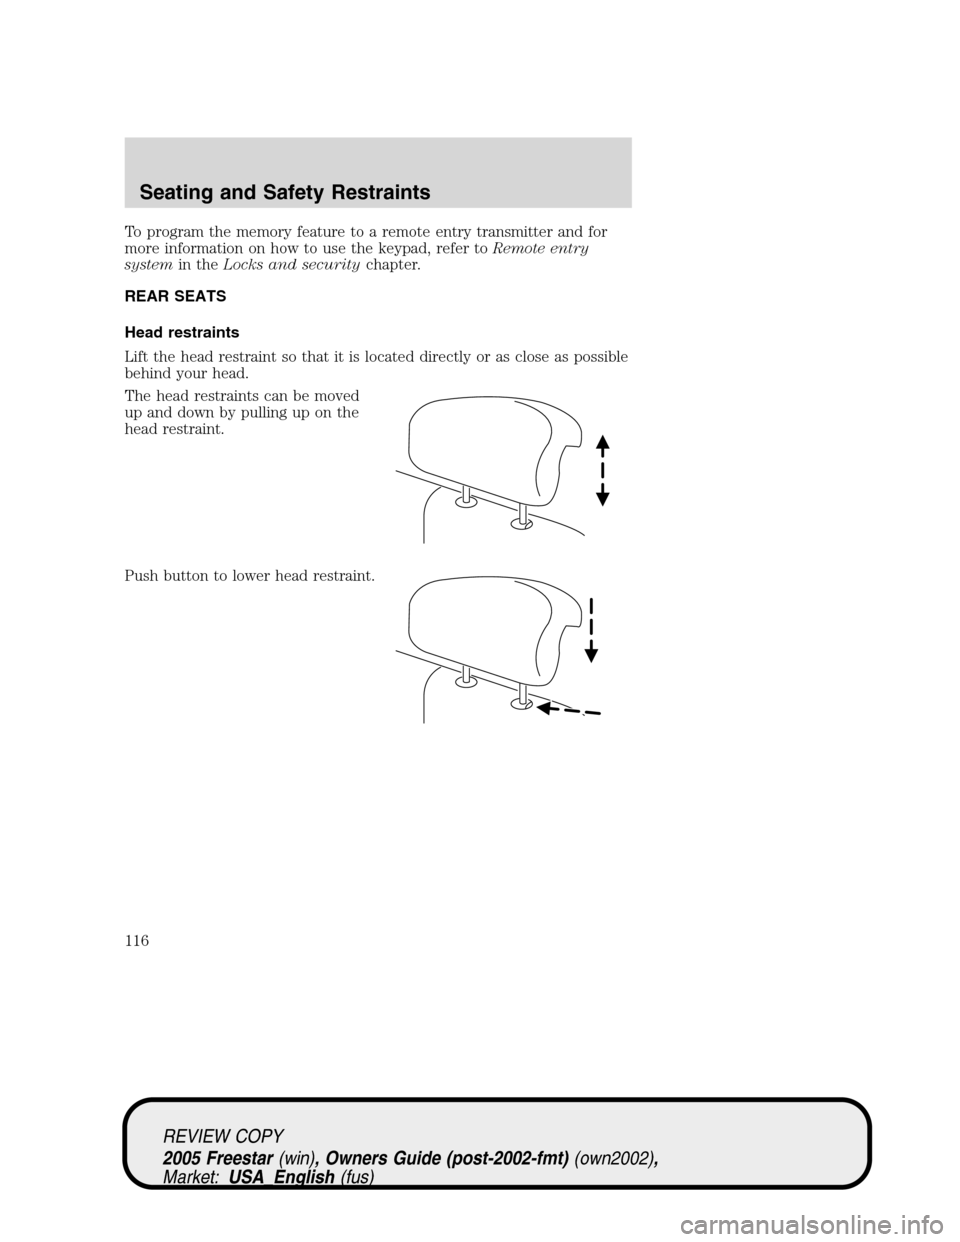
Head restraints
Lift the head restraint so that it is located directly or as close as possible
behind your head.
The head restraints can be moved
up and down by pulling up on the
head restraint.
Push button to lower head restraint.
REVIEW COPY
2005 Freestar(win), Owners Guide (post-2002-fmt)(own2002),
Market:USA_English(fus)
Seating and Safety Restraints
116
Page 118 of 312
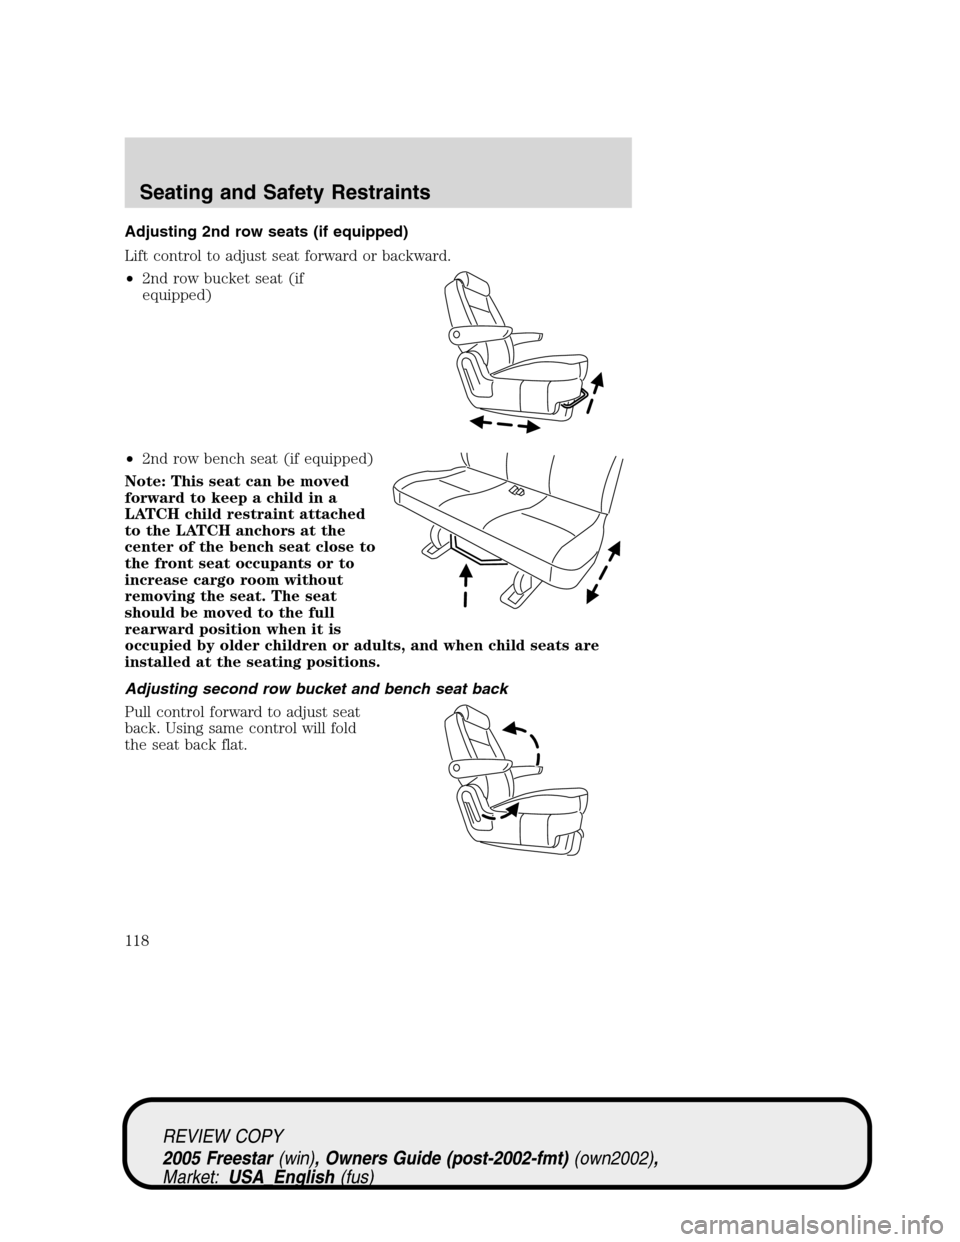
Adjusting 2nd row seats (if equipped)
Lift control to adjust seat forward or backward.
•2nd row bucket seat (if
equipped)
•2nd row bench seat (if equipped)
Note: This seat can be moved
forward to keep a child in a
LATCH child restraint attached
to the LATCH anchors at the
center of the bench seat close to
the front seat occupants or to
increase cargo room without
removing the seat. The seat
should be moved to the full
rearward position when it is
occupied by older children or adults, and when child seats are
installed at the seating positions.
Adjusting second row bucket and bench seat back
Pull control forward to adjust seat
back. Using same control will fold
the seat back flat.
REVIEW COPY
2005 Freestar(win), Owners Guide (post-2002-fmt)(own2002),
Market:USA_English(fus)
Seating and Safety Restraints
118