FORD FREESTAR 2006 1.G Workshop Manual
Manufacturer: FORD, Model Year: 2006, Model line: FREESTAR, Model: FORD FREESTAR 2006 1.GPages: 320, PDF Size: 3.59 MB
Page 51 of 320
Replacing headlamp bulbs
To remove the headlamp bulb:
1. Make sure headlamp switch is in the OFF position, then open the
hood.
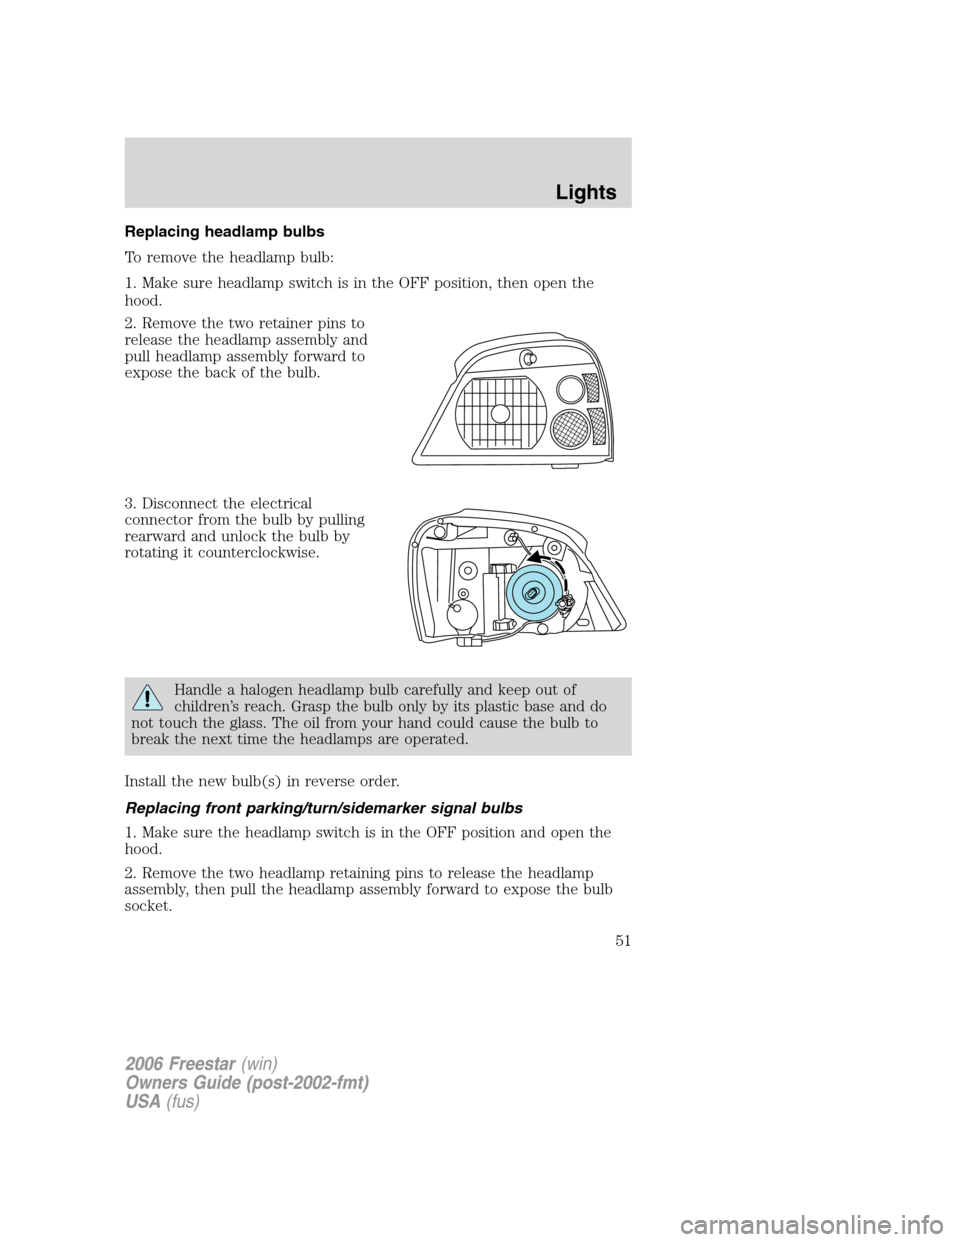
2. Remove the two retainer pins to
release the headlamp assembly and
pull headlamp assembly forward to
expose the back of the bulb.
3. Disconnect the electrical
connector from the bulb by pulling
rearward and unlock the bulb by
rotating it counterclockwise.
Handle a halogen headlamp bulb carefully and keep out of
children’s reach. Grasp the bulb only by its plastic base and do
not touch the glass. The oil from your hand could cause the bulb to
break the next time the headlamps are operated.
Install the new bulb(s) in reverse order.
Replacing front parking/turn/sidemarker signal bulbs
1. Make sure the headlamp switch is in the OFF position and open the
hood.
2. Remove the two headlamp retaining pins to release the headlamp
assembly, then pull the headlamp assembly forward to expose the bulb
socket.
2006 Freestar(win)
Owners Guide (post-2002-fmt)
USA(fus)
Lights
51
Page 52 of 320
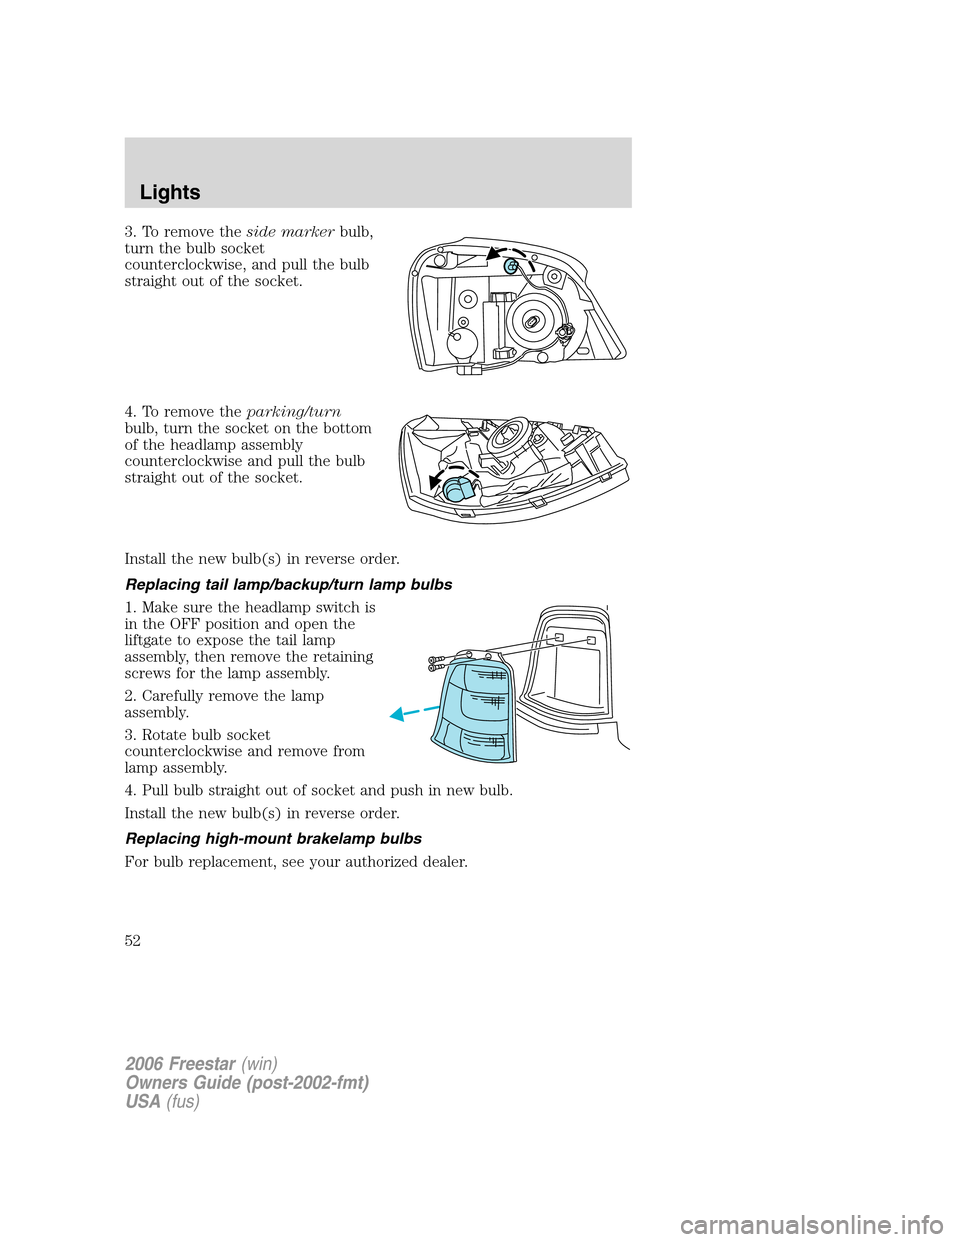
3. To remove theside markerbulb,
turn the bulb socket
counterclockwise, and pull the bulb
straight out of the socket.
4. To remove theparking/turn
bulb, turn the socket on the bottom
of the headlamp assembly
counterclockwise and pull the bulb
straight out of the socket.
Install the new bulb(s) in reverse order.
Replacing tail lamp/backup/turn lamp bulbs
1. Make sure the headlamp switch is
in the OFF position and open the
liftgate to expose the tail lamp
assembly, then remove the retaining
screws for the lamp assembly.
2. Carefully remove the lamp
assembly.
3. Rotate bulb socket
counterclockwise and remove from
lamp assembly.
4. Pull bulb straight out of socket and push in new bulb.
Install the new bulb(s) in reverse order.
Replacing high-mount brakelamp bulbs
For bulb replacement, see your authorized dealer.
2006 Freestar(win)
Owners Guide (post-2002-fmt)
USA(fus)
Lights
52
Page 53 of 320
Replacing license plate lamp bulb
The license plate bulbs are located in the license plate housing assembly
on the liftgate. To change the license plate bulbs:
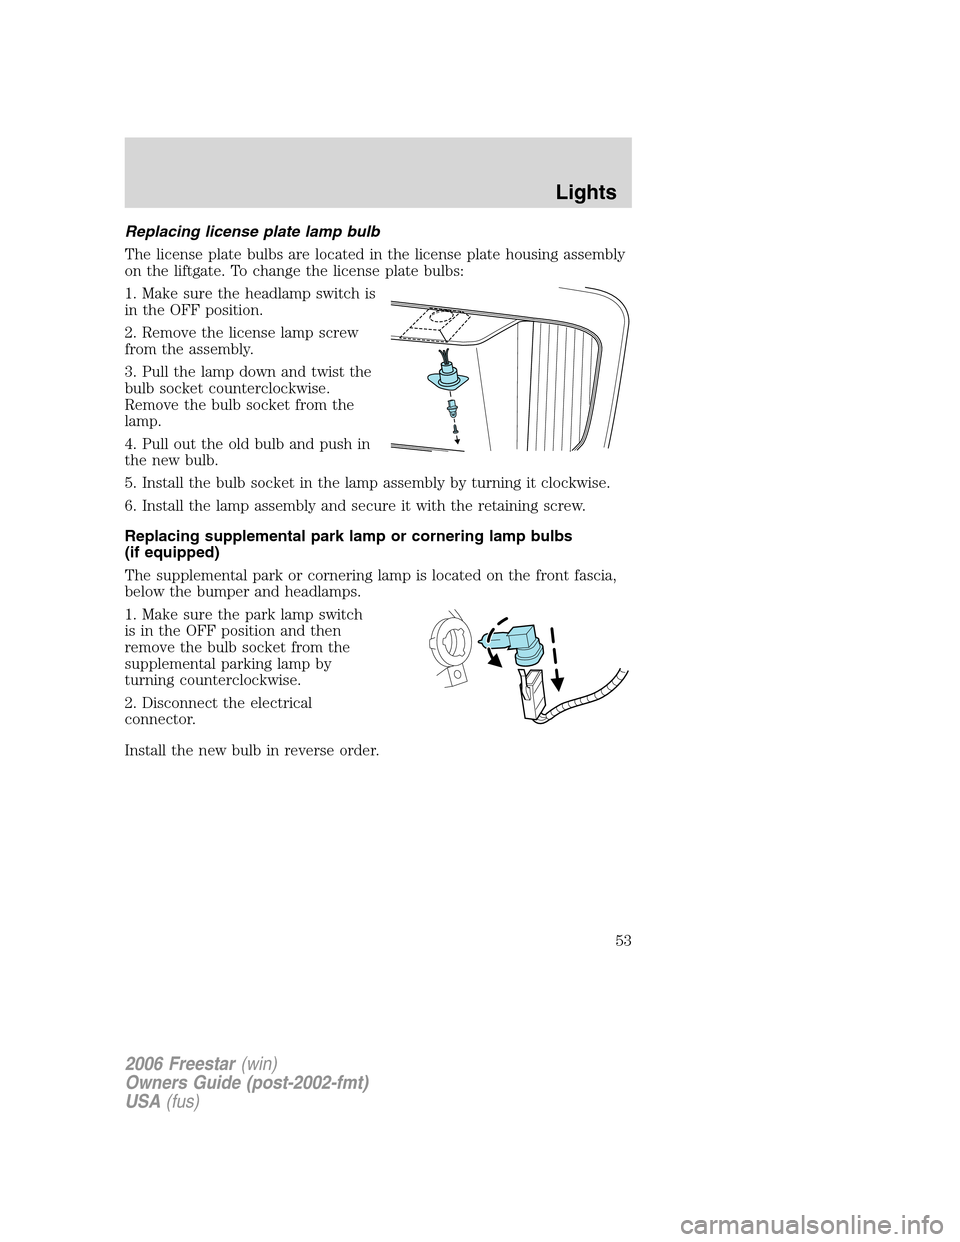
1. Make sure the headlamp switch is
in the OFF position.
2. Remove the license lamp screw
from the assembly.
3. Pull the lamp down and twist the
bulb socket counterclockwise.
Remove the bulb socket from the
lamp.
4. Pull out the old bulb and push in
the new bulb.
5. Install the bulb socket in the lamp assembly by turning it clockwise.
6. Install the lamp assembly and secure it with the retaining screw.
Replacing supplemental park lamp or cornering lamp bulbs
(if equipped)
The supplemental park or cornering lamp is located on the front fascia,
below the bumper and headlamps.
1. Make sure the park lamp switch
is in the OFF position and then
remove the bulb socket from the
supplemental parking lamp by
turning counterclockwise.
2. Disconnect the electrical
connector.
Install the new bulb in reverse order.
2006 Freestar(win)
Owners Guide (post-2002-fmt)
USA(fus)
Lights
53
Page 54 of 320
MULTI-FUNCTION LEVER
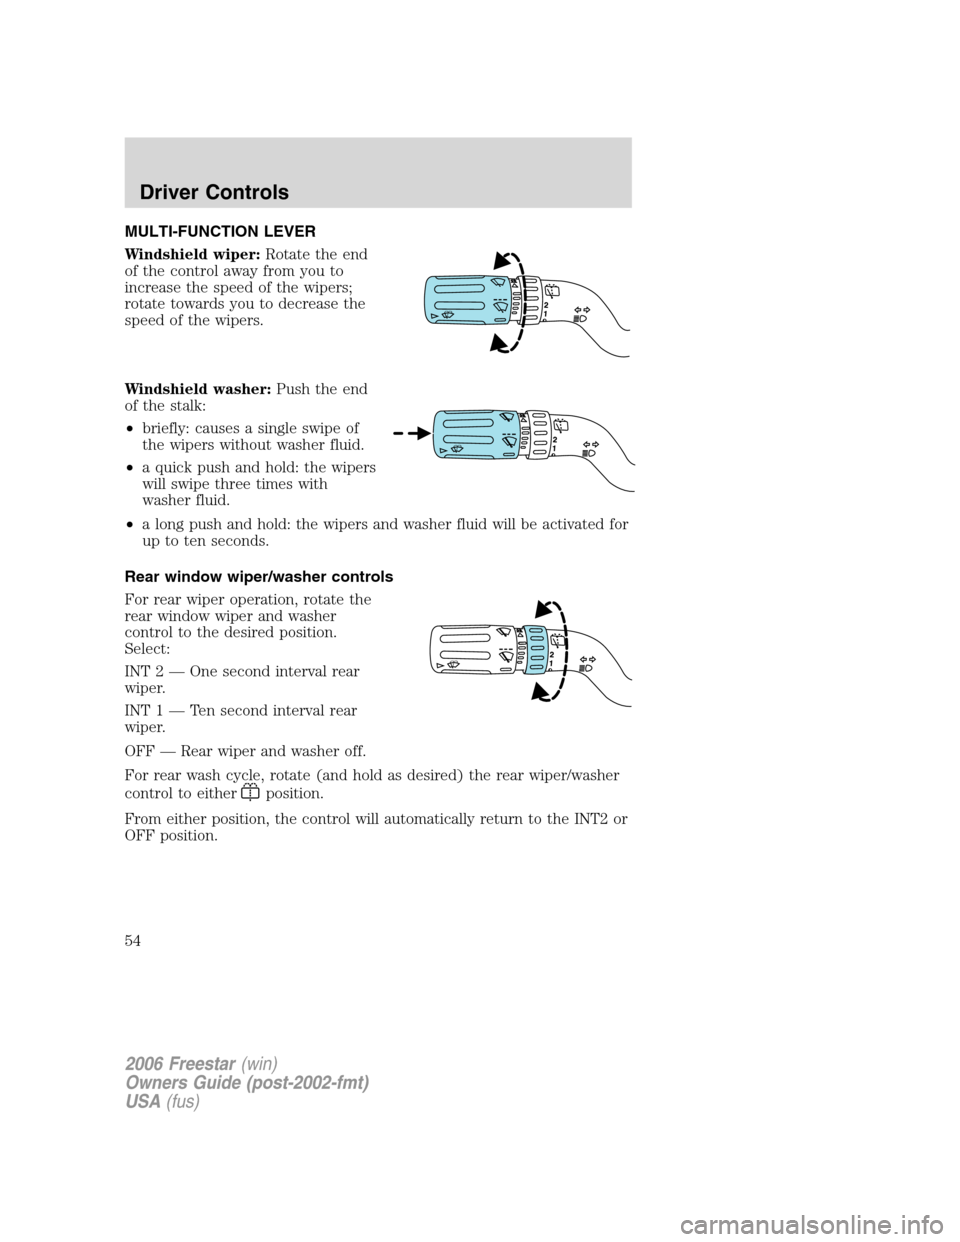
Windshield wiper:Rotate the end
of the control away from you to
increase the speed of the wipers;
rotate towards you to decrease the
speed of the wipers.
Windshield washer:Push the end
of the stalk:
•briefly: causes a single swipe of
the wipers without washer fluid.
•a quick push and hold: the wipers
will swipe three times with
washer fluid.
•a long push and hold: the wipers and washer fluid will be activated for
up to ten seconds.
Rear window wiper/washer controls
For rear wiper operation, rotate the
rear window wiper and washer
control to the desired position.
Select:
INT 2 — One second interval rear
wiper.
INT 1 — Ten second interval rear
wiper.
OFF — Rear wiper and washer off.
For rear wash cycle, rotate (and hold as desired) the rear wiper/washer
control to either
position.
From either position, the control will automatically return to the INT2 or
OFF position.
2006 Freestar(win)
Owners Guide (post-2002-fmt)
USA(fus)
Driver Controls
54
Page 55 of 320
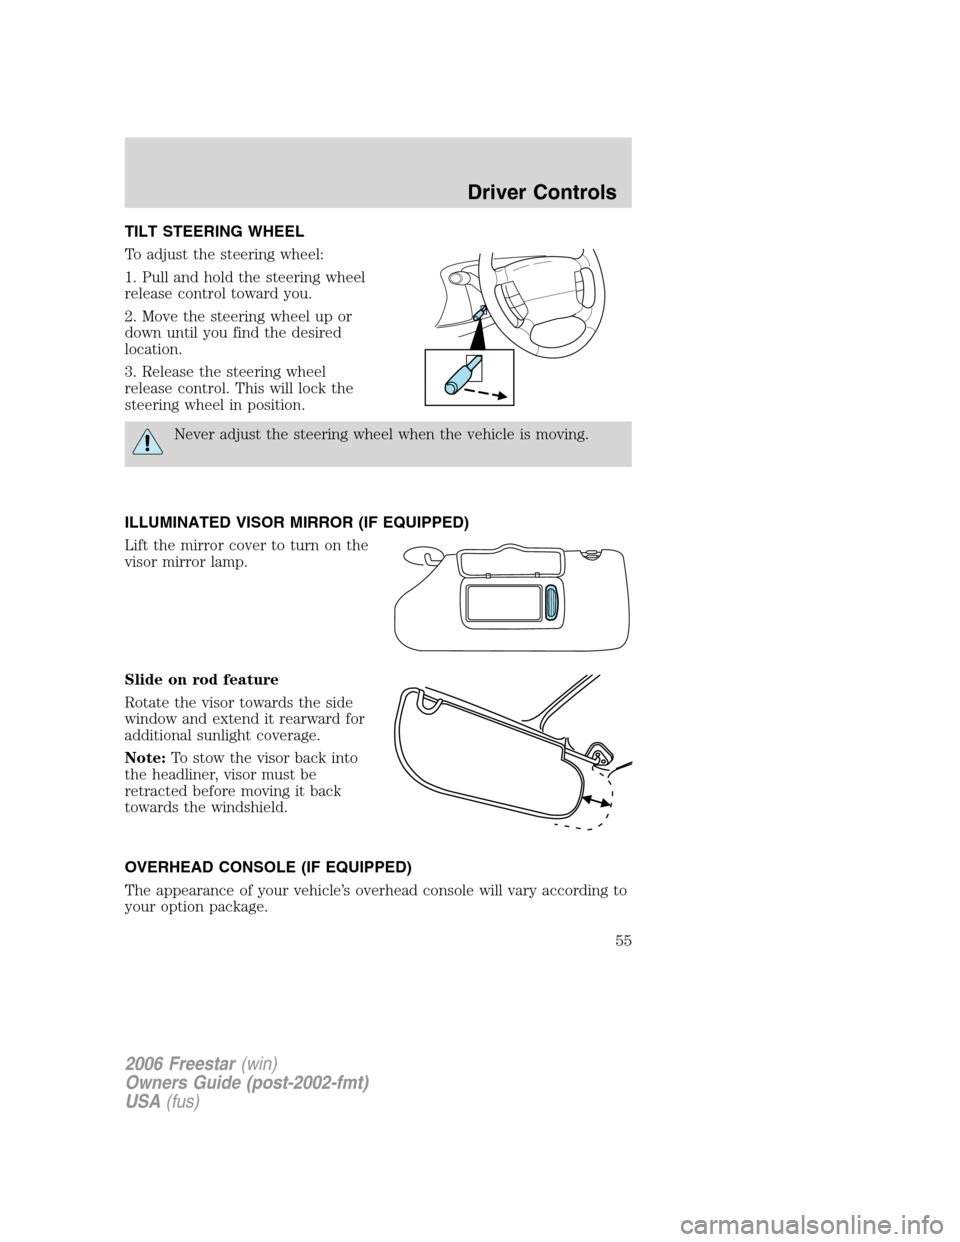
TILT STEERING WHEEL
To adjust the steering wheel:
1. Pull and hold the steering wheel
release control toward you.
2. Move the steering wheel up or
down until you find the desired
location.
3. Release the steering wheel
release control. This will lock the
steering wheel in position.
Never adjust the steering wheel when the vehicle is moving.
ILLUMINATED VISOR MIRROR (IF EQUIPPED)
Lift the mirror cover to turn on the
visor mirror lamp.
Slide on rod feature
Rotate the visor towards the side
window and extend it rearward for
additional sunlight coverage.
Note:To stow the visor back into
the headliner, visor must be
retracted before moving it back
towards the windshield.
OVERHEAD CONSOLE (IF EQUIPPED)
The appearance of your vehicle’s overhead console will vary according to
your option package.
2006 Freestar(win)
Owners Guide (post-2002-fmt)
USA(fus)
Driver Controls
55
Page 56 of 320
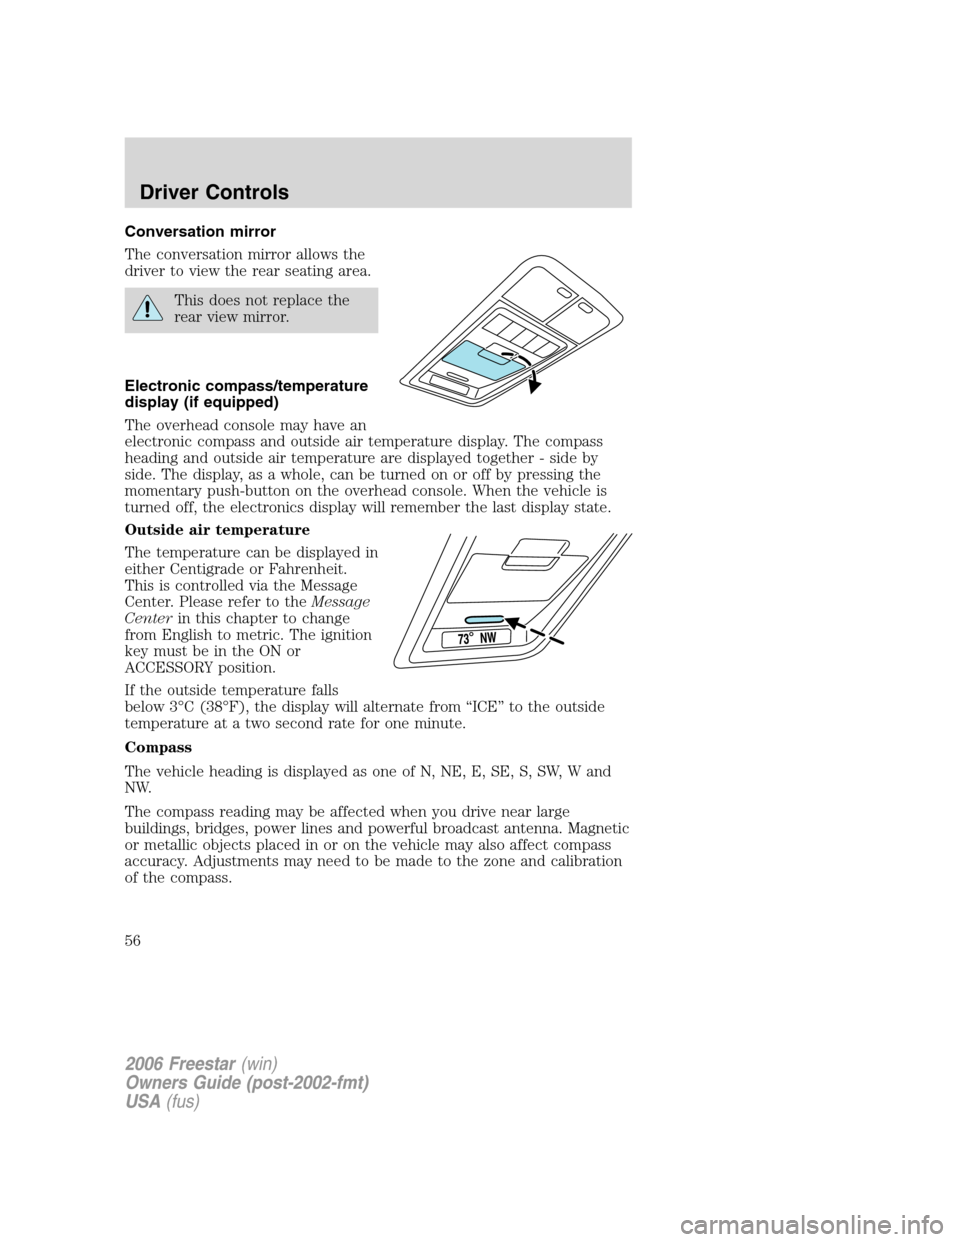
Conversation mirror
The conversation mirror allows the
driver to view the rear seating area.
This does not replace the
rear view mirror.
Electronic compass/temperature
display (if equipped)
The overhead console may have an
electronic compass and outside air temperature display. The compass
heading and outside air temperature are displayed together - side by
side. The display, as a whole, can be turned on or off by pressing the
momentary push-button on the overhead console. When the vehicle is
turned off, the electronics display will remember the last display state.
Outside air temperature
The temperature can be displayed in
either Centigrade or Fahrenheit.
This is controlled via the Message
Center. Please refer to theMessage
Centerin this chapter to change
from English to metric. The ignition
key must be in the ON or
ACCESSORY position.
If the outside temperature falls
below 3°C (38°F), the display will alternate from “ICE” to the outside
temperature at a two second rate for one minute.
Compass
The vehicle heading is displayed as one of N, NE, E, SE, S, SW, W and
NW.
The compass reading may be affected when you drive near large
buildings, bridges, power lines and powerful broadcast antenna. Magnetic
or metallic objects placed in or on the vehicle may also affect compass
accuracy. Adjustments may need to be made to the zone and calibration
of the compass.
2006 Freestar(win)
Owners Guide (post-2002-fmt)
USA(fus)
Driver Controls
56
Page 57 of 320
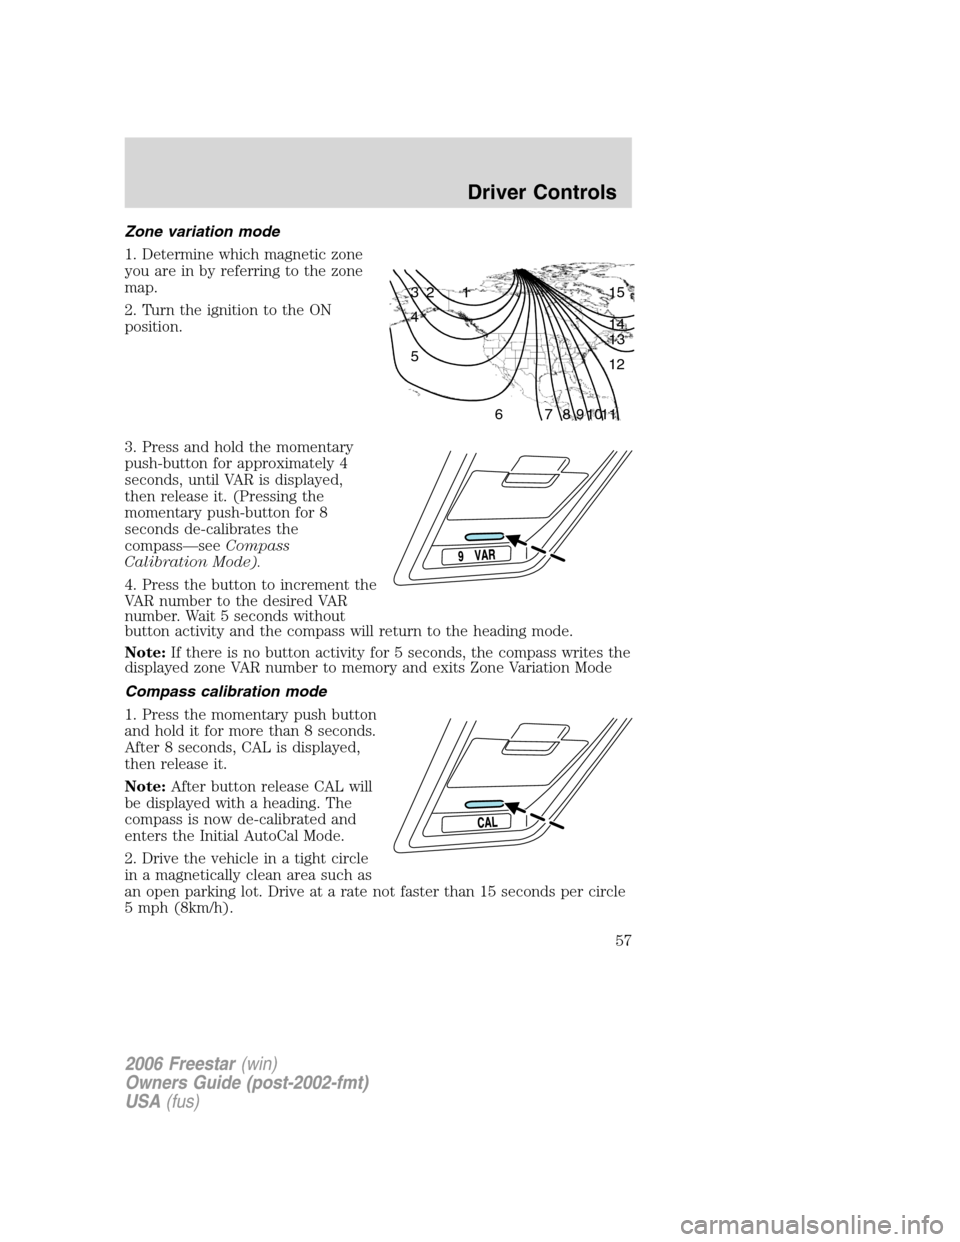
Zone variation mode
1. Determine which magnetic zone
you are in by referring to the zone
map.
2. Turn the ignition to the ON
position.
3. Press and hold the momentary
push-button for approximately 4
seconds, until VAR is displayed,
then release it. (Pressing the
momentary push-button for 8
seconds de-calibrates the
compass—seeCompass
Calibration Mode).
4. Press the button to increment the
VAR number to the desired VAR
number. Wait 5 seconds without
button activity and the compass will return to the heading mode.
Note:If there is no button activity for 5 seconds, the compass writes the
displayed zone VAR number to memory and exits Zone Variation Mode
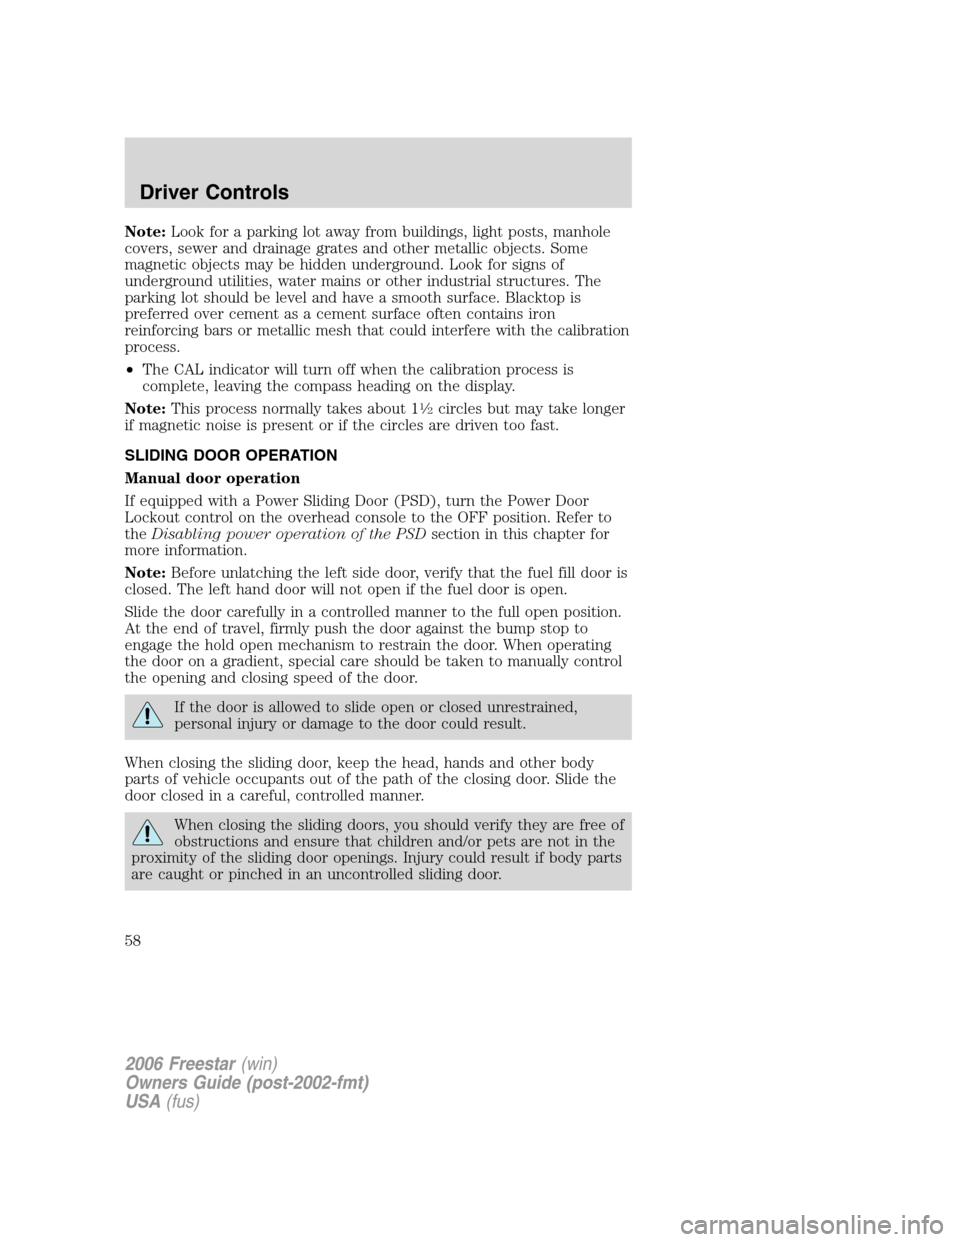
Compass calibration mode
1. Press the momentary push button
and hold it for more than 8 seconds.
After 8 seconds, CAL is displayed,
then release it.
Note:After button release CAL will
be displayed with a heading. The
compass is now de-calibrated and
enters the Initial AutoCal Mode.
2. Drive the vehicle in a tight circle
in a magnetically clean area such as
an open parking lot. Drive at a rate not faster than 15 seconds per circle
5 mph (8km/h).
1 2 3
4
5
6 7 8 9 101112 13 14 15
2006 Freestar(win)
Owners Guide (post-2002-fmt)
USA(fus)
Driver Controls
57
Page 58 of 320
Note:Look for a parking lot away from buildings, light posts, manhole
covers, sewer and drainage grates and other metallic objects. Some
magnetic objects may be hidden underground. Look for signs of
underground utilities, water mains or other industrial structures. The
parking lot should be level and have a smooth surface. Blacktop is
preferred over cement as a cement surface often contains iron
reinforcing bars or metallic mesh that could interfere with the calibration
process.
•The CAL indicator will turn off when the calibration process is
complete, leaving the compass heading on the display.
Note:This process normally takes about 1
1�2circles but may take longer
if magnetic noise is present or if the circles are driven too fast.
SLIDING DOOR OPERATION
Manual door operation
If equipped with a Power Sliding Door (PSD), turn the Power Door
Lockout control on the overhead console to the OFF position. Refer to
theDisabling power operation of the PSDsection in this chapter for
more information.
Note:Before unlatching the left side door, verify that the fuel fill door is
closed. The left hand door will not open if the fuel door is open.
Slide the door carefully in a controlled manner to the full open position.
At the end of travel, firmly push the door against the bump stop to
engage the hold open mechanism to restrain the door. When operating
the door on a gradient, special care should be taken to manually control
the opening and closing speed of the door.
If the door is allowed to slide open or closed unrestrained,
personal injury or damage to the door could result.
When closing the sliding door, keep the head, hands and other body
parts of vehicle occupants out of the path of the closing door. Slide the
door closed in a careful, controlled manner.
When closing the sliding doors, you should verify they are free of
obstructions and ensure that children and/or pets are not in the
proximity of the sliding door openings. Injury could result if body parts
are caught or pinched in an uncontrolled sliding door.
2006 Freestar(win)
Owners Guide (post-2002-fmt)
USA(fus)
Driver Controls
58
Page 59 of 320
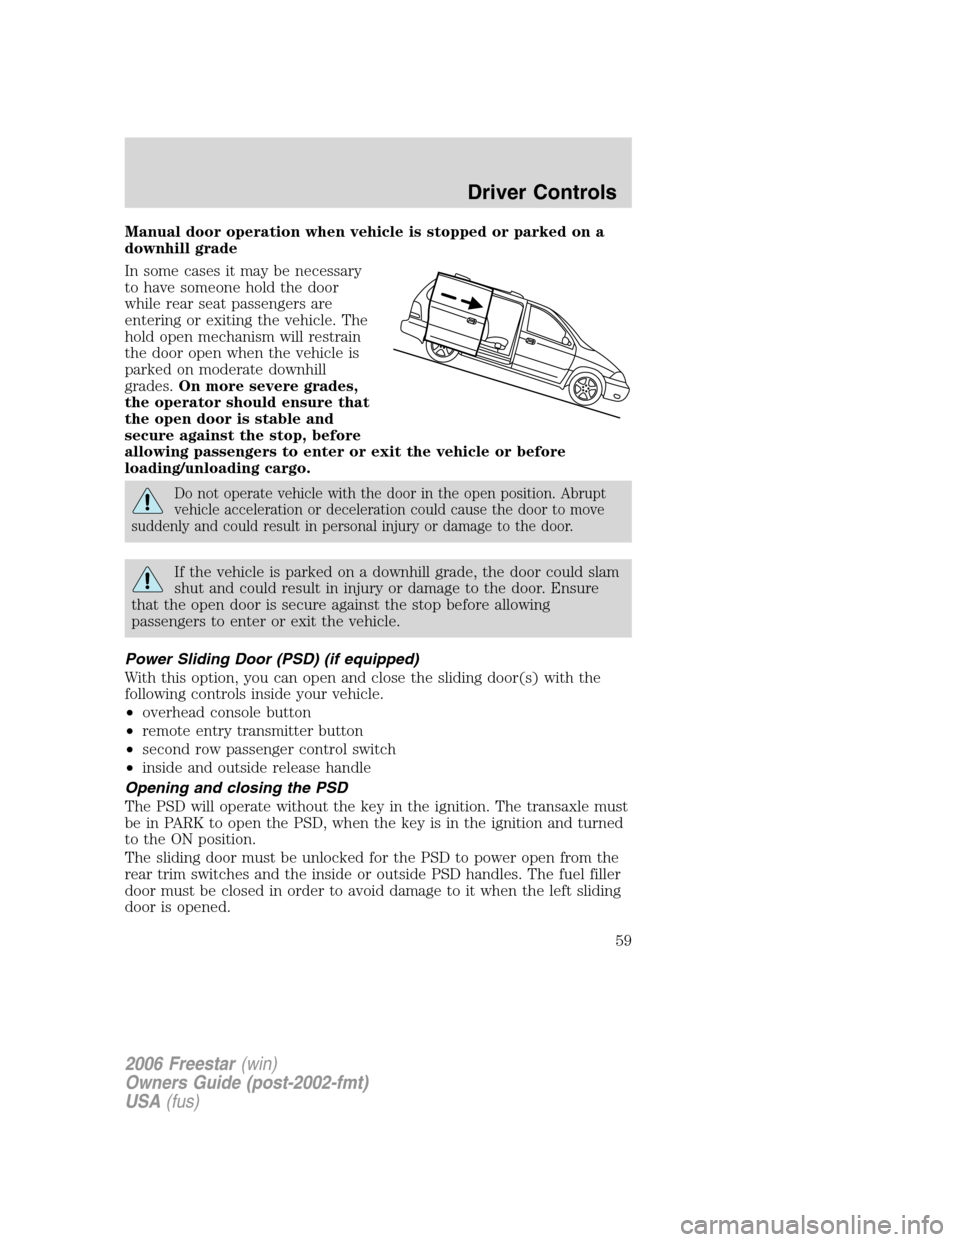
Manual door operation when vehicle is stopped or parked on a
downhill grade
In some cases it may be necessary
to have someone hold the door
while rear seat passengers are
entering or exiting the vehicle. The
hold open mechanism will restrain
the door open when the vehicle is
parked on moderate downhill
grades.On more severe grades,
the operator should ensure that
the open door is stable and
secure against the stop, before
allowing passengers to enter or exit the vehicle or before
loading/unloading cargo.
Do not operate vehicle with the door in the open position. Abrupt
vehicle acceleration or deceleration could cause the door to move
suddenly and could result in personal injury or damage to the door.
If the vehicle is parked on a downhill grade, the door could slam
shut and could result in injury or damage to the door. Ensure
that the open door is secure against the stop before allowing
passengers to enter or exit the vehicle.
Power Sliding Door (PSD) (if equipped)
With this option, you can open and close the sliding door(s) with the
following controls inside your vehicle.
•overhead console button
•remote entry transmitter button
•second row passenger control switch
•inside and outside release handle
Opening and closing the PSD
The PSD will operate without the key in the ignition. The transaxle must
be in PARK to open the PSD, when the key is in the ignition and turned
to the ON position.
The sliding door must be unlocked for the PSD to power open from the
rear trim switches and the inside or outside PSD handles. The fuel filler
door must be closed in order to avoid damage to it when the left sliding
door is opened.
2006 Freestar(win)
Owners Guide (post-2002-fmt)
USA(fus)
Driver Controls
59
Page 60 of 320
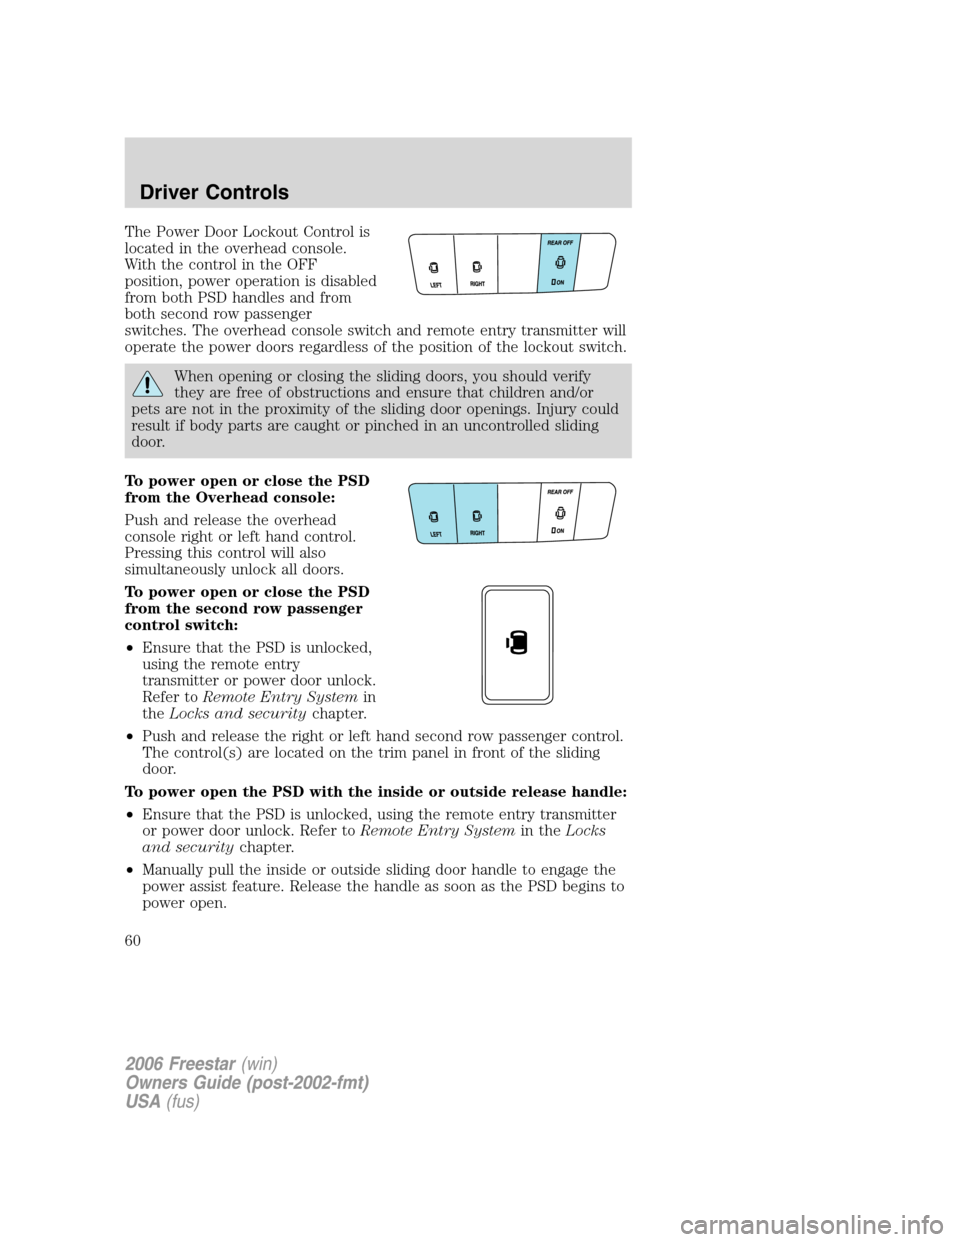
The Power Door Lockout Control is
located in the overhead console.
With the control in the OFF
position, power operation is disabled
from both PSD handles and from
both second row passenger
switches. The overhead console switch and remote entry transmitter will
operate the power doors regardless of the position of the lockout switch.
When opening or closing the sliding doors, you should verify
they are free of obstructions and ensure that children and/or
pets are not in the proximity of the sliding door openings. Injury could
result if body parts are caught or pinched in an uncontrolled sliding
door.
To power open or close the PSD
from the Overhead console:
Push and release the overhead
console right or left hand control.
Pressing this control will also
simultaneously unlock all doors.
To power open or close the PSD
from the second row passenger
control switch:
•Ensure that the PSD is unlocked,
using the remote entry
transmitter or power door unlock.
Refer toRemote Entry Systemin
theLocks and securitychapter.
•Push and release the right or left hand second row passenger control.
The control(s) are located on the trim panel in front of the sliding
door.
To power open the PSD with the inside or outside release handle:
•Ensure that the PSD is unlocked, using the remote entry transmitter
or power door unlock. Refer toRemote Entry Systemin theLocks
and securitychapter.
•Manually pull the inside or outside sliding door handle to engage the
power assist feature. Release the handle as soon as the PSD begins to
power open.
2006 Freestar(win)
Owners Guide (post-2002-fmt)
USA(fus)
Driver Controls
60