warning light FORD FUSION 2010 User Guide
[x] Cancel search | Manufacturer: FORD, Model Year: 2010, Model line: FUSION, Model: FORD FUSION 2010Pages: 340, PDF Size: 2.87 MB
Page 62 of 340
Replacing interior bulbs
Check the operation of all bulbs frequently.
Replacing exterior bulbs
Check the operation of all the bulbs frequently.
Replacing headlamp bulbs (2.5L/3.0L engines)
High beam/low beam bulb replacement
For driver side replacement of this bulb, do the following:
WARNING:To reduce the risk of vehicle damage and/or
personal burn injuries do not start your engine with the air
cleaner removed and do not remove it while the engine is running.
1. Release the clamps that secure the air filter housing cover. See
Changing the air filter elementin theMaintenance & Specifications
section for more information.
2. Carefully separate the two halves of the air filter housing.
3. Locate the mass air flow sensor electrical connector on the air outlet
tube. This connector will need to be unplugged.
4. Remove the air filter assembly.
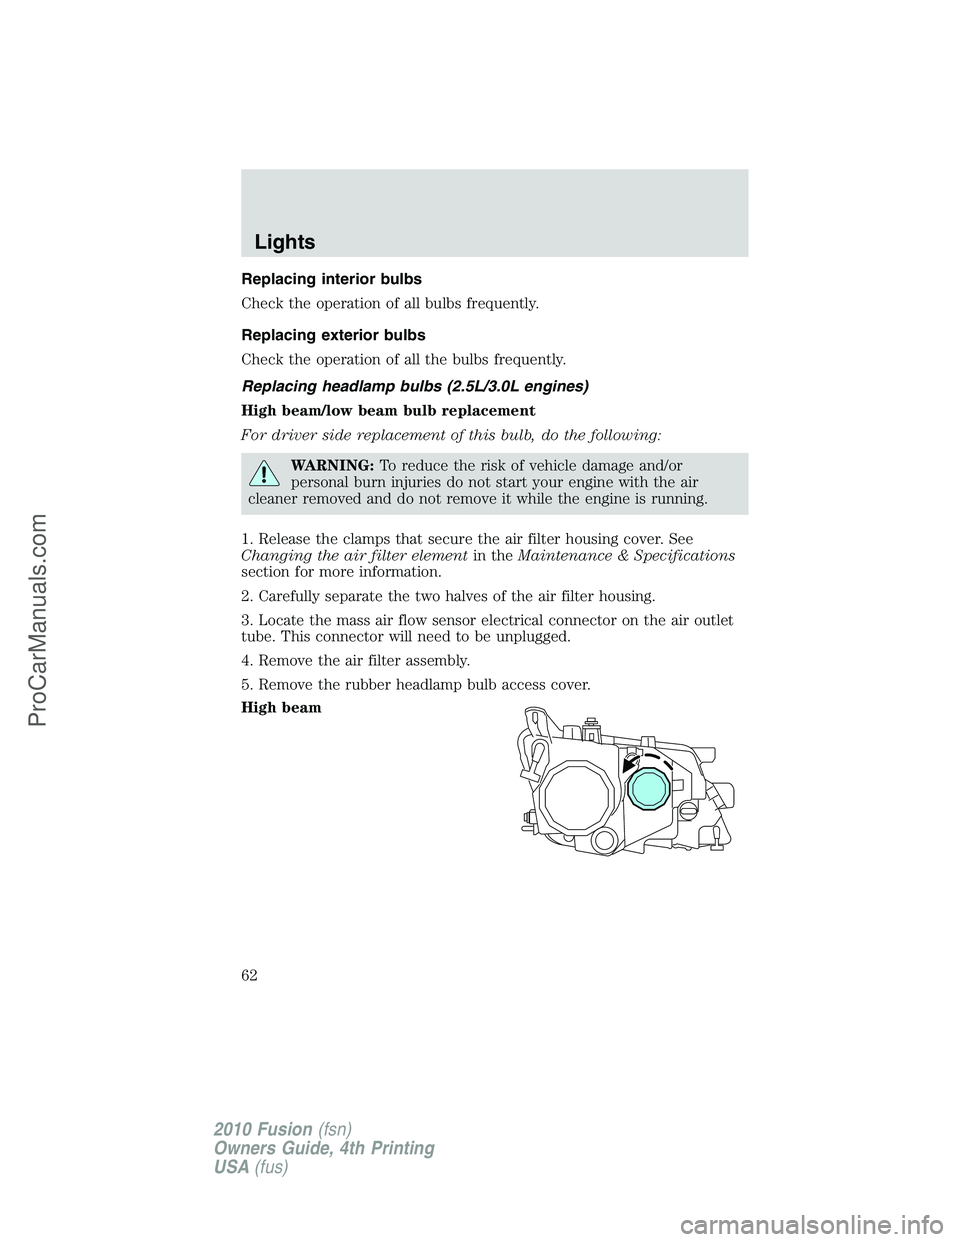
5. Remove the rubber headlamp bulb access cover.
High beam
Lights
62
2010 Fusion(fsn)
Owners Guide, 4th Printing
USA(fus)
ProCarManuals.com
Page 64 of 340
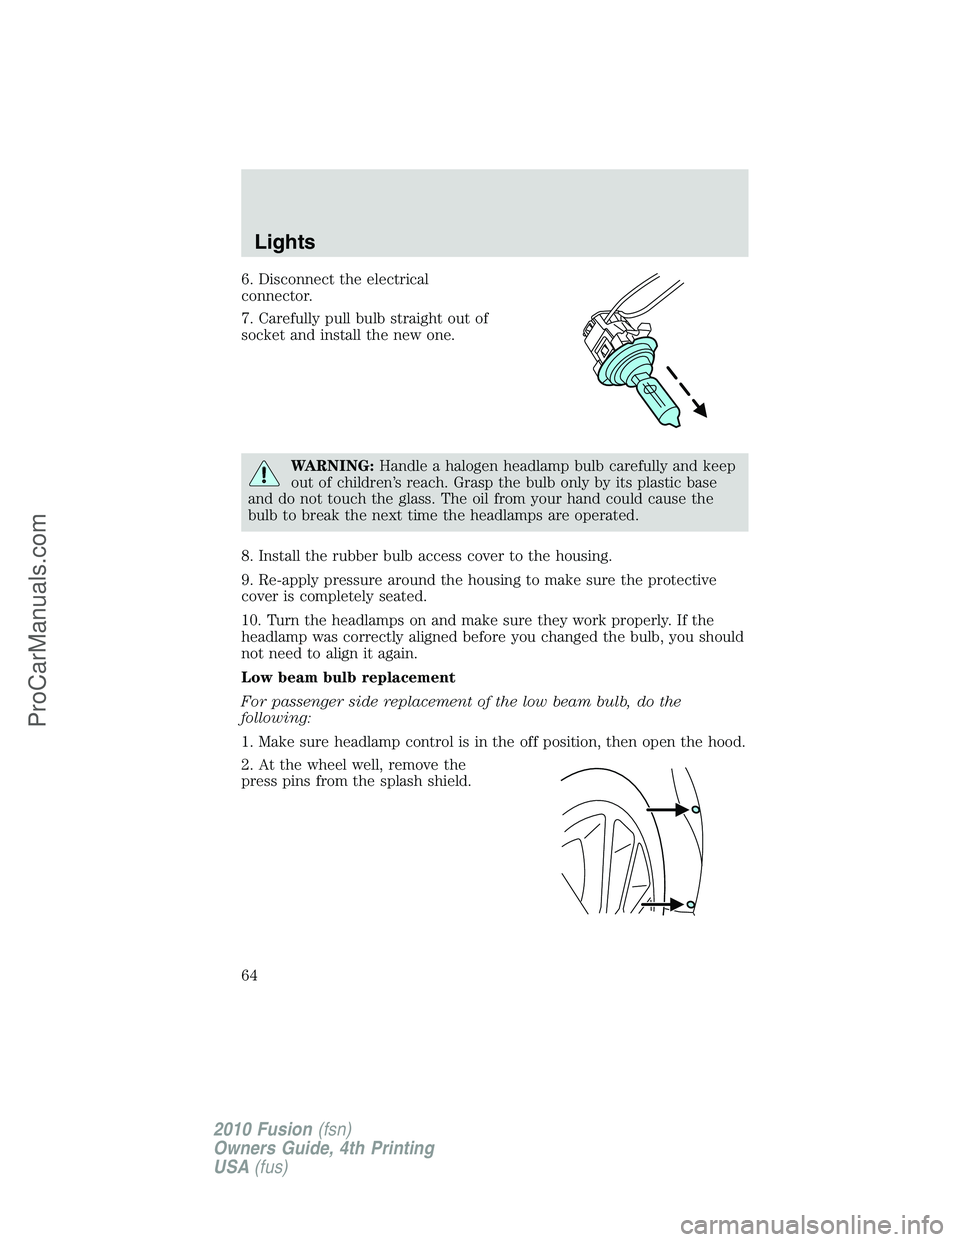
6. Disconnect the electrical
connector.
7. Carefully pull bulb straight out of
socket and install the new one.
WARNING:Handle a halogen headlamp bulb carefully and keep
out of children’s reach. Grasp the bulb only by its plastic base
and do not touch the glass. The oil from your hand could cause the
bulb to break the next time the headlamps are operated.
8. Install the rubber bulb access cover to the housing.
9. Re-apply pressure around the housing to make sure the protective
cover is completely seated.
10. Turn the headlamps on and make sure they work properly. If the
headlamp was correctly aligned before you changed the bulb, you should
not need to align it again.
Low beam bulb replacement
For passenger side replacement of the low beam bulb, do the
following:
1. Make sure headlamp control is in the off position, then open the hood.
2. At the wheel well, remove the
press pins from the splash shield.
Lights
64
2010 Fusion(fsn)
Owners Guide, 4th Printing
USA(fus)
ProCarManuals.com
Page 65 of 340
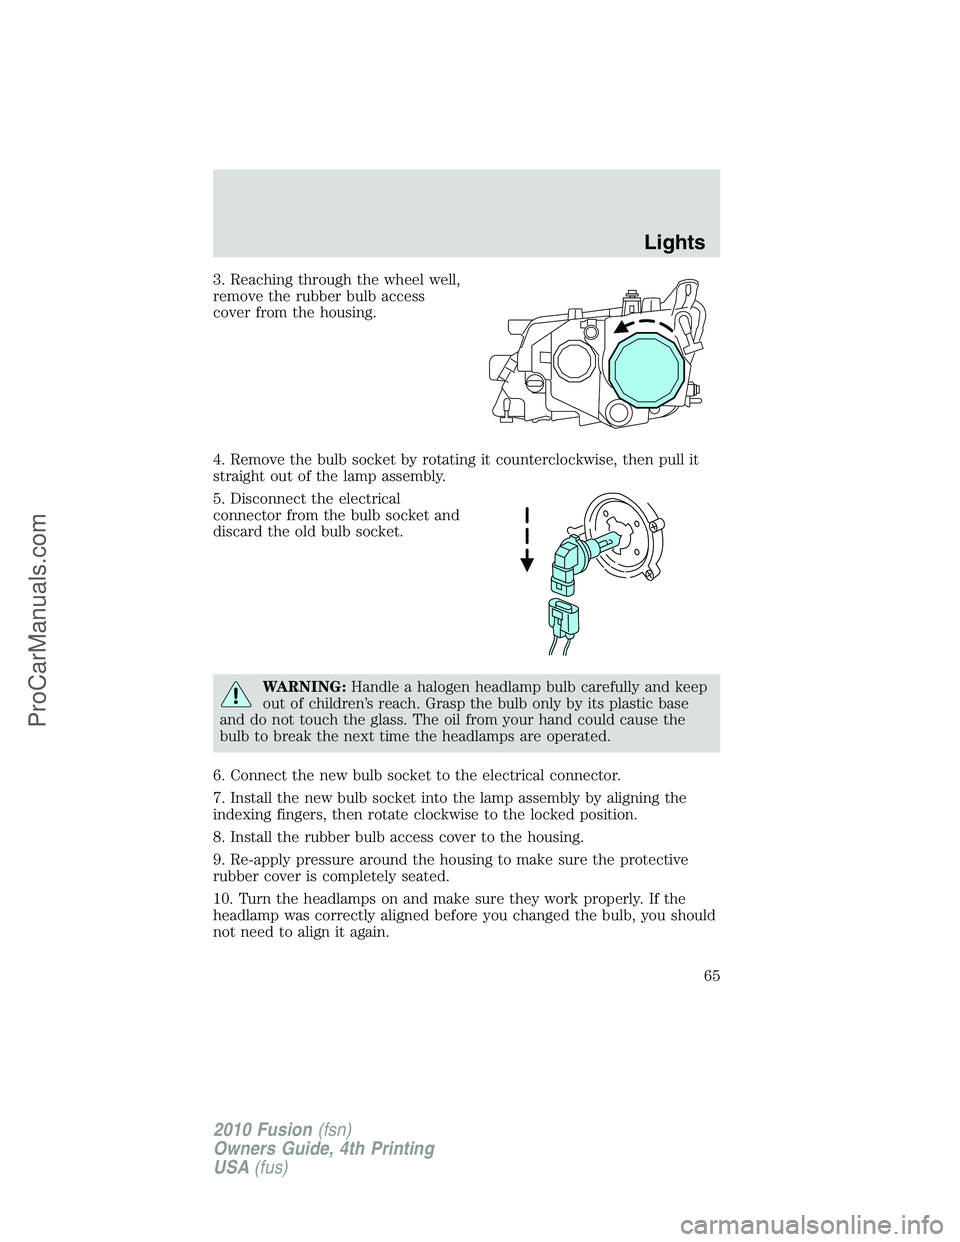
3. Reaching through the wheel well,
remove the rubber bulb access
cover from the housing.
4. Remove the bulb socket by rotating it counterclockwise, then pull it
straight out of the lamp assembly.
5. Disconnect the electrical
connector from the bulb socket and
discard the old bulb socket.
WARNING:Handle a halogen headlamp bulb carefully and keep
out of children’s reach. Grasp the bulb only by its plastic base
and do not touch the glass. The oil from your hand could cause the
bulb to break the next time the headlamps are operated.
6. Connect the new bulb socket to the electrical connector.
7. Install the new bulb socket into the lamp assembly by aligning the
indexing fingers, then rotate clockwise to the locked position.
8. Install the rubber bulb access cover to the housing.
9. Re-apply pressure around the housing to make sure the protective
rubber cover is completely seated.
10. Turn the headlamps on and make sure they work properly. If the
headlamp was correctly aligned before you changed the bulb, you should
not need to align it again.
Lights
65
2010 Fusion(fsn)
Owners Guide, 4th Printing
USA(fus)
ProCarManuals.com
Page 68 of 340
WARNING:To reduce the risk of vehicle damage and/or
personal burn injuries do not start your engine with the air
cleaner removed and do not remove it while the engine is running.
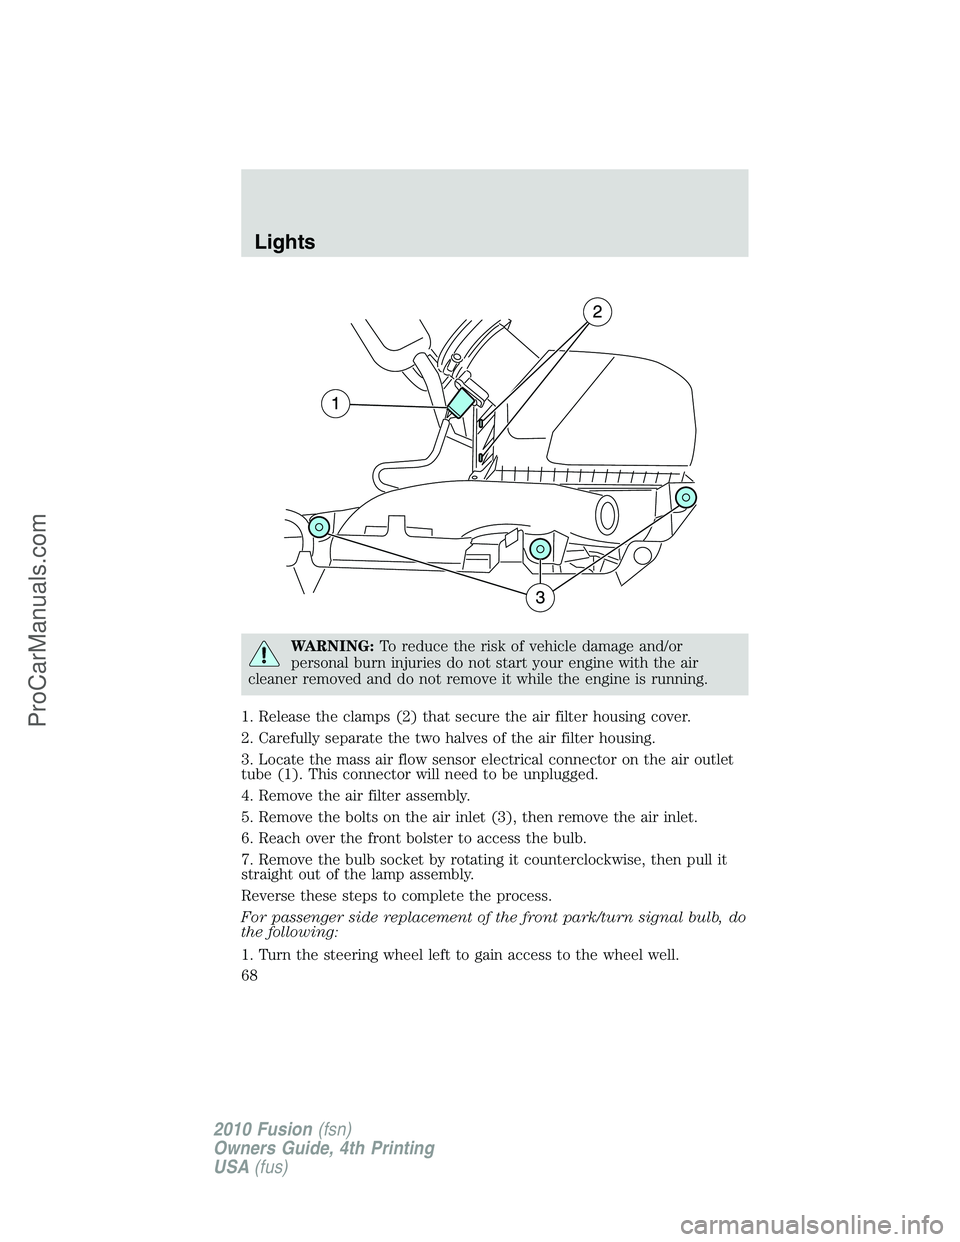
1. Release the clamps (2) that secure the air filter housing cover.
2. Carefully separate the two halves of the air filter housing.
3. Locate the mass air flow sensor electrical connector on the air outlet
tube (1). This connector will need to be unplugged.
4. Remove the air filter assembly.
5. Remove the bolts on the air inlet (3), then remove the air inlet.
6. Reach over the front bolster to access the bulb.
7. Remove the bulb socket by rotating it counterclockwise, then pull it
straight out of the lamp assembly.
Reverse these steps to complete the process.
For passenger side replacement of the front park/turn signal bulb, do
the following:
1. Turn the steering wheel left to gain access to the wheel well.
Lights
68
2010 Fusion(fsn)
Owners Guide, 4th Printing
USA(fus)
ProCarManuals.com
Page 73 of 340
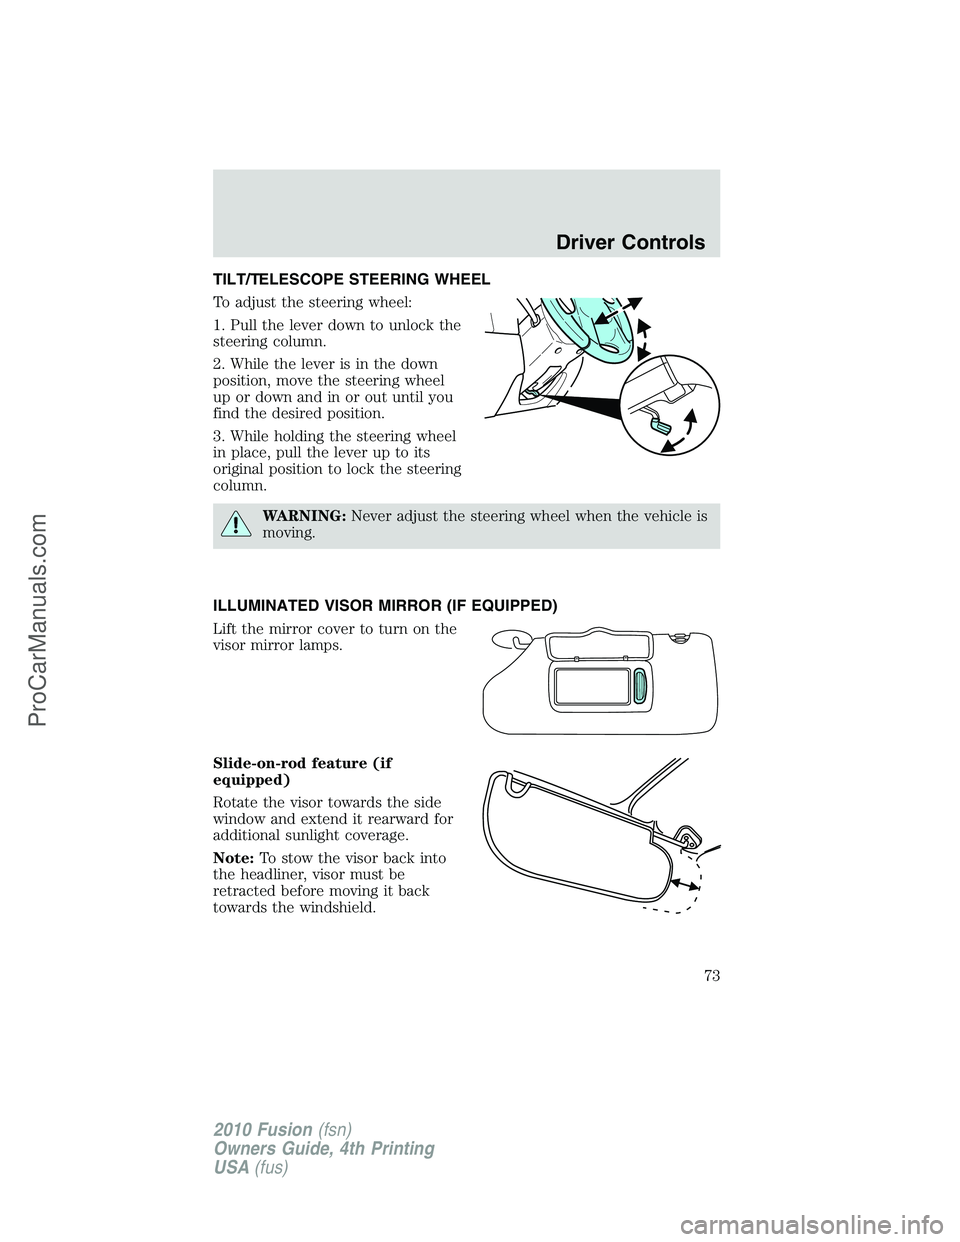
TILT/TELESCOPE STEERING WHEEL
To adjust the steering wheel:
1. Pull the lever down to unlock the
steering column.
2. While the lever is in the down
position, move the steering wheel
up or down and in or out until you
find the desired position.
3. While holding the steering wheel
in place, pull the lever up to its
original position to lock the steering
column.
WARNING:Never adjust the steering wheel when the vehicle is
moving.
ILLUMINATED VISOR MIRROR (IF EQUIPPED)
Lift the mirror cover to turn on the
visor mirror lamps.
Slide-on-rod feature (if
equipped)
Rotate the visor towards the side
window and extend it rearward for
additional sunlight coverage.
Note:To stow the visor back into
the headliner, visor must be
retracted before moving it back
towards the windshield.
Driver Controls
73
2010 Fusion(fsn)
Owners Guide, 4th Printing
USA(fus)
ProCarManuals.com
Page 76 of 340
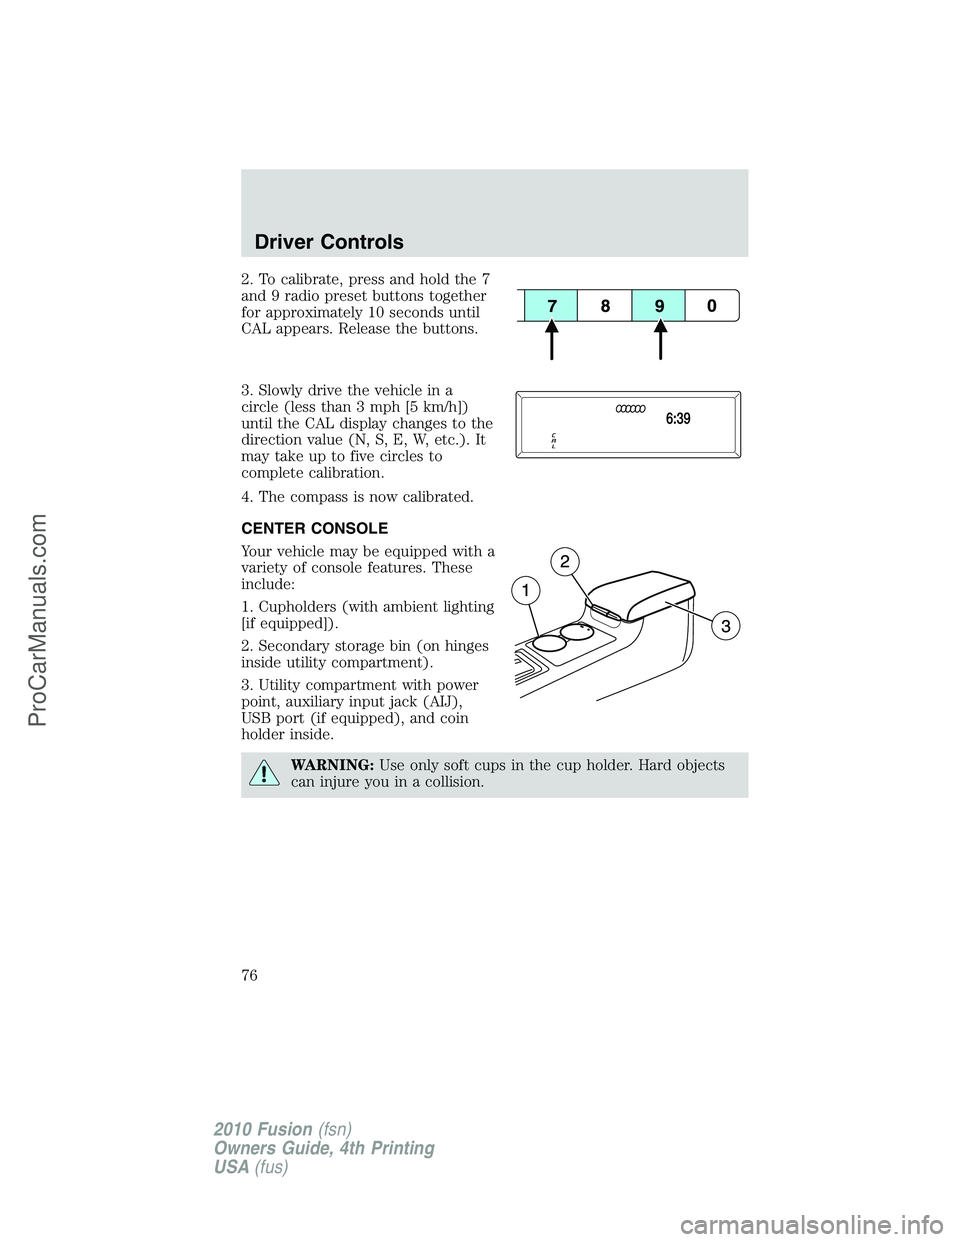
2. To calibrate, press and hold the 7
and 9 radio preset buttons together
for approximately 10 seconds until
CAL appears. Release the buttons.
3. Slowly drive the vehicle in a
circle (less than 3 mph [5 km/h])
until the CAL display changes to the
direction value (N, S, E, W, etc.). It
may take up to five circles to
complete calibration.
4. The compass is now calibrated.
CENTER CONSOLE
Your vehicle may be equipped with a
variety of console features. These
include:
1. Cupholders (with ambient lighting
[if equipped]).
2. Secondary storage bin (on hinges
inside utility compartment).
3. Utility compartment with power
point, auxiliary input jack (AIJ),
USB port (if equipped), and coin
holder inside.
WARNING:Use only soft cups in the cup holder. Hard objects
can injure you in a collision.
Driver Controls
76
2010 Fusion(fsn)
Owners Guide, 4th Printing
USA(fus)
ProCarManuals.com
Page 80 of 340
INTERIOR MIRROR
The interior rear view mirror has two pivot points on the support arm
which lets you adjust the mirror up or down and from side to side.
WARNING:Do not adjust the mirror while the vehicle is in
motion.
Automatic dimming interior rear view mirror (if equipped)
Your vehicle may be equipped with an interior rear view mirror that has
an auto-dimming function. The electronic day/night mirror will change
from the normal (high reflective) state to the non-glare (darkened) state
when bright lights (glare) reach the mirror. When the mirror detects
bright light from behind the vehicle, it will automatically adjust (darken)
to minimize glare.
The mirror will automatically return to the normal state whenever the
vehicle is placed in R (Reverse) to ensure a bright clear view when
backing up.
Do not block the sensors on the front and back of the interior
rear view mirror since this may impair proper mirror
performance.
Do not clean the housing or glass of any mirror with harsh
abrasives, fuel or other petroleum-based cleaning products.
Note:If equipped with a rearview camera system, a video image will be
displayed in the mirror or the navigation system display (if equipped)
when the vehicle is put in (R) Reverse. Refer toRearview camera
systemin theDrivingchapter.
Driver Controls
80
2010 Fusion(fsn)
Owners Guide, 4th Printing
USA(fus)
ProCarManuals.com
Page 94 of 340
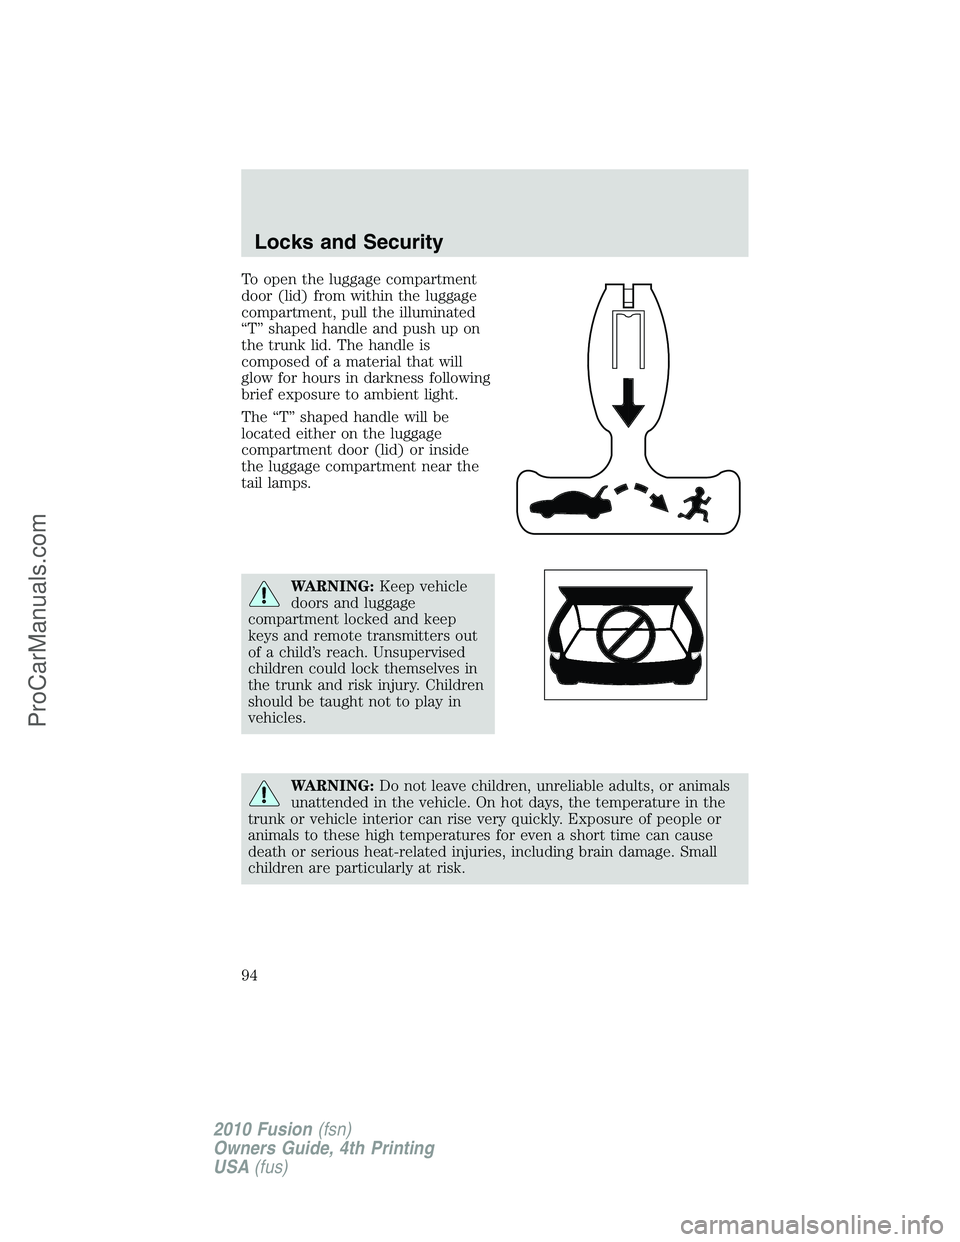
To open the luggage compartment
door (lid) from within the luggage
compartment, pull the illuminated
“T” shaped handle and push up on
the trunk lid. The handle is
composed of a material that will
glow for hours in darkness following
brief exposure to ambient light.
The “T” shaped handle will be
located either on the luggage
compartment door (lid) or inside
the luggage compartment near the
tail lamps.
WARNING:Keep vehicle
doors and luggage
compartment locked and keep
keys and remote transmitters out
of a child’s reach. Unsupervised
children could lock themselves in
the trunk and risk injury. Children
should be taught not to play in
vehicles.
WARNING:Do not leave children, unreliable adults, or animals
unattended in the vehicle. On hot days, the temperature in the
trunk or vehicle interior can rise very quickly. Exposure of people or
animals to these high temperatures for even a short time can cause
death or serious heat-related injuries, including brain damage. Small
children are particularly at risk.
Locks and Security
94
2010 Fusion(fsn)
Owners Guide, 4th Printing
USA(fus)
ProCarManuals.com
Page 114 of 340
Heated seats (if equipped)
WARNING:Persons who are unable to feel pain to the skin
because of advanced age, chronic illness, diabetes, spinal cord
injury, medication, alcohol use, exhaustion, or other physical
conditions, must exercise care when using the seat heater. The seat
heater may cause burns even at low temperatures, especially if used
for long periods of time. Do not place anything on the seat that
insulates against heat, such as a blanket or cushion, because this may
cause the seat heater to overheat. Do not puncture the seat with pins,
needles, or other pointed objects because this may damage the heating
element which may cause the seat heater to overheat. An overheated
seat may cause serious personal injury.
Note:Do not do the following:
•Place heavy objects on the seat
•Operate the seat heater if water or any other liquid is spilled on the
seat. Allow the seat to dry thoroughly.
The heated seats will only function when the ignition is in the on
position.
To operate the heated seats:
DATC systems
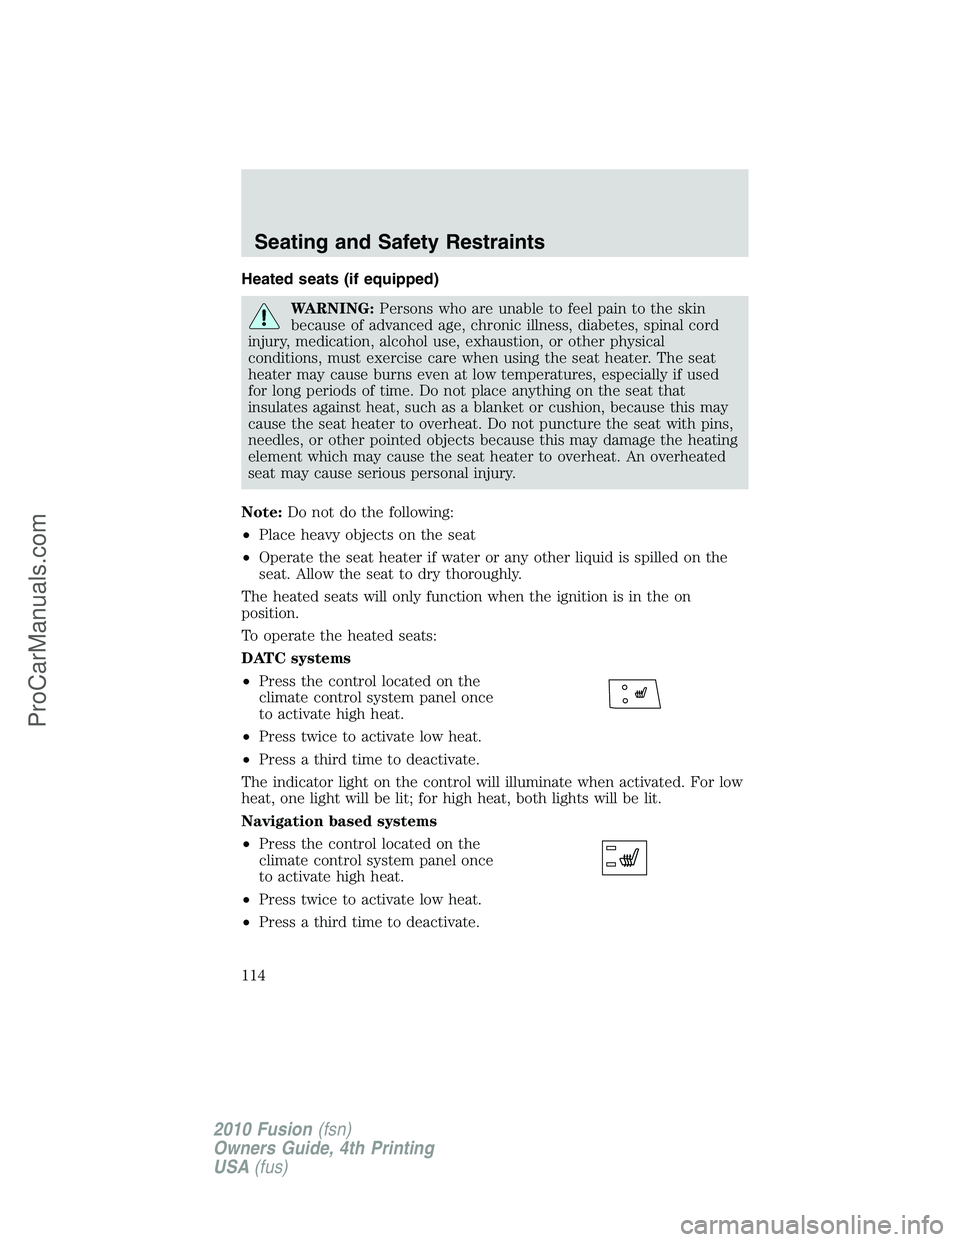
•Press the control located on the
climate control system panel once
to activate high heat.
•Press twice to activate low heat.
•Press a third time to deactivate.
The indicator light on the control will illuminate when activated. For low
heat, one light will be lit; for high heat, both lights will be lit.
Navigation based systems
•Press the control located on the
climate control system panel once
to activate high heat.
•Press twice to activate low heat.
•Press a third time to deactivate.
Seating and Safety Restraints
114
2010 Fusion(fsn)
Owners Guide, 4th Printing
USA(fus)
ProCarManuals.com
Page 120 of 340
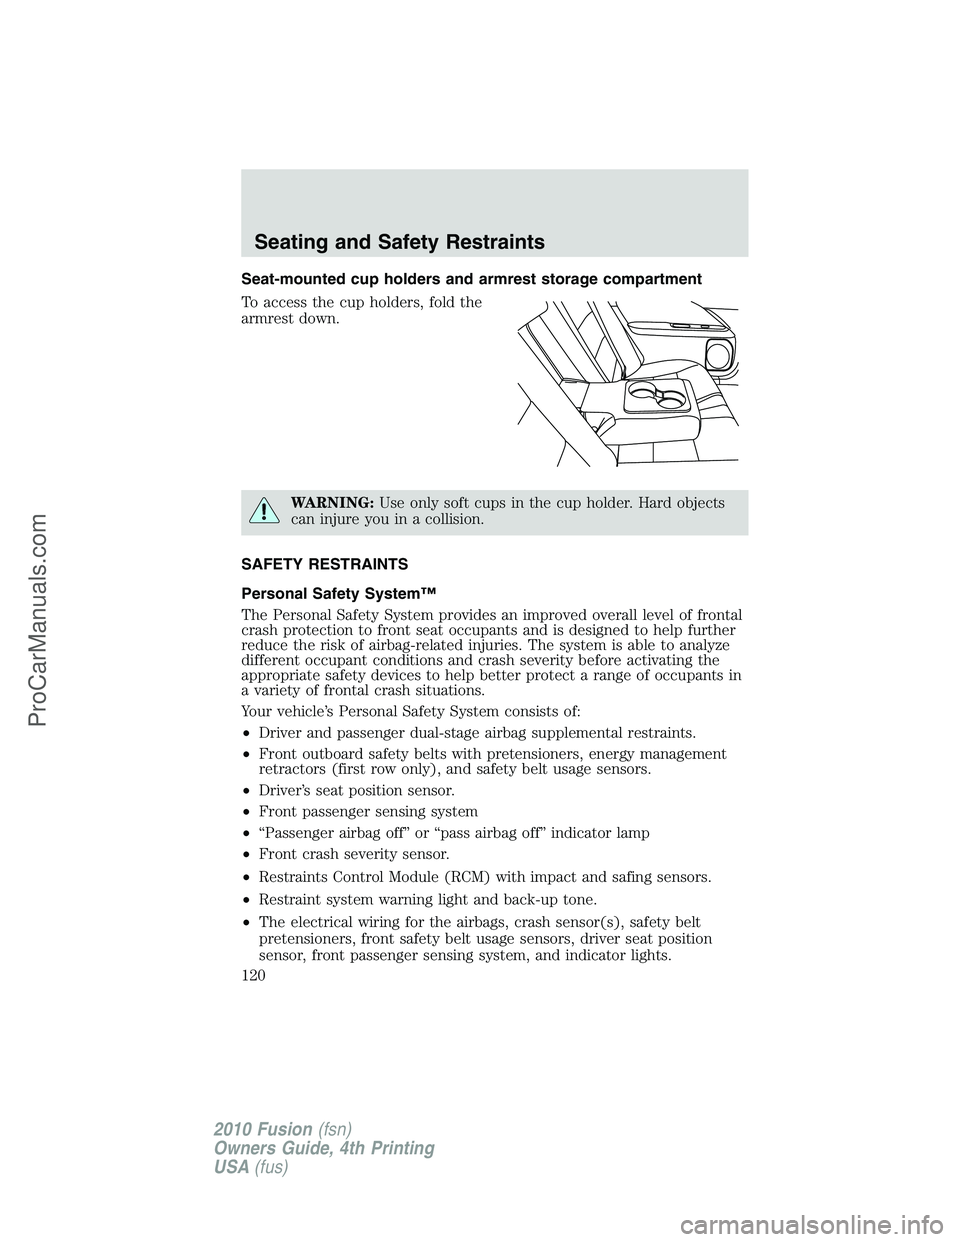
Seat-mounted cup holders and armrest storage compartment
To access the cup holders, fold the
armrest down.
WARNING:Use only soft cups in the cup holder. Hard objects
can injure you in a collision.
SAFETY RESTRAINTS
Personal Safety System™
The Personal Safety System provides an improved overall level of frontal
crash protection to front seat occupants and is designed to help further
reduce the risk of airbag-related injuries. The system is able to analyze
different occupant conditions and crash severity before activating the
appropriate safety devices to help better protect a range of occupants in
a variety of frontal crash situations.
Your vehicle’s Personal Safety System consists of:
•Driver and passenger dual-stage airbag supplemental restraints.
•Front outboard safety belts with pretensioners, energy management
retractors (first row only), and safety belt usage sensors.
•Driver’s seat position sensor.
•Front passenger sensing system
•“Passenger airbag off” or “pass airbag off” indicator lamp
•Front crash severity sensor.
•Restraints Control Module (RCM) with impact and safing sensors.
•Restraint system warning light and back-up tone.
•The electrical wiring for the airbags, crash sensor(s), safety belt
pretensioners, front safety belt usage sensors, driver seat position
sensor, front passenger sensing system, and indicator lights.
Seating and Safety Restraints
120
2010 Fusion(fsn)
Owners Guide, 4th Printing
USA(fus)
ProCarManuals.com