brake sensor FORD FUSION (AMERICAS) 2014 2.G Quick Reference Guide
[x] Cancel search | Manufacturer: FORD, Model Year: 2014, Model line: FUSION (AMERICAS), Model: FORD FUSION (AMERICAS) 2014 2.GPages: 8, PDF Size: 1.4 MB
Page 6 of 8

Remote Start*
Remote start allows you to start the engine from outside your
vehicle using your remote transmitter. To start, press and then
press twice within three seconds. Once inside, apply the brake
while pressing the ENGINE START/STOP button. Shift into drive
(D) and go. If you have the integrated keyhead transmitter, insert
the key into the ignition and switch on the ignition as you normally
would before driving. To switch the engine off from outside the
vehicle after using your remote start, press
once.
Intelligent Access*
NOTE Your intelligent access transmitter must be within 3 feet
(1 meter) of the vehicle for intelligent access to function properly.
This system operates the power locks. To unlock the driver’s door,
pull the front exterior door handle. To lock the doors, press the
sensor on top of the door handles. To unlock and open the trunk,
press the exterior trunk release button near the license plate. The
intelligent access transmitter also contains a mechanical key
blade, which can be used to unlock the driver’s door, if necessary.
You must have a valid transmitter inside the vehicle to switch on
the ignition and start the engine. If you are unable to start your
vehicle using the push-button start, do the following:
1. Place the transmitter in the backup slot in the center console.
2. With the transmitter in this position, press the brake pedal, then
the ENGINE START/STOP button to switch the ignition on and
start your vehicle.
Auto Start-Stop*
The system helps reduce fuel consumption. When you stop at a
light or experience prolonged stops in heavy traffic, the engine will
stop automatically. When you take your foot from the brake pedal
and press on the accelerator, the engine will restart automatically.
A green Auto Start-Stop indicator light within the instrument
cluster will display to indicate when the engine stop occurs.
The system turns on automatically with every ignition cycle.
To switch this feature off, press the AUTO START-STOP button,
located on the center console, near the gearshift lever. The button
will light. Press the button again to restart.
Active Park Assist*
The active park assist system can detect an available parallel
parking space and automatically steer the vehicle into that space
(hands-free). The system instructs you with visual and audible
instructions on when you need to apply the brake, accelerate and
shift gears in order to safely park the vehicle. To initiate active
park assist, press the
button located on the center console,
near the gear shifter lever. To stop the parking procedure, grab the
steering wheel or press the control again. For complete information,
refer to the Parking Aids chapter of your Owner’s Manual.
NOTE The driver is always responsible for controlling the vehicle,
supervising the system and intervening, if required.
11
CONVENIENCE
*if equipped
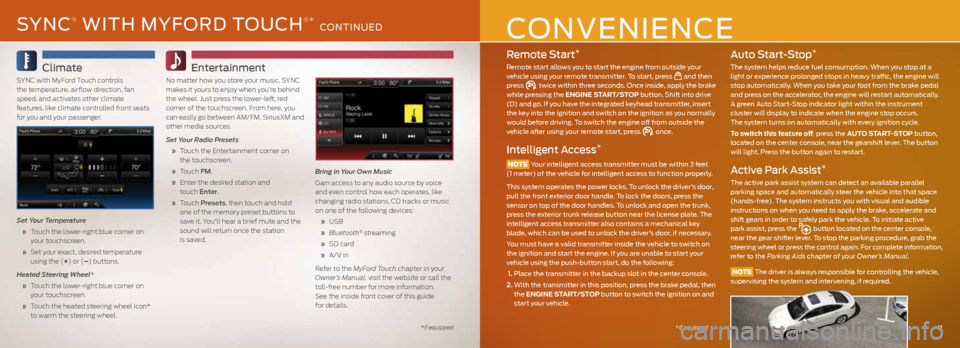
Climate
SYNC with MyFord Touch controls
the temperature, airflow direction, fan
speed, and activates other climate
features, like climate controlled front seats
for you and your passenger.
Set Your Temperature
» Touch the lower-right blue corner on
your touchscreen.
» Set your exact, desired temperature
using the (+) or (–) buttons.
Heated Steering Wheel*
» Touch the lower-right blue corner on
your touchscreen.
» Touch the heated steering wheel icon*
to warm the steering wheel.
Entertainment
No matter how you store your music, SYNC
makes it yours to enjoy when you’re behind
the wheel. Just press the lower-left, red
corner of the touchscreen. From here, you
can easily go between AM/FM, SiriusXM and
other media sources.
Set Your Radio Presets
» Touch the Entertainment corner on
the touchscreen.
» Touch FM.
» Enter the desired station and
touch Enter.
» Touch Presets , then touch and hold
one of the memory preset buttons to
save it. You'll hear a brief mute and the
sound will return once the station
is saved. Bring in Your Own Music
Gain access to any audio source by voice
and even control how each operates, like
changing radio stations, CD tracks or music
on one of the following devices:
» USB
» Bluetooth
® streaming
» SD card
» A/V in
Refer to the MyFord Touch chapter in your
Owner’s Manual, visit the website or call the
toll-free number for more information.
See the inside front cover of this guide
for details.
*if equipped
SYNC® WITH MYFORD TOUCH®* CONTINUED
Page 7 of 8

Fuel Tank
Capacity/Fuel Info
Fuel tank capacity varies on your Fusion,
depending on your drive type: 16.5 gallons
(62.5 liters) for front-wheel drive models
and 17.5 gallons (66.2 liters) for all-wheel
drive models. Use only UNLEADED
gasoline with an 87 octane rating. Do not
use ethanol (E85), diesel, fuel-methanol,
leaded fuel or any other fuel because
it could damage or impair the emission
control system.
Fuel-efficient
Automatic Transmission
*
Your vehicle has been designed to improve
fuel economy by reducing fuel usage
while coasting or decelerating. This may
be perceived as a light to medium braking
sensation when removing your foot from
the accelerator pedal.
Easy Fuel® System
With this system, open the fuel door, insert
the nozzle and begin fueling. It is self-
sealing and therefore protected against
dust, dirt, water, snow and ice. Wait 10
seconds from the time the refueling nozzle
is shut-off until you remove the nozzle from
the vehicle to allow residual fuel in the
nozzle to drain into the tank.
NOTE When using a portable fuel
container, use the removable fuel funnel,
located behind the left rear seat, under
the carpet. To access, fold the seatback
down and pull back the piece of carpet.
Slowly insert the fuel funnel and pour the
fuel into the funnel. When done, clean the
funnel or properly dispose of it. Do not use
aftermarket funnels as they will not work
with the Easy Fuel system and may cause
damage. Refer to the Refueling section
in the Fuel and Refueling chapter of your
Owner's Manual for additional information.
ESSENTIAL INFORMATION
13*if equipped
Electric Parking Brake
This feature replaces the conventional
handbrake. The operating switch is located
on the center console, to the left of the
gearshift lever. To apply the electric parking
brake, pull the switch up. The brake system
warning lamp will light to confirm that the
electric parking brake has been applied.
You can release the electric parking brake
manually by switching the ignition on,
pressing the brake pedal and then pressing
the electric parking brake switch. Refer to
the Brakes chapter of your Owner's Manual
for more details.
Towing Your Fusion
Towing your vehicle behind an RV or any
other vehicle may be limited. Refer to
Towing the Vehicle on Four Wheels in the
Towing chapter of your Owner’s Manual.
Roadside Assistance
Your new Ford vehicle comes with the
assurance and support of 24-hour
emergency roadside assistance.
To receive roadside assistance in the
United States, call 1-800-241-3673.
In Canada, call 1 -800-665-2006.
BLIS® (Blind Spot
Information System)
with Cross Traffic Alert
*
BLIS uses radar sensors to help you
determine if a vehicle may be in your blind
spot zone. Cross traffic alert will alert you
if a car is coming toward you when you
are backing out of a parking space. BLIS
and cross traffic alert will display a yellow
indicator light in your exterior mirrors and
cross traffic alert will also sound tones
and display messages to warn you which
direction vehicles are approaching. Refer
to the Driving Aids chapter in your Owner’s
Manual for more information.
Tire Pressure
Monitoring System
Your vehicle displays a low tire pressure
warning light in your instrument
cluster when one or more of your tires are
significantly under-inflated. If this happens,
stop and check your tires as soon as
possible, then inflate them to the proper
pressure. Refer to the Inflating Your Tires
section in the Wheels and Tires chapter of
your Owner’s Manual for more information.
*if equipped
Page 8 of 8

Rear View Camera*
Provides a video image of the area behind the vehicle. The image
automatically appears in the right vehicle information display or
the interior mirror when the vehicle is in reverse (R) and uses green,
yellow and red guides to alert you of your proximity to objects.
Front and Rear Sensing System*
Sounds a warning tone if there is an obstacle near the vehicle’s rear
bumper when the vehicle is in reverse (R) and is traveling less than
3 mph (5 km/h). The warning tone will increase in frequency as the
object gets closer.
Lane Keeping System*
Prevents unintentional drifting out of your lane through various
driver alerts and steering corrections toward the center of the
lane. Set your system settings as desired by Mode, Sensitivity and
Intensity from your information display screen.
Driver Alert*
Monitors your driving behavior using various inputs including the
front camera sensor, lane markings and other factors. If the system
detects that your driving alertness level reduces below a certain
threshold, then the system will alert you using a tone and displaying
a message in the information display. Press OK on the steering
wheel to clear the warning.
Collision Warning System*
Designed to alert the driver of certain collision risks, sensors detect if
vehicles ahead of you, which are moving in the same direction, may
be a collision risk. The system will alert you with an audible tone and
displaying a red warning light above the instrument panel. If the risk
of collision increases, the system will increase brake support to help
reduce collision speed.
SecuriCodeTM Keyless Entry Keypad*
Allows you to lock or unlock the doors, recall memory features and
arm or disarm the anti-theft alarm. The keypad, located near the
driver’s window, is invisible until touched and then it lights up so you
can see and touch the buttons. To get started, you will need your
five-digit factory code found on your owner’s wallet card or it can be
temporarily displayed on the information display, if the card is not
handy. Entering this code unlocks the driver’s door. To lock all of the
doors, press and hold 7•8 and 9•0 at the same time. For complete
information, refer to the Locks chapter of your Owner’s Manual.
NOTE Visibility aids do not replace the need to watch where
the vehicle is moving. Refer to your Owner’s Manual for safety
information, more details and system limitations.
Heated Front Seats*
To access, press the Climate corner on the touchscreen. For heated front seats, press repeatedly to cycle through the various heat
modes and off. If your vehicle is not equipped with a touchscreen,
use the hard button controls (indicated by the same symbol) to
cycle through the various heat modes and off.
Memory Function*
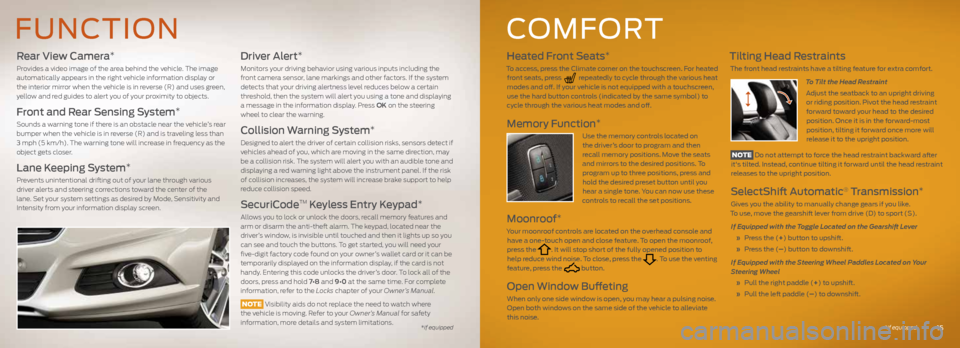
Use the memory controls located on
the driver’s door to program and then recall memory positions. Move the seats
and mirrors to the desired positions. To program up to three positions, press and hold the desired preset button until you
hear a single tone. You can now use these
controls to recall the set positions.
Moonroof*
Your moonroof controls are located on the overhead console and have a one-touch open and close feature. To open the moonroof,
press the
. It will stop short of the fully opened position to
help reduce wind noise. To close, press the . To use the venting
feature, press the button.
Open Window Buffeting
When only one side window is open, you may hear a pulsing noise. Open both windows on the same side of the vehicle to alleviate
this noise.
Tilting Head Restraints
The front head restraints have a tilting feature for extra comfort.
To Tilt the Head RestraintAdjust the seatback to an upright driving or riding position. Pivot the head restraint forward toward your head to the desired position. Once it is in the forward-most
position, tilting it forward once more will
release it to the upright position.
NOTE Do not attempt to force the head restraint backward after it's tilted. Instead, continue tilting it forward until the head restraint
releases to the upright position.
SelectShift Automatic® Transmission*
Gives you the ability to manually change gears if you like.
To use, move the gearshift lever from drive (D) to sport (S).
If Equipped with the Toggle Located on the Gearshift Lever
» Press the (+) button to upshift.
» Press the (–) button to downshift.
If Equipped with the Steering Wheel Paddles Located on Your
Steering Wheel
» Pull the right paddle (+) to upshift.
» Pull the left paddle (–) to downshift.
FUNCTION COMFORT
15*if equipped
*if equipped