change wheel FORD FUSION (AMERICAS) 2014 2.G Quick Reference Guide
[x] Cancel search | Manufacturer: FORD, Model Year: 2014, Model line: FUSION (AMERICAS), Model: FORD FUSION (AMERICAS) 2014 2.GPages: 8, PDF Size: 1.4 MB
Page 8 of 8

Rear View Camera*
Provides a video image of the area behind the vehicle. The image
automatically appears in the right vehicle information display or
the interior mirror when the vehicle is in reverse (R) and uses green,
yellow and red guides to alert you of your proximity to objects.
Front and Rear Sensing System*
Sounds a warning tone if there is an obstacle near the vehicle’s rear
bumper when the vehicle is in reverse (R) and is traveling less than
3 mph (5 km/h). The warning tone will increase in frequency as the
object gets closer.
Lane Keeping System*
Prevents unintentional drifting out of your lane through various
driver alerts and steering corrections toward the center of the
lane. Set your system settings as desired by Mode, Sensitivity and
Intensity from your information display screen.
Driver Alert*
Monitors your driving behavior using various inputs including the
front camera sensor, lane markings and other factors. If the system
detects that your driving alertness level reduces below a certain
threshold, then the system will alert you using a tone and displaying
a message in the information display. Press OK on the steering
wheel to clear the warning.
Collision Warning System*
Designed to alert the driver of certain collision risks, sensors detect if
vehicles ahead of you, which are moving in the same direction, may
be a collision risk. The system will alert you with an audible tone and
displaying a red warning light above the instrument panel. If the risk
of collision increases, the system will increase brake support to help
reduce collision speed.
SecuriCodeTM Keyless Entry Keypad*
Allows you to lock or unlock the doors, recall memory features and
arm or disarm the anti-theft alarm. The keypad, located near the
driver’s window, is invisible until touched and then it lights up so you
can see and touch the buttons. To get started, you will need your
five-digit factory code found on your owner’s wallet card or it can be
temporarily displayed on the information display, if the card is not
handy. Entering this code unlocks the driver’s door. To lock all of the
doors, press and hold 7•8 and 9•0 at the same time. For complete
information, refer to the Locks chapter of your Owner’s Manual.
NOTE Visibility aids do not replace the need to watch where
the vehicle is moving. Refer to your Owner’s Manual for safety
information, more details and system limitations.
Heated Front Seats*
To access, press the Climate corner on the touchscreen. For heated front seats, press repeatedly to cycle through the various heat
modes and off. If your vehicle is not equipped with a touchscreen,
use the hard button controls (indicated by the same symbol) to
cycle through the various heat modes and off.
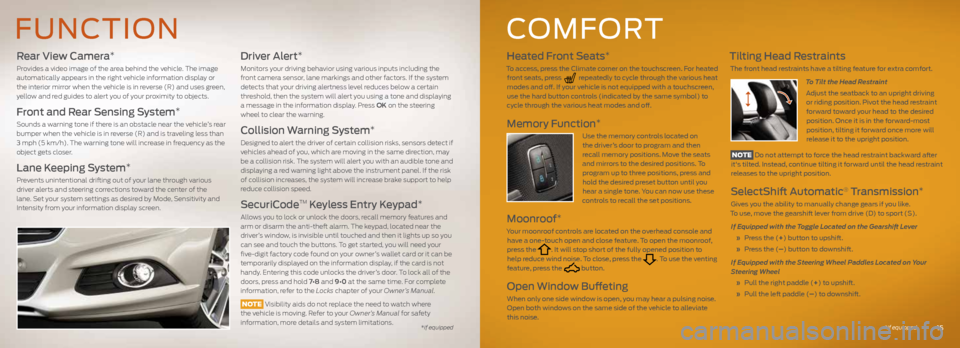
Memory Function*
Use the memory controls located on
the driver’s door to program and then recall memory positions. Move the seats
and mirrors to the desired positions. To program up to three positions, press and hold the desired preset button until you
hear a single tone. You can now use these
controls to recall the set positions.
Moonroof*
Your moonroof controls are located on the overhead console and have a one-touch open and close feature. To open the moonroof,
press the
. It will stop short of the fully opened position to
help reduce wind noise. To close, press the . To use the venting
feature, press the button.
Open Window Buffeting
When only one side window is open, you may hear a pulsing noise. Open both windows on the same side of the vehicle to alleviate
this noise.
Tilting Head Restraints
The front head restraints have a tilting feature for extra comfort.
To Tilt the Head RestraintAdjust the seatback to an upright driving or riding position. Pivot the head restraint forward toward your head to the desired position. Once it is in the forward-most
position, tilting it forward once more will
release it to the upright position.
NOTE Do not attempt to force the head restraint backward after it's tilted. Instead, continue tilting it forward until the head restraint
releases to the upright position.
SelectShift Automatic® Transmission*
Gives you the ability to manually change gears if you like.
To use, move the gearshift lever from drive (D) to sport (S).
If Equipped with the Toggle Located on the Gearshift Lever
» Press the (+) button to upshift.
» Press the (–) button to downshift.
If Equipped with the Steering Wheel Paddles Located on Your
Steering Wheel
» Pull the right paddle (+) to upshift.
» Pull the left paddle (–) to downshift.
FUNCTION COMFORT
15*if equipped
*if equipped