inflation pressure FORD FUSION ENERGI 2019 Owners Manual
[x] Cancel search | Manufacturer: FORD, Model Year: 2019, Model line: FUSION ENERGI, Model: FORD FUSION ENERGI 2019Pages: 541, PDF Size: 7.19 MB
Page 38 of 541
2. Grasp the shoulder portion and pull
downward until you pull the entire belt
out. As the belt retracts, you will hear
a clicking sound. This indicates the
seatbelt is now in the automatic
locking mode.
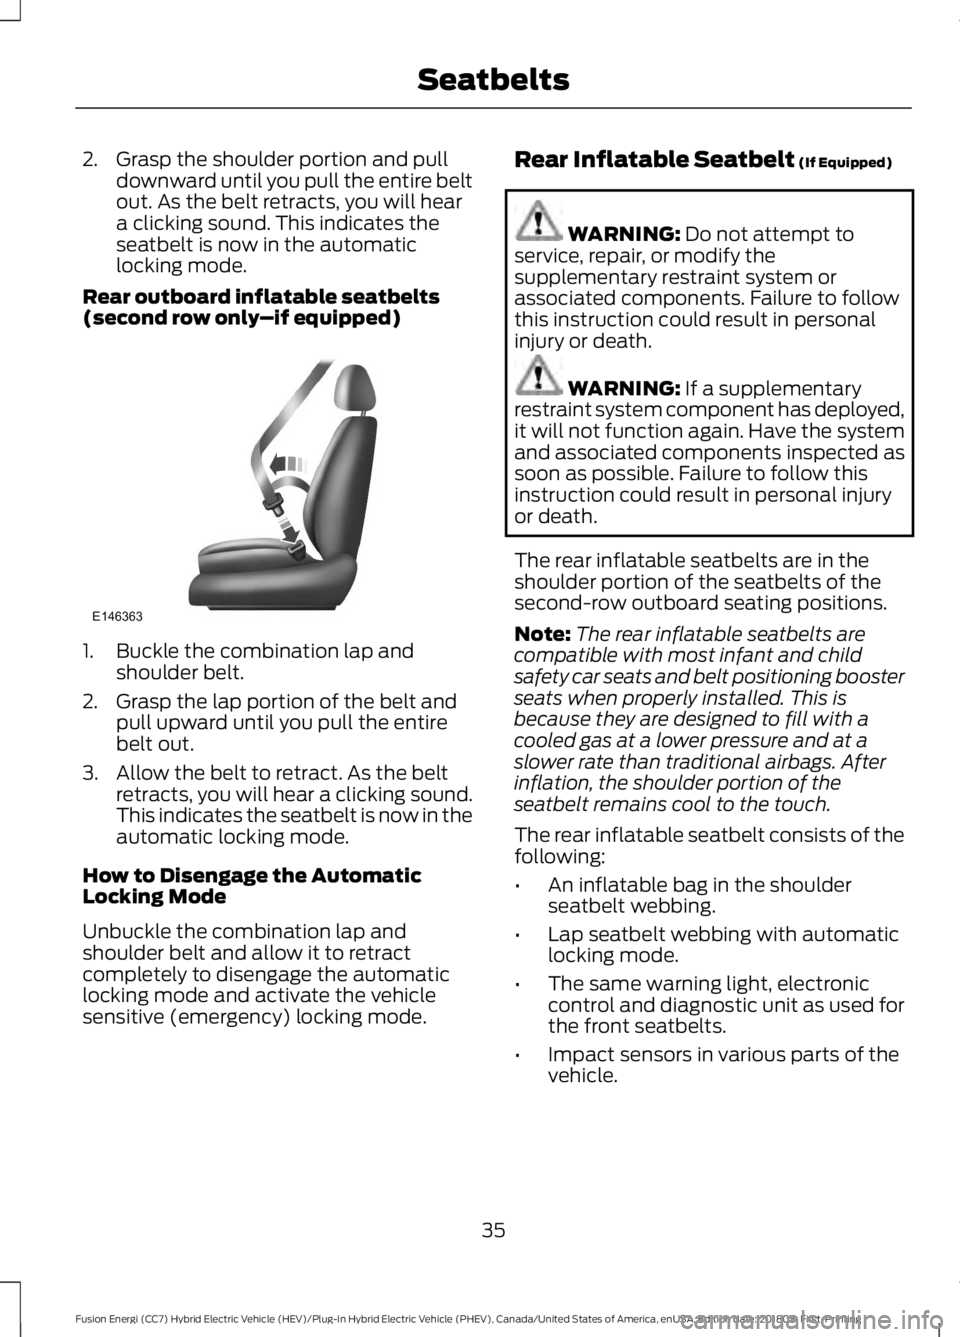
Rear outboard inflatable seatbelts
(second row only –if equipped)1. Buckle the combination lap and
shoulder belt.
2. Grasp the lap portion of the belt and pull upward until you pull the entire
belt out.
3. Allow the belt to retract. As the belt retracts, you will hear a clicking sound.
This indicates the seatbelt is now in the
automatic locking mode.
How to Disengage the Automatic
Locking Mode
Unbuckle the combination lap and
shoulder belt and allow it to retract
completely to disengage the automatic
locking mode and activate the vehicle
sensitive (emergency) locking mode. Rear Inflatable Seatbelt (If Equipped) WARNING:
Do not attempt to
service, repair, or modify the
supplementary restraint system or
associated components. Failure to follow
this instruction could result in personal
injury or death. WARNING:
If a supplementary
restraint system component has deployed,
it will not function again. Have the system
and associated components inspected as
soon as possible. Failure to follow this
instruction could result in personal injury
or death.
The rear inflatable seatbelts are in the
shoulder portion of the seatbelts of the
second-row outboard seating positions.
Note: The rear inflatable seatbelts are
compatible with most infant and child
safety car seats and belt positioning booster
seats when properly installed. This is
because they are designed to fill with a
cooled gas at a lower pressure and at a
slower rate than traditional airbags. After
inflation, the shoulder portion of the
seatbelt remains cool to the touch.
The rear inflatable seatbelt consists of the
following:
• An inflatable bag in the shoulder
seatbelt webbing.
• Lap seatbelt webbing with automatic
locking mode.
• The same warning light, electronic
control and diagnostic unit as used for
the front seatbelts.
• Impact sensors in various parts of the
vehicle.
35
Fusion Energi (CC7) Hybrid Electric Vehicle (HEV)/Plug-In Hybrid Electric Vehicle (PHEV), Canada/United States of America, enUSA, Edition date: 201805, First-Printing SeatbeltsE146363
Page 164 of 541
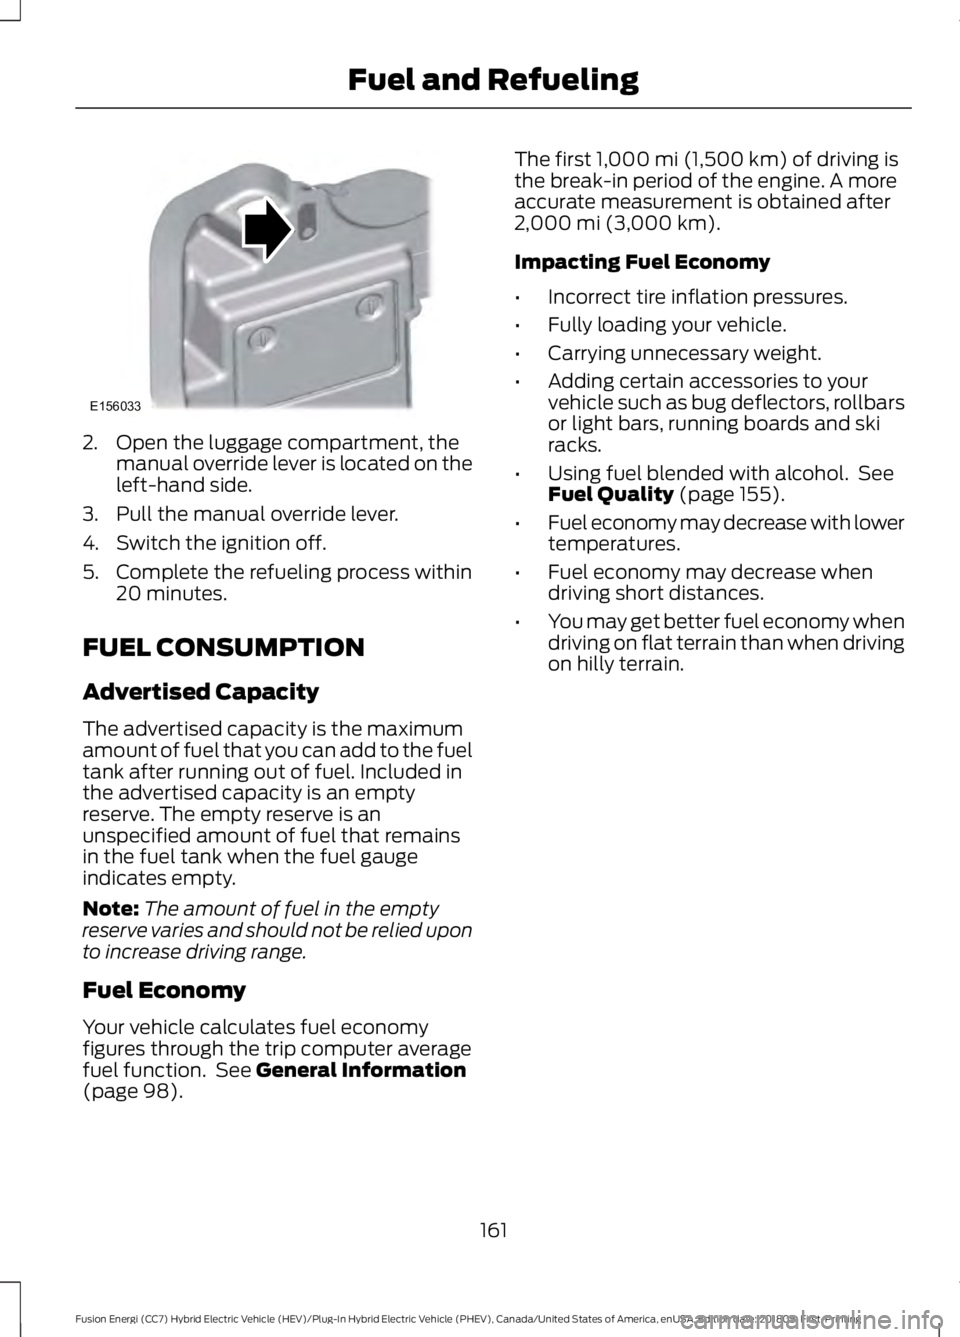
2. Open the luggage compartment, the
manual override lever is located on the
left-hand side.
3. Pull the manual override lever.
4. Switch the ignition off.
5. Complete the refueling process within 20 minutes.
FUEL CONSUMPTION
Advertised Capacity
The advertised capacity is the maximum
amount of fuel that you can add to the fuel
tank after running out of fuel. Included in
the advertised capacity is an empty
reserve. The empty reserve is an
unspecified amount of fuel that remains
in the fuel tank when the fuel gauge
indicates empty.
Note: The amount of fuel in the empty
reserve varies and should not be relied upon
to increase driving range.
Fuel Economy
Your vehicle calculates fuel economy
figures through the trip computer average
fuel function. See General Information
(page 98). The first
1,000 mi (1,500 km) of driving is
the break-in period of the engine. A more
accurate measurement is obtained after
2,000 mi (3,000 km)
.
Impacting Fuel Economy
• Incorrect tire inflation pressures.
• Fully loading your vehicle.
• Carrying unnecessary weight.
• Adding certain accessories to your
vehicle such as bug deflectors, rollbars
or light bars, running boards and ski
racks.
• Using fuel blended with alcohol. See
Fuel Quality
(page 155).
• Fuel economy may decrease with lower
temperatures.
• Fuel economy may decrease when
driving short distances.
• You may get better fuel economy when
driving on flat terrain than when driving
on hilly terrain.
161
Fusion Energi (CC7) Hybrid Electric Vehicle (HEV)/Plug-In Hybrid Electric Vehicle (PHEV), Canada/United States of America, enUSA, Edition date: 201805, First-Printing Fuel and RefuelingE156033
Page 214 of 541
Why is the feature not available (line markings are gray) when I can see the lane markings
on the road?
Your vehicle stays too close to the lane markings.
Driving at high speeds in curves.
The last alert warning or aid intervention occurred a short time ago.
Ambiguous lane markings, for example in construction zones.
Rapid transition from light to dark, or from dark to light.
Sudden offset in lane markings.
ABS or AdvanceTrac ™ is active.
There is a camera blockage due to dirt, grime, fog, frost or water on the windshield.
You are driving too close to the vehicle in front of you.
Transitioning between no lane markings to lane markings or vice versa.
There is standing water on the road.
Faint lane markings, for example partial yellow lane markings on concrete roads.
Lane width is too narrow or too wide.
The camera has not been calibrated after a windshield replacement.
Driving on tight roads or on uneven roads. Why does the vehicle not come back toward the middle of the lane, as expected, in the
Aid or Aid + Alert mode?
High cross winds are present.
There is a large road crown.
Rough roads, grooves or shoulder drop-offs.
Heavy uneven loading of the vehicle or improper tire inflation pressure.
The tires have been changed, or the suspension has been modified.
211
Fusion Energi (CC7) Hybrid Electric Vehicle (HEV)/Plug-In Hybrid Electric Vehicle (PHEV), Canada/United States of America, enUSA, Edition date: 201805, First-Printing Driving Aids
Page 284 of 541
Removing Vehicle From Storage
When your vehicle is ready to come out of
storage, do the following:
•
Wash your vehicle to remove any dirt
or grease film build-up on window
surfaces.
• Check windshield wipers for any
deterioration.
• Check under the hood for any foreign
material that may have collected
during storage such as mice or squirrel
nests.
• Check the exhaust for any foreign
material that may have collected
during storage.
• Check tire pressures and set tire
inflation per the Tire Label.
• Check brake pedal operation. Drive
your vehicle 15 ft (4.5 m) back and
forth to remove rust build-up.
• Check fluid levels (including coolant
and gas) to make sure there are no
leaks, and fluids are at recommended
levels.
• If you remove the 12-volt battery, clean
the cable ends and inspect.
Contact an authorized dealer if you have
any concerns or issues.
BODY STYLING KITS
The distance between the underside of
your vehicle and the ground is less than
that of other models. Drive with extreme
care to avoid damage to your vehicle.
281
Fusion Energi (CC7) Hybrid Electric Vehicle (HEV)/Plug-In Hybrid Electric Vehicle (PHEV), Canada/United States of America, enUSA, Edition date: 201805, First-Printing Vehicle Care
Page 285 of 541
GENERAL INFORMATION
The recommended tire inflation pressures
are on the tire information label on the
driver side B-pillar.
Check and set the tire pressure at the
ambient temperature in which you are
intending to drive your vehicle and when
the tires are cold. See Technical
Specifications (page 307).
Note: Check your tire pressures regularly to
optimize fuel economy.
Only use approved wheel and tire sizes.
Using other sizes could damage your
vehicle and could make the National Type
Approval invalid.
Installation of any tires that are not the
original equipment tire size can cause the
speedometer to display incorrect vehicle
speed.
TIRE SEALANT AND INFLATOR
KIT
Note: The temporary mobility kit contains
enough sealant compound in the canister
for one tire repair only. See your authorized
Ford dealer for replacement sealant
canisters.
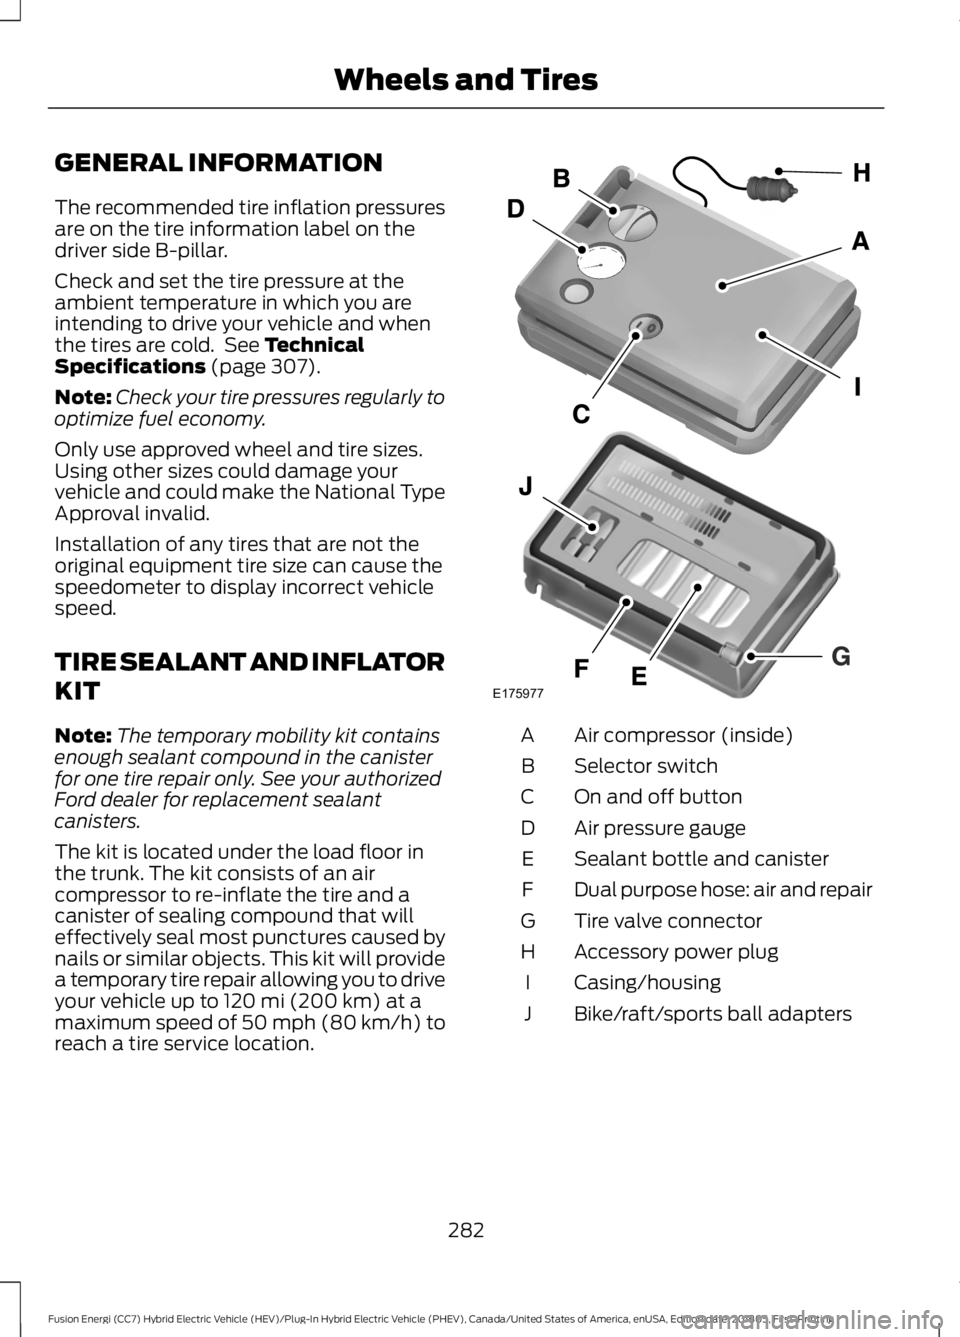
The kit is located under the load floor in
the trunk. The kit consists of an air
compressor to re-inflate the tire and a
canister of sealing compound that will
effectively seal most punctures caused by
nails or similar objects. This kit will provide
a temporary tire repair allowing you to drive
your vehicle up to
120 mi (200 km) at a
maximum speed of 50 mph (80 km/h) to
reach a tire service location. Air compressor (inside)
A
Selector switch
B
On and off button
C
Air pressure gauge
D
Sealant bottle and canister
E
Dual purpose hose: air and repair
F
Tire valve connector
G
Accessory power plug
H
Casing/housing
I
Bike/raft/sports ball adapters
J
282
Fusion Energi (CC7) Hybrid Electric Vehicle (HEV)/Plug-In Hybrid Electric Vehicle (PHEV), Canada/United States of America, enUSA, Edition date: 201805, First-Printing Wheels and TiresE175977
Page 286 of 541
General Information
WARNING: Failure to follow these
guidelines could result in an increased risk
of loss of vehicle control, injury or death.
Note: Do not use the kit if a tire has become
severely damaged. Only punctures located
within the tire tread can be sealed with the
kit.
Do not attempt to repair punctures larger
than 0.24 in (6 mm) or damage to the tire's
sidewall. The tire may not completely seal.
Loss of air pressure may adversely affect
tire performance. For this reason:
Note: Do not drive the vehicle above
50 mph (80 km/h)
.
Note: Do not drive further than
120 mi
(200 km). Drive only to the closest
authorized Ford dealer or tire repair shop to
have your tire inspected.
• Drive carefully and avoid abrupt
steering maneuvers.
• Periodically monitor tire inflation
pressure in the affected tire; if the tire
is losing pressure, have the vehicle
towed.
• Read the information in the Tips for
Use of the Kit section to make sure safe
operation of the kit and your vehicle.
Tips for Use of the Kit
To ensure safe operation of the kit:
• Read all instructions and cautions fully.
• Before operating the kit, make sure
your vehicle is safely off the road and
away from moving traffic. Turn on the
hazard lights.
• Always set the parking brake to ensure
the vehicle doesn't move unexpectedly.
• Do not remove any foreign objects,
such as nails or screws, from the tire. •
When using the kit, leave the engine
running (only if the vehicle is outdoors
or in a well-ventilated area) so the
compressor does not drain the
vehicle's battery.
• Do not allow the compressor to
operate continuously for more than 15
minutes. This will help prevent the
compressor from overheating.
• Never leave the kit unattended during
operation.
• Sealant compound contains latex.
Those with latex sensitivities should
use appropriate precautions to avoid
an allergic reaction.
• Keep the kit away from children.
• Only use the kit when the ambient
temperature is between
-22°F (-30°C)
and 158°F (70°C).
• Only use the sealing compound before
the use-by date. The use-by date is on
a label on the sealant canister and can
be seen through the rectangular
viewing window on the bottom of the
compressor. Check the use-by date
regularly and replace the canister after
four years of non-use.
• Do not store the kit unsecured inside
the passenger compartment of the
vehicle as it may cause injury during a
sudden stop or crash. Always store the
kit in its original location.
• After sealant use, the tire pressure
monitoring system sensor and valve
stem on the wheel must be replaced
by an authorized Ford dealer.
• Operating the kit could cause an
electrical disturbance in radio, CD, and
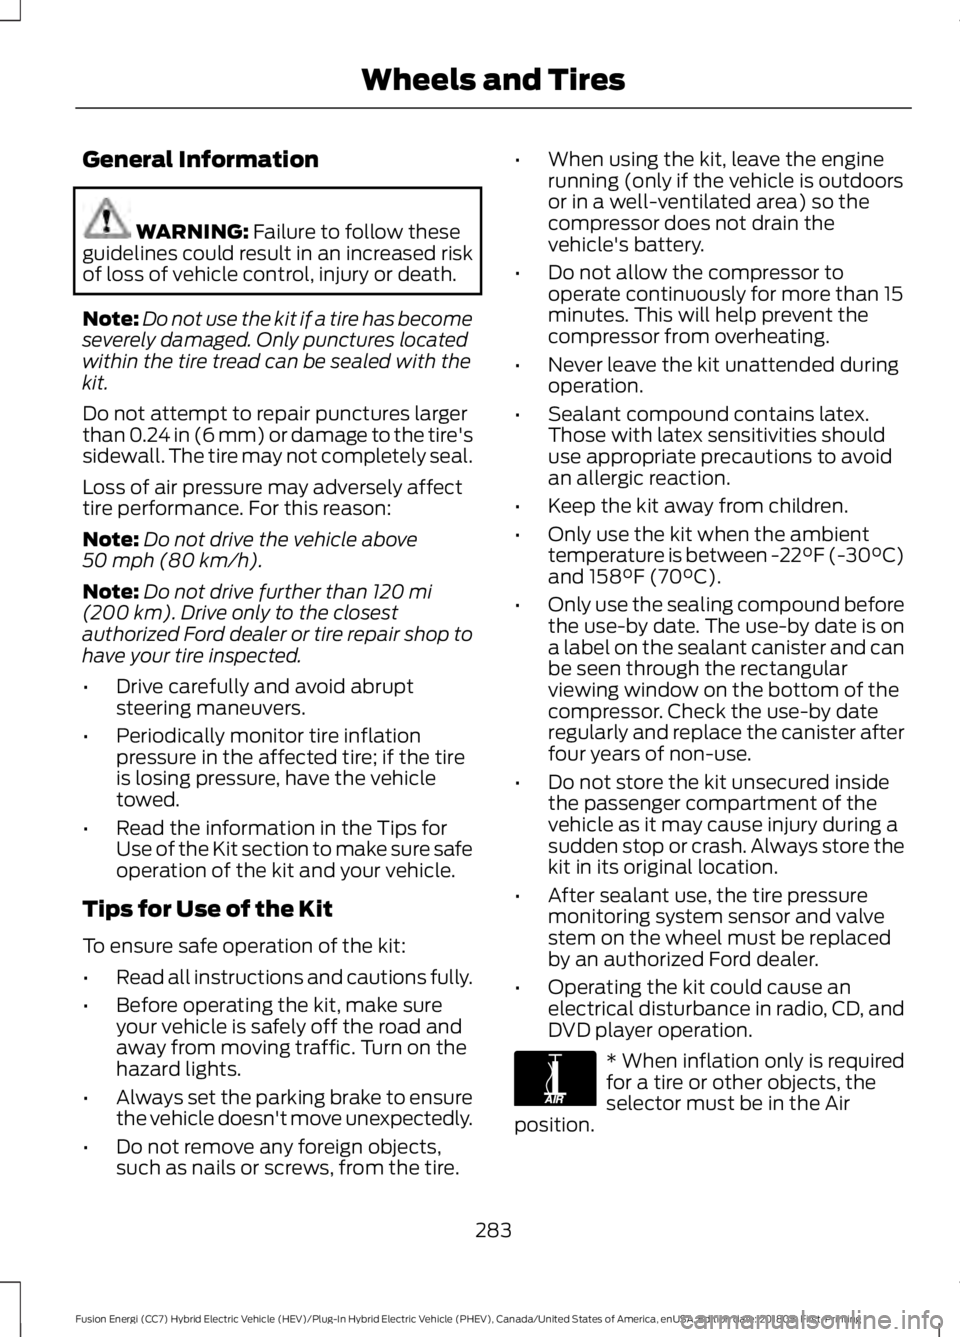
DVD player operation. * When inflation only is required
for a tire or other objects, the
selector must be in the Air
position.
283
Fusion Energi (CC7) Hybrid Electric Vehicle (HEV)/Plug-In Hybrid Electric Vehicle (PHEV), Canada/United States of America, enUSA, Edition date: 201805, First-Printing Wheels and TiresE175978
Page 287 of 541
What to do when a Tire Is
Punctured
A tire puncture within the tire's tread area
can be repaired in two stages with the kit.
•
In the first stage, the tire will be
reinflated with a sealing compound
and air. After the tire has been inflated,
you will need to drive the vehicle a
short distance 4 mi (6 km) to distribute
the sealant in the tire.
• In the second stage, you will need to
check the tire pressure and adjust, if
necessary, to the vehicle's specified
tire inflation pressure.
First Stage: Reinflating the Tire
with Sealing Compound and Air WARNING: Do not stand directly
over the kit while inflating the tire. If you
notice any unusual bulges or deformations
in the tire's sidewall during inflation, stop
and call roadside assistance. WARNING: If the tire does not inflate
to the recommended tire pressure within
15 minutes, stop and call roadside
assistance. WARNING:
Do not run the engine
when operating the air compressor unless
the vehicle is outdoors or in a
well-ventilated area.
Preparation: Park the vehicle in a safe, level
and secure area, away from moving traffic.
Turn the hazard lights on. Apply the parking
brake and turn the engine off. Inspect the
flat tire for visible damage.
Sealant compound contains latex. Use
appropriate precautions to avoid any
allergic reactions. Do not remove any foreign object that has
pierced the tire. If a puncture is located in
the tire sidewall, stop and call roadside
assistance.
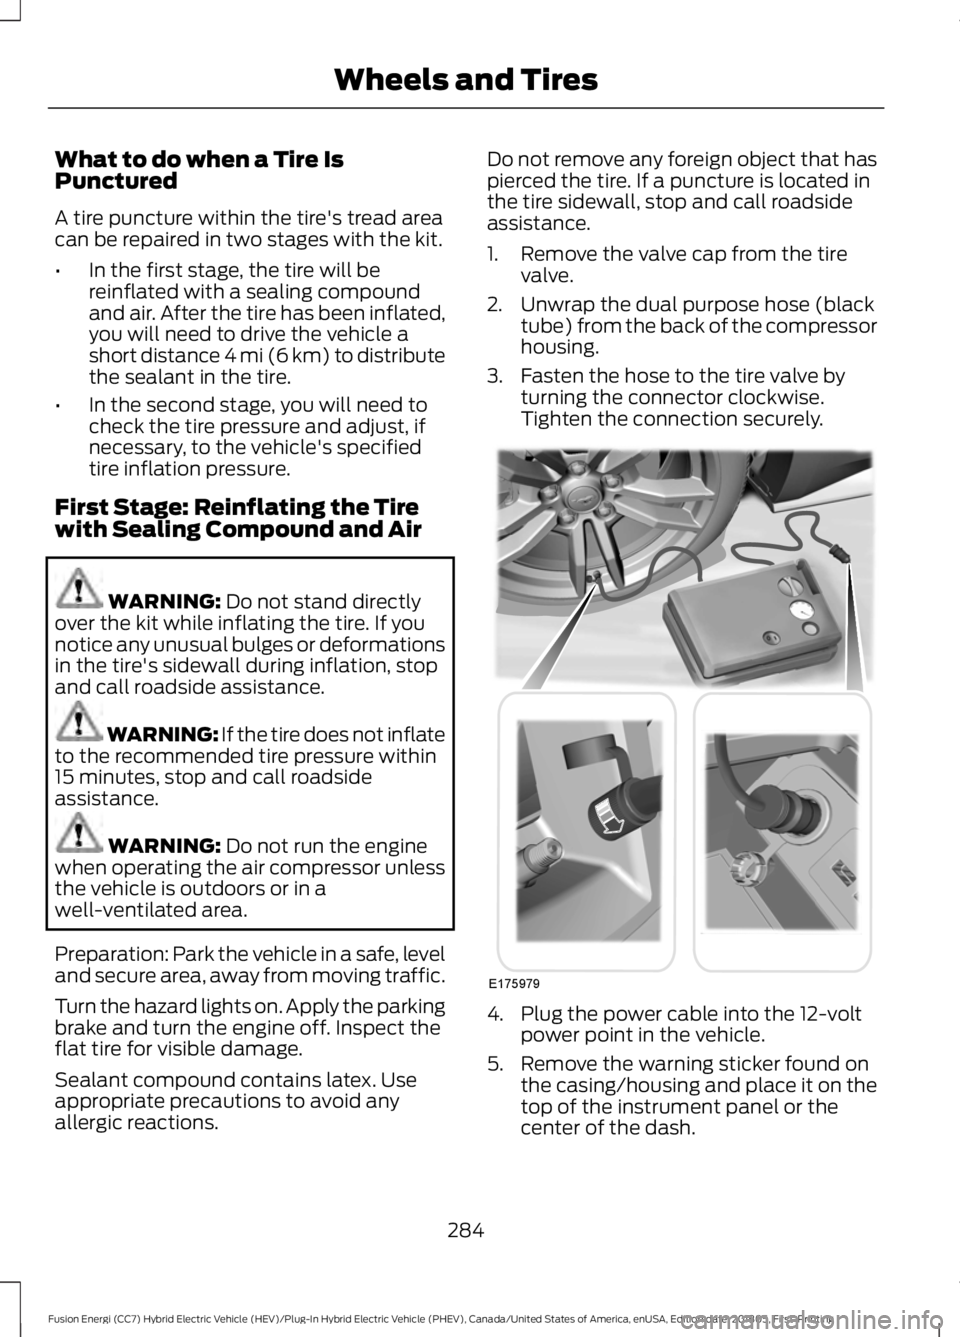
1. Remove the valve cap from the tire
valve.
2. Unwrap the dual purpose hose (black tube) from the back of the compressor
housing.
3. Fasten the hose to the tire valve by turning the connector clockwise.
Tighten the connection securely. 4. Plug the power cable into the 12-volt
power point in the vehicle.
5. Remove the warning sticker found on the casing/housing and place it on the
top of the instrument panel or the
center of the dash.
284
Fusion Energi (CC7) Hybrid Electric Vehicle (HEV)/Plug-In Hybrid Electric Vehicle (PHEV), Canada/United States of America, enUSA, Edition date: 201805, First-Printing Wheels and TiresE175979
Page 288 of 541
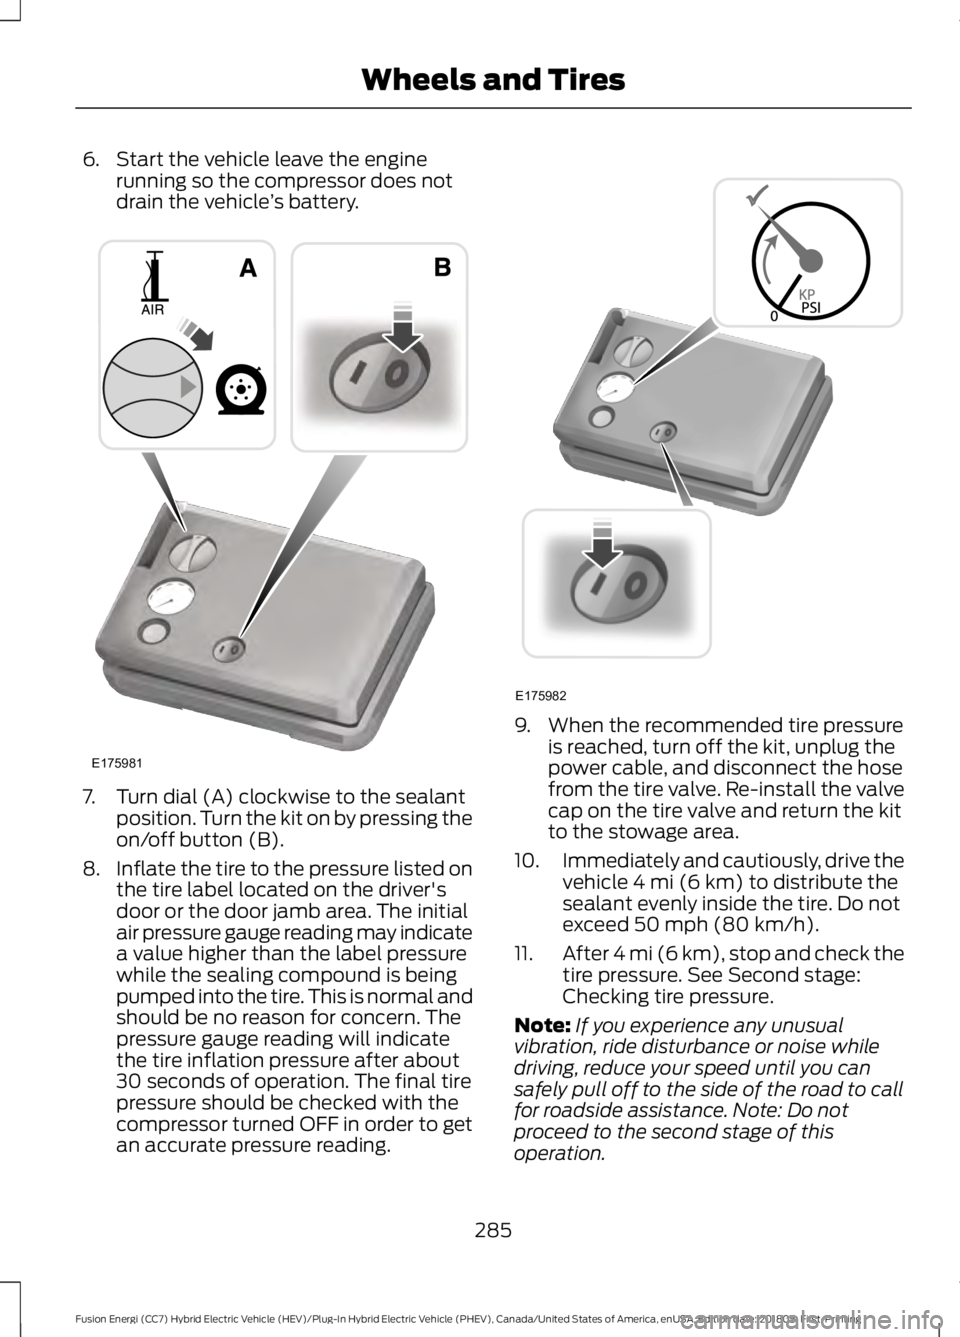
6. Start the vehicle leave the engine
running so the compressor does not
drain the vehicle ’s battery. 7. Turn dial (A) clockwise to the sealant
position. Turn the kit on by pressing the
on/off button (B).
8. Inflate the tire to the pressure listed on
the tire label located on the driver's
door or the door jamb area. The initial
air pressure gauge reading may indicate
a value higher than the label pressure
while the sealing compound is being
pumped into the tire. This is normal and
should be no reason for concern. The
pressure gauge reading will indicate
the tire inflation pressure after about
30 seconds of operation. The final tire
pressure should be checked with the
compressor turned OFF in order to get
an accurate pressure reading. 9. When the recommended tire pressure
is reached, turn off the kit, unplug the
power cable, and disconnect the hose
from the tire valve. Re-install the valve
cap on the tire valve and return the kit
to the stowage area.
10. Immediately and cautiously, drive the
vehicle 4 mi (6 km) to distribute the
sealant evenly inside the tire. Do not
exceed
50 mph (80 km/h).
11. After 4 mi (6 km), stop and check the
tire pressure. See Second stage:
Checking tire pressure.
Note: If you experience any unusual
vibration, ride disturbance or noise while
driving, reduce your speed until you can
safely pull off to the side of the road to call
for roadside assistance. Note: Do not
proceed to the second stage of this
operation.
285
Fusion Energi (CC7) Hybrid Electric Vehicle (HEV)/Plug-In Hybrid Electric Vehicle (PHEV), Canada/United States of America, enUSA, Edition date: 201805, First-Printing Wheels and TiresE175981 E175982
Page 289 of 541
Second Stage: Checking Tire
Pressure
WARNING: If the tire does not inflate
to the recommended tire pressure within
15 minutes, stop and call roadside
assistance. WARNING: The power plug may get
hot after use and should be handled
carefully when unplugging.
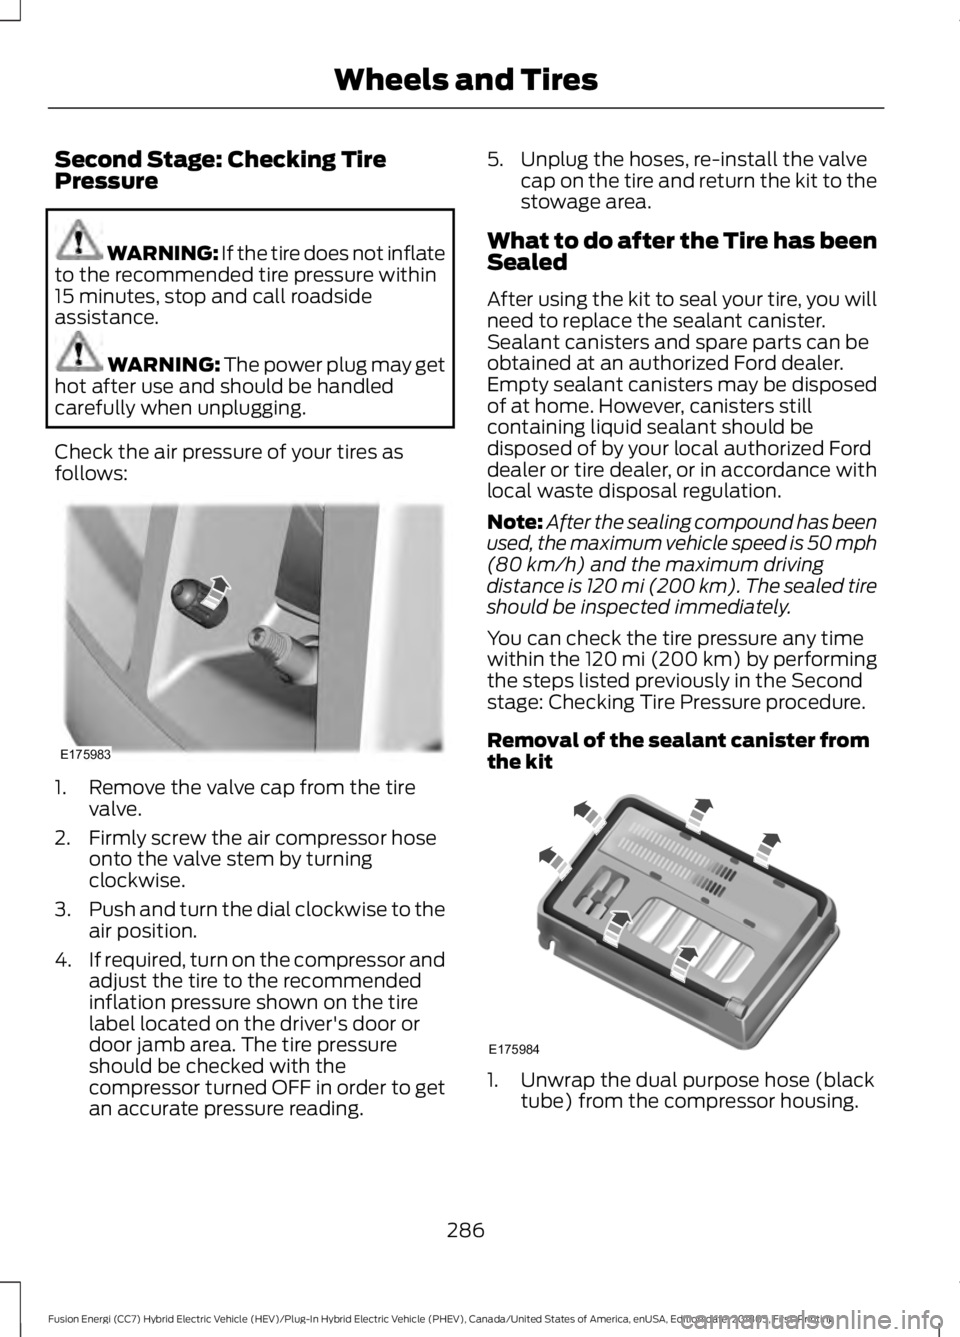
Check the air pressure of your tires as
follows: 1. Remove the valve cap from the tire
valve.
2. Firmly screw the air compressor hose onto the valve stem by turning
clockwise.
3. Push and turn the dial clockwise to the
air position.
4. If required, turn on the compressor and
adjust the tire to the recommended
inflation pressure shown on the tire
label located on the driver's door or
door jamb area. The tire pressure
should be checked with the
compressor turned OFF in order to get
an accurate pressure reading. 5. Unplug the hoses, re-install the valve
cap on the tire and return the kit to the
stowage area.
What to do after the Tire has been
Sealed
After using the kit to seal your tire, you will
need to replace the sealant canister.
Sealant canisters and spare parts can be
obtained at an authorized Ford dealer.
Empty sealant canisters may be disposed
of at home. However, canisters still
containing liquid sealant should be
disposed of by your local authorized Ford
dealer or tire dealer, or in accordance with
local waste disposal regulation.
Note: After the sealing compound has been
used, the maximum vehicle speed is 50 mph
(80 km/h)
and the maximum driving
distance is 120 mi (200 km). The sealed tire
should be inspected immediately.
You can check the tire pressure any time
within the 120 mi (200 km) by performing
the steps listed previously in the Second
stage: Checking Tire Pressure procedure.
Removal of the sealant canister from
the kit 1. Unwrap the dual purpose hose (black
tube) from the compressor housing.
286
Fusion Energi (CC7) Hybrid Electric Vehicle (HEV)/Plug-In Hybrid Electric Vehicle (PHEV), Canada/United States of America, enUSA, Edition date: 201805, First-Printing Wheels and TiresE175983 E175984
Page 292 of 541
the government course as a tire
graded 100. The relative
performance of tires depends
upon the actual conditions of their
use, however, and may depart
significantly from the norm due to
variations in driving habits, service
practices, and differences in road
characteristics and climate.
Traction AA A B C
WARNING: The traction
grade assigned to this tire is based
on straight-ahead braking traction
tests, and does not include
acceleration, cornering,
hydroplaning or peak traction
characteristics.
The traction grades, from highest
to lowest are AA, A, B, and C. The
grades represent the tire ’s ability
to stop on wet pavement as
measured under controlled
conditions on specified
government test surfaces of
asphalt and concrete. A tire
marked C may have poor traction
performance. Temperature A B C WARNING: The temperature
grade for this tire is established for
a tire that is properly inflated and
not overloaded. Excessive speed,
underinflation, or excessive
loading, either separately or in
combination, can cause heat
buildup and possible tire failure.
The temperature grades are A
(the highest), B and C,
representing the tire ’s resistance
to the generation of heat and its
ability to dissipate heat when
tested under controlled conditions
on a specified indoor laboratory
test wheel. Sustained high
temperature can cause the
material of the tire to degenerate
and reduce tire life, and excessive
temperature can lead to sudden
tire failure. The grade C
corresponds to a level of
performance which all passenger
car tires must meet under the
Federal Motor Vehicle Safety
Standard No. 139. Grades B and A
represent higher levels of
performance on the laboratory
test wheel than the minimum
required by law.
Glossary of Tire Terminology
*
Tire label: A label showing the
original equipment tire sizes,
recommended inflation pressure
and the maximum weight the
vehicle can carry.
289
Fusion Energi (CC7) Hybrid Electric Vehicle (HEV)/Plug-In Hybrid Electric Vehicle (PHEV), Canada/United States of America, enUSA, Edition date: 201805, First-Printing Wheels and Tires