ECO mode FORD FUSION HYBRID 2014 Owner's Manual
[x] Cancel search | Manufacturer: FORD, Model Year: 2014, Model line: FUSION HYBRID, Model: FORD FUSION HYBRID 2014Pages: 473, PDF Size: 5.93 MB
Page 135 of 473
1. Press and hold the previously
programmed Genie button on the
hand-held transmitter for 10 seconds.
The indicator light will change from red
to red and green.
2. Press the same button twice to confirm
the change. If done correctly the
indicator light will turn green.
Programming HomeLink to the Genie
Intellicode Ga rage Door Opener Motor
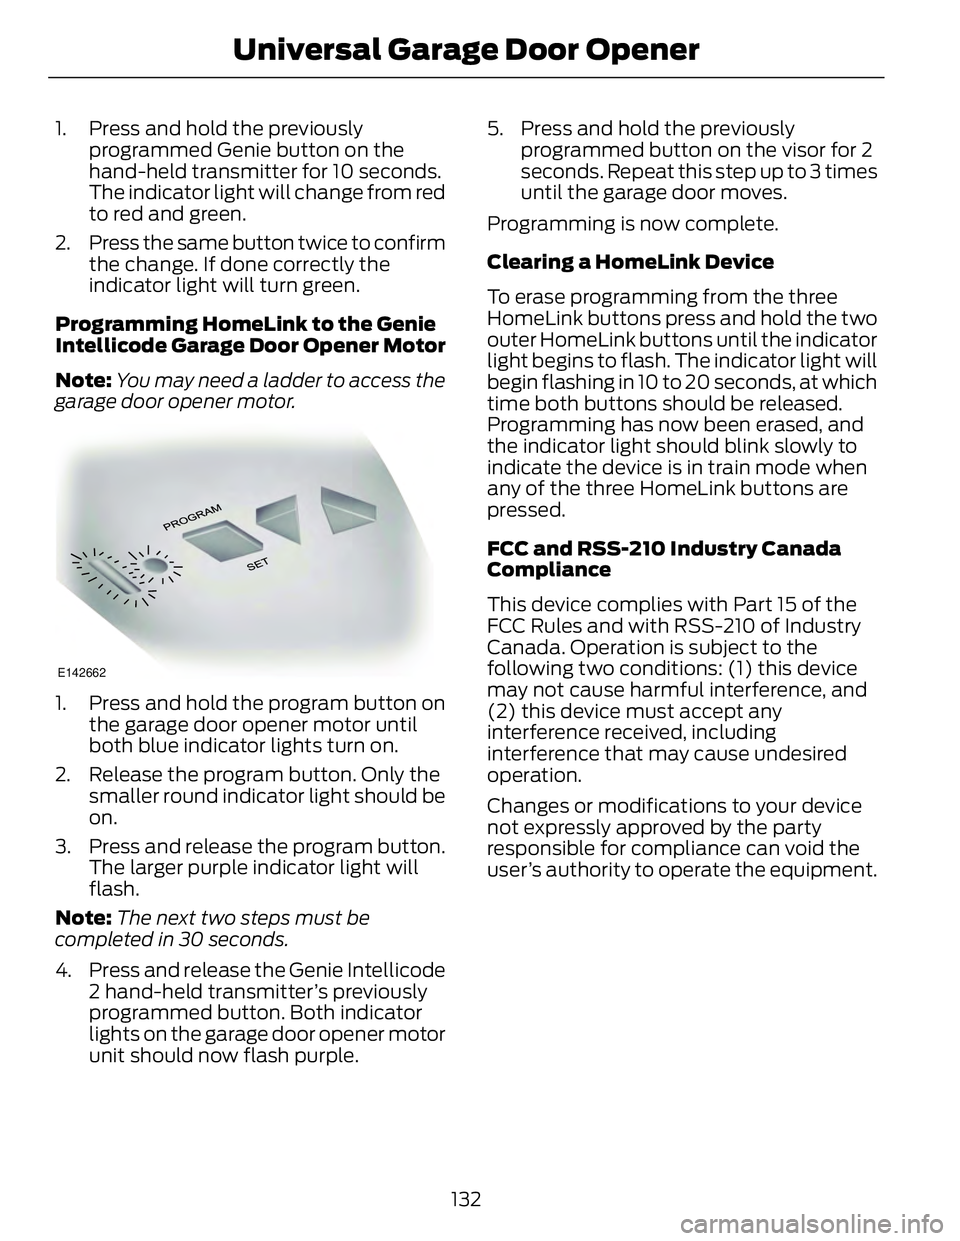
Note: You may need a ladder to access the
garage door opener motor. E142662
1. Press and hold the program button on
the garage door opener motor until
both blue indicator lights turn on.
2. Release the program button. Only the
smaller round indicator light should be
on.
3. Press and release the program button.
The larger purple indicator light will
flash.
Note: The next two steps must be
completed in 30 seconds.
4. Press and release the Genie Intellicode
2 hand-held transmitter’s previously
programmed button. Both indicator
lights on the garage door opener motor
unit should now flash purple. 5. Press and hold the previously
programmed button on the visor for 2
seconds. Repeat this step up to 3 times
until the garage door moves.
Programming is now complete.
Clearing a HomeLink Device
To erase programming from the three
HomeLink buttons press and hold the two
outer HomeLink buttons until the indicator
light begins to flash. The indicator light will
begin flashing in 10 to 20 seconds, at which
time both buttons should be released.
Programming has now been erased, and
the indicator light should blink slowly to
indicate the device is in train mode when
any of the three HomeLink buttons are
pressed.
FCC and RSS-210 Industry Canada
Compliance
This device complies with Part 15 of the
FCC Rules and with RSS-210 of Industry
Canada. Operation is subject to the
following two conditions: (1) this device
may not cause harmful interference, and
(2) this device must accept any
interference received, including
interference that may cause undesired
operation.
Changes or modifications to your device
not expressly approved by the party
responsible for compliance can void the
user’s authority to operate the equipment.
132Universal Ga rage Door Opener
Page 140 of 473
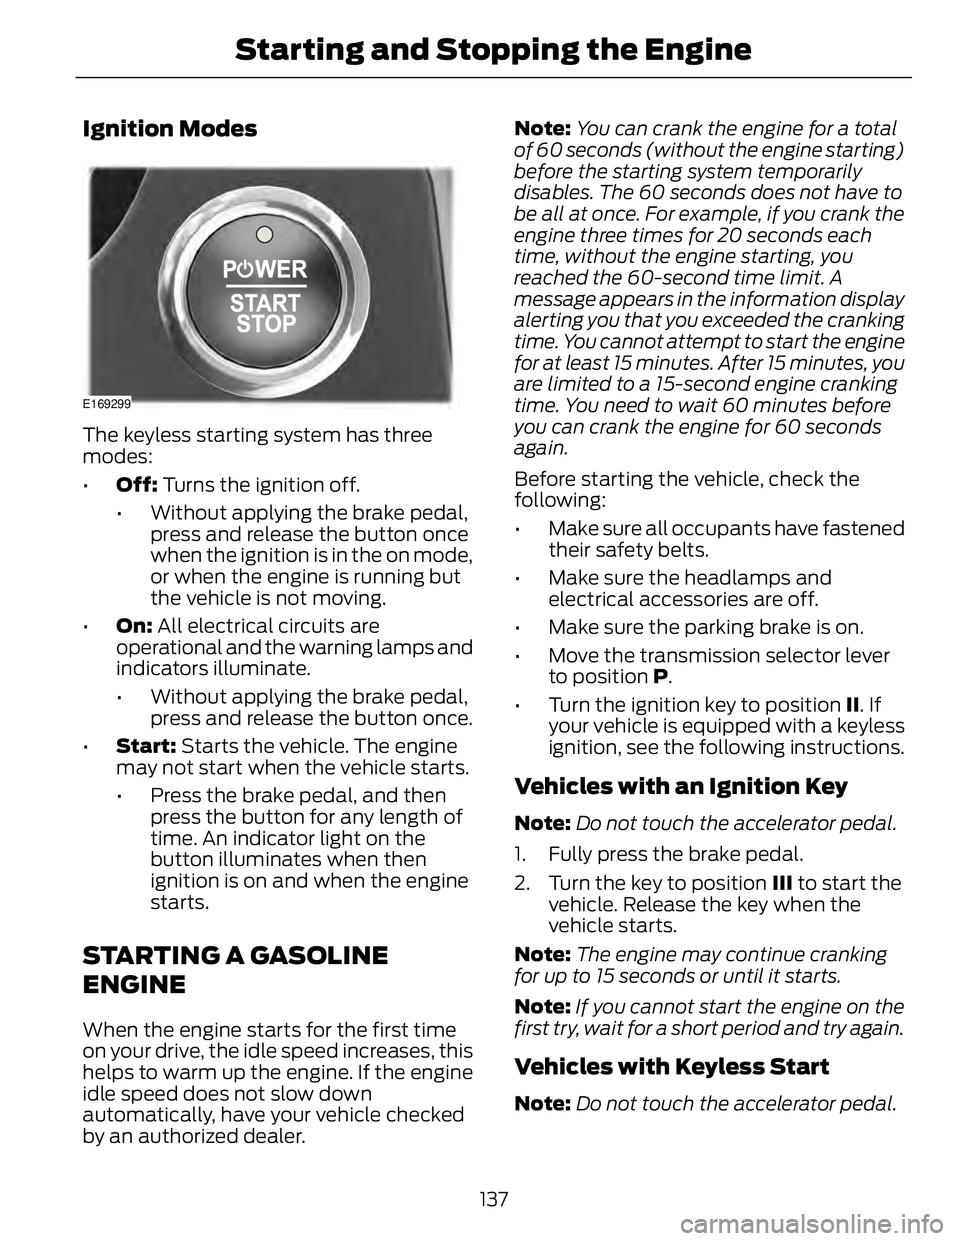
Ignition Modes E169299
The keyless starting system has three
modes:
• Off: Turns the ignition off.
• Without applying the brake pedal,
press and release the button once
when the ignition is in the on mode,
or when the engine is running but
the vehicle is not moving.
• On: All electrical circuits are
operational and the warning lamps and
indicators illuminate.
• Without applying the brake pedal,
press and release the button once.
• Start: Starts the vehicle. The engine
may not start when the vehicle starts.
• Press the brake pedal, and then
press the button for any length of
time. An indicator light on the
button illuminates when then
ignition is on and when the engine
starts.
STARTING A GASOLINE
ENGINE When the engine starts for the first time
on your drive, the idle speed increases, this
helps to warm up the engine. If the engine
idle speed does not slow down
automatically, have your vehicle checked
by an authorized dealer. Note: You can crank the engine for a total
of 60 seconds (without the engine starting)
before the starting system temporarily
disables. The 60 seconds does not have to
be all at once. For example, if you crank the
engine three times for 20 seconds each
time, without the engine starting, you
reached the 60-second time limit. A
message appears in the information display
alerting you that you exceeded the cranking
time. You cannot attempt to start the engine
for at least 15 minutes. After 15 minutes, you
are limited to a 15-second engine cranking
time. You need to wait 60 minutes before
you can crank the engine for 60 seconds
again.
Before starting the vehicle, check the
following:
• Make sure all occupants have fastened
their safety belts.
• Make sure the headlamps and
electrical accessories are off.
• Make sure the parking brake is on.
• Move the transmission selector lever
to position P .
• Turn the ignition key to position II . If
your vehicle is equipped with a keyless
ignition, see the following instructions.
Vehicles with an Ignition Key Note: Do not touch the accelerator pedal.
1. Fully press the brake pedal.
2. Turn the key to position III to start the
vehicle. Release the key when the
vehicle starts.
Note: The engine may continue cranking
for up to 15 seconds or until it starts.
Note: If you cannot start the engine on the
first try, wait for a short period and try again.
Vehicles with Keyless Start
Note: Do not touch the accelerator pedal.
137Starting and Stopping the Engine
Page 145 of 473
HYBRID ELECTRIC VEHICLE Plug-in Power Mode and Hybrid
Mode (Fusion Energi Only) You must plug in your Fusion Energi vehicle
regularly for optimal use of the high
voltage battery's extended range
capability. When you charge your vehicle,
you add electrical energy that is then used
to propel the vehicle in plug-in power
mode. You can view your estimated
electric range in this mode from the
enhanced battery gauge on the instrument
panel display. The system maximizes the
use of electric-only operation in plug-in
power mode. System conditions may
require engine operation; however, the
system uses plug-in power whenever
possible.
When your plug-in power has been
depleted, the powertrain system will
automatically switch to hybrid mode. Your
battery gauge will show an electric range
of zero before transitioning to a simple
battery graphic upon entering hybrid mode.
Hybrid mode uses both the gasoline engine
and electric motor to power your vehicle
and maximize fuel economy as with Fusion
Hybrid.
EV Modes (Fusion Energi Only) E144814
Your vehicle contains selectable
EV modes through the EV button
on the center console.
These modes are available when the
vehicle can run under high voltage battery
power. With the vehicle in driving mode,
you can change EV modes with each press
of the EV button. The current mode
displays in the left hand instrument cluster
screen. Auto EV E155152
This mode provides an
automatic use of high voltage
battery power during the drive,
staying in electric mode when possible and
running the engine when needed. This
mode will be the only one available if the
plug-in power has been depleted.
EV Now E144814
This mode provides an electric
only driving experience using
plug-in power. The left-hand
information display will change to an
Energy Use screen that supplies EV specific
tools and functions. The vehicle may
accelerate more slowly and the top speed
may be lower than in Auto mode. Your
engine may be enabled at any time by
using one of the following methods:
1. Press the OK button on the left 5–way
steering wheel control while viewing
the EV screen. The vehicle will enable
the engine as needed, and will
automatically return to EV Now after
eight seconds or when the engine is no
longer needed.
2. Press the accelerator pedal fully. A pop
up message stating Press OK to
Enable Engine will appear. Press OK
on the left steering wheel button to
activate as needed. The message will
disappear if you release the accelerator
pedal.
3. Press the EV button. This will change
the mode to EV Later and permit
engine operation.
The vehicle may automatically enter
Engine Enabled mode if system conditions
require it. A message Engine Enabled for
System Performance will display if this
occurs. This is normal function, and your
vehicle will return to EV Now when
possible.
142Unique Driving Characteristics
Page 148 of 473
During certain events (such as vehicle
servicing) your low voltage 12-volt battery
may become disconnected or disabled.
Once the battery is reconnected and after
driving the vehicle, the engine may
continue to operate for three to five
seconds after the key is turned to off. This
is a normal condition.
Braking: Your hybrid is equipped with
standard hydraulic braking and
regenerative braking. Regenerative braking
is performed by your transmission and it
captures brake energy and stores it in your
high voltage battery.
Driving to optimize fuel economy
Note: Having your engine running is not
always an indication of inefficiency. In some
cases, it is actually more efficient than
driving in electric mode.
Your fuel economy should improve
throughout your hybrid's break-in period.
As with any vehicle, your driving habits and
accessory usage can significantly impact
your fuel economy. For best results, keep
in mind these tips:
• Keep the tires properly inflated and
only use the recommended size.
• Aggressive driving increases the
amount of energy required to move
your vehicle. In general, you can
achieve better fuel economy with mild
to moderate acceleration and
deceleration. Moderate braking is
particularly important since it allows
you to maximize the energy captured
by the regenerative braking system. Additional Tips:
• Do not carry extra loads.
• Be mindful of adding external
accessories that may increase
aerodynamic drag.
• Observe posted speed limits.
• Perform all scheduled maintenance.
• There is no need to wait for your engine
to warm up. The vehicle is ready to
drive immediately after starting.
EV+ Mode
Your vehicle will recognize your frequent
destinations and allow for more EV driving
as you approach them. For example, when
nearing your home it should be easier to
stay in electric mode. The EV indicator will
display EV+ when this mode is active. You
should see this about 1/8 mile (200
meters) from a frequent destination. See
Information Displays (page 86).
Note: Frequent destinations are learned by
your vehicle after two to four weeks of use.
You can clear these destinations with a
Driving History reset through the Settings
menu.
Note: The EV+ feature can be turned on or
off through the Driver Assist section of the
Settings menu.
145Unique Driving Characteristics
Page 152 of 473

FUEL QUALITY Note: Use of any fuel other than those
recommended may cause powertrain
damage, a loss of vehicle performance and
repairs may not be covered under warranty.
Choosing the Right Fuel Use only UNLEADED fuel or UNLEADED
fuel blended with a maximum of 15%
ethanol. Do not use fuel ethanol (E85),
diesel fuel, fuel-methanol, leaded fuel or
any other fuel because it could damage or
impair the emission control system.
Your vehicle was not designed to use fuel
or fuel additives with metallic compounds,
including manganese-based additives. The
use of leaded fuel is prohibited by law.
Octane Recommendations Regular unleaded gasoline with a pump
(R+M)/2 octane rating of 87 is
recommended. Some fuel stations offer
fuels posted as regular with an octane
rating below 87, particularly in high altitude
areas. Fuels with octane levels below 87
are not recommended.
Do not be concerned if your engine
sometimes knocks lightly. However, if it
knocks heavily while you are using fuel with
the recommended octane rating, see your
authorized dealer to prevent any engine
damage.
Fuel Freshness Mode (Energi
Vehicles Only)
This feature helps keeps the fuel system
functional and the fuel fresh.
If you operate your vehicle mainly in plug-in
power mode using electricity from plugging
in without refueling, the gasoline in your
tank eventually becomes old. Old fuel can
damage the engine and fuel system. To prevent the fuel from becoming old,
your vehicle will automatically enter fuel
freshness mode. In fuel freshness mode
operates, your vehicle will operate in hybrid
mode causing the gasoline engine to run
in order to consume the fuel in the fuel
tank.
Note: If new fuel is not added during an 18
month period, fuel freshness mode will
consume fuel until about 1 gallon (3.8 liters)
is left in the tank.
During fuel freshness mode:
• The information display screen will
indicate that fuel freshness mode is
active.
• The vehicle will only run in hybrid mode.
EV Now will not be available.
• Most of the plug-in power will be
stored until fuel freshness mode is
completed.
Note: EV Now can resume if less than 1
gallon (3.8 liters) of fuel is left in the tank.
Note: In most cases, when the fuel level is
below 1/4 tank, refueling the vehicle will end
fuel freshness mode and EV Now will now
become available. Refueling after
consuming a full tank in fuel freshness mode
will end the mode.
Note: It is recommended to use a fuel
stabilizer if you consume less than a full
tank of fuel during an 18 month period.
REFUELING WARNINGS
Fuel vapor burns violently and a fuel
fire can cause severe injuries.
Read and follow all the instructions
on the pump island.
Turn off your vehicle when you are
refueling.
149Fuel and Refueling
Page 194 of 473
A message displays if something obstructs
the radar signals from the sensor. The
sensor is located behind a fascia cover
near the driver side of the lower grille. The
system cannot detect a vehicle ahead and will not function when something obstructs
the radar signals. The following table lists
possible causes and actions for this
message displaying. ActionCause
Clean the grille surface in front of the radar
or remove the object causing the obstruc-
tion.The surface of the radar in the grille is dirty
or obstructed in some way.
Wait a short time. It may take several
minutes for the radar to detect that it is no
longer obstructed.The surface of the radar in the grille is clean
but the message remains in the display.
Do not use the system in these conditions
because it may not detect any vehicles
ahead.Heavy rain or snow is interfering with the
radar signals.
Do not use the system in these conditions
because it may not detect any vehicles
ahead.Swirling water, or snow or ice on the surface
of the road may interfere with the radar
signals.
Wait a short time or switch to normal cruise
control.You are in a desert or remote area with no
other vehicles and no roadside objects.
Due to the nature of radar technology, it is
possible to get a blockage warning and not
be blocked. This can happen, for example,
when driving in sparse rural or desert
environments. A false blocked condition
will either self clear or clear after a key
cycle.
Switching to Normal Cruise
Control
WARNING
Normal cruise control will not brake
due to slower vehicles. Always be
aware of which mode is selected and
apply the brakes when necessary.
You can manually change from adaptive
cruise control to normal cruise control
through the information display. E71340
The cruise control indicator light
replaces the adaptive cruise
control indicator light if you
select normal cruise control. The gap
setting will not display, the system will not
automatically respond to lead vehicles and
automatic braking will activate. The
system defaults to adaptive cruise control
when you start the vehicle.
ECO Cruise Control This feature saves vehicle energy by
relaxing acceleration compared to
standard cruise control. For example, your
vehicle may temporarily lose speed when
going uphill. ECO will appear in the
information display when you activate ECO
cruise control. It can be switched on or off
in the information display. See General
Information (page 86).
191Cruise Control
Page 196 of 473
E131359
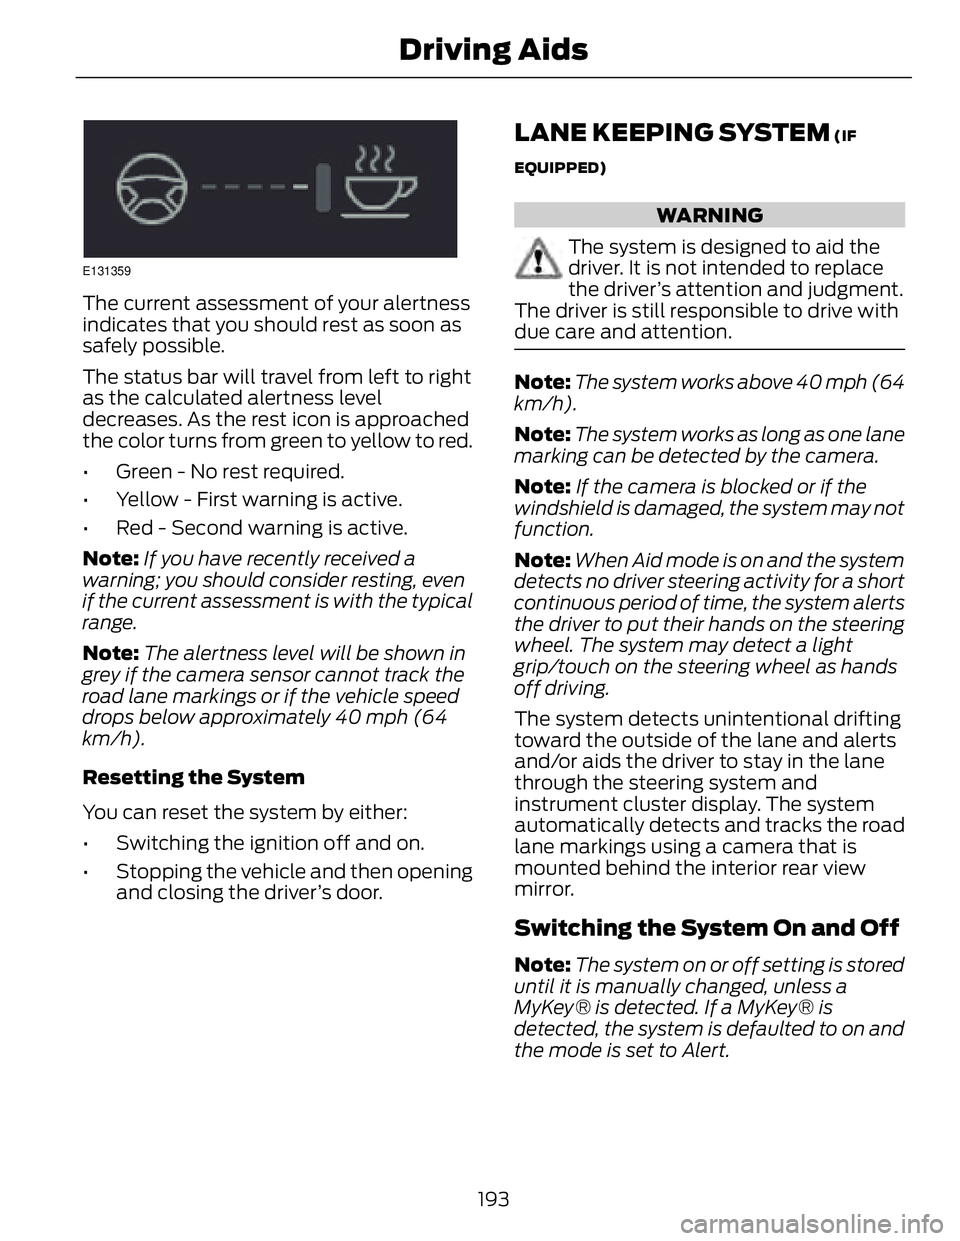
The current assessment of your alertness
indicates that you should rest as soon as
safely possible.
The status bar will travel from left to right
as the calculated alertness level
decreases. As the rest icon is approached
the color turns from green to yellow to red.
• Green - No rest required.
• Yellow - First warning is active.
• Red - Second warning is active.
Note: If you have recently received a
warning; you should consider resting, even
if the current assessment is with the typical
range.
Note: The alertness level will be shown in
grey if the camera sensor cannot track the
road lane markings or if the vehicle speed
drops below approximately 40 mph (64
km/h).
Resetting the System
You can reset the system by either:
• Switching the ignition off and on.
• Stopping the vehicle and then opening
and closing the driver’s door. LANE KEEPING SYSTEM (IF
EQUIPPED)
WARNING
The system is designed to aid the
driver. It is not intended to replace
the driver’s attention and judgment.
The driver is still responsible to drive with
due care and attention.
Note: The system works above 40 mph (64
km/h).
Note: The system works as long as one lane
marking can be detected by the camera.
Note: If the camera is blocked or if the
windshield is damaged, the system may not
function.
Note: When Aid mode is on and the system
detects no driver steering activity for a short
continuous period of time, the system alerts
the driver to put their hands on the steering
wheel. The system may detect a light
grip/touch on the steering wheel as hands
off driving.
The system detects unintentional drifting
toward the outside of the lane and alerts
and/or aids the driver to stay in the lane
through the steering system and
instrument cluster display. The system
automatically detects and tracks the road
lane markings using a camera that is
mounted behind the interior rear view
mirror.
Switching the System On and Off
Note: The system on or off setting is stored
until it is manually changed, unless a
MyKey® is detected. If a MyKey® is
detected, the system is defaulted to on and
the mode is set to Alert.
193Driving Aids
Page 200 of 473
Why does the vehicle not come back into the middle of the lane always, as expected, in
the Aid or Aid + Alert mode?
High cross winds
Large road crown
Rough roads, grooves, shoulder drop-offs
Heavy uneven loading of the vehicle or improper tire inflation pressure
If the tires have been exchanged (including snow tires), or the suspension has been
modified
BLIND SPOT MONITOR Blind Spot Information System
(BLIS®) with Cross Traffic Alert (If
Equipped)
WARNING
To help avoid injuries, NEVER use the
BLIS as a replacement for using the
interior and exterior mirrors and
looking over your shoulder before changing
lanes. BLIS is not a replacement for careful
driving and only an assist.
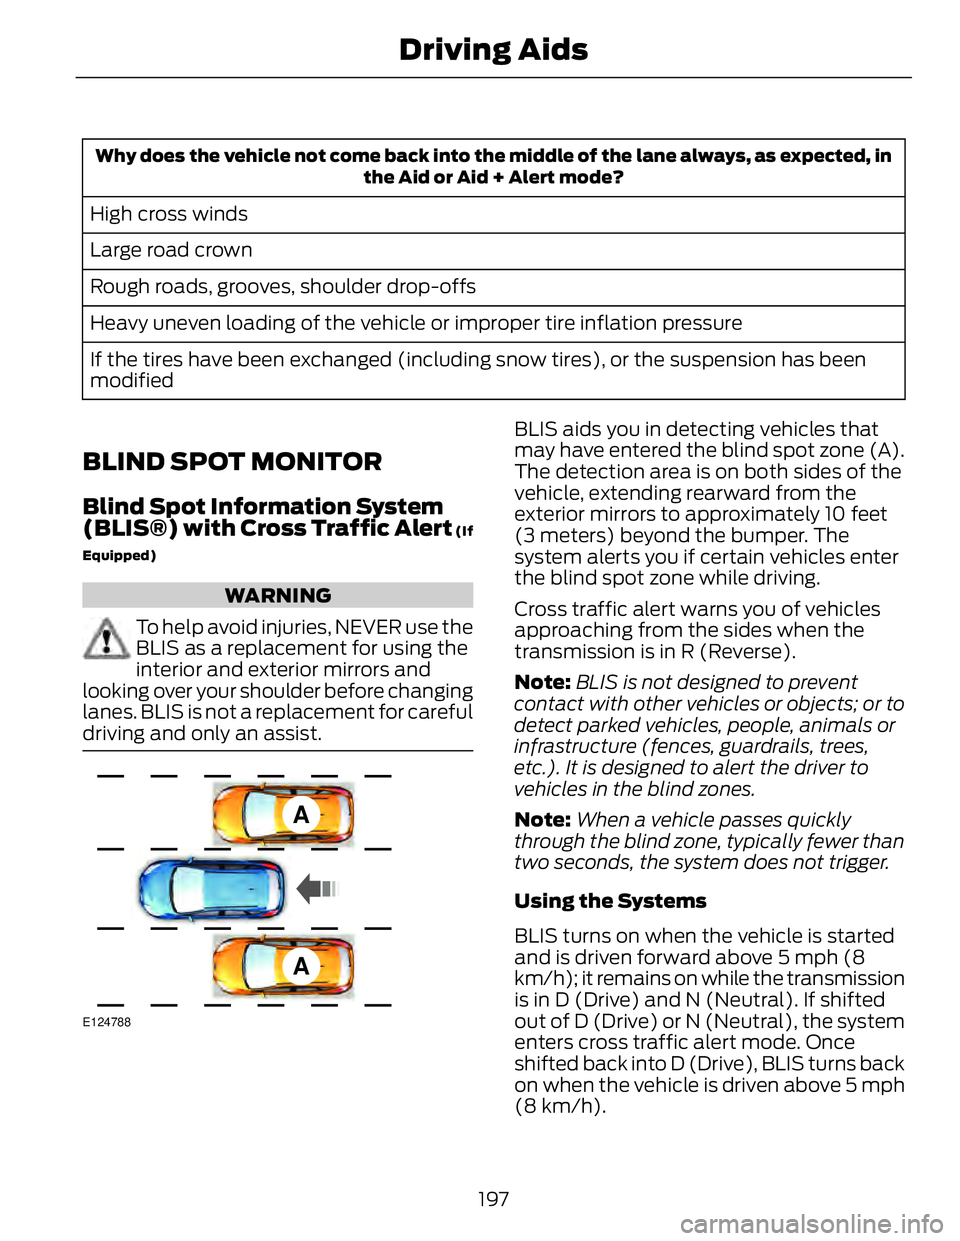
A
AE124788 BLIS aids you in detecting vehicles that
may have entered the blind spot zone (A).
The detection area is on both sides of the
vehicle, extending rearward from the
exterior mirrors to approximately 10 feet
(3 meters) beyond the bumper. The
system alerts you if certain vehicles enter
the blind spot zone while driving.
Cross traffic alert warns you of vehicles
approaching from the sides when the
transmission is in R (Reverse).
Note: BLIS is not designed to prevent
contact with other vehicles or objects; or to
detect parked vehicles, people, animals or
infrastructure (fences, guardrails, trees,
etc.). It is designed to alert the driver to
vehicles in the blind zones.
Note: When a vehicle passes quickly
through the blind zone, typically fewer than
two seconds, the system does not trigger.
Using the Systems
BLIS turns on when the vehicle is started
and is driven forward above 5 mph (8
km/h); it remains on while the transmission
is in D (Drive) and N (Neutral). If shifted
out of D (Drive) or N (Neutral), the system
enters cross traffic alert mode. Once
shifted back into D (Drive), BLIS turns back
on when the vehicle is driven above 5 mph
(8 km/h).
197Driving Aids
Page 218 of 473
BREAKING-IN You need to break in new tires for
approximately 300 miles (480
kilometers). During this time, your vehicle
may exhibit some unusual driving
characteristics. The engine also needs to
break in. Avoid hard accelerations and
driving too fast for the first 1000 miles
(1600 kilometers). If possible, avoid
carrying heavy loads up steep grades
during the break-in period.
ECONOMICAL DRIVING Fuel economy is affected by several things
such as how you drive, the conditions you
drive under and how you maintain your
vehicle.
There are some things to keep in mind that
may improve your fuel economy:
• Accelerate and slow down in a smooth,
moderate fashion.
• Drive at steady speeds.
• Anticipate stops; slowing down may
eliminate the need to stop.
• Combine errands and minimize
stop-and-go driving.
• When running errands, go to the
furthest destination first and then
work your way back home.
• Close the windows for high-speed
driving.
• Drive at reasonable speeds. (Traveling
at 65 mph/105 kph uses about 15%
less fuel than traveling at 75 mph/121
kph).
• Keep the tires properly inflated and use
only the recommended size.
• Use the recommended engine oil.
• Perform all regularly scheduled
maintenance. There are also some things you may want
to avoid doing because they reduce your
fuel economy:
• Avoid sudden or hard accelerations.
• Avoid revving the engine before turning
off the car.
• Avoid long idle periods.
• Do not warm up your vehicle on cold
mornings.
• Reduce the use of air conditioning and
heat.
• Avoid using speed control in hilly
terrain.
• Do not rest your foot on the brake
pedal while driving.
• Avoid carrying unnecessary weight
(approximately 1 mpg [0.4
kilometers/liter] is lost for every 400
lbs [180 kilograms] of weight carried).
• Avoid adding particular accessories to
your vehicle (e.g. bug deflectors,
rollbars/light bars, running boards, ski
racks).
• Avoid driving with the wheels out of
alignment.
DRIVING THROUGH WATER Note: Driving through deep water above
the recommended levels can cause vehicle
damage.
If driving through deep or standing water
is unavoidable, proceed very slowly. Never
drive through water that is higher than the
bottom of the wheel rims (for cars) or the
bottom of the hubs (for trucks).
215Driving Hints
Page 228 of 473
HAZARD WARNING FLASHERS Note: If used when the vehicle is not
running, the battery will lose charge. There
may be insufficient power to restart your
vehicle.
The hazard warning button is
located on the instrument panel.
Use it when your vehicle is
creating a safety hazard for other
motorists.
• Press the button to turn on the hazard
warning function, and the front and
rear direction indicators will flash.
• Press the button again to turn them
off.
FUEL SHUTOFF WARNING
Failure to inspect and, if necessary,
repair fuel leaks after a collision may
increase the risk of fire and serious
injury. Ford Motor Company recommends
that the fuel system be inspected by an
authorized dealer after any collision.
In the event of a moderate to severe
collision, this vehicle is equipped with a
fuel pump shut-off feature that stops the
flow of fuel to the engine. Not every impact
will cause a shut-off.
Should your vehicle shut off after a
collision, you may restart your vehicle by
doing the following:
1. Turn the ignition off.
2. Turn the ignition to crank.
3. Turn the ignition off.
4. Turn the ignition on again to re-enable
the fuel pump.
For vehicles equipped with a push button
start system: 1. Press the START/STOP button to
turn the ignition off.
2. Press the brake pedal and press the
START/STOP button (crank
attempt).
3. Remove your foot from the brake pedal
and press the START/STOP button
(ignition off).
4. Press the START/STOP button again
to re-enable the fuel system.
JUMP-STARTING THE VEHICLE WARNINGS
The gases around the battery can
explode if exposed to flames, sparks,
or lit cigarettes. An explosion could
result in injury or vehicle damage.
Batteries contain sulfuric acid which
can burn skin, eyes and clothing, if
contacted.
Do not attempt to push-start your
automatic transmission vehicle. Automatic
transmissions do not have push-start
capability. Attempting to push-start a
vehicle with an automatic transmission
may cause transmission damage.
Preparing Your Vehicle Note: Use only a 12-volt supply to start your
vehicle.
Note: Do not disconnect the battery of the
disabled vehicle as this could damage the
vehicle's electrical system.
1. Park the booster vehicle close to the
hood of the disabled vehicle making
sure the two vehicles do not touch. Set
the parking brake on both vehicles and
stay clear of the engine cooling fan and
other moving parts.
225Roadside Emergencies