center console FORD FUSION HYBRID 2014 Owners Manual
[x] Cancel search | Manufacturer: FORD, Model Year: 2014, Model line: FUSION HYBRID, Model: FORD FUSION HYBRID 2014Pages: 473, PDF Size: 5.93 MB
Page 5 of 473
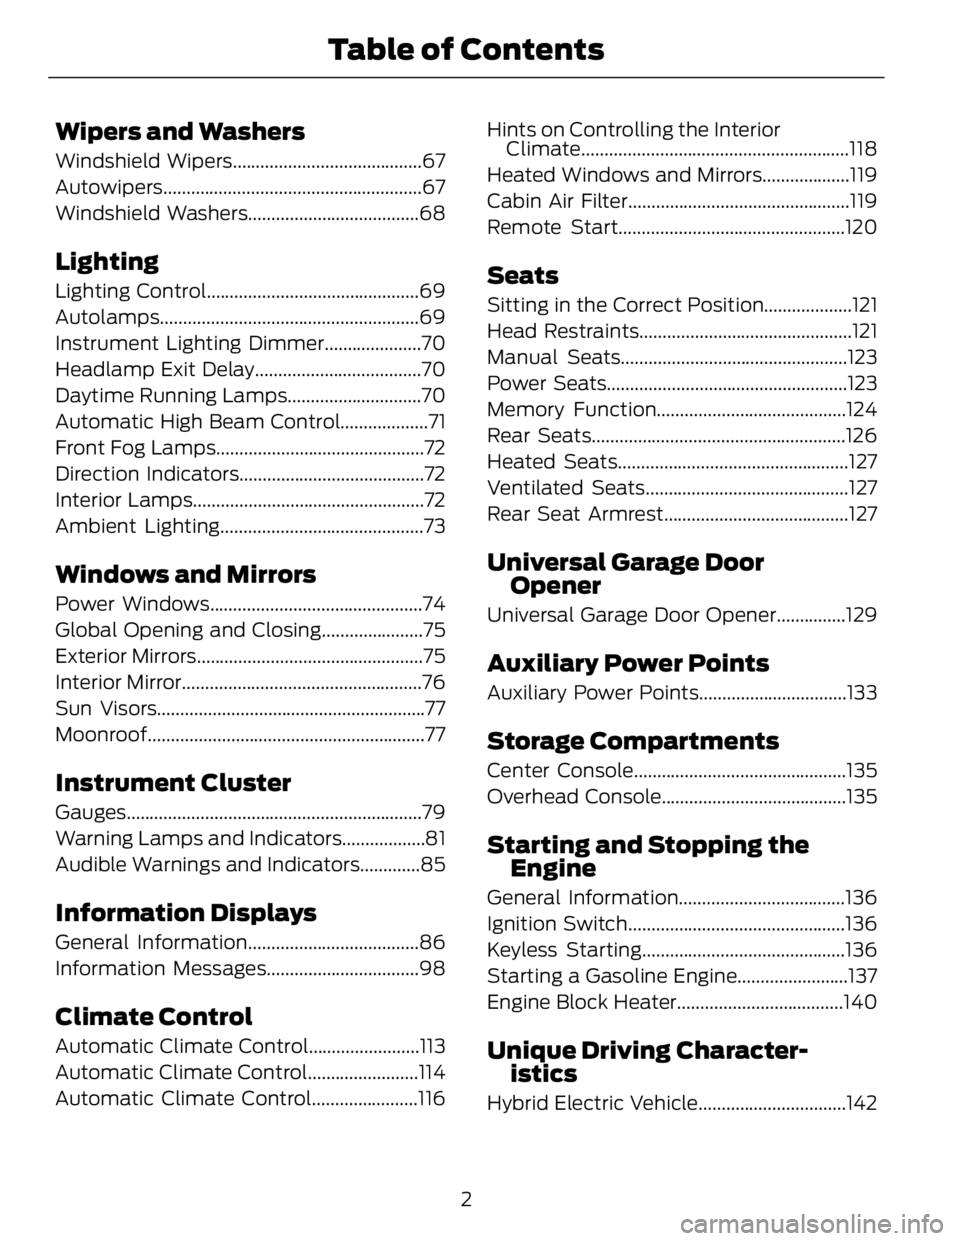
Wipers and Washers Windshield Wipers.........................................67
Autowiper s........................................................67
Windshield Washers.....................................68
Lighting Lighting Control..............................................69
Autolamps........................................................69
Instrument Lighting Dimmer.....................70
Headlamp Exit Delay....................................70
Daytime Running Lamps.............................70
Automatic High Beam Control...................71
Front Fog Lamps.............................................72
Direction Indicators........................................72
Interior Lamps..................................................72
Ambient Lighting............................................73
Windows and Mirrors Power Windows..............................................74
Global Opening and Closing......................75
Exterior Mirrors.................................................75
Interior Mirror....................................................76
Sun Visors..........................................................77
Moonroof............................................................77
Instrument Cluster Gauges................................................................79
Warning Lamps and Indicators..................81
Audible Warnings and Indicators.............85
Information Displays General Information.....................................86
Information Messages.................................98
Climate Control Automatic Climate Control........................113
Automatic Climate Control........................114
Automatic Climate Control.......................116 Hints on Controlling the Interior
Climate..........................................................118
Heated Windows and Mirrors...................119
Cabin Air Filter................................................119
Remote Start.................................................120
Seats Sitting in the Correct Position...................121
Head Restraints..............................................121
Manual Seats.................................................123
Power Seats....................................................123
Memory Function.........................................124
Rear Seats.......................................................126
Heated Seats..................................................127
Ventilated Seats............................................127
Rear Seat Armrest........................................127
Universal Ga rage Door
Opener Universal Garage Door Opener...............129
Auxiliary Power Points Auxiliary Power Points................................133
Storage C ompartmentsCenter Console..............................................135
Overhead Console........................................135
Starting and Stopping the
Engine General Information....................................136
Ignition Switch...............................................136
Keyless Starting............................................136
Starting a Gasoline Engine........................137
Engine Block Heater....................................140
Unique Driving Character-
istics
Hybrid Electric Vehicle................................142
2Table of Contents
Page 40 of 473
E142846
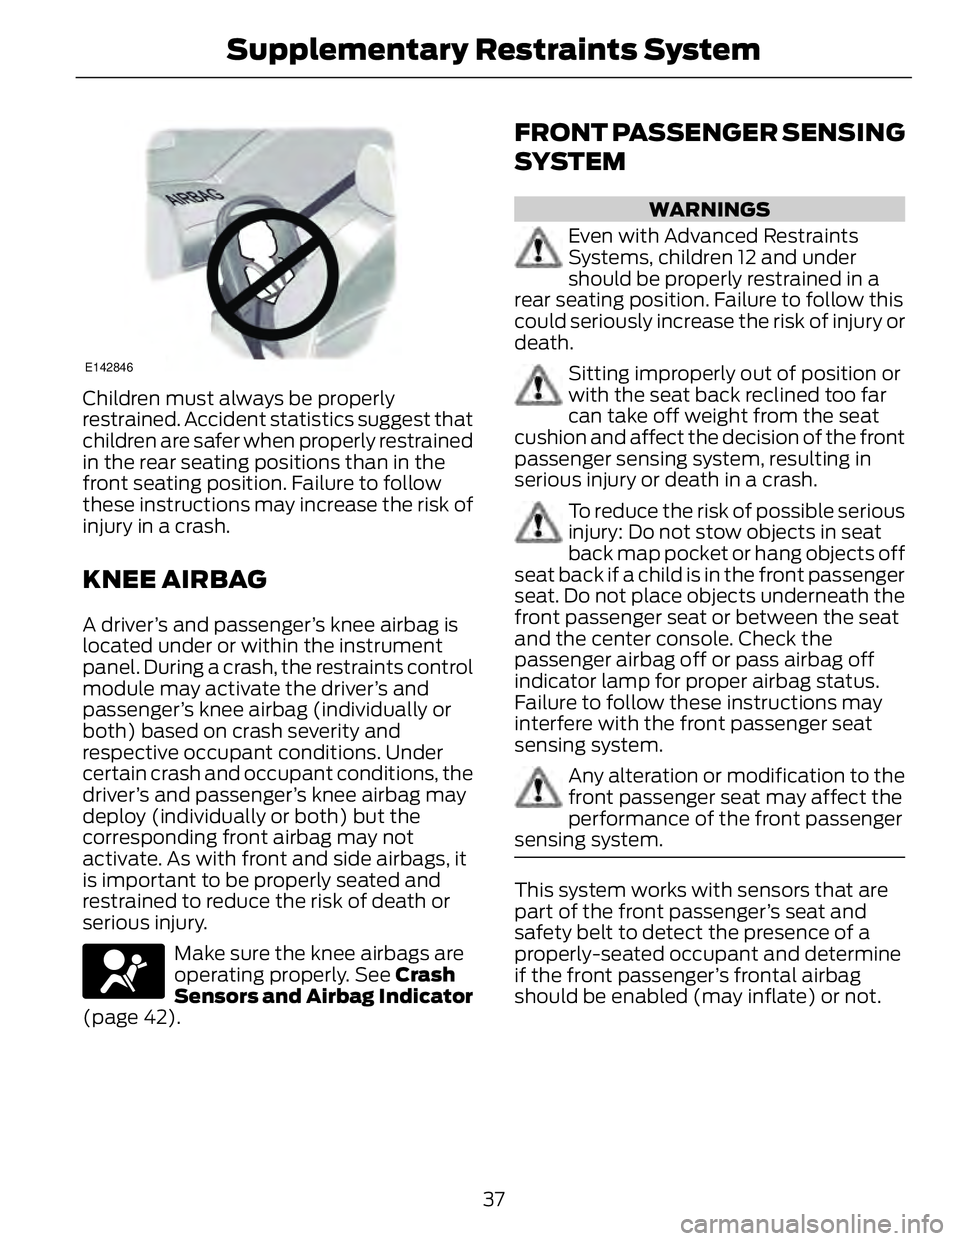
Children must always be properly
restrained. Accident statistics suggest that
children are safer when properly restrained
in the rear seating positions than in the
front seating position. Failure to follow
these instructions may increase the risk of
injury in a crash.
KNEE AIRBAG A driver’s and passenger’s knee airbag is
located under or within the instrument
panel. During a crash, the restraints control
module may activate the driver’s and
passenger’s knee airbag (individually or
both) based on crash severity and
respective occupant conditions. Under
certain crash and occupant conditions, the
driver’s and passenger’s knee airbag may
deploy (individually or both) but the
corresponding front airbag may not
activate. As with front and side airbags, it
is important to be properly seated and
restrained to reduce the risk of death or
serious injury.
Make sure the knee airbags are
operating properly. See Crash
Sensors and Airbag Indicator
(page 42). FRONT PASSENGER SENSING
SYSTEM WARNINGS
Even with Advanced Restraints
Systems, children 12 and under
should be properly restrained in a
rear seating position. Failure to follow this
could seriously increase the risk of injury or
death.
Sitting improperly out of position or
with the seat back reclined too far
can take off weight from the seat
cushion and affect the decision of the front
passenger sensing system, resulting in
serious injury or death in a crash.
To reduce the risk of possible serious
injury: Do not stow objects in seat
back map pocket or hang objects off
seat back if a child is in the front passenger
seat. Do not place objects underneath the
front passenger seat or between the seat
and the center console. Check the
passenger airbag off or pass airbag off
indicator lamp for proper airbag status.
Failure to follow these instructions may
interfere with the front passenger seat
sensing system.
Any alteration or modification to the
front passenger seat may affect the
performance of the front passenger
sensing system.
This system works with sensors that are
part of the front passenger’s seat and
safety belt to detect the presence of a
properly-seated occupant and determine
if the front passenger’s frontal airbag
should be enabled (may inflate) or not.
37Supplementary Restraints System
Page 42 of 473
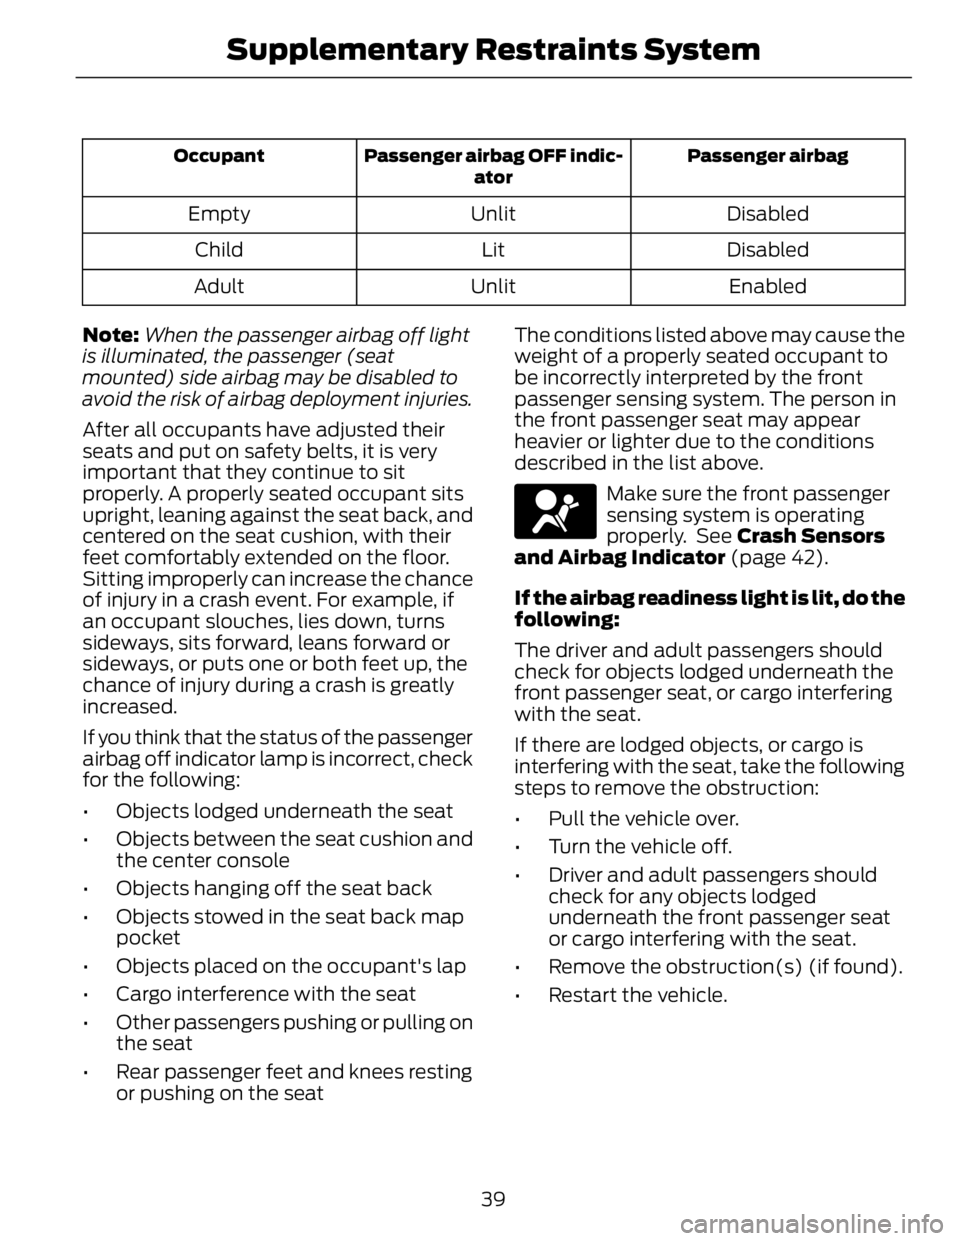
Passenger airbagPassenger airbag OFF indic-
atorOccupant
DisabledUnlitEmpty
DisabledLitChild
EnabledUnlitAdult
Note: When the passenger airbag off light
is illuminated, the passenger (seat
mounted) side airbag may be disabled to
avoid the risk of airbag deployment injuries.
After all occupants have adjusted their
seats and put on safety belts, it is very
important that they continue to sit
properly. A properly seated occupant sits
upright, leaning against the seat back, and
centered on the seat cushion, with their
feet comfortably extended on the floor.
Sitting improperly can increase the chance
of injury in a crash event. For example, if
an occupant slouches, lies down, turns
sideways, sits forward, leans forward or
sideways, or puts one or both feet up, the
chance of injury during a crash is greatly
increased.
If you think that the status of the passenger
airbag off indicator lamp is incorrect, check
for the following:
• Objects lodged underneath the seat
• Objects between the seat cushion and
the center console
• Objects hanging off the seat back
• Objects stowed in the seat back map
pocket
• Objects placed on the occupant's lap
• Cargo interference with the seat
• Other passengers pushing or pulling on
the seat
• Rear passenger feet and knees resting
or pushing on the seat The conditions listed above may cause the
weight of a properly seated occupant to
be incorrectly interpreted by the front
passenger sensing system. The person in
the front passenger seat may appear
heavier or lighter due to the conditions
described in the list above.
Make sure the front passenger
sensing system is operating
properly. See Crash Sensors
and Airbag Indicator (page 42).
If the airbag readiness light is lit, do the
following:
The driver and adult passengers should
check for objects lodged underneath the
front passenger seat, or cargo interfering
with the seat.
If there are lodged objects, or cargo is
interfering with the seat, take the following
steps to remove the obstruction:
• Pull the vehicle over.
• Turn the vehicle off.
• Driver and adult passengers should
check for any objects lodged
underneath the front passenger seat
or cargo interfering with the seat.
• Remove the obstruction(s) (if found).
• Restart the vehicle.
39Supplementary Restraints System
Page 62 of 473
Anti-Scan Feature
The keypad will go into an anti-scan mode
if you enter the wrong code seven times
(35 consecutive button presses). This
mode disables the keypad for one minute
and the keypad lamp will flash.
The anti-scan feature will turn off after:
• one minute of keypad inactivity
• pressing the unlock button on the
remote control
• switching the ignition on
• unlocking your vehicle using intelligent
access.
Unlocking and Locking the Doors
To Unlock the Driver Door
Enter the factory-set 5-digit code or your
personal code. You must press each
number within five seconds of each other.
The interior lamps will illuminate.
Note: All doors will unlock if you enable the
all-door unlocking mode. See Locking and
Unlocking (page 54).
To Unlock All Doors
Enter the factory-set code or your personal
code, then press 3·4 within five seconds.
To Lock All Doors
Press and hold 7·8 and 9·0 at the same
time (with the driver door closed). You do
not need to enter the keypad code first.
To Release the Trunk
Enter the factory-set code or your personal
code, then press 5·6 within five seconds.
Displaying the Factory Set Code
With Integrated Keyhead Transmitters
Note: You will need to have two
programmed passive anti-theft keys for this
procedure. To display the factory-set code in the
information display:
1. Insert a key into the ignition and switch
the ignition on for a few seconds.
2. Switch the ignition off and remove the
key.
3. Insert the second key into the ignition
and switch the ignition on.
The factory-set code will display for a few
seconds.
Note: The code may not display until after
any other warning messages first display.
With Intelligent Access Keys
Note: You will need to have two
programmed intelligent access keys for this
procedure.
To display the factory-set code in the
information display:
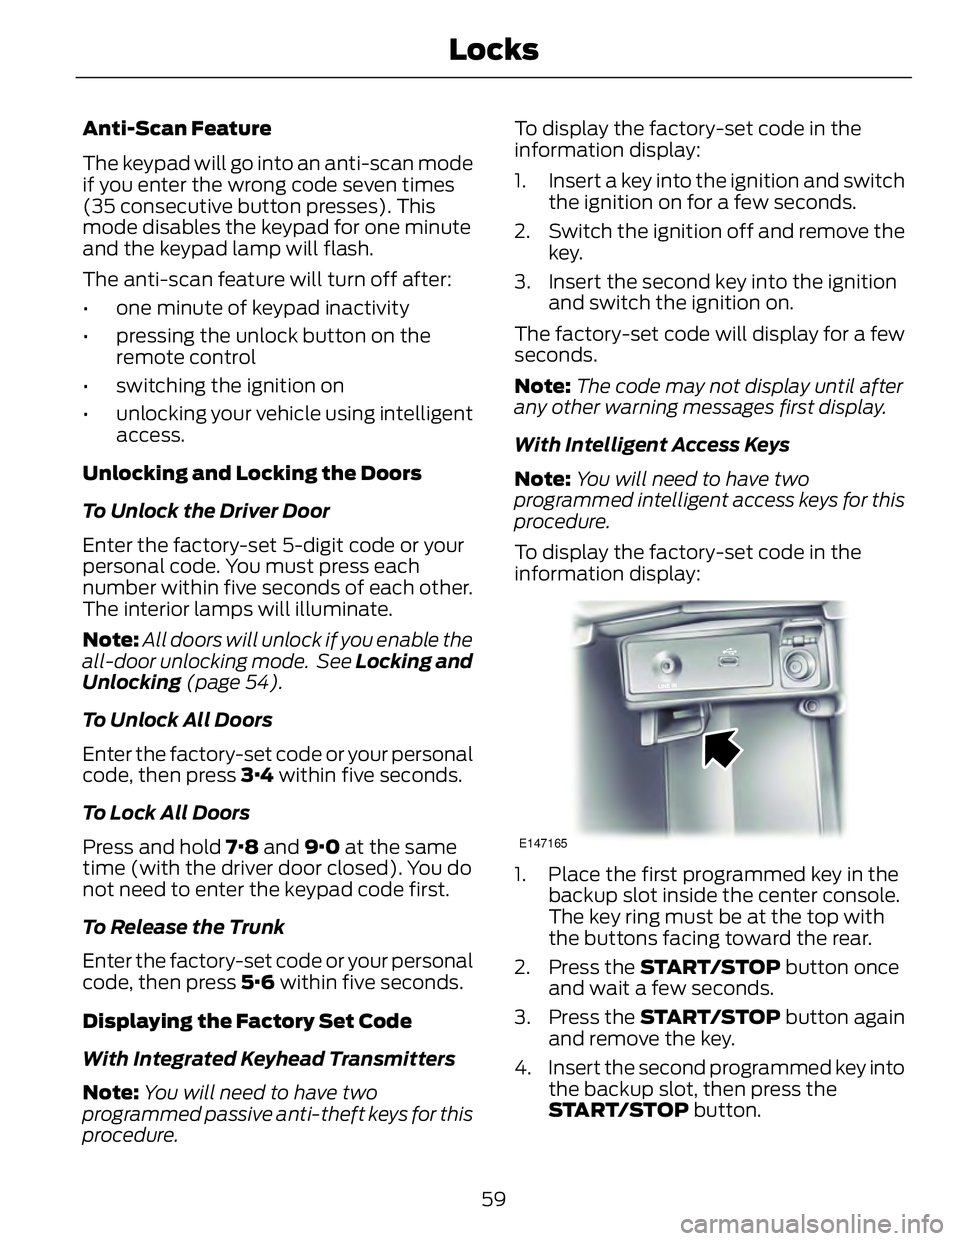
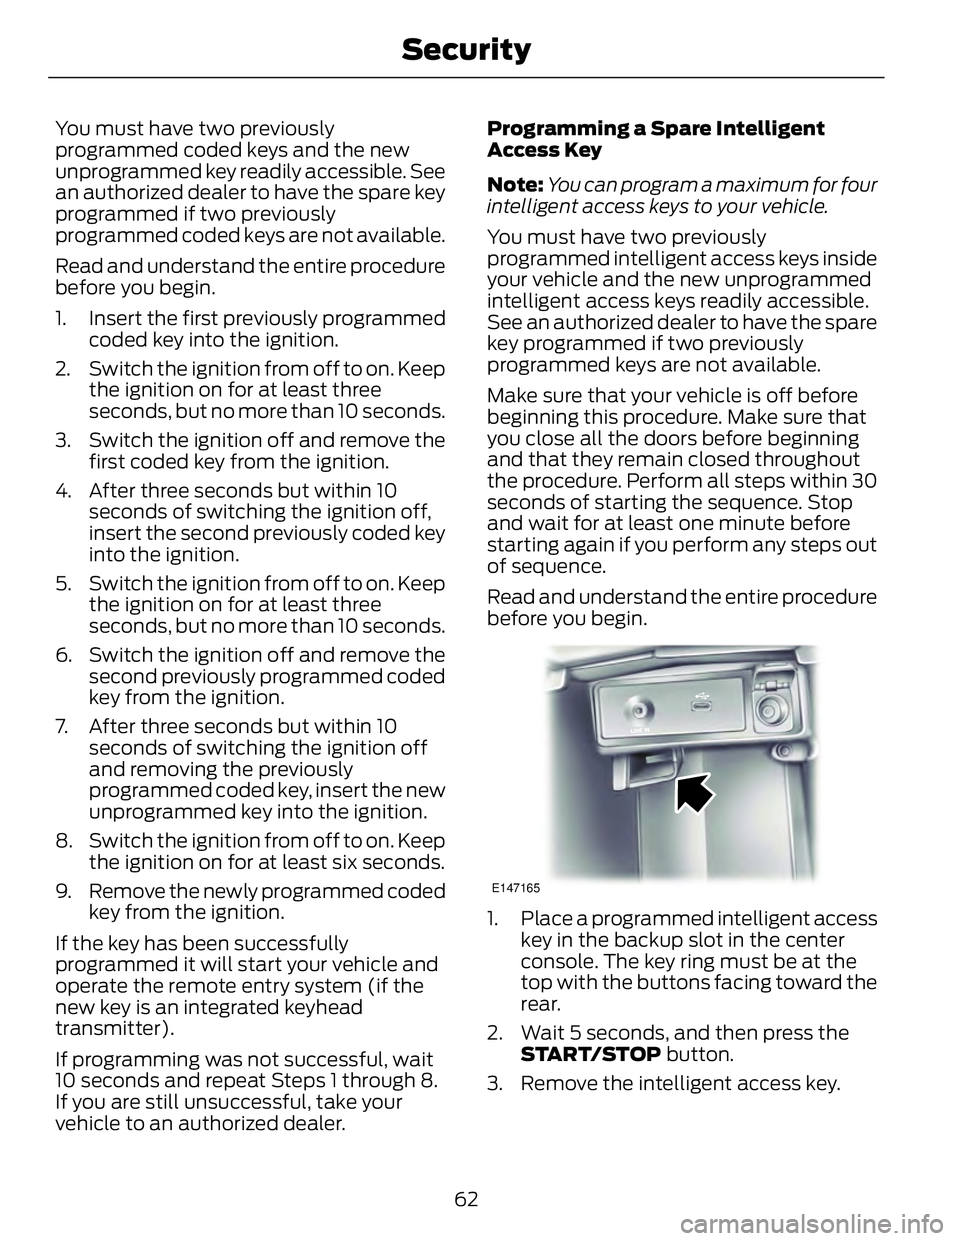
E147165
1. Place the first programmed key in the
backup slot inside the center console.
The key ring must be at the top with
the buttons facing toward the rear.
2. Press the START/STOP button once
and wait a few seconds.
3. Press the START/STOP button again
and remove the key.
4. Insert the second programmed key into
the backup slot, then press the
START/STOP button.
59Locks
Page 65 of 473
You must have two previously
programmed coded keys and the new
unprogrammed key readily accessible. See
an authorized dealer to have the spare key
programmed if two previously
programmed coded keys are not available.
Read and understand the entire procedure
before you begin.
1. Insert the first previously programmed
coded key into the ignition.
2. Switch the ignition from off to on. Keep
the ignition on for at least three
seconds, but no more than 10 seconds.
3. Switch the ignition off and remove the
first coded key from the ignition.
4. After three seconds but within 10
seconds of switching the ignition off,
insert the second previously coded key
into the ignition.
5. Switch the ignition from off to on. Keep
the ignition on for at least three
seconds, but no more than 10 seconds.
6. Switch the ignition off and remove the
second previously programmed coded
key from the ignition.
7. After three seconds but within 10
seconds of switching the ignition off
and removing the previously
programmed coded key, insert the new
unprogrammed key into the ignition.
8. Switch the ignition from off to on. Keep
the ignition on for at least six seconds.
9. Remove the newly programmed coded
key from the ignition.
If the key has been successfully
programmed it will start your vehicle and
operate the remote entry system (if the
new key is an integrated keyhead
transmitter).
If programming was not successful, wait
10 seconds and repeat Steps 1 through 8.
If you are still unsuccessful, take your
vehicle to an authorized dealer. Programming a Spare Intelligent
Access Key
Note: You can program a maximum for four
intelligent access keys to your vehicle.
You must have two previously
programmed intelligent access keys inside
your vehicle and the new unprogrammed
intelligent access keys readily accessible.
See an authorized dealer to have the spare
key programmed if two previously
programmed keys are not available.
Make sure that your vehicle is off before
beginning this procedure. Make sure that
you close all the doors before beginning
and that they remain closed throughout
the procedure. Perform all steps within 30
seconds of starting the sequence. Stop
and wait for at least one minute before
starting again if you perform any steps out
of sequence.
Read and understand the entire procedure
before you begin.
E147165
1. Place a programmed intelligent access
key in the backup slot in the center
console. The key ring must be at the
top with the buttons facing toward the
rear.
2. Wait 5 seconds, and then press the
START/STOP button.
3. Remove the intelligent access key.
62Security
Page 80 of 473
Note: Do not clean the housing or glass of
any mirror with harsh abrasives, fuel or other
petroleum or ammonia-based cleaning
products.
You can adjust the interior mirror to your
preference. Some mirrors also have a
second pivot point. This lets you move the
mirror head up or down and from side to
side.
Pull the tab below the mirror toward you
to reduce glare at night.
Auto-Dimming Mirror (If Equipped)
Note: Do not block the sensors on the front
and back of the mirror. Mirror performance
may be affected. A rear center passenger or
raised rear center head restraint may also
block light from reaching the sensor.
The mirror will dim automatically to reduce
glare when bright lights are detected from
behind your vehicle. It will automatically
return to normal reflection when you select
reverse gear to make sure you have a clear
view when backing up.
SUN VISORS
E138666
Rotate the sun visor toward the side
window and extend it rearward for extra
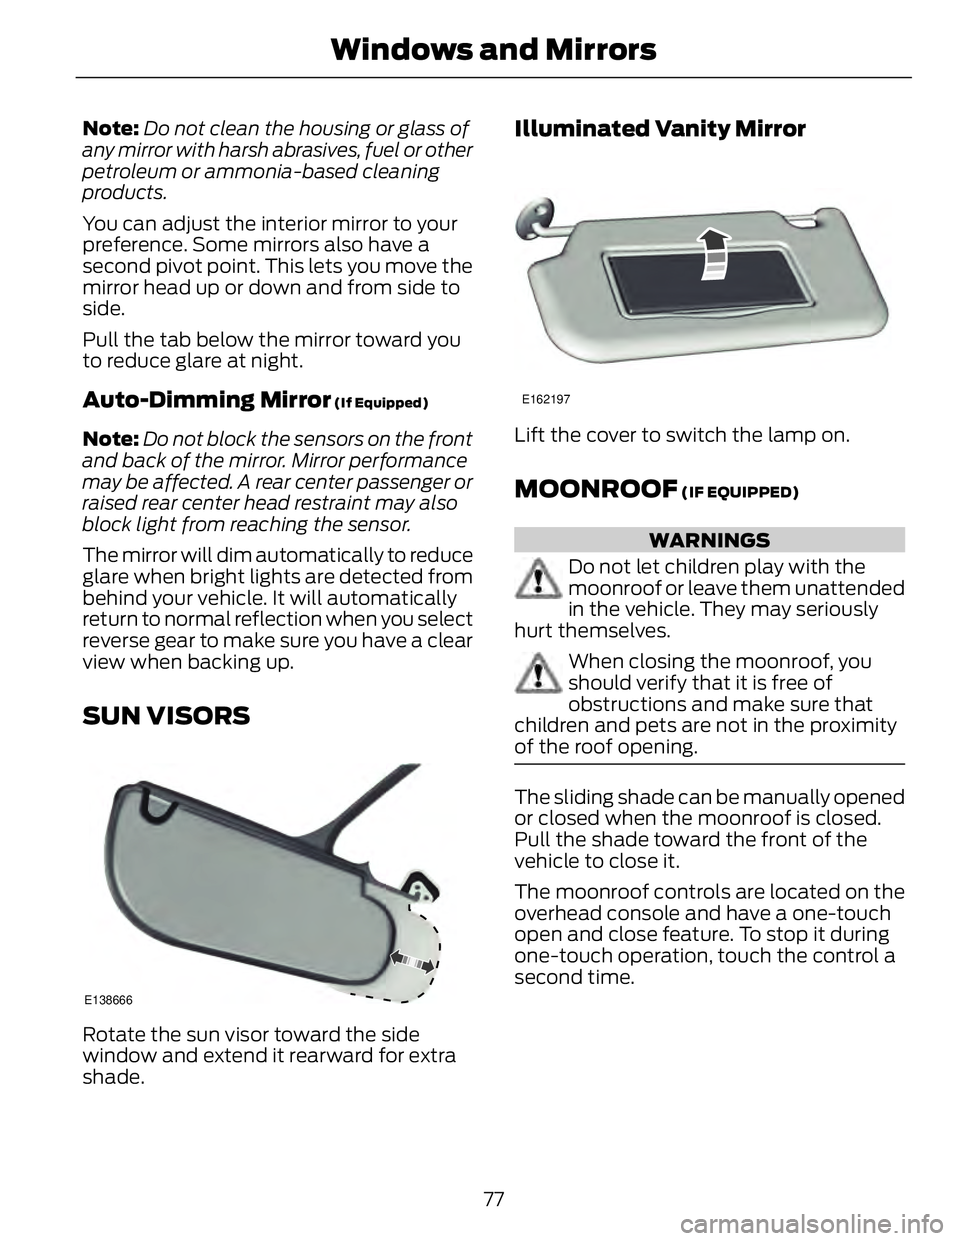
shade. Illuminated Vanity Mirror E162197
Lift the cover to switch the lamp on.
MOONROOF (IF EQUIPPED)
WARNINGS
Do not let children play with the
moonroof or leave them unattended
in the vehicle. They may seriously
hurt themselves.
When closing the moonroof, you
should verify that it is free of
obstructions and make sure that
children and pets are not in the proximity
of the roof opening.
The sliding shade can be manually opened
or closed when the moonroof is closed.
Pull the shade toward the front of the
vehicle to close it.
The moonroof controls are located on the
overhead console and have a one-touch
open and close feature. To stop it during
one-touch operation, touch the control a
second time.
77Windows and Mirrors
Page 136 of 473
12 Volt DC Power Point WARNING
Do not plug optional electrical
accessories into the cigar lighter
socket (if equipped). Improper use
of the lighter can cause damage not
covered by y our warranty, and can result
in fire or serious injury.
Note: If used when the vehicle is not
running, the battery will discharge. There
may be insufficient power to restart your
vehicle.
Note: Do not insert objects other than an
accessory plug into the power point. This
will damage the outlet and blow the fuse.
Note: Do not hang any type of accessory or
accessory bracket from the plug.
Note: Do not use the power point over the
vehicle capacity of 12 volt DC 180 watts or
a fuse may blow.
Note: Do not use the power point for
operating a cigar lighter element.
Note: Improper use of the power point can
cause damage not covered by your
warranty.
Note: Always keep the power point caps
closed when not in use.
Run the vehicle for full capacity use of the
power point. To prevent the battery from
discharging accidentally:
• Do not use the power point longer than
necessary when the vehicle is not
running.
• Do not leave devices plugged in
overnight or when you park your vehicle
for extended periods.
Locations
Power points may be in the following
locations: • in the front of the center console
• inside the center console storage bin
• on the rear of the center console.
110 Volt AC Power Point (If Equipped)
WARNING
Do not keep electrical devices
plugged in the power point whenever
the device is not in use. Do not use
any extension cord with the 110 volt AC
power point, since it will defeat the safety
protection design. Doing so my cause the
power point to overload due to powering
multiple devices that can reach beyond
the 150 watt load limit and could result in
fire or serious injury.
Note: Keep the vehicle running to use the
power point.
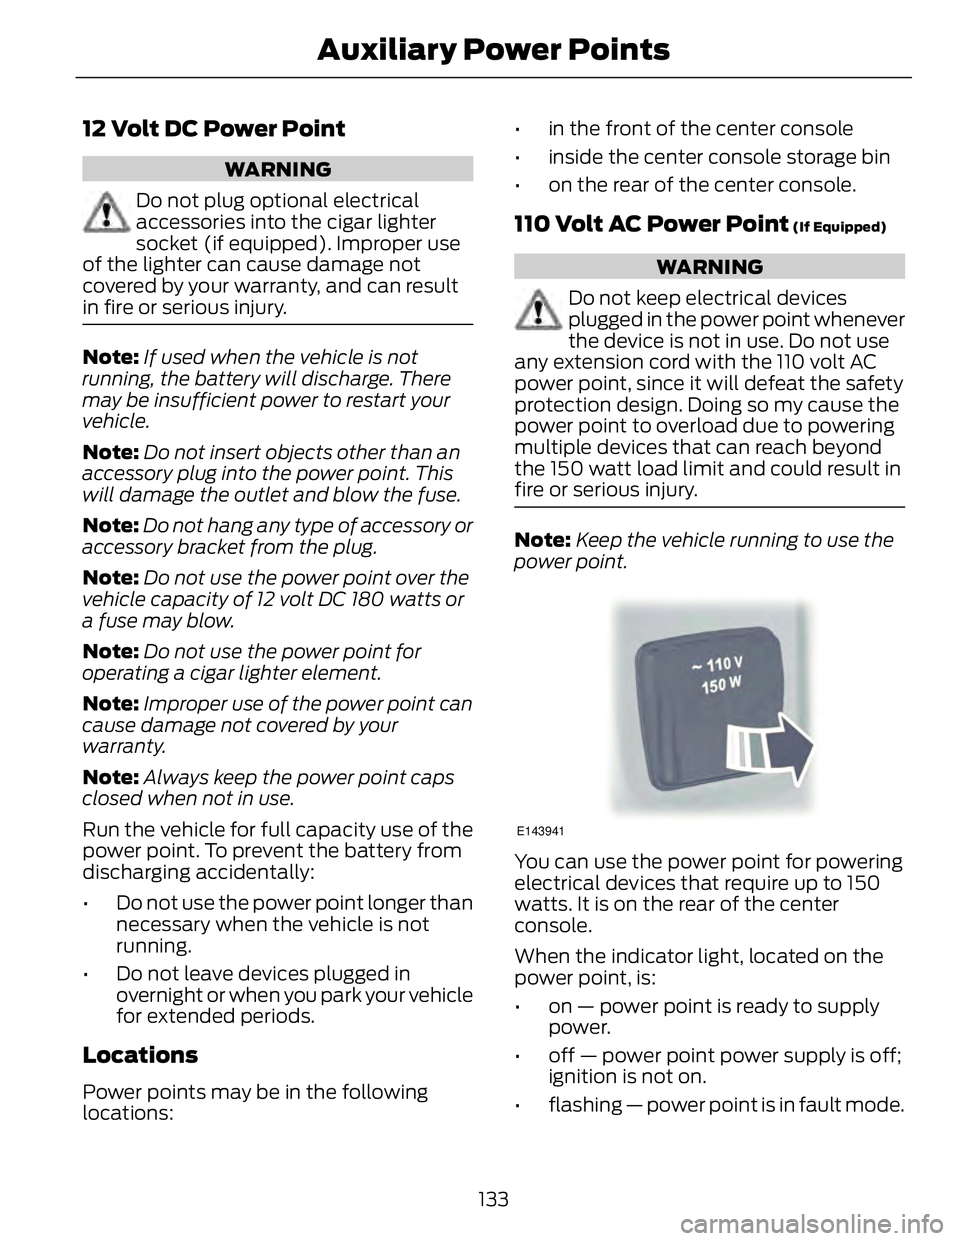
E143941
You can use the power point for powering
electrical devices that require up to 150
watts. It is on the rear of the center
console.
When the indicator light, located on the
power point, is:
• on — power point is ready to supply
power.
• off — power point power supply is off;
ignition is not on.
• flashing — power point is in fault mode.
133Auxiliary Power Points
Page 138 of 473
CENTER CONSOLE Stow items in the cupholder carefully as
items may become loose during hard
braking, acceleration or collisions, including
hot drinks which may spill.
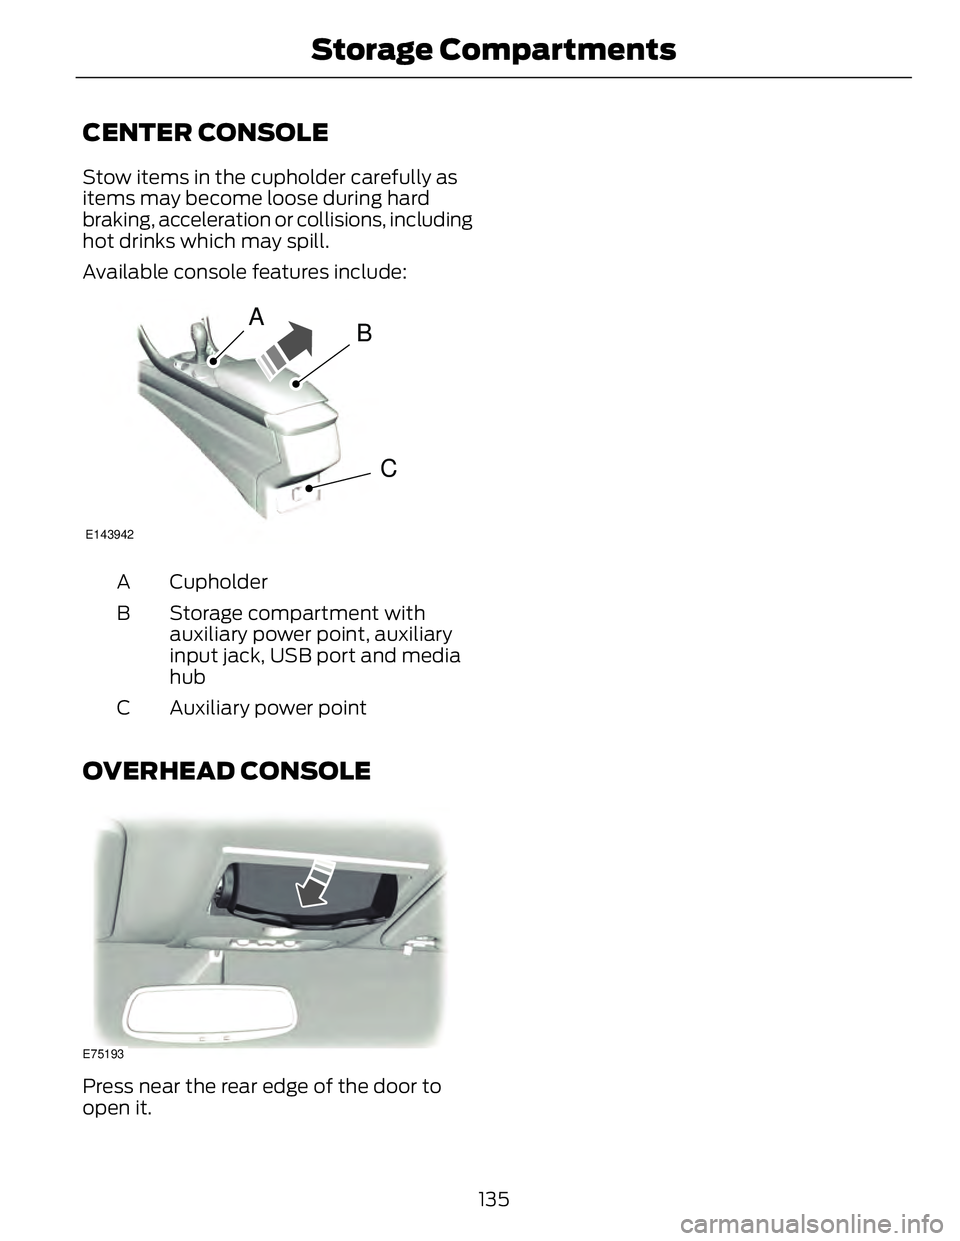
Available console features include:
A
B
CE143942
CupholderA
Storage compartment with
auxiliary power point, auxiliary
input jack, USB port and media
hubB
Auxiliary power pointC
OVERHEAD CONSOLE
E75193
Press near the rear edge of the door to
open it.
135Storage C ompartments
Page 141 of 473
Note: You must have your intelligent access
key in the vehicle in order to shift the
transmission out of position P .
1. Fully press the brake pedal.
2. Press the button.
Note: The green ready indicator illuminates
letting you know that the vehicle is ready
for driving. Since your vehicle is equipped
with a silent key start, the engine may not
start at the time of the vehicle start. See
Hybrid Electric Vehicle (page 142).
The system does not function if:
• The key frequencies are jammed.
• The key battery has no charge.
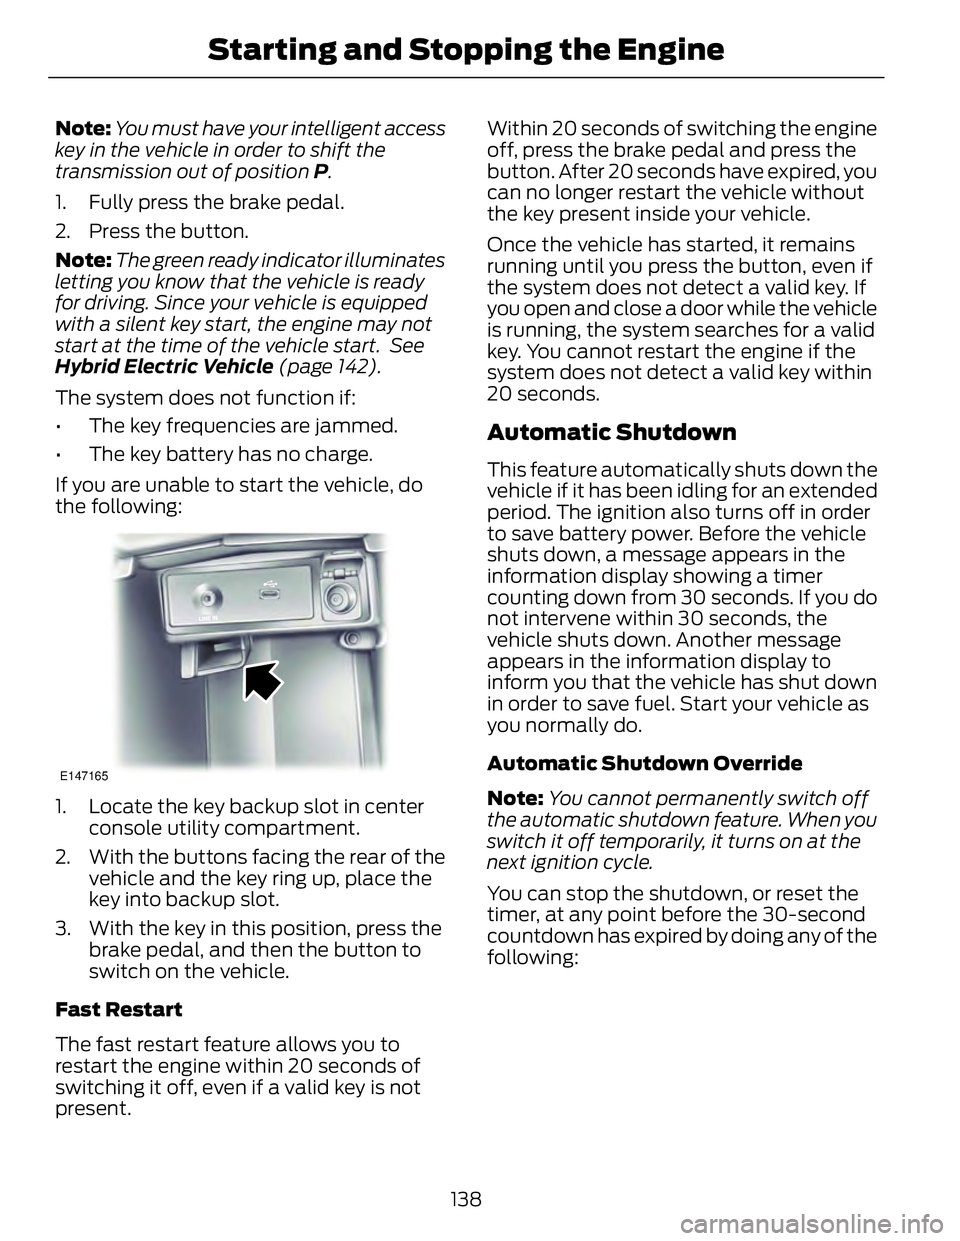
If you are unable to start the vehicle, do
the following: E147165
1. Locate the key backup slot in center
console utility compartment.
2. With the buttons facing the rear of the
vehicle and the key ring up, place the
key into backup slot.
3. With the key in this position, press the
brake pedal, and then the button to
switch on the vehicle.
Fast Restart
The fast restart feature allows you to
restart the engine within 20 seconds of
switching it off, even if a valid key is not
present. Within 20 seconds of switching the engine
off, press the brake pedal and press the
button. After 20 seconds have expired, you
can no longer restart the vehicle without
the key present inside your vehicle.
Once the vehicle has started, it remains
running until you press the button, even if
the system does not detect a valid key. If
you open and close a door while the vehicle
is running, the system searches for a valid
key. You cannot restart the engine if the
system does not detect a valid key within
20 seconds.
Automatic Shutdown This feature automatically shuts down the
vehicle if it has been idling for an extended
period. The ignition also turns off in order
to save battery power. Before the vehicle
shuts down, a message appears in the
information display showing a timer
counting down from 30 seconds. If you do
not intervene within 30 seconds, the
vehicle shuts down. Another message
appears in the information display to
inform you that the vehicle has shut down
in order to save fuel. Start your vehicle as
you normally do.
Automatic Shutdown Override
Note: You cannot permanently switch off
the automatic shutdown feature. When you
switch it off temporarily, it turns on at the
next ignition cycle.
You can stop the shutdown, or reset the
timer, at any point before the 30-second
countdown has expired by doing any of the
following:
138Starting and Stopping the Engine
Page 145 of 473
HYBRID ELECTRIC VEHICLE Plug-in Power Mode and Hybrid
Mode (Fusion Energi Only) You must plug in your Fusion Energi vehicle
regularly for optimal use of the high
voltage battery's extended range
capability. When you charge your vehicle,
you add electrical energy that is then used
to propel the vehicle in plug-in power
mode. You can view your estimated
electric range in this mode from the
enhanced battery gauge on the instrument
panel display. The system maximizes the
use of electric-only operation in plug-in
power mode. System conditions may
require engine operation; however, the
system uses plug-in power whenever
possible.
When your plug-in power has been
depleted, the powertrain system will
automatically switch to hybrid mode. Your
battery gauge will show an electric range
of zero before transitioning to a simple
battery graphic upon entering hybrid mode.
Hybrid mode uses both the gasoline engine
and electric motor to power your vehicle
and maximize fuel economy as with Fusion
Hybrid.
EV Modes (Fusion Energi Only) E144814
Your vehicle contains selectable
EV modes through the EV button
on the center console.
These modes are available when the
vehicle can run under high voltage battery
power. With the vehicle in driving mode,
you can change EV modes with each press
of the EV button. The current mode
displays in the left hand instrument cluster
screen. Auto EV E155152
This mode provides an
automatic use of high voltage
battery power during the drive,
staying in electric mode when possible and
running the engine when needed. This
mode will be the only one available if the
plug-in power has been depleted.
EV Now E144814
This mode provides an electric
only driving experience using
plug-in power. The left-hand
information display will change to an
Energy Use screen that supplies EV specific
tools and functions. The vehicle may
accelerate more slowly and the top speed
may be lower than in Auto mode. Your
engine may be enabled at any time by
using one of the following methods:
1. Press the OK button on the left 5–way
steering wheel control while viewing
the EV screen. The vehicle will enable
the engine as needed, and will
automatically return to EV Now after
eight seconds or when the engine is no
longer needed.
2. Press the accelerator pedal fully. A pop
up message stating Press OK to
Enable Engine will appear. Press OK
on the left steering wheel button to
activate as needed. The message will
disappear if you release the accelerator
pedal.
3. Press the EV button. This will change
the mode to EV Later and permit
engine operation.
The vehicle may automatically enter
Engine Enabled mode if system conditions
require it. A message Engine Enabled for
System Performance will display if this
occurs. This is normal function, and your
vehicle will return to EV Now when
possible.
142Unique Driving Characteristics