ECO mode FORD MONDEO 2006 2.G Owners Manual
[x] Cancel search | Manufacturer: FORD, Model Year: 2006, Model line: MONDEO, Model: FORD MONDEO 2006 2.GPages: 198, PDF Size: 4.69 MB
Page 7 of 198
Downloaded from www.Manualslib.com manuals search engine ABOUT THIS HANDBOOK
Congratulations on acquiring yournew Ford. Please take the time to getwell acquainted with your vehicle byreading your owner literature. Themore you know and understandabout your vehicle the greater thesafety, economy, and pleasure youwill derive from driving it.
The Owner’s handbookdescribes every option andmodel variant available inevery European country andtherefore some of the itemscovered may not apply to yourparticular vehicle.Furthermore, due to printingcycles it may describe optionsbefore they are generallyavailable.
Regular servicing of your vehiclehelps maintain both itsroadworthiness and its resale value.A network of more than 7 000 Fordauthorized repairers throughoutEurope can help you with theirprofessional servicing expertise.
Their specially trained personnel arebest qualified to service your vehicleproperly and expertly. Also, they aresupported by a wide range of highlyspecialised tools and equipmentspecially developed for servicing Fordvehicles.
Note: Remember to pass on theOwner’s handbook when resellingthe vehicle. It is an integral part of thevehicle.
SYMBOLS GLOSSARY
Warning symbols in thishandbook
WARNING
How can you reduce the risk ofpersonal injury and preventpossible damage to others, yourvehicle and its equipment? In thishandbook, answers to suchquestions are contained incomments highlighted by thewarning triangle symbol.
Note: Important information is alsogiven in paragraphs starting with thehighlighted word Note:
Warning symbols on yourvehicle
When you see this symbol,it is imperative that youconsult the relevant sectionof this handbook before touching orattempting adjustment of any kind.
PARTS AND
ACCESSORIES
Important: Ford genuine parts andaccessories have been specificallydesigned for Ford vehicles. They arededicated for your Ford vehicle.
5
Introduction
Page 31 of 198
Downloaded from www.Manualslib.com manuals search engine The restraint system, with beltpretensioners in the front seat, helpsto reduce the risk of serious injury ina head-on collision. During a seriouscrash the seat belts are pretensionedto help reduce slack in the belt.
The pretensioners are triggered infrontal and side collisions providedthe threshold is reached. In rearcollisions the pretensioners are nottriggered. The passenger’spretensioner is also disabled if thepassenger’s seat is empty, even ifthe passenger’s buckle is latched.
SEAT BELT REMINDER
When the vehicle’s speedexceeds 7 km/h (4 mph),the seat belt reminder lampwill illuminate and a chime will soundif the driver’s safety belt is unbuckled.The chime will stop after 10 minutes.The lamp will not go out until thedriver has fastened his/her safetybelt.
WARNING
Never sit on top of a buckledsafety belt to avoid the seat beltreminder function. The restraintsystem can only work properly ifpassengers have buckled up theirsafety belts.
Note: The seat belt reminderremains in stand−by mode after thedriver has fastened his/her safetybelt. It will be reactivated if the driverunbuckles his/her safety belt.
Deactivating the seat beltreminder
To deactivate the seat belt reminderfor one ignition cycle, buckle andunbuckle the seat belt within 3seconds with the ignition switchedon.
Contact your dealer to deactivate theseat belt reminder permanently andto reactivate it afterwards. Yourdealer will either provide you with therelevant information or will carry outthe deactivation/reactivation for you.
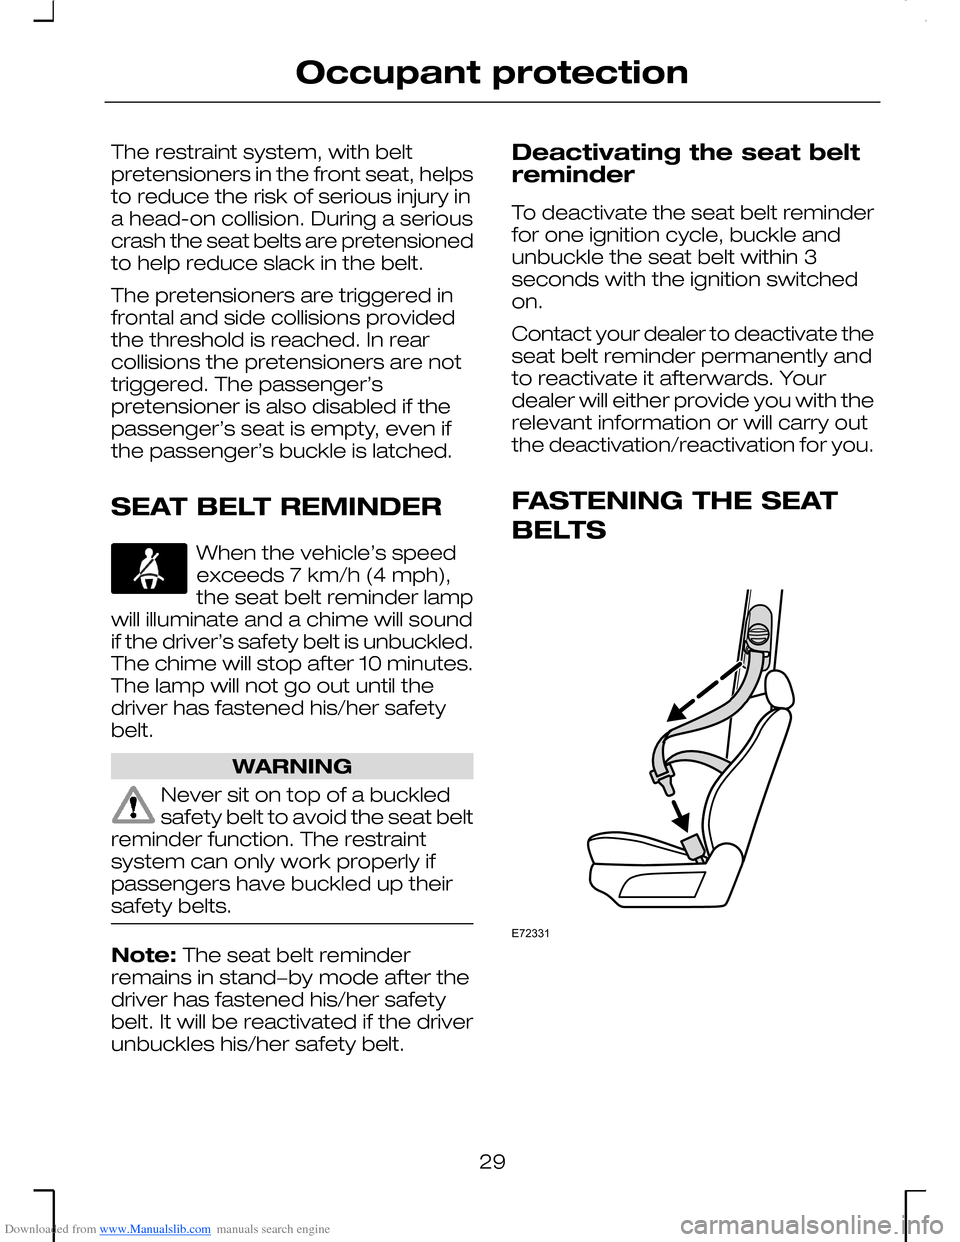
FASTENING THE SEAT
BELTS
29
Occupant protection E72331
Page 44 of 198
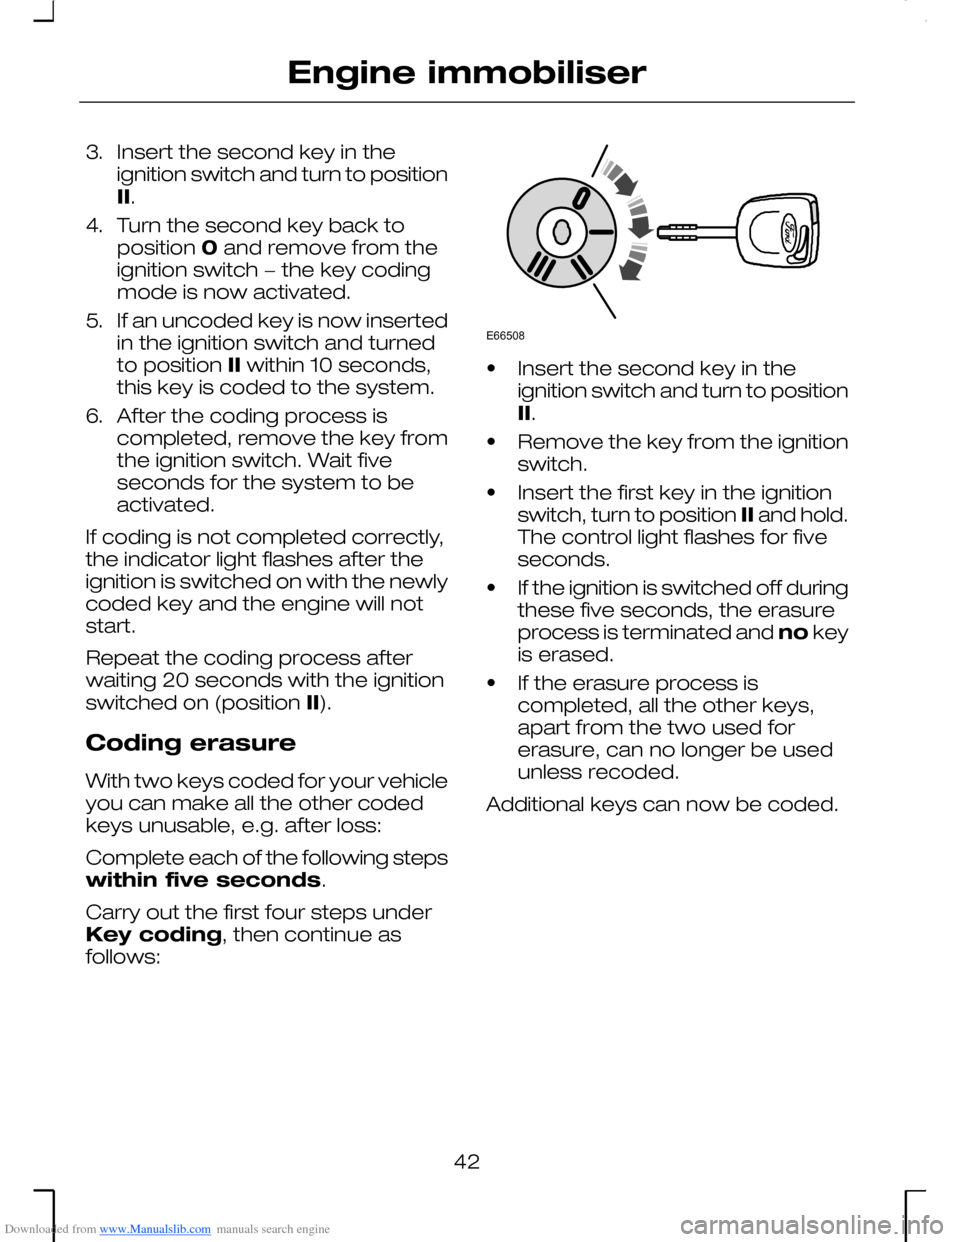
Downloaded from www.Manualslib.com manuals search engine 3.Insert the second key in theignition switch and turn to positionII.
4.Turn the second key back toposition 0 and remove from theignition switch − the key codingmode is now activated.
5.If an uncoded key is now insertedin the ignition switch and turnedto position II within 10 seconds,this key is coded to the system.
6.After the coding process iscompleted, remove the key fromthe ignition switch. Wait fiveseconds for the system to beactivated.
If coding is not completed correctly,the indicator light flashes after theignition is switched on with the newlycoded key and the engine will notstart.
Repeat the coding process afterwaiting 20 seconds with the ignitionswitched on (position II).
Coding erasure
With two keys coded for your vehicleyou can make all the other codedkeys unusable, e.g. after loss:
Complete each of the following stepswithin five seconds.
Carry out the first four steps underKey coding, then continue asfollows:
•Insert the second key in theignition switch and turn to positionII.
•Remove the key from the ignitionswitch.
•Insert the first key in the ignitionswitch, turn to position II and hold.The control light flashes for fiveseconds.
•If the ignition is switched off duringthese five seconds, the erasureprocess is terminated and no keyis erased.
•If the erasure process iscompleted, all the other keys,apart from the two used forerasure, can no longer be usedunless recoded.
Additional keys can now be coded.
42
Engine immobiliserE66508
Page 47 of 198
Downloaded from www.Manualslib.com manuals search engine The anti-theft alarm system for thetailgate is deactivated when theluggage compartment is unlockedwith a key (4-door models) or theremote control (all models). Afterclosure, the alarm is once againarmed.
Vehicles with 3.0 l Duratec-VE/-ST or 2.5 l Duratec-VEengine
Note: Unlocking a front door with akey will not deactivate this alarm.
On vehicles with enhanced security(certain markets only), the anti-theftalarm system is deactivated bypressing the unlock button on theremote control.
To deactivate with a non-remote key,open the driver’s door with themechanical key. This starts a 12second delay chime before the alarmsounds. During this period the alarmsystem can be deactivated by turningthe key in the ignition to position II.
45
Alarm
Page 86 of 198
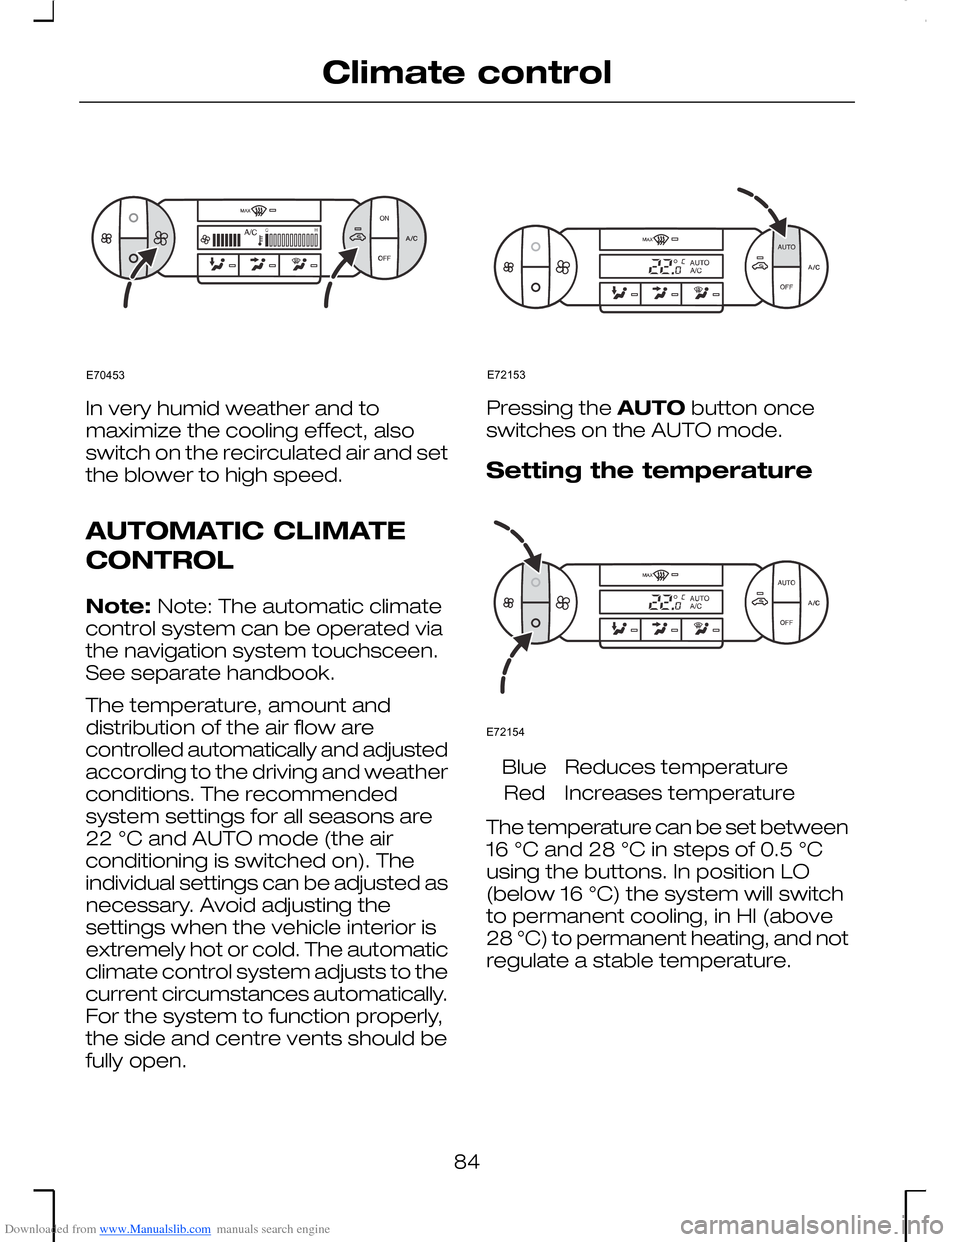
Downloaded from www.Manualslib.com manuals search engine In very humid weather and tomaximize the cooling effect, alsoswitch on the recirculated air and setthe blower to high speed.
AUTOMATIC CLIMATE
CONTROL
Note: Note: The automatic climatecontrol system can be operated viathe navigation system touchsceen.See separate handbook.
The temperature, amount anddistribution of the air flow arecontrolled automatically and adjustedaccording to the driving and weatherconditions. The recommendedsystem settings for all seasons are22 °C and AUTO mode (the airconditioning is switched on). Theindividual settings can be adjusted asnecessary. Avoid adjusting thesettings when the vehicle interior isextremely hot or cold. The automaticclimate control system adjusts to thecurrent circumstances automatically.For the system to function properly,the side and centre vents should befully open.
Pressing the AUTO button onceswitches on the AUTO mode.
Setting the temperature
Reduces temperatureBlue
Increases temperatureRed
The temperature can be set between16 °C and 28 °C in steps of 0.5 °Cusing the buttons. In position LO(below 16 °C) the system will switchto permanent cooling, in HI (above28 °C) to permanent heating, and notregulate a stable temperature.
84
Climate controlE70453 E72153 E72154
Page 87 of 198
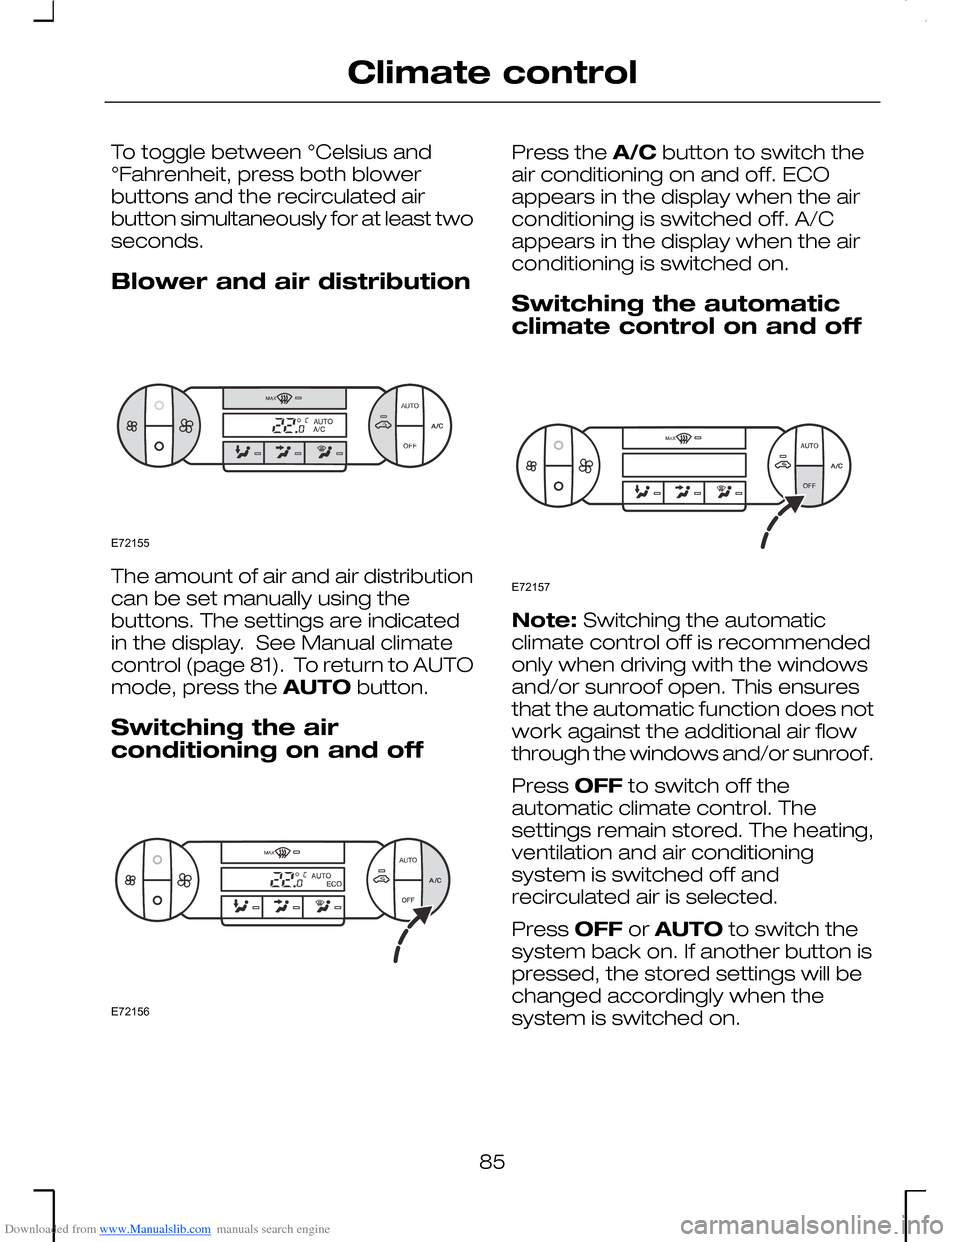
Downloaded from www.Manualslib.com manuals search engine To toggle between °Celsius and°Fahrenheit, press both blowerbuttons and the recirculated airbutton simultaneously for at least twoseconds.
Blower and air distribution
The amount of air and air distributioncan be set manually using thebuttons. The settings are indicatedin the display. See Manual climatecontrol (page 81). To return to AUTOmode, press the AUTO button.
Switching the airconditioning on and off
Press the A/C button to switch theair conditioning on and off. ECOappears in the display when the airconditioning is switched off. A/Cappears in the display when the airconditioning is switched on.
Switching the automaticclimate control on and off
Note: Switching the automaticclimate control off is recommendedonly when driving with the windowsand/or sunroof open. This ensuresthat the automatic function does notwork against the additional air flowthrough the windows and/or sunroof.
Press OFF to switch off theautomatic climate control. Thesettings remain stored. The heating,ventilation and air conditioningsystem is switched off andrecirculated air is selected.
Press OFF or AUTO to switch thesystem back on. If another button ispressed, the stored settings will bechanged accordingly when thesystem is switched on.
85
Climate controlE72155 E72156 E72157
Page 90 of 198
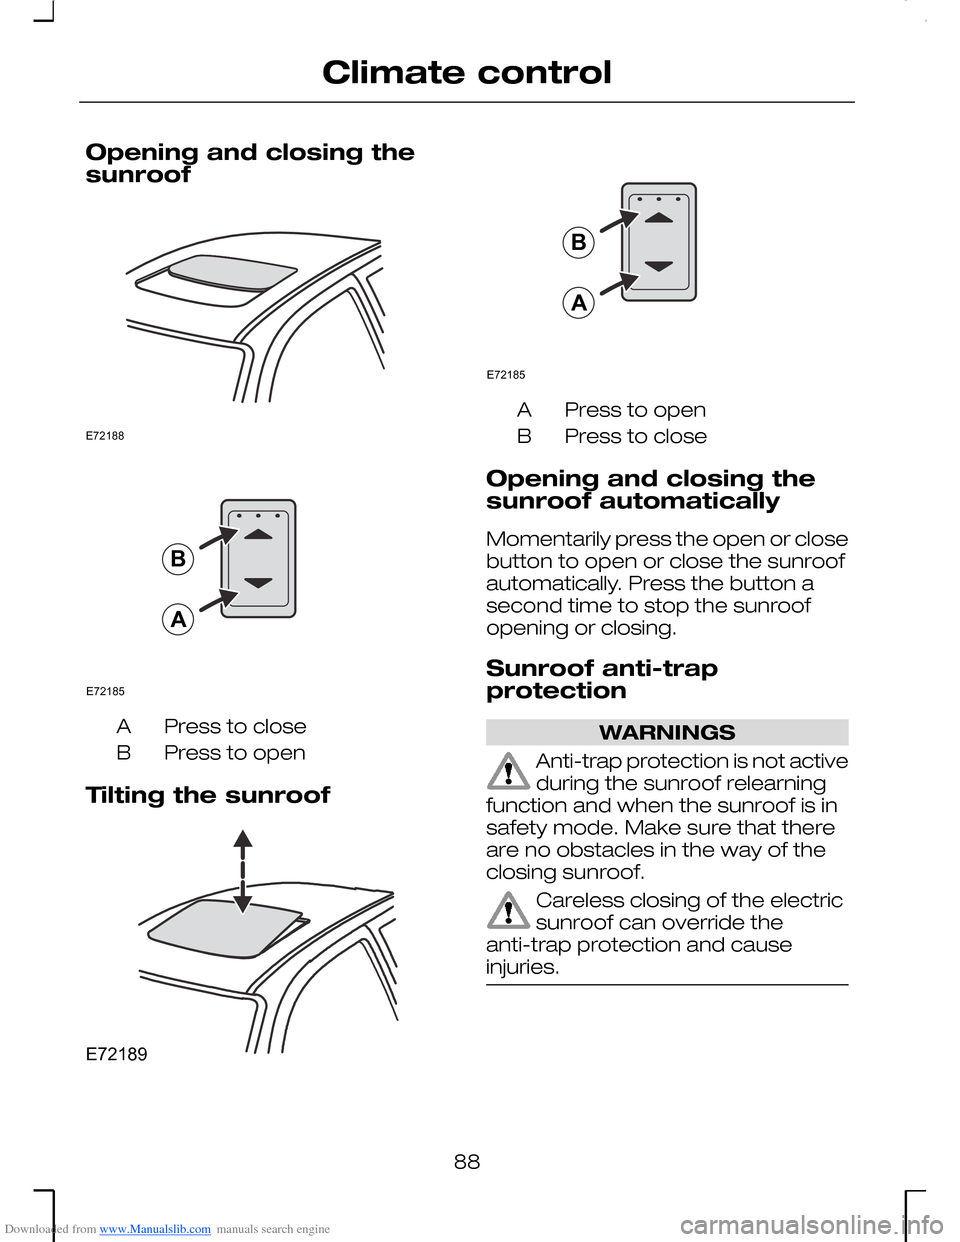
Downloaded from www.Manualslib.com manuals search engine Opening and closing thesunroof
Press to closeA
Press to openB
Tilting the sunroof
Press to openA
Press to closeB
Opening and closing thesunroof automatically
Momentarily press the open or closebutton to open or close the sunroofautomatically. Press the button asecond time to stop the sunroofopening or closing.
Sunroof anti-trapprotection
WARNINGS
Anti-trap protection is not activeduring the sunroof relearningfunction and when the sunroof is insafety mode. Make sure that thereare no obstacles in the way of theclosing sunroof.
Careless closing of the electricsunroof can override theanti-trap protection and causeinjuries.
88
Climate controlE72188 E72185BA E72189 E72185BA
Page 91 of 198
Downloaded from www.Manualslib.com manuals search engine The electric sunroof is equipped withanti-trap protection. The sunroof willstop automatically while closing andreverse some distance if there is anobstacle in the way.
To override anti-trap protection whenthere is a resistance, e. g. in thewinter, proceed as follows:
Close the sunroof twice until itreaches the resistance and let itreverse. Close the sunroof a thirdtime to the resistance. Briefly releasethe switch and press againimmediately. The sunroof will overridethe resistance and can then beclosed fully.
Sunroof safety mode
If the system detects a malfunction,it enters a safety mode. The sunroofwill move for only about 0.5 secondsat a time and then stop again. Closethe sunroof by pressing the buttonagain when the sunroof stopsmoving. When the rear of the sunroofis lifted, lift the rear all the way andthen close the sunroof. Have thesystem checked by an expertimmediately.
Sunroof relearning
In case the sunroof no longer closesproperly, follow this relearningprocedure:
•Tilt the rear of the sunroof as faras possible. Release the button.
•Press and hold the same buttonagain for 30 seconds until you seethe sunroof move.
•Release the button andimmediately press and hold itagain. The sunroof will close, openfully and then close again. Do notrelease the button before thesunroof has reached the closedposition for the second time.
If the button is not pressedcontinuously, the relearning functionwill be interrupted. Start theprocedure once more from thebeginning.
89
Climate control
Page 117 of 198
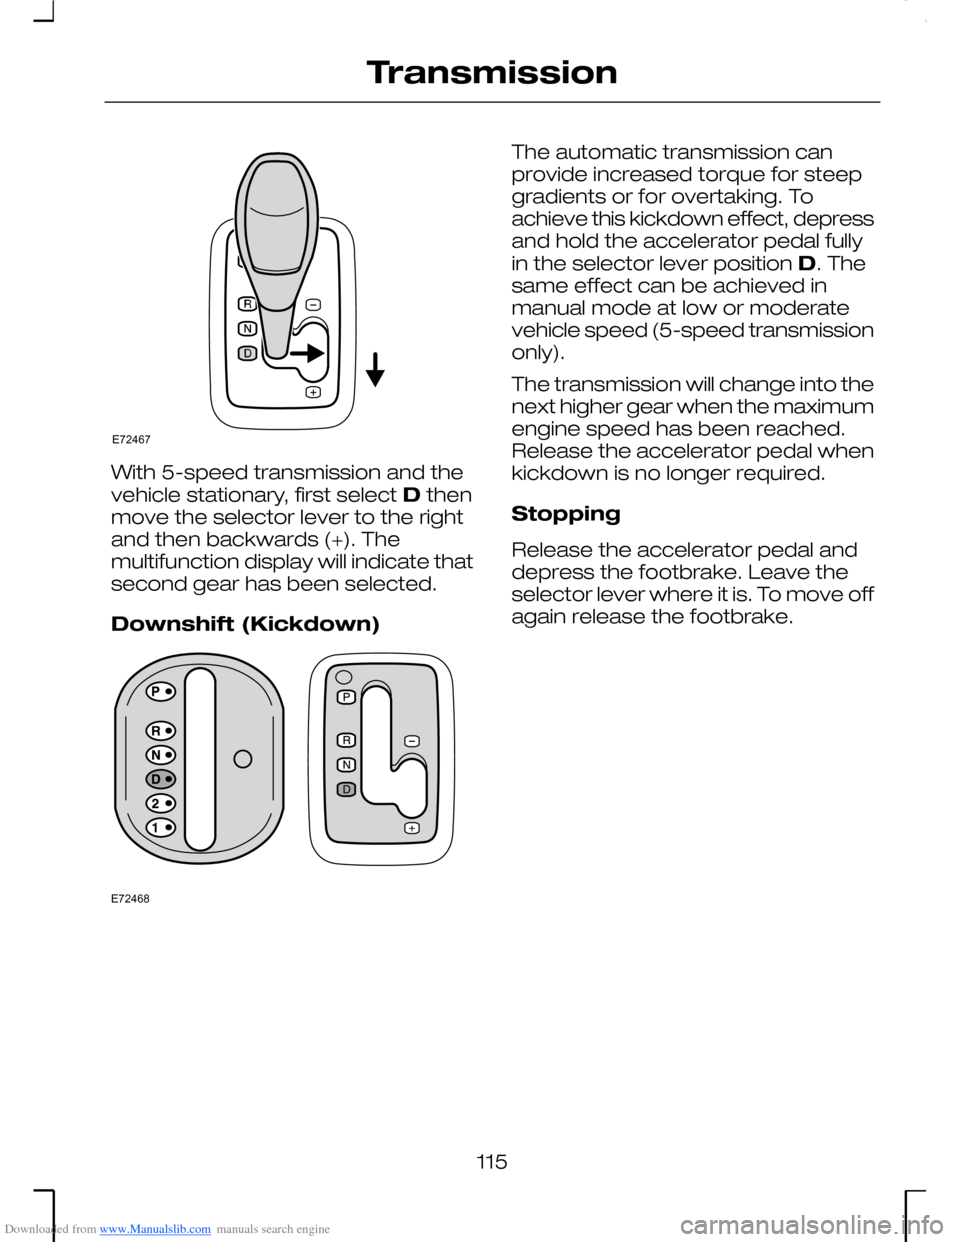
Downloaded from www.Manualslib.com manuals search engine With 5-speed transmission and thevehicle stationary, first select D thenmove the selector lever to the rightand then backwards (+). Themultifunction display will indicate thatsecond gear has been selected.
Downshift (Kickdown)
The automatic transmission canprovide increased torque for steepgradients or for overtaking. Toachieve this kickdown effect, depressand hold the accelerator pedal fullyin the selector lever position D. Thesame effect can be achieved inmanual mode at low or moderatevehicle speed (5-speed transmissiononly).
The transmission will change into thenext higher gear when the maximumengine speed has been reached.Release the accelerator pedal whenkickdown is no longer required.
Stopping
Release the accelerator pedal anddepress the footbrake. Leave theselector lever where it is. To move offagain release the footbrake.
115
TransmissionE72467 E72468
Page 118 of 198
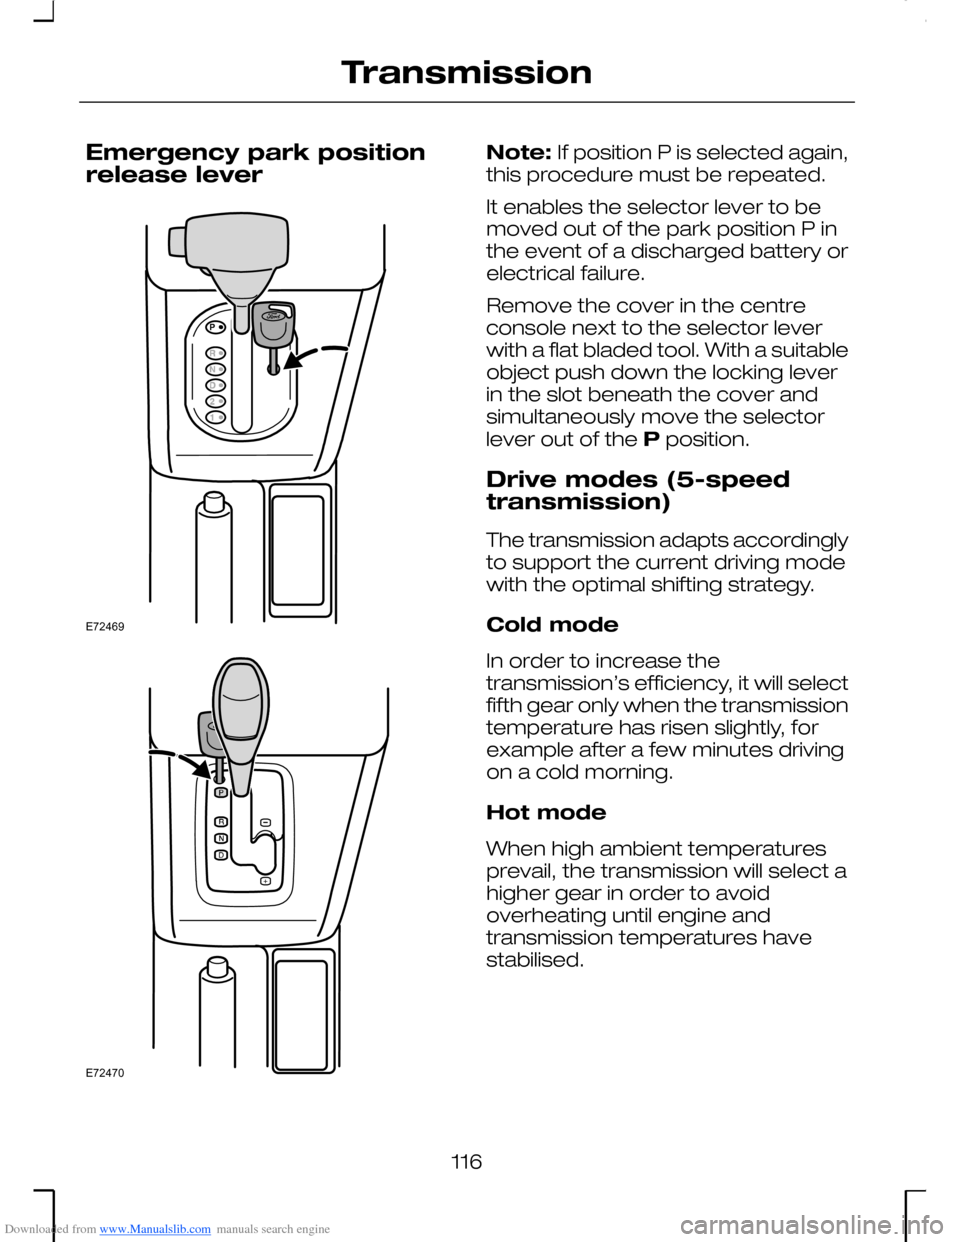
Downloaded from www.Manualslib.com manuals search engine Emergency park positionrelease lever
Note: If position P is selected again,this procedure must be repeated.
It enables the selector lever to bemoved out of the park position P inthe event of a discharged battery orelectrical failure.
Remove the cover in the centreconsole next to the selector leverwith a flat bladed tool. With a suitableobject push down the locking leverin the slot beneath the cover andsimultaneously move the selectorlever out of the P position.
Drive modes (5-speedtransmission)
The transmission adapts accordinglyto support the current driving modewith the optimal shifting strategy.
Cold mode
In order to increase thetransmission’s efficiency, it will selectfifth gear only when the transmissiontemperature has risen slightly, forexample after a few minutes drivingon a cold morning.
Hot mode
When high ambient temperaturesprevail, the transmission will select ahigher gear in order to avoidoverheating until engine andtransmission temperatures havestabilised.
116
TransmissionE72469 E72470