FORD POLICE INTERCEPTOR 2018 Warranty Guide
Manufacturer: FORD, Model Year: 2018, Model line: POLICE INTERCEPTOR, Model: FORD POLICE INTERCEPTOR 2018Pages: 364, PDF Size: 8.07 MB
Page 61 of 364
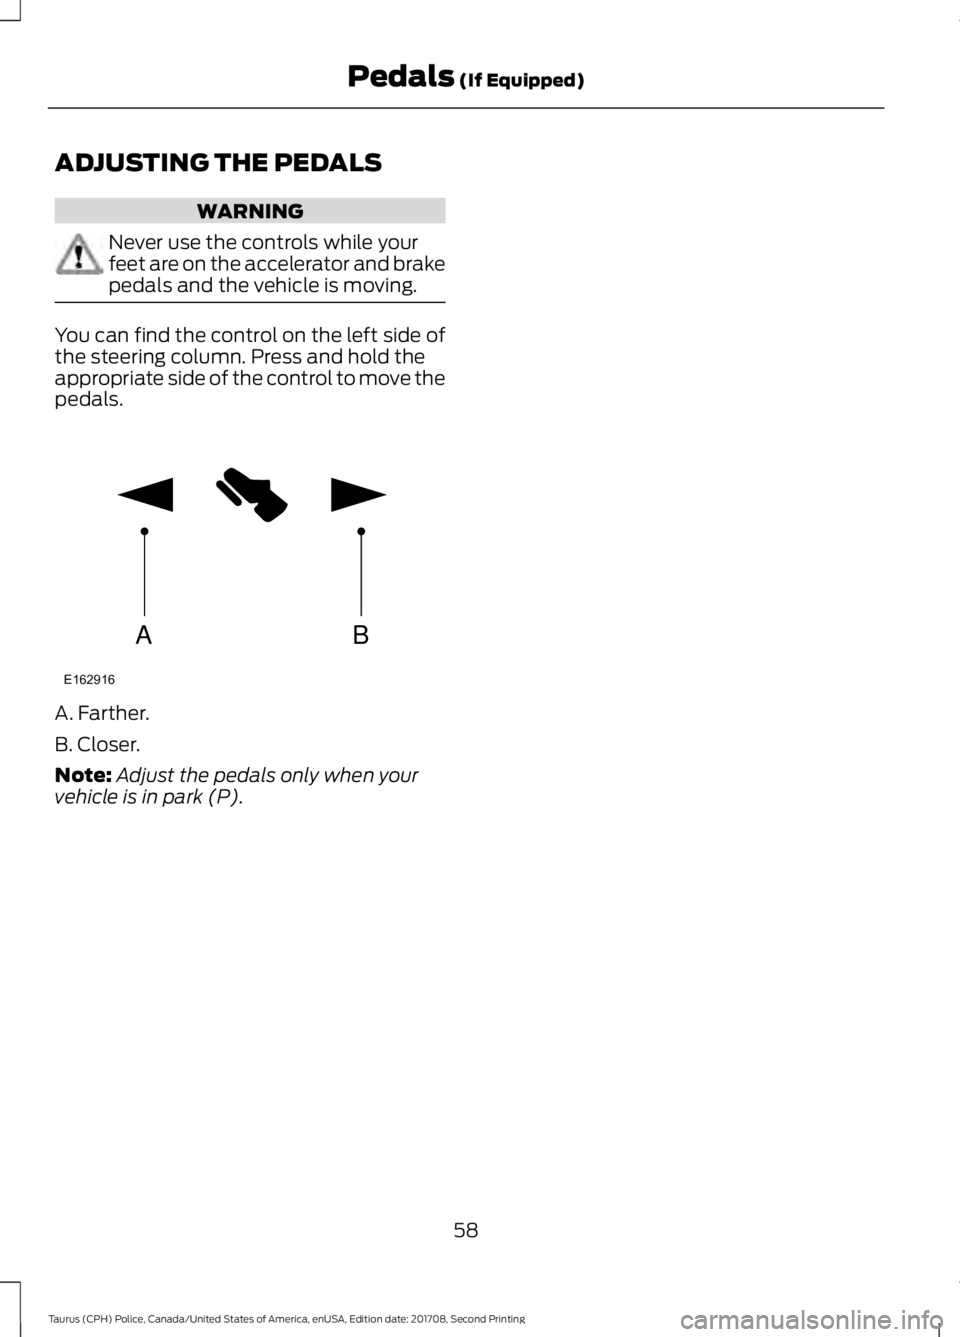
ADJUSTING THE PEDALS
WARNING
Never use the controls while your
feet are on the accelerator and brake
pedals and the vehicle is moving.
You can find the control on the left side of
the steering column. Press and hold the
appropriate side of the control to move the
pedals.
A. Farther.
B. Closer.
Note:
Adjust the pedals only when your
vehicle is in park (P).
58
Taurus (CPH) Police, Canada/United States of America, enUSA, Edition date: 201708, Second Printing Pedals (If Equipped)AB
E162916
Page 62 of 364
WINDSHIELD WIPERS
Note:
Fully defrost the windshield before
you switch the windshield wipers on.
Note: Make sure you switch the windshield
wipers off before entering a car wash.
Note: If streaks or smears appear on the
windshield, clean the windshield and the
wiper blades. If that does not resolve the
issue, install new wiper blades.
Note: Do not operate the wipers on a dry
windshield. This may scratch the glass,
damage the wiper blades or cause the wiper
motor to burn out. Always use the
windshield washers before wiping a dry
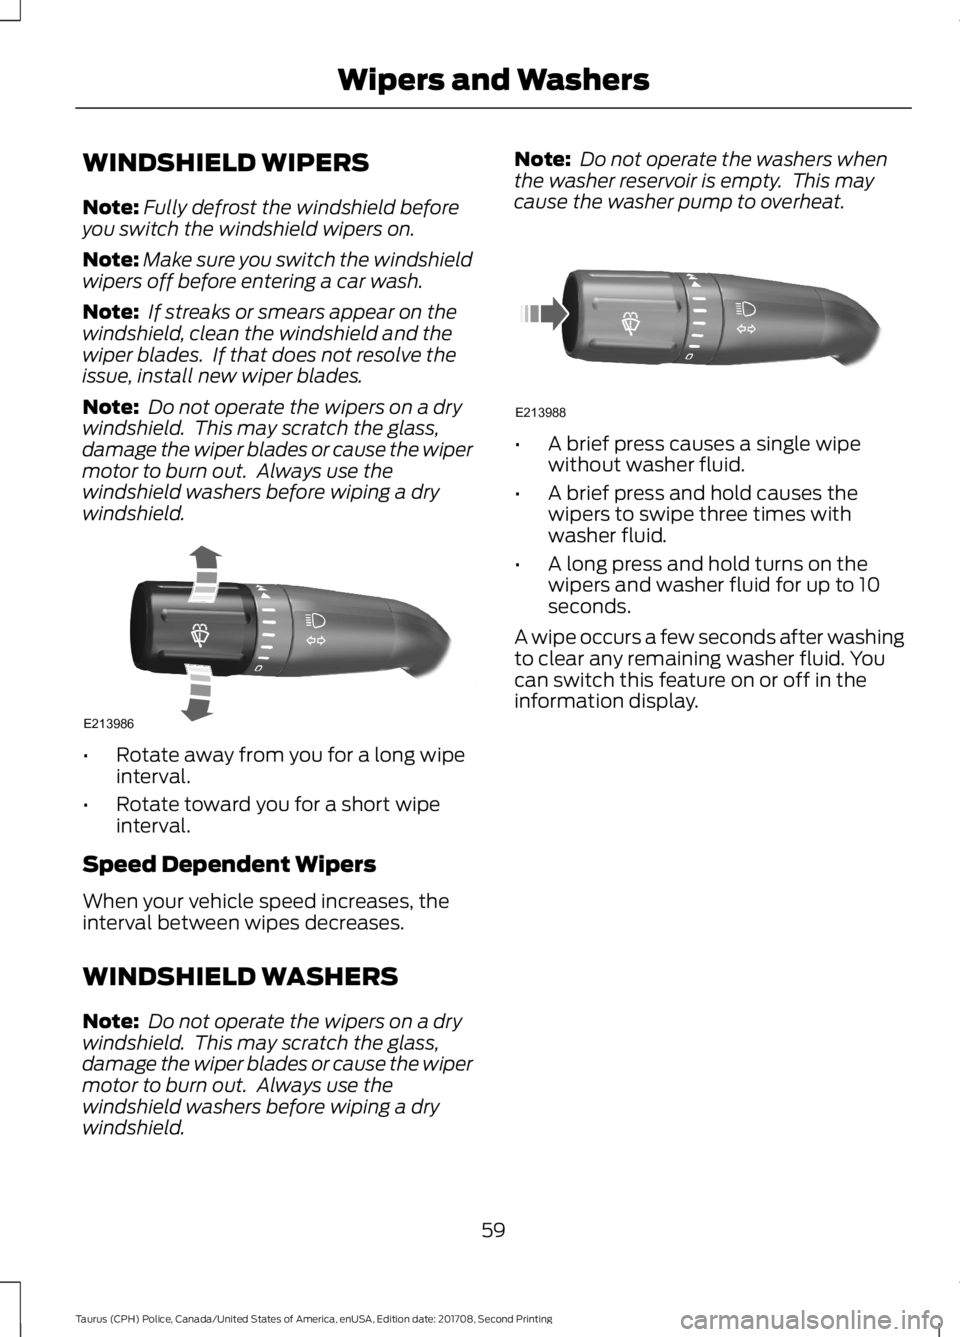
windshield. •
Rotate away from you for a long wipe
interval.
• Rotate toward you for a short wipe
interval.
Speed Dependent Wipers
When your vehicle speed increases, the
interval between wipes decreases.
WINDSHIELD WASHERS
Note: Do not operate the wipers on a dry
windshield. This may scratch the glass,
damage the wiper blades or cause the wiper
motor to burn out. Always use the
windshield washers before wiping a dry
windshield. Note:
Do not operate the washers when
the washer reservoir is empty. This may
cause the washer pump to overheat. •
A brief press causes a single wipe
without washer fluid.
• A brief press and hold causes the
wipers to swipe three times with
washer fluid.
• A long press and hold turns on the
wipers and washer fluid for up to 10
seconds.
A wipe occurs a few seconds after washing
to clear any remaining washer fluid. You
can switch this feature on or off in the
information display.
59
Taurus (CPH) Police, Canada/United States of America, enUSA, Edition date: 201708, Second Printing Wipers and WashersE213986 E213988
Page 63 of 364
GENERAL INFORMATION
Condensation in Lamp Assemblies
Exterior lamps have vents to
accommodate normal changes in air
pressure.
Condensation can be a natural by-product
of this design. When moist air enters the
lamp assembly through the vents, there is
a possibility that condensation can occur
when the temperature is cold. When
normal condensation occurs, a fine mist
can form on the interior of the lens. The
fine mist eventually clears and exits
through the vents during normal operation.
Clearing time may take as long as 48 hours
under dry weather conditions.
Examples of acceptable condensation are:
•
The presence of a fine mist (no streaks,
drip marks or large droplets).
• A fine mist covers less than 50% of the
lens.
Examples of unacceptable condensation
are:
• A water puddle inside the lamp.
• Streaks, drip marks or large droplets
present on the interior of the lens.
If you see any unacceptable condensation,
have your vehicle checked by an authorized
dealer.
Silent Mode (If Equipped)
You can switch on Silent Mode in the
information display. See
Information
Displays (page 74).
When you enable Silent Mode, the
following features may be disabled:
• Welcome/farewell lighting.
• Courtesy lighting.
• Daytime running lamps. Note:
Silent Mode does not disable the
daytime running lamps in markets that
mandate this feature by law.
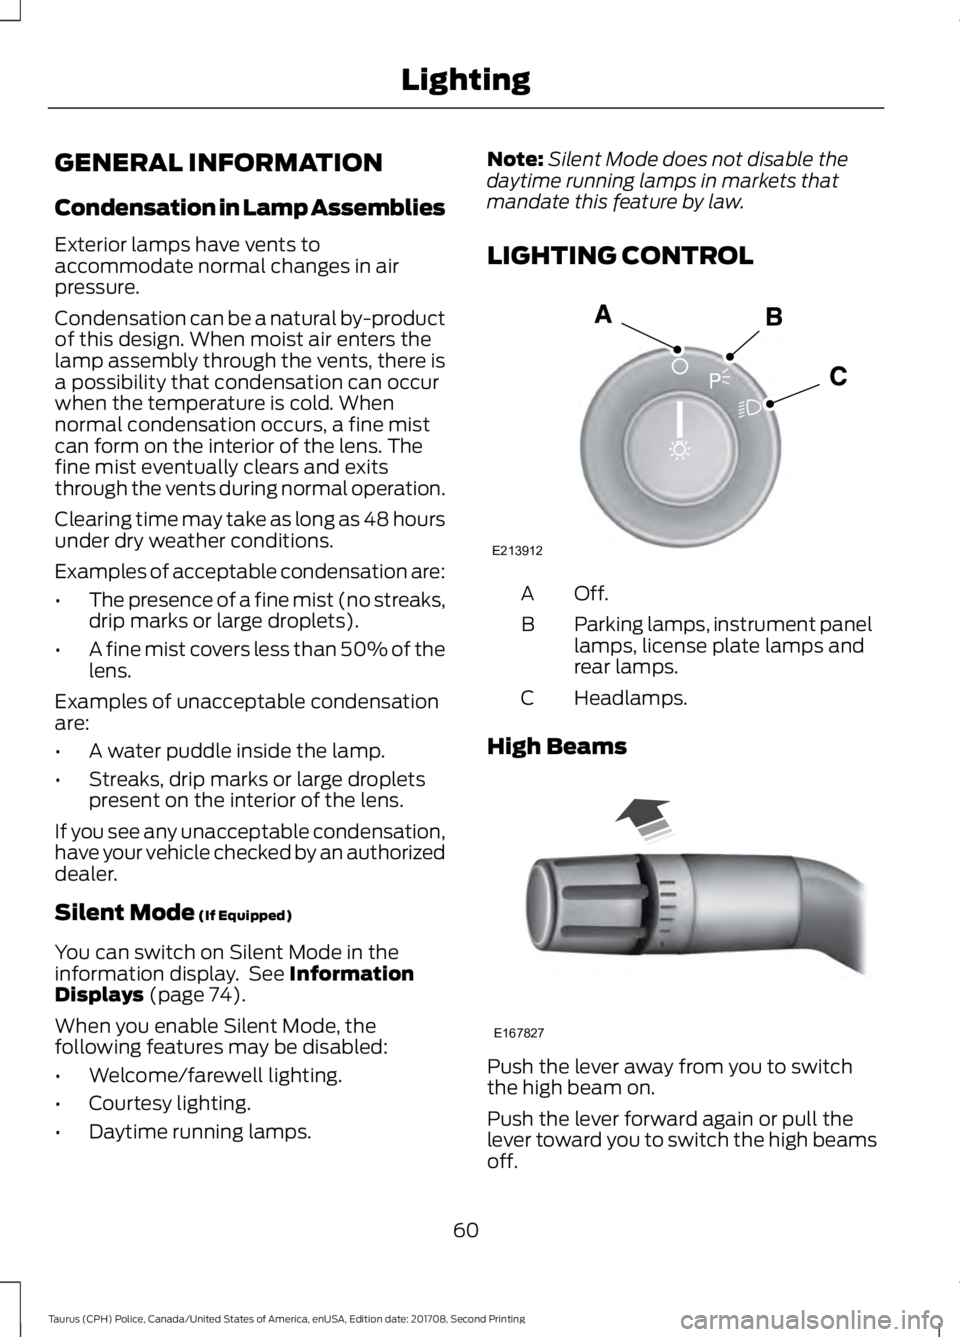
LIGHTING CONTROL Off.A
Parking lamps, instrument panel
lamps, license plate lamps and
rear lamps.
B
Headlamps.
C
High Beams Push the lever away from you to switch
the high beam on.
Push the lever forward again or pull the
lever toward you to switch the high beams
off.
60
Taurus (CPH) Police, Canada/United States of America, enUSA, Edition date: 201708, Second Printing LightingE213912 E167827
Page 64 of 364
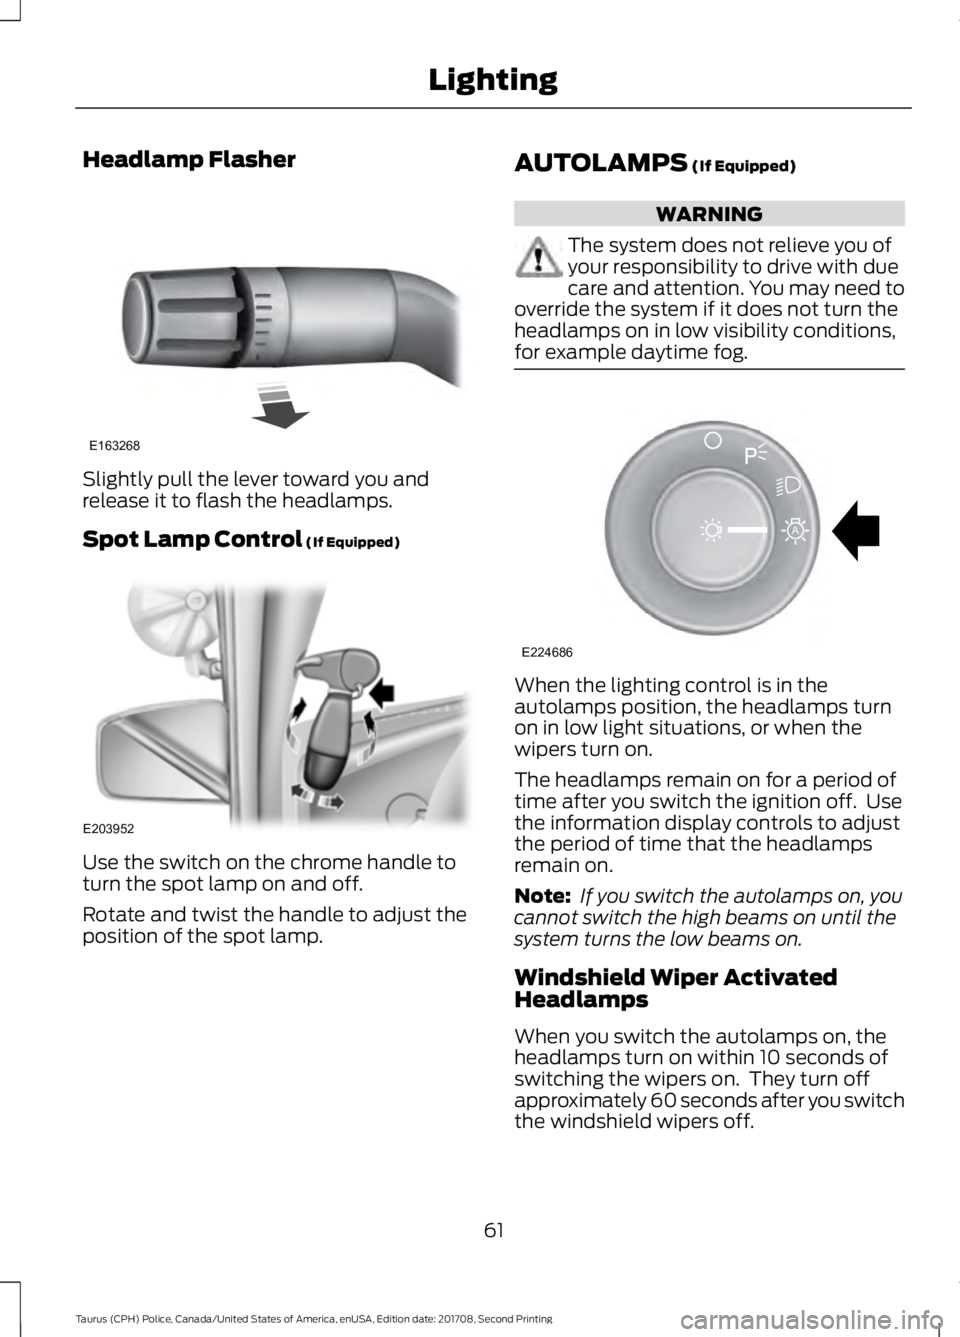
Headlamp Flasher
Slightly pull the lever toward you and
release it to flash the headlamps.
Spot Lamp Control (If Equipped)
Use the switch on the chrome handle to
turn the spot lamp on and off.
Rotate and twist the handle to adjust the
position of the spot lamp. AUTOLAMPS
(If Equipped) WARNING
The system does not relieve you of
your responsibility to drive with due
care and attention. You may need to
override the system if it does not turn the
headlamps on in low visibility conditions,
for example daytime fog. When the lighting control is in the
autolamps position, the headlamps turn
on in low light situations, or when the
wipers turn on.
The headlamps remain on for a period of
time after you switch the ignition off. Use
the information display controls to adjust
the period of time that the headlamps
remain on.
Note:
If you switch the autolamps on, you
cannot switch the high beams on until the
system turns the low beams on.
Windshield Wiper Activated
Headlamps
When you switch the autolamps on, the
headlamps turn on within 10 seconds of
switching the wipers on. They turn off
approximately 60 seconds after you switch
the windshield wipers off.
61
Taurus (CPH) Police, Canada/United States of America, enUSA, Edition date: 201708, Second Printing LightingE163268 E203952 E224686
A
Page 65 of 364
The headlamps do not turn on with the
wipers:
•
During a single wipe.
• When using the windshield washers.
• If the wipers are in intermittent mode.
Note: If you switch autolamps and
autowipers on, the headlamps turn on when
the windshield wipers continuously operate.
INSTRUMENT LIGHTING
DIMMER
Note: If you disconnect and connect the
battery, or fully discharge and charge the
battery, the illuminated components turn
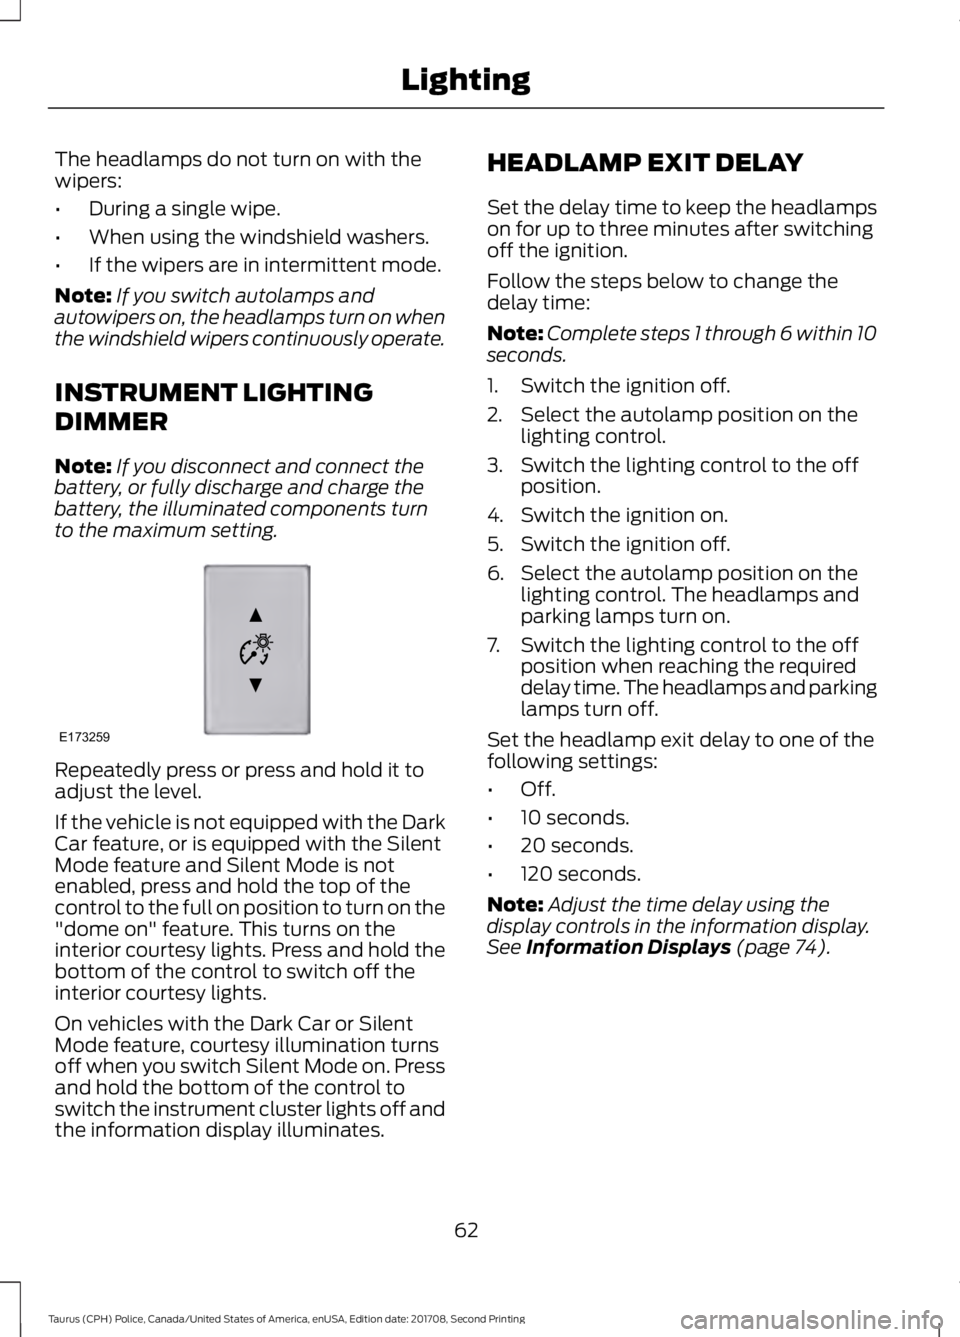
to the maximum setting. Repeatedly press or press and hold it to
adjust the level.
If the vehicle is not equipped with the Dark
Car feature, or is equipped with the Silent
Mode feature and Silent Mode is not
enabled, press and hold the top of the
control to the full on position to turn on the
"dome on" feature. This turns on the
interior courtesy lights. Press and hold the
bottom of the control to switch off the
interior courtesy lights.
On vehicles with the Dark Car or Silent
Mode feature, courtesy illumination turns
off when you switch Silent Mode on. Press
and hold the bottom of the control to
switch the instrument cluster lights off and
the information display illuminates. HEADLAMP EXIT DELAY
Set the delay time to keep the headlamps
on for up to three minutes after switching
off the ignition.
Follow the steps below to change the
delay time:
Note:
Complete steps 1 through 6 within 10
seconds.
1. Switch the ignition off.
2. Select the autolamp position on the lighting control.
3. Switch the lighting control to the off position.
4. Switch the ignition on.
5. Switch the ignition off.
6. Select the autolamp position on the lighting control. The headlamps and
parking lamps turn on.
7. Switch the lighting control to the off position when reaching the required
delay time. The headlamps and parking
lamps turn off.
Set the headlamp exit delay to one of the
following settings:
• Off.
• 10 seconds.
• 20 seconds.
• 120 seconds.
Note: Adjust the time delay using the
display controls in the information display.
See Information Displays (page 74).
62
Taurus (CPH) Police, Canada/United States of America, enUSA, Edition date: 201708, Second Printing LightingE173259
Page 66 of 364
DAYTIME RUNNING LAMPS (If
Equipped) WARNING
The daytime running lamps system
does not activate the rear lamps and
may not provide adequate lighting
during low visibility driving conditions.
Make sure you switch the headlamps on,
as appropriate, during all low visibility
conditions. Failure to do so may result in a
crash. The daytime running lamps turn on when:
1. Switching the ignition on.
2. The lighting control is in the off
position, parking lamps or the
autolamps position, and the sensor
detects daylight.
3. Your vehicle is in drive (D).
Note: Switch the daytime running lamps
on or off by selecting Police Silent Mode in
the information display. See
General
Information (page 74).
Note: In markets where daytime running
lamps are mandated by law, Silent Mode
does not disable the daytime running lamps.
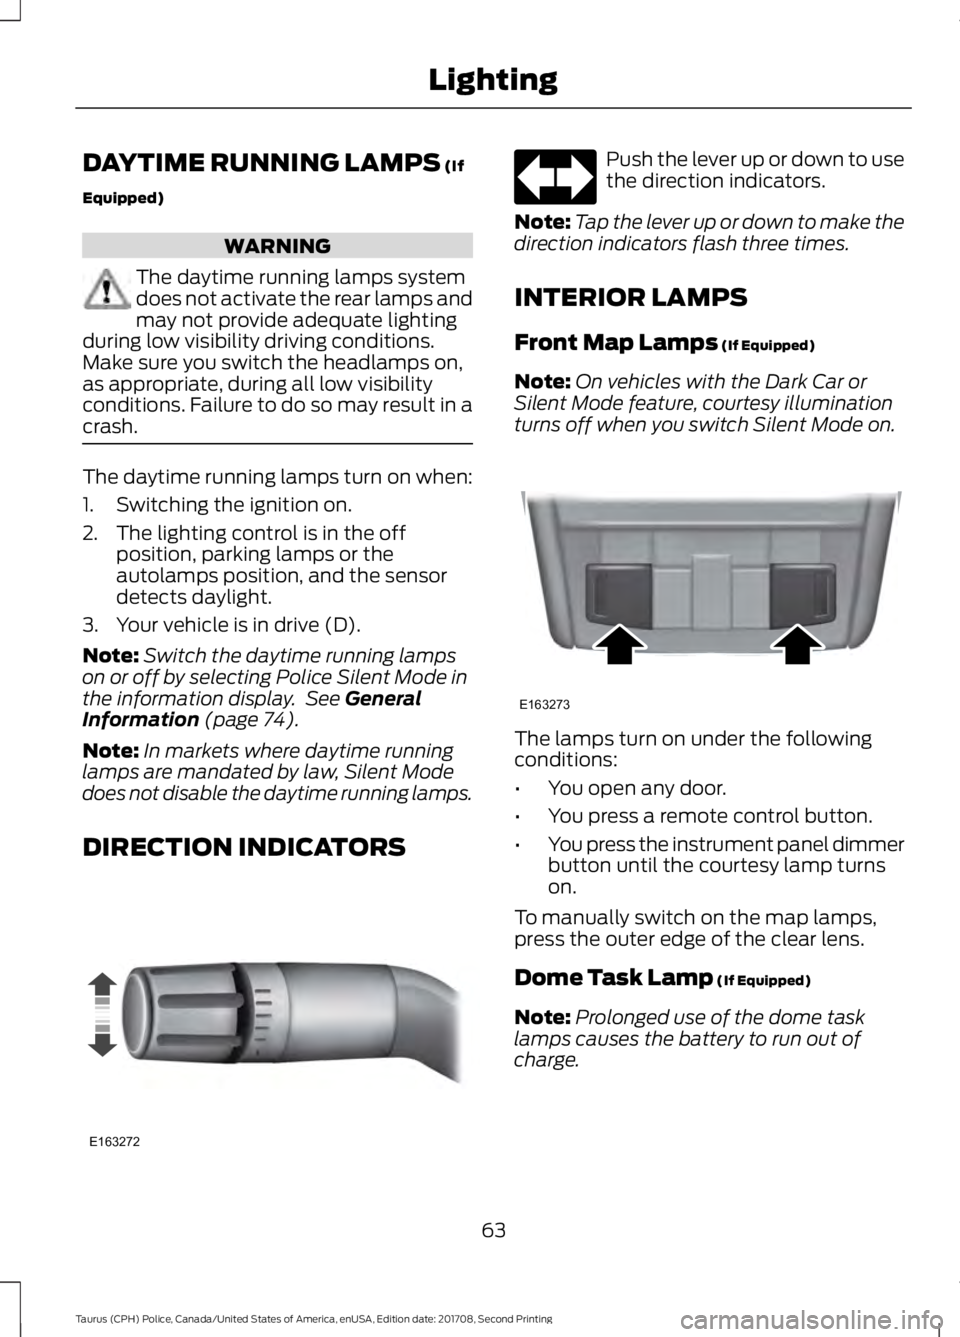
DIRECTION INDICATORS Push the lever up or down to use
the direction indicators.
Note: Tap the lever up or down to make the
direction indicators flash three times.
INTERIOR LAMPS
Front Map Lamps
(If Equipped)
Note: On vehicles with the Dark Car or
Silent Mode feature, courtesy illumination
turns off when you switch Silent Mode on. The lamps turn on under the following
conditions:
•
You open any door.
• You press a remote control button.
• You press the instrument panel dimmer
button until the courtesy lamp turns
on.
To manually switch on the map lamps,
press the outer edge of the clear lens.
Dome Task Lamp
(If Equipped)
Note: Prolonged use of the dome task
lamps causes the battery to run out of
charge.
63
Taurus (CPH) Police, Canada/United States of America, enUSA, Edition date: 201708, Second Printing LightingE163272 E163273
Page 67 of 364
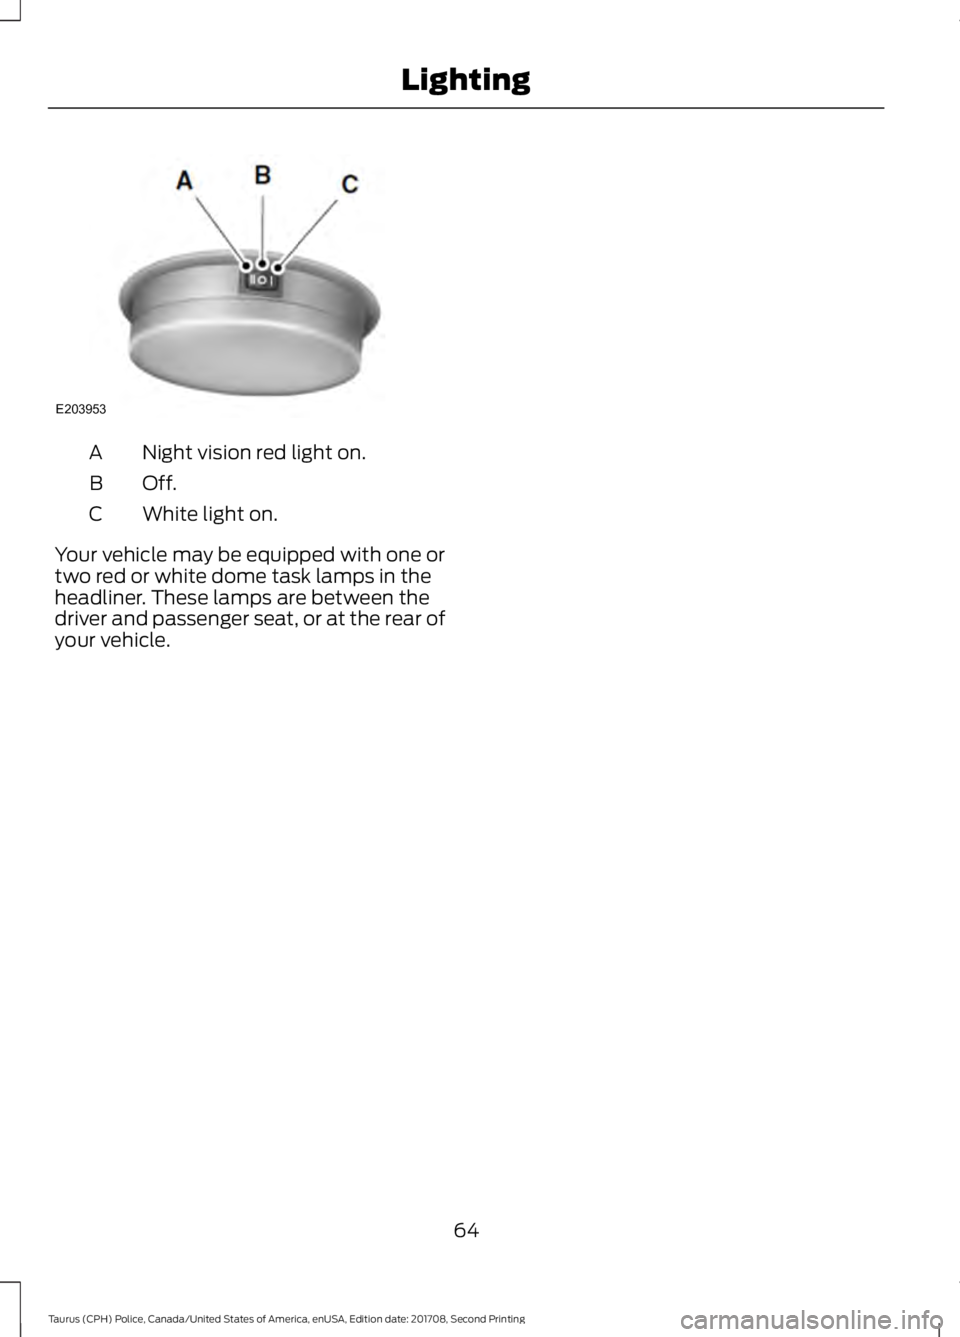
Night vision red light on.
A
Off.B
White light on.
C
Your vehicle may be equipped with one or
two red or white dome task lamps in the
headliner. These lamps are between the
driver and passenger seat, or at the rear of
your vehicle.
64
Taurus (CPH) Police, Canada/United States of America, enUSA, Edition date: 201708, Second Printing LightingE203953
Page 68 of 364
POWER WINDOWS
WARNINGS
Do not leave children unattended in
your vehicle and do not let them play
with the power windows. Failure to
follow this instruction could result in
personal injury. When closing the power windows,
verify they are free of obstruction and
make sure that children and pets are
not in the proximity of the window
openings. Note:
You may hear a pulsing noise when
just one of the windows is open. Lower the
opposite window slightly to reduce this
noise.
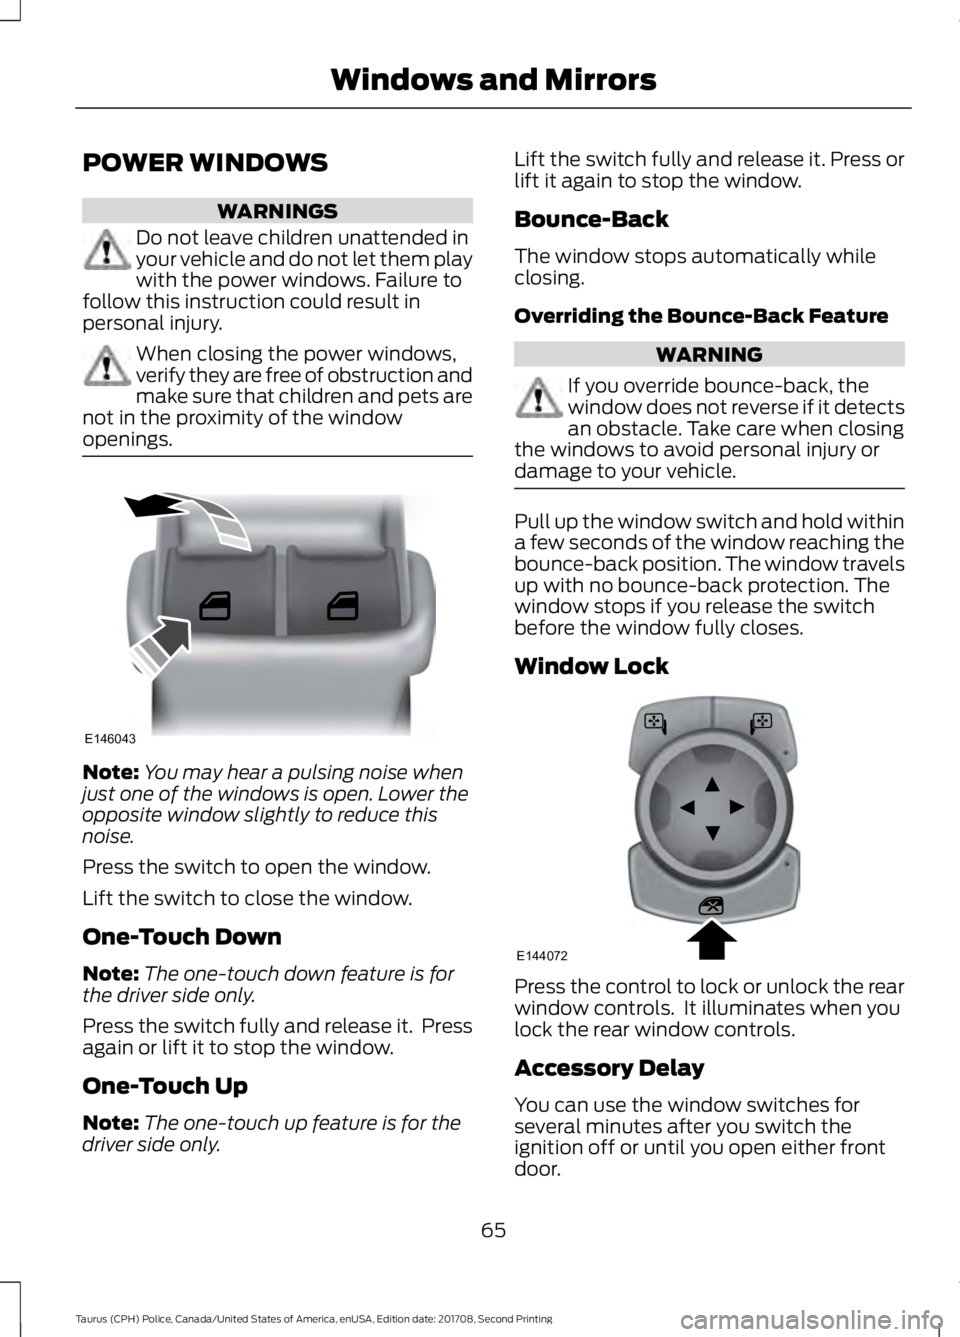
Press the switch to open the window.
Lift the switch to close the window.
One-Touch Down
Note: The one-touch down feature is for
the driver side only.
Press the switch fully and release it. Press
again or lift it to stop the window.
One-Touch Up
Note: The one-touch up feature is for the
driver side only. Lift the switch fully and release it. Press or
lift it again to stop the window.
Bounce-Back
The window stops automatically while
closing.
Overriding the Bounce-Back Feature
WARNING
If you override bounce-back, the
window does not reverse if it detects
an obstacle. Take care when closing
the windows to avoid personal injury or
damage to your vehicle. Pull up the window switch and hold within
a few seconds of the window reaching the
bounce-back position. The window travels
up with no bounce-back protection. The
window stops if you release the switch
before the window fully closes.
Window Lock
Press the control to lock or unlock the rear
window controls. It illuminates when you
lock the rear window controls.
Accessory Delay
You can use the window switches for
several minutes after you switch the
ignition off or until you open either front
door.
65
Taurus (CPH) Police, Canada/United States of America, enUSA, Edition date: 201708, Second Printing Windows and MirrorsE146043 E144072
Page 69 of 364
EXTERIOR MIRRORS
Power Exterior Mirrors
WARNING
Do not adjust the mirrors when your
vehicle is moving.
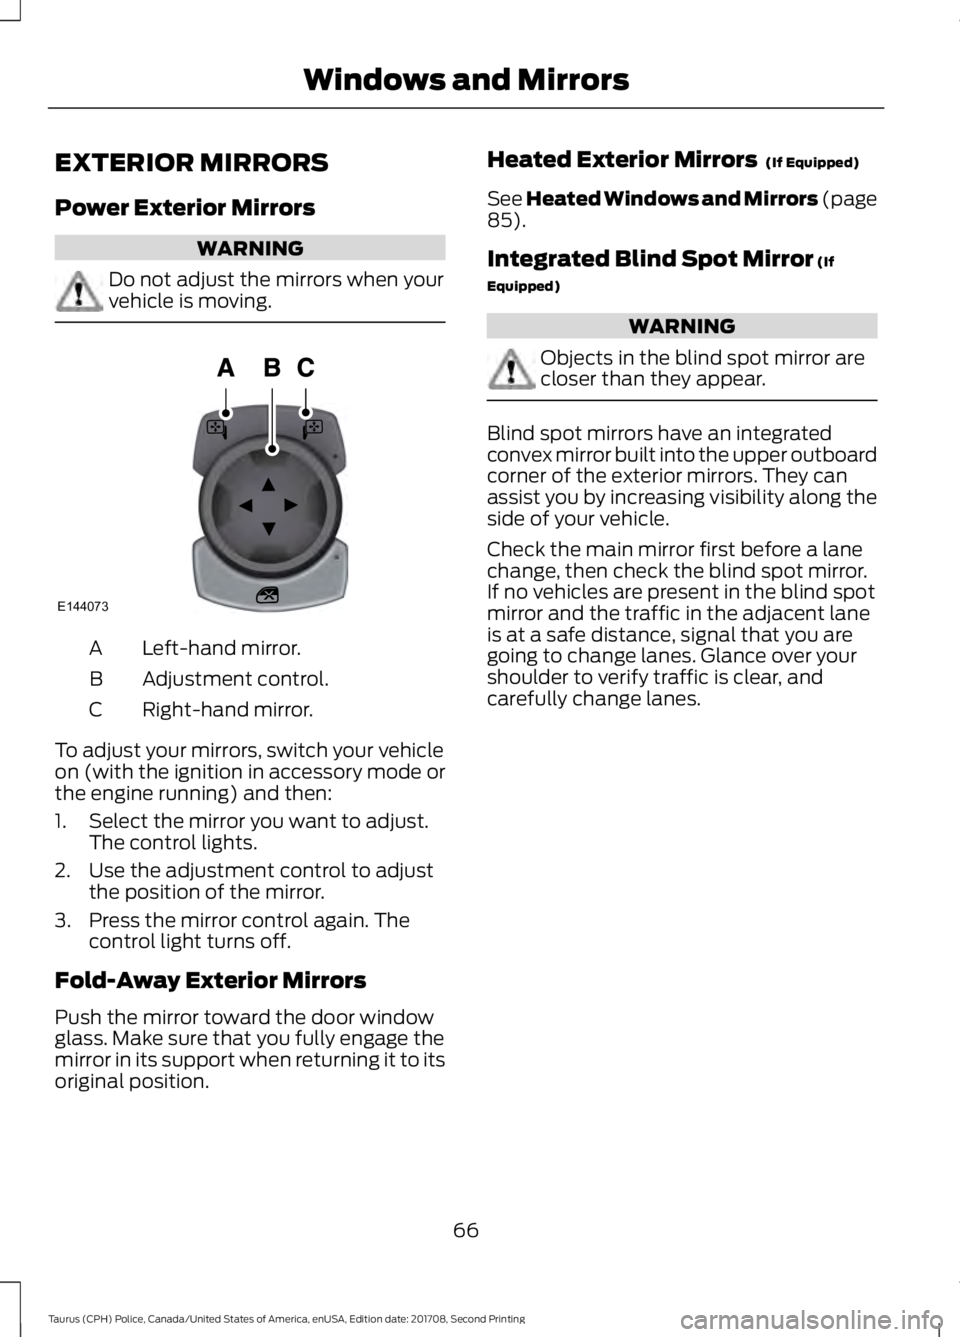
Left-hand mirror.
A
Adjustment control.
B
Right-hand mirror.
C
To adjust your mirrors, switch your vehicle
on (with the ignition in accessory mode or
the engine running) and then:
1. Select the mirror you want to adjust. The control lights.
2. Use the adjustment control to adjust the position of the mirror.
3. Press the mirror control again. The control light turns off.
Fold-Away Exterior Mirrors
Push the mirror toward the door window
glass. Make sure that you fully engage the
mirror in its support when returning it to its
original position. Heated Exterior Mirrors (If Equipped)
See Heated Windows and Mirrors (page
85
).
Integrated Blind Spot Mirror
(If
Equipped) WARNING
Objects in the blind spot mirror are
closer than they appear.
Blind spot mirrors have an integrated
convex mirror built into the upper outboard
corner of the exterior mirrors. They can
assist you by increasing visibility along the
side of your vehicle.
Check the main mirror first before a lane
change, then check the blind spot mirror.
If no vehicles are present in the blind spot
mirror and the traffic in the adjacent lane
is at a safe distance, signal that you are
going to change lanes. Glance over your
shoulder to verify traffic is clear, and
carefully change lanes.
66
Taurus (CPH) Police, Canada/United States of America, enUSA, Edition date: 201708, Second Printing Windows and MirrorsE144073
Page 70 of 364
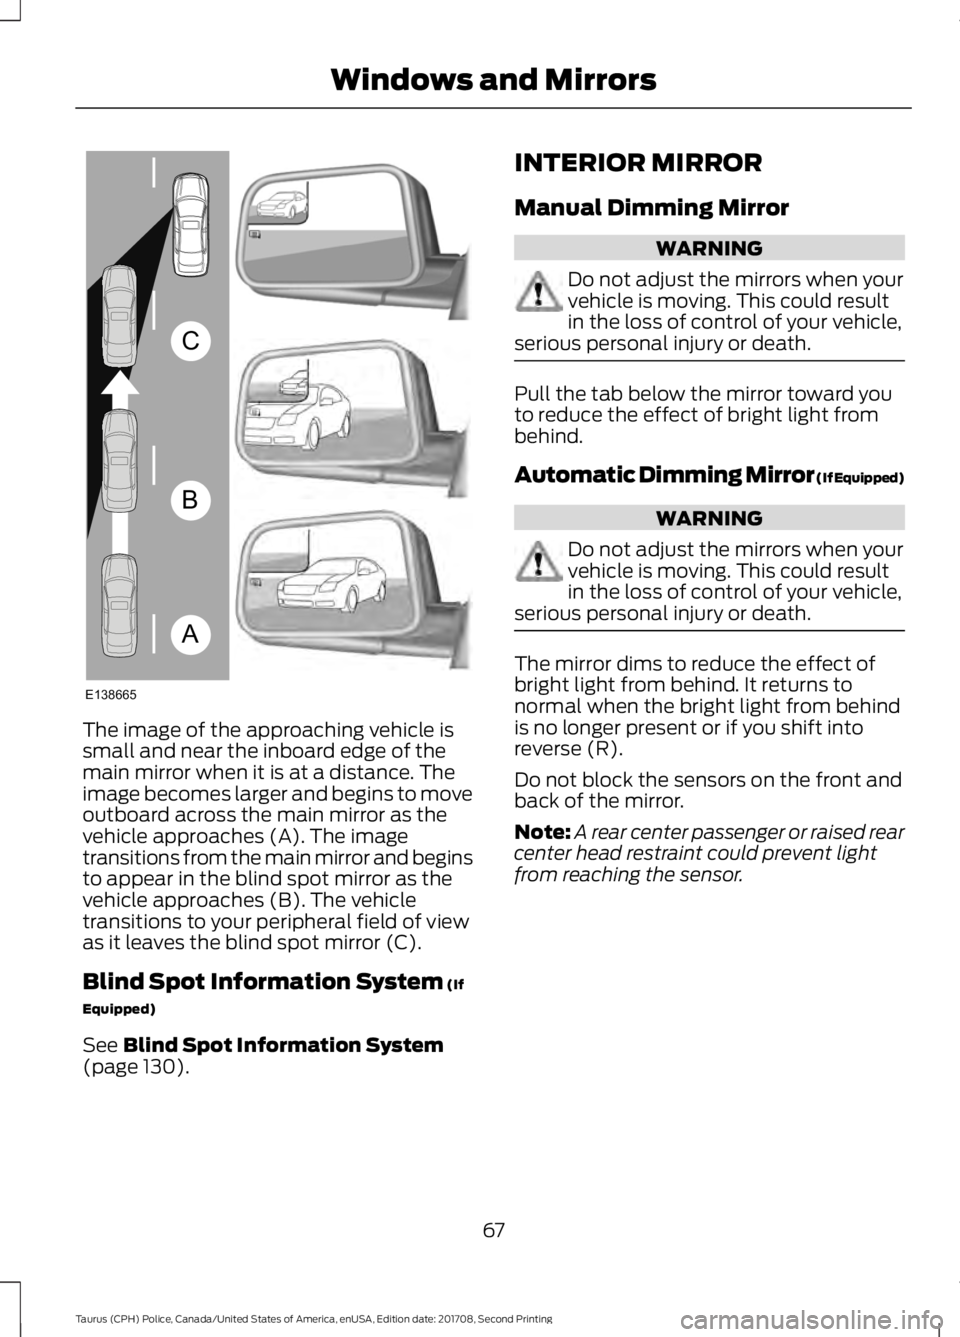
The image of the approaching vehicle is
small and near the inboard edge of the
main mirror when it is at a distance. The
image becomes larger and begins to move
outboard across the main mirror as the
vehicle approaches (A). The image
transitions from the main mirror and begins
to appear in the blind spot mirror as the
vehicle approaches (B). The vehicle
transitions to your peripheral field of view
as it leaves the blind spot mirror (C).
Blind Spot Information System (If
Equipped)
See
Blind Spot Information System
(page 130). INTERIOR MIRROR
Manual Dimming Mirror WARNING
Do not adjust the mirrors when your
vehicle is moving. This could result
in the loss of control of your vehicle,
serious personal injury or death. Pull the tab below the mirror toward you
to reduce the effect of bright light from
behind.
Automatic Dimming Mirror (If Equipped)
WARNING
Do not adjust the mirrors when your
vehicle is moving. This could result
in the loss of control of your vehicle,
serious personal injury or death. The mirror dims to reduce the effect of
bright light from behind. It returns to
normal when the bright light from behind
is no longer present or if you shift into
reverse (R).
Do not block the sensors on the front and
back of the mirror.
Note:
A rear center passenger or raised rear
center head restraint could prevent light
from reaching the sensor.
67
Taurus (CPH) Police, Canada/United States of America, enUSA, Edition date: 201708, Second Printing Windows and MirrorsA
B
C
E138665