Time FORD POLICE INTERCEPTOR 2020 User Guide
[x] Cancel search | Manufacturer: FORD, Model Year: 2020, Model line: POLICE INTERCEPTOR, Model: FORD POLICE INTERCEPTOR 2020Pages: 395, PDF Size: 5.62 MB
Page 38 of 395
Pregnant women should always wear their
seatbelt. Position the lap belt portion of a
combination lap and shoulder belt low
across the hips below the belly and worn
as tight as comfort allows. Position the
shoulder belt to cross the middle of the
shoulder and the center of the chest.
Seatbelt Locking Modes
WARNING: If your vehicle is
involved in a crash, have the seatbelts
and associated components inspected
as soon as possible. Failure to follow this
instruction could result in personal injury
or death.
All safety restraints in the vehicle are
combination lap and shoulder belts. The
driver seatbelt has the first type of locking
mode, and the front outboard passenger
and rear seat seatbelts have both types of
locking modes described as follows:
Vehicle Sensitive Mode
This is the normal retractor mode, which
allows free shoulder belt length
adjustment to your movements and
locking in response to vehicle movement.
For example, if the driver brakes suddenly
or turns a corner sharply, or the vehicle
receives an impact of about
5 mph
(8 km/h) or more, the combination
seatbelts lock to help reduce forward
movement of the driver and passengers.
In addition, the design of the retractor is to
lock if you pull the webbing out too quickly.
If the seatbelt retractor locks, slowly lower
the height adjuster to allow the seatbelt
to retract. If the retractor does not unlock,
pull the seatbelt out slowly then feed a small length of webbing back toward the
stowed position. For rear seatbelts, recline
the rear seat backrest or push the seat
backrest cushion away from the seatbelt.
Feed a small length of webbing back
toward the stowed position.
Automatic Locking Mode
In this mode, the shoulder belt
automatically pre-locks. The belt retracts
to remove any slack in the shoulder belt.
The automatic locking mode is not
available on the driver seatbelt.
When to Use the Automatic Locking
Mode
Use this mode any time you install a child
safety seat, except a booster, in passenger
front or rear seating positions. Properly
restrain children 12 years old and under in
a rear seating position whenever possible.
See
Child Safety (page 20).
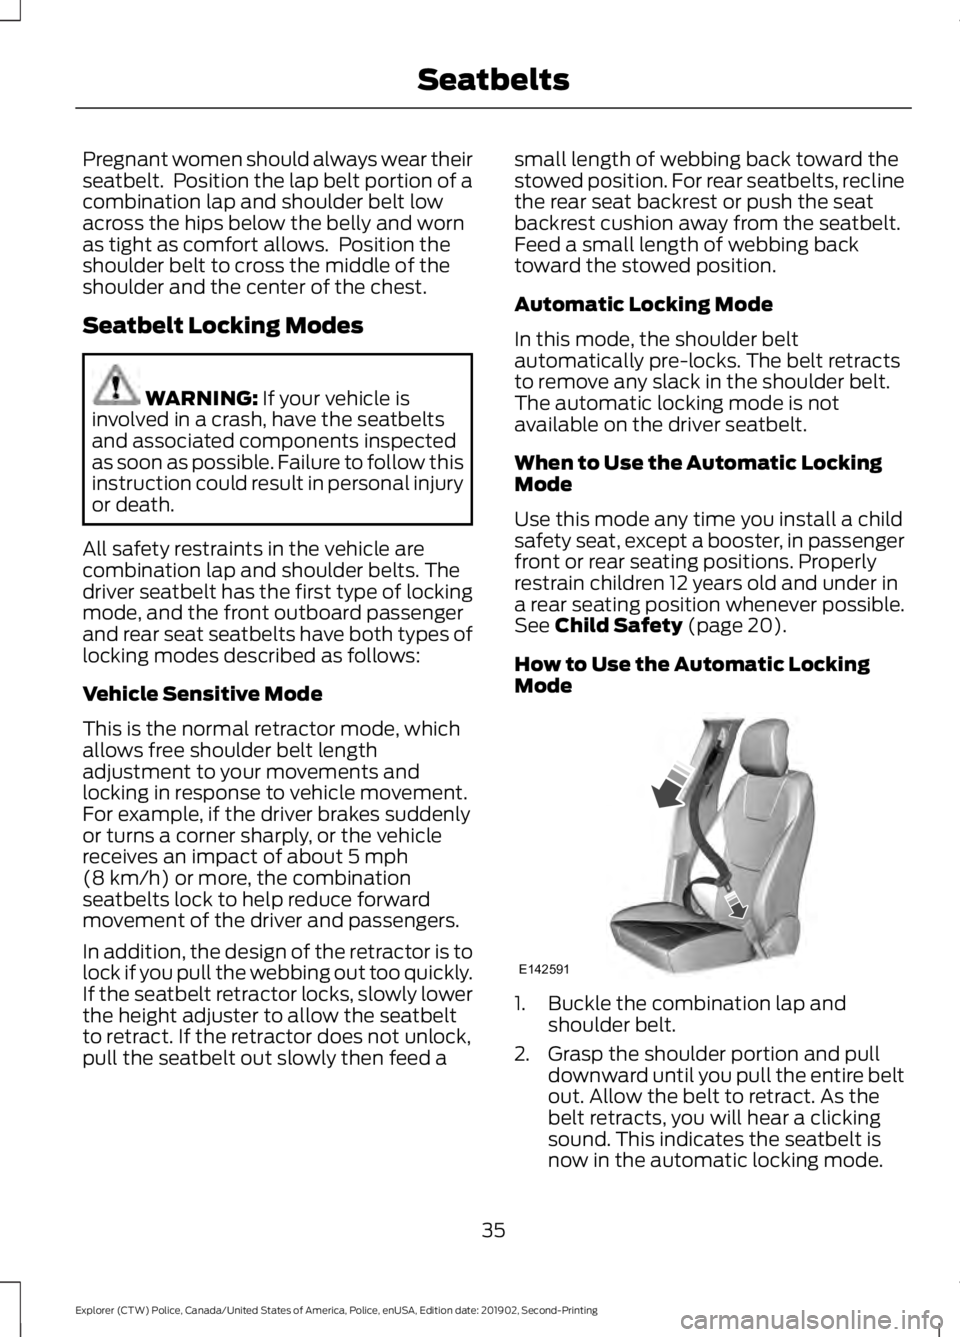
How to Use the Automatic Locking
Mode 1. Buckle the combination lap and
shoulder belt.
2. Grasp the shoulder portion and pull downward until you pull the entire belt
out. Allow the belt to retract. As the
belt retracts, you will hear a clicking
sound. This indicates the seatbelt is
now in the automatic locking mode.
35
Explorer (CTW) Police, Canada/United States of America, Police, enUSA, Edition date: 201902, Second-Printing SeatbeltsE142591
Page 41 of 395
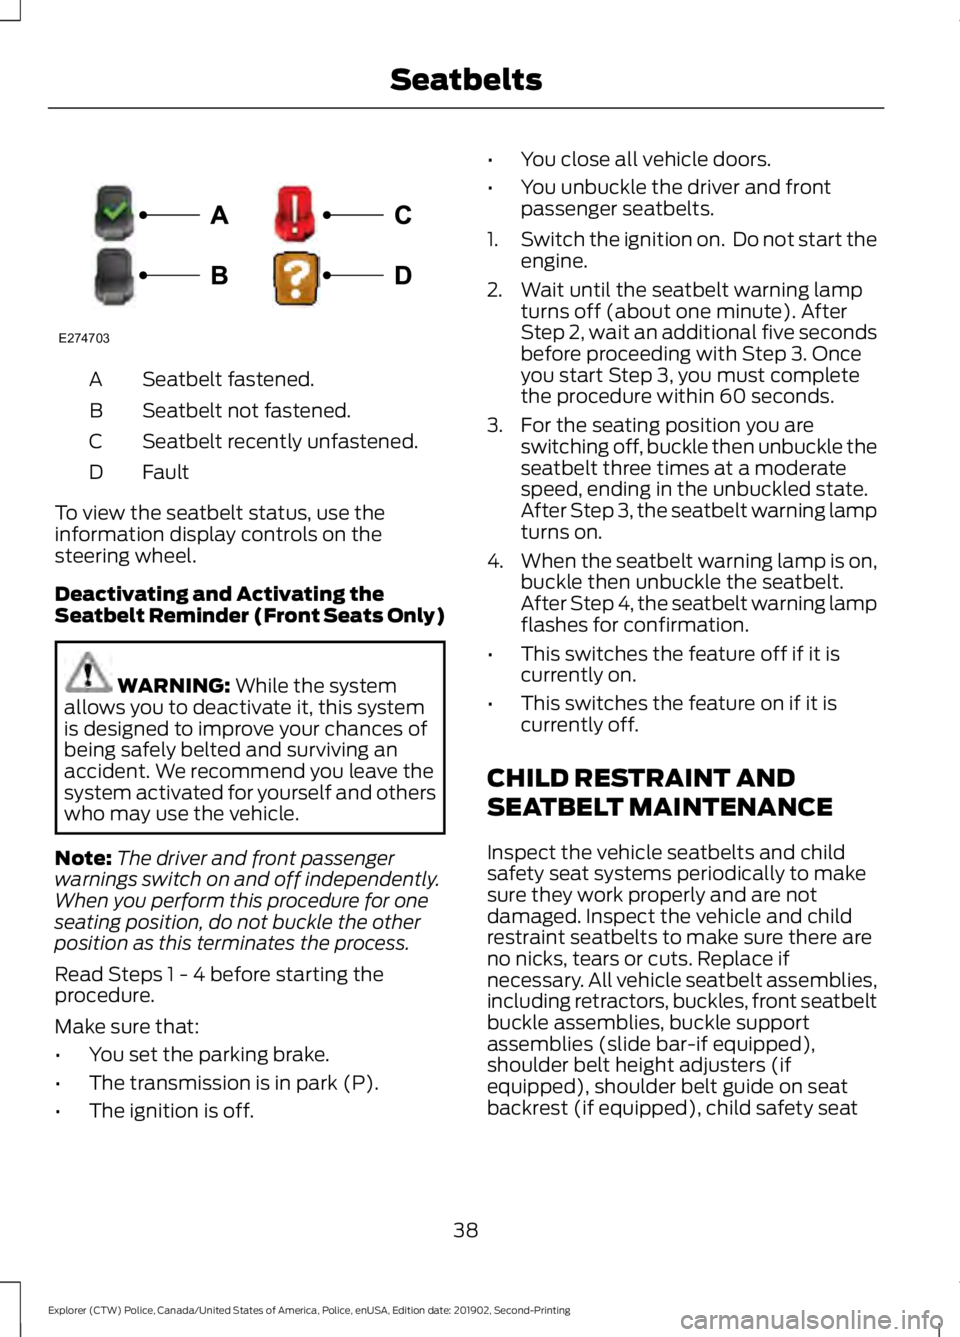
Seatbelt fastened.
A
Seatbelt not fastened.
B
Seatbelt recently unfastened.
C
Fault
D
To view the seatbelt status, use the
information display controls on the
steering wheel.
Deactivating and Activating the
Seatbelt Reminder (Front Seats Only) WARNING: While the system
allows you to deactivate it, this system
is designed to improve your chances of
being safely belted and surviving an
accident. We recommend you leave the
system activated for yourself and others
who may use the vehicle.
Note: The driver and front passenger
warnings switch on and off independently.
When you perform this procedure for one
seating position, do not buckle the other
position as this terminates the process.
Read Steps 1 - 4 before starting the
procedure.
Make sure that:
• You set the parking brake.
• The transmission is in park (P).
• The ignition is off. •
You close all vehicle doors.
• You unbuckle the driver and front
passenger seatbelts.
1. Switch the ignition on. Do not start the
engine.
2. Wait until the seatbelt warning lamp turns off (about one minute). After
Step 2, wait an additional five seconds
before proceeding with Step 3. Once
you start Step 3, you must complete
the procedure within 60 seconds.
3. For the seating position you are switching off, buckle then unbuckle the
seatbelt three times at a moderate
speed, ending in the unbuckled state.
After Step 3, the seatbelt warning lamp
turns on.
4. When the seatbelt warning lamp is on,
buckle then unbuckle the seatbelt.
After Step 4, the seatbelt warning lamp
flashes for confirmation.
• This switches the feature off if it is
currently on.
• This switches the feature on if it is
currently off.
CHILD RESTRAINT AND
SEATBELT MAINTENANCE
Inspect the vehicle seatbelts and child
safety seat systems periodically to make
sure they work properly and are not
damaged. Inspect the vehicle and child
restraint seatbelts to make sure there are
no nicks, tears or cuts. Replace if
necessary. All vehicle seatbelt assemblies,
including retractors, buckles, front seatbelt
buckle assemblies, buckle support
assemblies (slide bar-if equipped),
shoulder belt height adjusters (if
equipped), shoulder belt guide on seat
backrest (if equipped), child safety seat
38
Explorer (CTW) Police, Canada/United States of America, Police, enUSA, Edition date: 201902, Second-Printing SeatbeltsE274703
Page 45 of 395
While the system is designed to help
reduce serious injuries, contact with a
deploying airbag may also cause abrasions
or swelling. Temporary hearing loss is also
a possibility as a result of the noise
associated with a deploying airbag.
Because airbags must inflate rapidly and
with considerable force, there is the risk of
death or serious injuries such as fractures,
facial and eye injuries or internal injuries,
particularly to occupants who are not
properly restrained or are otherwise out of
position at the time of airbag deployment.
Thus, it is extremely important that
occupants be properly restrained as far
away from the airbag module as possible
while maintaining vehicle control.
Routine maintenance of the airbags is not
required.
DRIVER AND PASSENGER
AIRBAGS
WARNING: Do not place your arms
on the airbag cover or through the
steering wheel. Failure to follow this
instruction could result in personal injury. WARNING: Keep the areas in front
of the airbags free from obstruction. Do
not affix anything to or over the airbag
covers. Objects could become projectiles
during airbag deployment or in a sudden
stop. Failure to follow this instruction
could result in personal injury or death. WARNING:
Airbags can kill or
injure a child in a child restraint. Never
place a rear-facing child restraint in front
of an active airbag. If you must use a
forward-facing child restraint in the front
seat, move the seat upon which the child
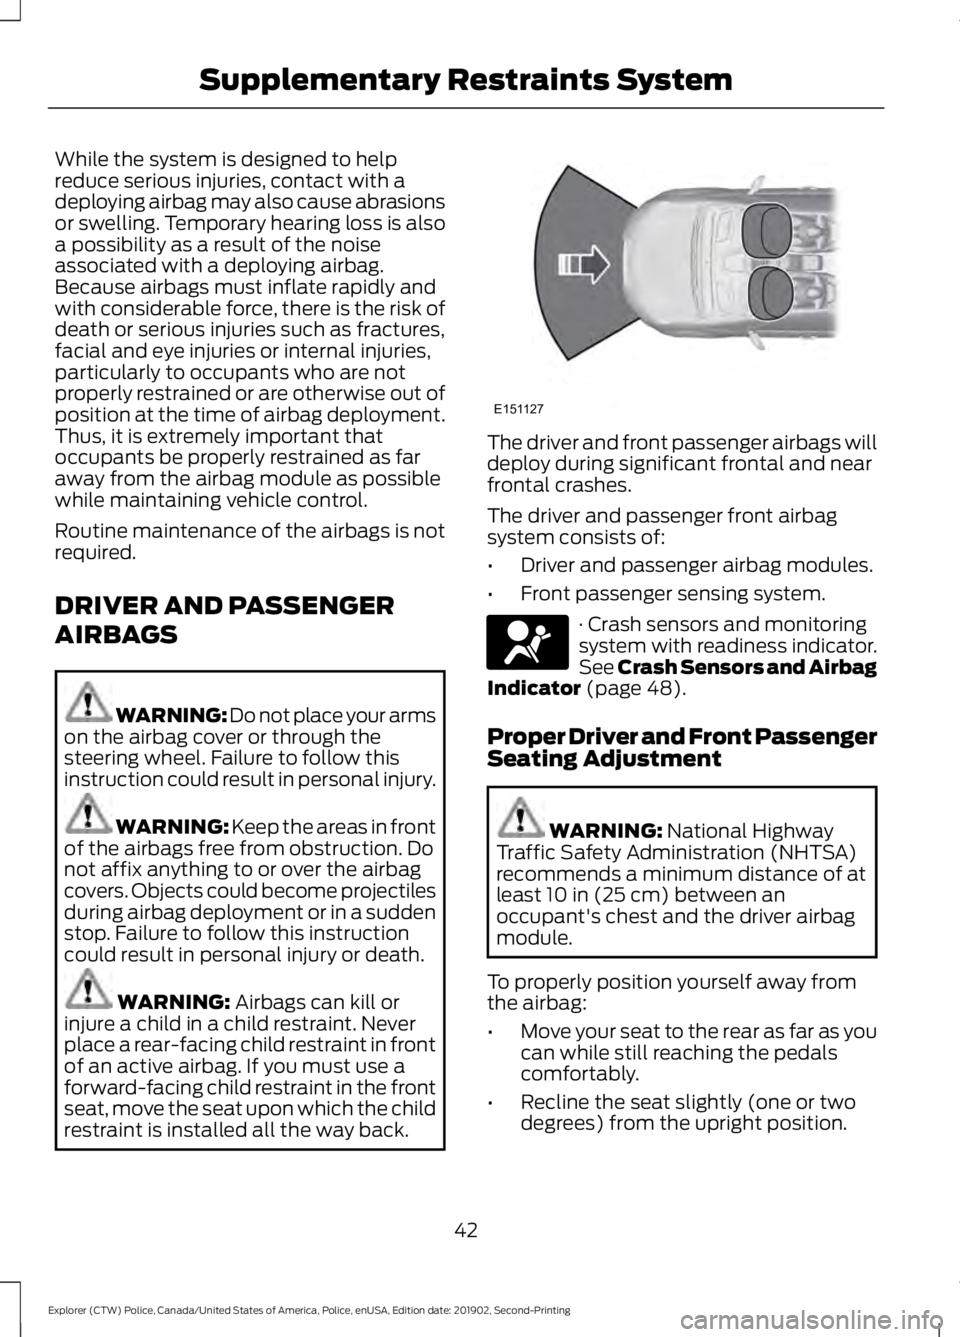
restraint is installed all the way back. The driver and front passenger airbags will
deploy during significant frontal and near
frontal crashes.
The driver and passenger front airbag
system consists of:
•
Driver and passenger airbag modules.
• Front passenger sensing system. · Crash sensors and monitoring
system with readiness indicator.
See Crash Sensors and Airbag
Indicator
(page 48).
Proper Driver and Front Passenger
Seating Adjustment WARNING:
National Highway
Traffic Safety Administration (NHTSA)
recommends a minimum distance of at
least
10 in (25 cm) between an
occupant's chest and the driver airbag
module.
To properly position yourself away from
the airbag:
• Move your seat to the rear as far as you
can while still reaching the pedals
comfortably.
• Recline the seat slightly (one or two
degrees) from the upright position.
42
Explorer (CTW) Police, Canada/United States of America, Police, enUSA, Edition date: 201902, Second-Printing Supplementary Restraints SystemE151127 E67017
Page 47 of 395
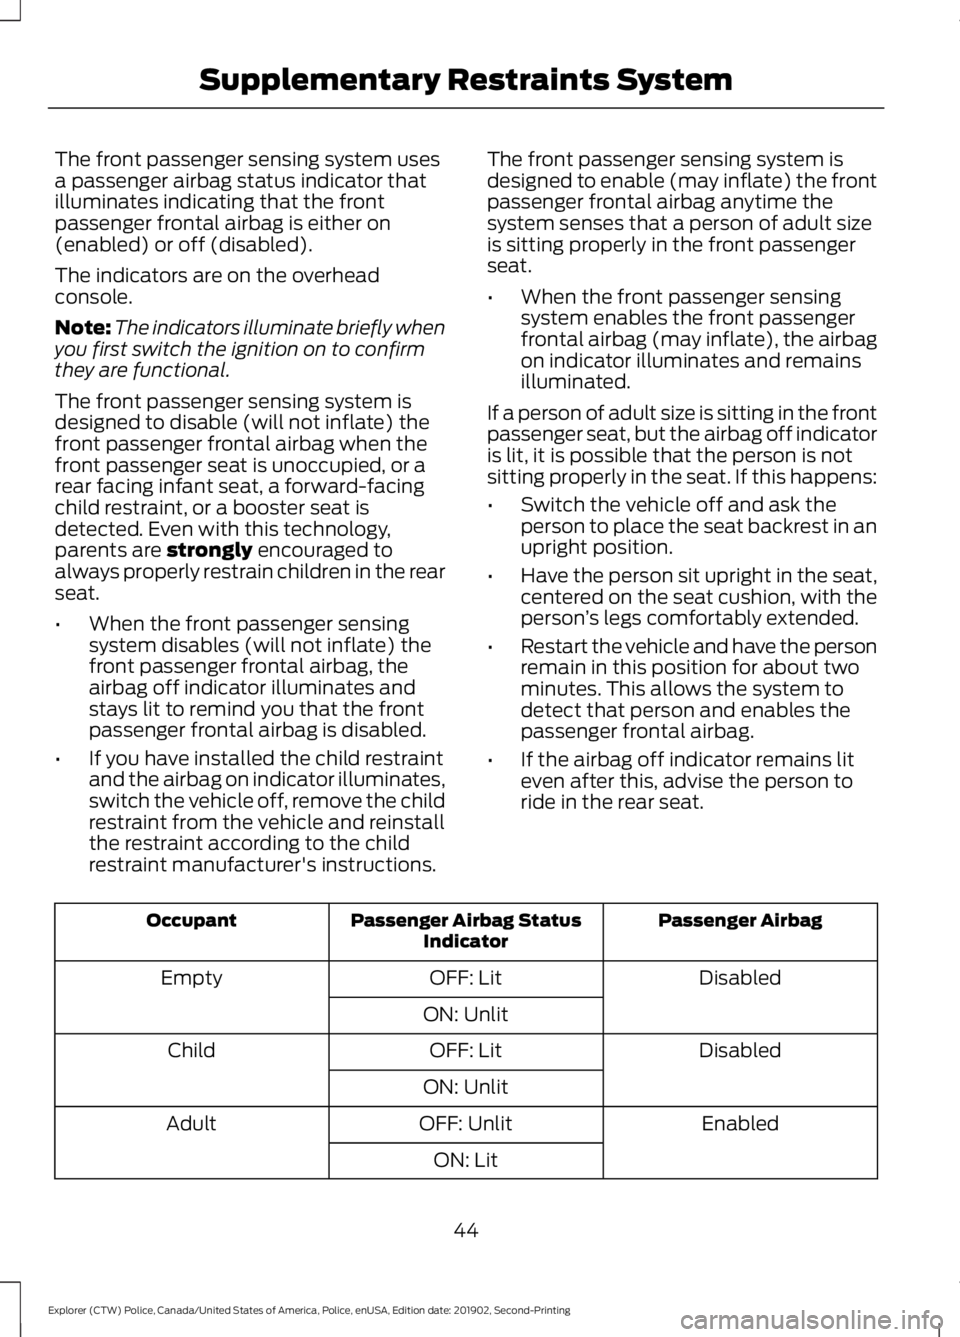
The front passenger sensing system uses
a passenger airbag status indicator that
illuminates indicating that the front
passenger frontal airbag is either on
(enabled) or off (disabled).
The indicators are on the overhead
console.
Note:
The indicators illuminate briefly when
you first switch the ignition on to confirm
they are functional.
The front passenger sensing system is
designed to disable (will not inflate) the
front passenger frontal airbag when the
front passenger seat is unoccupied, or a
rear facing infant seat, a forward-facing
child restraint, or a booster seat is
detected. Even with this technology,
parents are strongly encouraged to
always properly restrain children in the rear
seat.
• When the front passenger sensing
system disables (will not inflate) the
front passenger frontal airbag, the
airbag off indicator illuminates and
stays lit to remind you that the front
passenger frontal airbag is disabled.
• If you have installed the child restraint
and the airbag on indicator illuminates,
switch the vehicle off, remove the child
restraint from the vehicle and reinstall
the restraint according to the child
restraint manufacturer's instructions. The front passenger sensing system is
designed to enable (may inflate) the front
passenger frontal airbag anytime the
system senses that a person of adult size
is sitting properly in the front passenger
seat.
•
When the front passenger sensing
system enables the front passenger
frontal airbag (may inflate), the airbag
on indicator illuminates and remains
illuminated.
If a person of adult size is sitting in the front
passenger seat, but the airbag off indicator
is lit, it is possible that the person is not
sitting properly in the seat. If this happens:
• Switch the vehicle off and ask the
person to place the seat backrest in an
upright position.
• Have the person sit upright in the seat,
centered on the seat cushion, with the
person ’s legs comfortably extended.
• Restart the vehicle and have the person
remain in this position for about two
minutes. This allows the system to
detect that person and enables the
passenger frontal airbag.
• If the airbag off indicator remains lit
even after this, advise the person to
ride in the rear seat. Passenger Airbag
Passenger Airbag Status
Indicator
Occupant
Disabled
OFF: Lit
Empty
ON: Unlit Disabled
OFF: Lit
Child
ON: Unlit Enabled
OFF: Unlit
Adult
ON: Lit
44
Explorer (CTW) Police, Canada/United States of America, Police, enUSA, Edition date: 201902, Second-Printing Supplementary Restraints System
Page 61 of 395
Sounding the Panic Alarm (If Equipped)
On Type 1, press the button to
sound the panic alarm. Press the
button again or switch the
ignition on to turn it off.
Note: The panic alarm operates regardless
of the ignition position.
Opening the Liftgate With the
Liftgate Button (If Equipped) On Type 2, press the button to
unlock the liftgate. The liftgate
unlocks for 45 seconds, during
which time you can open the liftgate using
the exterior liftgate release button. See
Manual Liftgate
(page 62).
Note: Only the liftgate unlocks. All other
passenger doors remain in the previous
locking state.
Note: If you do not open the liftgate within
45 seconds of unlocking it, the liftgate locks
again. Press the button on the remote
control or use the key blade inserted into
the liftgate lock cylinder to unlock the
liftgate again.
Note: The liftgate does not unlock when
you unlock all the doors using the remote
control or power door lock control, unless
you use the global unlock feature which,
overrides the 45-second timer.
REPLACING A LOST KEY OR
REMOTE CONTROL
Replacement keys or remote controls can
be purchased from an authorized dealer.
Authorized dealers can program remote
controls for your vehicle.
58
Explorer (CTW) Police, Canada/United States of America, Police, enUSA, Edition date: 201902, Second-Printing Keys and Remote ControlsE138624
Page 62 of 395
LOCKING AND UNLOCKING
You can use the power door lock control
or the remote control to lock and unlock
your vehicle.
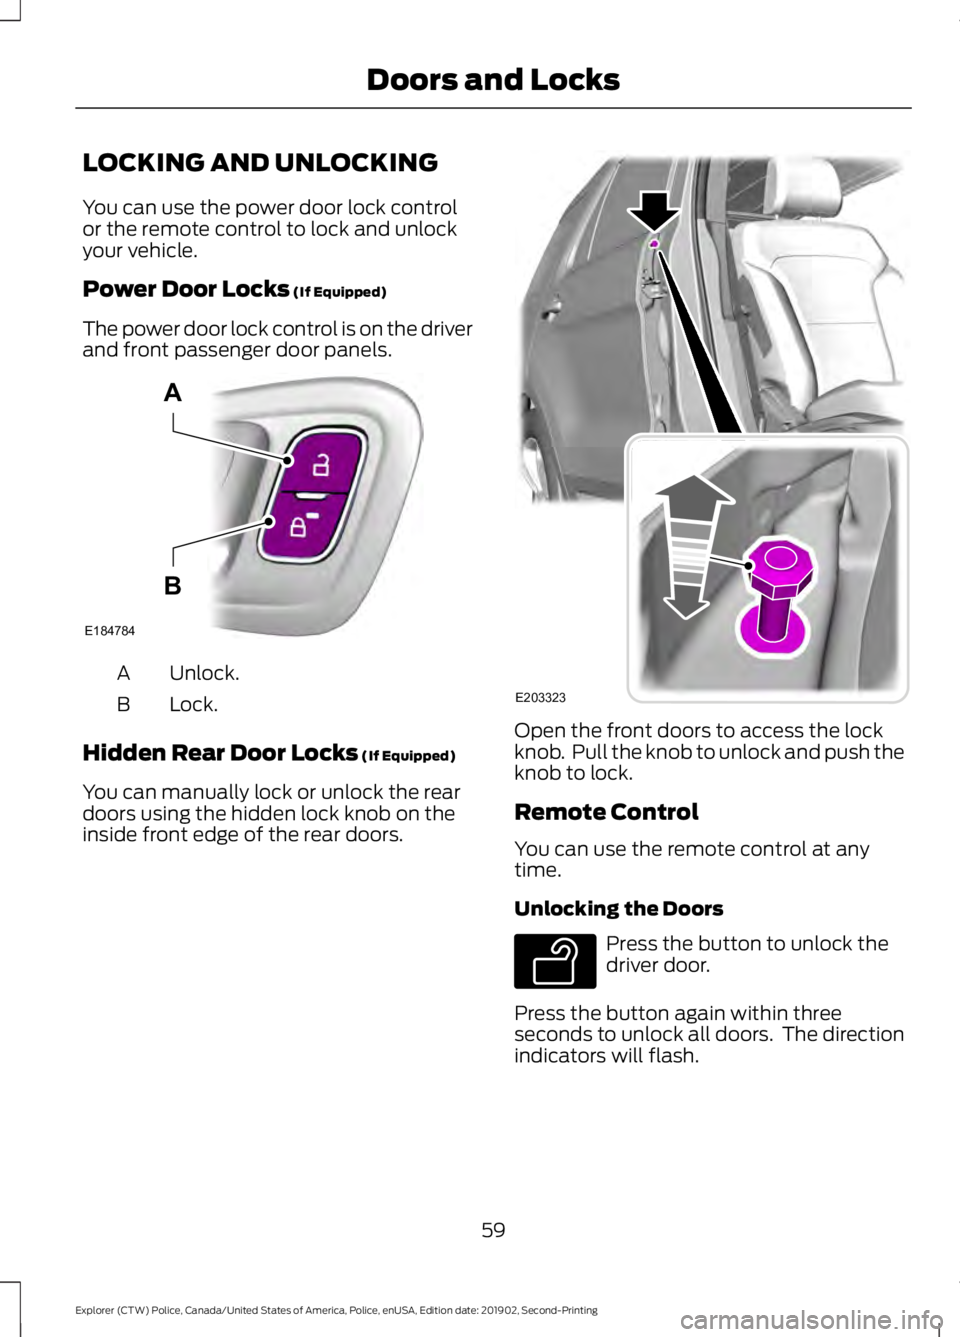
Power Door Locks (If Equipped)
The power door lock control is on the driver
and front passenger door panels. Unlock.
A
Lock.
B
Hidden Rear Door Locks
(If Equipped)
You can manually lock or unlock the rear
doors using the hidden lock knob on the
inside front edge of the rear doors. Open the front doors to access the lock
knob. Pull the knob to unlock and push the
knob to lock.
Remote Control
You can use the remote control at any
time.
Unlocking the Doors
Press the button to unlock the
driver door.
Press the button again within three
seconds to unlock all doors. The direction
indicators will flash.
59
Explorer (CTW) Police, Canada/United States of America, Police, enUSA, Edition date: 201902, Second-Printing Doors and LocksE184784
A
B E203323 E138629
Page 63 of 395
Press and hold both the lock and unlock
buttons on the remote control for three
seconds to change between driver door or
all doors unlock mode. The direction
indicators will flash twice to indicate a
change to the unlocking mode. Driver door
mode only unlocks the driver door when
you press the unlock button once. All door
mode unlocks all doors when you press
the unlock button once. The unlocking
mode applies to the remote control.
Locking the Doors
Press the button to lock all
doors. The direction indicators
flash.
Press the button again within three
seconds to confirm that all the doors
close. The doors lock again, the horn
sounds and the direction indicators flash
if all the doors and the liftgate close.
Note: If any door or the liftgate is open, or
if the hood is open on vehicles with an
anti-theft alarm or remote start, the horn
sounds twice and the direction indicators
do not flash.
Independent Liftgate Unlocking
Feature (If Equipped)
This feature allows you to unlock the
liftgate independently of the other doors.
Unlocking
The liftgate unlocks when you pull and
release the liftgate control on the overhead
console with the ignition on.
Note: The liftgate does not unlock when
you unlock all the doors electronically using
the remote control or power door lock
control.
Liftgate Timed Release (If Equipped)
Switch the ignition to the run, start or
accessory position. Pull and release the liftgate
control on the overhead console.
Note: Only the liftgate unlocks. All other
passenger doors remain in the previous
locking state.
A warning lamp illuminates in the
instrument cluster for 45 seconds.
See
Warning Lamps and Indicators (page
80). You can then open the liftgate using
the exterior liftgate release button.
Once the 45 second timer expires, the
lamp turns off and you can no longer open
the liftgate. Pull and release the liftgate
control on the overhead console again to
restart the timer.
Note: You can also unlock the liftgate by
using the key blade inserted into the liftgate
lock cylinder.
Locking
The liftgate locks when any of the
following occur:
• You open and close the liftgate after
you pull and release the liftgate control
on the overhead console.
• The 45 second timer expires.
Locking and Unlocking the Doors
with the Key Blade
Locking with the Key
Turn the top of the key toward the front of
your vehicle.
Unlocking with the Key
Turn the top of the key toward the rear of
your vehicle.
Note: With the child safety locks on and
you pull the interior handle, you only turn off
the emergency locking, not the child safety
lock. You can only open the doors using the
external door handle.
60
Explorer (CTW) Police, Canada/United States of America, Police, enUSA, Edition date: 201902, Second-Printing Doors and LocksE138623
Page 65 of 395
MANUAL LIFTGATE
WARNING: It is extremely
dangerous to ride in a cargo area, inside
or outside of a vehicle. In a crash, people
riding in these areas are more likely to be
seriously injured or killed. Do not allow
people to ride in any area of your vehicle
that is not equipped with seats and
seatbelts. Make sure everyone in your
vehicle is in a seat and properly using a
seatbelt. Failure to follow this warning
could result in serious personal injury or
death. WARNING:
Make sure that you
fully close the liftgate to prevent exhaust
fumes from entering your vehicle. If you
are unable to fully close the liftgate,
open the air vents or the windows to
allow fresh air to enter your vehicle.
Failure to follow this instruction could
result in personal injury or death.
Note: Be careful when opening or closing
the liftgate in a garage or other enclosed
area to avoid damaging the liftgate.
Note: Do not hang anything, for example
a bike rack, from the glass or liftgate. This
could damage the liftgate and its
components.
Note: Do not leave the liftgate open while
driving. This could damage the liftgate and
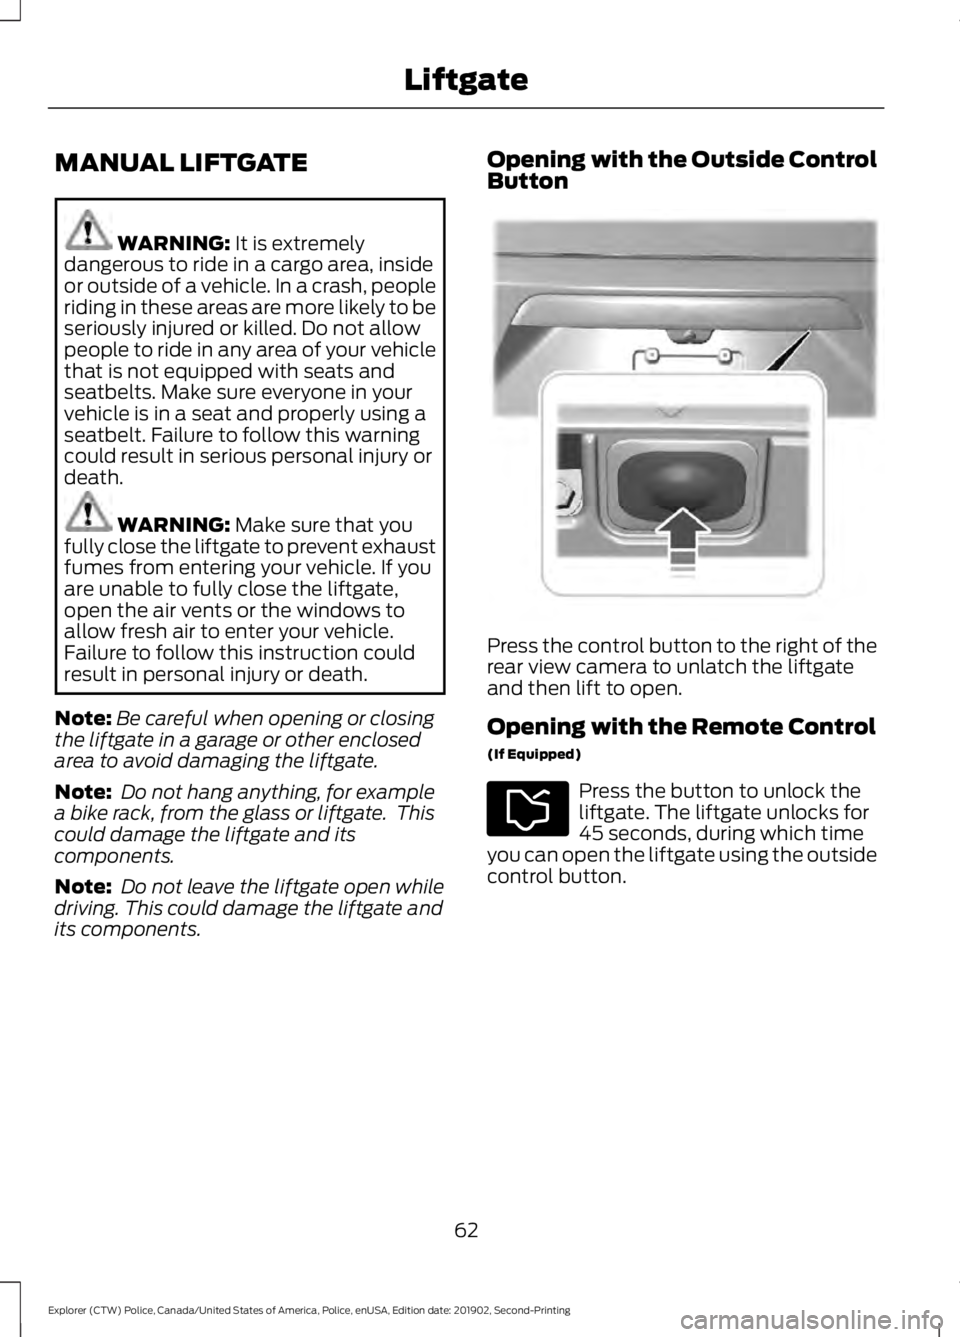
its components. Opening with the Outside Control
Button
Press the control button to the right of the
rear view camera to unlatch the liftgate
and then lift to open.
Opening with the Remote Control
(If Equipped)
Press the button to unlock the
liftgate. The liftgate unlocks for
45 seconds, during which time
you can open the liftgate using the outside
control button.
62
Explorer (CTW) Police, Canada/United States of America, Police, enUSA, Edition date: 201902, Second-Printing LiftgateE291352
Page 71 of 395
WINDSHIELD WIPERS
Note:
Fully defrost the windshield before
you switch the windshield wipers on.
Note: Make sure you switch the windshield
wipers off before entering a car wash.
Note: If streaks or smears appear on the
windshield, clean the windshield and the
wiper blades. If that does not resolve the
issue, install new wiper blades.
Note: Do not operate the wipers on a dry
windshield. This may scratch the glass,
damage the wiper blades or cause the wiper
motor to burn out. Always use the
windshield washers before wiping a dry
windshield. •
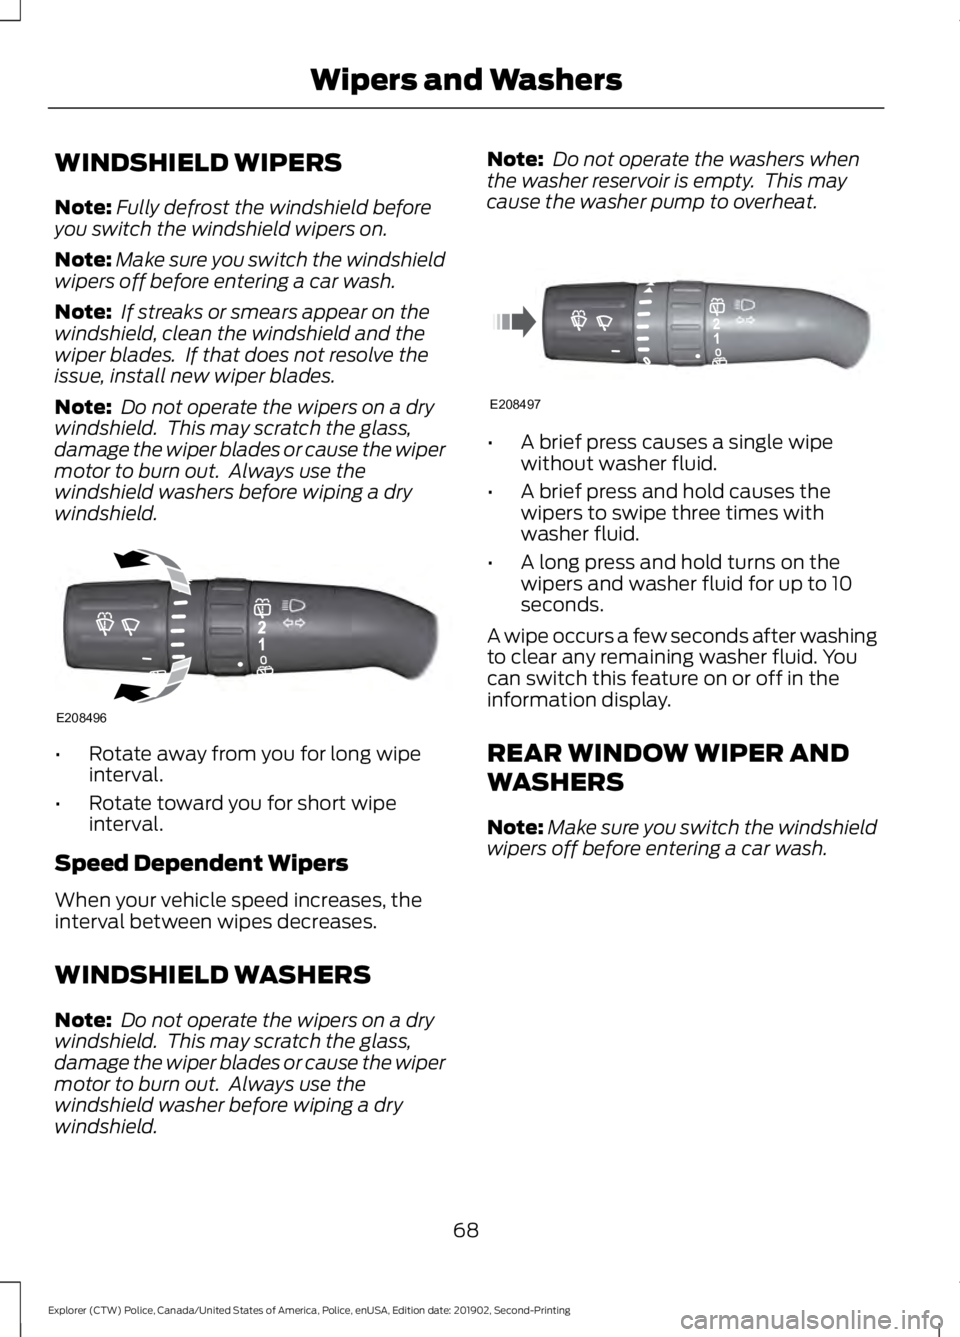
Rotate away from you for long wipe
interval.
• Rotate toward you for short wipe
interval.
Speed Dependent Wipers
When your vehicle speed increases, the
interval between wipes decreases.
WINDSHIELD WASHERS
Note: Do not operate the wipers on a dry
windshield. This may scratch the glass,
damage the wiper blades or cause the wiper
motor to burn out. Always use the
windshield washer before wiping a dry
windshield. Note:
Do not operate the washers when
the washer reservoir is empty. This may
cause the washer pump to overheat. •
A brief press causes a single wipe
without washer fluid.
• A brief press and hold causes the
wipers to swipe three times with
washer fluid.
• A long press and hold turns on the
wipers and washer fluid for up to 10
seconds.
A wipe occurs a few seconds after washing
to clear any remaining washer fluid. You
can switch this feature on or off in the
information display.
REAR WINDOW WIPER AND
WASHERS
Note: Make sure you switch the windshield
wipers off before entering a car wash.
68
Explorer (CTW) Police, Canada/United States of America, Police, enUSA, Edition date: 201902, Second-Printing Wipers and WashersE208496 E208497
Page 73 of 395
GENERAL INFORMATION
Condensation in Lamp Assemblies
Exterior lamps have vents to
accommodate normal changes in air
pressure.
Condensation can be a natural by-product
of this design. When moist air enters the
lamp assembly through the vents, there is
a possibility that condensation can occur
when the temperature is cold. When
normal condensation occurs, a fine mist
can form on the interior of the lens. The
fine mist eventually clears and exits
through the vents during normal operation.
Clearing time may take as long as 48 hours
under dry weather conditions.
Examples of acceptable condensation are:
•
The presence of a fine mist (no streaks,
drip marks or large droplets).
• A fine mist covers less than 50% of the
lens.
Examples of unacceptable condensation
are:
• A water puddle inside the lamp.
• Streaks, drip marks or large droplets
present on the interior of the lens.
If you see any unacceptable condensation,
have your vehicle checked by an authorized
dealer.
Dark Car Feature (If Equipped)
The Dark Car feature may disable the
following features:
• Welcome/farewell strategy.
• Courtesy lighting.
• Daytime running lamps.
Note: In markets where daytime running
lamps are mandated by law, the Dark Car
feature does not disable the daytime
running lamps. Switching the Backlighting Off
The Dark Car feature allows you to switch
the cabin backlighting off, this state can
be reached by:
1.
Switch the lighting control to the lamps
off position.
2. Use the instrument lighting dimmer switch to lower the brightness to off.
LIGHTING CONTROL
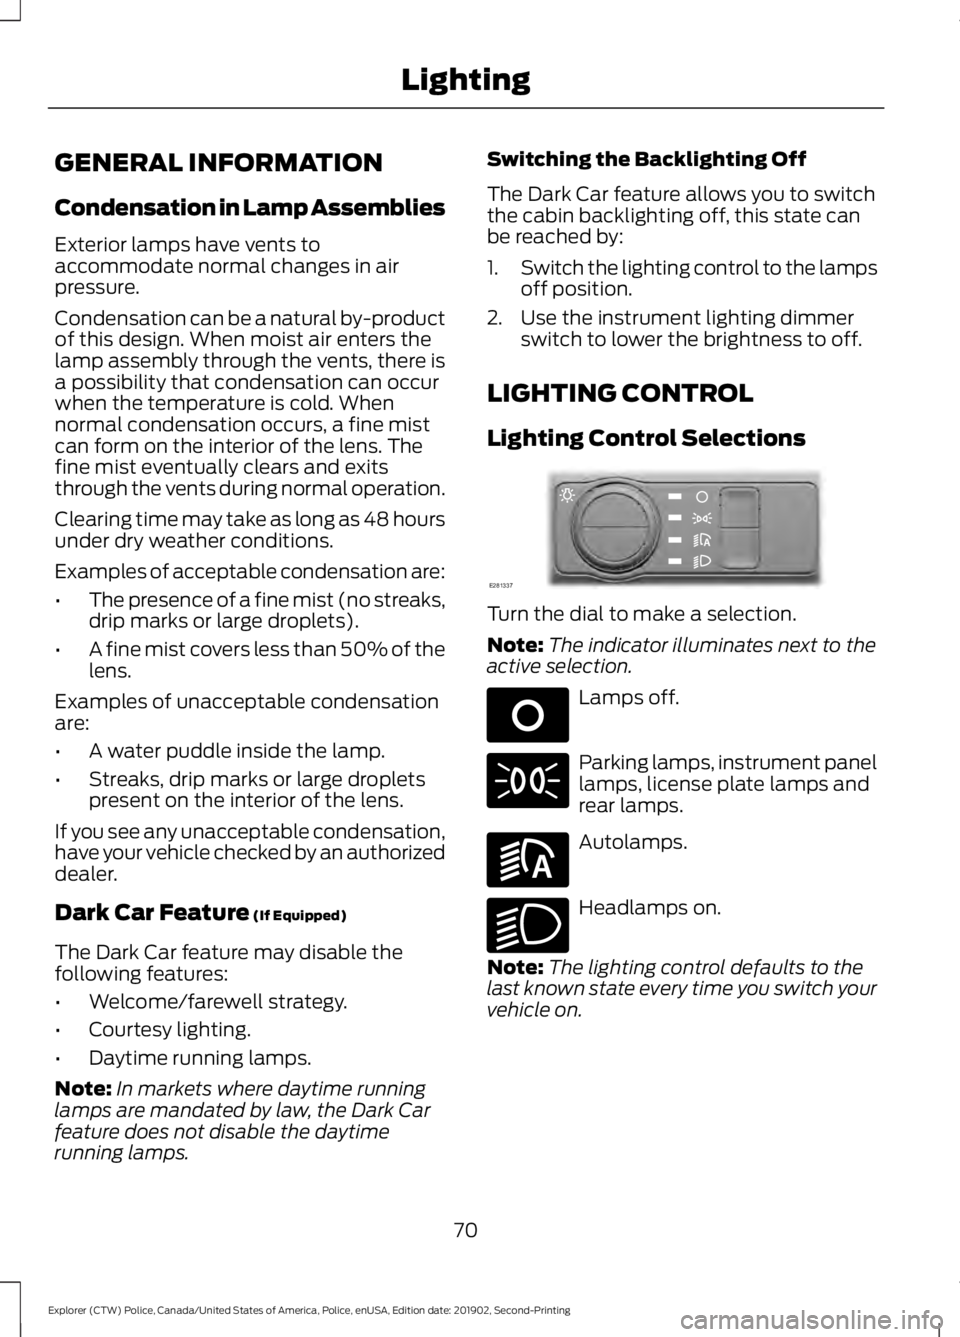
Lighting Control Selections Turn the dial to make a selection.
Note:
The indicator illuminates next to the
active selection. Lamps off.
Parking lamps, instrument panel
lamps, license plate lamps and
rear lamps.
Autolamps.
Headlamps on.
Note: The lighting control defaults to the
last known state every time you switch your
vehicle on.
70
Explorer (CTW) Police, Canada/United States of America, Police, enUSA, Edition date: 201902, Second-Printing LightingE281337 E265031 E281240 E270968