glove box FORD POLICE INTERCEPTOR SEDAN 2016 1.G Owners Manual
[x] Cancel search | Manufacturer: FORD, Model Year: 2016, Model line: POLICE INTERCEPTOR SEDAN, Model: FORD POLICE INTERCEPTOR SEDAN 2016 1.GPages: 358, PDF Size: 3.55 MB
Page 85 of 358

CABIN AIR FILTER
Your vehicle is equipped with a cabin air
filter, which gives you and your passengers
the following benefits:
•
It improves your driving comfort by
reducing particle concentration.
• It improves the interior compartment
cleanliness.
• It protects the climate control
components from particle deposits.
You can locate the cabin air filter behind
the glove box.
Note: Make sure you have a cabin air filter
installed at all times. This prevents foreign
objects from entering the system. Running
the system without a filter in place could
result in degradation or damage to the
system.
Replace the filter at regular intervals. See
Scheduled Maintenance (page 310).
For additional cabin air filter information,
or to replace the filter, see an authorized
dealer.
82
Police Interceptor (CPH), enUSA, Edition date: 10/2015, First Printing Climate Control
Page 168 of 358

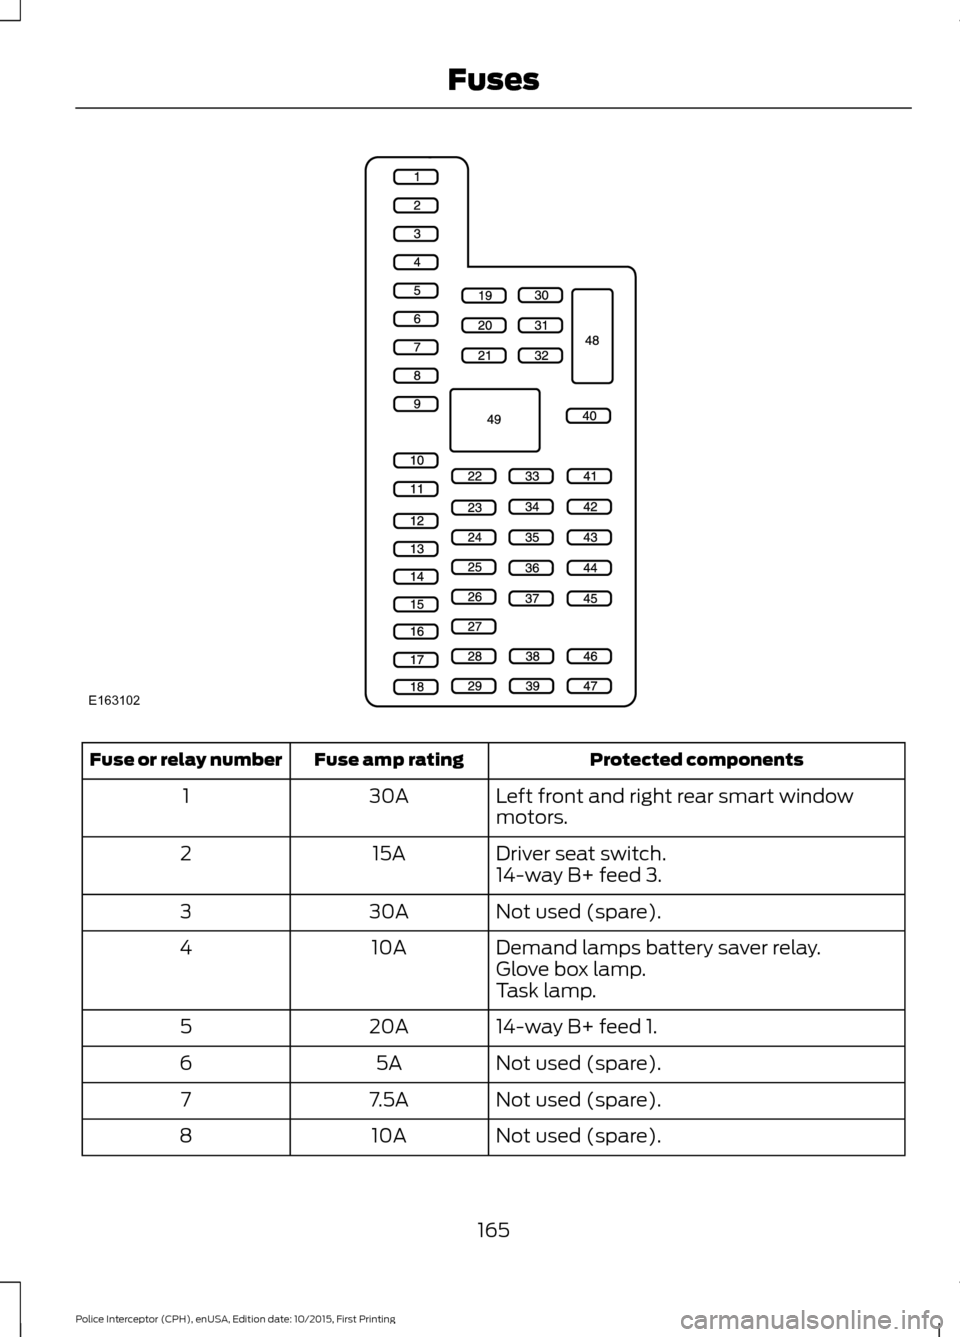
Protected components
Fuse amp rating
Fuse or relay number
Left front and right rear smart window
motors.
30A
1
Driver seat switch.
15A
2
14-way B+ feed 3.
Not used (spare).
30A
3
Demand lamps battery saver relay.
10A
4
Glove box lamp.
Task lamp.
14-way B+ feed 1.
20A
5
Not used (spare).
5A
6
Not used (spare).
7.5A
7
Not used (spare).
10A
8
165
Police Interceptor (CPH), enUSA, Edition date: 10/2015, First Printing FusesE163102
Page 205 of 358

•
When inflating a tire or other objects,
use the black air hose only. Do not use
the transparent hose which is designed
for sealant application only.
• Operating the kit could cause an
electrical disturbance in radio, CD, and
DVD player operation.
What to do when a Tire Is
Punctured
A tire puncture within the tire tread area
can be repaired in two stages with the kit.
• In the first stage, the tire will be
reinflated with a sealing compound
and air. After the tire has been
reinflated, you will need to drive the
vehicle a short distance 4 mi (6 km) to
distribute the sealant in the tire.
• In the second stage, you will need to
check the tire pressure and adjust, if
necessary, to the vehicle tire inflation
pressure.
First Stage: Reinflating the Tire
with Sealing Compound and Air WARNINGS
Do not stand directly over the kit
while inflating the tire. If you notice
any unusual bulges or deformations
in the tire sidewall during inflation, stop
and call roadside assistance. If the tire does not inflate to the
recommended tire pressure within
15 minutes, stop and call roadside
assistance. Preparation: Park the vehicle in a safe, level
and secure area, away from moving traffic.
Turn the hazard lights on. Apply the parking
brake and turn the engine off. Inspect the
flat tire for visible damage. Sealant compound contains latex. To
avoid any allergic reactions, use the
non-latex gloves located in the accessory
box on the underside of the kit housing.
Do not remove any foreign object that has
pierced the tire. If a puncture is located in
the tire sidewall, stop and call roadside
assistance.
1. Remove the valve cap from the tire
valve.
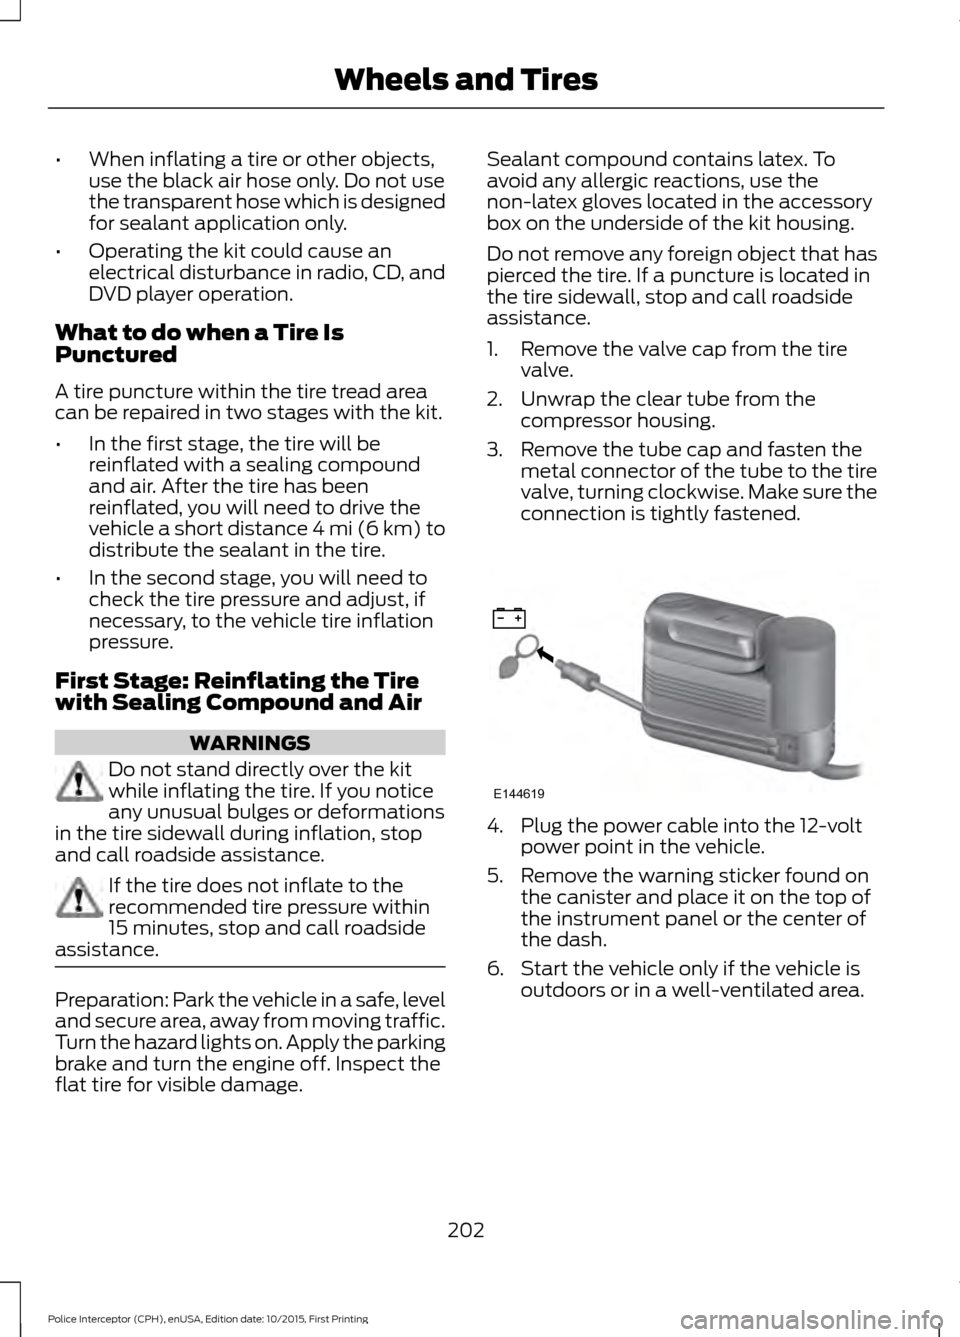
2. Unwrap the clear tube from the compressor housing.
3. Remove the tube cap and fasten the metal connector of the tube to the tire
valve, turning clockwise. Make sure the
connection is tightly fastened. 4. Plug the power cable into the 12-volt
power point in the vehicle.
5. Remove the warning sticker found on the canister and place it on the top of
the instrument panel or the center of
the dash.
6. Start the vehicle only if the vehicle is outdoors or in a well-ventilated area.
202
Police Interceptor (CPH), enUSA, Edition date: 10/2015, First Printing Wheels and TiresE144619
Page 262 of 358

AUDIO INPUT JACK
WARNINGS
Driving while distracted can result in
loss of vehicle control, crash and
injury. We strongly recommend that
you use extreme caution when using any
device that may take your focus off the
road. Your primary responsibility is the safe
operation of your vehicle. We recommend
against the use of any hand-held device
while driving and encourage the use of
voice-operated systems when possible.
Make sure you are aware of all applicable
local laws that may affect the use of
electronic devices while driving. For safety reasons, do not connect
or adjust the settings on your
portable music player while your
vehicle is moving. Store the portable music player in a
secure location, such as the center
console or the glove box, when your
vehicle is moving. Hard objects may
become projectiles in a collision or sudden
stop, which may increase the risk of serious
injury. The audio extension cable must be
long enough to allow the portable music
player to be safely stored while your
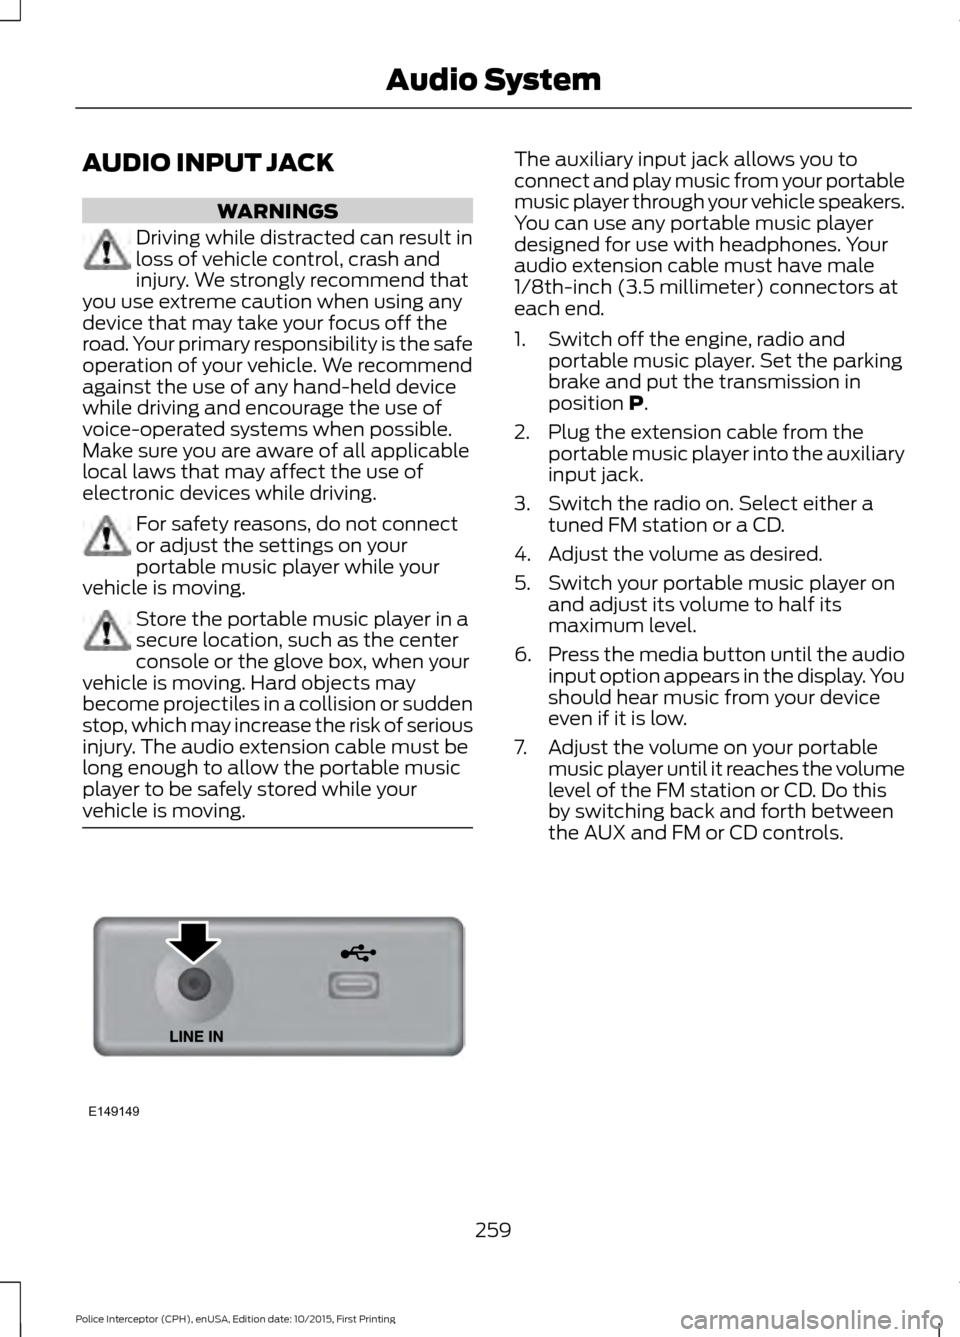
vehicle is moving. The auxiliary input jack allows you to
connect and play music from your portable
music player through your vehicle speakers.
You can use any portable music player
designed for use with headphones. Your
audio extension cable must have male
1/8th-inch (3.5 millimeter) connectors at
each end.
1. Switch off the engine, radio and
portable music player. Set the parking
brake and put the transmission in
position P.
2. Plug the extension cable from the portable music player into the auxiliary
input jack.
3. Switch the radio on. Select either a tuned FM station or a CD.
4. Adjust the volume as desired.
5. Switch your portable music player on and adjust its volume to half its
maximum level.
6. Press the media button until the audio
input option appears in the display. You
should hear music from your device
even if it is low.
7. Adjust the volume on your portable music player until it reaches the volume
level of the FM station or CD. Do this
by switching back and forth between
the AUX and FM or CD controls.
259
Police Interceptor (CPH), enUSA, Edition date: 10/2015, First Printing Audio SystemE149149