remote control FORD POLICE INTERCEPTOR SEDAN 2017 1.G Owners Manual
[x] Cancel search | Manufacturer: FORD, Model Year: 2017, Model line: POLICE INTERCEPTOR SEDAN, Model: FORD POLICE INTERCEPTOR SEDAN 2017 1.GPages: 358, PDF Size: 3.74 MB
Page 4 of 358
Introduction
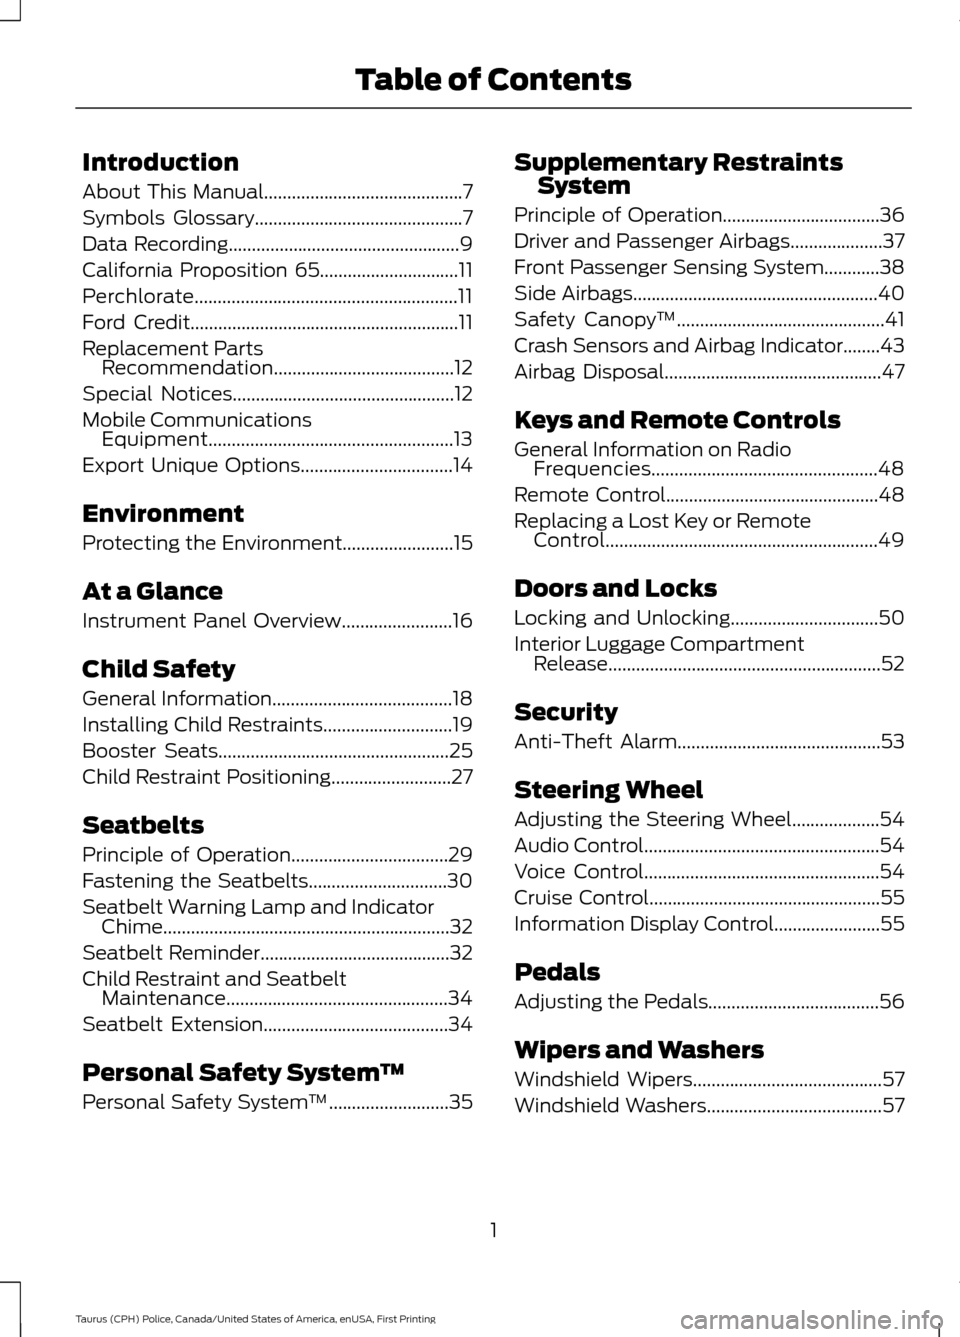
About This Manual...........................................7
Symbols Glossary
.............................................7
Data Recording
..................................................9
California Proposition 65..............................11
Perchlorate.........................................................11
Ford Credit
..........................................................11
Replacement Parts Recommendation.......................................12
Special Notices................................................12
Mobile Communications Equipment.....................................................13
Export Unique Options
.................................14
Environment
Protecting the Environment........................15
At a Glance
Instrument Panel Overview........................16
Child Safety
General Information
.......................................18
Installing Child Restraints
............................19
Booster Seats..................................................25
Child Restraint Positioning
..........................27
Seatbelts
Principle of Operation..................................29
Fastening the Seatbelts..............................30
Seatbelt Warning Lamp and Indicator Chime
..............................................................32
Seatbelt Reminder.........................................32
Child Restraint and Seatbelt Maintenance................................................34
Seatbelt Extension
........................................34
Personal Safety System ™
Personal Safety System ™
..........................35Supplementary Restraints
System
Principle of Operation..................................36
Driver and Passenger Airbags....................37
Front Passenger Sensing System
............38
Side Airbags
.....................................................40
Safety Canopy ™
.............................................41
Crash Sensors and Airbag Indicator........43
Airbag Disposal
...............................................47
Keys and Remote Controls
General Information on Radio Frequencies.................................................48
Remote Control..............................................48
Replacing a Lost Key or Remote Control...........................................................49
Doors and Locks
Locking and Unlocking................................50
Interior Luggage Compartment Release...........................................................52
Security
Anti-Theft Alarm............................................53
Steering Wheel
Adjusting the Steering Wheel
...................54
Audio Control
...................................................54
Voice Control
...................................................54
Cruise Control
..................................................55
Information Display Control.......................55
Pedals
Adjusting the Pedals.....................................56
Wipers and Washers
Windshield Wipers
.........................................57
Windshield Washers......................................57
1
Taurus (CPH) Police, Canada/United States of America, enUSA, First Printing Table of Contents
Page 14 of 358
Note:
Including to the extent that any
law pertaining to Event Data Recorders
applies to SYNC or its features, please
note the following: Once 911 Assist (if
equipped) is enabled (set ON), 911 Assist
may, through any paired and connected
cell phone, disclose to emergency
services that the vehicle has been in a
crash involving the deployment of an
airbag or, in certain vehicles, the
activation of the fuel pump shut-off.
Certain versions or updates to 911 Assist
may also be capable of being used to
electronically or verbally provide to 911
operators the vehicle location (such as
latitude and longitude), and/or other
details about the vehicle or crash or
personal information about the
occupants to assist 911 operators to
provide the most appropriate emergency
services. If you do not want to disclose
this information, do not activate the 911
Assist feature. See SYNC™ (page 258).
Additionally, when you connect to
Traffic, Directions and Information (if
equipped, U.S. only), the service uses
GPS technology and advanced vehicle
sensors to collect the vehicle ’s current
location, travel direction, and speed
(“ vehicle travel information ”), only to
help provide you with the directions,
traffic reports, or business searches
that you request. If you do not want
Ford or its vendors to receive this
information, do not activate the
service. For more information, see
Traffic, Directions and Information,
Terms and Conditions. See
SYNC™
(page 258). CALIFORNIA PROPOSITION 65 WARNINGS
Some constituents of engine
exhaust, certain vehicle components,
certain fluids contained in vehicles
and certain products of component wear
contain or emit chemicals known to the
State of California to cause cancer and
birth defects or other reproductive harm. Battery posts, terminals and related
accessories contain lead and lead
compounds, chemicals known to the
State of California to cause cancer and
reproductive harm. Batteries also contain
other chemicals known to the State of
California to cause cancer. Wash your
hands after handling. PERCHLORATE
Certain components in your vehicle such
as airbag modules, seatbelt pretensioners
and remote control batteries may contain
perchlorate material. Special handling
may apply for service or vehicle end of life
disposal.
For more information visit:
Web Address
www.dtsc.ca.gov/hazard- ouswaste/perchlorate
FORD CREDIT
US Only
Ford Credit offers a full range of financing
and lease plans to help you acquire your
vehicle. If you have financed or leased your
vehicle through Ford Credit, thank you for
your business.
11
Taurus (CPH) Police, Canada/United States of America, enUSA, First Printing Introduction
Page 16 of 358
On-board Diagnostics (OBD-II)
WARNING
Do not connect wireless plug-in
devices to the data link connector.
Unauthorized third parties could gain
access to vehicle data and impair the
performance of safety related systems.
Only allow repair facilities that follow our
service and repair instructions to connect
their equipment to the data link connector. Your vehicle
’s On-board Diagnostics
(OBD-II) system has a data port for
diagnostics, repair and reprogramming
services with diagnostic scan tools.
Installing a non-Ford-approved
aftermarket OBD plug-in device that uses
the port during normal driving, for example
remote insurance company monitoring,
remote vehicle diagnostics, telematics or
engine reprogramming, may cause
interference or damage to vehicle systems.
We do not recommend or endorse the use
of any non-Ford-approved aftermarket
OBD plug-in devices. The vehicle Warranty
may not cover damage caused by any
non-Ford-approved aftermarket OBD
plug-in device.
My Fleet Management
This feature allows a fleet administrator
to control specific vehicle settings using a
Ford authorized service tool. This helps the
fleet administrator set certain vehicle
settings to match administrative policy.
The configurable settings are: •
Vehicle Speed: Select an alternative
speed limit that is below your vehicle's
maximum capability. A message
displays and a tone sounds when
starting your vehicle to indicate the
customized speed limit.
• Audio Volume: Select a limit for the
maximum volume of the audio system
in the range of 0% (full mute) to 100%
(no limit) in 10% increments.
For more information regarding the My
Fleet Management feature
configuration process, reference the
procedure in the Police Upfit &
Modifier ’s Guide found at: Web Address
www.fordpoliceinterceptorupfit.com
MOBILE COMMUNICATIONS
EQUIPMENT WARNING
Driving while distracted can result in
loss of vehicle control, crash and
injury. We strongly recommend that
you use extreme caution when using any
device that may take your focus off the
road. Your primary responsibility is the safe
operation of your vehicle. We recommend
against the use of any hand-held device
while driving and encourage the use of
voice-operated systems when possible.
Make sure you are aware of all applicable
local laws that may affect the use of
electronic devices while driving. Using mobile communications equipment
is becoming increasingly important in the
conduct of business and personal affairs.
However, you must not compromise your
own or others’
safety when using such
equipment. Mobile communications can
enhance personal safety and security when
13
Taurus (CPH) Police, Canada/United States of America, enUSA, First Printing Introduction
Page 51 of 358
GENERAL INFORMATION ON
RADIO FREQUENCIES
This device complies with Part 15 of the
FCC Rules and with Industry Canada
license-exempt RSS standard(s).
Operation is subject to the following two
conditions: (1) This device may not cause
harmful interference, and (2) This device
must accept any interference received,
including interference that may cause
undesired operation.
Note:
Changes or modifications not
expressively approved by the party
responsible for compliance could void the
user's authority to operate the equipment.
The term IC before the radio certification
number only signifies that Industry Canada
technical specifications were met.
The typical operating range for your
transmitter is approximately 33 feet (10
meters). Vehicles with the remote start
feature will have a greater range. One of
the following could cause a decrease in
operating range:
• weather conditions
• nearby radio towers
• structures around the vehicle
• other vehicles parked next to your
vehicle
The radio frequency used by your remote
control can also be used by other short
distance radio transmissions, for example
amateur radios, medical equipment,
wireless headphones, remote controls and
alarm systems. If the frequencies are
jammed, you will not be able to use your
remote control. You can lock and unlock
the doors with the key.
Note: Make sure to lock your vehicle before
leaving it unattended.
Note: If you are in range, the remote control
will operate if you press any button
unintentionally. Note:
The remote control contains sensitive
electrical components. Exposure to moisture
or impact may cause permanent damage.
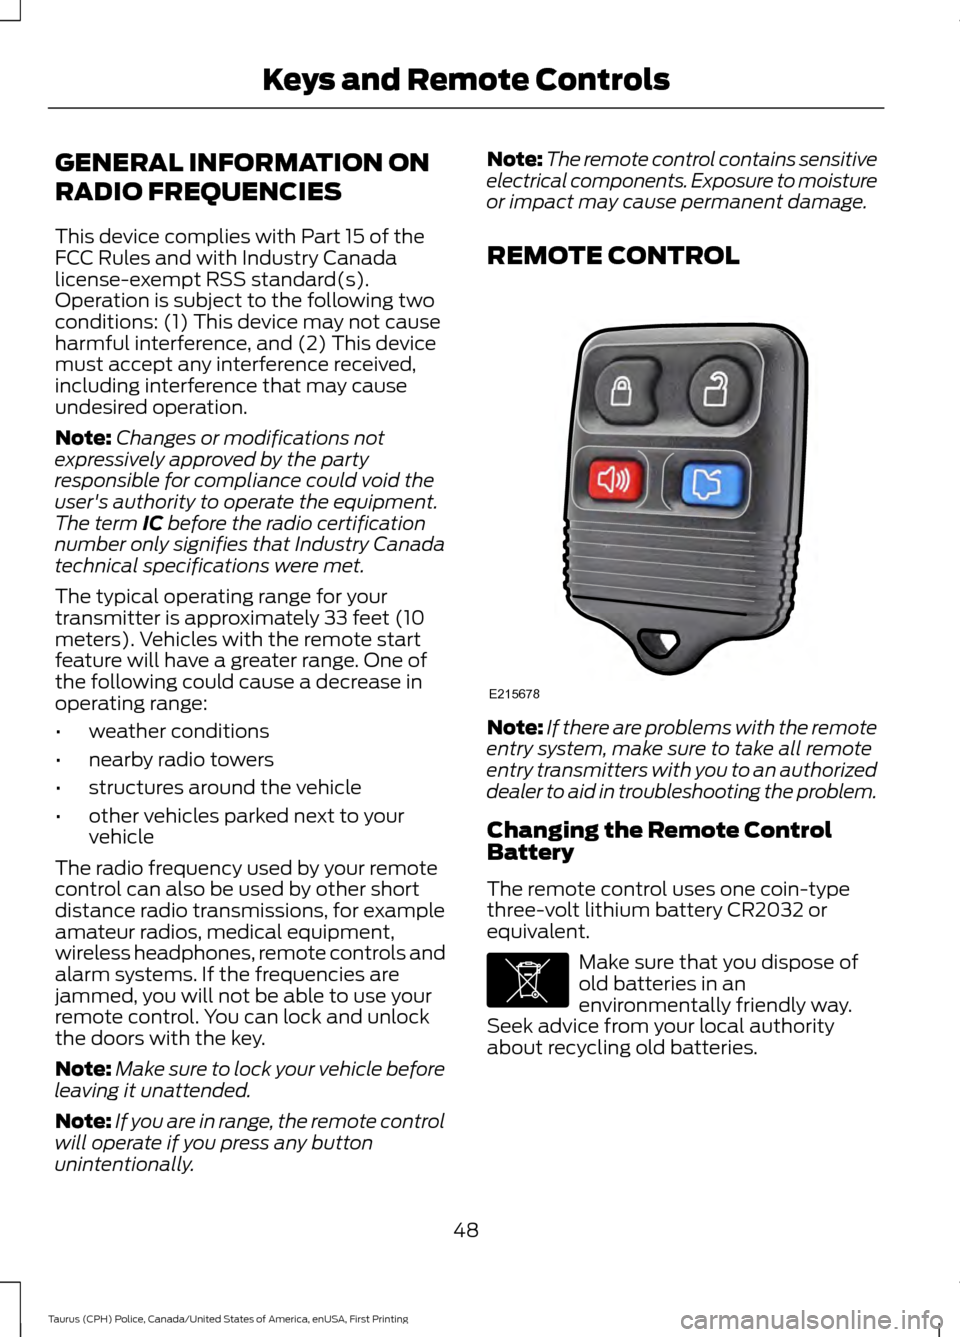
REMOTE CONTROL Note:
If there are problems with the remote
entry system, make sure to take all remote
entry transmitters with you to an authorized
dealer to aid in troubleshooting the problem.
Changing the Remote Control
Battery
The remote control uses one coin-type
three-volt lithium battery CR2032 or
equivalent. Make sure that you dispose of
old batteries in an
environmentally friendly way.
Seek advice from your local authority
about recycling old batteries.
48
Taurus (CPH) Police, Canada/United States of America, enUSA, First Printing Keys and Remote ControlsE215678 E107998
Page 52 of 358
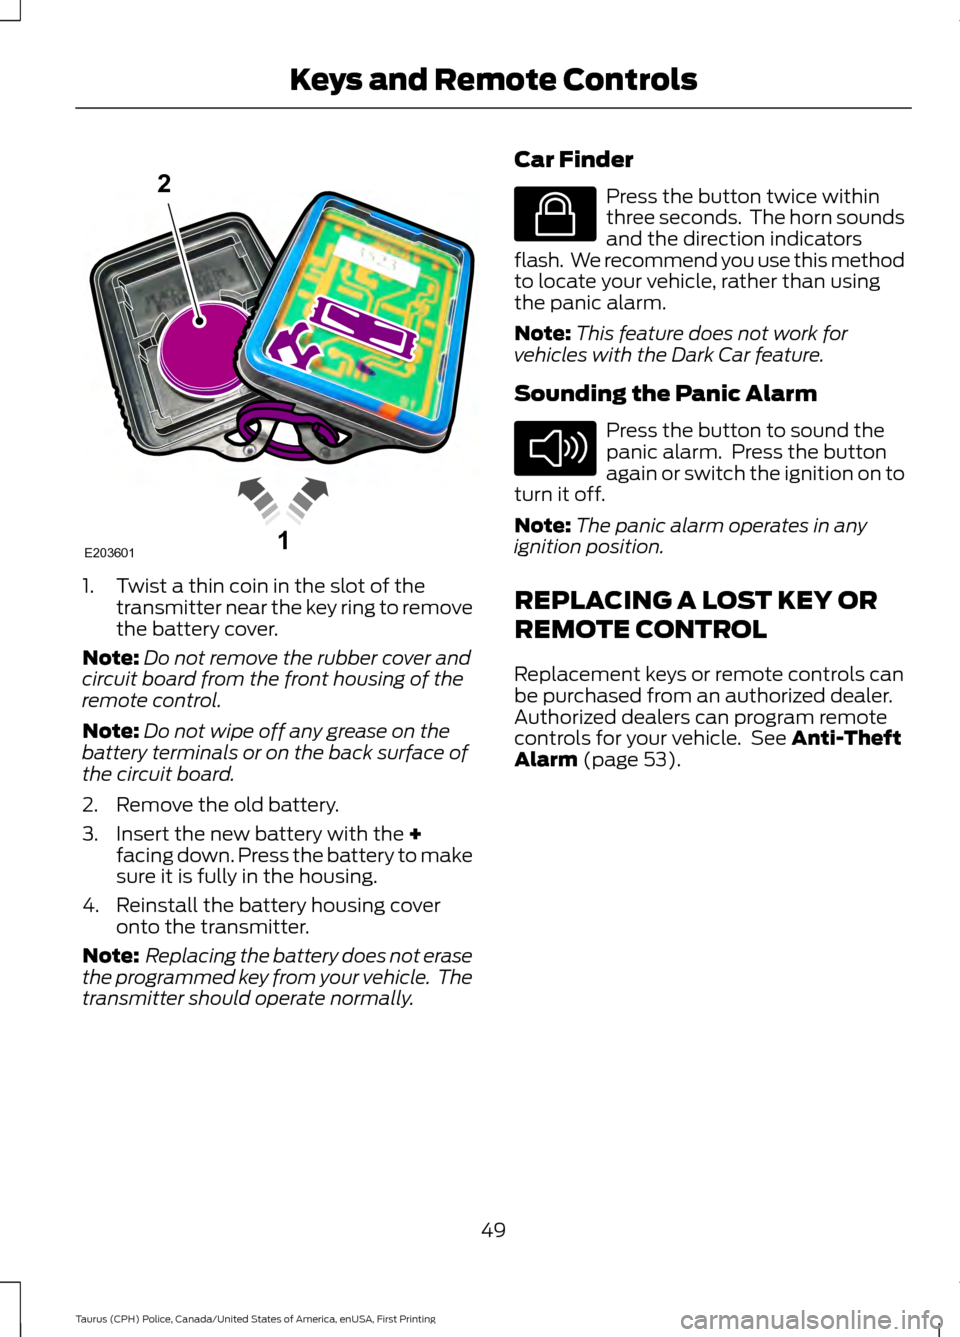
1. Twist a thin coin in the slot of the
transmitter near the key ring to remove
the battery cover.
Note: Do not remove the rubber cover and
circuit board from the front housing of the
remote control.
Note: Do not wipe off any grease on the
battery terminals or on the back surface of
the circuit board.
2. Remove the old battery.
3. Insert the new battery with the +
facing down. Press the battery to make
sure it is fully in the housing.
4. Reinstall the battery housing cover onto the transmitter.
Note: Replacing the battery does not erase
the programmed key from your vehicle. The
transmitter should operate normally. Car Finder Press the button twice within
three seconds. The horn sounds
and the direction indicators
flash. We recommend you use this method
to locate your vehicle, rather than using
the panic alarm.
Note: This feature does not work for
vehicles with the Dark Car feature.
Sounding the Panic Alarm Press the button to sound the
panic alarm. Press the button
again or switch the ignition on to
turn it off.
Note: The panic alarm operates in any
ignition position.
REPLACING A LOST KEY OR
REMOTE CONTROL
Replacement keys or remote controls can
be purchased from an authorized dealer.
Authorized dealers can program remote
controls for your vehicle. See
Anti-Theft
Alarm (page 53).
49
Taurus (CPH) Police, Canada/United States of America, enUSA, First Printing Keys and Remote Controls1E203601
2 E138623 E138624
Page 53 of 358
LOCKING AND UNLOCKING
You can use the power door lock control
or the remote control to lock and unlock
your vehicle.
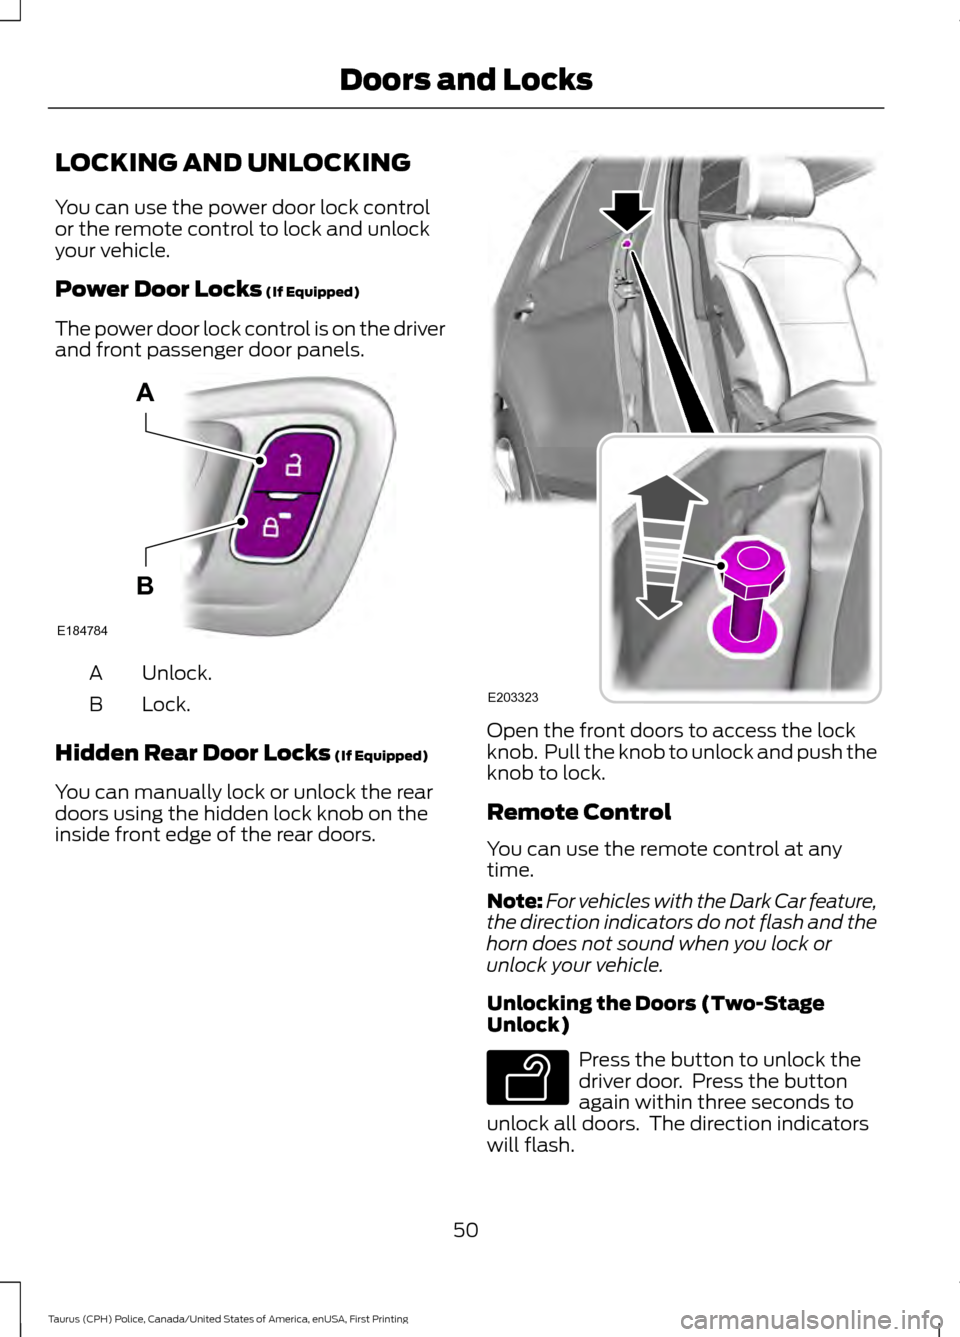
Power Door Locks (If Equipped)
The power door lock control is on the driver
and front passenger door panels. Unlock.
A
Lock.
B
Hidden Rear Door Locks
(If Equipped)
You can manually lock or unlock the rear
doors using the hidden lock knob on the
inside front edge of the rear doors. Open the front doors to access the lock
knob. Pull the knob to unlock and push the
knob to lock.
Remote Control
You can use the remote control at any
time.
Note:
For vehicles with the Dark Car feature,
the direction indicators do not flash and the
horn does not sound when you lock or
unlock your vehicle.
Unlocking the Doors (Two-Stage
Unlock) Press the button to unlock the
driver door. Press the button
again within three seconds to
unlock all doors. The direction indicators
will flash.
50
Taurus (CPH) Police, Canada/United States of America, enUSA, First Printing Doors and LocksE184784
A
B E203323 E138629
Page 54 of 358
Press and hold both the lock and unlock
buttons on the remote control for three
seconds to change between driver door or
all doors unlock mode. The direction
indicators will flash twice to indicate a
change to the unlocking mode. Driver door
mode only unlocks the driver door when
you press the unlock button once. All door
mode unlocks all doors when you press
the unlock button once. The unlocking
mode applies to the remote control.
Locking the Doors
Press the button to lock all
doors. The direction indicators
will flash. Press the button again
within three seconds to confirm that all
the doors are closed.
The doors will lock again, the horn will
sound and the direction indicators will
flash if all the doors and the luggage
compartment are closed.
Locking and Unlocking the Doors
with the Key Blade
Locking the Doors
Turn the top of the key toward the front of
your vehicle.
Unlocking the Doors
Turn the top of the key toward the rear of
your vehicle.
Note: If the hidden rear door locks are on
and you pull the interior handle, you only
switch off the emergency locking, not the
hidden rear door locks. You can only open
the doors using the external door handle.
Opening a Rear Door From the
Inside
Pull the interior door handle twice to
unlock and open a rear door. The first pull
unlocks the door and the second pull
opens the door. Illuminated Entry (If Equipped)
The interior lamps and some exterior
lamps illuminate when you unlock the
doors with the remote control.
The lamps turn off if:
• The ignition is on.
• You press the remote control lock
button.
• 25 seconds have elapsed.
The lamps do not turn off if:
• You switch them on with the lighting
control.
• Any door is open.
Illuminated Exit
(If Equipped)
The interior lamps and some exterior
lamps illuminate when all doors are closed
and you switch the ignition off.
The lamps will turn off if all the doors
remain closed and:
• 25 seconds have elapsed.
• You lock your vehicle from the outside.
Battery Saver
If you leave the courtesy lamps, interior
lamps or headlamps on, the battery saver
shuts them off 10 minutes after you switch
the ignition off.
Opening the Luggage
Compartment
With the Remote Control Press the button twice within
three seconds.
51
Taurus (CPH) Police, Canada/United States of America, enUSA, First Printing Doors and LocksE138623 E211694
Page 56 of 358
ANTI-THEFT ALARM (If Equipped)
Alarm System
The perimeter alarm is a deterrent against
unauthorized access to your vehicle
through the doors, luggage compartment
and the hood.
Triggering the Alarm
Once armed, the alarm is triggered in any
of the following ways:
• If someone opens a door, cargo area
or the hood without a valid key or
remote control.
• If you switch the ignition on without a
valid key.
If the alarm is triggered, the horn will sound
for 30 seconds and the hazard warning
flasher will flash for five minutes.
Any further attempts to perform one of the
above will trigger the alarm again.
Arming the Alarm
To arm the alarm, lock your vehicle. See
Doors and Locks
(page 50).
Disarming the Alarm
Disarm and silence the alarm by unlocking
the doors with the key and switching the
ignition on within 12 seconds, or by
unlocking the doors or the cargo area with
the remote control.
53
Taurus (CPH) Police, Canada/United States of America, enUSA, First Printing Security
Page 63 of 358
The daytime running lamps turn on when:
1. The ignition is switched to the on
position.
2. The lighting control is in the off position, parking lamps position or the
autolamps position, and the sensor
detects daylight.
3. Your vehicle is in drive (D).
Note: You can switch the daytime running
lamps on or off by selecting Police Silent
Mode through the information display. See
General Information (page 71).
Note: In markets where daytime running
lamps are mandated by law, Silent Mode
will not disable the daytime running lamps.
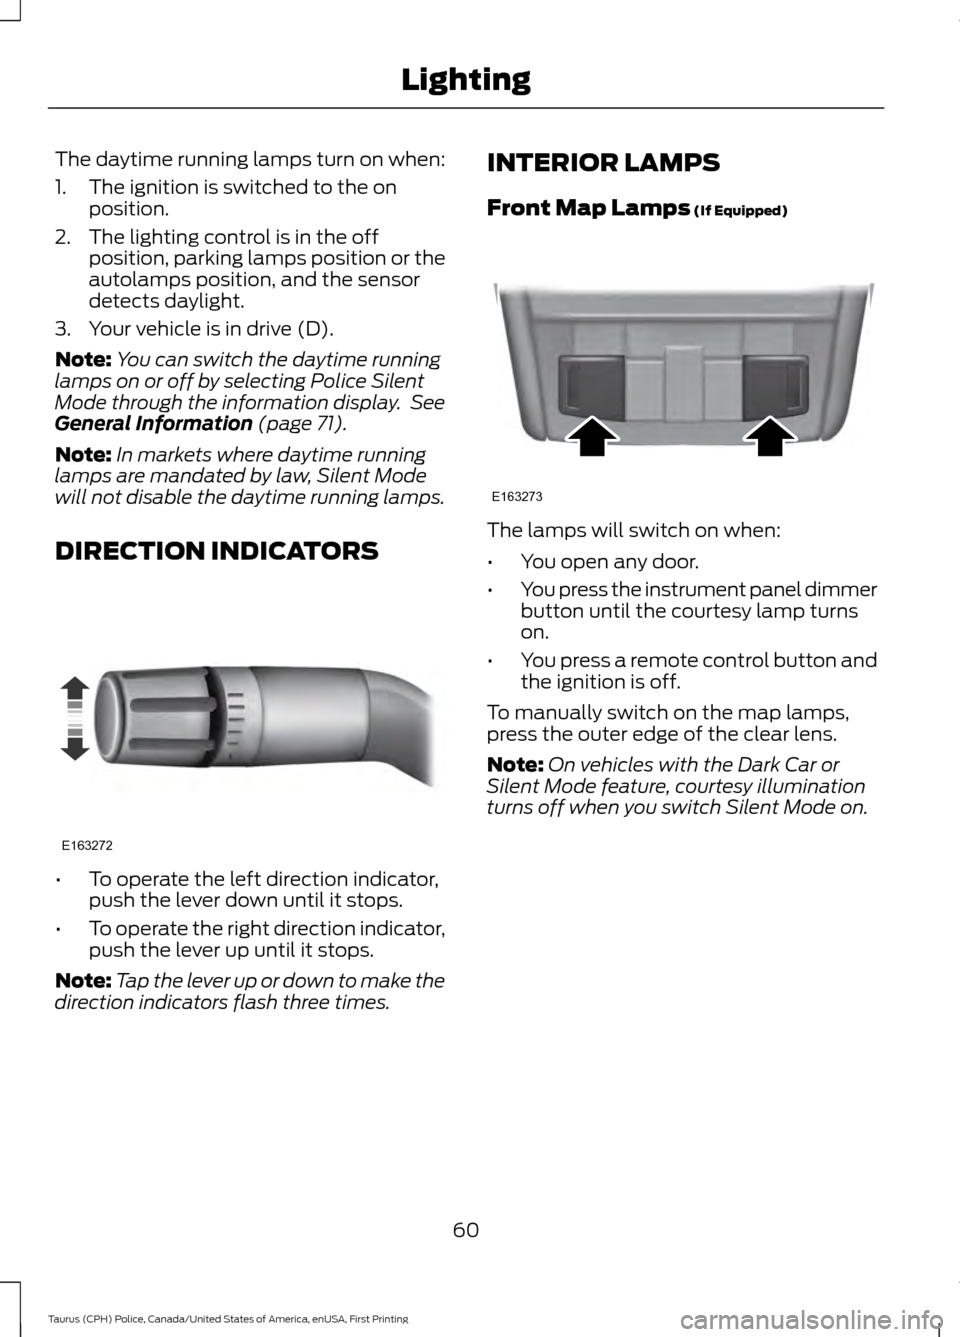
DIRECTION INDICATORS •
To operate the left direction indicator,
push the lever down until it stops.
• To operate the right direction indicator,
push the lever up until it stops.
Note: Tap the lever up or down to make the
direction indicators flash three times. INTERIOR LAMPS
Front Map Lamps
(If Equipped)
The lamps will switch on when:
•
You open any door.
• You press the instrument panel dimmer
button until the courtesy lamp turns
on.
• You press a remote control button and
the ignition is off.
To manually switch on the map lamps,
press the outer edge of the clear lens.
Note: On vehicles with the Dark Car or
Silent Mode feature, courtesy illumination
turns off when you switch Silent Mode on.
60
Taurus (CPH) Police, Canada/United States of America, enUSA, First Printing LightingE163272 E163273
Page 214 of 358
WARNINGS
is located on the B-Pillar or edge
of the driver's door. If this
information is not found on these
labels, then you should contact
your authorized dealer as soon as
possible. Use of any tire or wheel
not recommended by Ford can
affect the safety and performance
of your vehicle, which could result
in an increased risk of loss of
vehicle control, vehicle rollover,
personal injury and death. To reduce the risk of serious
injury, when mounting
replacement tires and wheels, you
should not exceed the maximum
pressure indicated on the sidewall
of the tire to set the beads without
additional precautions listed
below. If the beads do not seat at
the maximum pressure indicated,
re-lubricate and try again.
When inflating the tire for
mounting pressures up to 20 psi
(1.38 bar) greater than the
maximum pressure on the tire
sidewall, the following
precautions must be taken to
protect the person mounting the
tire:
1. Make sure that you have the
correct tire and wheel size.
2. Lubricate the tire bead and
wheel bead seat area again. WARNINGS
3. Stand at a minimum of
12 ft
(3.66 m) away from the wheel
and tire assembly.
4. Use both eye and ear
protection.
For a mounting pressure more
than 20 psi (1.38 bar) greater than
the maximum pressure, a Ford
dealer or other tire service
professional should do the
mounting.
Always inflate steel carcass tires
with a remote air fill with the
person inflating standing at a
minimum of
12 ft (3.66 m) away
from the wheel and tire assembly. Important: Remember to replace
the wheel valve stems when the
road tires are replaced on your
vehicle.
It is recommended that the two
front tires or two rear tires
generally be replaced as a pair.
The tire pressure sensors mounted
in the wheels (originally installed
on your vehicle) are not designed
to be used in aftermarket wheels.
The use of wheels or tires not
recommended by Ford Motor
Company may affect the
operation of your tire pressure
monitoring system.
211
Taurus (CPH) Police, Canada/United States of America, enUSA, First Printing Wheels and Tires