ECU FORD POLICE INTERCEPTOR UTILITY 2013 1.G Owners Manual
[x] Cancel search | Manufacturer: FORD, Model Year: 2013, Model line: POLICE INTERCEPTOR UTILITY, Model: FORD POLICE INTERCEPTOR UTILITY 2013 1.GPages: 375, PDF Size: 5.47 MB
Page 2 of 375
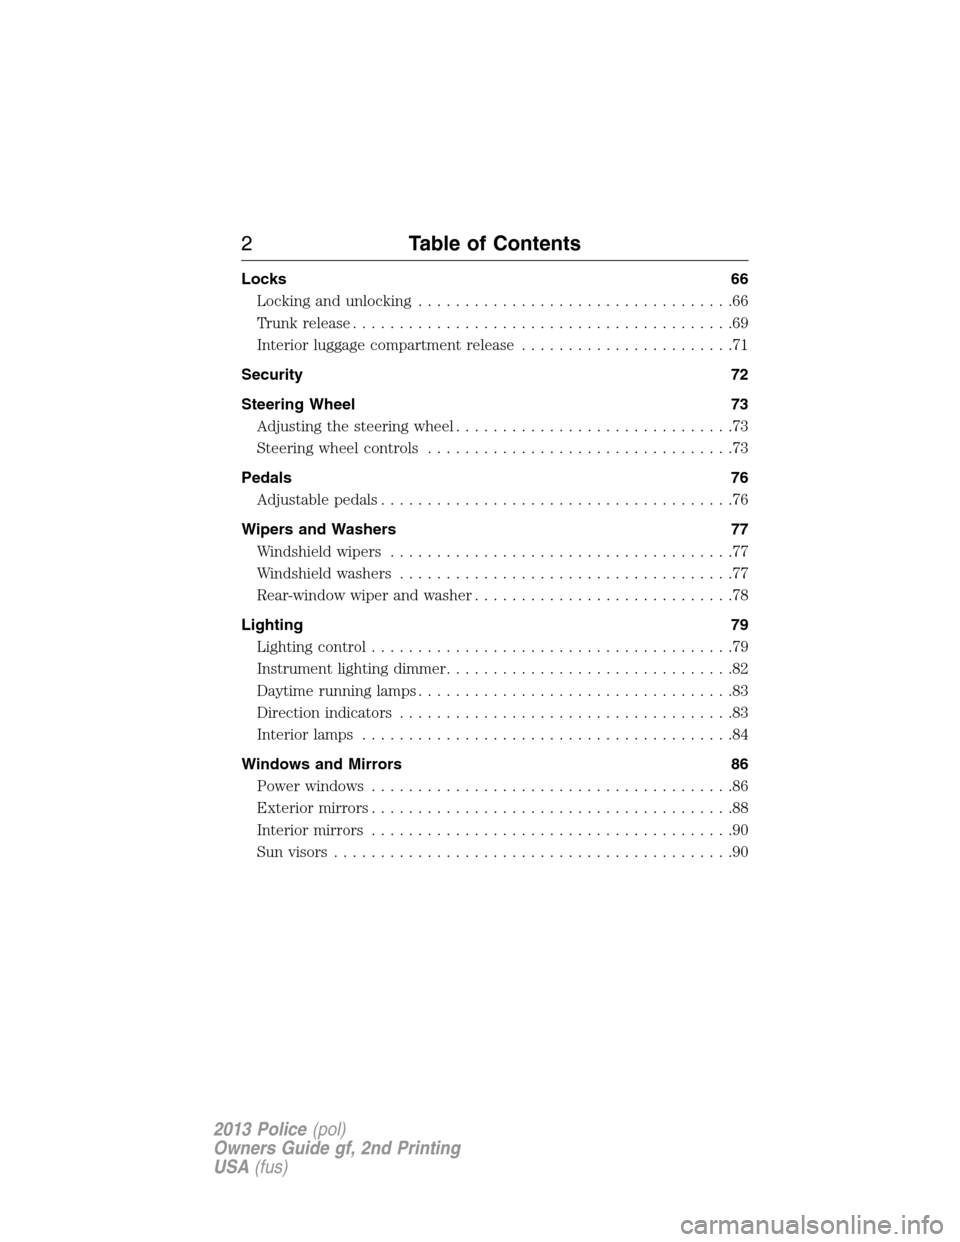
Locks 66
Locking and unlocking..................................66
Trunk release.........................................69
Interior luggage compartment release.......................71
Security 72
Steering Wheel 73
Adjusting the steering wheel..............................73
Steering wheel controls.................................73
Pedals 76
Adjustable pedals......................................76
Wipers and Washers 77
Windshield wipers.....................................77
Windshield washers....................................77
Rear-window wiper and washer............................78
Lighting 79
Lighting control.......................................79
Instrument lighting dimmer...............................82
Daytime running lamps..................................83
Directionindicators ....................................83
Interior lamps........................................84
Windows and Mirrors 86
Power windows.......................................86
Exteriormirrors.......................................88
Interiormirrors .......................................90
Sunvisors ...........................................90
2Table of Contents
2013 Police(pol)
Owners Guide gf, 2nd Printing
USA(fus)
Page 15 of 375
MOBILE COMMUNICATIONS EQUIPMENT
Using mobile communications equipment is becoming increasingly
important in the conduct of business and personal affairs. However, you
must not compromise your own or others’ safety when using such
equipment. Mobile communications can enhance personal safety and
security when appropriately used, particularly in emergency situations.
Safety must be paramount when using mobile communications
equipment to avoid negating these benefits.
Mobile communication equipment includes, but is not limited to, cellular
phones, pagers, portable email devices, text messaging devices and
portable two-way radios.
WARNING:Driving while distracted can result in loss of vehicle
control, accident and injury. Ford strongly recommends that you
use extreme caution when using any device or feature that may take
your focus off the road. Your primary responsibility is the safe operation
of your vehicle. We recommend against the use of any handheld device
while driving, encourage the use of voice operated systems when
possible and that you become aware of applicable state and local laws
that may affect use of electronic devices while driving.
EXPORT UNIQUE (NON–UNITED STATES/CANADA) VEHICLE
SPECIFIC INFORMATION
For your particular global region, your vehicle may be equipped with
features and options that are different from the features and options that
are described in this Owner’s Manual. A market unique supplement may
be supplied that complements this book. By referring to the market
unique supplement, if provided, you can properly identify those features,
recommendations and specifications that are unique to your vehicle. This
Owner’s Manual is written primarily for the U.S. and Canadian Markets.
Features or equipment listed as standard may be different on units built
for Export.Refer to this Owner’s Manual for all other required
information and warnings.
Introduction15
2013 Police(pol)
Owners Guide gf, 2nd Printing
USA(fus)
Page 16 of 375
GENERAL INFORMATION
See the following sections for directions on how to properly use safety
restraints for children.
WARNING:Always make sure your child is secured properly in a
device that is appropriate for their height, age and weight. Child
safety restraints must be purchased separately from the vehicle. Failure
to follow these instructions and guidelines may result in an increased
risk of serious injury or death to your child.
WARNING:All children are shaped differently. The
recommendations for safety restraints are based on probable
child height, age and weight thresholds from NHTSA and other safety
organizations, or are the minimum requirements of law. Ford
recommends checking with a NHTSA Certified Child Passenger Safety
Technician (CPST) and consulting your pediatrician to make sure your
child seat is appropriate for your child, and is compatible with and
properly installed in the vehicle. To locate a child seat fitting station
and CPST, contact the NHTSA toll free at 1-888-327-4236 or on the
internet at http://www.nhtsa.dot.gov. In Canada, check with your local
St. John Ambulance office for referral to a CPST or for further
information, contact your provincial ministry of transportation, your
local St. John Ambulance office at http://www.sfa.ca, or Transport
Canada at 1–800–333–0371 (http://www.tc.gc.ca). Failure to properly
restrain children in safety seats made especially for their height, age,
and weight may result in an increased risk of serious injury or death to
your child.
Recommendations for Safety Restraints for Children
Child size, height, weight, or
ageRecommended
restraint type
Infants
or
toddlersChildren weighing 40 lb (18 kg) or
less (generally age four or
younger).Use a child safety seat
(sometimes called an
infant carrier,
convertible seat, or
toddler seat).
16Child Safety
2013 Police(pol)
Owners Guide gf, 2nd Printing
USA(fus)
Page 23 of 375
WARNING:Depending on where you secure a child restraint,
and depending on the child restraint design, you may block
access to certain safety belt buckle assemblies and/or LATCH lower
anchors, rendering those features potentially unusable. To avoid risk of
injury, occupants should only use seating positions where they are able
to be properly restrained.
When installing a child safety seat with combination lap and shoulder belts:
•Use the correct safety belt buckle for that seating position.
•
Insert the belt tongue into the proper buckle until you hear a snap and
feel it latch. Make sure the tongue is securely fastened in the buckle.
•Keep the buckle release button pointing up and away from the safety
seat, with the tongue between the child seat and the release button,
to prevent accidental unbuckling.
•Place vehicle seat back in upright position.
•For second row seating positions, if needed, the recliner may be
adjusted slightly to improve child seat fit. If needed the head
restraints may be removed.
•Put the safety belt in the automatic locking mode. See Step 5. This
vehicle does not require the use of a locking clip.
Perform the following steps when installing the child seat with
combination lap/shoulder belts:
Note:Although the child seat illustrated is a forward facing child seat,
the steps are the same for installing a rear facing child seat.
Note:Follow all instructions provided by the manufacturer of the child
restraint regarding the necessary and proper use of the Lock-off device.
In some instances these devices have been provided only for use in
vehicles with safety belt systems that would otherwise require a locking
clip. This vehicle does not require the use of a locking clip.
Child Safety23
2013 Police(pol)
Owners Guide gf, 2nd Printing
USA(fus)
Page 25 of 375
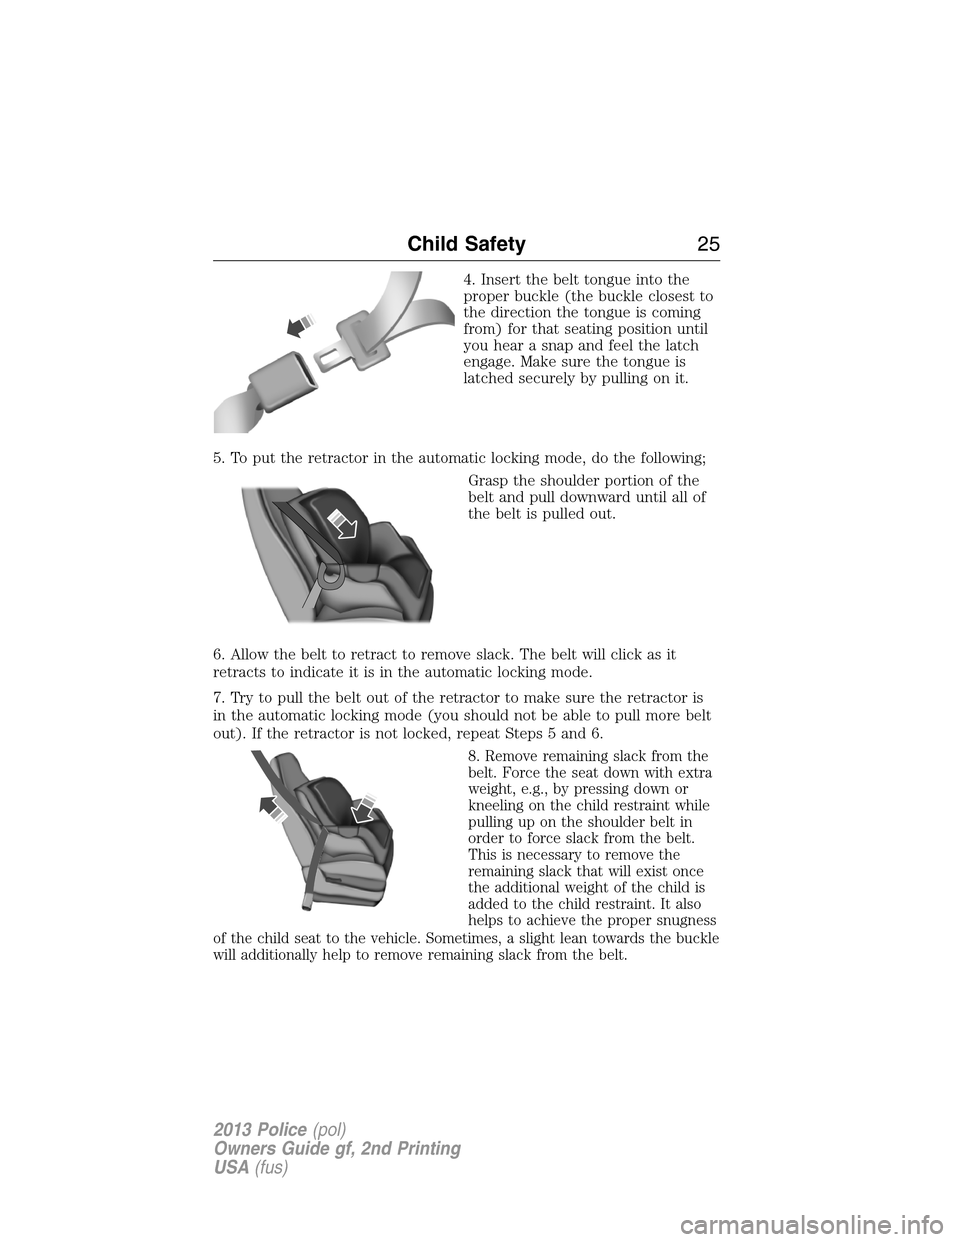
4. Insert the belt tongue into the
proper buckle (the buckle closest to
the direction the tongue is coming
from) for that seating position until
you hear a snap and feel the latch
engage. Make sure the tongue is
latched securely by pulling on it.
5. To put the retractor in the automatic locking mode, do the following;
Grasp the shoulder portion of the
belt and pull downward until all of
the belt is pulled out.
6. Allow the belt to retract to remove slack. The belt will click as it
retracts to indicate it is in the automatic locking mode.
7. Try to pull the belt out of the retractor to make sure the retractor is
in the automatic locking mode (you should not be able to pull more belt
out). If the retractor is not locked, repeat Steps 5 and 6.
8. Remove remaining slack from the
belt. Force the seat down with extra
weight, e.g., by pressing down or
kneeling on the child restraint while
pulling up on the shoulder belt in
order to force slack from the belt.
This is necessary to remove the
remaining slack that will exist once
the additional weight of the child is
added to the child restraint. It also
helps to achieve the proper snugness
of the child seat to the vehicle. Sometimes, a slight lean towards the buckle
will additionally help to remove remaining slack from the belt.
Child Safety25
2013 Police(pol)
Owners Guide gf, 2nd Printing
USA(fus)
Page 26 of 375
9. Attach the tether strap (if the child seat is equipped). SeeUsing
Tether Strapslater in this chapter.
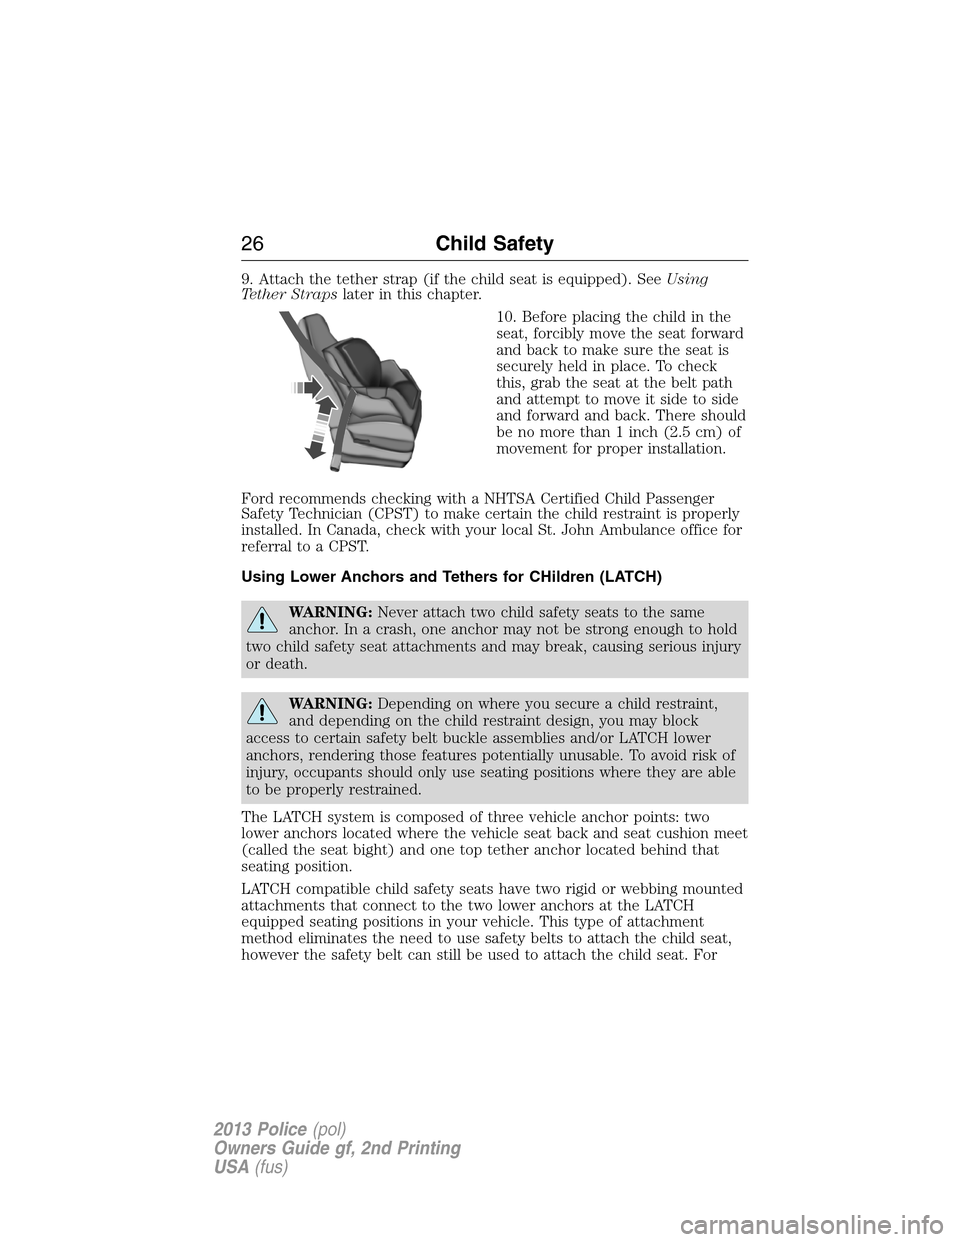
10. Before placing the child in the
seat, forcibly move the seat forward
and back to make sure the seat is
securely held in place. To check
this, grab the seat at the belt path
and attempt to move it side to side
and forward and back. There should
be no more than 1 inch (2.5 cm) of
movement for proper installation.
Ford recommends checking with a NHTSA Certified Child Passenger
Safety Technician (CPST) to make certain the child restraint is properly
installed. In Canada, check with your local St. John Ambulance office for
referral to a CPST.
Using Lower Anchors and Tethers for CHildren (LATCH)
WARNING:Never attach two child safety seats to the same
anchor. In a crash, one anchor may not be strong enough to hold
two child safety seat attachments and may break, causing serious injury
or death.
WARNING:Depending on where you secure a child restraint,
and depending on the child restraint design, you may block
access to certain safety belt buckle assemblies and/or LATCH lower
anchors, rendering those features potentially unusable. To avoid risk of
injury, occupants should only use seating positions where they are able
to be properly restrained.
The LATCH system is composed of three vehicle anchor points: two
lower anchors located where the vehicle seat back and seat cushion meet
(called the seat bight) and one top tether anchor located behind that
seating position.
LATCH compatible child safety seats have two rigid or webbing mounted
attachments that connect to the two lower anchors at the LATCH
equipped seating positions in your vehicle. This type of attachment
method eliminates the need to use safety belts to attach the child seat,
however the safety belt can still be used to attach the child seat. For
26Child Safety
2013 Police(pol)
Owners Guide gf, 2nd Printing
USA(fus)
Page 28 of 375
instructions permit use with the anchor spacing stated. Do not attach a
child seat to any lower anchor if an adjacent child seat is attached to
that anchor.
Each time you use the safety seat, check that the seat is properly
attached to the lower anchors and tether anchor, if applicable. Tug the
child seat from side to side and forward and back where it is secured to
the vehicle. The seat should move less than one inch when you do this
for a proper installation.
If the safety seat is not anchored properly, the risk of a child being
injured in a crash greatly increases.
Use of inboard lower anchors from the outboard seating positions
(center seating use) (utility vehicles)
WARNING:The standardized spacing for LATCH lower anchors
is 11 in. (28 cm) center to center. Do not use LATCH lower
anchors for the center seating position unless the child seat
manufacturer’s instructions permit and specify using anchors spaced at
least as far apart as those in this vehicle.
The lower anchors at the center of the second row bench seats are
spaced 20.5 inches (52 cm) apart. The standardized spacing for LATCH
lower anchors is 11 in. (28 cm) center to center. A child seat with rigid
LATCH attachments cannot be installed at the center seating position.
LATCH compatible child seats (with attachments on belt webbing) can
only be used at this seating position provided that the child seat
manufacturer’s instructions permit use with the anchor spacing stated.
Do not attach a child seat to any lower anchor if an adjacent child seat is
attached to that anchor.
Each time you use the safety seat, check that the seat is properly
attached to the lower anchors and tether anchor, if applicable. Tug the
child seat from side to side and forward and back where it is secured to
the vehicle. The seat should move less than one inch when you do this
for a proper installation.
If the safety seat is not anchored properly, the risk of a child being
injured in a crash greatly increases.
Combining Safety Belt and LATCH Lower Anchors for Attaching
Child Safety Seats
When used in combination, either the safety belt or the LATCH lower
anchors may be attached first, provided a proper installation is achieved.
Attach the tether strap afterward, if included with the child seat.
28Child Safety
2013 Police(pol)
Owners Guide gf, 2nd Printing
USA(fus)
Page 35 of 375
FASTENING THE SAFETY BELTS
The front outboard and rear safety restraints in the vehicle are
combination lap and shoulder belts.
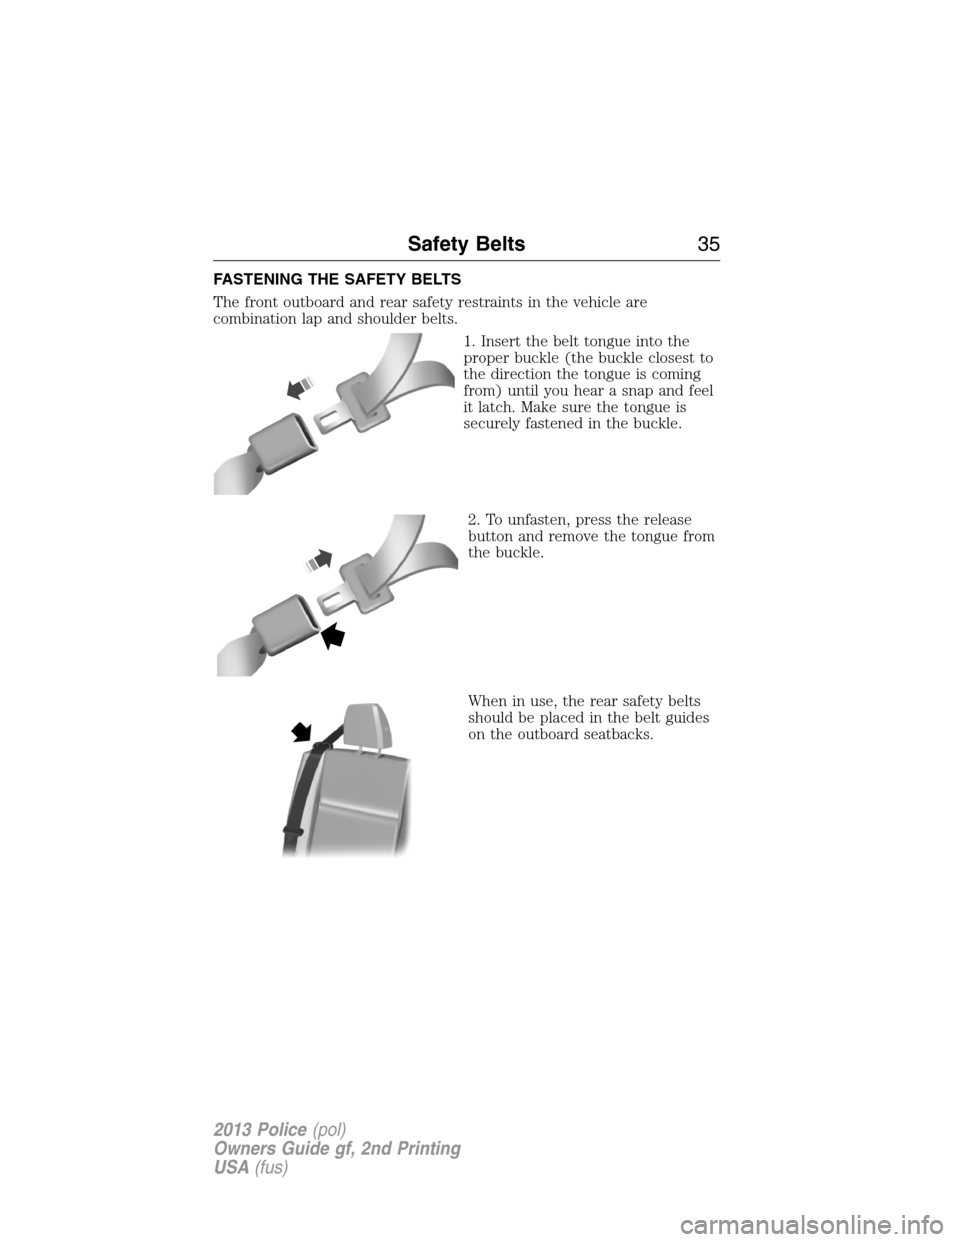
1. Insert the belt tongue into the
proper buckle (the buckle closest to
the direction the tongue is coming
from) until you hear a snap and feel
it latch. Make sure the tongue is
securely fastened in the buckle.
2. To unfasten, press the release
button and remove the tongue from
the buckle.
When in use, the rear safety belts
should be placed in the belt guides
on the outboard seatbacks.
Safety Belts35
2013 Police(pol)
Owners Guide gf, 2nd Printing
USA(fus)
Page 50 of 375
After all occupants have adjusted their seats and put on safety belts, it’s
very important that they continue to sit properly. A properly seated
occupant sits upright, leaning against the seat back, and centered on the
seat cushion, with their feet comfortably extended on the floor. Sitting
improperly can increase the chance of injury in a crash event. For
example, if an occupant slouches, lies down, turns sideways, sits forward,
leans forward or sideways, or puts one or both feet up, the chance of
injury during a crash is greatly increased.
In case there is a problem with the front passenger sensing
system, the airbag readiness light in the instrument cluster will
stay lit.
DO NOT attempt to repair or service the system; take your vehicle
immediately to an authorized dealer.
If it is necessary to modify an advanced front airbag system to
accommodate a person with disabilities, contact the Ford Customer
Relationship Center at the phone number shown in theGetting the
services you needsection of theCustomer Assistancechapter, or see
your authorized dealer.
SIDE AIRBAGS
WARNING:Do not place objects or mount equipment on or near
the airbag cover, on the side of the seat backs (of the front
seats), or in front seat areas that may come into contact with a
deploying airbag. Failure to follow these instructions may increase the
risk of personal injury in the event of a collision.
WARNING:Do not use accessory seat covers. The use of
accessory seat covers may prevent the deployment of the side
airbags and increase the risk of injury in an accident.
WARNING:Do not lean your head on the door. The side airbag
could injure you as it deploys from the side of the seat back.
WARNING:Do not attempt to service, repair, or modify the
airbag, its fuses or the seat cover on a seat containing an airbag.
Contact your authorized dealer as soon as possible.
50Supplementary Restraints System
2013 Police(pol)
Owners Guide gf, 2nd Printing
USA(fus)
Page 72 of 375
ANTI-THEFT ALARM (IF EQUIPPED)
The system will warn you of an unauthorized entry to your vehicle. It
will be triggered if any door, the luggage compartment or the hood is
opened without using the key or the remote control.
The park and turn lamps will flash and the horn will sound if
unauthorized entry is attempted while the alarm is armed.
Take all remote controls to an authorized dealer if there is any potential
alarm problem with your vehicle.
Arming the Alarm
The alarm is ready to arm when there is not a key in the ignition. Lock
the vehicle to arm the alarm.
Disarming the Alarm
Disarm the alarm by any of the following actions:
•Unlock the doors or luggage compartment with the remote control.
•Turn the ignition on or start the vehicle.
•Use a key in the driver’s door to unlock the vehicle, then turn the
ignition on within 12 seconds.
72Security
2013 Police(pol)
Owners Guide gf, 2nd Printing
USA(fus)