transmission FORD POLICE INTERCEPTOR UTILITY 2016 1.G Owner's Manual
[x] Cancel search | Manufacturer: FORD, Model Year: 2016, Model line: POLICE INTERCEPTOR UTILITY, Model: FORD POLICE INTERCEPTOR UTILITY 2016 1.GPages: 350, PDF Size: 3.58 MB
Page 123 of 350
PARKING BRAKE
WARNING
Always set the parking brake fully
and make sure the transmission is
locked in park (P). Failure to set the
parking brake and engage park could result
in vehicle roll-away, property damage or
bodily injury. To set the parking brake, press the parking
brake pedal down to its fullest extent. The
brake warning lamp in the instrument
cluster will illuminate and remains
illuminated until the parking brake is
released.
To release the parking brake, press the
parking brake pedal down again.
If you are parking your vehicle on a grade
or with a trailer, press and hold the brake
pedal down, then set the parking brake.
There may be a little vehicle movement as
the parking brake sets to hold the vehicle's
weight. This is normal and should be no
reason for concern. If needed, press and
hold the service brake pedal down, then
try reapplying the parking brake. Chock the
wheels if required. If the parking brake
cannot hold the weight of the vehicle, the
parking brake may need to be serviced or
the vehicle may be overloaded.
120
Explorer (TUB), enUSA, Edition date: 03/2015, First Printing Brakes
Page 126 of 350
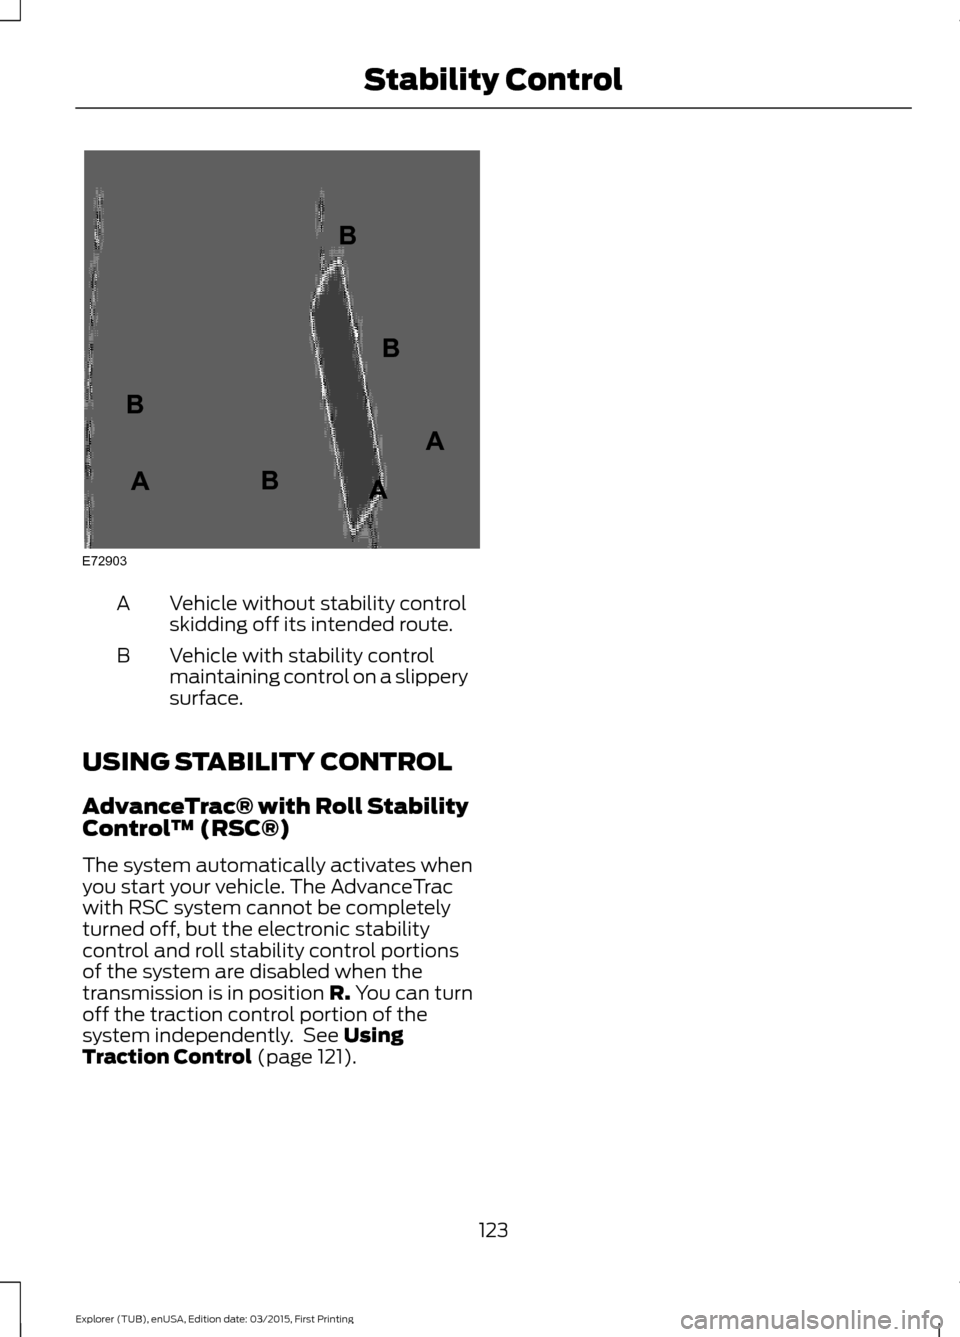
Vehicle without stability control
skidding off its intended route.
A
Vehicle with stability control
maintaining control on a slippery
surface.
B
USING STABILITY CONTROL
AdvanceTrac® with Roll Stability
Control ™ (RSC®)
The system automatically activates when
you start your vehicle. The AdvanceTrac
with RSC system cannot be completely
turned off, but the electronic stability
control and roll stability control portions
of the system are disabled when the
transmission is in position R. You can turn
off the traction control portion of the
system independently. See
Using
Traction Control (page 121).
123
Explorer (TUB), enUSA, Edition date: 03/2015, First Printing Stability ControlE72903A
AA
B
BB
B
Page 127 of 350
PRINCIPLE OF OPERATION
WARNINGS
To help avoid personal injury, please
read and understand the limitations
of the system as contained in this
section. Sensing is only an aid for some
(generally large and fixed) objects when
moving on a flat surface at parking speeds.
Certain objects with surfaces that absorb
ultrasonic waves, surrounding vehicle's
parking aid systems, traffic control
systems, fluorescent lamps, inclement
weather, air brakes, and external motors
and fans may also affect the function of
the sensing system; this may include
reduced performance or a false activation. To help avoid personal injury, always
use caution when in reverse (R) and
when using the sensing system.
This system is not designed to
prevent contact with small or moving
objects. The system is designed to
provide a warning to assist the driver in
detecting large stationary objects to avoid
damaging your vehicle. The system may
not detect smaller objects, particularly
those close to the ground. Certain add-on devices such as large
trailer hitches, bike or surfboard racks
and any device that may block the
normal detection zone of the system, may
create false beeps. Note:
Keep the sensors, located on the
bumper or fascia, free from snow, ice and
large accumulations of dirt. If the sensors
are covered, the system ’s accuracy can be
affected. Do not clean the sensors with
sharp objects.
Note: If your vehicle sustains damage to
the bumper or fascia, leaving it misaligned
or bent, the sensing zone may be altered
causing inaccurate measurement of
obstacles or false alarms. Note:
The sensing system cannot be turned
off when a MyKey is present.
Note: If you attach certain add-on devices
such as a trailer or bike rack, the rear sensing
system may detect that add-on device and
therefore provide warnings. It is suggested
that you disable the rear sensing system
when you attach an add-on device to your
vehicle to prevent these warnings.
The sensing system warns the driver of
obstacles within a certain range of your
vehicle. The system turns on automatically
whenever you switch the ignition on.
The system can be switched off through
the information display menu or from the
pop-up message that appears once you
shift the transmission into reverse (R). See
(page 73).
Note: On vehicles with front parking aid you
can use the parking aid switch to switch the
system off.
If a fault is present in the system, a warning
message appears in the information
display. See
Information Messages
(page 76).
REAR PARKING AID
(If Equipped)
The rear sensors are only active when the
transmission is in reverse (R). As your
vehicle moves closer to the obstacle, the
rate of the audible warning increases.
When the obstacle is less than
12 in
(30 cm) away, the warning sounds
continuously. If the system detects a
stationary or receding object farther than
12 in (30 cm)
from the corners of the
bumper, the tone sounds for only three
seconds. Once the system detects an
object approaching, the warning sounds
again.
124
Explorer (TUB), enUSA, Edition date: 03/2015, First Printing Parking Aids
Page 128 of 350
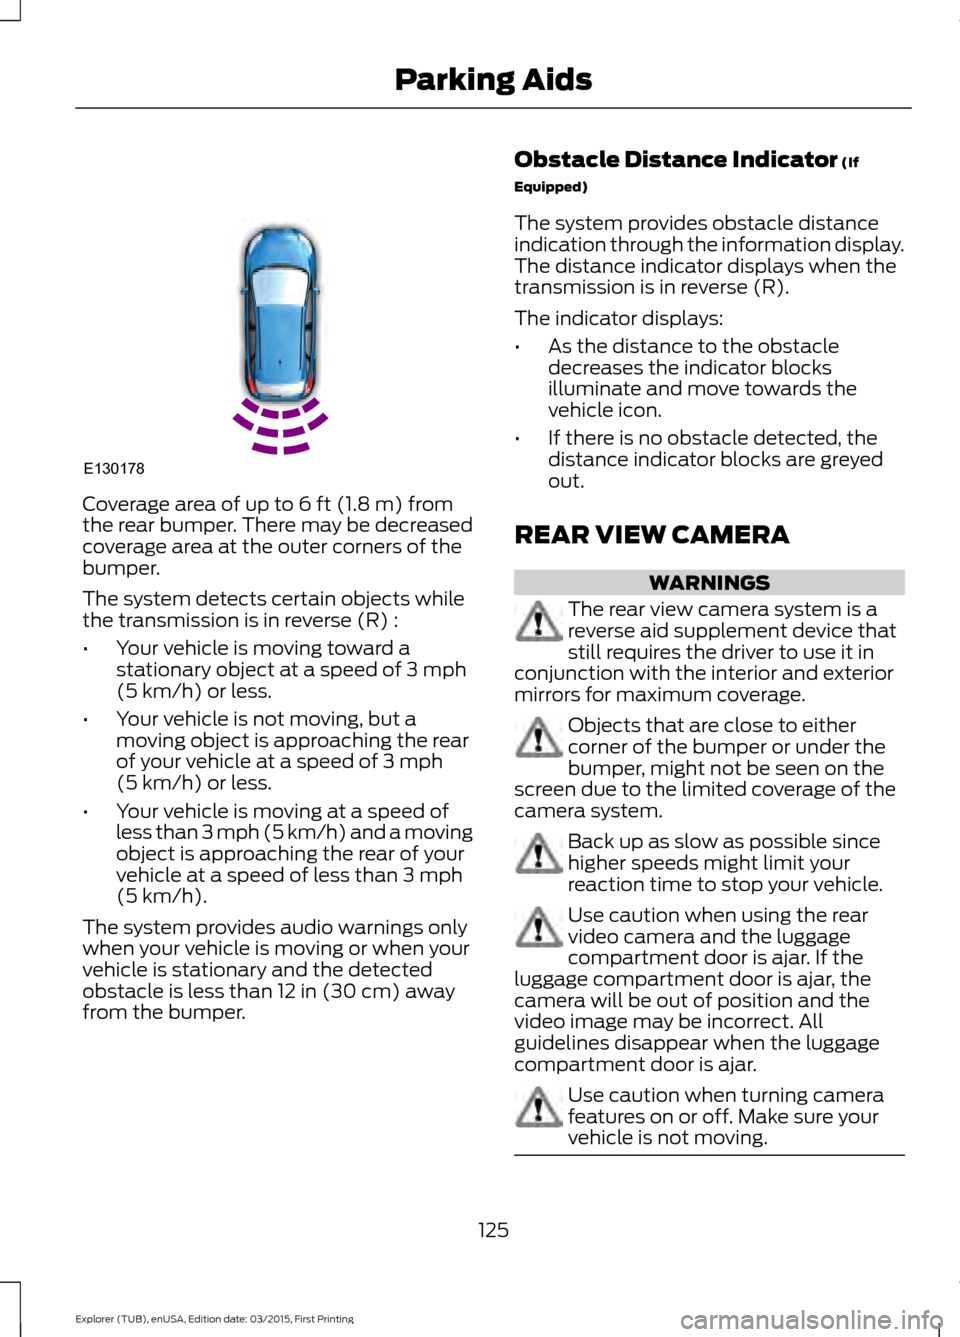
Coverage area of up to 6 ft (1.8 m) from
the rear bumper. There may be decreased
coverage area at the outer corners of the
bumper.
The system detects certain objects while
the transmission is in reverse (R) :
• Your vehicle is moving toward a
stationary object at a speed of
3 mph
(5 km/h) or less.
• Your vehicle is not moving, but a
moving object is approaching the rear
of your vehicle at a speed of
3 mph
(5 km/h) or less.
• Your vehicle is moving at a speed of
less than 3 mph (5 km/h) and a moving
object is approaching the rear of your
vehicle at a speed of less than
3 mph
(5 km/h).
The system provides audio warnings only
when your vehicle is moving or when your
vehicle is stationary and the detected
obstacle is less than
12 in (30 cm) away
from the bumper. Obstacle Distance Indicator
(If
Equipped)
The system provides obstacle distance
indication through the information display.
The distance indicator displays when the
transmission is in reverse (R).
The indicator displays:
• As the distance to the obstacle
decreases the indicator blocks
illuminate and move towards the
vehicle icon.
• If there is no obstacle detected, the
distance indicator blocks are greyed
out.
REAR VIEW CAMERA WARNINGS
The rear view camera system is a
reverse aid supplement device that
still requires the driver to use it in
conjunction with the interior and exterior
mirrors for maximum coverage. Objects that are close to either
corner of the bumper or under the
bumper, might not be seen on the
screen due to the limited coverage of the
camera system. Back up as slow as possible since
higher speeds might limit your
reaction time to stop your vehicle.
Use caution when using the rear
video camera and the luggage
compartment door is ajar. If the
luggage compartment door is ajar, the
camera will be out of position and the
video image may be incorrect. All
guidelines disappear when the luggage
compartment door is ajar. Use caution when turning camera
features on or off. Make sure your
vehicle is not moving.
125
Explorer (TUB), enUSA, Edition date: 03/2015, First Printing Parking AidsE130178
Page 129 of 350
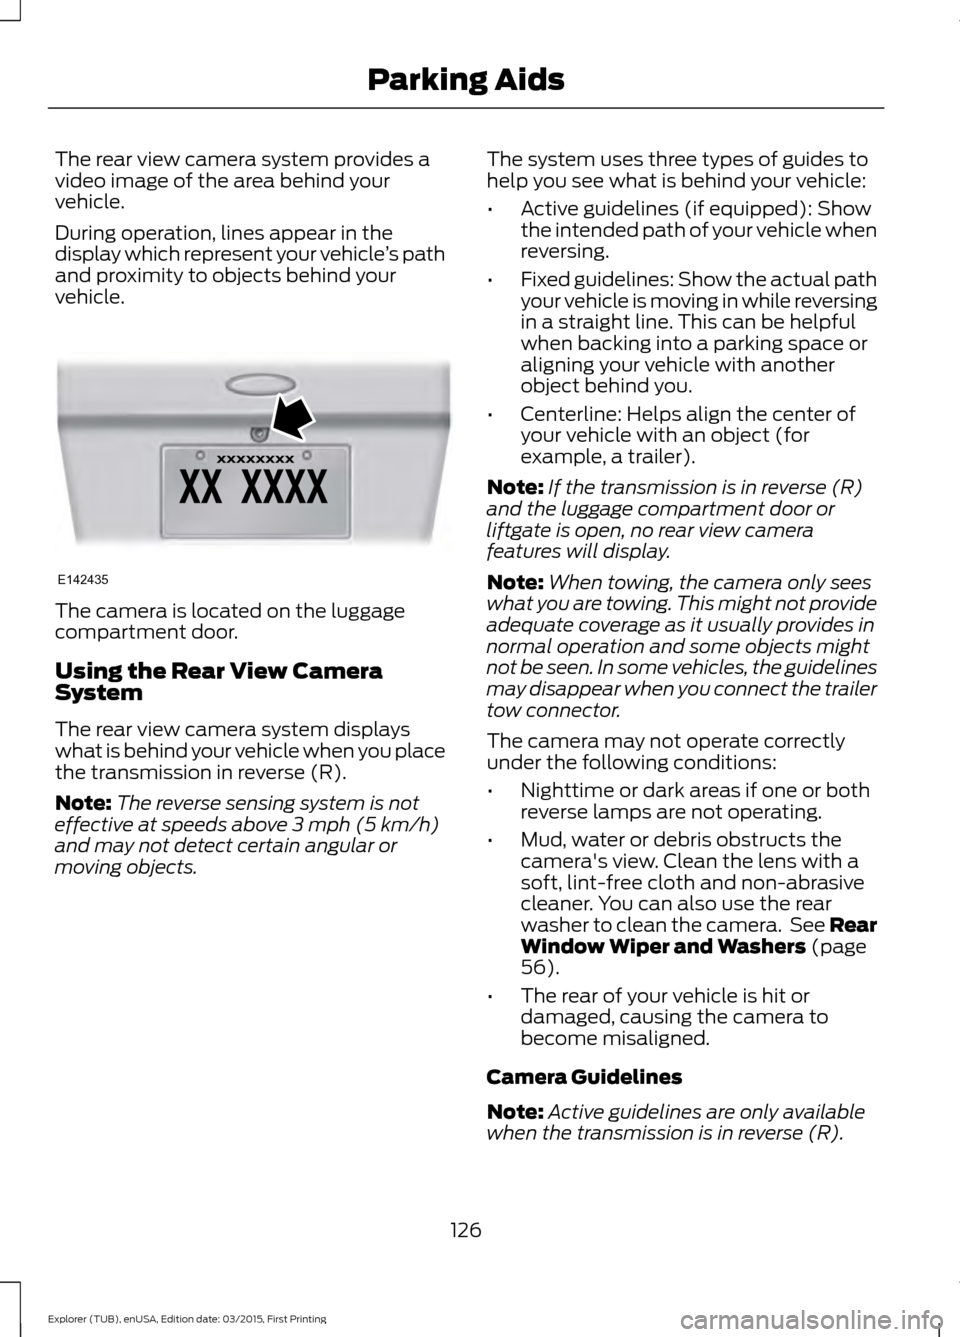
The rear view camera system provides a
video image of the area behind your
vehicle.
During operation, lines appear in the
display which represent your vehicle
’s path
and proximity to objects behind your
vehicle. The camera is located on the luggage
compartment door.
Using the Rear View Camera
System
The rear view camera system displays
what is behind your vehicle when you place
the transmission in reverse (R).
Note:
The reverse sensing system is not
effective at speeds above 3 mph (5 km/h)
and may not detect certain angular or
moving objects. The system uses three types of guides to
help you see what is behind your vehicle:
•
Active guidelines (if equipped): Show
the intended path of your vehicle when
reversing.
• Fixed guidelines: Show the actual path
your vehicle is moving in while reversing
in a straight line. This can be helpful
when backing into a parking space or
aligning your vehicle with another
object behind you.
• Centerline: Helps align the center of
your vehicle with an object (for
example, a trailer).
Note: If the transmission is in reverse (R)
and the luggage compartment door or
liftgate is open, no rear view camera
features will display.
Note: When towing, the camera only sees
what you are towing. This might not provide
adequate coverage as it usually provides in
normal operation and some objects might
not be seen. In some vehicles, the guidelines
may disappear when you connect the trailer
tow connector.
The camera may not operate correctly
under the following conditions:
• Nighttime or dark areas if one or both
reverse lamps are not operating.
• Mud, water or debris obstructs the
camera's view. Clean the lens with a
soft, lint-free cloth and non-abrasive
cleaner. You can also use the rear
washer to clean the camera. See Rear
Window Wiper and Washers
(page
56).
• The rear of your vehicle is hit or
damaged, causing the camera to
become misaligned.
Camera Guidelines
Note: Active guidelines are only available
when the transmission is in reverse (R).
126
Explorer (TUB), enUSA, Edition date: 03/2015, First Printing Parking AidsE142435
Page 130 of 350
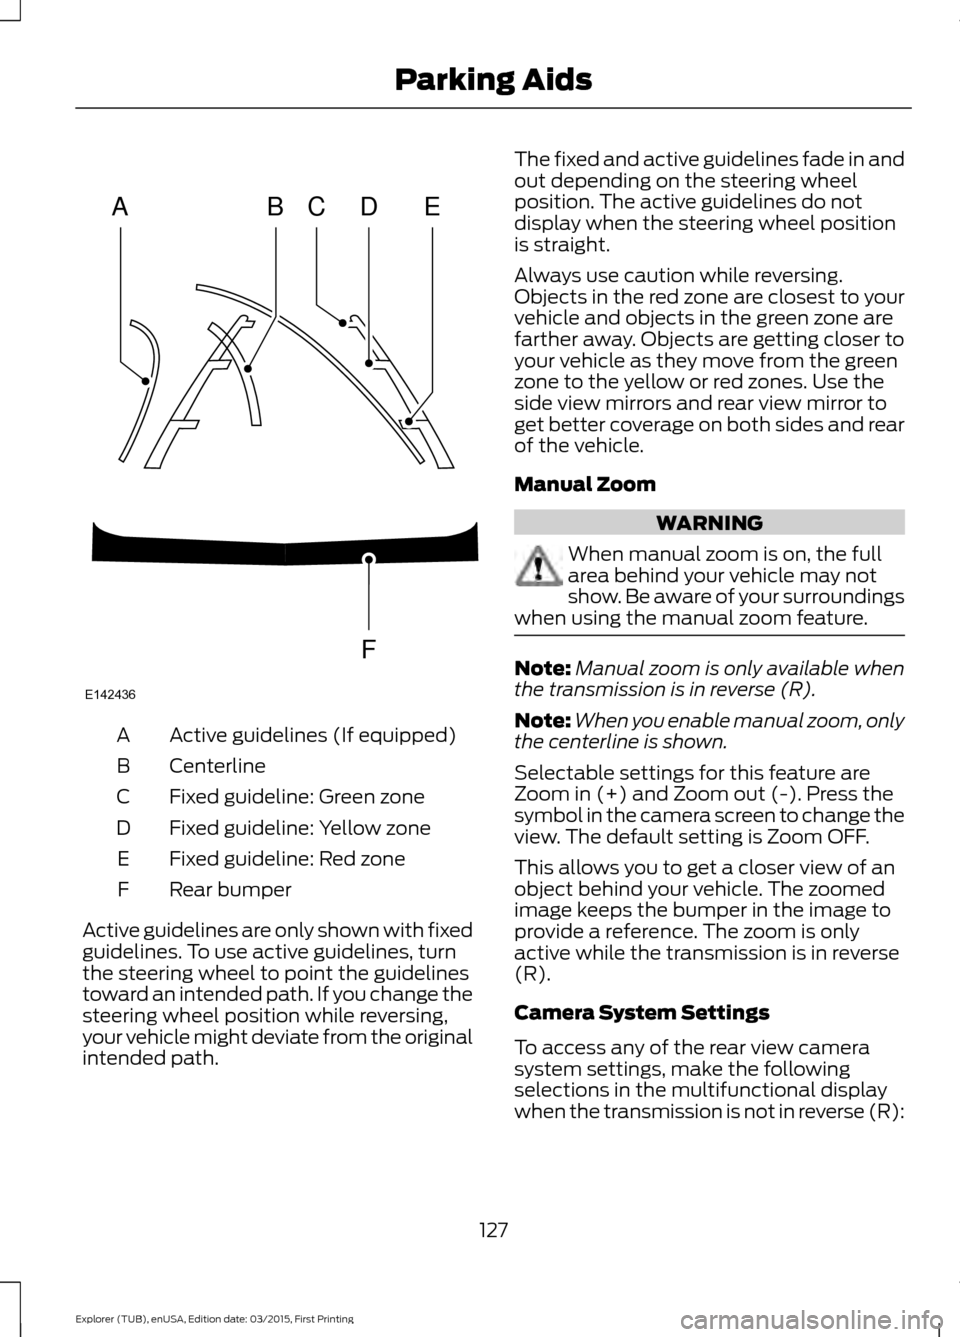
Active guidelines (If equipped)
A
Centerline
B
Fixed guideline: Green zone
C
Fixed guideline: Yellow zone
D
Fixed guideline: Red zone
E
Rear bumper
F
Active guidelines are only shown with fixed
guidelines. To use active guidelines, turn
the steering wheel to point the guidelines
toward an intended path. If you change the
steering wheel position while reversing,
your vehicle might deviate from the original
intended path. The fixed and active guidelines fade in and
out depending on the steering wheel
position. The active guidelines do not
display when the steering wheel position
is straight.
Always use caution while reversing.
Objects in the red zone are closest to your
vehicle and objects in the green zone are
farther away. Objects are getting closer to
your vehicle as they move from the green
zone to the yellow or red zones. Use the
side view mirrors and rear view mirror to
get better coverage on both sides and rear
of the vehicle.
Manual Zoom
WARNING
When manual zoom is on, the full
area behind your vehicle may not
show. Be aware of your surroundings
when using the manual zoom feature. Note:
Manual zoom is only available when
the transmission is in reverse (R).
Note: When you enable manual zoom, only
the centerline is shown.
Selectable settings for this feature are
Zoom in (+) and Zoom out (-). Press the
symbol in the camera screen to change the
view. The default setting is Zoom OFF.
This allows you to get a closer view of an
object behind your vehicle. The zoomed
image keeps the bumper in the image to
provide a reference. The zoom is only
active while the transmission is in reverse
(R).
Camera System Settings
To access any of the rear view camera
system settings, make the following
selections in the multifunctional display
when the transmission is not in reverse (R):
127
Explorer (TUB), enUSA, Edition date: 03/2015, First Printing Parking AidsABCD
F
E
E142436
Page 131 of 350
Main Menu
SettingsVehicle
Camera Settings
Enhanced Park Aids or Park Pilot
Selectable settings for this feature are ON
and OFF.
The system uses red, yellow and green
highlights that appear on top of the video
image when any of the sensing systems
detect an object.
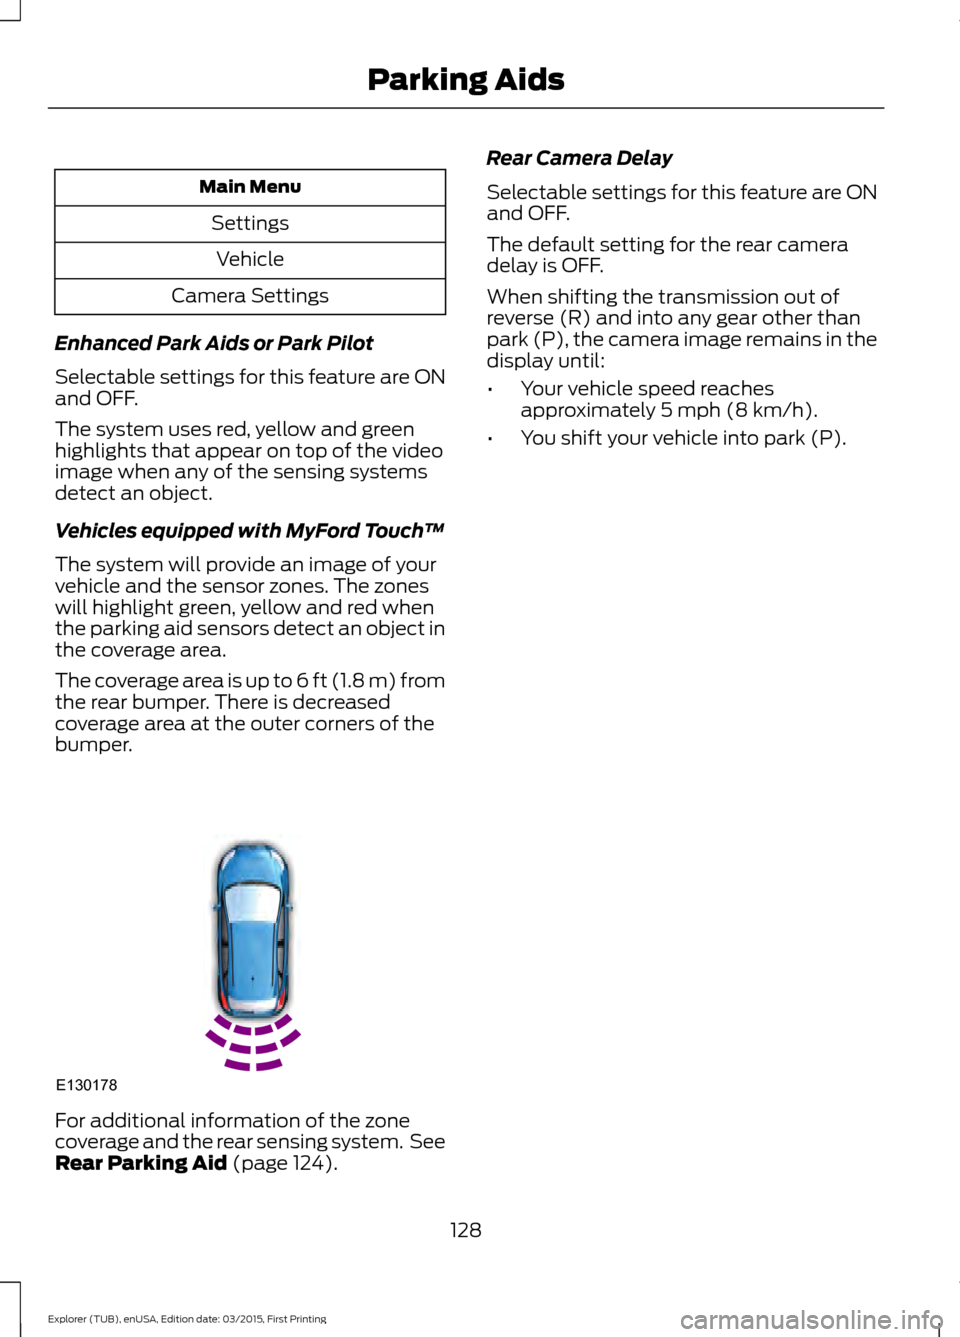
Vehicles equipped with MyFord Touch ™
The system will provide an image of your
vehicle and the sensor zones. The zones
will highlight green, yellow and red when
the parking aid sensors detect an object in
the coverage area.
The coverage area is up to 6 ft (1.8 m) from
the rear bumper. There is decreased
coverage area at the outer corners of the
bumper. For additional information of the zone
coverage and the rear sensing system. See
Rear Parking Aid (page 124). Rear Camera Delay
Selectable settings for this feature are ON
and OFF.
The default setting for the rear camera
delay is OFF.
When shifting the transmission out of
reverse (R) and into any gear other than
park (P), the camera image remains in the
display until:
•
Your vehicle speed reaches
approximately
5 mph (8 km/h).
• You shift your vehicle into park (P).
128
Explorer (TUB), enUSA, Edition date: 03/2015, First Printing Parking AidsE130178
Page 136 of 350
False Alerts
Note:
If your vehicle has a trailer tow
module approved by us, the system will
detect a connected trailer and turn off. For
non-factory equipped tow bars, you may
want to turn the Blind Spot Information
System off manually.
There may be certain instances when there
is a false alert by the system that
illuminates the alert indicator with no
vehicle in the coverage zone. Some
amount of false alerts are normal; they are
temporary and self-correct.
Detection Errors
If the system senses a problem with the
left or right sensor, the Blind Spot
Information System warning indicator will
illuminate and a message will appear in
the information display.
All other system faults will display only
with a message in the information display.
See Information Messages (page 76).
Switching the Systems Off and On
You can temporarily switch off the Blind
Spot Information System in the
information display. See
(page 73). When
you switch off the Blind Spot Information
System, you will not receive alerts and the
information display will display a system
off message.
Note: The Blind Spot Information System
will remember the last selected on or off
setting. The Blind Spot Information System cannot
be switched off when MyKey is used.
You can have the Blind Spot Information
System switched off permanently at an
authorized dealer. Once switched off, the
system can only be switched back on at
an authorized dealer.
CROSS TRAFFIC ALERT WARNING
To help avoid personal injury, NEVER
use the Cross Traffic Alert system as
a replacement for using the interior
and exterior mirrors and looking over your
shoulder before backing out of a parking
space. Cross Traffic Alert is not a
replacement for careful driving. Cross traffic alert is designed to warn you
of vehicles approaching from the sides
when the transmission is in reverse (R).
Using the System
Cross traffic alert turns on when you start
the engine and you shift into reverse (R).
Once shifted out of reverse (R), cross
traffic alert turns off.
Note:
Cross traffic alert is designed to
detect vehicles that approach with a speed
up to
37 mph (60 km/h). Coverage
decreases when the sensors are partially,
mostly or fully obstructed. Reversing slowly
helps increase the coverage area and
effectiveness.
133
Explorer (TUB), enUSA, Edition date: 03/2015, First Printing Driving Aids
Page 139 of 350
Note:
The cross traffic alert system always
switches on whenever the ignition is
switched on and ready to provide
appropriate alerts when the transmission is
in reverse (R). Cross Traffic Alert will not
remember the last selected on or off setting.
You can have cross traffic alert switched
off permanently at an authorized dealer.
Once switched off permanently, the
system can only be switched back on at
an authorized dealer.
STEERING
Electric Power Steering WARNINGS
The electric power steering system
has diagnostic checks that
continuously monitor the system. If
a fault is detected, a message displays in
the information display. Stop your vehicle
as soon as it is safe to do so. Switch the
ignition off. After at least 10 seconds,
switch the ignition on and watch the
information display for a steering system
warning message. If a steering system
warning message returns, have the system
checked by an authorized dealer. If the system detects an error, you
may not feel a difference in the
steering, however a serious condition
may exist. Obtain immediate service from
an authorized dealer, failure to do so may
result in loss of steering control. Your vehicle has an electric power steering
system. There is no fluid reservoir. No
maintenance is required.
If your vehicle loses electrical power while
you are driving, electric power steering
assistance is lost. The steering system still
operates and you can steer your vehicle
manually. Manually steering your vehicle
requires more effort. Extreme continuous steering may increase
the effort required for you to steer your
vehicle. This increased effort prevents
overheating and permanent damage to
the steering system. You do not lose the
ability to steer your vehicle manually.
Typical steering and driving maneuvers
allow the system to cool and return to
normal operation.
Steering Tips
If the steering wanders or pulls, check for:
•
Correct tire pressures.
• Uneven tire wear.
• Loose or worn suspension
components.
• Loose or worn steering components.
• Improper vehicle alignment.
Note: A high crown in the road or high
crosswinds may also make the steering
seem to wander or pull.
Adaptive Learning
The electronic power steering system
adaptive learning helps correct road
irregularities and improves overall handling
and steering feel. It communicates with
the brake system to help operate
advanced stability control and accident
avoidance systems. Additionally, whenever
the battery is disconnected or a new
battery installed, you must drive your
vehicle a short distance before the system
relearns the strategy and reactivates all
systems.
136
Explorer (TUB), enUSA, Edition date: 03/2015, First Printing Driving Aids
Page 145 of 350
WARNING
Exceeding the Safety
Compliance Certification
Label vehicle weight rating limits
could result in substandard
vehicle handling or performance,
engine, transmission and/or
structural damage, serious
damage to the vehicle, loss of
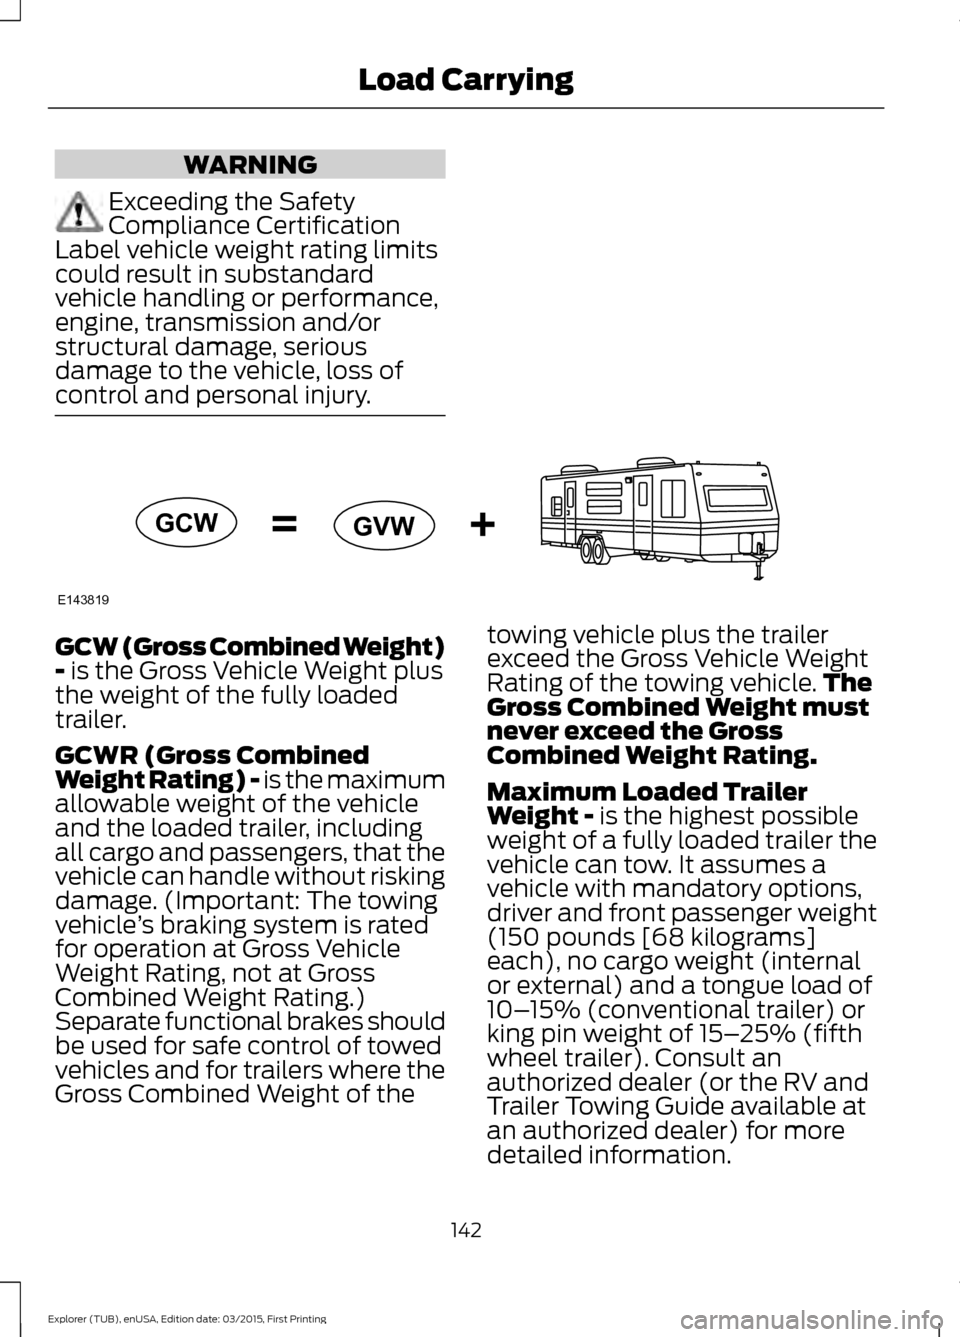
control and personal injury. GCW (Gross Combined Weight)
- is the Gross Vehicle Weight plus
the weight of the fully loaded
trailer.
GCWR (Gross Combined
Weight Rating) - is the maximum
allowable weight of the vehicle
and the loaded trailer, including
all cargo and passengers, that the
vehicle can handle without risking
damage. (Important: The towing
vehicle ’s braking system is rated
for operation at Gross Vehicle
Weight Rating, not at Gross
Combined Weight Rating.)
Separate functional brakes should
be used for safe control of towed
vehicles and for trailers where the
Gross Combined Weight of the towing vehicle plus the trailer
exceed the Gross Vehicle Weight
Rating of the towing vehicle.
The
Gross Combined Weight must
never exceed the Gross
Combined Weight Rating.
Maximum Loaded Trailer
Weight -
is the highest possible
weight of a fully loaded trailer the
vehicle can tow. It assumes a
vehicle with mandatory options,
driver and front passenger weight
(150 pounds [68 kilograms]
each), no cargo weight (internal
or external) and a tongue load of
10– 15% (conventional trailer) or
king pin weight of 15– 25% (fifth
wheel trailer). Consult an
authorized dealer (or the RV and
Trailer Towing Guide available at
an authorized dealer) for more
detailed information.
142
Explorer (TUB), enUSA, Edition date: 03/2015, First Printing Load CarryingE143819GCW
GVW