FORD RANGER 2000 2.G Owners Manual
Manufacturer: FORD, Model Year: 2000, Model line: RANGER, Model: FORD RANGER 2000 2.GPages: 240, PDF Size: 2.07 MB
Page 111 of 240
Use extra caution while becoming familiar with your vehicle. Know the
capabilities and limitations of both you as a driver and your vehicle.
AUTOMATIC TRANSMISSION OPERATION (IF EQUIPPED)
Brake-shift interlock
This vehicle is equipped with a brake-shift interlock feature that prevents
the gearshift lever from being moved from P (Park) when the ignition is
in the ON position unless brake pedal is depressed.
If you cannot move the gearshift lever out of P (Park) with ignition in
the ON position and the brake pedal depressed:
1. Apply the parking brake, turn ignition key to LOCK, then remove the
key.
2. Insert the key and turn it to OFF. Apply the brake pedal and shift to N
(Neutral).
3. Start the vehicle.
If it is necessary to use the above procedure to move the gearshift lever,
it is possible that a fuse has blown or the vehicle's brakelamps are not
operating properly. Refer toFuses and relaysin theRoadside
emergencieschapter.
Do not drive your vehicle until you verify that the brakelamps
are working.
If your vehicle gets stuck in mud or snow it may be rocked out by
shifting from forward and reverse gears, stopping between shifts, in a
steady pattern. Press lightly on the accelerator in each gear.
Do not rock the vehicle if the engine is not at normal operating
temperature or damage to the transmission may occur.
Do not rock the vehicle for more than a few minutes or damage
to the transmission and tires may occur or the engine may
overheat.
Always set the parking brake fully and make sure the gearshift is
latched in P (Park). Turn off the ignition whenever you leave
your vehicle.
Driving
111
Page 112 of 240
If the parking brake is fully released, but the brake warning lamp
remains illuminated, the brakes may not be working properly.
See your dealer or a qualified service technician.
Driving with a 4±speed automatic transmission (if equipped)
To put your vehicle in gear, start the engine, depress the brake pedal,
then move gearshift lever out of P (Park).
Hold the brake pedal down while you move the gearshift lever
from P (Park) to another position. If you do not hold the brake
pedal down, your vehicle may move unexpectedly and injure someone.
Understanding gearshift positions
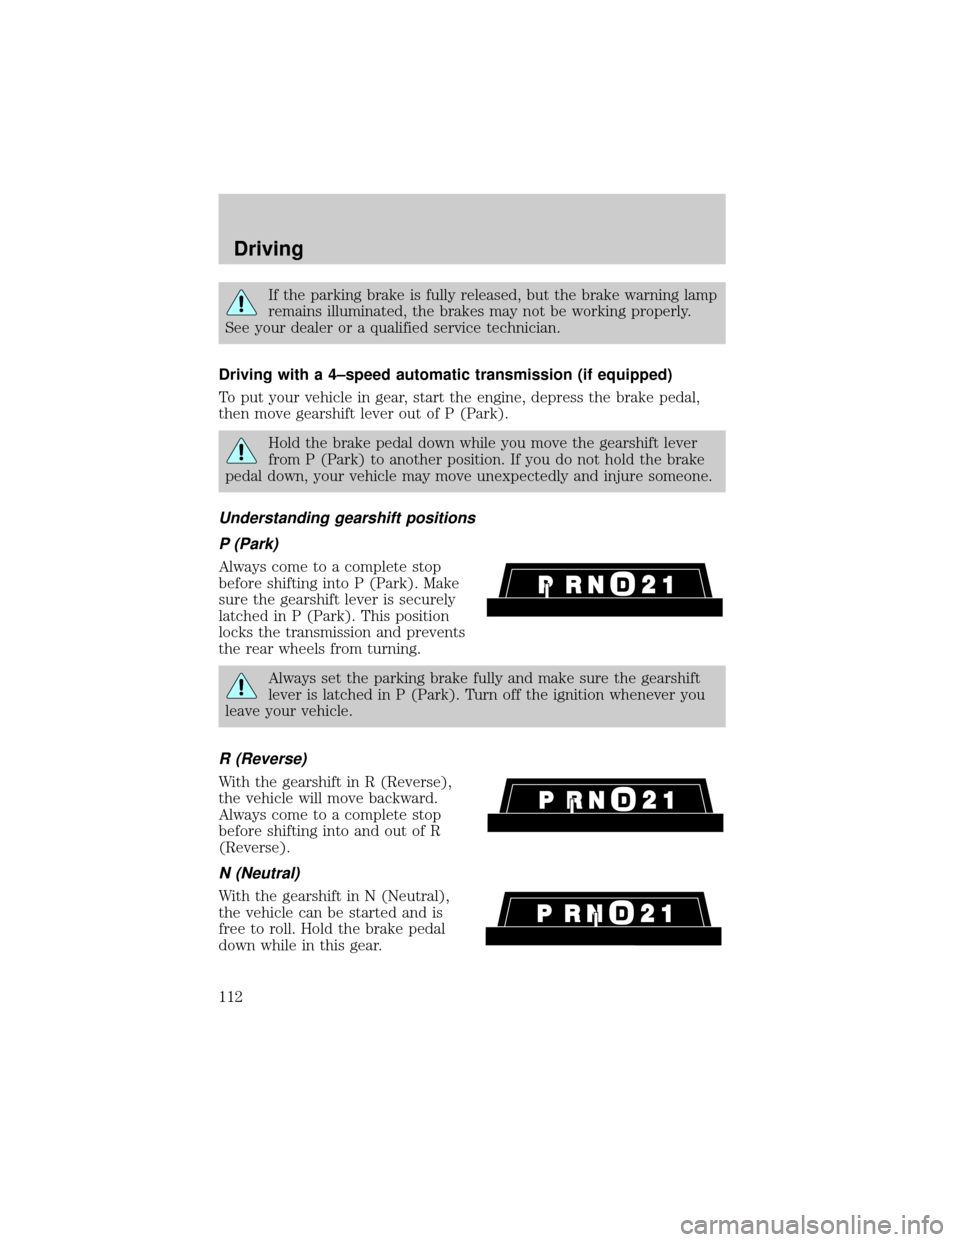
P (Park)
Always come to a complete stop
before shifting into P (Park). Make
sure the gearshift lever is securely
latched in P (Park). This position
locks the transmission and prevents
the rear wheels from turning.
Always set the parking brake fully and make sure the gearshift
lever is latched in P (Park). Turn off the ignition whenever you
leave your vehicle.
R (Reverse)
With the gearshift in R (Reverse),
the vehicle will move backward.
Always come to a complete stop
before shifting into and out of R
(Reverse).
N (Neutral)
With the gearshift in N (Neutral),
the vehicle can be started and is
free to roll. Hold the brake pedal
down while in this gear.
Driving
112
Page 113 of 240
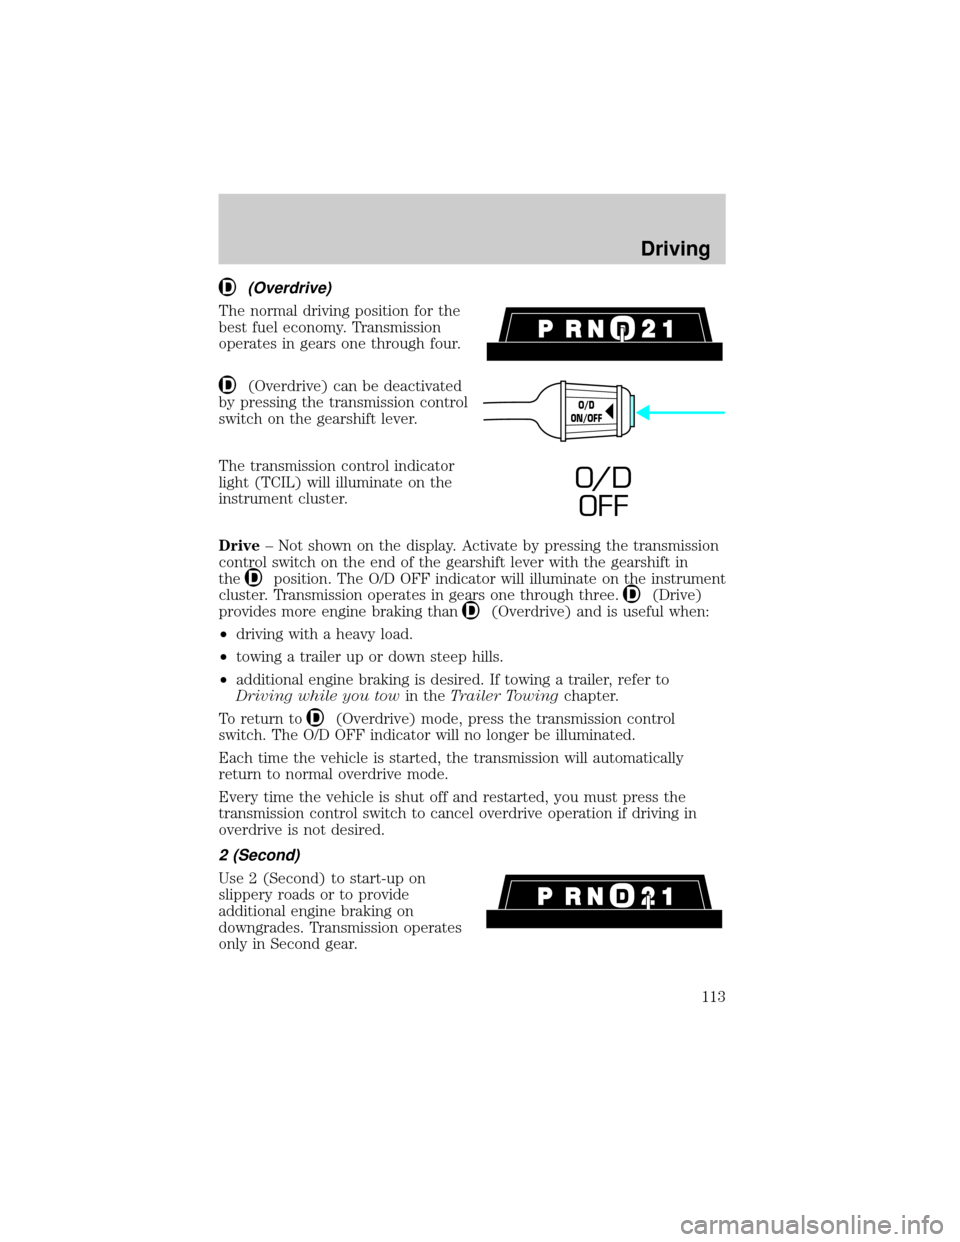
(Overdrive)
The normal driving position for the
best fuel economy. Transmission
operates in gears one through four.
(Overdrive) can be deactivated
by pressing the transmission control
switch on the gearshift lever.
The transmission control indicator
light (TCIL) will illuminate on the
instrument cluster.
Drive± Not shown on the display. Activate by pressing the transmission
control switch on the end of the gearshift lever with the gearshift in
the
position. The O/D OFF indicator will illuminate on the instrument
cluster. Transmission operates in gears one through three.
(Drive)
provides more engine braking than
(Overdrive) and is useful when:
²driving with a heavy load.
²towing a trailer up or down steep hills.
²additional engine braking is desired. If towing a trailer, refer to
Driving while you towin theTrailer Towingchapter.
To return to
(Overdrive) mode, press the transmission control
switch. The O/D OFF indicator will no longer be illuminated.
Each time the vehicle is started, the transmission will automatically
return to normal overdrive mode.
Every time the vehicle is shut off and restarted, you must press the
transmission control switch to cancel overdrive operation if driving in
overdrive is not desired.
2 (Second)
Use 2 (Second) to start-up on
slippery roads or to provide
additional engine braking on
downgrades. Transmission operates
only in Second gear.
O/D
ON/OFF
O/ D
OFF
Driving
113
Page 114 of 240
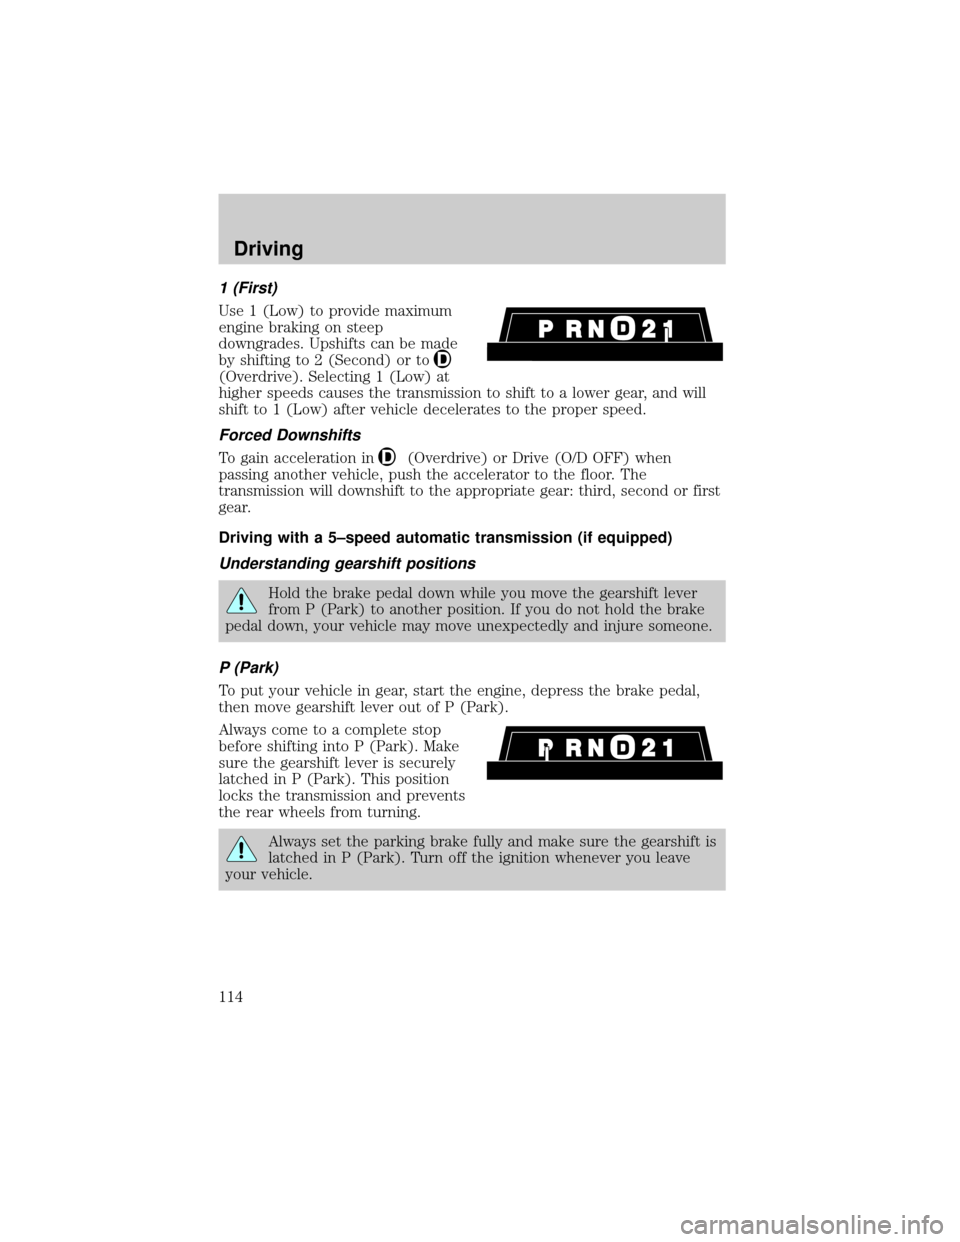
1 (First)
Use 1 (Low) to provide maximum
engine braking on steep
downgrades. Upshifts can be made
by shifting to 2 (Second) or to
(Overdrive). Selecting 1 (Low) at
higher speeds causes the transmission to shift to a lower gear, and will
shift to 1 (Low) after vehicle decelerates to the proper speed.
Forced Downshifts
To gain acceleration in(Overdrive) or Drive (O/D OFF) when
passing another vehicle, push the accelerator to the floor. The
transmission will downshift to the appropriate gear: third, second or first
gear.
Driving with a 5±speed automatic transmission (if equipped)
Understanding gearshift positions
Hold the brake pedal down while you move the gearshift lever
from P (Park) to another position. If you do not hold the brake
pedal down, your vehicle may move unexpectedly and injure someone.
P (Park)
To put your vehicle in gear, start the engine, depress the brake pedal,
then move gearshift lever out of P (Park).
Always come to a complete stop
before shifting into P (Park). Make
sure the gearshift lever is securely
latched in P (Park). This position
locks the transmission and prevents
the rear wheels from turning.
Always set the parking brake fully and make sure the gearshift is
latched in P (Park). Turn off the ignition whenever you leave
your vehicle.
Driving
114
Page 115 of 240
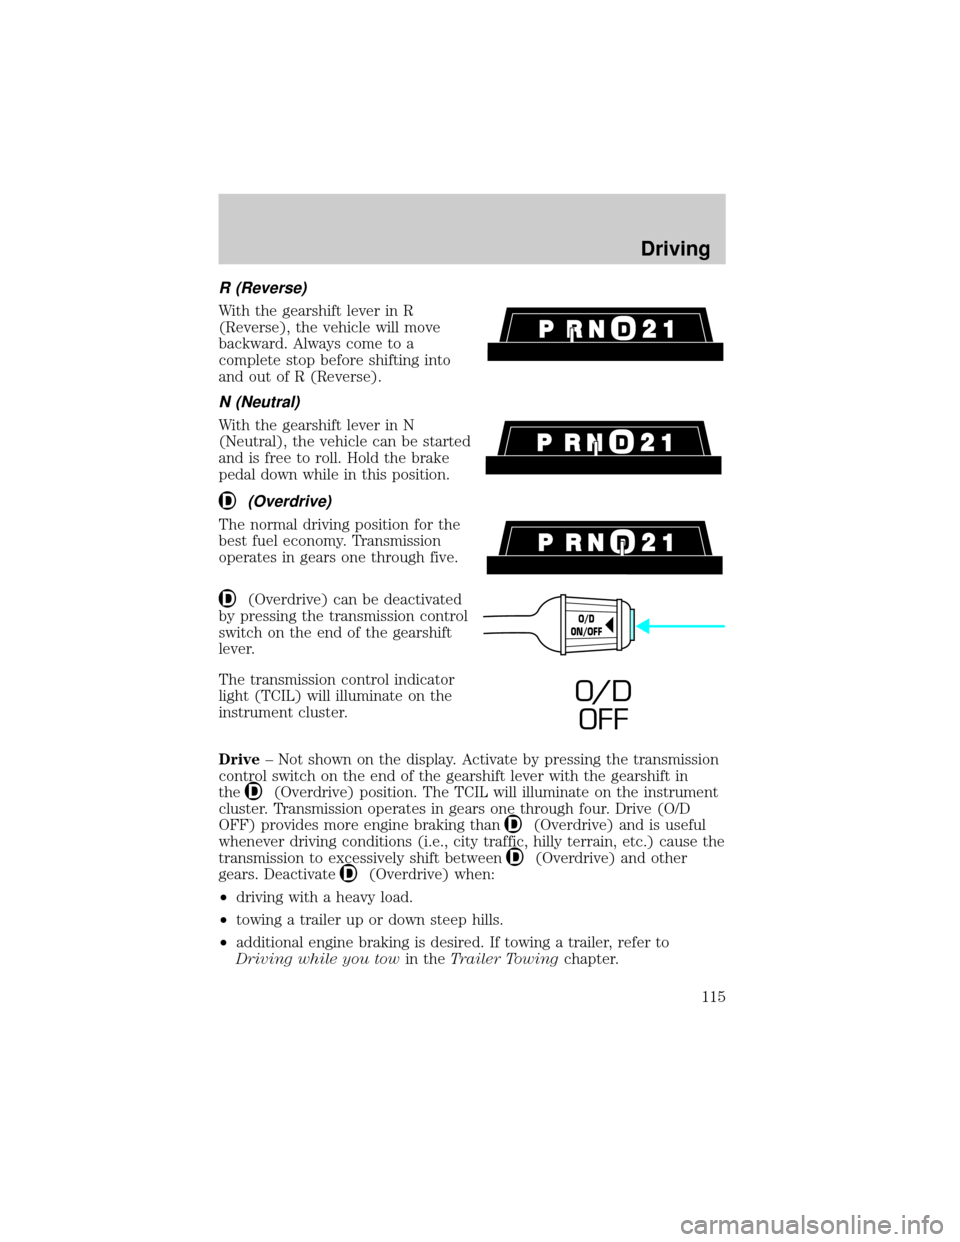
R (Reverse)
With the gearshift lever in R
(Reverse), the vehicle will move
backward. Always come to a
complete stop before shifting into
and out of R (Reverse).
N (Neutral)
With the gearshift lever in N
(Neutral), the vehicle can be started
and is free to roll. Hold the brake
pedal down while in this position.
(Overdrive)
The normal driving position for the
best fuel economy. Transmission
operates in gears one through five.
(Overdrive) can be deactivated
by pressing the transmission control
switch on the end of the gearshift
lever.
The transmission control indicator
light (TCIL) will illuminate on the
instrument cluster.
Drive± Not shown on the display. Activate by pressing the transmission
control switch on the end of the gearshift lever with the gearshift in
the
(Overdrive) position. The TCIL will illuminate on the instrument
cluster. Transmission operates in gears one through four. Drive (O/D
OFF) provides more engine braking than
(Overdrive) and is useful
whenever driving conditions (i.e., city traffic, hilly terrain, etc.) cause the
transmission to excessively shift between
(Overdrive) and other
gears. Deactivate
(Overdrive) when:
²driving with a heavy load.
²towing a trailer up or down steep hills.
²additional engine braking is desired. If towing a trailer, refer to
Driving while you towin theTrailer Towingchapter.
O/D
ON/OFF
O/ D
OFF
Driving
115
Page 116 of 240
To return to(Overdrive) mode, press the transmission control
switch. The TCIL will no longer be illuminated.
Each time the vehicle is started, the transmission will automatically
return to normal
(Overdrive) mode.
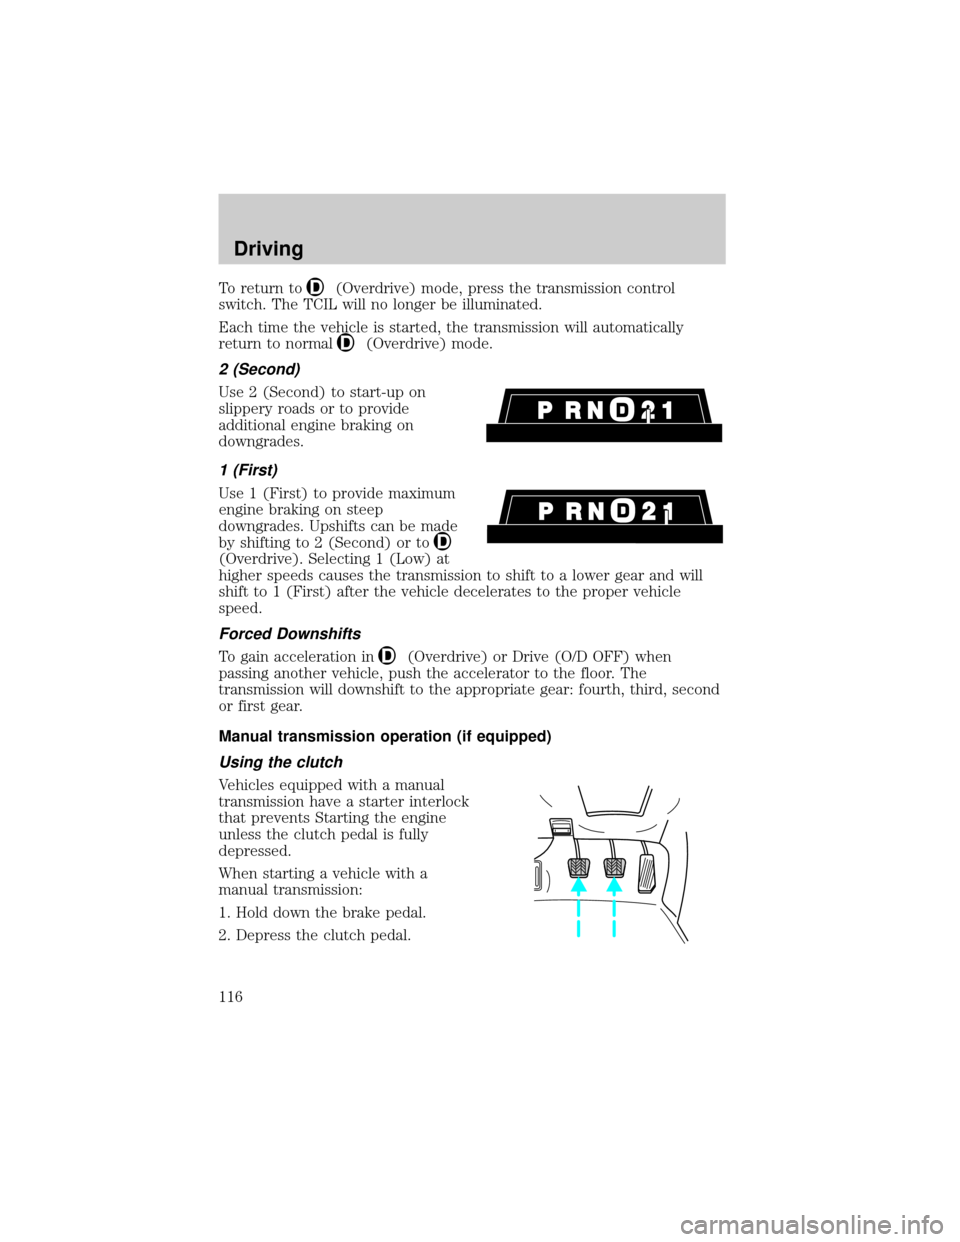
2 (Second)
Use 2 (Second) to start-up on
slippery roads or to provide
additional engine braking on
downgrades.
1 (First)
Use 1 (First) to provide maximum
engine braking on steep
downgrades. Upshifts can be made
by shifting to 2 (Second) or to
(Overdrive). Selecting 1 (Low) at
higher speeds causes the transmission to shift to a lower gear and will
shift to 1 (First) after the vehicle decelerates to the proper vehicle
speed.
Forced Downshifts
To gain acceleration in(Overdrive) or Drive (O/D OFF) when
passing another vehicle, push the accelerator to the floor. The
transmission will downshift to the appropriate gear: fourth, third, second
or first gear.
Manual transmission operation (if equipped)
Using the clutch
Vehicles equipped with a manual
transmission have a starter interlock
that prevents Starting the engine
unless the clutch pedal is fully
depressed.
When starting a vehicle with a
manual transmission:
1. Hold down the brake pedal.
2. Depress the clutch pedal.
Driving
116
Page 117 of 240
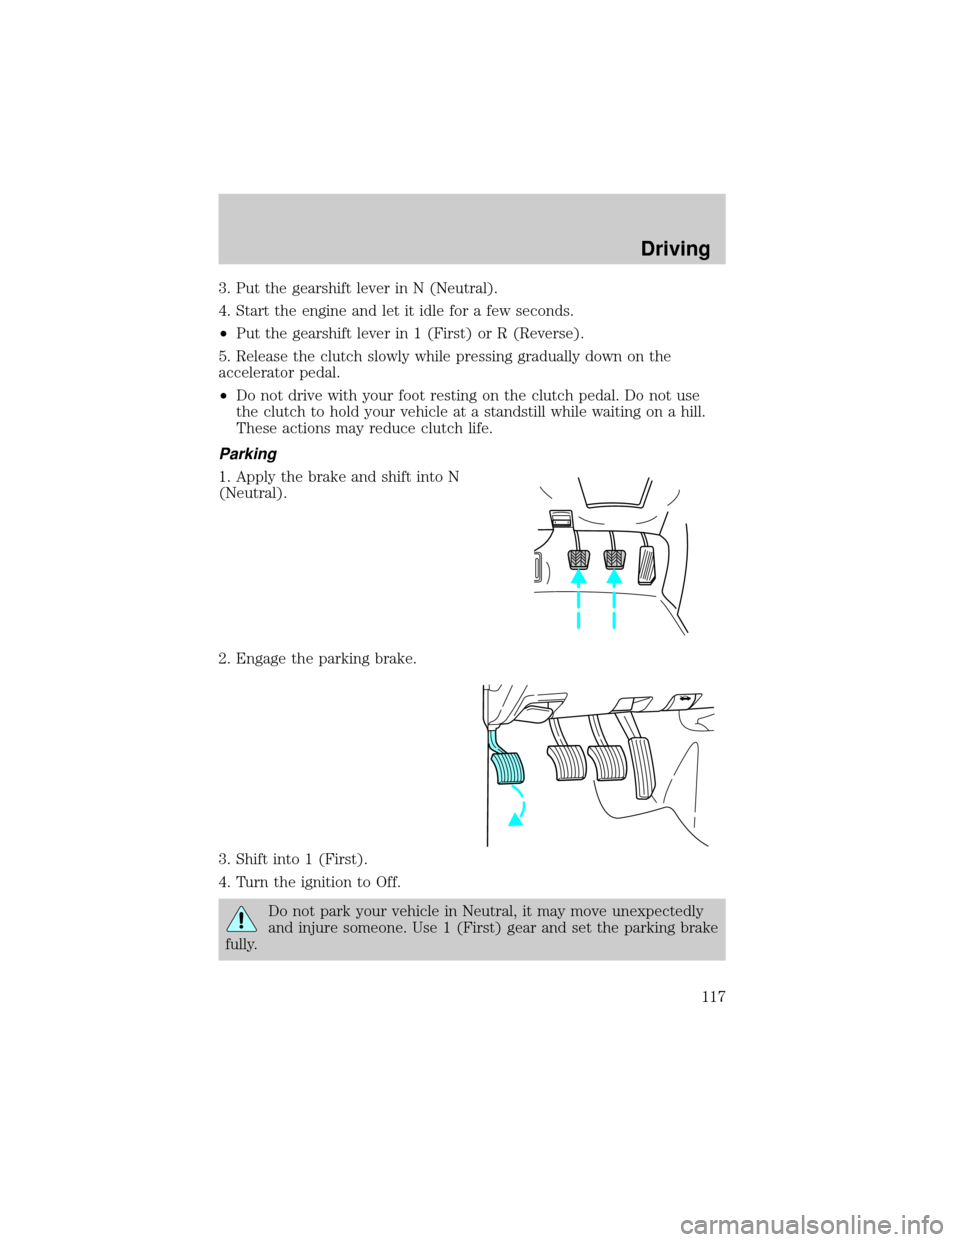
3. Put the gearshift lever in N (Neutral).
4. Start the engine and let it idle for a few seconds.
²Put the gearshift lever in 1 (First) or R (Reverse).
5. Release the clutch slowly while pressing gradually down on the
accelerator pedal.
²Do not drive with your foot resting on the clutch pedal. Do not use
the clutch to hold your vehicle at a standstill while waiting on a hill.
These actions may reduce clutch life.
Parking
1. Apply the brake and shift into N
(Neutral).
2. Engage the parking brake.
3. Shift into 1 (First).
4. Turn the ignition to Off.
Do not park your vehicle in Neutral, it may move unexpectedly
and injure someone. Use 1 (First) gear and set the parking brake
fully.
Driving
117
Page 118 of 240
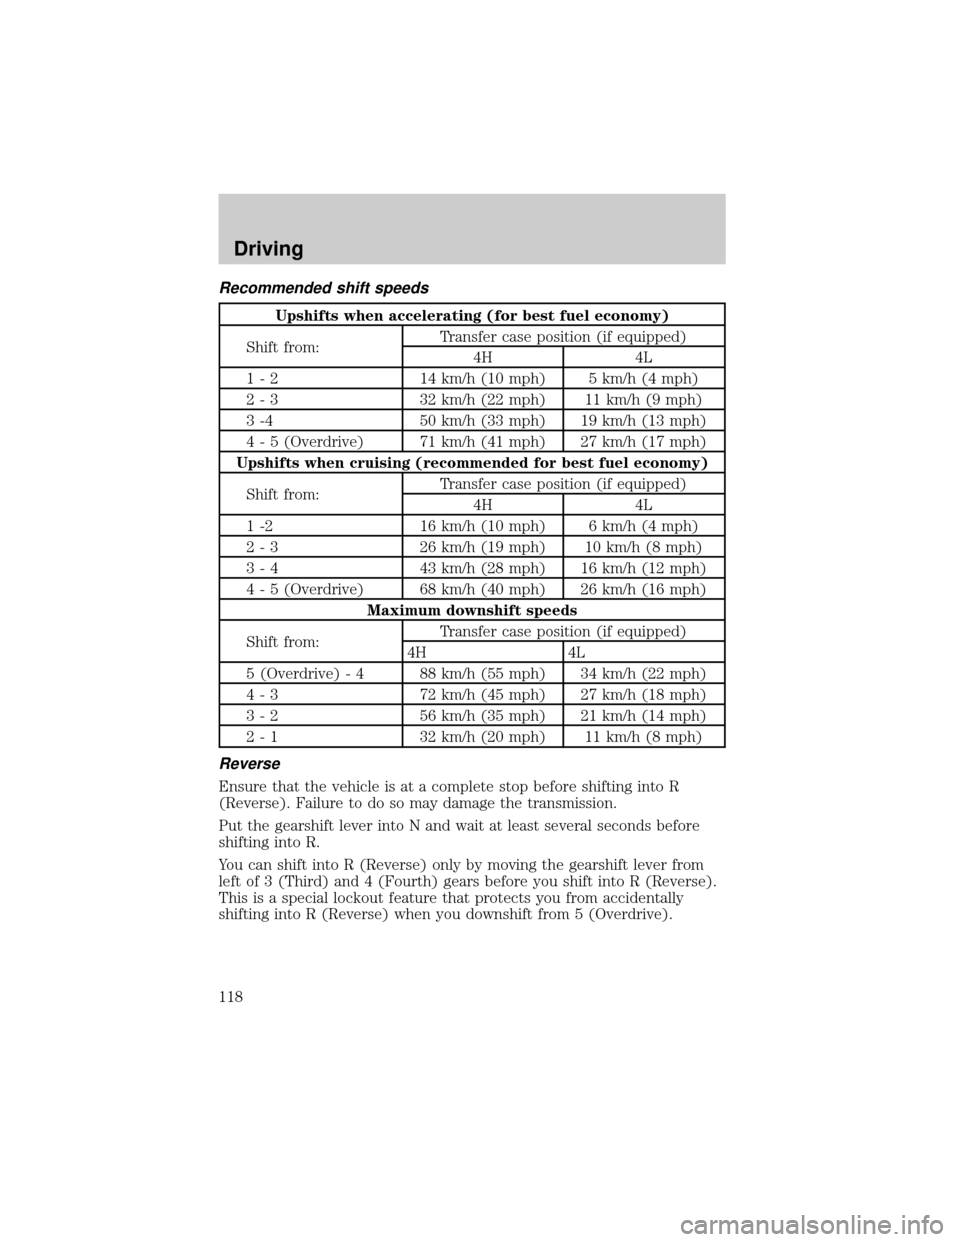
Recommended shift speeds
Upshifts when accelerating (for best fuel economy)
Shift from:Transfer case position (if equipped)
4H 4L
1 - 2 14 km/h (10 mph) 5 km/h (4 mph)
2 - 3 32 km/h (22 mph) 11 km/h (9 mph)
3 -4 50 km/h (33 mph) 19 km/h (13 mph)
4 - 5 (Overdrive) 71 km/h (41 mph) 27 km/h (17 mph)
Upshifts when cruising (recommended for best fuel economy)
Shift from:Transfer case position (if equipped)
4H 4L
1 -2 16 km/h (10 mph) 6 km/h (4 mph)
2 - 3 26 km/h (19 mph) 10 km/h (8 mph)
3 - 4 43 km/h (28 mph) 16 km/h (12 mph)
4 - 5 (Overdrive) 68 km/h (40 mph) 26 km/h (16 mph)
Maximum downshift speeds
Shift from:Transfer case position (if equipped)
4H 4L
5 (Overdrive) - 4 88 km/h (55 mph) 34 km/h (22 mph)
4 - 3 72 km/h (45 mph) 27 km/h (18 mph)
3 - 2 56 km/h (35 mph) 21 km/h (14 mph)
2 - 1 32 km/h (20 mph) 11 km/h (8 mph)
Reverse
Ensure that the vehicle is at a complete stop before shifting into R
(Reverse). Failure to do so may damage the transmission.
Put the gearshift lever into N and wait at least several seconds before
shifting into R.
You can shift into R (Reverse) only by moving the gearshift lever from
left of 3 (Third) and 4 (Fourth) gears before you shift into R (Reverse).
This is a special lockout feature that protects you from accidentally
shifting into R (Reverse) when you downshift from 5 (Overdrive).
Driving
118
Page 119 of 240
FOUR-WHEEL DRIVE (4WD) OPERATION (IF EQUIPPED)
For important information regarding safe operation of this type
of vehicle, seePreparing to drive your vehiclein this chapter.
When Four±wheel drive (4WD) is engaged, power is supplied to all four
wheels through a transfer case. 4WD power can be selected when
additional driving power is desired.
If equipped with the Electronic Shift 4WD System, and the
instrument panel control is moved to 4WD Low while the vehicle
is moving, the system will not engage and no damage will occur to
the 4WD system. Before 4WD Low can be engaged, the vehicle
must be brought to a complete stop with the brake pedal
depressed and the transmission placed in neutral (or the clutch
pedal depressed on manual transmissions).
4WD operation is not recommended on dry pavement. Doing so could
result in difficult disengagement of the transfer case, increased tire wear
and decreased fuel economy.
4WD system indicator lights
The 4WD system indicator lights illuminate only under the following
conditions. If these lights illuminate when driving in 2WD, contact your
Ford dealer as soon as possible.
²4WD HIGH-momentarily
illuminates when the vehicle is
started. Illuminates when 4H
(4WD High) is engaged.
²4WD LOW±momentarily
illuminates when the vehicle is
started. Illuminates when 4L
(4WD Low) is engaged.
Using the electronic shift 4WD system (if equipped)
Positions of the electronic shift system
2WD (2WD High)± Power to rear axle only.
4X4 HIGH (4WD High)± Power delivered to front and rear axles for
increased traction.
4X4 LOW (4WD Low)± Power to front and rear axles at low speeds.
4WD
HIGH
4WD
LOW
Driving
119
Page 120 of 240
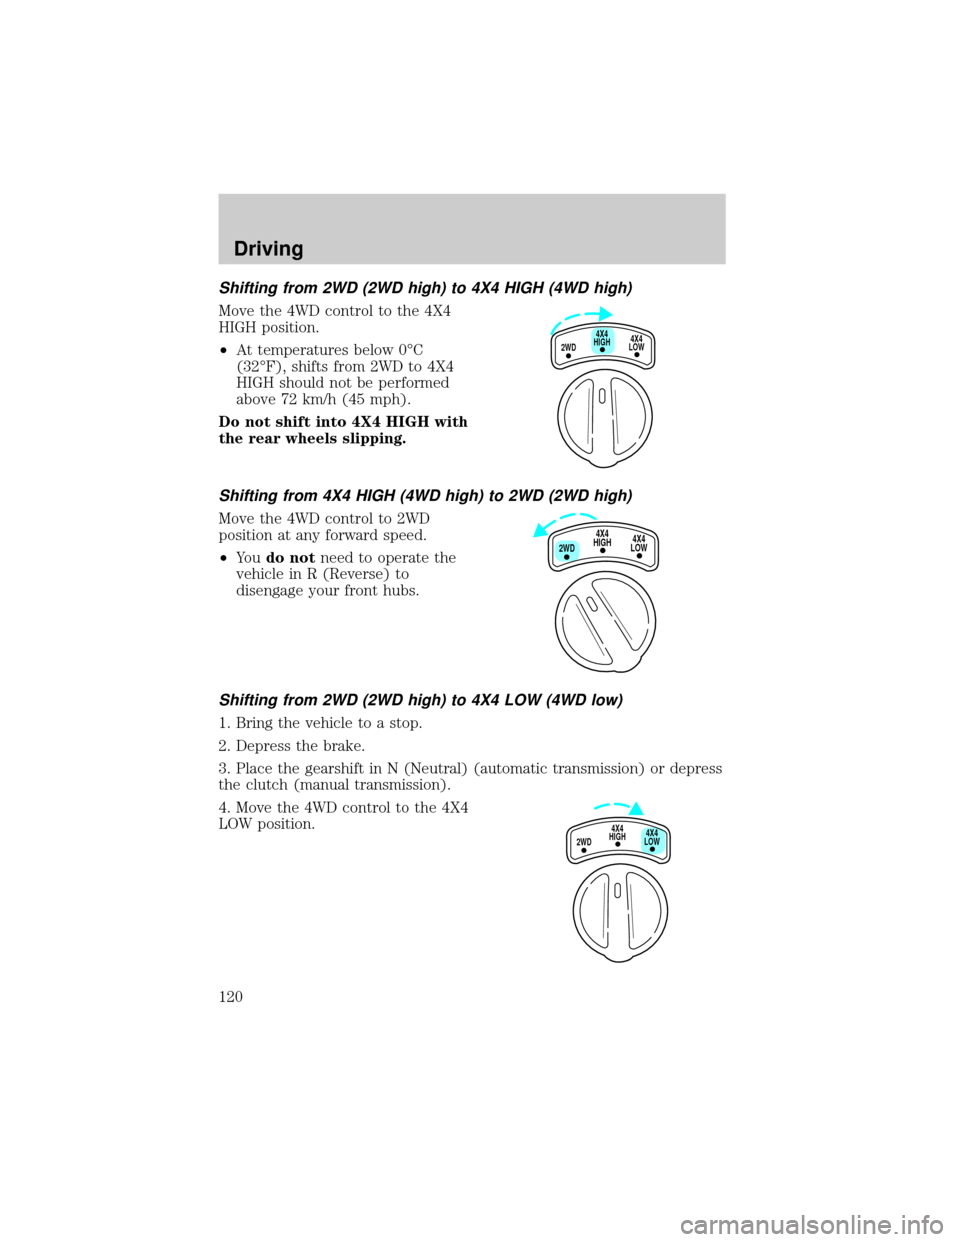
Shifting from 2WD (2WD high) to 4X4 HIGH (4WD high)
Move the 4WD control to the 4X4
HIGH position.
²At temperatures below 0ÉC
(32ÉF), shifts from 2WD to 4X4
HIGH should not be performed
above 72 km/h (45 mph).
Do not shift into 4X4 HIGH with
the rear wheels slipping.
Shifting from 4X4 HIGH (4WD high) to 2WD (2WD high)
Move the 4WD control to 2WD
position at any forward speed.
²Yo udo notneed to operate the
vehicle in R (Reverse) to
disengage your front hubs.
Shifting from 2WD (2WD high) to 4X4 LOW (4WD low)
1. Bring the vehicle to a stop.
2. Depress the brake.
3. Place the gearshift in N (Neutral) (automatic transmission) or depress
the clutch (manual transmission).
4. Move the 4WD control to the 4X4
LOW position.
4X4
HIGH
2WD4X4
LOW
4X4
HIGH
2WD4X4
LOW
4X4
HIGH
2WD4X4
LOW
Driving
120