key FORD RANGER 2002 2.G User Guide
[x] Cancel search | Manufacturer: FORD, Model Year: 2002, Model line: RANGER, Model: FORD RANGER 2002 2.GPages: 288, PDF Size: 3.03 MB
Page 108 of 288
Programming spare keys
A maximum of eight keys can be coded to your vehicle. Only
SecuriLockykeys can be used. To program acoded keyyourself, you
will need two previously programmedcoded keys(keys that already
operate your vehicle's engine) and the new unprogrammed key(s) readily
accessible for timely implementation of each step in the procedure.
If two previously programmed coded keys are not available, you must
bring your vehicle to your dealership to have the spare coded key(s)
programmed.
Please read and understand the entire procedure before you begin.
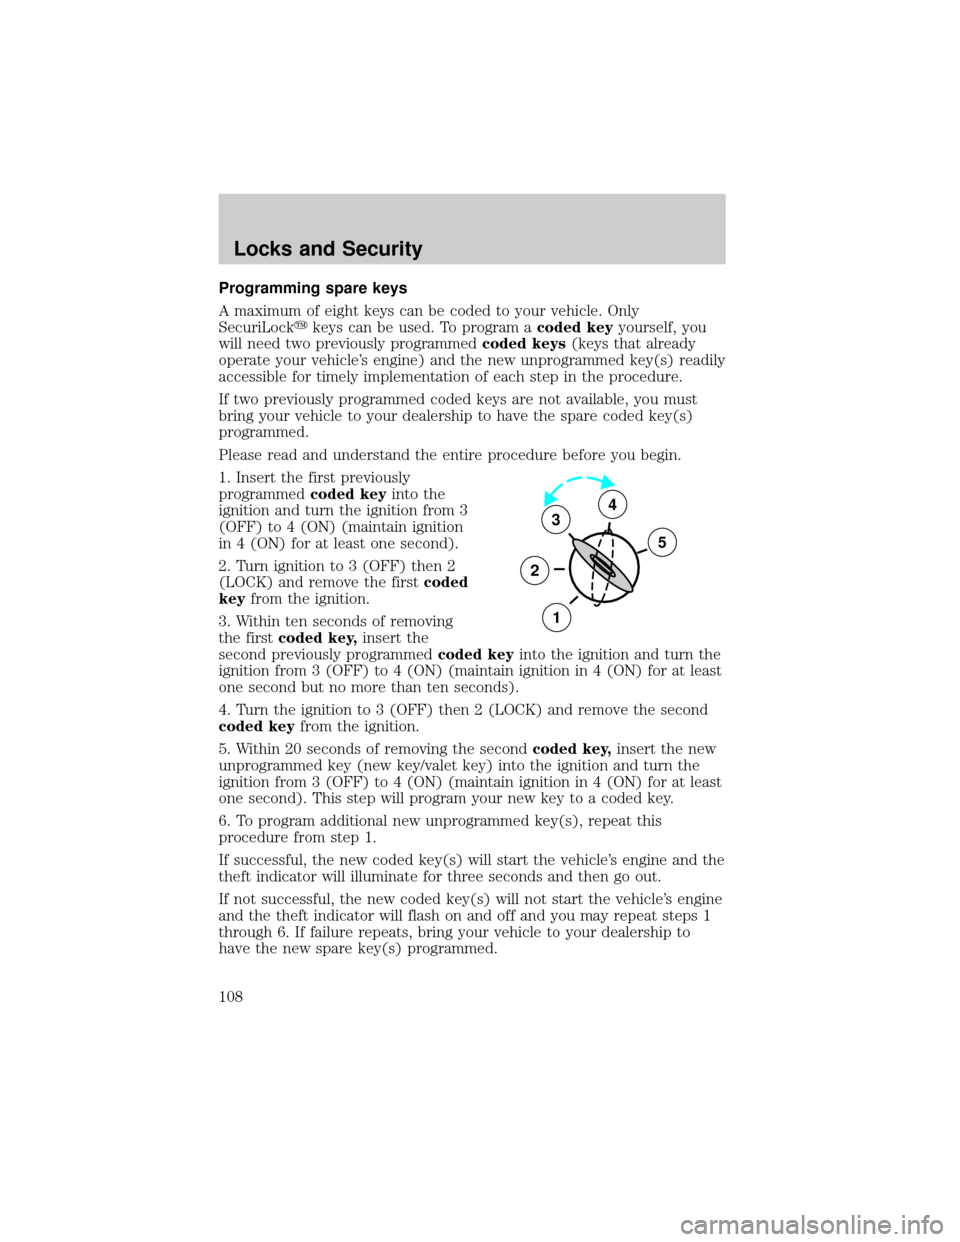
1. Insert the first previously
programmedcoded keyinto the
ignition and turn the ignition from 3
(OFF) to 4 (ON) (maintain ignition
in 4 (ON) for at least one second).
2. Turn ignition to 3 (OFF) then 2
(LOCK) and remove the firstcoded
keyfrom the ignition.
3. Within ten seconds of removing
the firstcoded key,insert the
second previously programmedcoded keyinto the ignition and turn the
ignition from 3 (OFF) to 4 (ON) (maintain ignition in 4 (ON) for at least
one second but no more than ten seconds).
4. Turn the ignition to 3 (OFF) then 2 (LOCK) and remove the second
coded keyfrom the ignition.
5. Within 20 seconds of removing the secondcoded key,insert the new
unprogrammed key (new key/valet key) into the ignition and turn the
ignition from 3 (OFF) to 4 (ON) (maintain ignition in 4 (ON) for at least
one second). This step will program your new key to a coded key.
6. To program additional new unprogrammed key(s), repeat this
procedure from step 1.
If successful, the new coded key(s) will start the vehicle's engine and the
theft indicator will illuminate for three seconds and then go out.
If not successful, the new coded key(s) will not start the vehicle's engine
and the theft indicator will flash on and off and you may repeat steps 1
through 6. If failure repeats, bring your vehicle to your dealership to
have the new spare key(s) programmed.
3
2
1
5
4
Locks and Security
108
Page 128 of 288
If any of these things happen, even intermittently, have the SRS serviced at
your dealership or by a qualified technician immediately. Unless serviced, the
system may not function properly in the event of a collision.
Disposal of air bags and air bag equipped vehicles
(including pretensioners)
For disposal of air bags or air bag equipped vehicles, see your local
dealership or qualified technician. Air bags MUST BE disposed of by
qualified personnel.
Passenger air bag ON/OFF switch
An air bag ON/OFF switch
has been installed in this
vehicle. Before driving,always
look at the face of the switch to
be sure the switch is in the proper
position in accordance with these
instructions and warnings. Failure
to put the switch in a proper
position can increase the risk of
serious injury or death in a
collision.
Turning the passenger air bag off
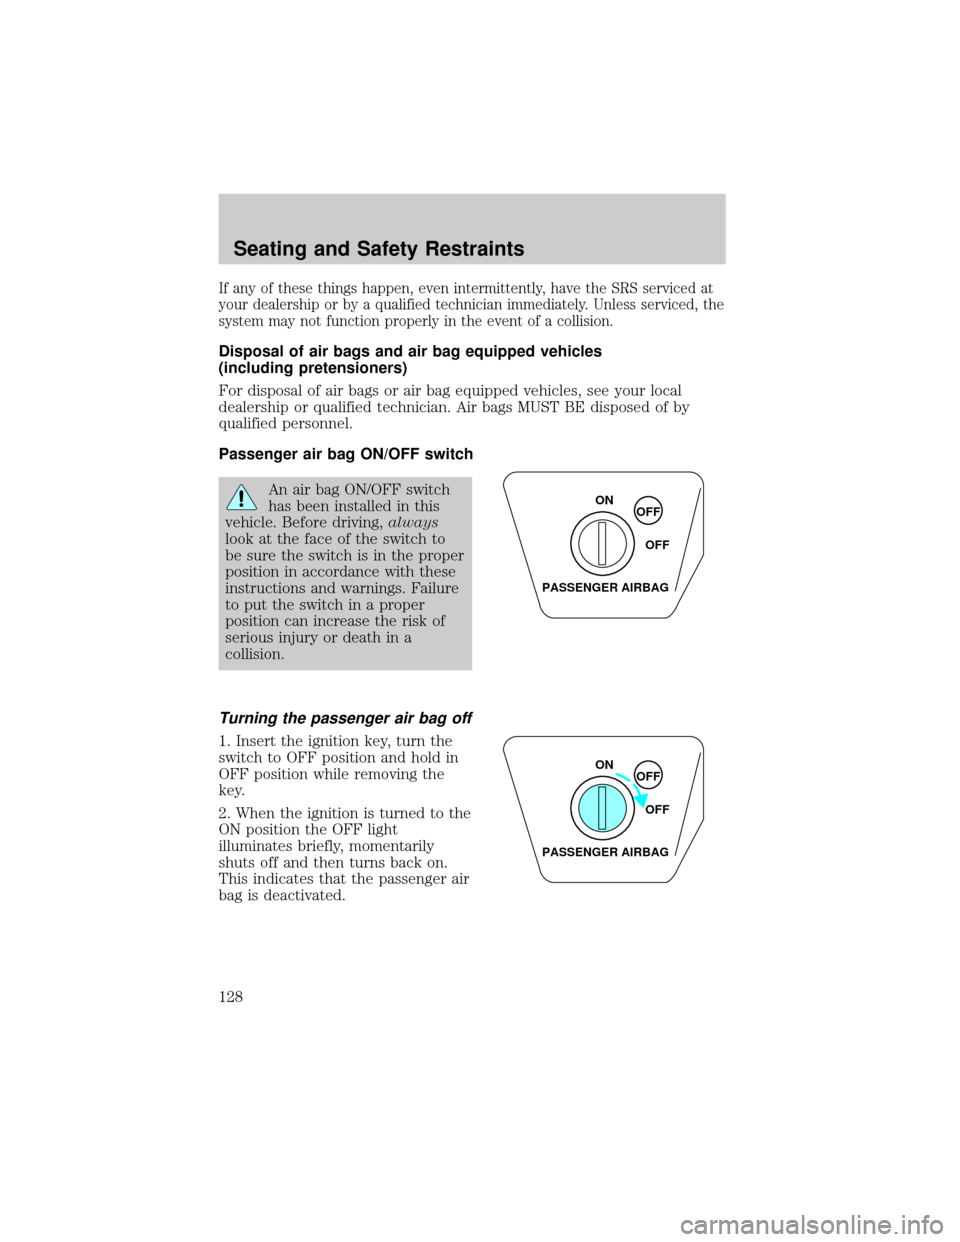
1. Insert the ignition key, turn the
switch to OFF position and hold in
OFF position while removing the
key.
2. When the ignition is turned to the
ON position the OFF light
illuminates briefly, momentarily
shuts off and then turns back on.
This indicates that the passenger air
bag is deactivated.
ON
OFF
OFF
PASSENGER AIRBAG
ON
OFF
OFF
PASSENGER AIRBAG
Seating and Safety Restraints
128
Page 129 of 288
If the light fails to illuminate when the passenger air bag switch
is in the OFF position and the ignition switch is in ON, have the
passenger air bag switch serviced at your Ford or Lincoln-Mercury
dealer immediately.
In order to avoid inadvertent activation of the switch, always
remove the ignition key from the passenger air bag ON/OFF
switch.
Turning the passenger air bag back on
The passenger air bag remains OFF until you turn it back ON.
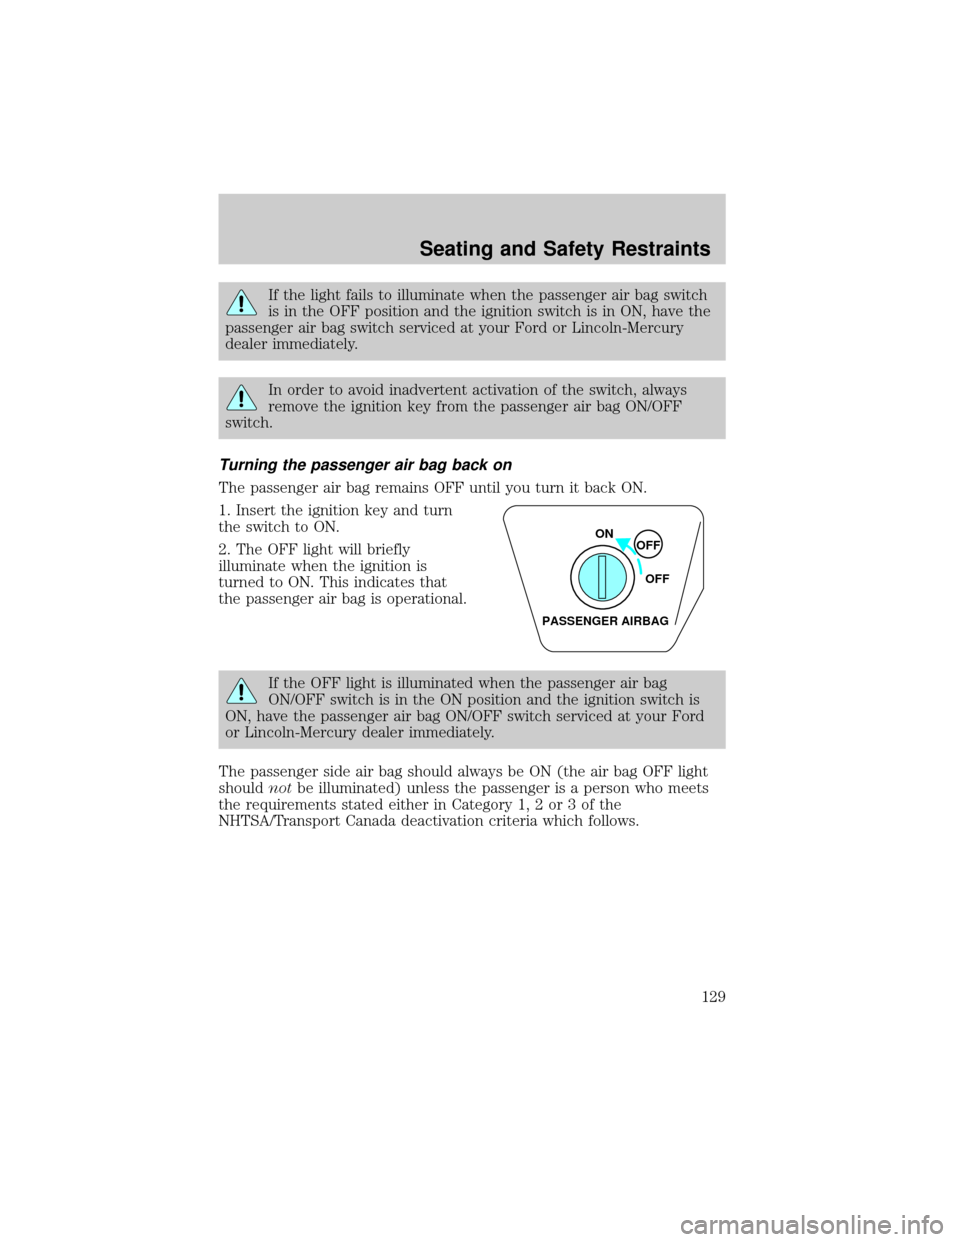
1. Insert the ignition key and turn
the switch to ON.
2. The OFF light will briefly
illuminate when the ignition is
turned to ON. This indicates that
the passenger air bag is operational.
If the OFF light is illuminated when the passenger air bag
ON/OFF switch is in the ON position and the ignition switch is
ON, have the passenger air bag ON/OFF switch serviced at your Ford
or Lincoln-Mercury dealer immediately.
The passenger side air bag should always be ON (the air bag OFF light
shouldnotbe illuminated) unless the passenger is a person who meets
the requirements stated either in Category 1, 2 or 3 of the
NHTSA/Transport Canada deactivation criteria which follows.
ON
OFF
OFF
PASSENGER AIRBAG
Seating and Safety Restraints
129
Page 144 of 288
STARTING
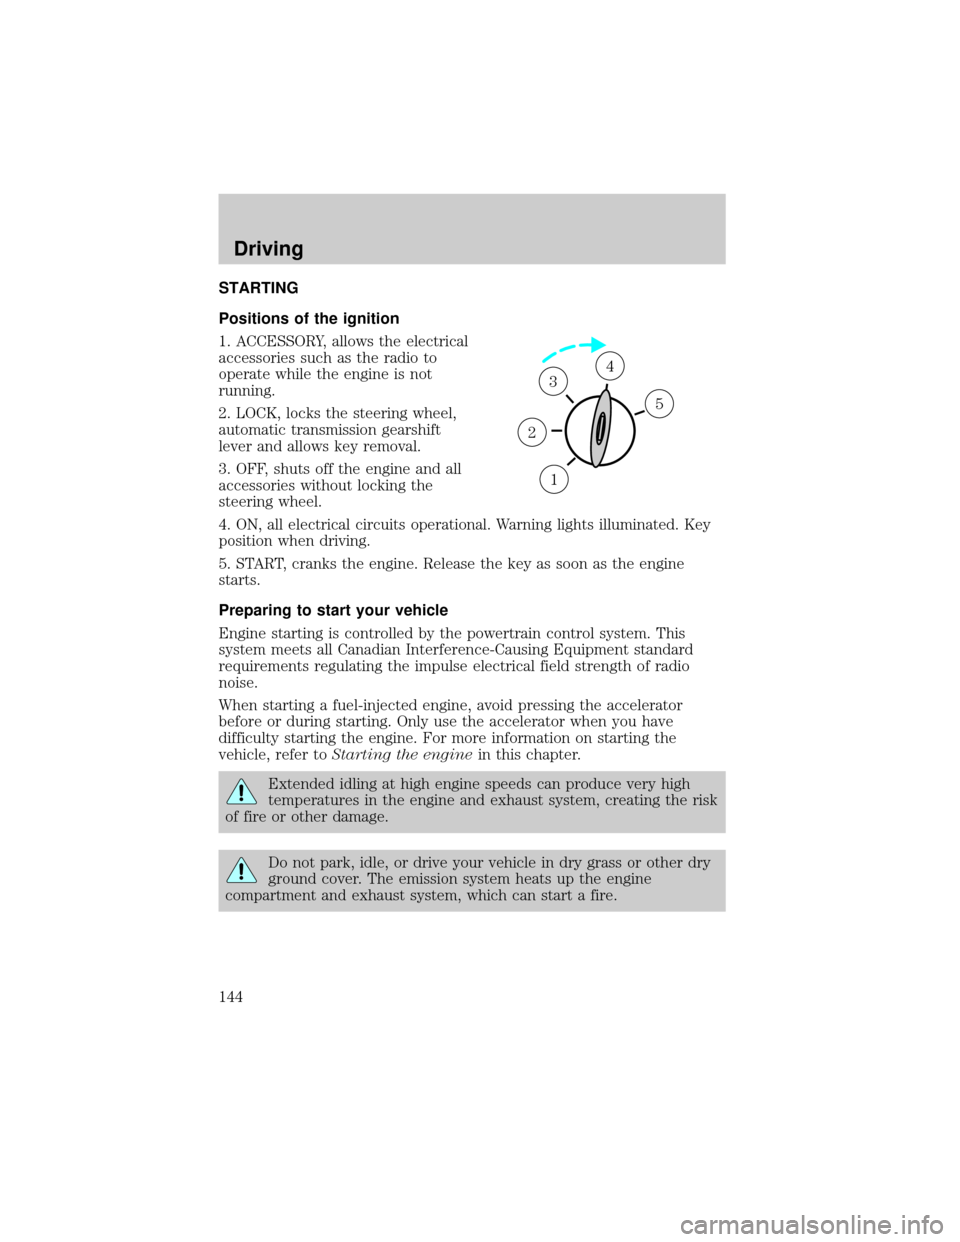
Positions of the ignition
1. ACCESSORY, allows the electrical
accessories such as the radio to
operate while the engine is not
running.
2. LOCK, locks the steering wheel,
automatic transmission gearshift
lever and allows key removal.
3. OFF, shuts off the engine and all
accessories without locking the
steering wheel.
4. ON, all electrical circuits operational. Warning lights illuminated. Key
position when driving.
5. START, cranks the engine. Release the key as soon as the engine
starts.
Preparing to start your vehicle
Engine starting is controlled by the powertrain control system. This
system meets all Canadian Interference-Causing Equipment standard
requirements regulating the impulse electrical field strength of radio
noise.
When starting a fuel-injected engine, avoid pressing the accelerator
before or during starting. Only use the accelerator when you have
difficulty starting the engine. For more information on starting the
vehicle, refer toStarting the enginein this chapter.
Extended idling at high engine speeds can produce very high
temperatures in the engine and exhaust system, creating the risk
of fire or other damage.
Do not park, idle, or drive your vehicle in dry grass or other dry
ground cover. The emission system heats up the engine
compartment and exhaust system, which can start a fire.
1
2
34
5
Driving
144
Page 146 of 288
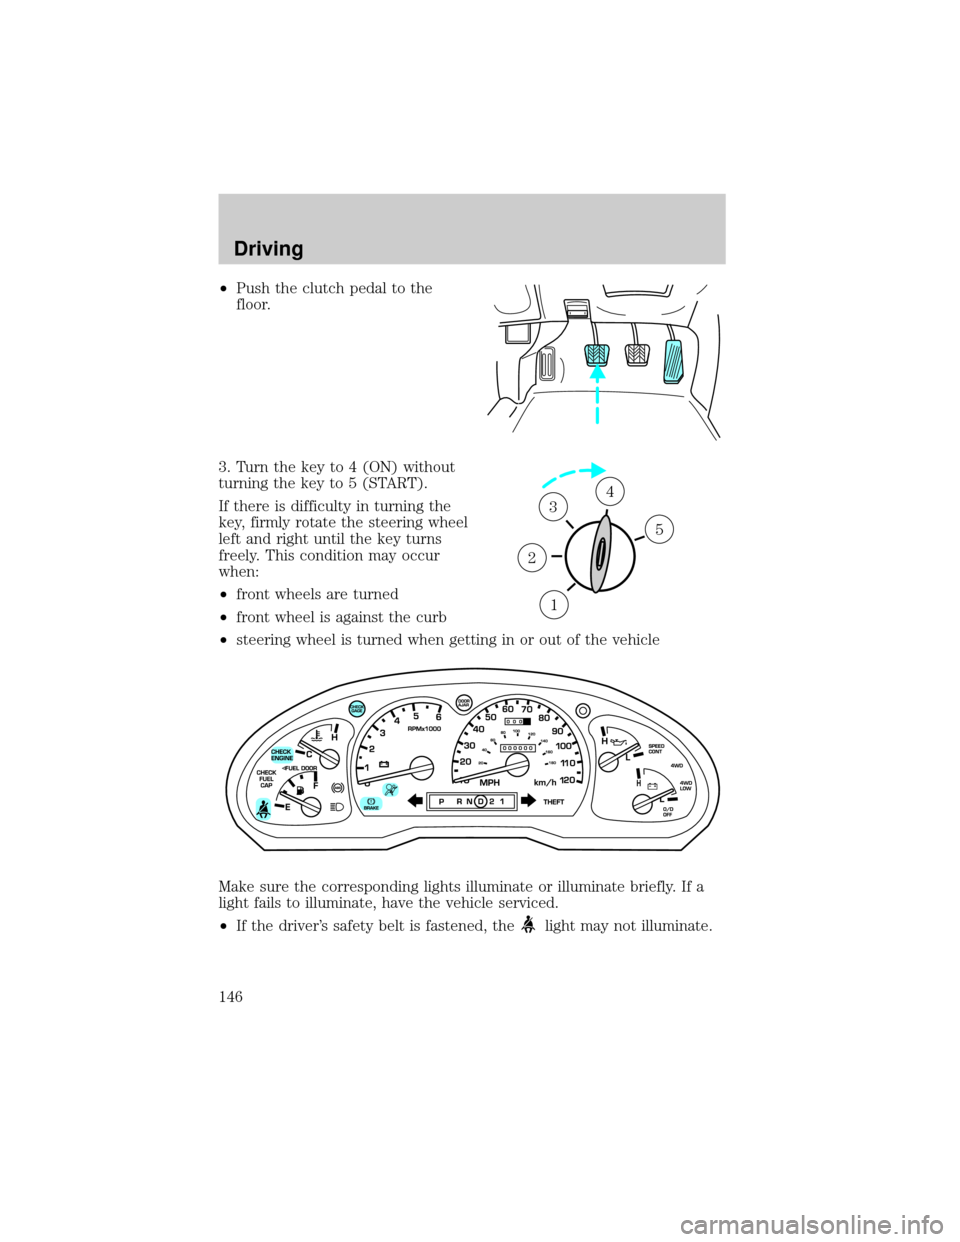
²Push the clutch pedal to the
floor.
3. Turn the key to 4 (ON) without
turning the key to 5 (START).
If there is difficulty in turning the
key, firmly rotate the steering wheel
left and right until the key turns
freely. This condition may occur
when:
²front wheels are turned
²front wheel is against the curb
²steering wheel is turned when getting in or out of the vehicle
Make sure the corresponding lights illuminate or illuminate briefly. If a
light fails to illuminate, have the vehicle serviced.
²If the driver's safety belt is fastened, the
light may not illuminate.
1
2
34
5
Driving
146
Page 147 of 288
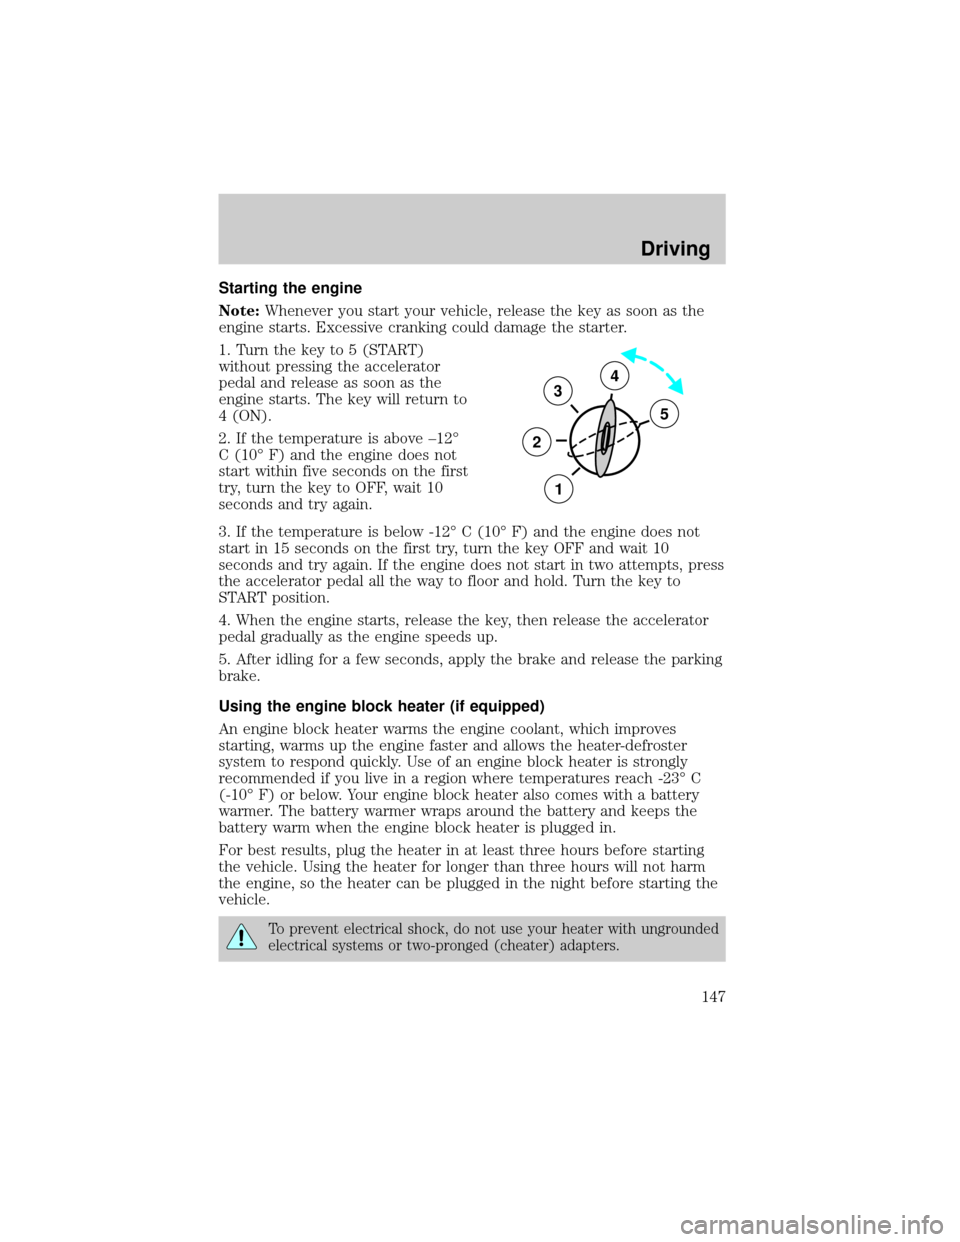
Starting the engine
Note:Whenever you start your vehicle, release the key as soon as the
engine starts. Excessive cranking could damage the starter.
1. Turn the key to 5 (START)
without pressing the accelerator
pedal and release as soon as the
engine starts. The key will return to
4 (ON).
2. If the temperature is above ±12É
C (10É F) and the engine does not
start within five seconds on the first
try, turn the key to OFF, wait 10
seconds and try again.
3. If the temperature is below -12É C (10É F) and the engine does not
start in 15 seconds on the first try, turn the key OFF and wait 10
seconds and try again. If the engine does not start in two attempts, press
the accelerator pedal all the way to floor and hold. Turn the key to
START position.
4. When the engine starts, release the key, then release the accelerator
pedal gradually as the engine speeds up.
5. After idling for a few seconds, apply the brake and release the parking
brake.
Using the engine block heater (if equipped)
An engine block heater warms the engine coolant, which improves
starting, warms up the engine faster and allows the heater-defroster
system to respond quickly. Use of an engine block heater is strongly
recommended if you live in a region where temperatures reach -23É C
(-10É F) or below. Your engine block heater also comes with a battery
warmer. The battery warmer wraps around the battery and keeps the
battery warm when the engine block heater is plugged in.
For best results, plug the heater in at least three hours before starting
the vehicle. Using the heater for longer than three hours will not harm
the engine, so the heater can be plugged in the night before starting the
vehicle.
To prevent electrical shock, do not use your heater with ungrounded
electrical systems or two-pronged (cheater) adapters.
3
2
1
5
4
Driving
147
Page 153 of 288
AUTOMATIC TRANSMISSION OPERATION (IF EQUIPPED)
Brake-shift interlock
This vehicle is equipped with a brake-shift interlock feature that prevents
the gearshift lever from being moved from P (Park) when the ignition is
in the ON position unless the brake pedal is depressed.
If you cannot move the gearshift lever out of P (Park) with ignition in
the ON position and the brake pedal depressed:
1. Apply the parking brake, turn ignition key to LOCK, then remove the
key.
2. Insert the key and turn it to OFF.Apply the brake pedal and shift
to N (Neutral).
3. Start the vehicle.
If it is necessary to use the above procedure to move the gearshift lever,
it is possible that a fuse has blown or the vehicle's brakelamps are not
operating properly. Refer toFuses and relaysin theRoadside
emergencieschapter.
Do not drive your vehicle until you verify that the brakelamps
are working.
If your vehicle gets stuck in mud or snow it may be rocked out by
shifting from forward and reverse gears, stopping between shifts, in a
steady pattern. Press lightly on the accelerator in each gear.
Do not rock the vehicle if the engine is not at normal operating
temperature or damage to the transmission may occur.
Do not rock the vehicle for more than a few minutes or damage
to the transmission and tires may occur or the engine may
overheat.
Always set the parking brake fully and make sure the gearshift is
latched in P (Park). Turn off the ignition whenever you leave
your vehicle.
If the parking brake is fully released, but the brake warning lamp
remains illuminated, the brakes may not be working properly.
See your dealer or a qualified service technician.
Driving
153
Page 186 of 288

4X2 AND 4X4 VEHICLES EQUIPPED WITH MANUAL
TRANSMISSIONS
Before you have your vehicle towed:
²Release the parking brake.
²Move the gearshift to N (Neutral).
²Turn the key in the ignition to the OFF/UNLOCKED position.
²The maximum recommended speed is 88 km/h (55 mph).
²The maximum recommended distance is unlimited.
In addition, it is recommended that you follow the instructions
provided by the after market manufacturer of the towing
apparatus if one has been installed.
4X2 AND 4X4 VEHICLES EQUIPPED WITH AUTOMATIC
TRANSMISSIONS
4x2 vehicles with automatic transmissions or 4x4 vehicles with manual
transfer cases and automatic transmissions, follow these guidelines for
recreational towing:
²Release the parking brake.
²Turn the key in the ignition to the OFF/UNLOCKED position.
²Place the transmission in N (Neutral).
²Do not exceed a distance of 80 km (50 miles).
²Do not exceed 56 km/h (35 mph) vehicle speed.
If a distance of 80 km (50 miles) or a speed of 56 km/h (35 mph) must
be exceeded, you must disconnect the driveshaft. Ford recommends the
driveshaft be removed/installed only by a qualified technician. See your
local dealer for driveshaft removal/installation.
Improper removal/installation of the driveshaft can cause
transmission fluid loss, damage to the driveshaft and internal
transmission components.
CAMPER BODIES
Your Ranger Pickup is not recommended for slide±in camper bodies.
Driving
186
Page 189 of 288
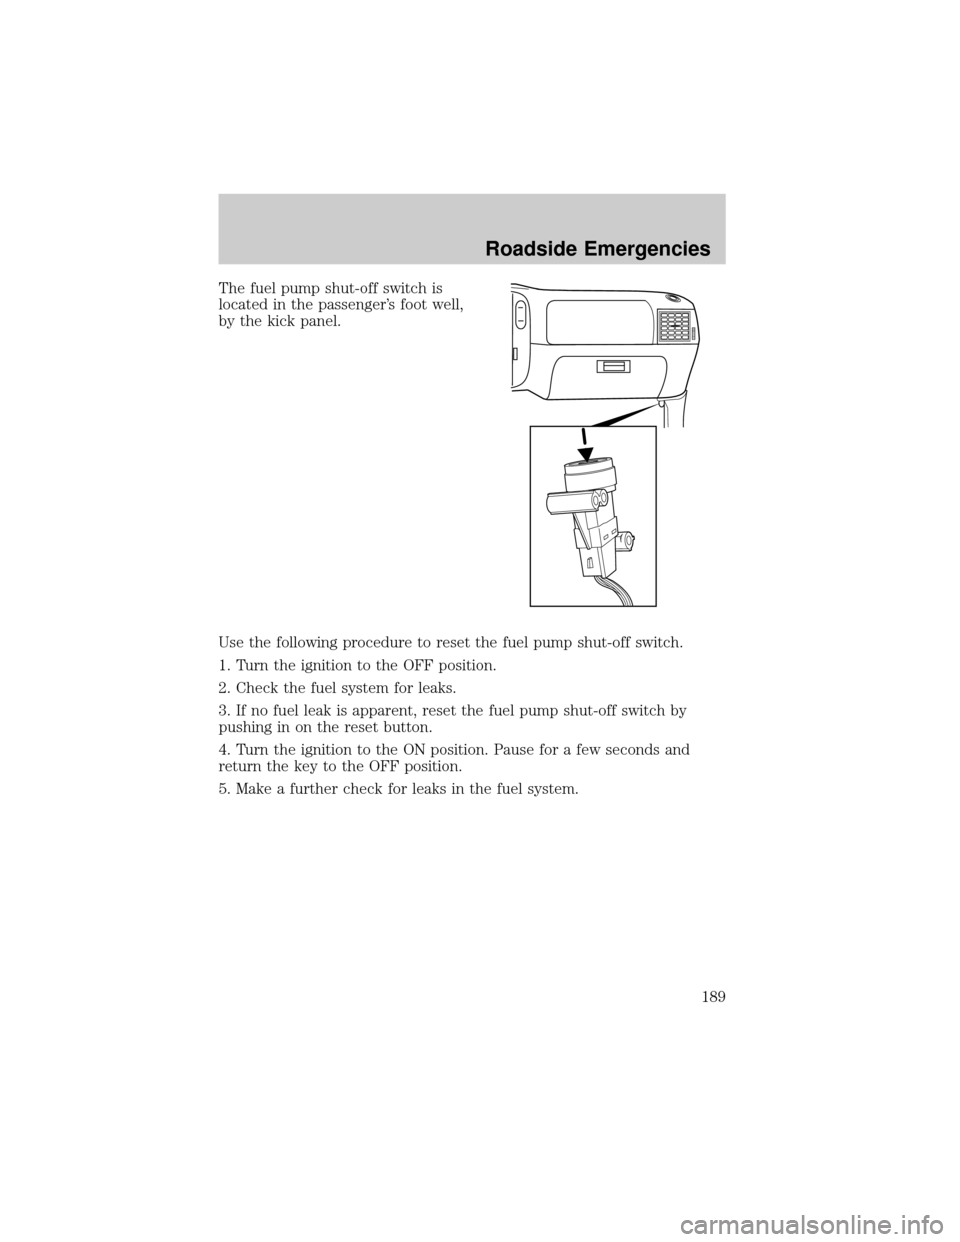
The fuel pump shut-off switch is
located in the passenger's foot well,
by the kick panel.
Use the following procedure to reset the fuel pump shut-off switch.
1. Turn the ignition to the OFF position.
2. Check the fuel system for leaks.
3. If no fuel leak is apparent, reset the fuel pump shut-off switch by
pushing in on the reset button.
4. Turn the ignition to the ON position. Pause for a few seconds and
return the key to the OFF position.
5. Make a further check for leaks in the fuel system.
Roadside Emergencies
189
Page 201 of 288
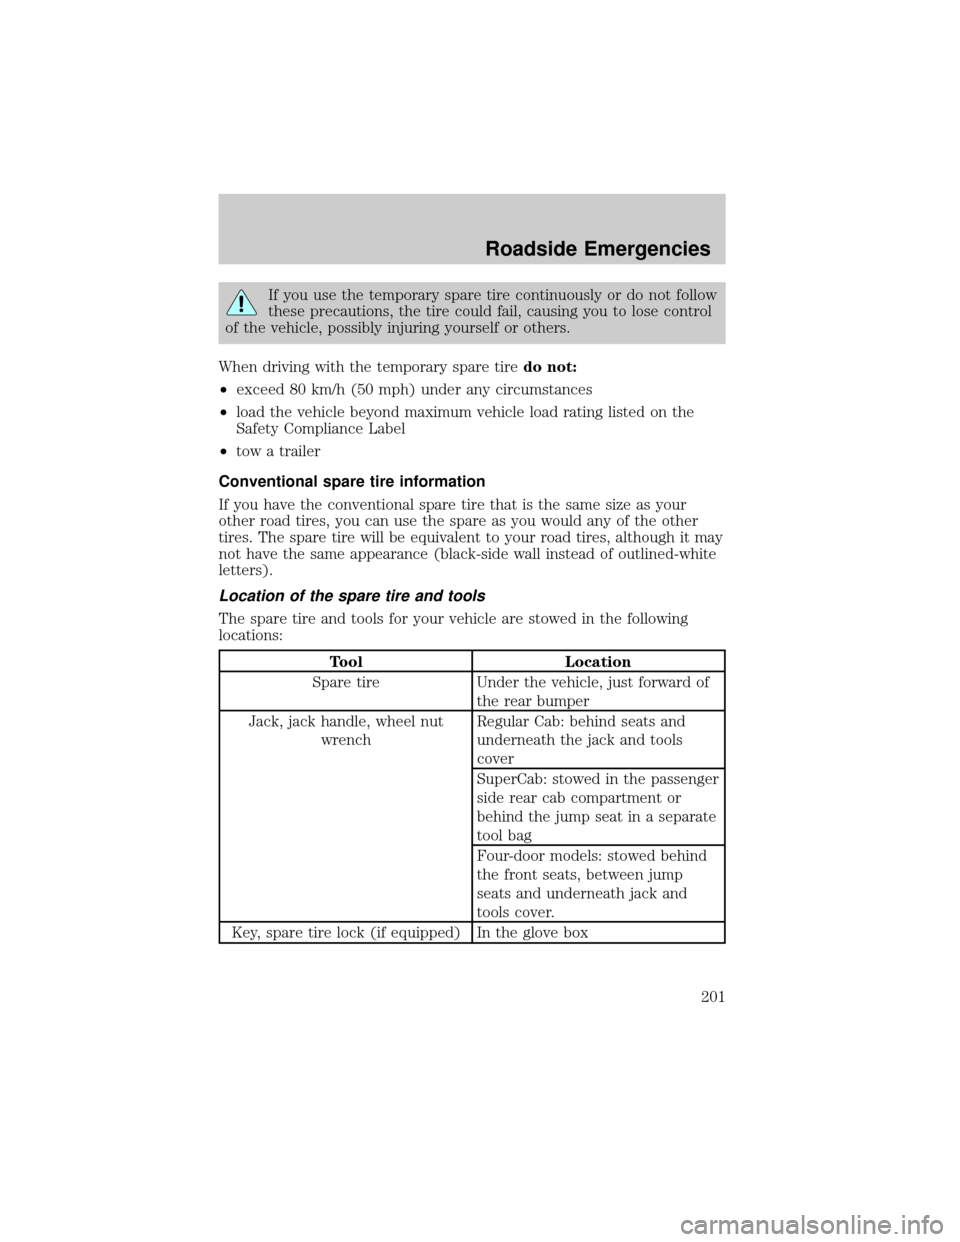
If you use the temporary spare tire continuously or do not follow
these precautions, the tire could fail, causing you to lose control
of the vehicle, possibly injuring yourself or others.
When driving with the temporary spare tiredo not:
²exceed 80 km/h (50 mph) under any circumstances
²load the vehicle beyond maximum vehicle load rating listed on the
Safety Compliance Label
²tow a trailer
Conventional spare tire information
If you have the conventional spare tire that is the same size as your
other road tires, you can use the spare as you would any of the other
tires. The spare tire will be equivalent to your road tires, although it may
not have the same appearance (black-side wall instead of outlined-white
letters).
Location of the spare tire and tools
The spare tire and tools for your vehicle are stowed in the following
locations:
Tool Location
Spare tire Under the vehicle, just forward of
the rear bumper
Jack, jack handle, wheel nut
wrenchRegular Cab: behind seats and
underneath the jack and tools
cover
SuperCab: stowed in the passenger
side rear cab compartment or
behind the jump seat in a separate
tool bag
Four-door models: stowed behind
the front seats, between jump
seats and underneath jack and
tools cover.
Key, spare tire lock (if equipped) In the glove box
Roadside Emergencies
201