tailgate FORD RANGER 2002 2.G Owners Manual
[x] Cancel search | Manufacturer: FORD, Model Year: 2002, Model line: RANGER, Model: FORD RANGER 2002 2.GPages: 288, PDF Size: 3.03 MB
Page 80 of 288
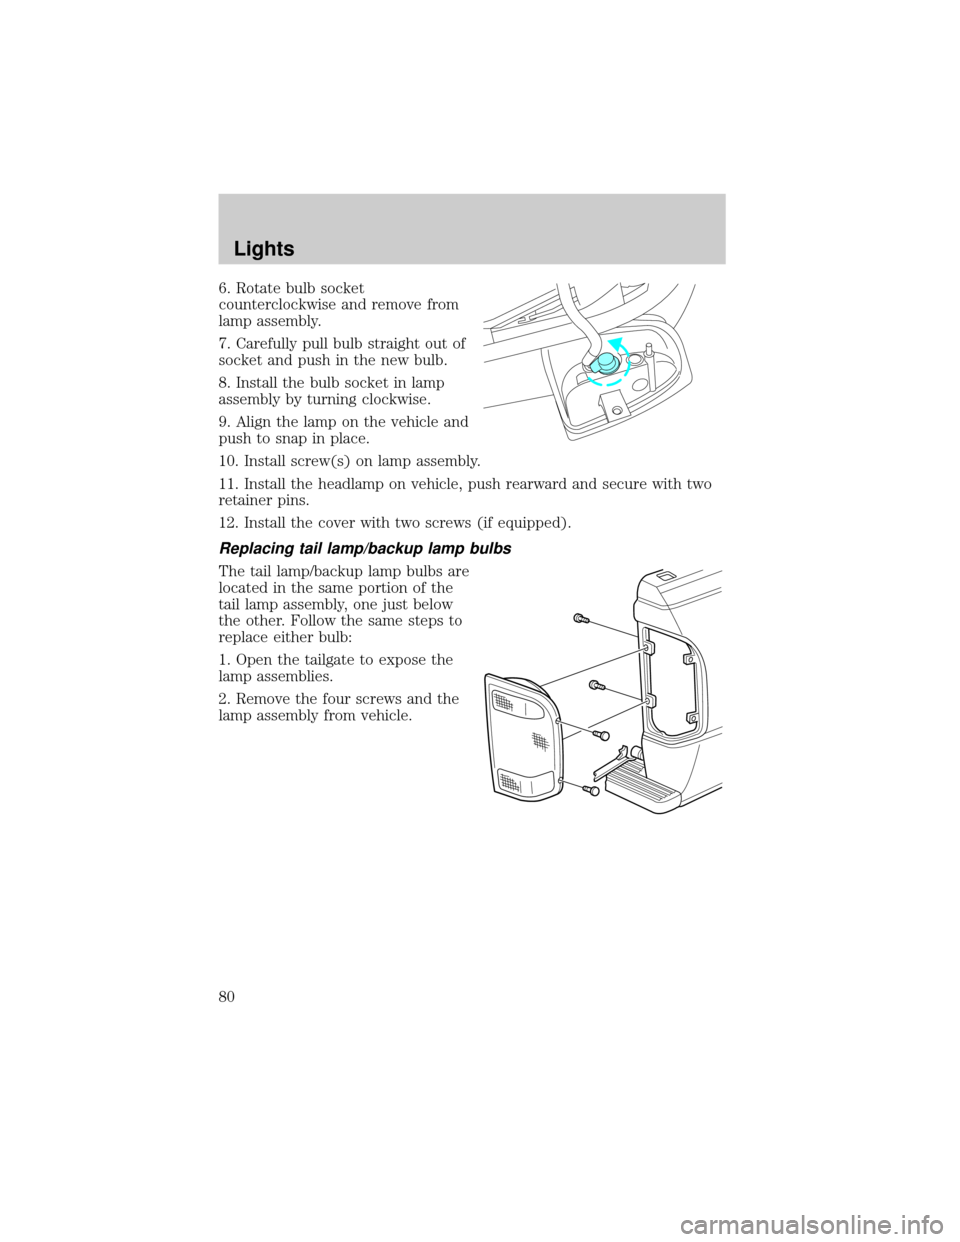
6. Rotate bulb socket
counterclockwise and remove from
lamp assembly.
7. Carefully pull bulb straight out of
socket and push in the new bulb.
8. Install the bulb socket in lamp
assembly by turning clockwise.
9. Align the lamp on the vehicle and
push to snap in place.
10. Install screw(s) on lamp assembly.
11. Install the headlamp on vehicle, push rearward and secure with two
retainer pins.
12. Install the cover with two screws (if equipped).
Replacing tail lamp/backup lamp bulbs
The tail lamp/backup lamp bulbs are
located in the same portion of the
tail lamp assembly, one just below
the other. Follow the same steps to
replace either bulb:
1. Open the tailgate to expose the
lamp assemblies.
2. Remove the four screws and the
lamp assembly from vehicle.
Lights
80
Page 93 of 288
BED EXTENDER (IF EQUIPPED)
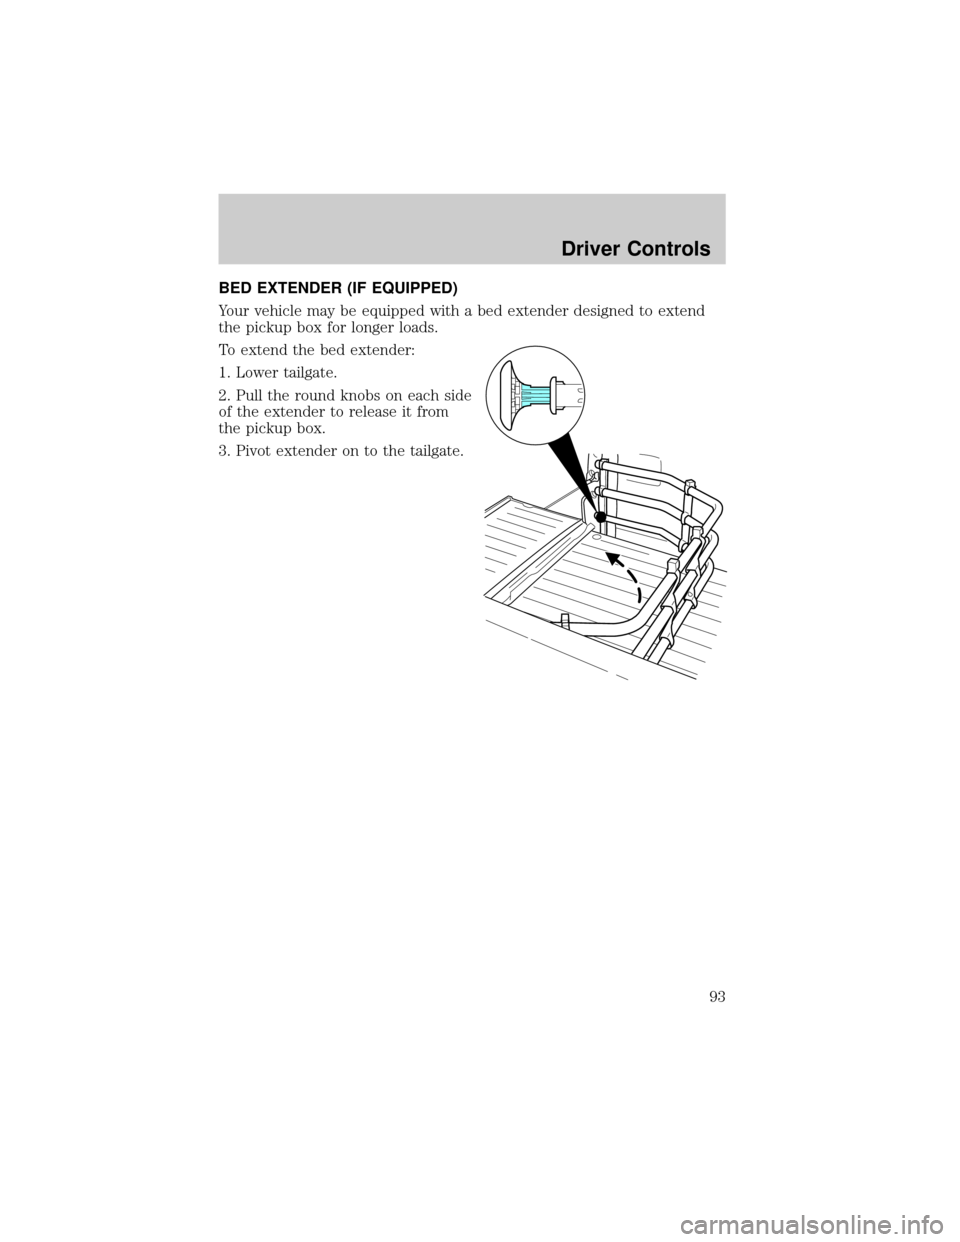
Your vehicle may be equipped with a bed extender designed to extend
the pickup box for longer loads.
To extend the bed extender:
1. Lower tailgate.
2. Pull the round knobs on each side
of the extender to release it from
the pickup box.
3. Pivot extender on to the tailgate.
Driver Controls
93
Page 94 of 288
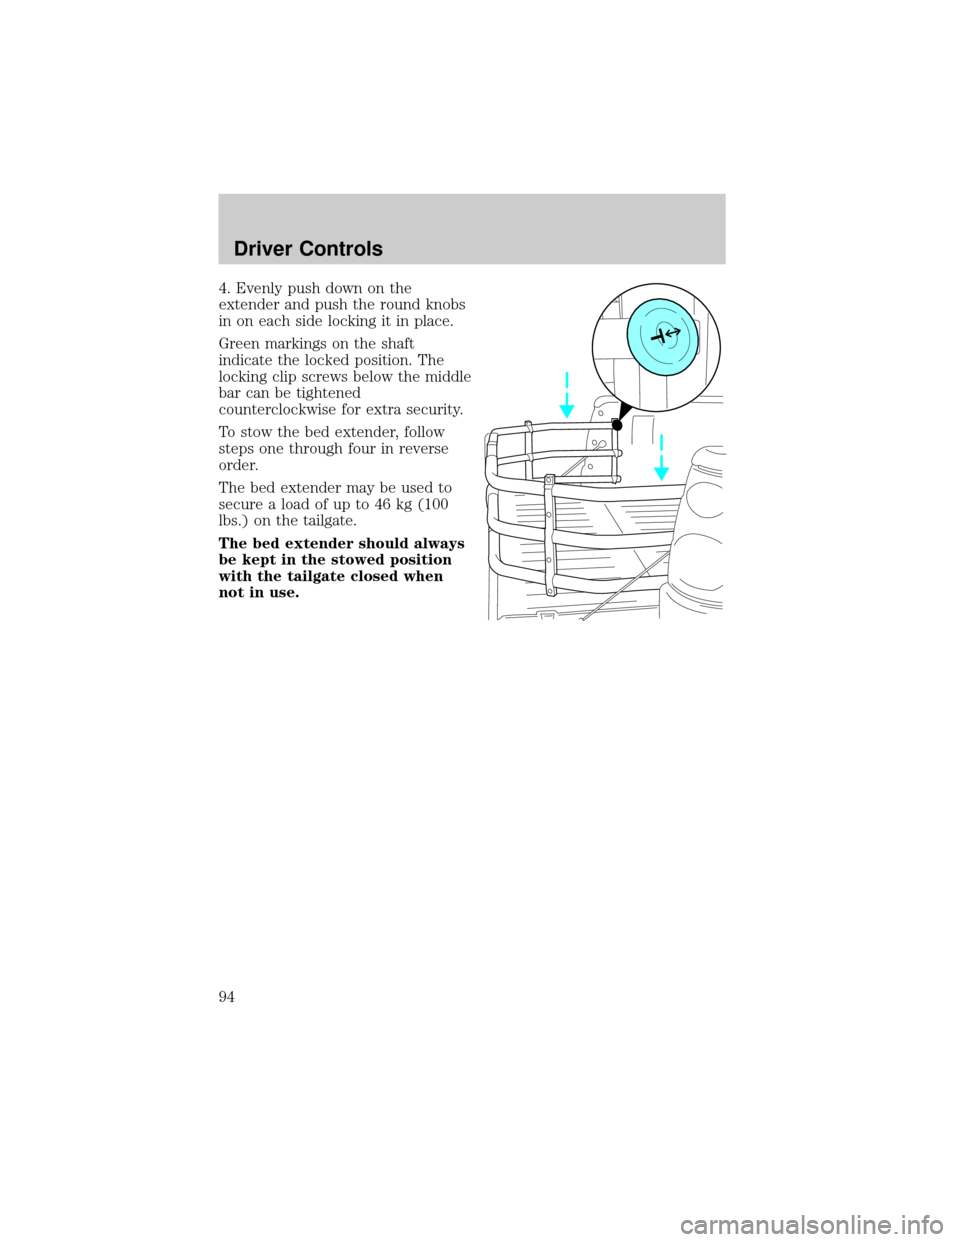
4. Evenly push down on the
extender and push the round knobs
in on each side locking it in place.
Green markings on the shaft
indicate the locked position. The
locking clip screws below the middle
bar can be tightened
counterclockwise for extra security.
To stow the bed extender, follow
steps one through four in reverse
order.
The bed extender may be used to
secure a load of up to 46 kg (100
lbs.) on the tailgate.
The bed extender should always
be kept in the stowed position
with the tailgate closed when
not in use.
Driver Controls
94
Page 96 of 288
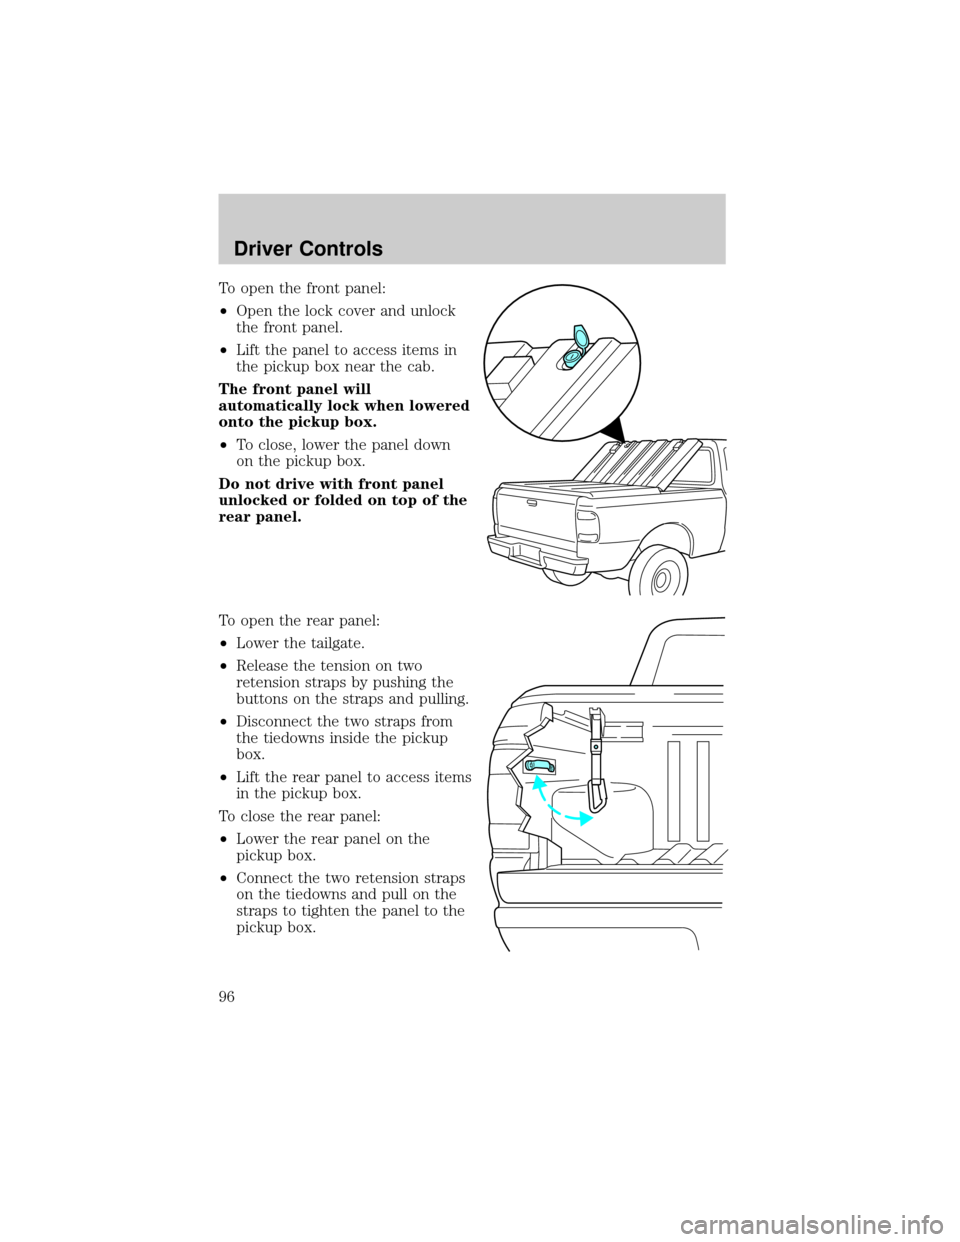
To open the front panel:
²Open the lock cover and unlock
the front panel.
²Lift the panel to access items in
the pickup box near the cab.
The front panel will
automatically lock when lowered
onto the pickup box.
²To close, lower the panel down
on the pickup box.
Do not drive with front panel
unlocked or folded on top of the
rear panel.
To open the rear panel:
²Lower the tailgate.
²Release the tension on two
retension straps by pushing the
buttons on the straps and pulling.
²Disconnect the two straps from
the tiedowns inside the pickup
box.
²Lift the rear panel to access items
in the pickup box.
To close the rear panel:
²Lower the rear panel on the
pickup box.
²Connect the two retension straps
on the tiedowns and pull on the
straps to tighten the panel to the
pickup box.
Driver Controls
96
Page 202 of 288
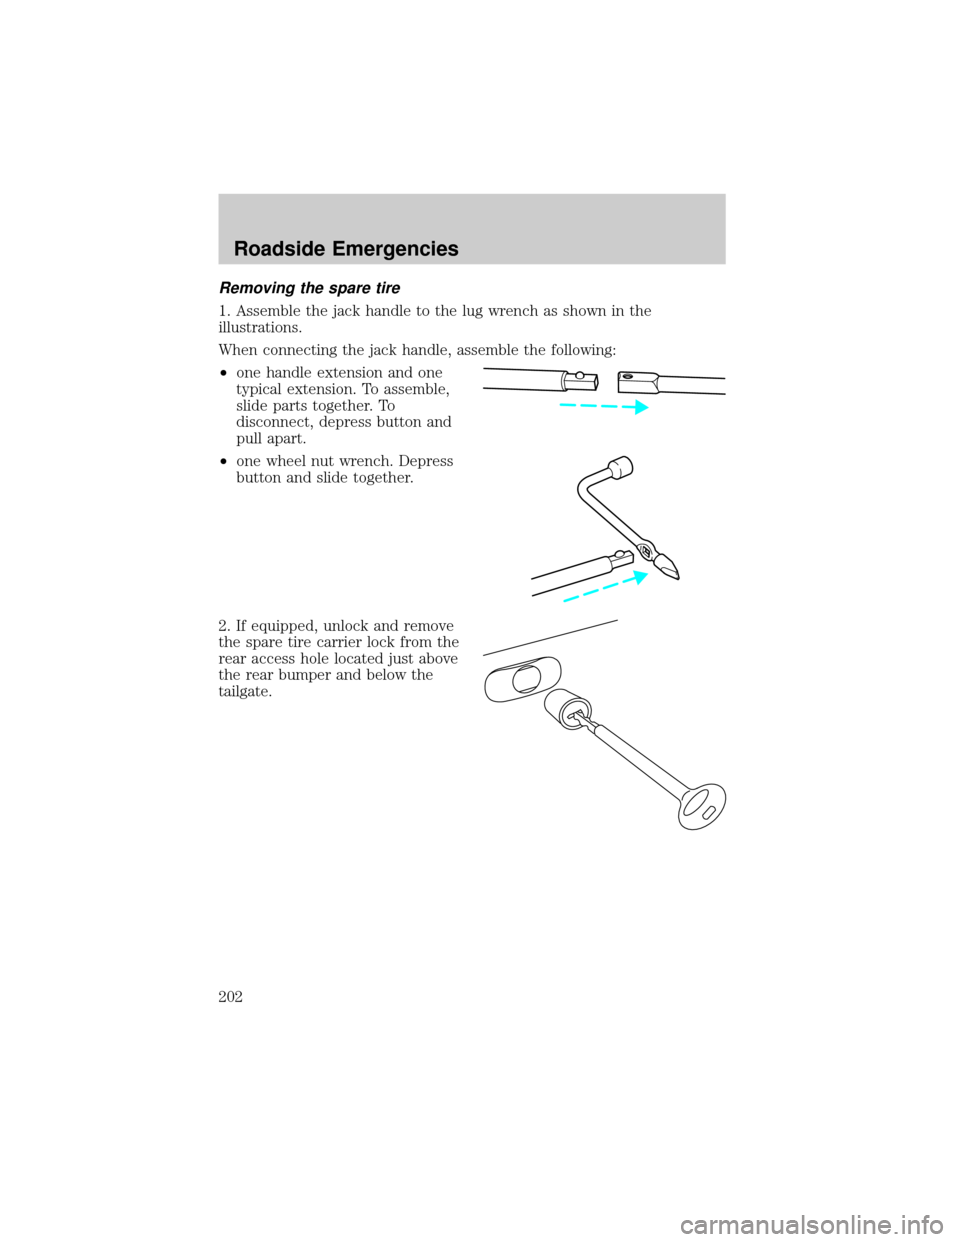
Removing the spare tire
1. Assemble the jack handle to the lug wrench as shown in the
illustrations.
When connecting the jack handle, assemble the following:
²one handle extension and one
typical extension. To assemble,
slide parts together. To
disconnect, depress button and
pull apart.
²one wheel nut wrench. Depress
button and slide together.
2. If equipped, unlock and remove
the spare tire carrier lock from the
rear access hole located just above
the rear bumper and below the
tailgate.
Roadside Emergencies
202
Page 203 of 288
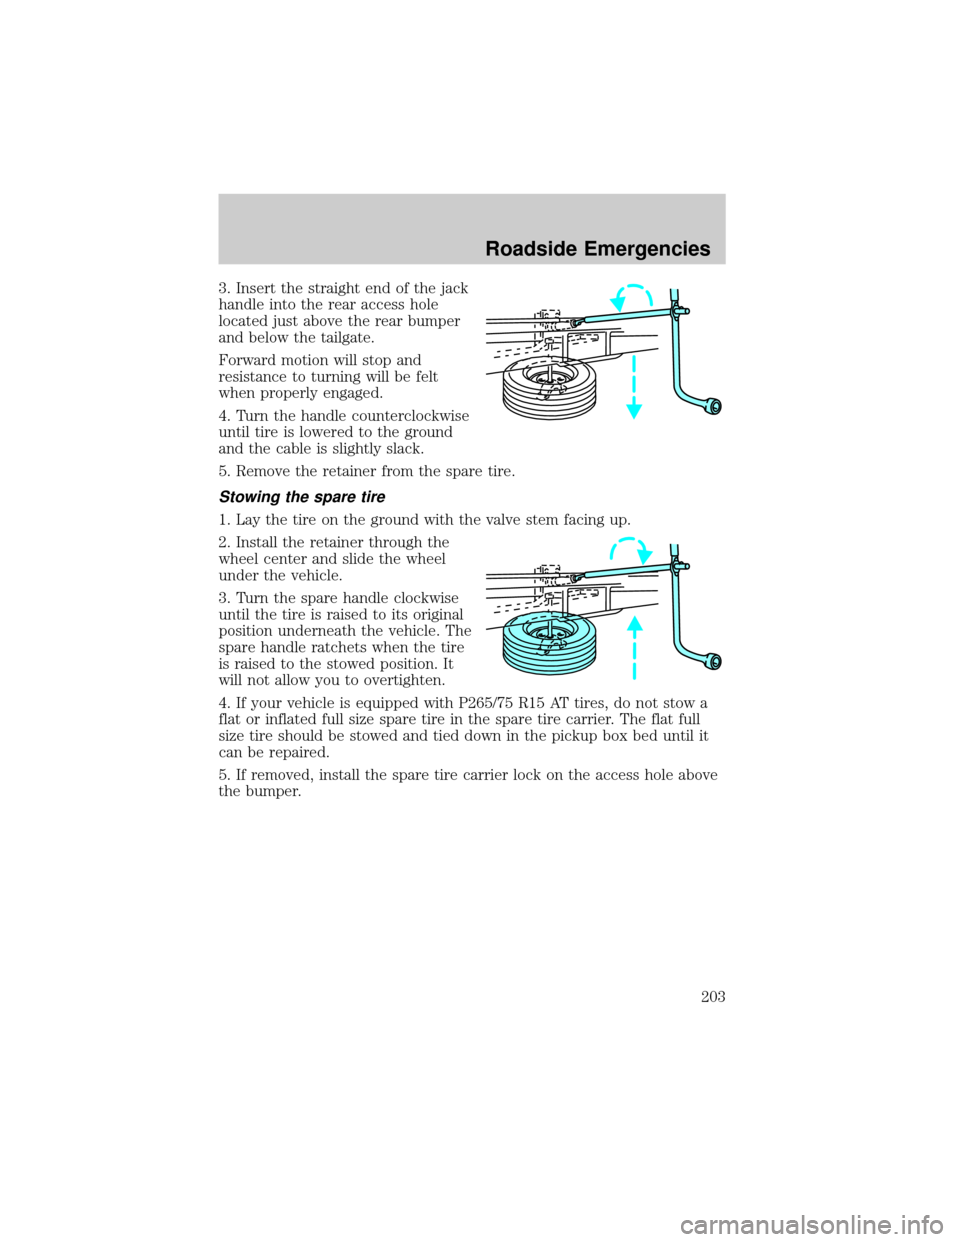
3. Insert the straight end of the jack
handle into the rear access hole
located just above the rear bumper
and below the tailgate.
Forward motion will stop and
resistance to turning will be felt
when properly engaged.
4. Turn the handle counterclockwise
until tire is lowered to the ground
and the cable is slightly slack.
5. Remove the retainer from the spare tire.
Stowing the spare tire
1. Lay the tire on the ground with the valve stem facing up.
2. Install the retainer through the
wheel center and slide the wheel
under the vehicle.
3. Turn the spare handle clockwise
until the tire is raised to its original
position underneath the vehicle. The
spare handle ratchets when the tire
is raised to the stowed position. It
will not allow you to overtighten.
4. If your vehicle is equipped with P265/75 R15 AT tires, do not stow a
flat or inflated full size spare tire in the spare tire carrier. The flat full
size tire should be stowed and tied down in the pickup box bed until it
can be repaired.
5. If removed, install the spare tire carrier lock on the access hole above
the bumper.
Roadside Emergencies
203
Page 282 of 288
Lubricants and oils
Rear window deflector
Removable tailgate lock
Retractable bed hooks
Running boards and bars
Side window air deflectors
Skid plate (4x4 only)
Spare tire lock
Tailgate protector
Tonneau covers Ð soft (snap and snapless) and hard
Universal floor mats
Wheel locks
For maximum vehicle performance, keep the following information in
mind when adding accessories or equipment to your vehicle:
²
When adding accessories, equipment, passengers and luggage to your
vehicle, do not exceed the total weight capacity of the vehicle or of the
front or rear axle (GVWR or GAWR as indicated on the Safety compliance
certification label). Consult your dealer for specific weight information.
²The Federal Communications Commission (FCC) and Canadian Radio
Telecommunications Commission (CRTC) regulate the use of mobile
communications systems - such as two-way radios, telephones and
theft alarms - that are equipped with radio transmitters. Any such
equipment installed in your vehicle should comply with FCC or CRTC
regulations and should be installed only by a qualified service
technician.
²Mobile communications systems may harm the operation of your
vehicle, particularly if they are not properly designed for automotive
use or are not properly installed. When operated, such systems may
cause the engine to stumble or stall or cause the transmission to be
damaged or operate improperly. In addition, such systems may be
damaged or their performance may be affected by operating your
vehicle. (Citizens band [CB] transceivers, garage door openers and
other transmitters with outputs of five watts or less will not ordinarily
affect your vehicle's operation.)
²Ford cannot assume responsibility for any adverse effects or damage
that may result from the use of such equipment.
Accessories
282