ECO mode FORD RANGER 2006 2.G User Guide
[x] Cancel search | Manufacturer: FORD, Model Year: 2006, Model line: RANGER, Model: FORD RANGER 2006 2.GPages: 256, PDF Size: 2.64 MB
Page 102 of 256
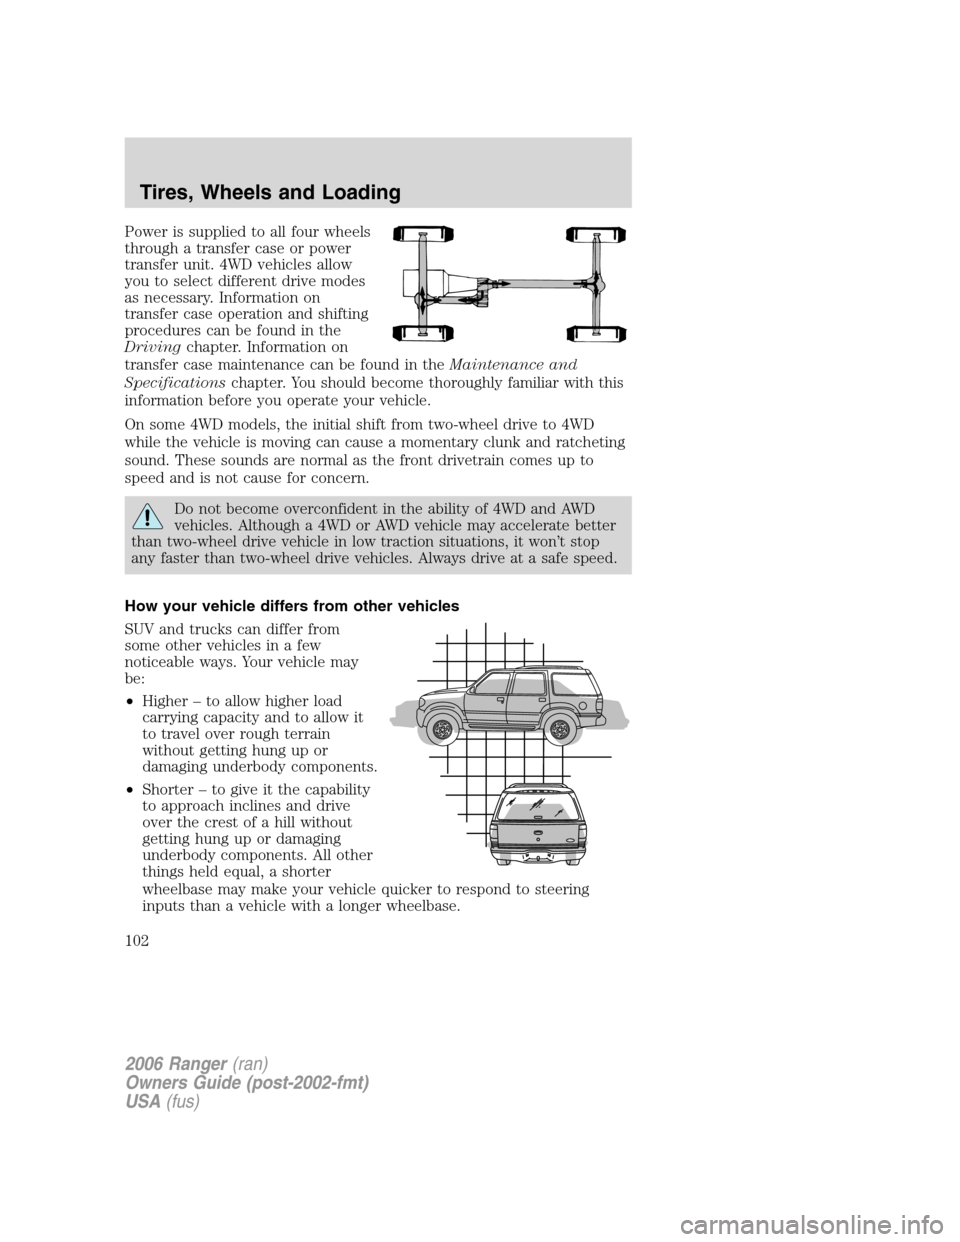
Power is supplied to all four wheels
through a transfer case or power
transfer unit. 4WD vehicles allow
you to select different drive modes
as necessary. Information on
transfer case operation and shifting
procedures can be found in the
Drivingchapter. Information on
transfer case maintenance can be found in theMaintenance and
Specificationschapter. You should become thoroughly familiar with this
information before you operate your vehicle.
On some 4WD models, the initial shift from two-wheel drive to 4WD
while the vehicle is moving can cause a momentary clunk and ratcheting
sound. These sounds are normal as the front drivetrain comes up to
speed and is not cause for concern.
Do not become overconfident in the ability of 4WD and AWD
vehicles. Although a 4WD or AWD vehicle may accelerate better
than two-wheel drive vehicle in low traction situations, it won’t stop
any faster than two-wheel drive vehicles. Always drive at a safe speed.
How your vehicle differs from other vehicles
SUV and trucks can differ from
some other vehicles in a few
noticeable ways. Your vehicle may
be:
•Higher – to allow higher load
carrying capacity and to allow it
to travel over rough terrain
without getting hung up or
damaging underbody components.
•Shorter – to give it the capability
to approach inclines and drive
over the crest of a hill without
getting hung up or damaging
underbody components. All other
things held equal, a shorter
wheelbase may make your vehicle quicker to respond to steering
inputs than a vehicle with a longer wheelbase.
2006 Ranger(ran)
Owners Guide (post-2002-fmt)
USA(fus)
Tires, Wheels and Loading
102
Page 133 of 256
Exceeding these limits may allow water to enter vehicle components:
•causing internal damage to the components.
•affecting driveability, emissions and reliability.
Replace the rear axle lubricant any time the axle has been submerged in
water. Rear axle lubricant quantities are not to be checked or changed
unless a leak is suspected or repair required.
RECREATIONAL TOWING
Follow these guidelines if you have a need for recreational towing. An
example of recreational towing would be towing your vehicle behind a
motorhome. These guidelines are designed to ensure that your
transmission is not damaged.
Vehicles equipped with a manual transmission:
Note:4x2 and 4x4 vehicles with a manual transmission follow these
guidelines for recreational towing:
Before you have your vehicle towed:
•Release the parking brake.
•Move the gearshift to the neutral position.
•Turn the key in the ignition to the OFF/UNLOCKED position.
•The maximum recommended speed is 55 mph (88 km/h).
•The maximum recommended distance is unlimited.
•Put 4x4 switch in 2WD mode (4x4 only)
•The vehicle must be towed in the forward position to ensure no
damage is done to the internal transmission components.
For 4x4 vehicles with a manual transmission, it is recommended that a
Neutral Tow Kit be purchased and installed by an authorized dealer if
the vehicle is towed frequently.
In addition, it is recommended that you follow the instructions
provided by the aftermarket manufacturer of the towing
apparatus if one has been installed.
2006 Ranger(ran)
Owners Guide (post-2002-fmt)
USA(fus)
Tires, Wheels and Loading
133
Page 134 of 256
Vehicles equipped with an automatic transmission
4x2 and 4x4 vehicles with an automatic transmission follow these
guidelines for recreational towing:
•Release the parking brake.
•Turn the key in the ignition to the OFF/UNLOCKED position.
•Place the transmission in N (Neutral).
•Do not exceed a distance of 50 miles (80 km).
•Do not exceed 35 mph (56 km/h) vehicle speed.
•Put 4x4 switch in 2WD mode (4x4 only)
•The vehicle must be towed in the forward position to ensure no
damage is done to the internal transfer case components.
For 4x4 vehicles with an automatic transmission, a Neutral Tow Kit must
be purchased and installed by an authorized dealer if a distance of 50
miles (80 km) or a speed of 35 mph (56 km/h) must be exceeded.
For 4x2 vehicles with an automatic transmission, if a distance of 50 miles
(80 km) or a speed of 35 mph (56 km/h) must be exceeded, you must
disconnect the rear driveshaft. It is recommended that the driveshaft be
removed/installed only by an authorized dealer. See your authorized
dealer for driveshaft removal/installation.
Improper removal/installation of the driveshaft can cause
transmission fluid or transfer case fluid loss, damage to the
driveshaft and internal transmission and transfer case
components.
2006 Ranger(ran)
Owners Guide (post-2002-fmt)
USA(fus)
Tires, Wheels and Loading
134
Page 144 of 256
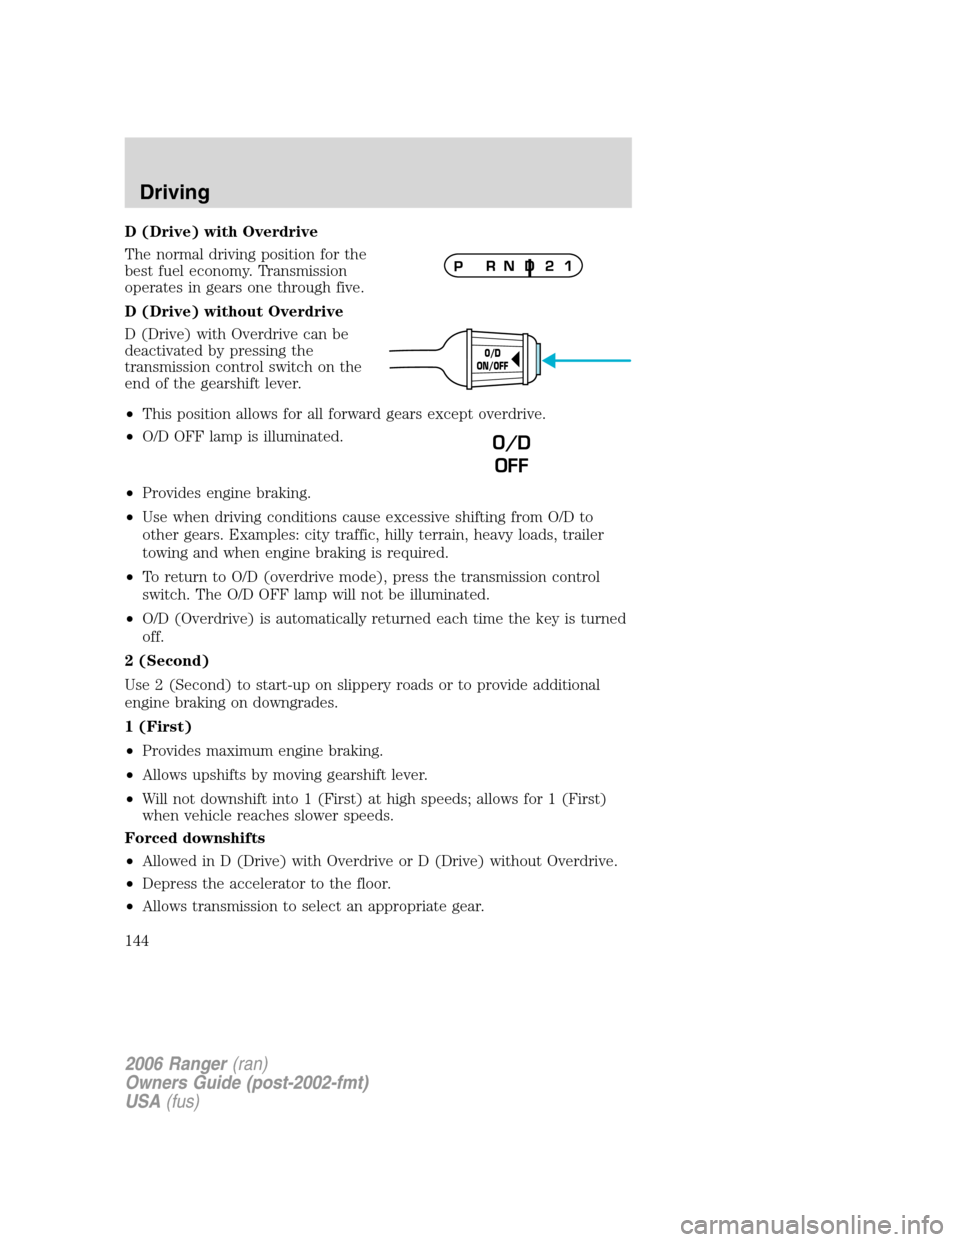
D (Drive) with Overdrive
The normal driving position for the
best fuel economy. Transmission
operates in gears one through five.
D (Drive) without Overdrive
D (Drive) with Overdrive can be
deactivated by pressing the
transmission control switch on the
end of the gearshift lever.
•This position allows for all forward gears except overdrive.
•O/D OFF lamp is illuminated.
•Provides engine braking.
•Use when driving conditions cause excessive shifting from O/D to
other gears. Examples: city traffic, hilly terrain, heavy loads, trailer
towing and when engine braking is required.
•To return to O/D (overdrive mode), press the transmission control
switch. The O/D OFF lamp will not be illuminated.
•O/D (Overdrive) is automatically returned each time the key is turned
off.
2 (Second)
Use 2 (Second) to start-up on slippery roads or to provide additional
engine braking on downgrades.
1 (First)
•Provides maximum engine braking.
•Allows upshifts by moving gearshift lever.
•Will not downshift into 1 (First) at high speeds; allows for 1 (First)
when vehicle reaches slower speeds.
Forced downshifts
•Allowed in D (Drive) with Overdrive or D (Drive) without Overdrive.
•Depress the accelerator to the floor.
•Allows transmission to select an appropriate gear.
O/D
ON/OFF
O/D
OFF
2006 Ranger(ran)
Owners Guide (post-2002-fmt)
USA(fus)
Driving
144
Page 152 of 256
case maintenance can be found in theMaintenance and Specifications
chapter. You should become thoroughly familiar with this information
before you operate your vehicle.
Normal characteristics
On some 4WD models, the initial shift from two-wheel drive to 4x4 while
the vehicle is moving can cause some momentary clunk and ratcheting
sounds.
Sand
When driving over sand, try to keep all four wheels on the most solid
area of the trail. Avoid reducing the tire pressures but shift to a lower
gear and drive steadily through the terrain. Apply the accelerator slowly
and avoid spinning the wheels.
Note:If your vehicle is equipped with the Tire Pressure Monitoring
System (TPMS), the system indicator light may illuminate depending on
how much air is released from your tires and/or how long you drive the
vehicle under these conditions
Avoid excessive speed because vehicle momentum can work against you
and cause the vehicle to become stuck to the point that assistance may
be required from another vehicle. Remember, you may be able to back
out the way you came if you proceed with caution.
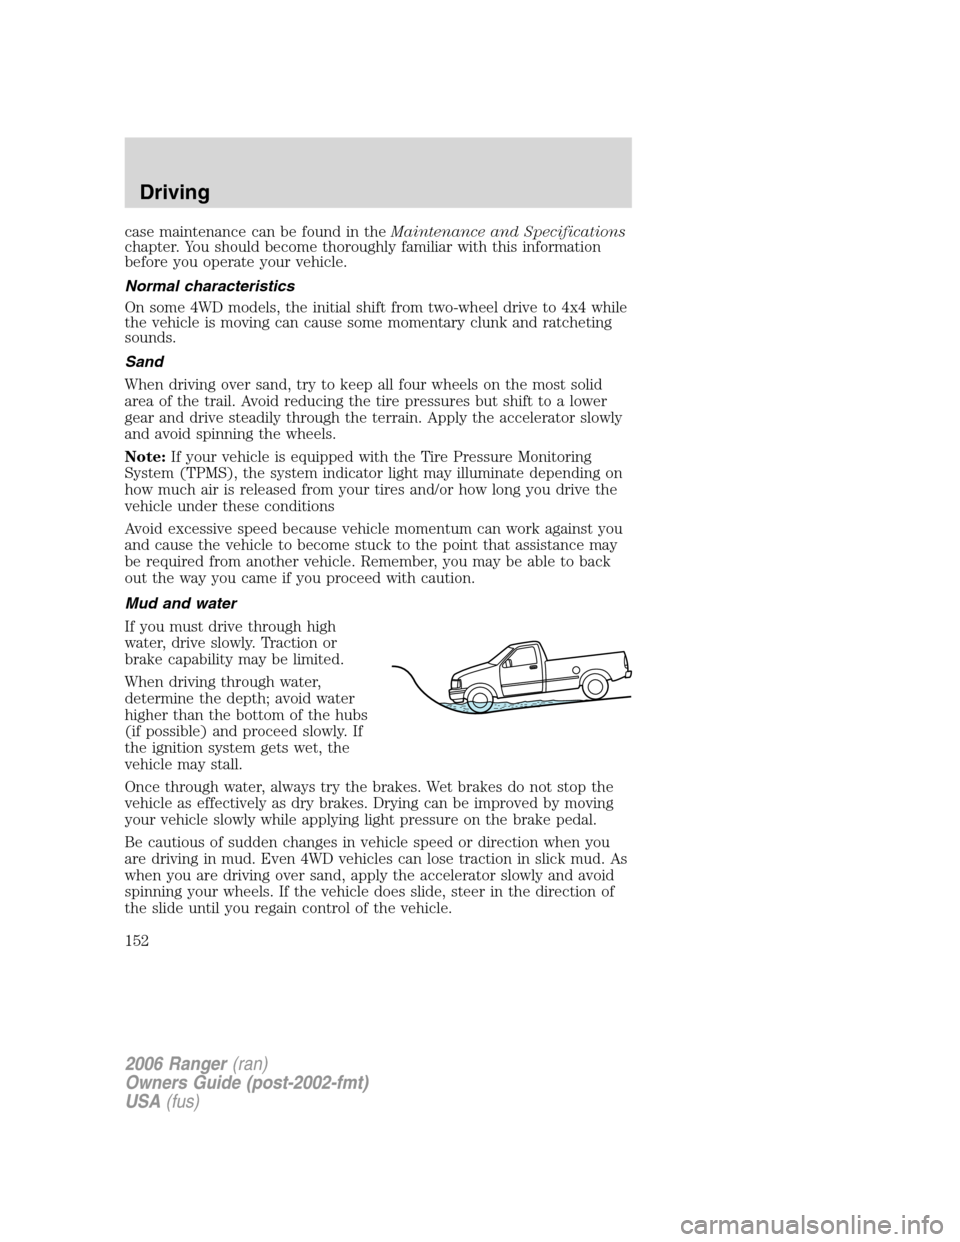
Mud and water
If you must drive through high
water, drive slowly. Traction or
brake capability may be limited.
When driving through water,
determine the depth; avoid water
higher than the bottom of the hubs
(if possible) and proceed slowly. If
the ignition system gets wet, the
vehicle may stall.
Once through water, always try the brakes. Wet brakes do not stop the
vehicle as effectively as dry brakes. Drying can be improved by moving
your vehicle slowly while applying light pressure on the brake pedal.
Be cautious of sudden changes in vehicle speed or direction when you
are driving in mud. Even 4WD vehicles can lose traction in slick mud. As
when you are driving over sand, apply the accelerator slowly and avoid
spinning your wheels. If the vehicle does slide, steer in the direction of
the slide until you regain control of the vehicle.
2006 Ranger(ran)
Owners Guide (post-2002-fmt)
USA(fus)
Driving
152
Page 172 of 256
For vehicles equipped with 4WD, it is not recommended that the vehicle
be operated in 4WD modes with a temporary emergency spare tire. If
4WD operation is necessary, do not operate above speeds of 10 mph (16
km/h) or for distances above 50 miles (80 km).
3.Full-size dissimilar spare without label on wheel
When driving with the full-size dissimilar spare tire/wheel,do not:
•Exceed 70 mph (113 km/h)
•Use more than one dissimilar spare tire/wheel at a time
•Use commercial car washing equipment
•Use snow chains on the end of the vehicle with the dissimilar spare
tire/wheel
The usage of a full-size dissimilar spare tire/wheel can lead to
impairment of the following:
•Handling, stability and braking performance
•Comfort and noise
•Ground clearance and parking at curbs
•Winter weather driving capability
•Wet weather driving capability
•All-Wheel driving capability (if applicable)
•Load leveling adjustment (if applicable)
When driving with the full-size dissimilar spare tire/wheel additional
caution should be given to:
•Towing a trailer
•Driving vehicles equipped with a camper body
•Driving vehicles with a load on the cargo rack
Drive cautiously when using a full-size dissimilar spare tire/wheel and
seek service as soon as possible.
Full-size Matching Spare Tire/Wheel Information
This spare tire/wheel will match the road tire/wheel. When driving with
the full size matching spare tire/wheel, do not exceed 70 mph (113
km/h). It is intended for temporary use only. This means if you need to
use it, you should replace it as soon as possible.
2006 Ranger(ran)
Owners Guide (post-2002-fmt)
USA(fus)
Roadside Emergencies
172
Page 181 of 256
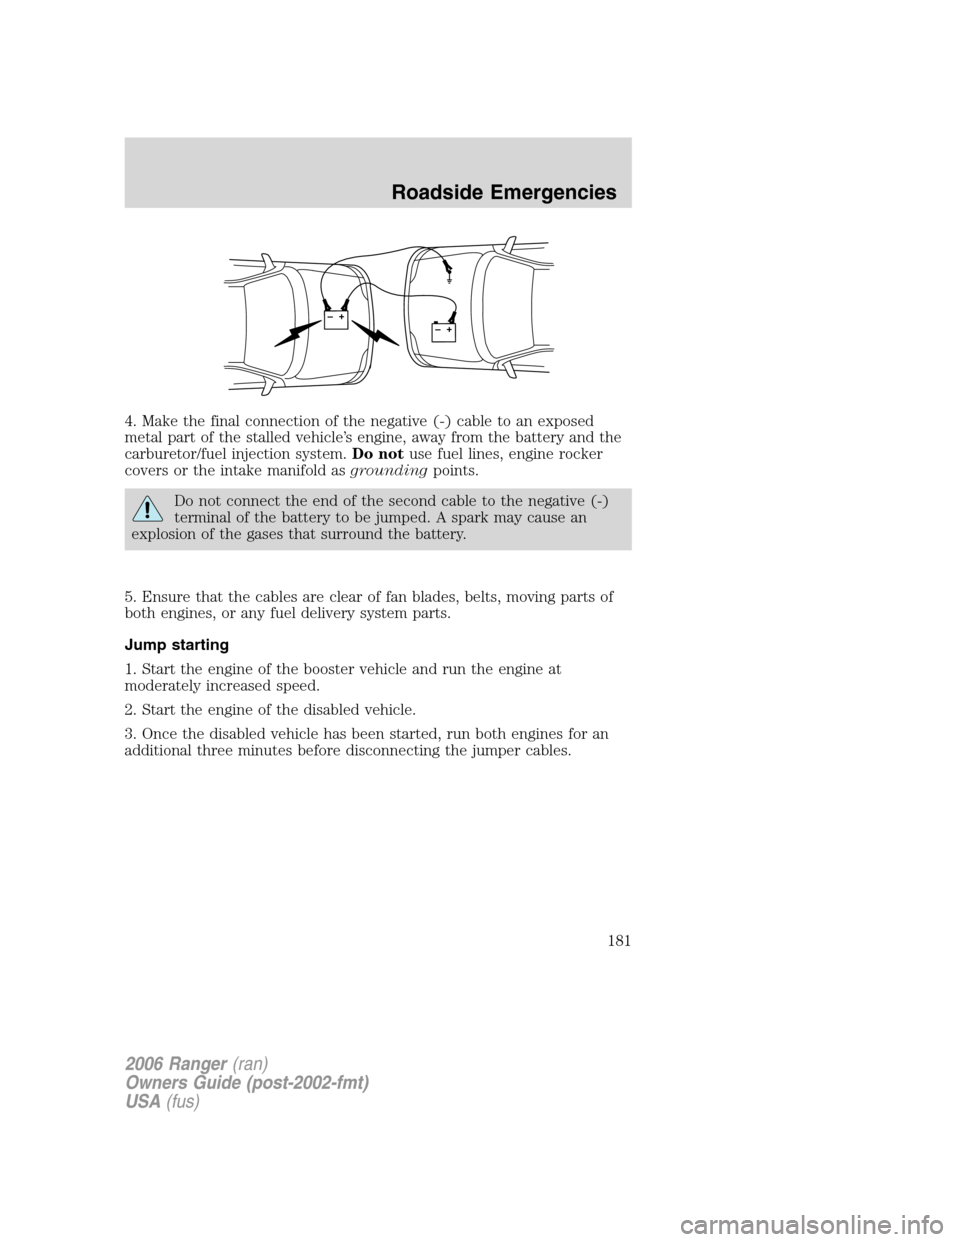
4. Make the final connection of the negative (-) cable to an exposed
metal part of the stalled vehicle’s engine, away from the battery and the
carburetor/fuel injection system.Do notuse fuel lines, engine rocker
covers or the intake manifold asgroundingpoints.
Do not connect the end of the second cable to the negative (-)
terminal of the battery to be jumped. A spark may cause an
explosion of the gases that surround the battery.
5. Ensure that the cables are clear of fan blades, belts, moving parts of
both engines, or any fuel delivery system parts.
Jump starting
1. Start the engine of the booster vehicle and run the engine at
moderately increased speed.
2. Start the engine of the disabled vehicle.
3. Once the disabled vehicle has been started, run both engines for an
additional three minutes before disconnecting the jumper cables.
+–+–
2006 Ranger(ran)
Owners Guide (post-2002-fmt)
USA(fus)
Roadside Emergencies
181
Page 225 of 256
2. Each time you fill the tank, record the amount of fuel added (in
gallons or liters).
3. After at least three to five tank fill-ups, fill the fuel tank and record
the current odometer reading.
4. Subtract your initial odometer reading from the current odometer
reading.
5. Follow one of the simple calculations in order to determine fuel
economy:
Calculation 1:Divide total miles traveled by total gallons used.
Calculation 2:Multiply liters used by 100, then divide by total
kilometers traveled.
Keep a record for at least one month and record the type of driving (city
or highway). This will provide an accurate estimate of the vehicle’s fuel
economy under current driving conditions. Additionally, keeping records
during summer and winter will show how temperature impacts fuel
economy. In general, lower temperatures give lower fuel economy.
Driving style — good driving and fuel economy habits
Give consideration to the lists that follow and you may be able to change
a number of variables and improve your fuel economy.
Habits
•Smooth, moderate operation can yield up to 10% savings in fuel.
•Steady speeds without stopping will usually give the best fuel
economy.
•Idling for long periods of time (greater than one minute) may waste
fuel.
•Anticipate stopping; slowing down may eliminate the need to stop.
•Sudden or hard accelerations may reduce fuel economy.
•Slow down gradually.
•Driving at reasonable speeds (traveling at 55 mph [88 km/h] uses 15%
less fuel than traveling at 65 mph [105 km/h]).
•Revving the engine before turning it off may reduce fuel economy.
•Using the air conditioner or defroster may reduce fuel economy.
•You may want to turn off the speed control in hilly terrain if
unnecessary shifting between third and fourth gear occurs.
Unnecessary shifting of this type could result in reduced fuel
economy.
2006 Ranger(ran)
Owners Guide (post-2002-fmt)
USA(fus)
Maintenance and Specifications
225