FORD RANGER 2007 2.G Workshop Manual
Manufacturer: FORD, Model Year: 2007, Model line: RANGER, Model: FORD RANGER 2007 2.GPages: 280, PDF Size: 2.9 MB
Page 51 of 280
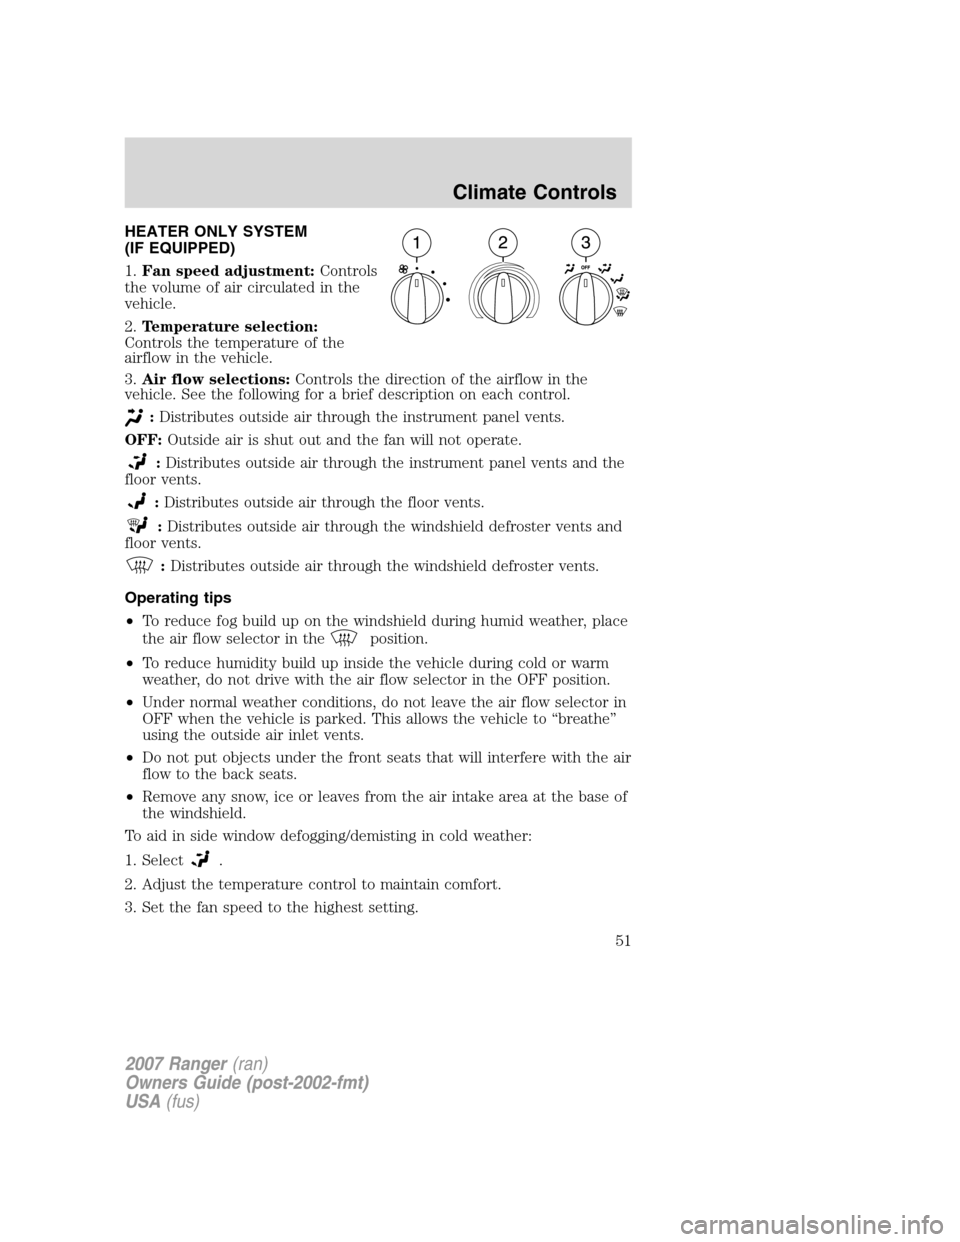
HEATER ONLY SYSTEM
(IF EQUIPPED)
1.Fan speed adjustment:Controls
the volume of air circulated in the
vehicle.
2.Temperature selection:
Controls the temperature of the
airflow in the vehicle.
3.Air flow selections:Controls the direction of the airflow in the
vehicle. See the following for a brief description on each control.
:Distributes outside air through the instrument panel vents.
OFF:Outside air is shut out and the fan will not operate.
:Distributes outside air through the instrument panel vents and the
floor vents.
:Distributes outside air through the floor vents.
:Distributes outside air through the windshield defroster vents and
floor vents.
:Distributes outside air through the windshield defroster vents.
Operating tips
•To reduce fog build up on the windshield during humid weather, place
the air flow selector in the
position.
•To reduce humidity build up inside the vehicle during cold or warm
weather, do not drive with the air flow selector in the OFF position.
•Under normal weather conditions, do not leave the air flow selector in
OFF when the vehicle is parked. This allows the vehicle to “breathe”
using the outside air inlet vents.
•Do not put objects under the front seats that will interfere with the air
flow to the back seats.
•Remove any snow, ice or leaves from the air intake area at the base of
the windshield.
To aid in side window defogging/demisting in cold weather:
1. Select
.
2. Adjust the temperature control to maintain comfort.
3. Set the fan speed to the highest setting.
2007 Ranger(ran)
Owners Guide (post-2002-fmt)
USA(fus)
Climate Controls
51
Page 52 of 280
4. Direct the outer instrument panel vents towards the side windows.
To increase airflow to the outer instrument panel vents, close the vents
located in the middle of the instrument panel.
Do not place objects on top of the instrument panel as these
objects may become projectiles in a collision or sudden stop.
MANUAL HEATING AND AIR CONDITIONING SYSTEM
(IF EQUIPPED)
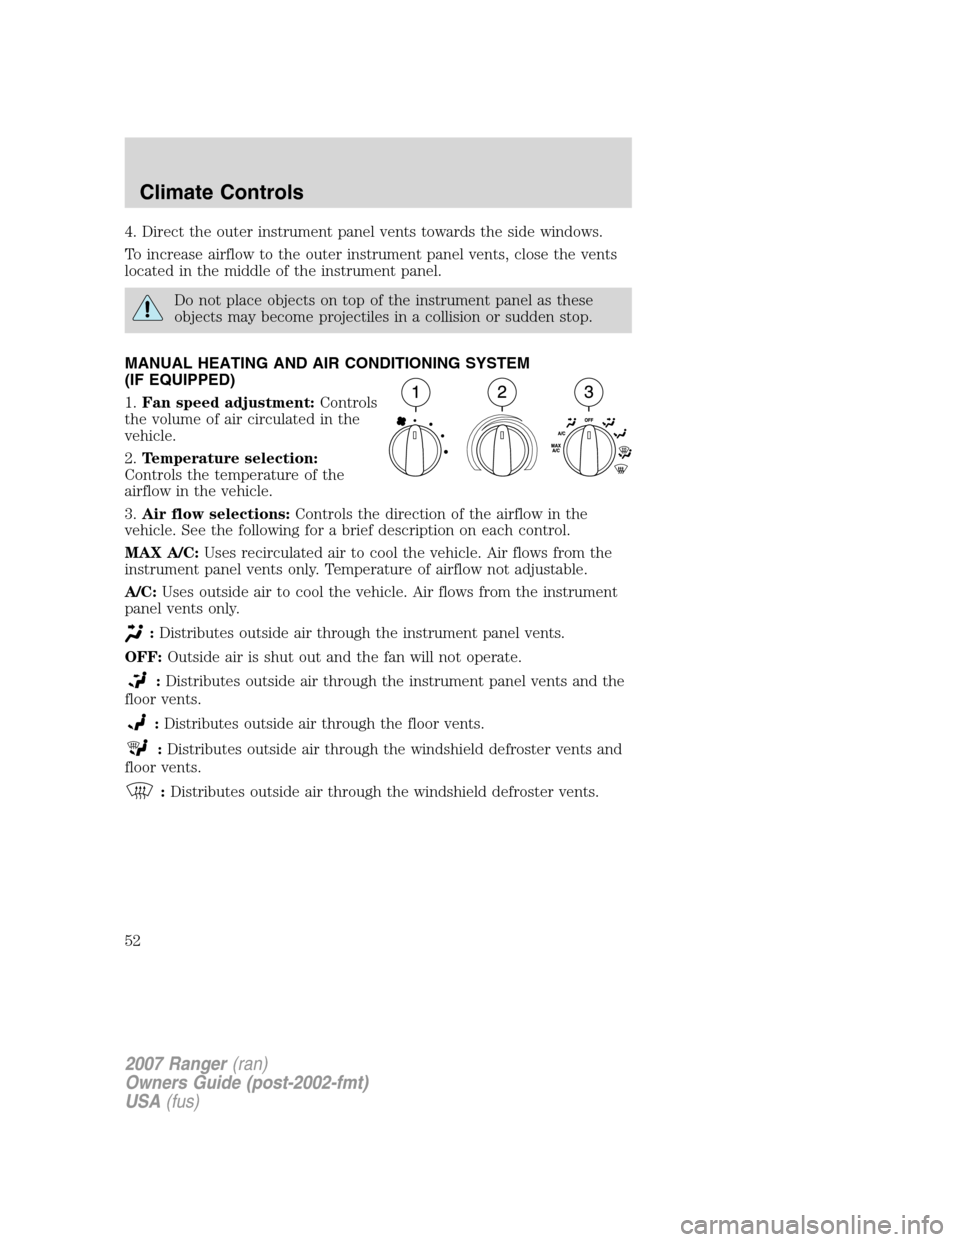
1.Fan speed adjustment:Controls
the volume of air circulated in the
vehicle.
2.Temperature selection:
Controls the temperature of the
airflow in the vehicle.
3.Air flow selections:Controls the direction of the airflow in the
vehicle. See the following for a brief description on each control.
MAX A/C:Uses recirculated air to cool the vehicle. Air flows from the
instrument panel vents only. Temperature of airflow not adjustable.
A/C:Uses outside air to cool the vehicle. Air flows from the instrument
panel vents only.
:Distributes outside air through the instrument panel vents.
OFF:Outside air is shut out and the fan will not operate.
:Distributes outside air through the instrument panel vents and the
floor vents.
:Distributes outside air through the floor vents.
:Distributes outside air through the windshield defroster vents and
floor vents.
:Distributes outside air through the windshield defroster vents.
2007 Ranger(ran)
Owners Guide (post-2002-fmt)
USA(fus)
Climate Controls
52
Page 53 of 280
Operating tips
•To reduce fog build up on the windshield during humid weather, place
the air flow selector in the
position.
•To reduce humidity build up inside the vehicle: do not drive with the
air flow selector in the OFF position.
•Under normal weather conditions, do not leave the air flow selector in
MAX A/C or OFF when the vehicle is parked. This allows the vehicle
to “breathe” using the outside air inlet vents.
•Do not put objects under the front seats that will interfere with the
airflow to the back seats.
•Remove any snow, ice or leaves from the air intake area at the base of
the windshield.
To aid in side window defogging/demisting in cold weather:
1. Select
.
2. Adjust the temperature control to maintain comfort.
3. Set the highest fan speed.
4. Direct the outer instrument panel vents towards the side windows.
To increase airflow to the outer instrument panel vents, close the vents
located in the middle of the instrument panel.
Do not place objects on top of the instrument panel as these
objects may become projectiles in a collision or sudden stop.
2007 Ranger(ran)
Owners Guide (post-2002-fmt)
USA(fus)
Climate Controls
53
Page 54 of 280
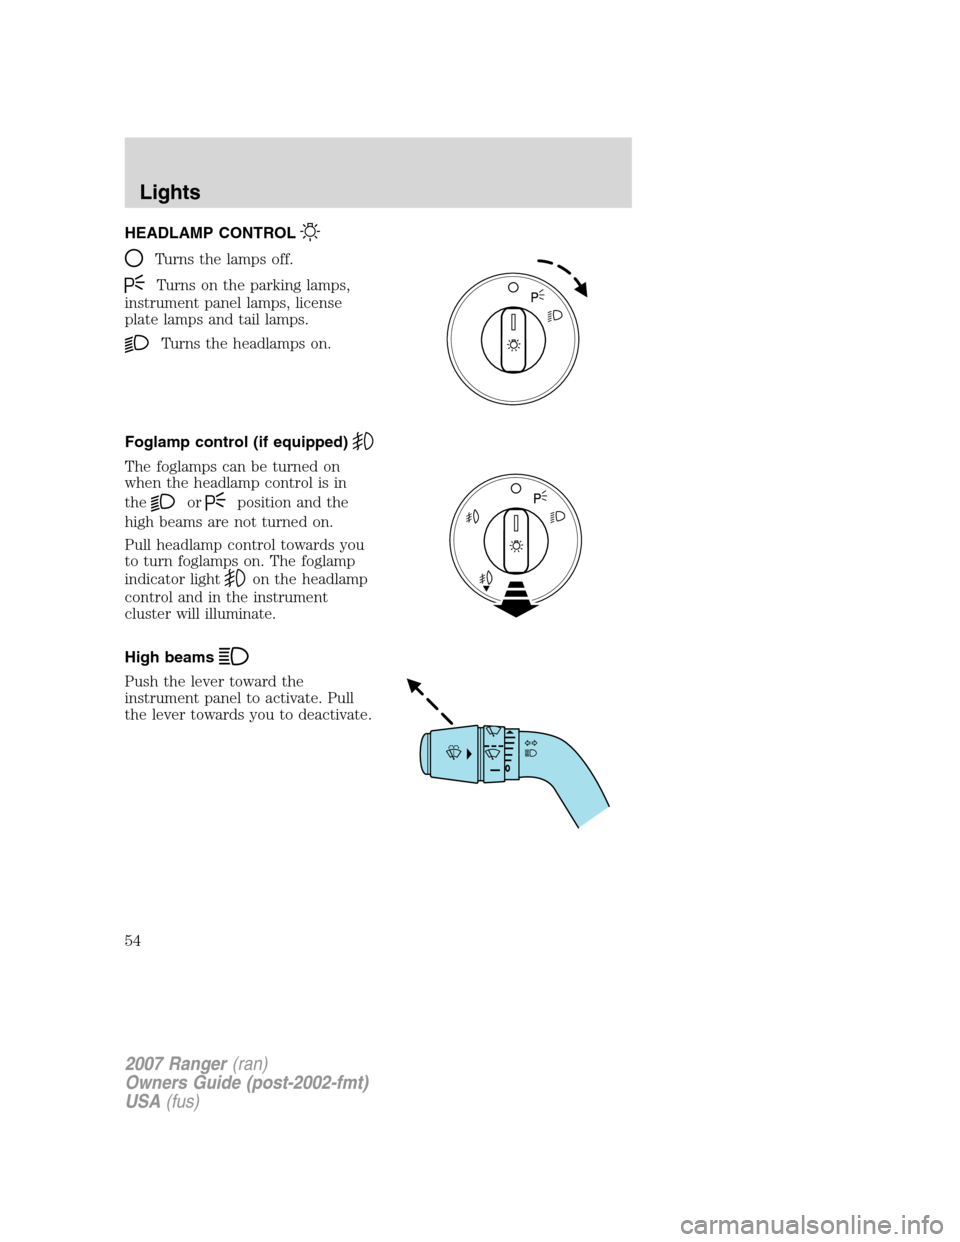
HEADLAMP CONTROL
Turns the lamps off.
Turns on the parking lamps,
instrument panel lamps, license
plate lamps and tail lamps.
Turns the headlamps on.
Foglamp control (if equipped)
The foglamps can be turned on
when the headlamp control is in
the
orposition and the
high beams are not turned on.
Pull headlamp control towards you
to turn foglamps on. The foglamp
indicator light
on the headlamp
control and in the instrument
cluster will illuminate.
High beams
Push the lever toward the
instrument panel to activate. Pull
the lever towards you to deactivate.
2007 Ranger(ran)
Owners Guide (post-2002-fmt)
USA(fus)
Lights
54
Page 55 of 280
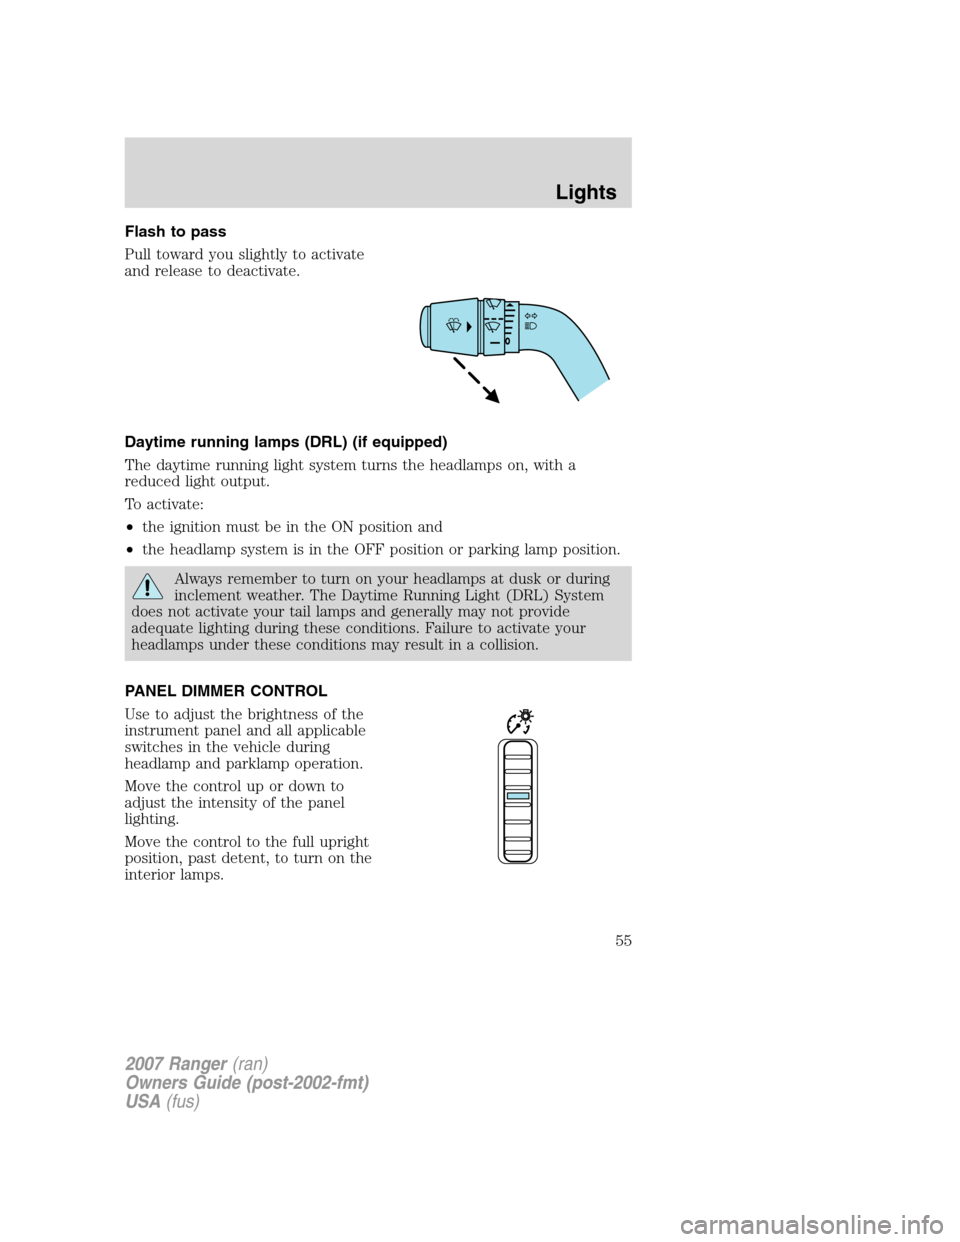
Flash to pass
Pull toward you slightly to activate
and release to deactivate.
Daytime running lamps (DRL) (if equipped)
The daytime running light system turns the headlamps on, with a
reduced light output.
To activate:
•the ignition must be in the ON position and
•the headlamp system is in the OFF position or parking lamp position.
Always remember to turn on your headlamps at dusk or during
inclement weather. The Daytime Running Light (DRL) System
does not activate your tail lamps and generally may not provide
adequate lighting during these conditions. Failure to activate your
headlamps under these conditions may result in a collision.
PANEL DIMMER CONTROL
Use to adjust the brightness of the
instrument panel and all applicable
switches in the vehicle during
headlamp and parklamp operation.
Move the control up or down to
adjust the intensity of the panel
lighting.
Move the control to the full upright
position, past detent, to turn on the
interior lamps.
2007 Ranger(ran)
Owners Guide (post-2002-fmt)
USA(fus)
Lights
55
Page 56 of 280
AIMING THE HEADLAMPS
The headlamps on your vehicle are properly aimed before leaving the
assembly plant. If your vehicle is involved in an accident or if you have
problems fixing the alignment of your headlamps, have them checked by
a qualified service technician.
Headlamp aim adjustment
The headlamps are designed to be mechanically aimed, but can also be
aimed visually by doing the following:
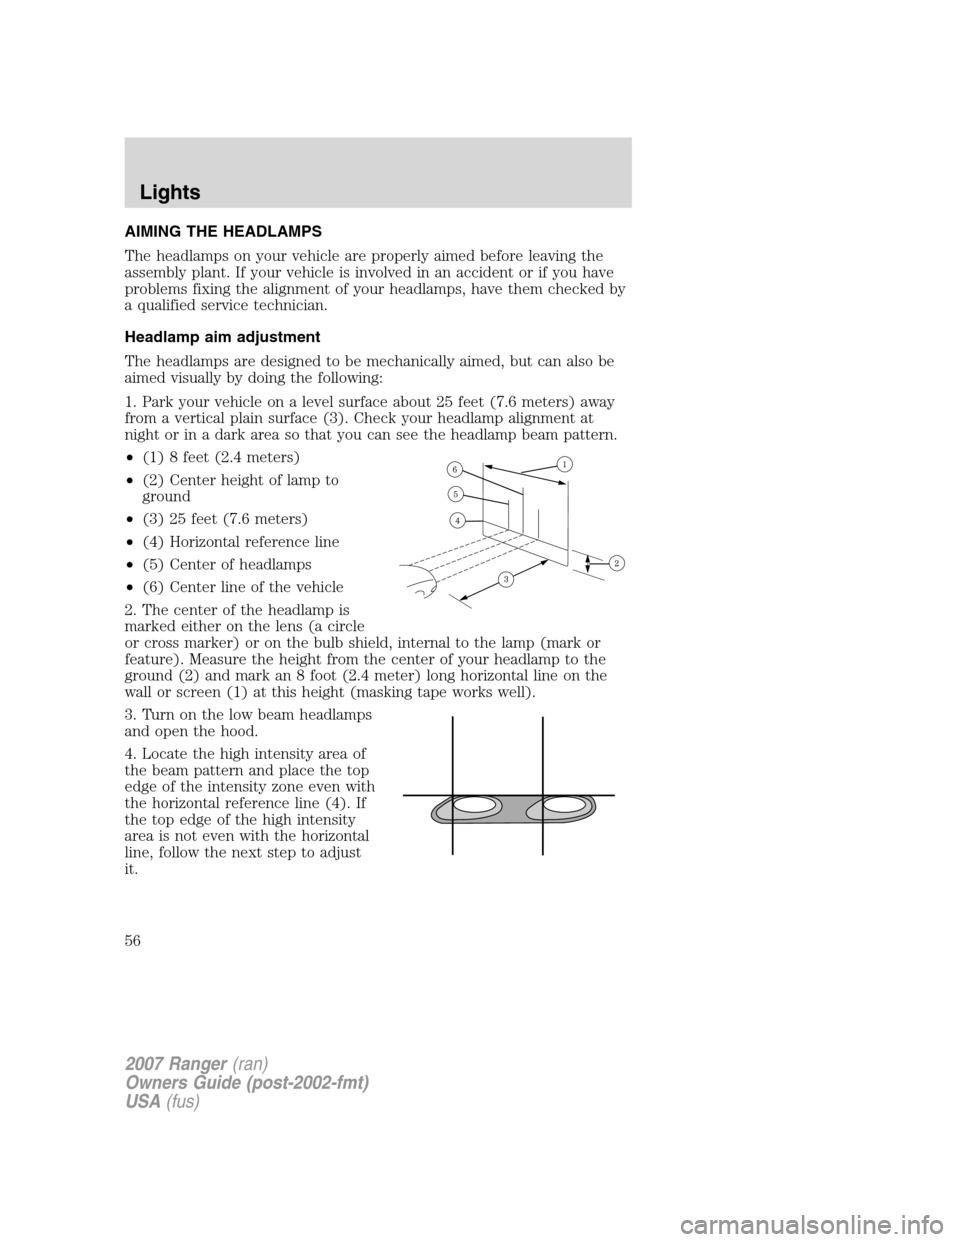
1. Park your vehicle on a level surface about 25 feet (7.6 meters) away
from a vertical plain surface (3). Check your headlamp alignment at
night or in a dark area so that you can see the headlamp beam pattern.
•(1) 8 feet (2.4 meters)
•(2) Center height of lamp to
ground
•(3) 25 feet (7.6 meters)
•(4) Horizontal reference line
•(5) Center of headlamps
•(6) Center line of the vehicle
2. The center of the headlamp is
marked either on the lens (a circle
or cross marker) or on the bulb shield, internal to the lamp (mark or
feature). Measure the height from the center of your headlamp to the
ground (2) and mark an 8 foot (2.4 meter) long horizontal line on the
wall or screen (1) at this height (masking tape works well).
3. Turn on the low beam headlamps
and open the hood.
4. Locate the high intensity area of
the beam pattern and place the top
edge of the intensity zone even with
the horizontal reference line (4). If
the top edge of the high intensity
area is not even with the horizontal
line, follow the next step to adjust
it.
2007 Ranger(ran)
Owners Guide (post-2002-fmt)
USA(fus)
Lights
56
Page 57 of 280
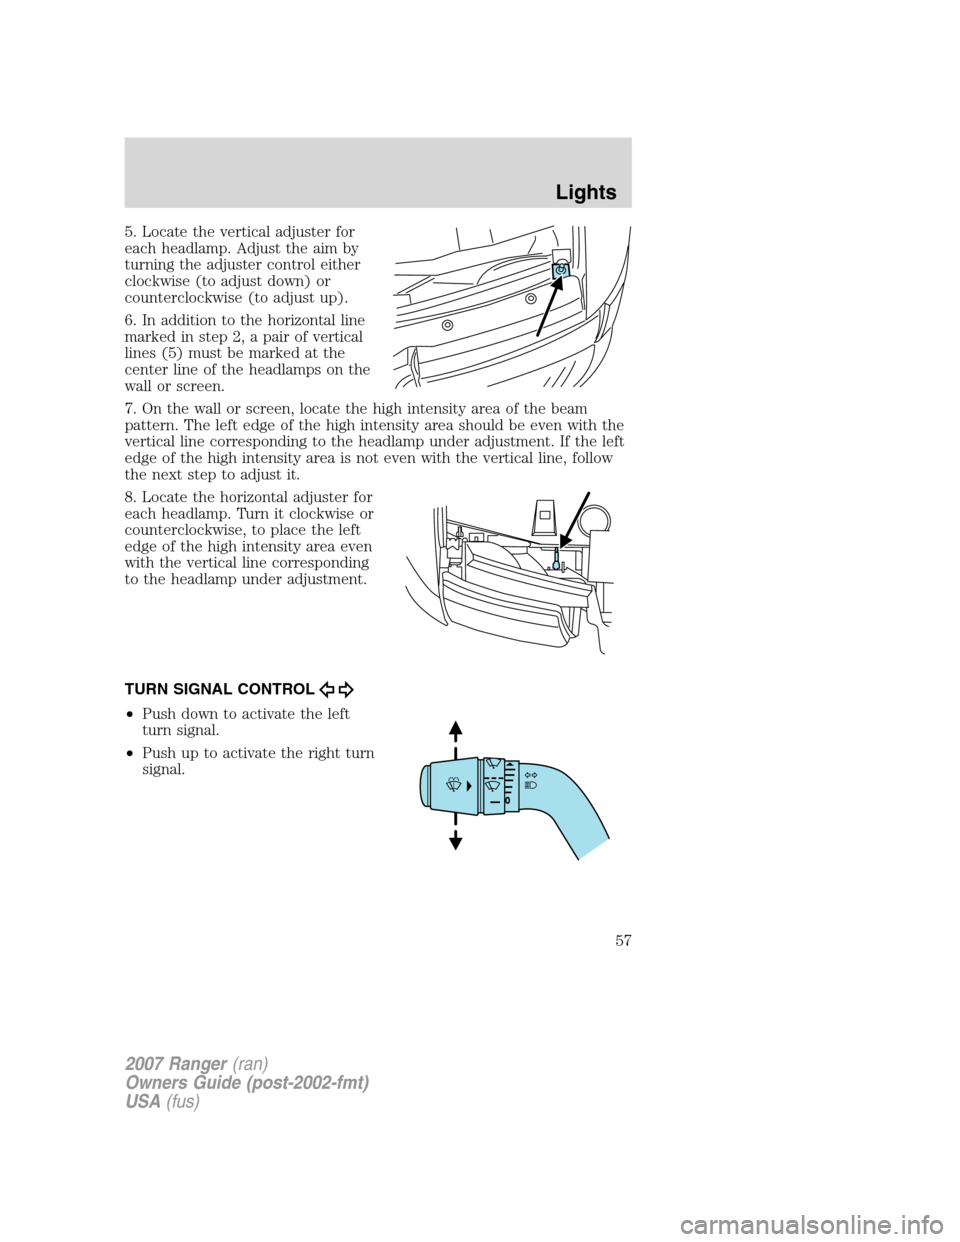
5. Locate the vertical adjuster for
each headlamp. Adjust the aim by
turning the adjuster control either
clockwise (to adjust down) or
counterclockwise (to adjust up).
6. In addition to the horizontal line
marked in step 2, a pair of vertical
lines (5) must be marked at the
center line of the headlamps on the
wall or screen.
7. On the wall or screen, locate the high intensity area of the beam
pattern. The left edge of the high intensity area should be even with the
vertical line corresponding to the headlamp under adjustment. If the left
edge of the high intensity area is not even with the vertical line, follow
the next step to adjust it.
8. Locate the horizontal adjuster for
each headlamp. Turn it clockwise or
counterclockwise, to place the left
edge of the high intensity area even
with the vertical line corresponding
to the headlamp under adjustment.
TURN SIGNAL CONTROL
•Push down to activate the left
turn signal.
•Push up to activate the right turn
signal.
2007 Ranger(ran)
Owners Guide (post-2002-fmt)
USA(fus)
Lights
57
Page 58 of 280
INTERIOR LAMPS
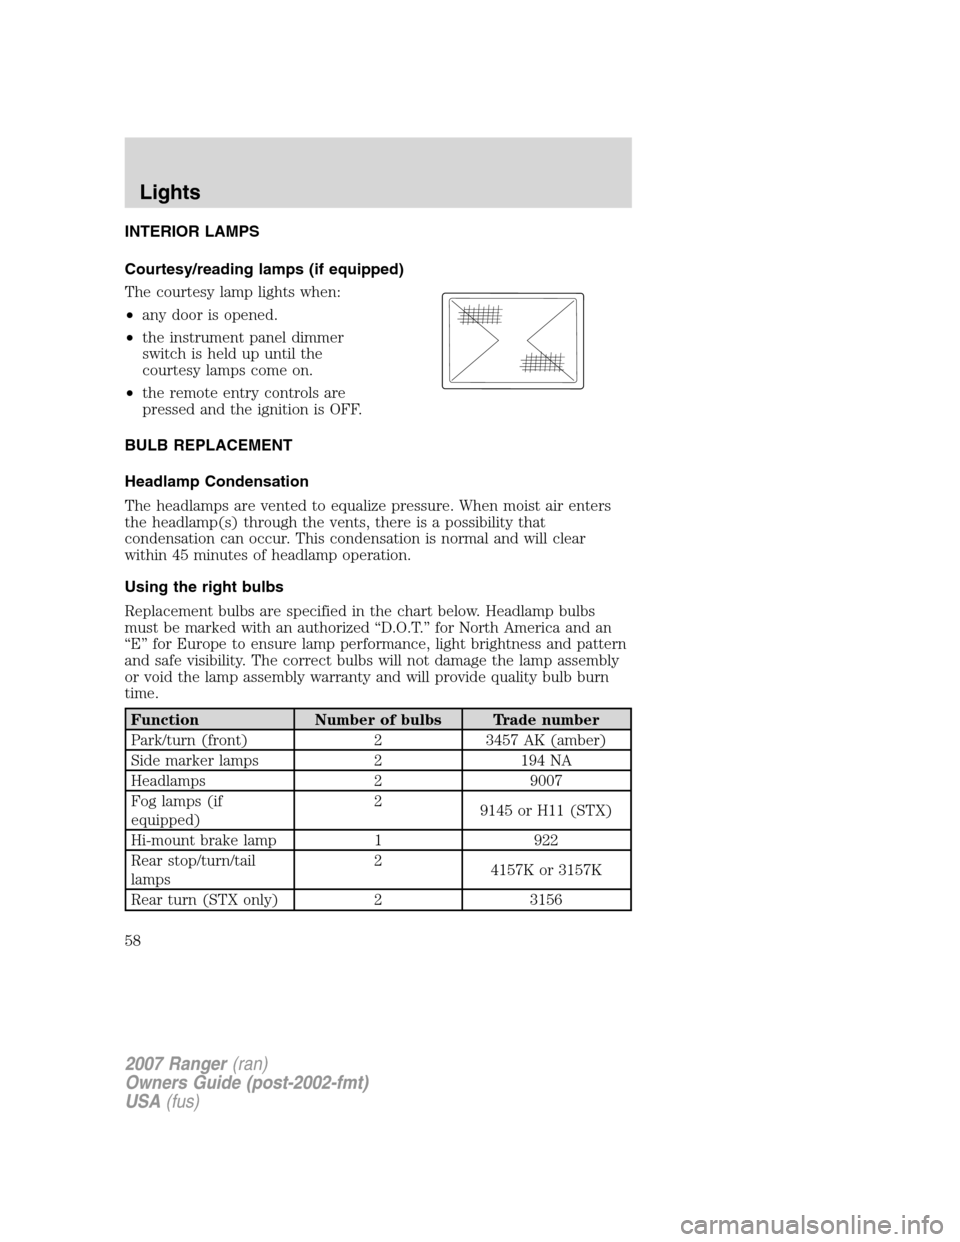
Courtesy/reading lamps (if equipped)
The courtesy lamp lights when:
•any door is opened.
•the instrument panel dimmer
switch is held up until the
courtesy lamps come on.
•the remote entry controls are
pressed and the ignition is OFF.
BULB REPLACEMENT
Headlamp Condensation
The headlamps are vented to equalize pressure. When moist air enters
the headlamp(s) through the vents, there is a possibility that
condensation can occur. This condensation is normal and will clear
within 45 minutes of headlamp operation.
Using the right bulbs
Replacement bulbs are specified in the chart below. Headlamp bulbs
must be marked with an authorized “D.O.T.” for North America and an
“E” for Europe to ensure lamp performance, light brightness and pattern
and safe visibility. The correct bulbs will not damage the lamp assembly
or void the lamp assembly warranty and will provide quality bulb burn
time.
Function Number of bulbs Trade number
Park/turn (front) 2 3457 AK (amber)
Side marker lamps 2 194 NA
Headlamps 2 9007
Fog lamps (if
equipped)2
9145 or H11 (STX)
Hi-mount brake lamp 1 922
Rear stop/turn/tail
lamps2
4157K or 3157K
Rear turn (STX only) 2 3156
2007 Ranger(ran)
Owners Guide (post-2002-fmt)
USA(fus)
Lights
58
Page 59 of 280
Function Number of bulbs Trade number
Rear license plate
lamps2
194
Backup lamps 2 3155 or 3156 (STX)
Dome lamp 1 912
Map/dome-SuperCab
(if equipped)2
904
Map/dome-Regular
Cab (if equipped)1
904
All replacement bulbs are clear in color except where noted.
To replace all instrument panel lights - see your authorized dealer.
Replacing the interior bulbs
Check the operation of all bulbs frequently.
Replacing exterior bulbs
Check the operation of all the bulbs frequently.
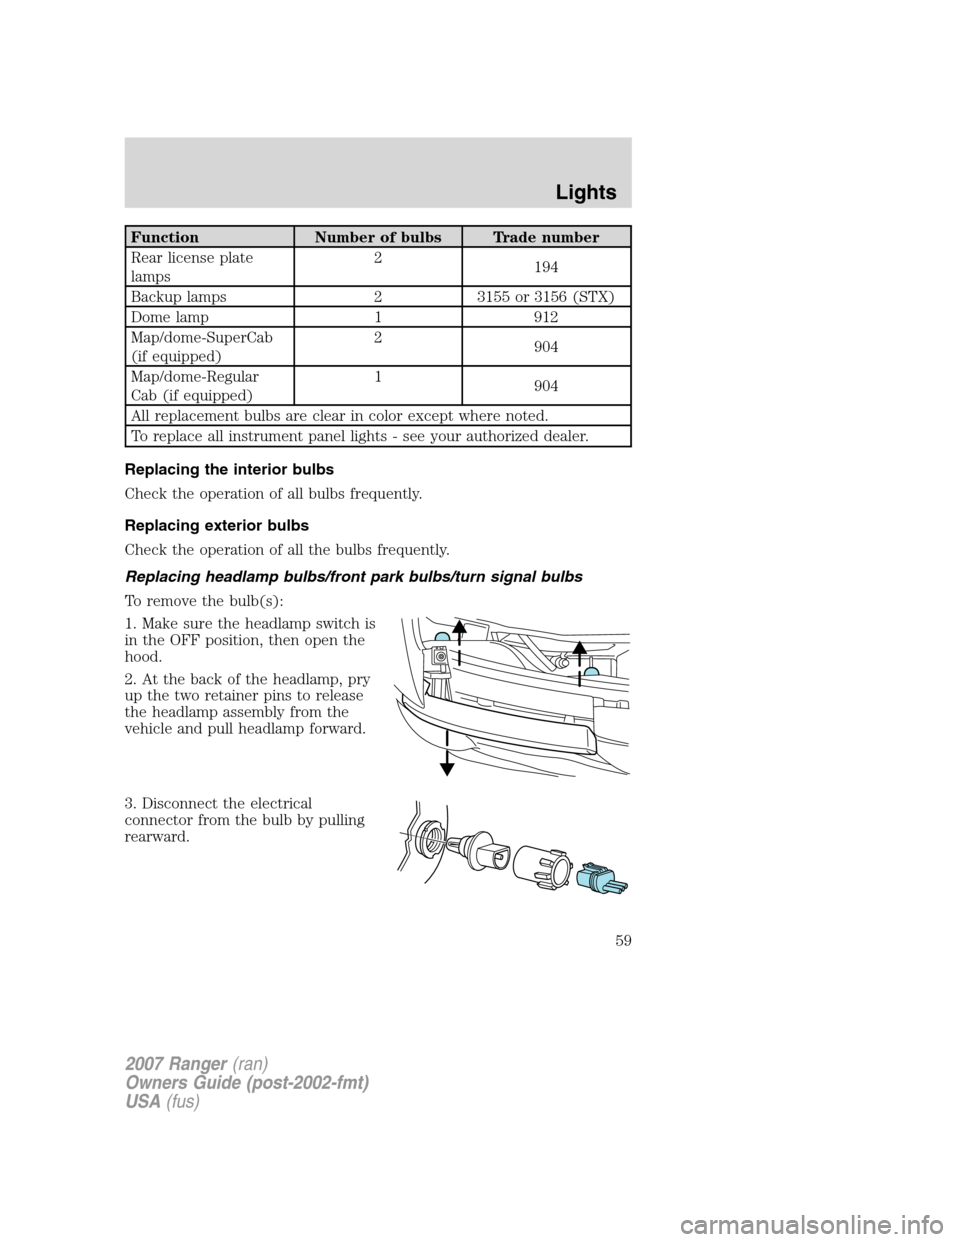
Replacing headlamp bulbs/front park bulbs/turn signal bulbs
To remove the bulb(s):
1. Make sure the headlamp switch is
in the OFF position, then open the
hood.
2. At the back of the headlamp, pry
up the two retainer pins to release
the headlamp assembly from the
vehicle and pull headlamp forward.
3. Disconnect the electrical
connector from the bulb by pulling
rearward.
2007 Ranger(ran)
Owners Guide (post-2002-fmt)
USA(fus)
Lights
59
Page 60 of 280
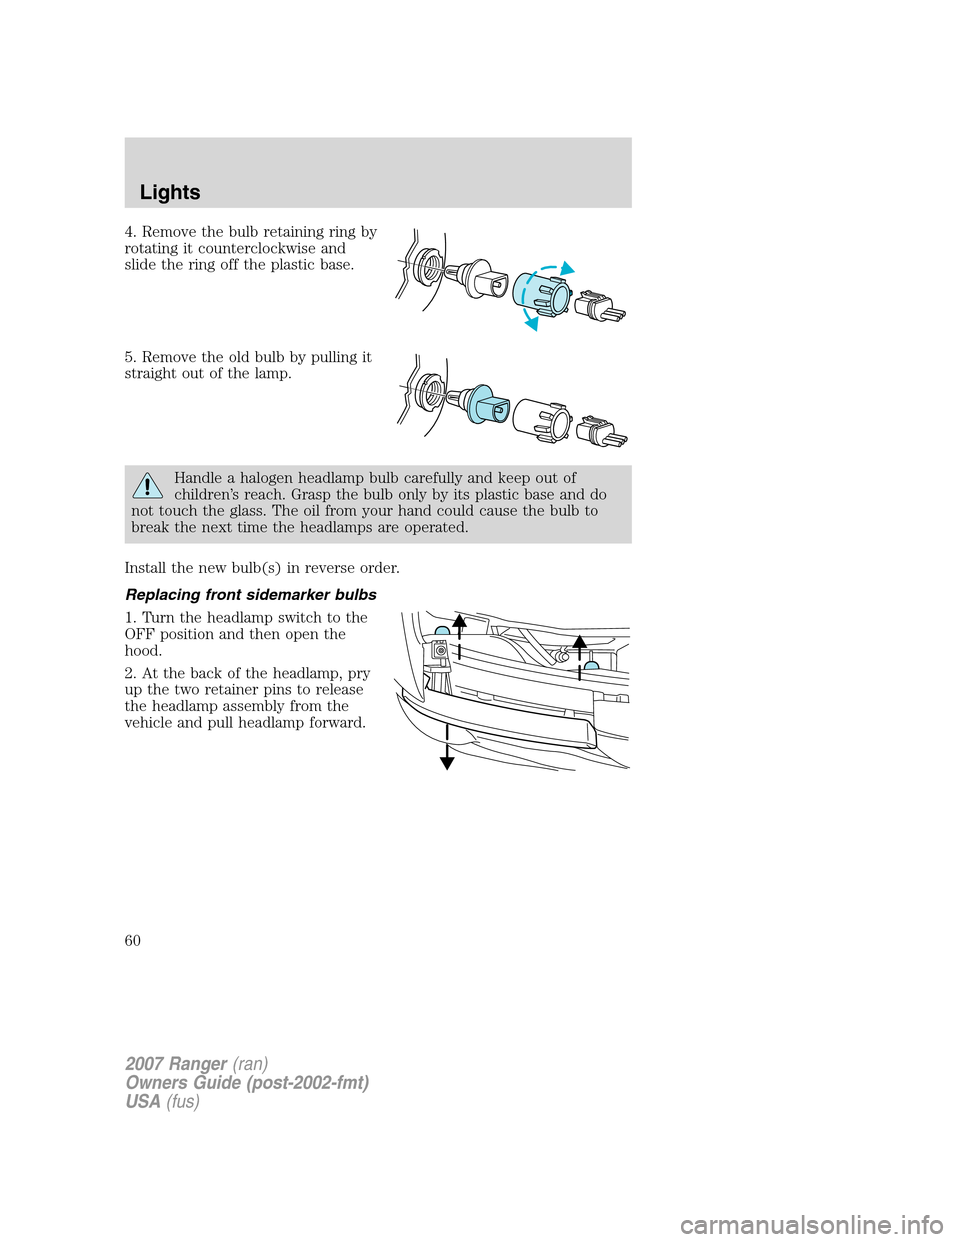
4. Remove the bulb retaining ring by
rotating it counterclockwise and
slide the ring off the plastic base.
5. Remove the old bulb by pulling it
straight out of the lamp.
Handle a halogen headlamp bulb carefully and keep out of
children’s reach. Grasp the bulb only by its plastic base and do
not touch the glass. The oil from your hand could cause the bulb to
break the next time the headlamps are operated.
Install the new bulb(s) in reverse order.
Replacing front sidemarker bulbs
1. Turn the headlamp switch to the
OFF position and then open the
hood.
2. At the back of the headlamp, pry
up the two retainer pins to release
the headlamp assembly from the
vehicle and pull headlamp forward.
2007 Ranger(ran)
Owners Guide (post-2002-fmt)
USA(fus)
Lights
60