wheel torque FORD RANGER 2019 Owners Manual
[x] Cancel search | Manufacturer: FORD, Model Year: 2019, Model line: RANGER, Model: FORD RANGER 2019Pages: 512, PDF Size: 7.63 MB
Page 159 of 512
PRINCIPLE OF OPERATION
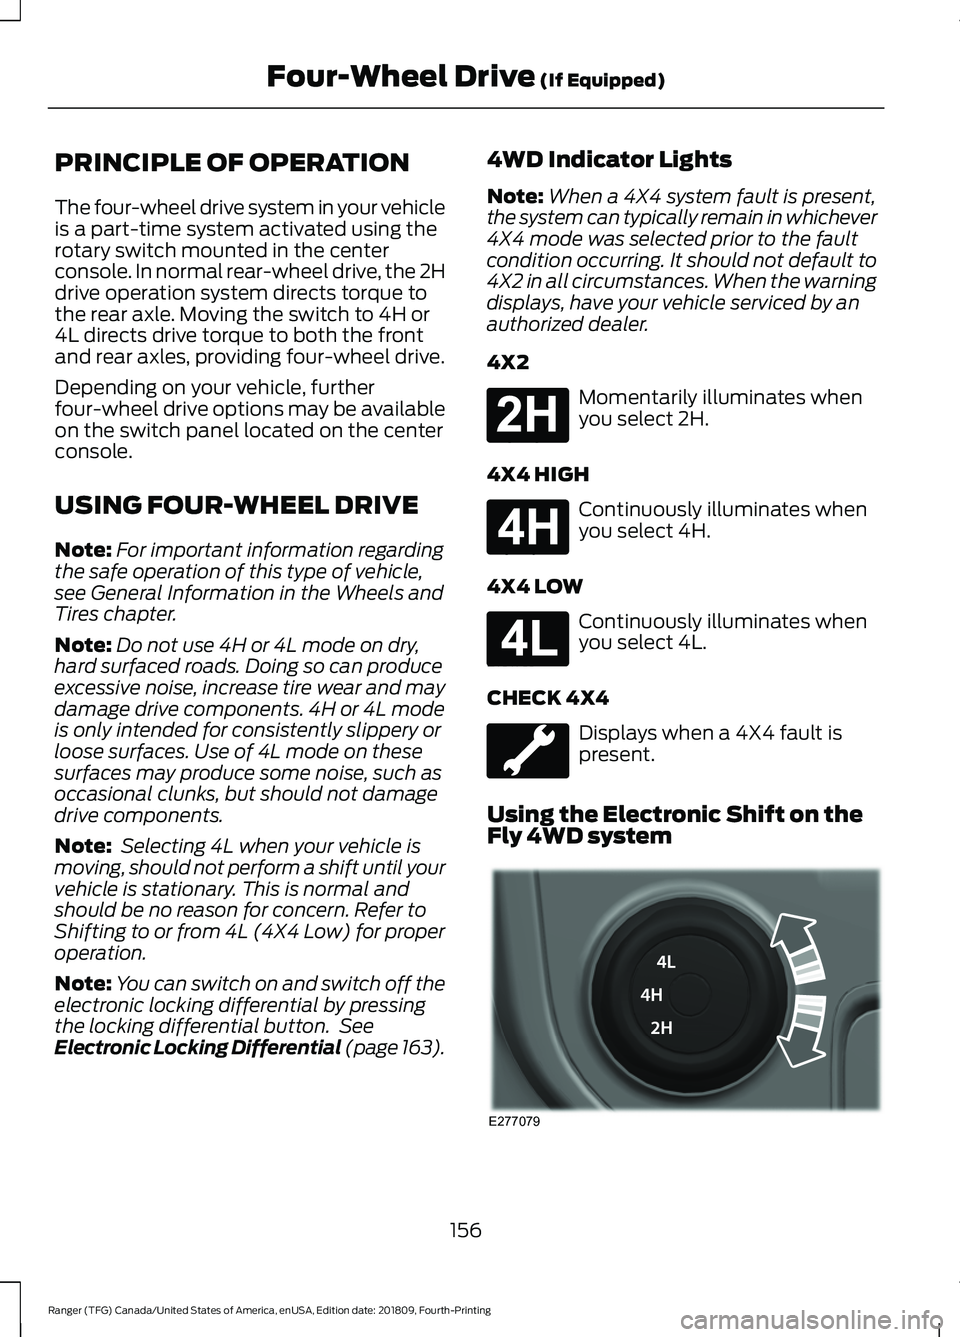
The four-wheel drive system in your vehicle
is a part-time system activated using the
rotary switch mounted in the center
console. In normal rear-wheel drive, the 2H
drive operation system directs torque to
the rear axle. Moving the switch to 4H or
4L directs drive torque to both the front
and rear axles, providing four-wheel drive.
Depending on your vehicle, further
four-wheel drive options may be available
on the switch panel located on the center
console.
USING FOUR-WHEEL DRIVE
Note:
For important information regarding
the safe operation of this type of vehicle,
see General Information in the Wheels and
Tires chapter.
Note: Do not use 4H or 4L mode on dry,
hard surfaced roads. Doing so can produce
excessive noise, increase tire wear and may
damage drive components. 4H or 4L mode
is only intended for consistently slippery or
loose surfaces. Use of 4L mode on these
surfaces may produce some noise, such as
occasional clunks, but should not damage
drive components.
Note: Selecting 4L when your vehicle is
moving, should not perform a shift until your
vehicle is stationary. This is normal and
should be no reason for concern. Refer to
Shifting to or from 4L (4X4 Low) for proper
operation.
Note: You can switch on and switch off the
electronic locking differential by pressing
the locking differential button. See
Electronic Locking Differential (page 163). 4WD Indicator Lights
Note:
When a 4X4 system fault is present,
the system can typically remain in whichever
4X4 mode was selected prior to the fault
condition occurring. It should not default to
4X2 in all circumstances. When the warning
displays, have your vehicle serviced by an
authorized dealer.
4X2 Momentarily illuminates when
you select 2H.
4X4 HIGH Continuously illuminates when
you select 4H.
4X4 LOW Continuously illuminates when
you select 4L.
CHECK 4X4 Displays when a 4X4 fault is
present.
Using the Electronic Shift on the
Fly 4WD system 156
Ranger (TFG) Canada/United States of America, enUSA, Edition date: 201809, Fourth-Printing Four-Wheel Drive (If Equipped)E181778 E181779 E181780 E277079
Page 160 of 512
2H (4X2)
For general on-road driving, this mode
provides optimal smoothness and fuel
economy. Sends power to the rear wheels
only.
Note:
2H may engage or disengage based
on terrain mode selection. See Principle of
Operation (page 156).
4H (4X4 HIGH)
Provides mechanically locked four-wheel
drive power to both the front and rear
wheels for use in off-road or winter
conditions such as deep snow, sand or
mud. This mode is not for use on dry
pavement.
Note: 4H may engage or disengage based
on terrain mode selection. See Principle of
Operation
(page 156).
4L (4X4 LOW)
Provides mechanically locked four-wheel
drive power to both the front and rear
wheels with additional gearing for
increased torque multiplication. Intended
only for off-road applications such as deep
sand, steep grades, or pulling heavy
objects.
Note: 4L may engage or disengage based
on terrain mode selection. See Principle of
Operation
(page 156).
Shifting Between 4WD System Modes
Note: Momentarily releasing the accelerator
pedal when performing a shift aids the
performance of engagement or
disengagement.
Note: Do not perform this operation if the
rear wheels are slipping or when applying
the accelerator pedal.
Note: You may hear some noise as the
system shifts or engages; this is normal. You can move the control between 2H to
4H at a stop or when driving up to 68 mph
(110 km/h)
. The information display may
display a message indicating a 4X4 shift
and the LED for the selected mode flashes.
Once the shift is complete, the LED light
for the selected mode remains illuminated.
Shifting To or From 4L (4X4 low)
Note: You may hear some noise as the
system shifts or engages; this is normal.
1. Stop your vehicle when it is safe to do so.
2. Place the transmission in neutral (N).
3. Turn the transfer shift switch from 2H to 4L or 4L to 2H.
The information display should display a
message indicating a 4X4 shift is in
progress followed by the system mode
selected. If any of the above shift
conditions are not present, the shift should
not occur and the information display
shows information guiding you through the
proper shifting procedures.
How Your Vehicle Differs From
Other Vehicles WARNING: Vehicles with a higher
center of gravity (utility and four-wheel
drive vehicles) handle differently than
vehicles with a lower center of gravity
(passenger cars). Avoid sharp turns,
excessive speed and abrupt steering in
these vehicles. Failure to drive cautiously
increases the risk of losing control of your
vehicle, vehicle rollover, personal injury
and death.
Truck and utility vehicles can differ from
some other vehicles. Your vehicle may be
higher to allow it to travel over rough
terrain without getting hung up or
damaging underbody components.
157
Ranger (TFG) Canada/United States of America, enUSA, Edition date: 201809, Fourth-Printing Four-Wheel Drive
(If Equipped)
Page 166 of 512
ELECTRONIC LOCKING
DIFFERENTIAL (IF EQUIPPED)
Note: Do not operate the system on dry
hard surface roads. Doing so could lead to
excessive tire noise and wear. Use the
system only on consistently slippery or loose
surfaces.
The system locks the left and right portions
of the rear axle together to form a solid
driving axle, resulting in increased rear
wheel traction in certain conditions.
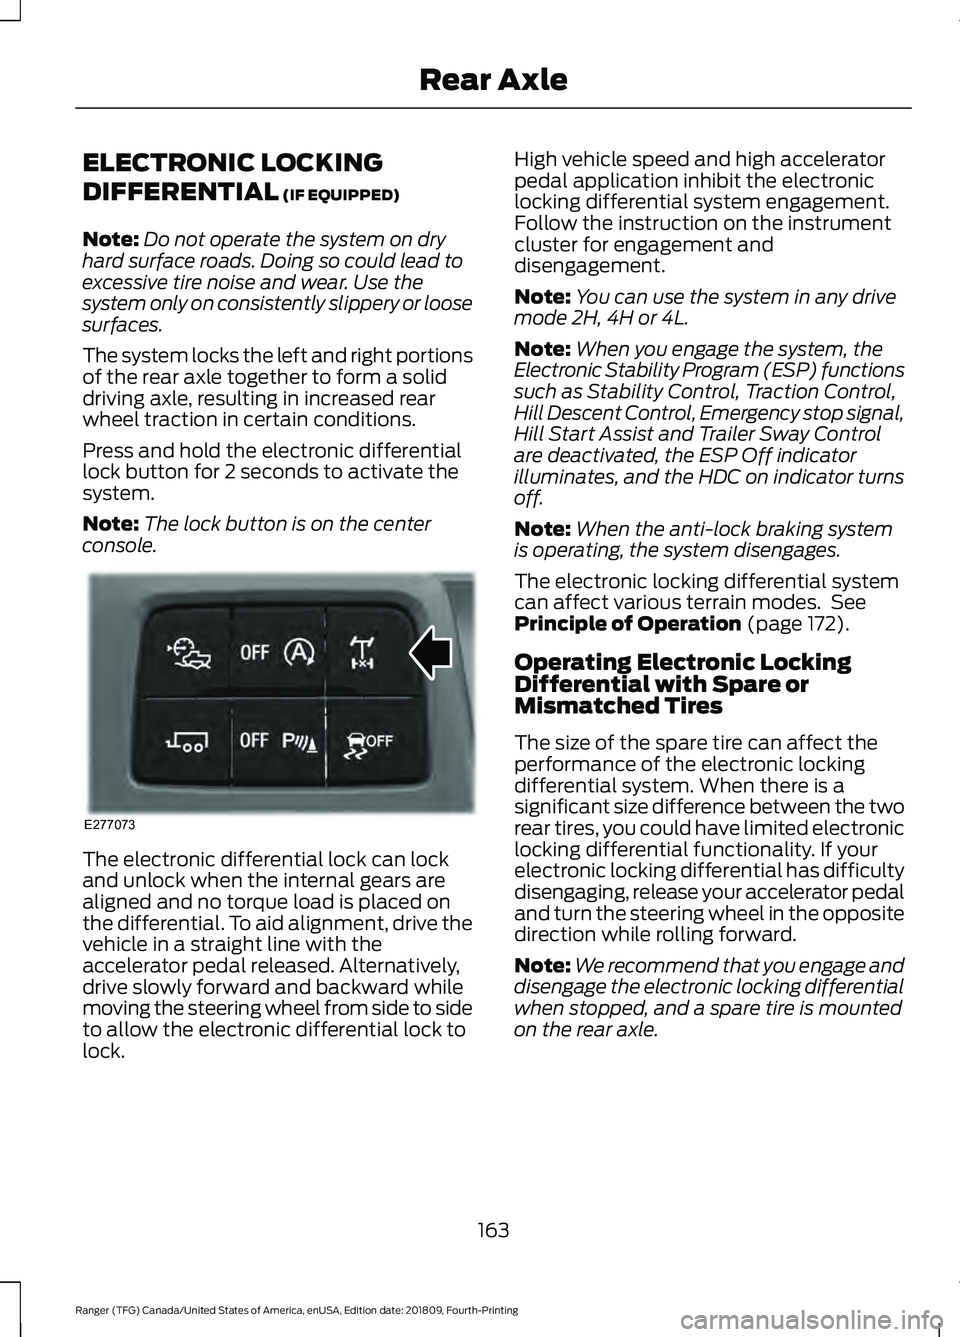
Press and hold the electronic differential
lock button for 2 seconds to activate the
system.
Note: The lock button is on the center
console. The electronic differential lock can lock
and unlock when the internal gears are
aligned and no torque load is placed on
the differential. To aid alignment, drive the
vehicle in a straight line with the
accelerator pedal released. Alternatively,
drive slowly forward and backward while
moving the steering wheel from side to side
to allow the electronic differential lock to
lock. High vehicle speed and high accelerator
pedal application inhibit the electronic
locking differential system engagement.
Follow the instruction on the instrument
cluster for engagement and
disengagement.
Note:
You can use the system in any drive
mode 2H, 4H or 4L.
Note: When you engage the system, the
Electronic Stability Program (ESP) functions
such as Stability Control, Traction Control,
Hill Descent Control, Emergency stop signal,
Hill Start Assist and Trailer Sway Control
are deactivated, the ESP Off indicator
illuminates, and the HDC on indicator turns
off.
Note: When the anti-lock braking system
is operating, the system disengages.
The electronic locking differential system
can affect various terrain modes. See
Principle of Operation
(page 172).
Operating Electronic Locking
Differential with Spare or
Mismatched Tires
The size of the spare tire can affect the
performance of the electronic locking
differential system. When there is a
significant size difference between the two
rear tires, you could have limited electronic
locking differential functionality. If your
electronic locking differential has difficulty
disengaging, release your accelerator pedal
and turn the steering wheel in the opposite
direction while rolling forward.
Note: We recommend that you engage and
disengage the electronic locking differential
when stopped, and a spare tire is mounted
on the rear axle.
163
Ranger (TFG) Canada/United States of America, enUSA, Edition date: 201809, Fourth-Printing Rear AxleE277073
Page 229 of 512
•
Always attempt to climb a steep hill
along the fall line of the slope and not
diagonally.
• If the vehicle is unable to make it up
the hill, DO NOT attempt to turn back
down the slope. Place the vehicle in
low range and slowly back down in
reverse.
• When descending a steep slope, select
low gear and activate hill descent
control. Use the throttle and brake
pedals to control your descent speed
as described earlier in this section using
hill descent control. Hill descent control
is functional in reverse (R) and should
be used in this situation.
After Off-Road Driving
It is important to complete a full vehicle
inspection after off-road driving. Some
items to check include:
• Check the wheels and undercarriage
for a buildup of mud or debris, which
can cause vehicle vibration.
• Make sure that the grille and radiator
are clear of any obstructions that may
affect cooling.
• Make sure that the brakes are in proper
working order and free of any mud,
stones and debris, which can become
trapped around the brake rotor,
backing plate and caliper.
• Check that the air filter is clean and dry.
• Inspect for torn or punctured boots on
ball joints, half shafts, steering gears.
• Inspect exhaust system for damage or
looseness.
• Inspect undercarriage fasteners. If any
are loose or damaged, tighten or
replace and make sure that you use the
proper torque specification. •
Inspect the wheels for dents, cracks,
or other damage.
• Clear any debris from the exhaust
components. For example, grass or hay.
DRIVING THROUGH WATER WARNING: Do not drive through
flowing or deep water as you may lose
control of your vehicle.
Note: Driving through standing water can
cause vehicle damage.
Note: Engine damage can occur if water
enters the air filter.
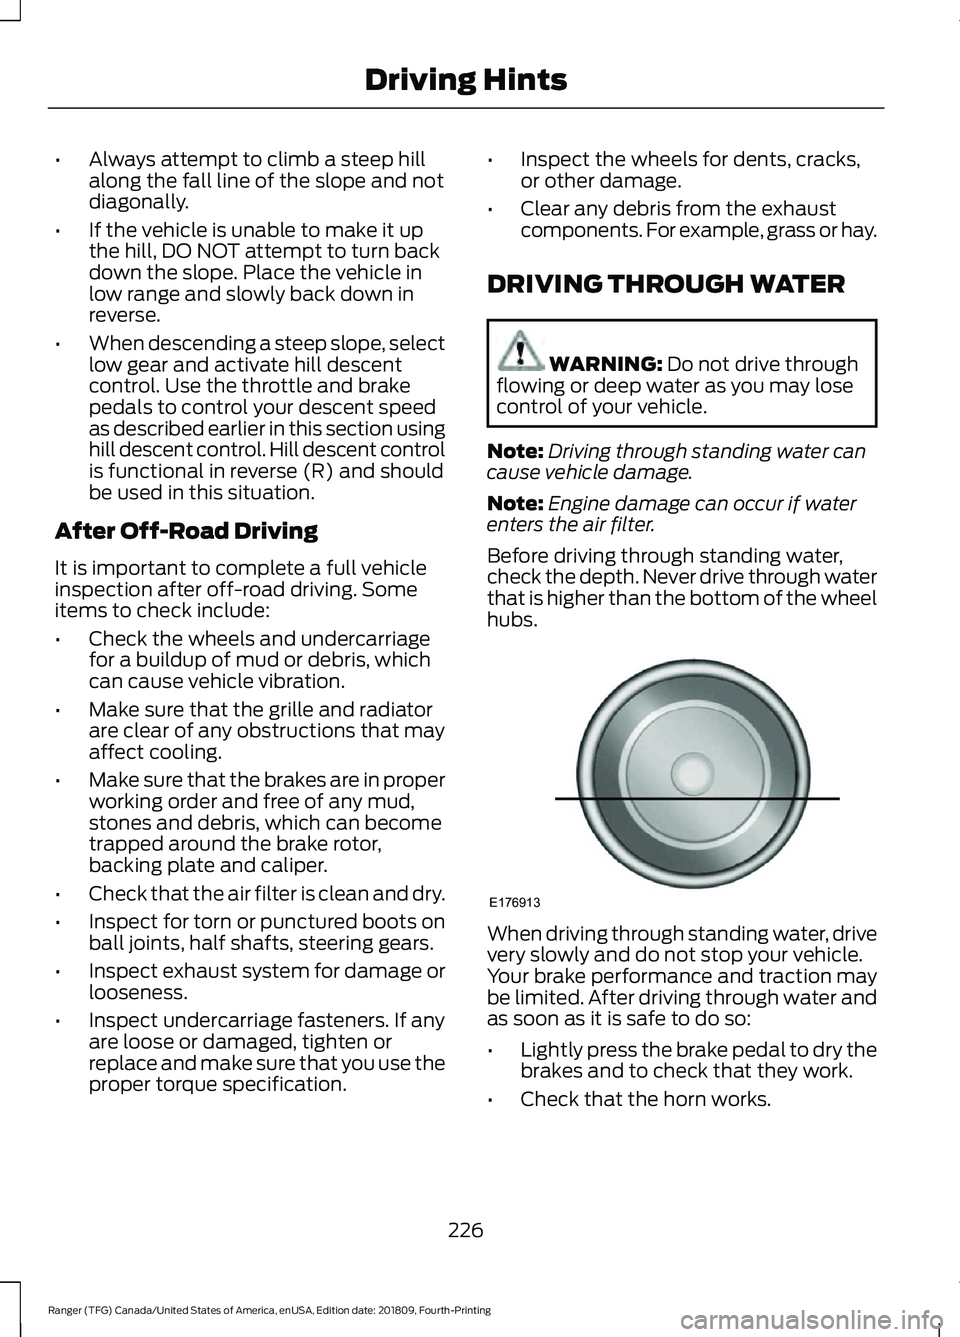
Before driving through standing water,
check the depth. Never drive through water
that is higher than the bottom of the wheel
hubs. When driving through standing water, drive
very slowly and do not stop your vehicle.
Your brake performance and traction may
be limited. After driving through water and
as soon as it is safe to do so:
•
Lightly press the brake pedal to dry the
brakes and to check that they work.
• Check that the horn works.
226
Ranger (TFG) Canada/United States of America, enUSA, Edition date: 201809, Fourth-Printing Driving HintsE176913
Page 309 of 512
WARNING: The jack should be
used on level firm ground wherever
possible. WARNING:
Check that the vehicle
jack is not damaged or deformed and
the thread is lubricated and clean. WARNING:
Never place anything
between the vehicle jack and the ground. WARNING:
Never place anything
between the vehicle jack and your
vehicle. WARNING:
It is recommended
that the wheels of the vehicle be
chocked, and that no person should
remain in a vehicle that is being jacked.
Note: Only use the spare tire carrier to stow
the tire and wheel combination provided
with your vehicle. Other tire and wheel
combinations will cause the tire carrier to
fail.
Note: Do not use impact tools or power
tools on the spare tire carrier, as this could
cause a winch malfunction and prevent a
secure fit. The spare tire carrier tightening
torque should be
29.50 lb.ft (40 Nm) +/-
4.43 lb.ft (6 Nm).
Note: When jacking the vehicle passengers
should not be in the vehicle.
Park on a level surface, activate the hazard
flashers and set the parking brake. Then,
place the transmission in park (P) and turn
the engine off. Vehicle Jack WARNING:
Ensure screwthread is
adequately lubricated before use. WARNING:
The jack should be
used on level firm ground wherever
possible. WARNING:
Switch the ignition off
and apply the park brake fully before
lifting vehicle. WARNING:
It is recommended
that the wheels of the vehicle be
chocked, and that no person should
remain in a vehicle that is being jacked. WARNING:
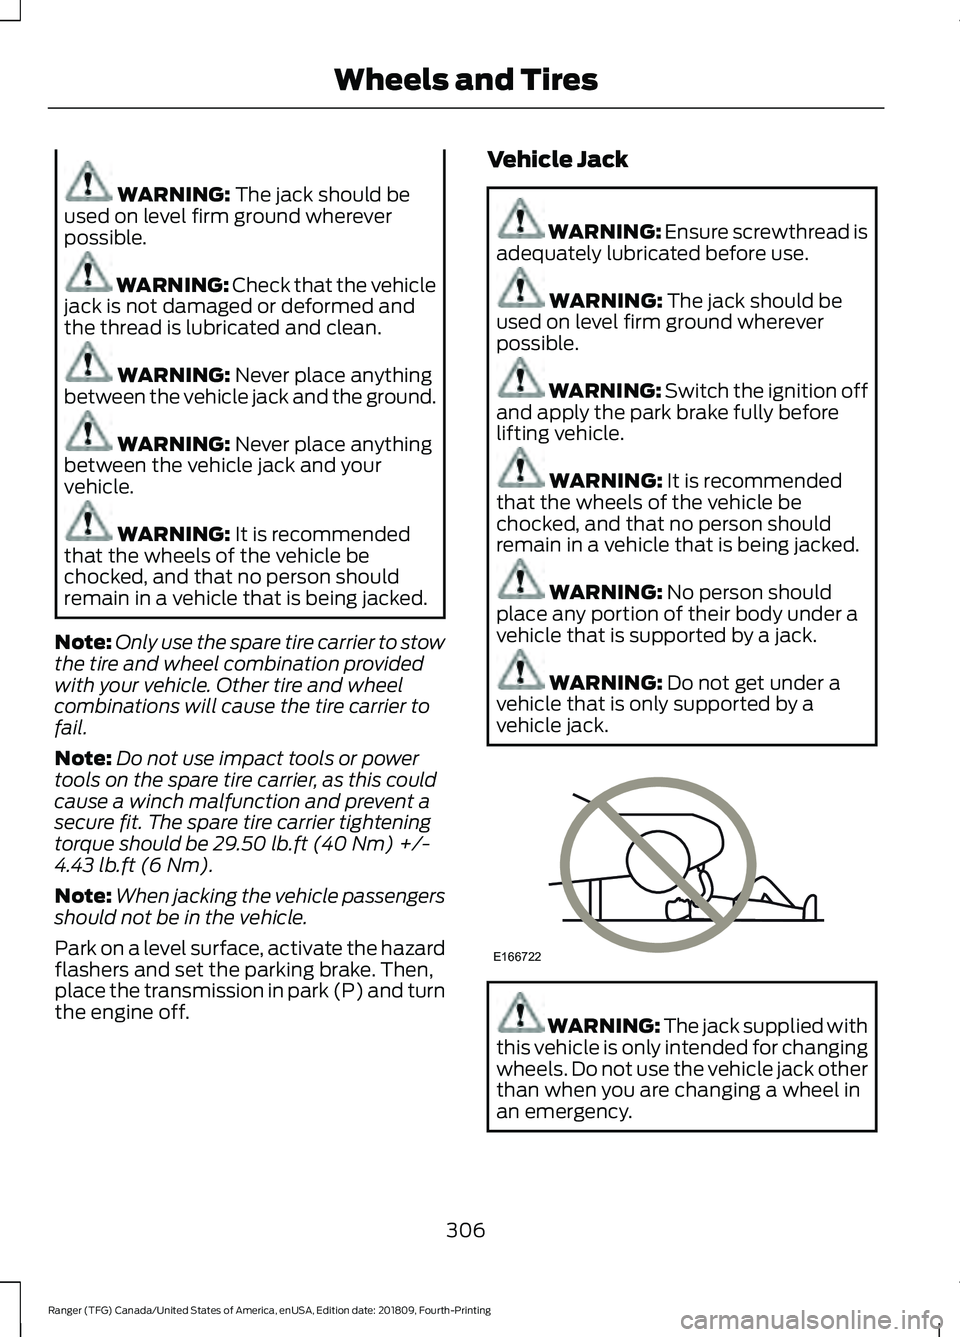
No person should
place any portion of their body under a
vehicle that is supported by a jack. WARNING:
Do not get under a
vehicle that is only supported by a
vehicle jack. WARNING: The jack supplied with
this vehicle is only intended for changing
wheels. Do not use the vehicle jack other
than when you are changing a wheel in
an emergency.
306
Ranger (TFG) Canada/United States of America, enUSA, Edition date: 201809, Fourth-Printing Wheels and TiresE166722
Page 316 of 512
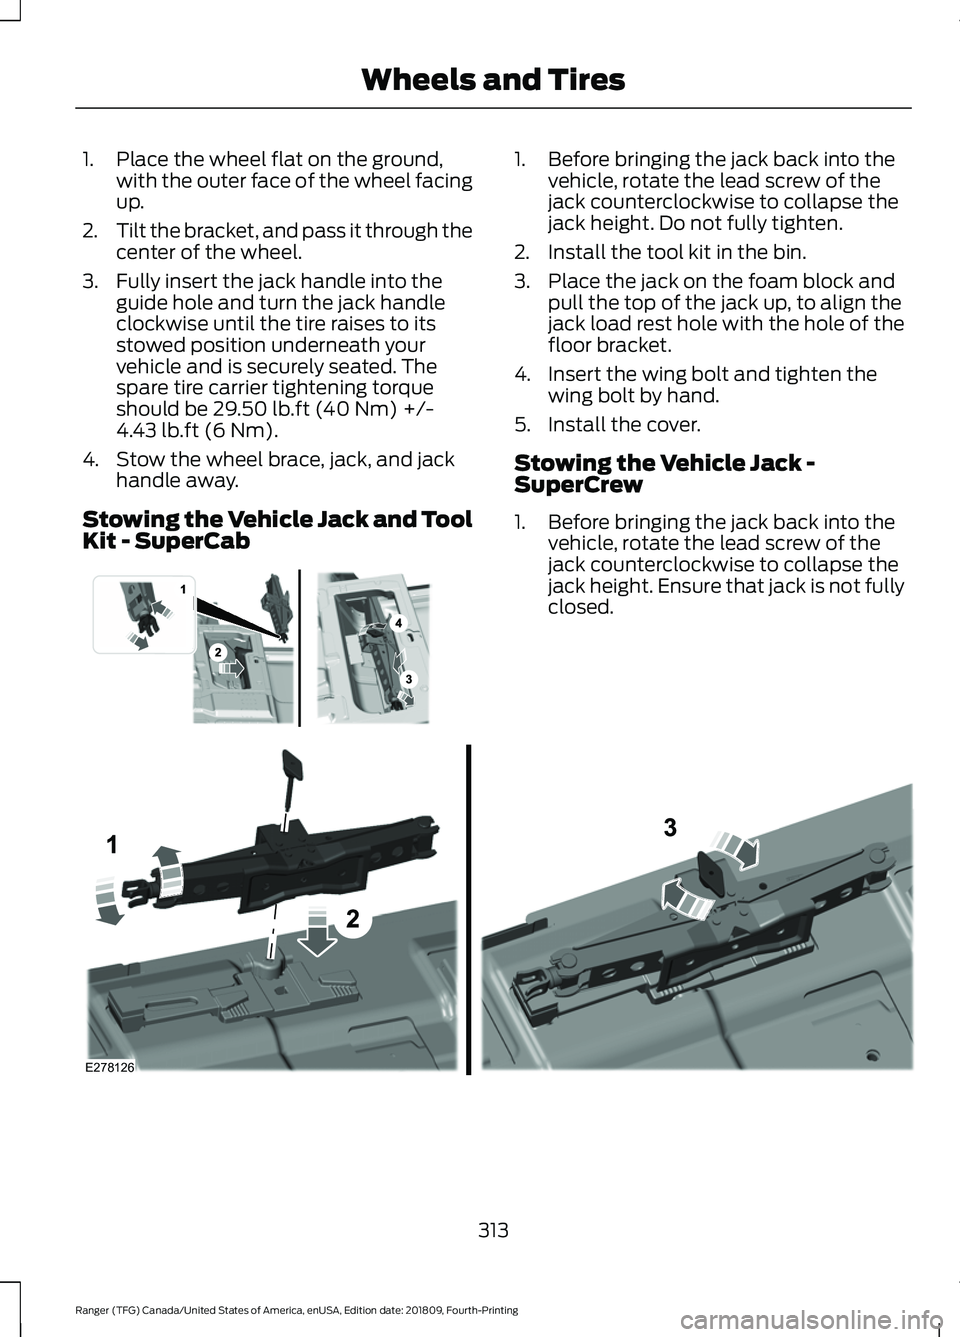
1. Place the wheel flat on the ground,
with the outer face of the wheel facing
up.
2. Tilt the bracket, and pass it through the
center of the wheel.
3. Fully insert the jack handle into the guide hole and turn the jack handle
clockwise until the tire raises to its
stowed position underneath your
vehicle and is securely seated. The
spare tire carrier tightening torque
should be 29.50 lb.ft (40 Nm) +/-
4.43 lb.ft (6 Nm).
4. Stow the wheel brace, jack, and jack handle away.
Stowing the Vehicle Jack and Tool
Kit - SuperCab 1. Before bringing the jack back into the
vehicle, rotate the lead screw of the
jack counterclockwise to collapse the
jack height. Do not fully tighten.
2. Install the tool kit in the bin.
3. Place the jack on the foam block and pull the top of the jack up, to align the
jack load rest hole with the hole of the
floor bracket.
4. Insert the wing bolt and tighten the wing bolt by hand.
5. Install the cover.
Stowing the Vehicle Jack -
SuperCrew
1. Before bringing the jack back into the vehicle, rotate the lead screw of the
jack counterclockwise to collapse the
jack height. Ensure that jack is not fully
closed. 313
Ranger (TFG) Canada/United States of America, enUSA, Edition date: 201809, Fourth-Printing Wheels and Tires E296013 E278126
Page 317 of 512
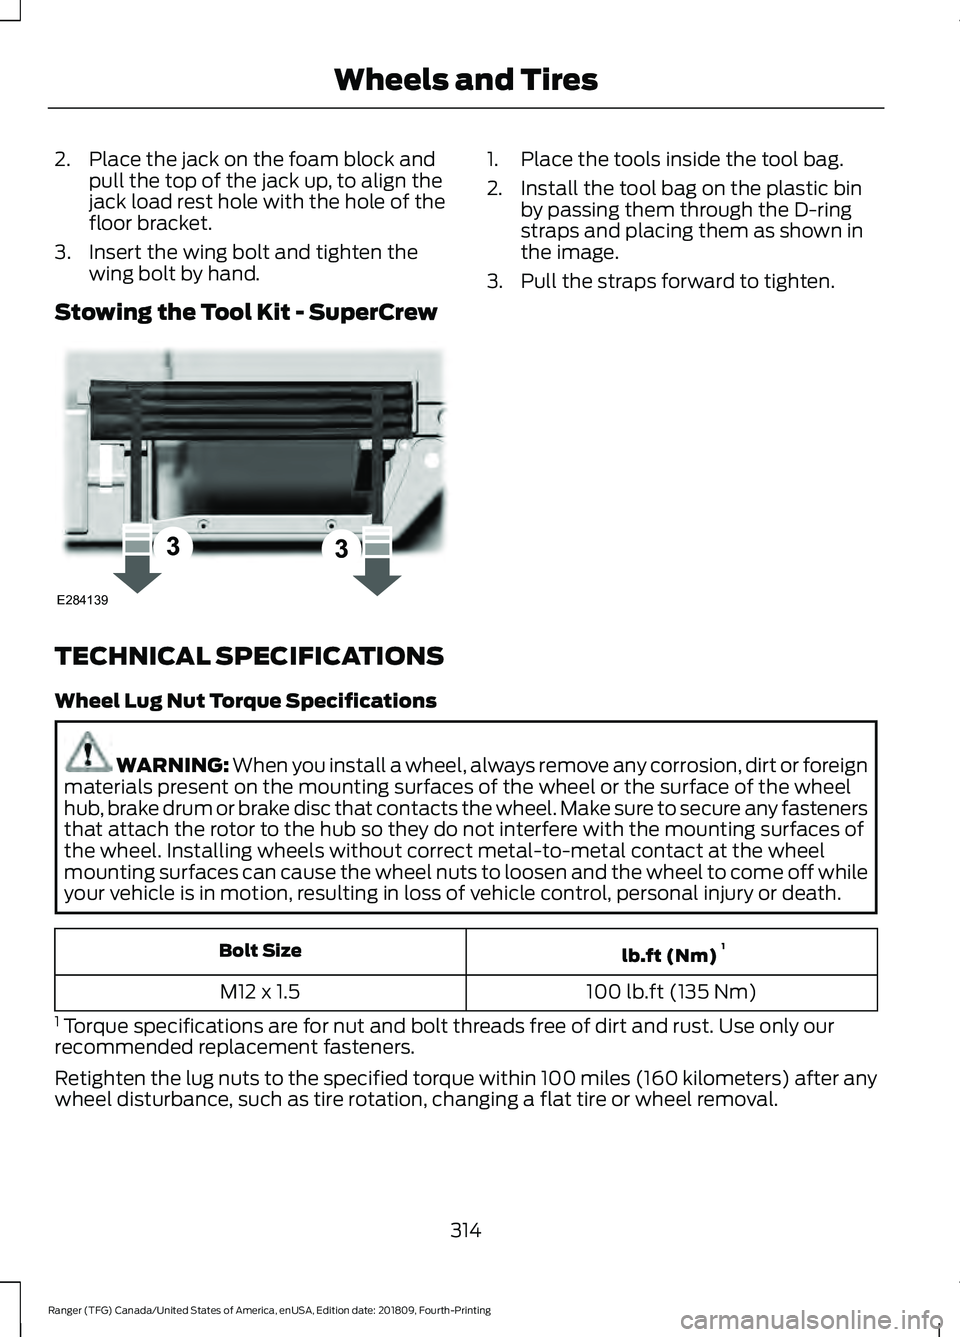
2. Place the jack on the foam block and
pull the top of the jack up, to align the
jack load rest hole with the hole of the
floor bracket.
3. Insert the wing bolt and tighten the wing bolt by hand.
Stowing the Tool Kit - SuperCrew 1. Place the tools inside the tool bag.
2. Install the tool bag on the plastic bin
by passing them through the D-ring
straps and placing them as shown in
the image.
3. Pull the straps forward to tighten.
TECHNICAL SPECIFICATIONS
Wheel Lug Nut Torque Specifications WARNING: When you install a wheel, always remove any corrosion, dirt or foreign
materials present on the mounting surfaces of the wheel or the surface of the wheel
hub, brake drum or brake disc that contacts the wheel. Make sure to secure any fasteners
that attach the rotor to the hub so they do not interfere with the mounting surfaces of
the wheel. Installing wheels without correct metal-to-metal contact at the wheel
mounting surfaces can cause the wheel nuts to loosen and the wheel to come off while
your vehicle is in motion, resulting in loss of vehicle control, personal injury or death. lb.ft (Nm)
1
Bolt Size
100 lb.ft (135 Nm)
M12 x 1.5
1 Torque specifications are for nut and bolt threads free of dirt and rust. Use only our
recommended replacement fasteners.
Retighten the lug nuts to the specified torque within 100 miles (160 kilometers) after any
wheel disturbance, such as tire rotation, changing a flat tire or wheel removal.
314
Ranger (TFG) Canada/United States of America, enUSA, Edition date: 201809, Fourth-Printing Wheels and TiresE284139