center console FORD RANGER 2020 Owners Manual
[x] Cancel search | Manufacturer: FORD, Model Year: 2020, Model line: RANGER, Model: FORD RANGER 2020Pages: 478, PDF Size: 7.44 MB
Page 5 of 478
Steering Wheel
Adjusting the Steering Wheel
...................72
Audio Control ..................................................
72
Voice Control ...................................................
73
Cruise Control .................................................
73
Information Display Control ......................
74
Horn ....................................................................
74
Wipers and Washers
Windshield Wipers ........................................
75
Autowipers .......................................................
75
Windshield Washers ....................................
76
Lighting
General Information ......................................
77
Lighting Control ..............................................
77
Autolamps .......................................................
78
Instrument Lighting Dimmer .....................
78
Daytime Running Lamps ............................
79
Automatic High Beam Control ................
80
Front Fog Lamps ............................................
81
Direction Indicators .......................................
81
Interior Lamps .................................................
81
Ambient Lighting ...........................................
82
Cargo Lamps ...................................................
82
Windows and Mirrors
Power Windows .............................................
83
Exterior Mirrors ...............................................
86
Interior Mirror ...................................................
87
Sun Visors ........................................................
88
Instrument Cluster
Gauges ..............................................................
89
Warning Lamps and Indicators ................
92
Audible Warnings and Indicators ............
95
Information Displays
General Information ....................................
96Information Messages
...............................
104
Climate Control
Manual Climate Control .............................
117
Automatic Climate Control ......................
118
Hints on Controlling the Interior Climate ........................................................................\
.
120
Heated Windshield ......................................
122
Heated Rear Window .................................
122
Heated Exterior Mirrors ..............................
122
Cabin Air Filter ...............................................
122
Remote Start .................................................
123
Seats
Sitting in the Correct Position .................
124
Head Restraints ............................................
124
Manual Seats ................................................
126
Power Seats ...................................................
127
Rear Seats ......................................................
128
Heated Seats ................................................
130
Garage Door Opener
Universal Garage Door Opener ................
131
Auxiliary Power Points
Auxiliary Power Points ...............................
135
Storage Compartments
Glove Compartment ...................................
137
Center Console ..............................................
137
Overhead Console .......................................
137
Rear Seat Armrest .......................................
138
Under Seat Storage ....................................
138
Starting and Stopping the Engine
General Information ...................................
139
Ignition Switch ..............................................
139
Keyless Starting ...........................................
140
Starting a Gasoline Engine ......................
140
2
Ranger (TFG) Canada/United States of America, Vehicles Built From: 18-11-2019, LB3J 19A321 AB enUSA, Edition date: 202002, Second-Printing Table of Contents
Page 47 of 478
The front passenger sensing system is
designed to disable (will not inflate) the
front passenger frontal airbag under
certain conditions:
•
The front passenger seat is
unoccupied.
• The system determines an infant is
present in a child restraint.
• A passenger takes their weight off of
the seat for a period of time.
• If there is a problem with the airbag
system or the passenger sensing
system.
Even with this technology, parents are
strongly encouraged to always properly
restrain children in the rear seat.
• When the front passenger sensing
system disables (will not inflate) the
front passenger frontal airbag, the
passenger airbag status indicator
illuminates the off lamp and stays lit
to remind you that the front passenger
frontal airbag is disabled.
• If you have installed the child restraint
and the passenger airbag status
indicator illuminates the on lamp, then
switch your vehicle off, remove the
child restraint from your vehicle and
reinstall the restraint following the
child restraint manufacturer's
instructions.
The front passenger sensing system works
with sensors that are part of the front
passenger seat and seatbelt. The sensors
are designed to detect the presence of a
properly seated occupant and determine
if the front passenger frontal airbag should
be enabled.
• When the front passenger sensing
system enables the front passenger
frontal airbag (may inflate), the
passenger airbag status indicator
illuminates the on lamp and remains
illuminated. If a person of adult size is sitting in the front
passenger seat, but the passenger airbag
status indicator off lamp is lit, it is possible
that the person is not sitting properly in the
seat. If this happens:
•
Switch your vehicle off and ask the
person to place the seat backrest in an
upright position.
• Have the person sit upright in the seat,
centered on the seat cushion, with the
person's legs comfortably extended.
• Restart your vehicle and have the
person remain in this position for about
two minutes. This allows the system
to detect that person and enable the
passenger frontal airbag.
• If the indicator off lamp remains lit
even after this, you should advise the
person to ride in the rear seat.
After all occupants have adjusted their
seats and put on seatbelts, it is very
important that they continue to sit
properly. A properly seated occupant sits
upright, leaning against the seat backrest,
and centered on the seat cushion, with
their feet comfortably extended on the
floor. Sitting improperly can increase the
chance of injury in a crash event. For
example, if an occupant slouches, lies
down, turns sideways, sits forward, leans
forward or sideways, or puts one or both
feet up, the chance of injury during a crash
greatly increases.
If you think that the state of the passenger
airbag status indicator lamp is incorrect,
check for the following:
• Objects lodged underneath the seat.
• Objects between the seat cushion and
the center console.
• Objects hanging off the seat backrest.
• Objects stowed in the seat backrest
map pocket.
• Objects placed on the occupant's lap.
• Cargo interference with the seat
44
Ranger (TFG) Canada/United States of America, Vehicles Built From: 18-11-2019, LB3J 19A321 AB enUSA, Edition date: 202002, Second-Printing Supplementary Restraints System
Page 138 of 478
12 V DC Power Point
WARNING: Do not use a power
point for operating a cigar lighter.
Incorrect use of the power points can
cause damage not covered by the
vehicle warranty, and can result in fire or
serious injury.
Note: When you switch the ignition on, you
can use the socket to power
12 V appliances
with a maximum current rating of 15 A.
If the power supply does not work after you
switch the ignition off, switch the ignition
on.
Note: Do not hang any accessory from the
accessory plug.
Note: Do not use the power point over the
vehicle capacity of
12 V DC 180 watts or a
fuse may blow.
Note: Always keep the power point caps
closed when not in use.
Do not insert objects other than an
accessory plug into the power point. This
damages the power point and may blow
the fuse.
Run the vehicle for full capacity use of the
power point.
To prevent the battery from running out of
charge:
• Do not use the power point longer than
necessary when the engine is not
running.
• Do not leave devices plugged in
overnight or when you park your vehicle
for extended periods.
Location
Power points may be in the following
locations:
• On the front of the center console.
• Inside the center console. •
On the rear of the center console.
• Inside the luggage compartment.
110 V AC Power Point
(If Equipped) WARNING:
Do not keep electrical
devices plugged in the power point
whenever the device is not in use. Do not
use any extension cord with the 110 volt
AC power point, since it will defeat the
safety protection design. Doing so may
cause the power point to overload due
to powering multiple devices that can
reach beyond the 150 watt load limit and
could result in fire or serious injury.
Note: The power point turns off when you
switch the ignition off, or when the battery
voltage drops below 11 volts.
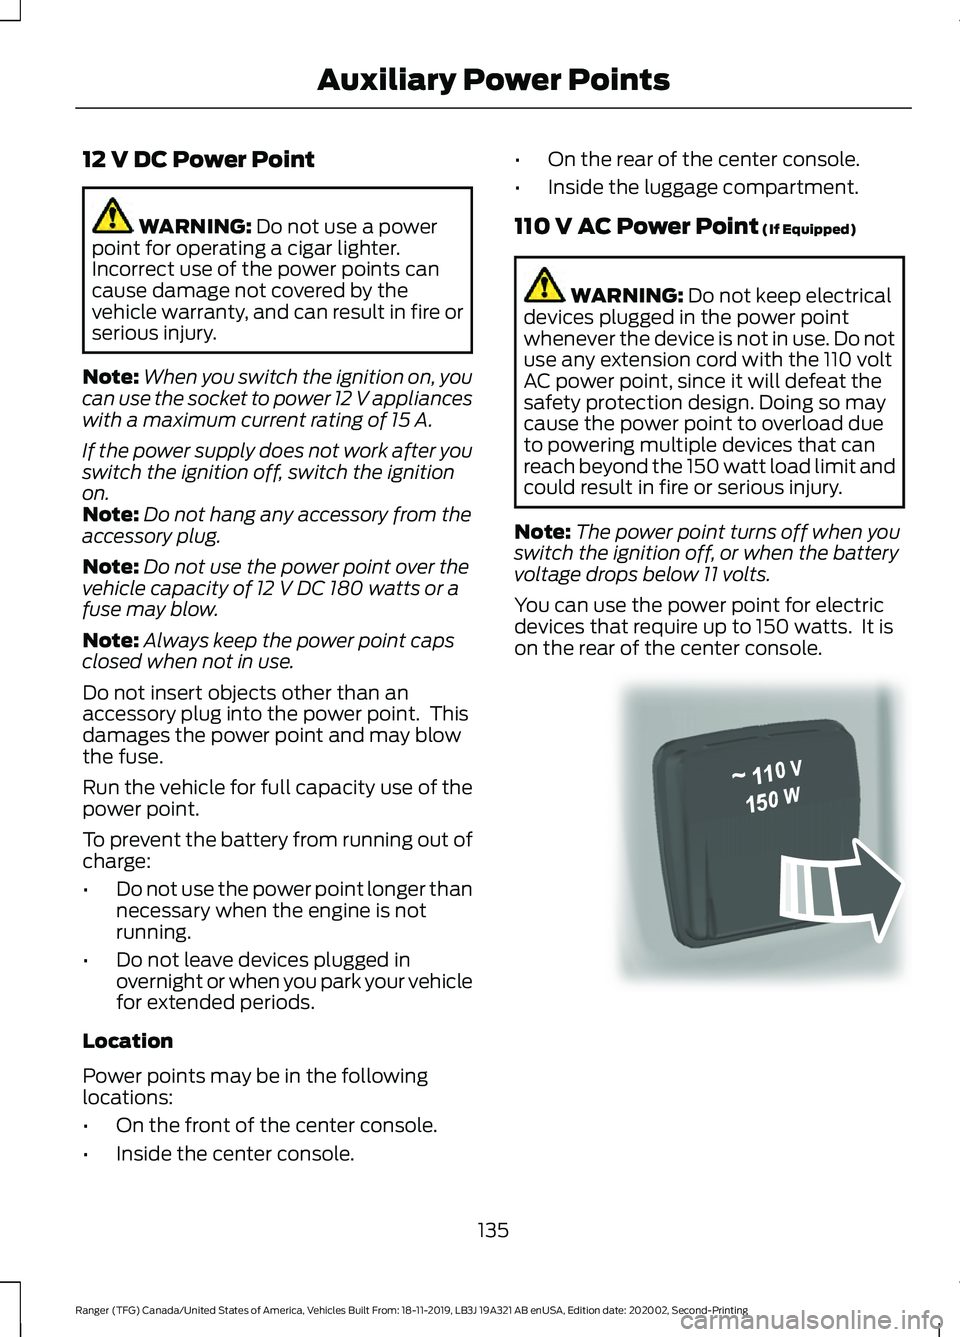
You can use the power point for electric
devices that require up to 150 watts. It is
on the rear of the center console. 135
Ranger (TFG) Canada/United States of America, Vehicles Built From: 18-11-2019, LB3J 19A321 AB enUSA, Edition date: 202002, Second-Printing Auxiliary Power PointsE305821
Page 140 of 478
GLOVE COMPARTMENT
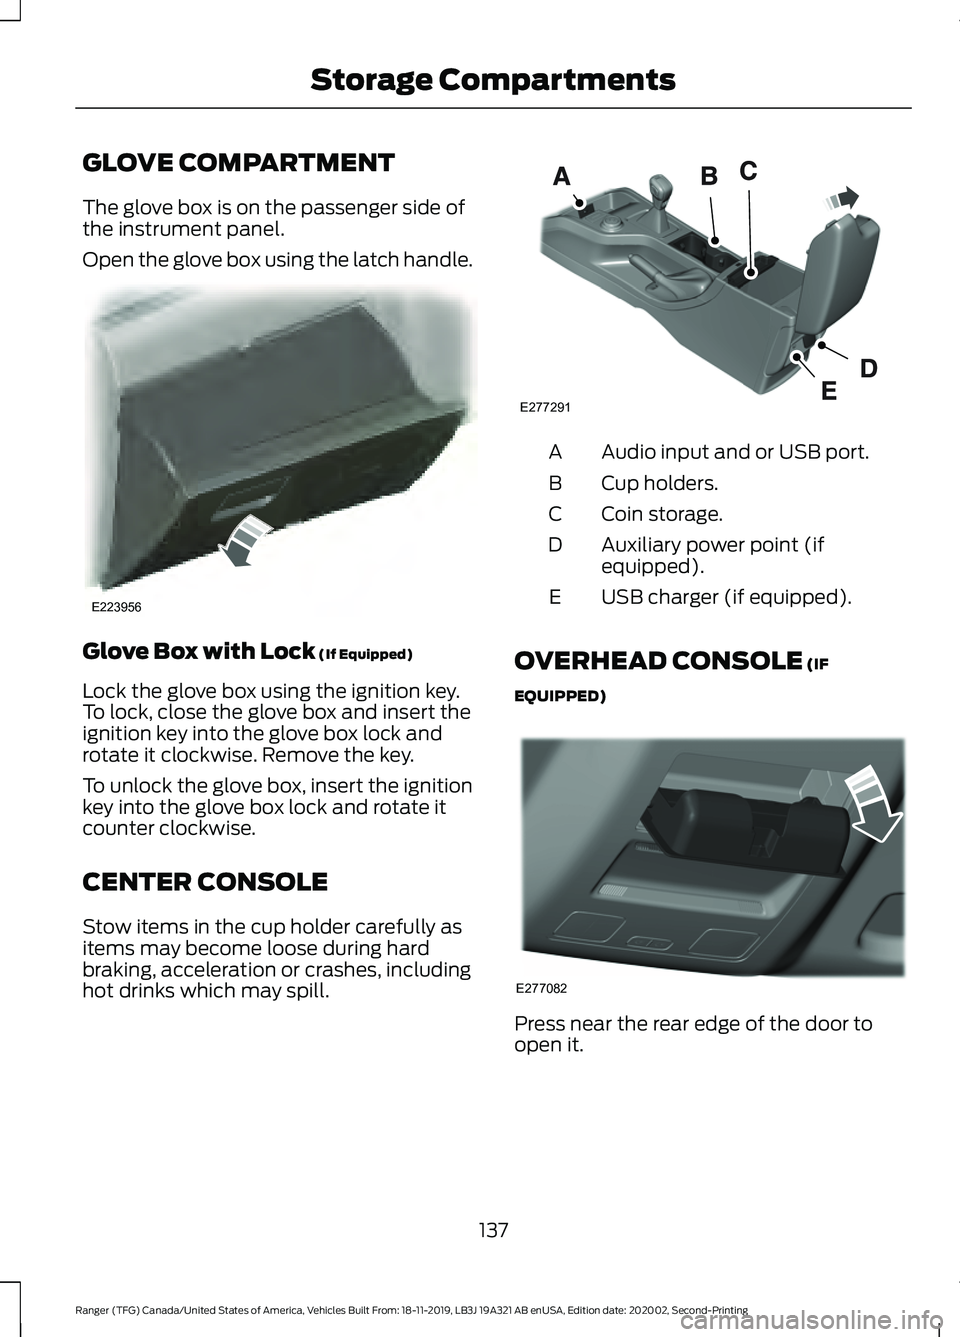
The glove box is on the passenger side of
the instrument panel.
Open the glove box using the latch handle.
Glove Box with Lock (If Equipped)
Lock the glove box using the ignition key.
To lock, close the glove box and insert the
ignition key into the glove box lock and
rotate it clockwise. Remove the key.
To unlock the glove box, insert the ignition
key into the glove box lock and rotate it
counter clockwise.
CENTER CONSOLE
Stow items in the cup holder carefully as
items may become loose during hard
braking, acceleration or crashes, including
hot drinks which may spill. Audio input and or USB port.
A
Cup holders.
B
Coin storage.
C
Auxiliary power point (if
equipped).
D
USB charger (if equipped).
E
OVERHEAD CONSOLE (IF
EQUIPPED) Press near the rear edge of the door to
open it.
137
Ranger (TFG) Canada/United States of America, Vehicles Built From: 18-11-2019, LB3J 19A321 AB enUSA, Edition date: 202002, Second-Printing Storage CompartmentsE223956 E277291 E277082
Page 149 of 478
Automatic Engine Restart
Any of the following conditions will result
in an automatic restart of the engine:
•
Your foot is removed from the brake
pedal.
• You press the accelerator pedal.
• You press the accelerator and the
brake pedal at the same time.
• The driver safety belt becomes
unfastened or the driver door is ajar.
• The transmission is moved into reverse
(R).
• Your vehicle is moving.
• The battery is not within optimal
operating conditions.
• The maximum engine off time is
exceeded.
• When you press the Auto-Start-Stop
button while the engine is stopped
automatically.
• The heated windshield is turned on.
Any of the following conditions may result
in an automatic restart of the engine:
• The blower fan speed is increased or
the climate control temperature is
changed.
• An electrical accessory is turned on or
plugged in.
Disabling Auto-Start-Stop Press the Auto-Start-Stop
button located on the center
console to switch the system off.
The button will illuminate. The system will
only be deactivated for the current ignition
cycle. Press the button again to restore
Auto-Start-Stop function. If your vehicle is in an Auto-Start-Stop
state and you shift the transmission to
reverse without pressing the brake, a
message telling you to press the brake
appears. You must press the brake pedal
within 60 seconds, or you will need to shift
to park and manually restart your vehicle.
Note:
If the Shift to P, Restart Engine
message appears and the amber
Auto-Start-Stop indicator light is flashing,
automatic restart is not available. The
vehicle must be restarted manually. See
Information Displays (page 96).
146
Ranger (TFG) Canada/United States of America, Vehicles Built From: 18-11-2019, LB3J 19A321 AB enUSA, Edition date: 202002, Second-Printing Unique Driving Characteristics
Page 162 of 478
Sport Mode (S)
Switch on sport mode by shifting the
transmission selector lever to sport (S). In
sport mode the transmission selects the
optimum gear for best performance. This
gear selection is typically lower than that
of drive (D) and the shifts are faster.
Tow Mode
To switch on tow mode, press
the button on the center console
until tow mode is active. The
indicator light illuminates in the instrument
cluster when the system becomes active.
The tow mode feature:
• Moves upshifts to higher engine speeds
to reduce the frequency of
transmission shifting.
• Provides engine braking in all forward
gears, which slows your vehicle and
assists you in controlling your vehicle
when descending a slope.
• Depending on driving conditions and
load conditions, may downshift the
transmission, slow your vehicle and
control your vehicle speed when
descending a hill, without pressing the
accelerator pedal. The amount of
downshift braking provided varies
based upon the amount you press the
brake pedal.
The tow mode feature improves
transmission operation when towing a
trailer or a heavy load. All transmission
gear ranges are available when using tow
mode.
To switch off the tow mode feature and
return to normal driving mode, press the
button on the center console twice. The
indicator light turns off when the system
turns off. Tow mode also turns off when
you power down your vehicle. SelectShift™ Automatic
Transmission
This feature gives you the ability to change
gears up or down as desired.
As long as the engine speed does not
exceed the maximum allowable limit,
downshifts are allowed. SelectShift
automatically downshifts at low engine
speeds in order to prevent engine stalls.
Note:
Engine damage may occur if you
maintain excessive engine revving without
shifting.
SelectShift does not automatically upshift,
even if the engine is approaching the RPM
limit.
For 10 speed transmissions - with the
transmission selector lever in sport (S)
position:
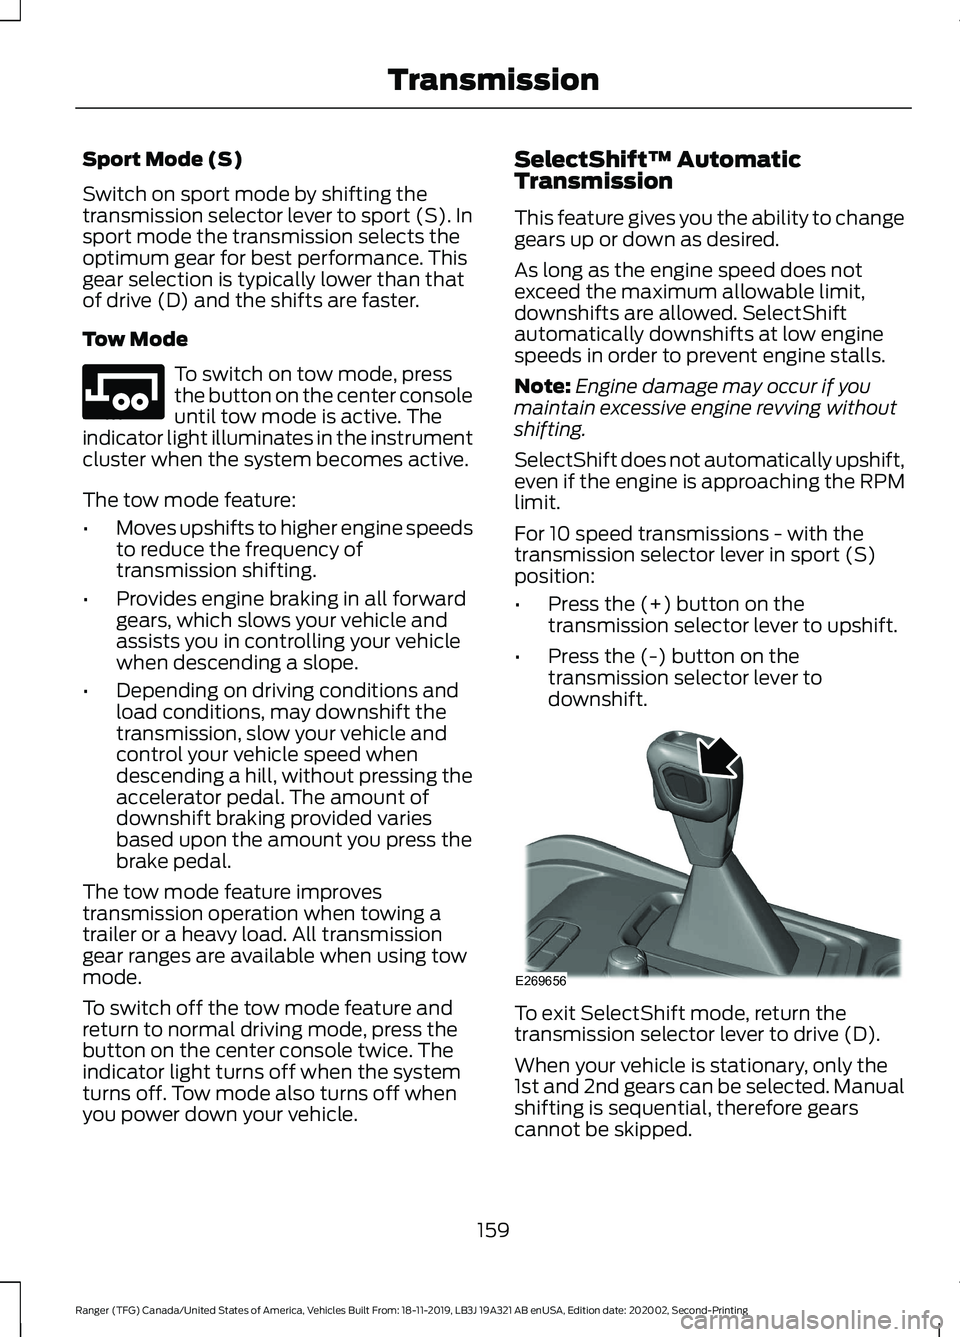
• Press the (+) button on the
transmission selector lever to upshift.
• Press the (-) button on the
transmission selector lever to
downshift. To exit SelectShift mode, return the
transmission selector lever to drive (D).
When your vehicle is stationary, only the
1st and 2nd gears can be selected. Manual
shifting is sequential, therefore gears
cannot be skipped.
159
Ranger (TFG) Canada/United States of America, Vehicles Built From: 18-11-2019, LB3J 19A321 AB enUSA, Edition date: 202002, Second-Printing TransmissionE246592 E269656
Page 165 of 478
PRINCIPLE OF OPERATION
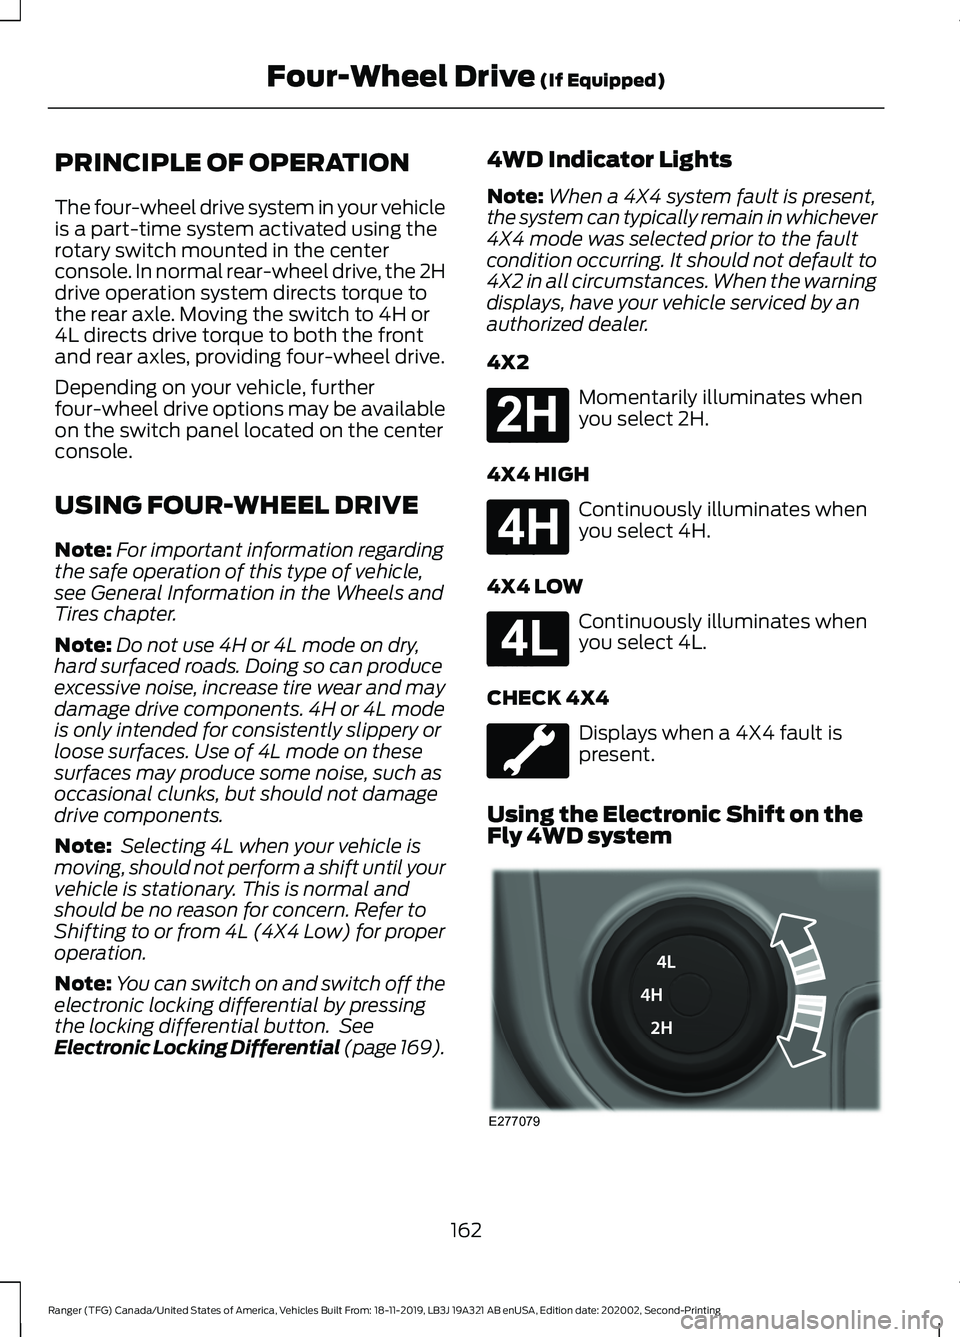
The four-wheel drive system in your vehicle
is a part-time system activated using the
rotary switch mounted in the center
console. In normal rear-wheel drive, the 2H
drive operation system directs torque to
the rear axle. Moving the switch to 4H or
4L directs drive torque to both the front
and rear axles, providing four-wheel drive.
Depending on your vehicle, further
four-wheel drive options may be available
on the switch panel located on the center
console.
USING FOUR-WHEEL DRIVE
Note:
For important information regarding
the safe operation of this type of vehicle,
see General Information in the Wheels and
Tires chapter.
Note: Do not use 4H or 4L mode on dry,
hard surfaced roads. Doing so can produce
excessive noise, increase tire wear and may
damage drive components. 4H or 4L mode
is only intended for consistently slippery or
loose surfaces. Use of 4L mode on these
surfaces may produce some noise, such as
occasional clunks, but should not damage
drive components.
Note: Selecting 4L when your vehicle is
moving, should not perform a shift until your
vehicle is stationary. This is normal and
should be no reason for concern. Refer to
Shifting to or from 4L (4X4 Low) for proper
operation.
Note: You can switch on and switch off the
electronic locking differential by pressing
the locking differential button. See
Electronic Locking Differential (page 169). 4WD Indicator Lights
Note:
When a 4X4 system fault is present,
the system can typically remain in whichever
4X4 mode was selected prior to the fault
condition occurring. It should not default to
4X2 in all circumstances. When the warning
displays, have your vehicle serviced by an
authorized dealer.
4X2 Momentarily illuminates when
you select 2H.
4X4 HIGH Continuously illuminates when
you select 4H.
4X4 LOW Continuously illuminates when
you select 4L.
CHECK 4X4 Displays when a 4X4 fault is
present.
Using the Electronic Shift on the
Fly 4WD system 162
Ranger (TFG) Canada/United States of America, Vehicles Built From: 18-11-2019, LB3J 19A321 AB enUSA, Edition date: 202002, Second-Printing Four-Wheel Drive (If Equipped)E181778 E181779 E181780 E277079
Page 172 of 478
ELECTRONIC LOCKING
DIFFERENTIAL (IF EQUIPPED)
Note: Do not operate the system on dry
hard surface roads. Doing so could lead to
excessive tire noise and wear. Use the
system only on consistently slippery or loose
surfaces.
The system locks the left and right portions
of the rear axle together to form a solid
driving axle, resulting in increased rear
wheel traction in certain conditions.
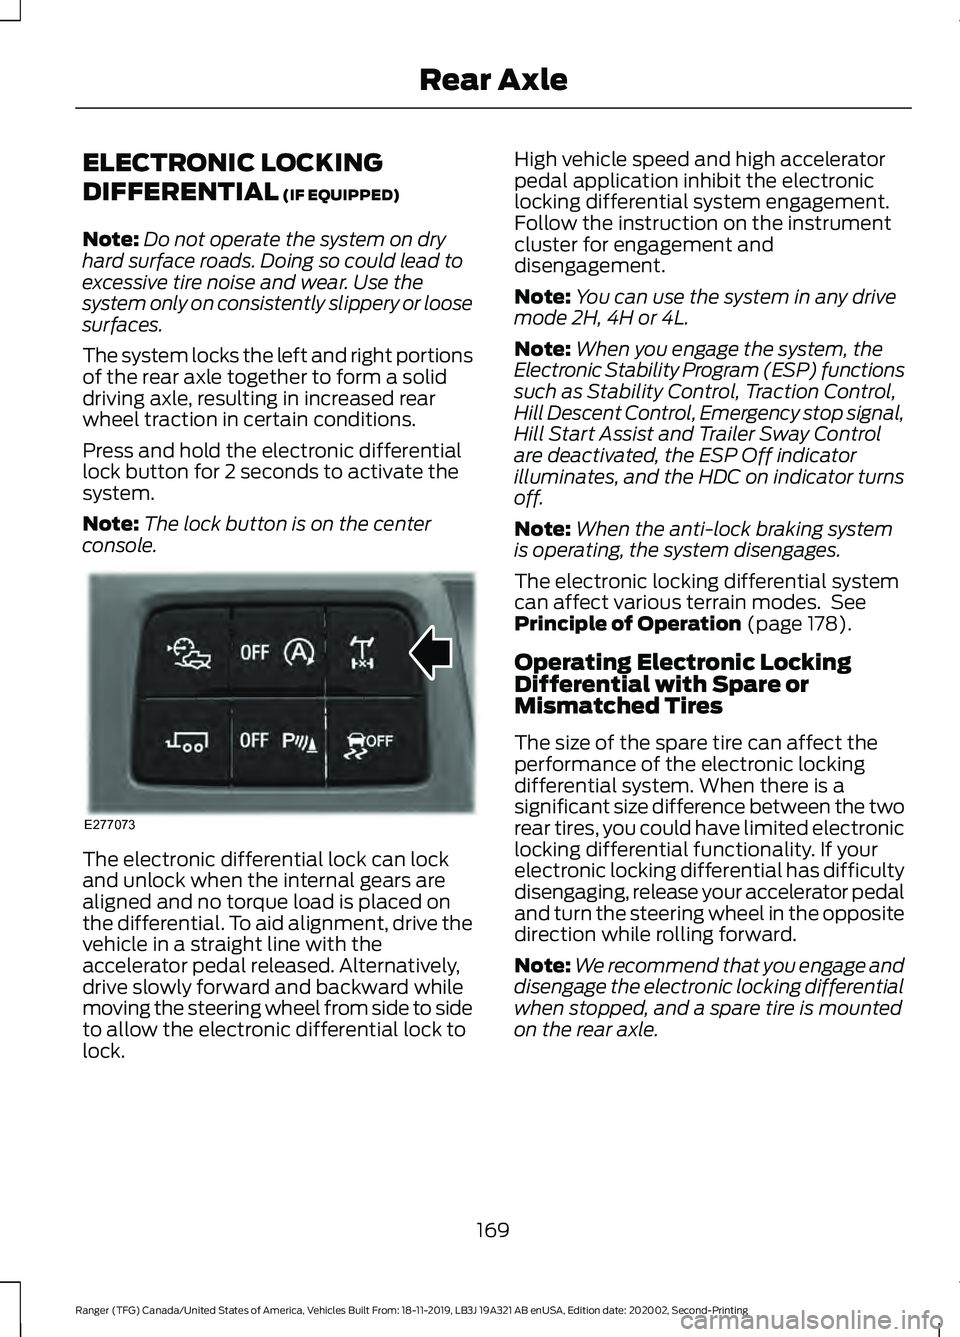
Press and hold the electronic differential
lock button for 2 seconds to activate the
system.
Note: The lock button is on the center
console. The electronic differential lock can lock
and unlock when the internal gears are
aligned and no torque load is placed on
the differential. To aid alignment, drive the
vehicle in a straight line with the
accelerator pedal released. Alternatively,
drive slowly forward and backward while
moving the steering wheel from side to side
to allow the electronic differential lock to
lock. High vehicle speed and high accelerator
pedal application inhibit the electronic
locking differential system engagement.
Follow the instruction on the instrument
cluster for engagement and
disengagement.
Note:
You can use the system in any drive
mode 2H, 4H or 4L.
Note: When you engage the system, the
Electronic Stability Program (ESP) functions
such as Stability Control, Traction Control,
Hill Descent Control, Emergency stop signal,
Hill Start Assist and Trailer Sway Control
are deactivated, the ESP Off indicator
illuminates, and the HDC on indicator turns
off.
Note: When the anti-lock braking system
is operating, the system disengages.
The electronic locking differential system
can affect various terrain modes. See
Principle of Operation
(page 178).
Operating Electronic Locking
Differential with Spare or
Mismatched Tires
The size of the spare tire can affect the
performance of the electronic locking
differential system. When there is a
significant size difference between the two
rear tires, you could have limited electronic
locking differential functionality. If your
electronic locking differential has difficulty
disengaging, release your accelerator pedal
and turn the steering wheel in the opposite
direction while rolling forward.
Note: We recommend that you engage and
disengage the electronic locking differential
when stopped, and a spare tire is mounted
on the rear axle.
169
Ranger (TFG) Canada/United States of America, Vehicles Built From: 18-11-2019, LB3J 19A321 AB enUSA, Edition date: 202002, Second-Printing Rear AxleE277073
Page 178 of 478
PRINCIPLE OF OPERATION
WARNING: Vehicle modifications
involving braking system, aftermarket
roof racks, suspension, steering system,
tire construction and wheel and tire size
may change the handling characteristics
of your vehicle and may adversely affect
the performance of the electronic
stability control system. In addition,
installing any stereo loudspeakers may
interfere with and adversely affect the
electronic stability control system. Install
any aftermarket stereo loudspeaker as
far as possible from the front center
console, the tunnel, and the front seats
in order to minimize the risk of interfering
with the electronic stability control
sensors. Reducing the effectiveness of
the electronic stability control system
could lead to an increased risk of loss of
vehicle control, vehicle rollover, personal
injury and death. WARNING:
Remember that even
advanced technology cannot defy the
laws of physics. It's always possible to
lose control of a vehicle due to
inappropriate driver input for the
conditions. Aggressive driving on any
road condition can cause you to lose
control of your vehicle increasing the risk
of personal injury or property damage.
Activation of the electronic stability
control system is an indication that at
least some of the tires have exceeded
their ability to grip the road; this could
reduce the operator's ability to control
the vehicle potentially resulting in a loss
of vehicle control, vehicle rollover,
personal injury and death. If your
electronic stability control system
activates, SLOW DOWN.
The system automatically turns on each
time you switch the ignition on. If the stability control or traction control
system detects a fault, the following may
occur:
•
The stability and traction control light
illuminates steadily.
• The stability control and traction
control systems do not enhance your
vehicle's ability to maintain traction of
the wheels.
If the stability control or traction control
system activates, the following may occur:
• The stability and traction control light
flashes.
• Your vehicle slows down.
• Reduced engine power.
• A vibration in the brake pedal.
• The brake pedal is stiffer than usual.
• If the driving condition is severe and
your foot is not on the brake pedal, the
pedal may move as the system applies
higher brake force.
The stability control system has several
features built into it to help you maintain
control of your vehicle.
Electronic Stability Control
The system helps to prevent your vehicle
skidding or laterally sliding by individually
applying the brakes to one or more wheels
and, if necessary, reducing engine power.
Roll Stability Control
The system helps to prevent rollovers by
detecting your vehicle's roll motion, and
individually applying the brakes to one or
more wheels.
Traction Control
The system enhances your vehicle's ability
to maintain traction of the wheels by
detecting and controlling wheel spin. See
Using Traction Control
(page 174).
175
Ranger (TFG) Canada/United States of America, Vehicles Built From: 18-11-2019, LB3J 19A321 AB enUSA, Edition date: 202002, Second-Printing Stability Control
Page 181 of 478
PRINCIPLE OF OPERATION
Using the Terrain Management
System
The terrain management system optimizes
drivability and comfort by maximizing
traction when operating on different types
of terrain.
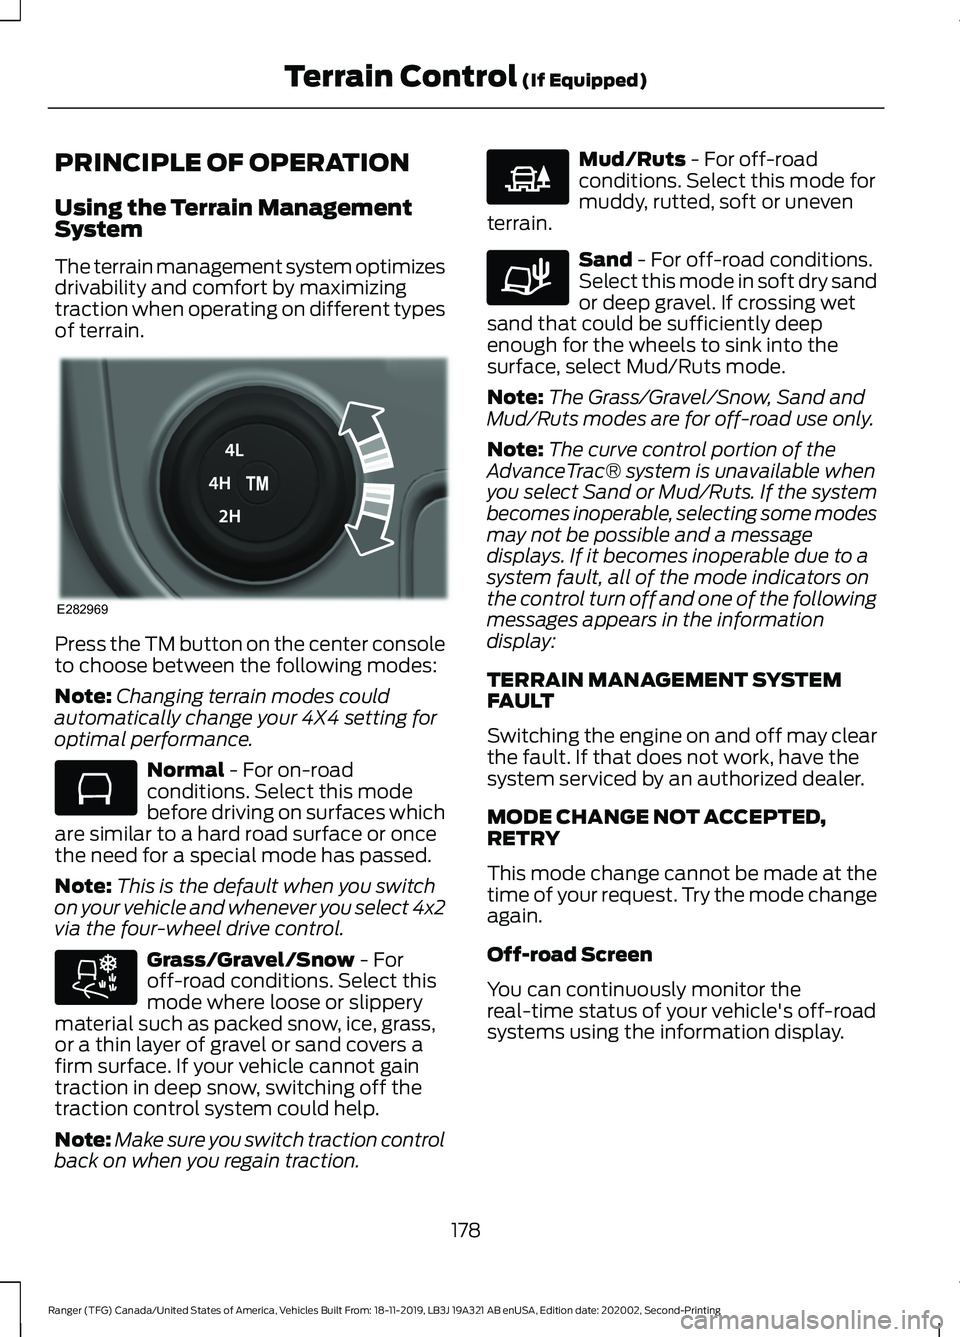
Press the TM button on the center console
to choose between the following modes:
Note:
Changing terrain modes could
automatically change your 4X4 setting for
optimal performance. Normal - For on-road
conditions. Select this mode
before driving on surfaces which
are similar to a hard road surface or once
the need for a special mode has passed.
Note: This is the default when you switch
on your vehicle and whenever you select 4x2
via the four-wheel drive control. Grass/Gravel/Snow
- For
off-road conditions. Select this
mode where loose or slippery
material such as packed snow, ice, grass,
or a thin layer of gravel or sand covers a
firm surface. If your vehicle cannot gain
traction in deep snow, switching off the
traction control system could help.
Note: Make sure you switch traction control
back on when you regain traction. Mud/Ruts
- For off-road
conditions. Select this mode for
muddy, rutted, soft or uneven
terrain. Sand
- For off-road conditions.
Select this mode in soft dry sand
or deep gravel. If crossing wet
sand that could be sufficiently deep
enough for the wheels to sink into the
surface, select Mud/Ruts mode.
Note: The Grass/Gravel/Snow, Sand and
Mud/Ruts modes are for off-road use only.
Note: The curve control portion of the
AdvanceTrac® system is unavailable when
you select Sand or Mud/Ruts. If the system
becomes inoperable, selecting some modes
may not be possible and a message
displays. If it becomes inoperable due to a
system fault, all of the mode indicators on
the control turn off and one of the following
messages appears in the information
display:
TERRAIN MANAGEMENT SYSTEM
FAULT
Switching the engine on and off may clear
the fault. If that does not work, have the
system serviced by an authorized dealer.
MODE CHANGE NOT ACCEPTED,
RETRY
This mode change cannot be made at the
time of your request. Try the mode change
again.
Off-road Screen
You can continuously monitor the
real-time status of your vehicle's off-road
systems using the information display.
178
Ranger (TFG) Canada/United States of America, Vehicles Built From: 18-11-2019, LB3J 19A321 AB enUSA, Edition date: 202002, Second-Printing Terrain Control
(If Equipped)E282969 E283048 E283044 E225313 E283037