service indicator FORD RANGER 2020 Owners Manual
[x] Cancel search | Manufacturer: FORD, Model Year: 2020, Model line: RANGER, Model: FORD RANGER 2020Pages: 478, PDF Size: 7.44 MB
Page 7 of 478
Towing
Towing a Trailer
...........................................220
Trailer Sway Control ....................................
221
Recommended Towing Weights ............
221
Essential Towing Checks ..........................
223
Towing the Vehicle on Four Wheels .....
226
Driving Hints
Breaking-In ....................................................
229
Economical Driving ....................................
229
Cold Weather Precautions ......................
230
Off-Road Driving .........................................
230
Driving Through Water ...............................
231
Floor Mats ......................................................
232
Roadside Emergencies
Roadside Assistance .................................
233
Hazard Flashers ...........................................
234
Fuel Shutoff ..................................................
234
Jump Starting the Vehicle .......................
235
Transporting the Vehicle ..........................
237
Towing Points ...............................................
238
Customer Assistance
Getting the Services You Need ..............
239
In California (U.S. Only) ...........................
240
The Better Business Bureau (BBB) Auto Line Program (U.S. Only) ......................
241
Utilizing the Mediation/Arbitration Program (Canada Only) ......................
242
Getting Assistance Outside the U.S. and Canada .......................................................
242
Ordering Additional Owner's Literature ........................................................................\
244
Reporting Safety Defects (U.S. Only) ........................................................................\
244
Reporting Safety Defects (Canada Only) ........................................................................\
244
Fuses
Fuse Box Locations ....................................
246Fuse Specification Chart
..........................
247
Changing a Fuse .........................................
259
Maintenance
General Information ...................................
261
Opening and Closing the Hood .............
262
Under Hood Overview ..............................
263
Engine Oil Dipstick .....................................
264
Engine Oil Check .........................................
264
Oil Change Indicator Reset .....................
265
Engine Coolant Check ..............................
266
Automatic Transmission Fluid Check ........................................................................\
270
Brake Fluid Check .......................................
270
Power Steering Fluid Check .....................
271
Washer Fluid Check .....................................
271
Fuel Filter .........................................................
271
Charging the 12V Battery ..........................
272
Changing the 12V Battery .........................
272
Checking the Wiper Blades .....................
274
Changing the Wiper Blades ....................
274
Adjusting the Headlamps ........................
275
Removing a Headlamp .............................
276
Changing a Bulb ..........................................
276
Changing the Engine Air Filter ...............
280
Vehicle Care
General Information ..................................
282
Cleaning Products ......................................
282
Cleaning the Exterior .................................
282
Waxing ............................................................
284
Cleaning the Engine ..................................
284
Cleaning the Windows and Wiper Blades ........................................................................\
284
Cleaning the Interior ..................................
285
Cleaning the Instrument Panel and Instrument Cluster Lens ......................
285
Cleaning Leather Seats ............................
286
Repairing Minor Paint Damage ..............
287
Cleaning the Wheels .................................
287
4
Ranger (TFG) Canada/United States of America, Vehicles Built From: 18-11-2019, LB3J 19A321 AB enUSA, Edition date: 202002, Second-Printing Table of Contents
Page 48 of 478
•
Other passengers pushing or pulling on
the seat.
• Rear passenger feet and knees resting
or pushing on the seat.
The conditions listed above may cause the
weight of a properly seated occupant to
be incorrectly interpreted by the front
passenger sensing system. The person in
the front passenger seat may appear
heavier or lighter due to the conditions
described in the previous list. Make sure the front passenger
sensing system is operating
properly. See Crash Sensors
and Airbag Indicator (page 47).
If the airbag readiness light is lit, do the
following:
The driver and adult passengers should
check for objects lodged underneath the
front passenger seat or cargo interfering
with the seat.
If objects are lodged or cargo is interfering
with the seat, take the following steps to
remove the obstruction:
• Pull your vehicle over.
• Switch your vehicle off.
• Driver or adult passengers should
check for any objects lodged
underneath the front passenger seat
or cargo interfering with the seat.
• Remove the obstruction(s) (if found).
• Restart your vehicle.
• Wait at least two minutes and verify
that the airbag readiness light in the
instrument cluster is no longer
illuminated.
• If the airbag readiness light in the
instrument cluster remains illuminated,
this may or may not be a problem due
to the front passenger sensing system. Do not attempt to repair or service the
system. Take your vehicle immediately to
an authorized dealer.
If it is necessary to modify an advanced
front airbag system to accommodate a
person with disabilities, contact your
Customer Relationship Center.
SIDE AIRBAGS
WARNING:
Do not place objects
or mount equipment on or near the
airbag cover, on the side of the front or
rear seatbacks, or in areas that may
come into contact with a deploying
airbag. Failure to follow these
instructions may increase the risk of
personal injury in the event of a crash. WARNING:
Do not use accessory
seat covers. The use of accessory seat
covers may prevent the deployment of
the side airbags and increase the risk of
injury in an accident. WARNING:
Do not lean your head
on the door. The side airbag could injure
you as it deploys from the side of the
seatback. WARNING:
Do not attempt to
service, repair, or modify the
supplementary restraint system or
associated components. Failure to
follow this instruction could result in
personal injury or death. WARNING:
If a supplementary
restraint system component has
deployed, it will not function again. Have
the system and associated components
inspected as soon as possible. Failure to
follow this instruction could result in
personal injury or death.
45
Ranger (TFG) Canada/United States of America, Vehicles Built From: 18-11-2019, LB3J 19A321 AB enUSA, Edition date: 202002, Second-Printing Supplementary Restraints SystemE67017
Page 49 of 478
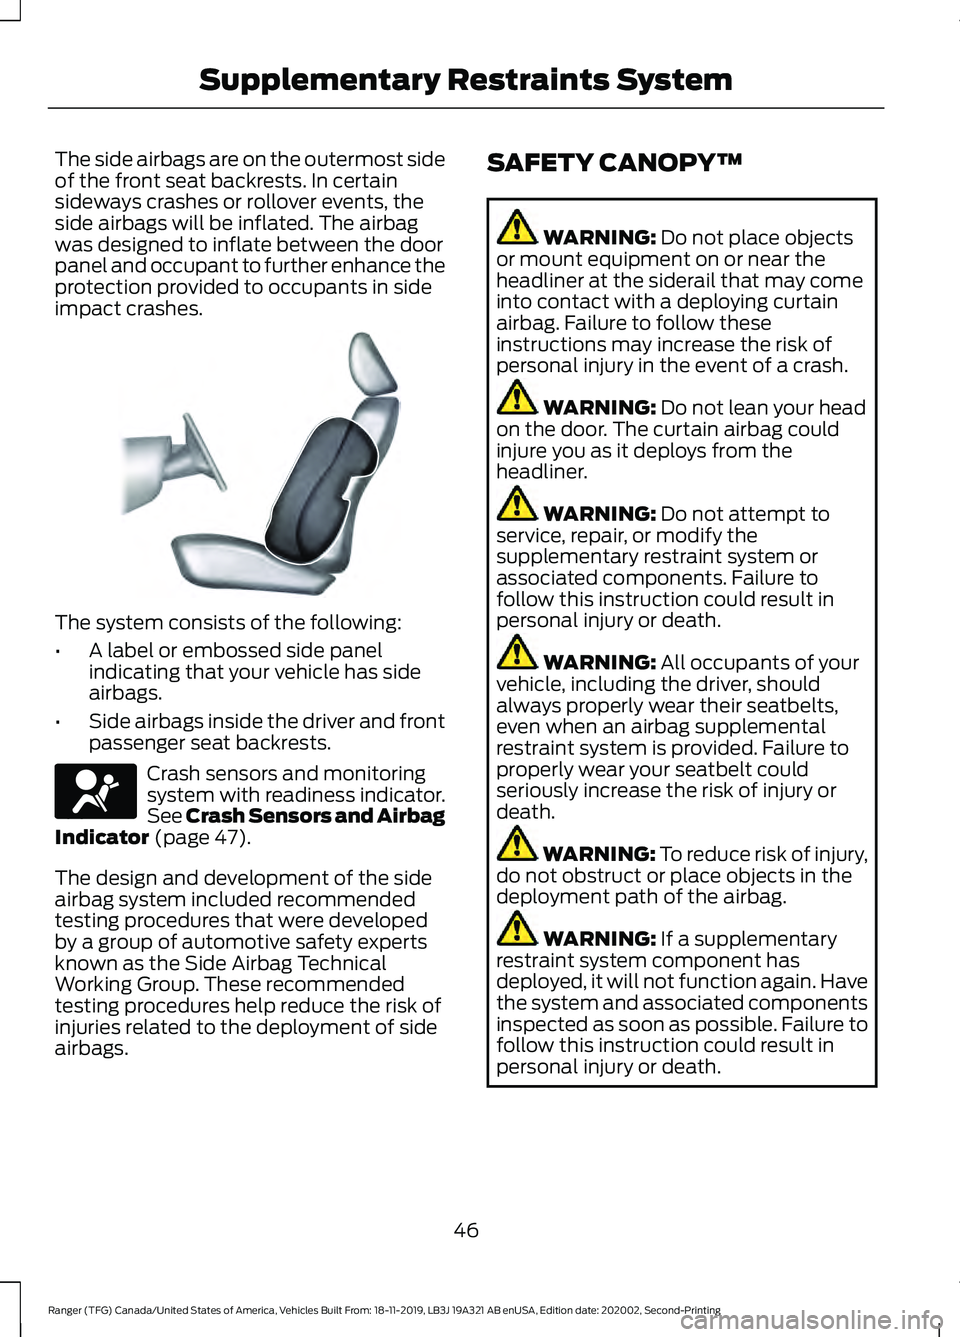
The side airbags are on the outermost side
of the front seat backrests. In certain
sideways crashes or rollover events, the
side airbags will be inflated. The airbag
was designed to inflate between the door
panel and occupant to further enhance the
protection provided to occupants in side
impact crashes.
The system consists of the following:
•
A label or embossed side panel
indicating that your vehicle has side
airbags.
• Side airbags inside the driver and front
passenger seat backrests. Crash sensors and monitoring
system with readiness indicator.
See Crash Sensors and Airbag
Indicator (page 47).
The design and development of the side
airbag system included recommended
testing procedures that were developed
by a group of automotive safety experts
known as the Side Airbag Technical
Working Group. These recommended
testing procedures help reduce the risk of
injuries related to the deployment of side
airbags. SAFETY CANOPY™ WARNING:
Do not place objects
or mount equipment on or near the
headliner at the siderail that may come
into contact with a deploying curtain
airbag. Failure to follow these
instructions may increase the risk of
personal injury in the event of a crash. WARNING:
Do not lean your head
on the door. The curtain airbag could
injure you as it deploys from the
headliner. WARNING:
Do not attempt to
service, repair, or modify the
supplementary restraint system or
associated components. Failure to
follow this instruction could result in
personal injury or death. WARNING:
All occupants of your
vehicle, including the driver, should
always properly wear their seatbelts,
even when an airbag supplemental
restraint system is provided. Failure to
properly wear your seatbelt could
seriously increase the risk of injury or
death. WARNING:
To reduce risk of injury,
do not obstruct or place objects in the
deployment path of the airbag. WARNING:
If a supplementary
restraint system component has
deployed, it will not function again. Have
the system and associated components
inspected as soon as possible. Failure to
follow this instruction could result in
personal injury or death.
46
Ranger (TFG) Canada/United States of America, Vehicles Built From: 18-11-2019, LB3J 19A321 AB enUSA, Edition date: 202002, Second-Printing Supplementary Restraints SystemE152533 E67017
Page 51 of 478
The restraints control module also
monitors the readiness of the above safety
devices plus the crash and occupant
sensors. The readiness of the safety
system is indicated by a warning indicator
light in the instrument cluster or by a
backup tone if the warning light is not
working. Routine maintenance of the
airbag is not required.
A difficulty with the system is indicated by
one or more of the following:
The readiness light will not
illuminate immediately after you
switch the ignition on.
• The readiness light either flashes or
stays lit.
• A series of five beeps is heard. The tone
pattern repeats periodically until the
problem, the light or both are repaired.
If any of these things happen, even
intermittently, have the supplemental
restraint system serviced at an authorized
dealer immediately. Unless serviced, the
system may not function properly in the
event of a crash.
The seatbelt pretensioners and the front
airbag supplemental restraint system are
designed to activate when the vehicle
sustains frontal deceleration sufficient to
cause the restraints control module to
deploy a safety device. The fact that the seatbelt pretensioners
or front airbags did not activate for all
occupants in a crash does not mean that
something is wrong with the system.
Rather, it means the restraints control
module determined the accident
conditions (crash severity, belt usage)
were not appropriate to activate these
safety devices.
•
The design of the front airbags is to
activate only in frontal and near-frontal
crashes (not rollovers, side impacts or
rear impacts) unless the crash causes
sufficient frontal deceleration.
• The design of the seatbelt
pretensioners is to activate in frontal,
near-frontal and side crashes and in
rollovers.
• The design of the side airbags is to
inflate in certain side impact crashes.
Side airbags may activate in other
types of crashes if the vehicle
experiences sufficient sideways motion
or deformation.
• The design of the Safety Canopy is to
inflate in certain side impact crashes
or rollover events. The Safety Canopy
may activate in other types of crashes
if the vehicle experiences sufficient
sideways motion or deformation, or a
certain likelihood of rollover.
AIRBAG DISPOSAL
Contact your authorized dealer as soon as
possible. Airbags must be disposed of by
qualified personnel.
48
Ranger (TFG) Canada/United States of America, Vehicles Built From: 18-11-2019, LB3J 19A321 AB enUSA, Edition date: 202002, Second-Printing Supplementary Restraints SystemE67017
Page 59 of 478
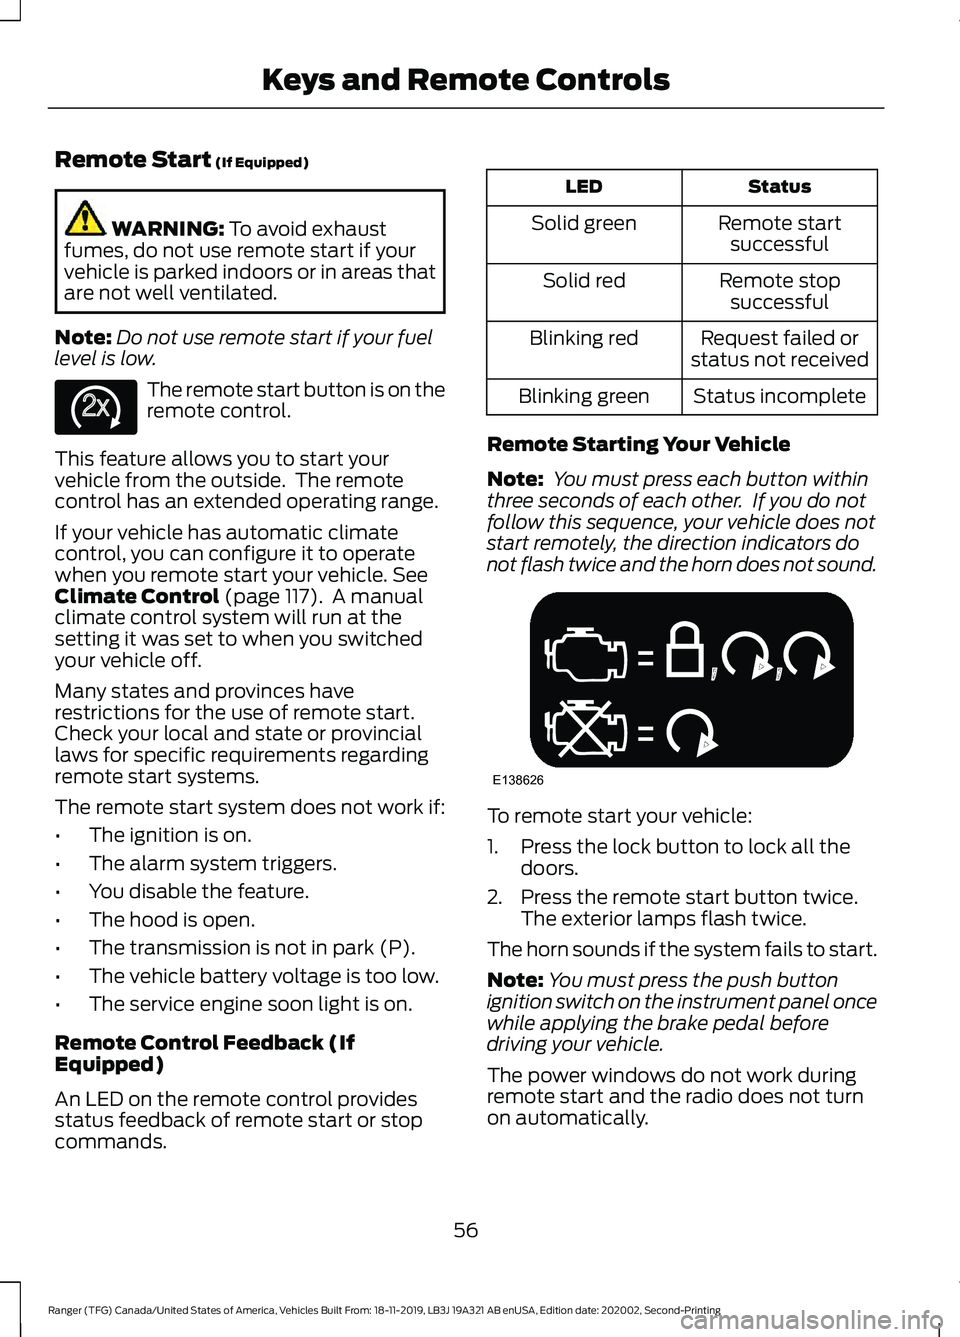
Remote Start (If Equipped)
WARNING:
To avoid exhaust
fumes, do not use remote start if your
vehicle is parked indoors or in areas that
are not well ventilated.
Note: Do not use remote start if your fuel
level is low. The remote start button is on the
remote control.
This feature allows you to start your
vehicle from the outside. The remote
control has an extended operating range.
If your vehicle has automatic climate
control, you can configure it to operate
when you remote start your vehicle.
See
Climate Control (page 117). A manual
climate control system will run at the
setting it was set to when you switched
your vehicle off.
Many states and provinces have
restrictions for the use of remote start.
Check your local and state or provincial
laws for specific requirements regarding
remote start systems.
The remote start system does not work if:
• The ignition is on.
• The alarm system triggers.
• You disable the feature.
• The hood is open.
• The transmission is not in park (P).
• The vehicle battery voltage is too low.
• The service engine soon light is on.
Remote Control Feedback (If
Equipped)
An LED on the remote control provides
status feedback of remote start or stop
commands. Status
LED
Remote startsuccessful
Solid green
Remote stopsuccessful
Solid red
Request failed or
status not received
Blinking red
Status incomplete
Blinking green
Remote Starting Your Vehicle
Note: You must press each button within
three seconds of each other. If you do not
follow this sequence, your vehicle does not
start remotely, the direction indicators do
not flash twice and the horn does not sound. To remote start your vehicle:
1. Press the lock button to lock all the
doors.
2. Press the remote start button twice. The exterior lamps flash twice.
The horn sounds if the system fails to start.
Note: You must press the push button
ignition switch on the instrument panel once
while applying the brake pedal before
driving your vehicle.
The power windows do not work during
remote start and the radio does not turn
on automatically.
56
Ranger (TFG) Canada/United States of America, Vehicles Built From: 18-11-2019, LB3J 19A321 AB enUSA, Edition date: 202002, Second-Printing Keys and Remote ControlsE138625 E138626
Page 148 of 478
AUTO-START-STOP
The system helps reduce fuel consumption
by automatically shutting off and restarting
the engine while your vehicle is stopped.
The engine will restart automatically when
you release the brake pedal. In some
situations, your vehicle may restart
automatically, for example:
•
To maintain interior comfort
• To recharge the battery
Note: Power assist steering is turned off
when the engine is off. WARNING: Apply the parking
brake, shift into park (P), switch the
ignition off and remove the key before
you leave your vehicle. Failure to follow
this instruction could result in personal
injury or death. WARNING:
Apply the parking
brake, shift into park (P), switch the
ignition off and remove the key before
you open the hood or have any service
or repair work completed. If you do not
switch the ignition off, the engine could
restart at any time. Failure to follow this
instruction could result in personal injury
or death. WARNING:
The system may
require the engine to automatically
restart when the auto-start-stop
indicator illuminates green or flashes
amber. Failure to follow this instruction
could result in personal injury.
The Auto-Start-Stop system status is
available at a glance within the information
display. See Information Displays (page
96
). Enabling Auto-Start-Stop
The system is automatically enabled every
time you start your vehicle if the following
conditions are met:
•
The Auto-Start-Stop button is not
pressed (not illuminated).
• Your vehicle exceeds an initial speed
of
3 mph (5 km/h) after you have
initially started the vehicle.
• Your vehicle is stopped.
• Your foot is on the brake pedal.
• The transmission is in drive (D).
• The driver's door is closed.
• There is adequate brake vacuum.
• The interior compartment has been
cooled or warmed to an acceptable
level.
• The front windshield defroster is off.
• The steering wheel is not turned rapidly
or is not at a sharp angle.
• The vehicle is not on a steep road
grade.
• The battery is within optimal operating
conditions (battery state of charge and
temperature in range).
• The engine coolant is at operating
temperature.
• Elevation is below approximately
12,000 ft (3,650 m)
.
• Ambient temperature is moderate. The green Auto-Start-Stop
indicator light on the instrument
cluster will illuminate to indicate
when the automatic engine stop occurs. If the instrument cluster is
equipped with a grey
Auto-Start-Stop indicator light,
it is illuminated when automatic engine
stop is not available due to one of the
above noted conditions not being met.
145
Ranger (TFG) Canada/United States of America, Vehicles Built From: 18-11-2019, LB3J 19A321 AB enUSA, Edition date: 202002, Second-Printing Unique Driving Characteristics E146361
Page 159 of 478
If you use anything other than our parts for
maintenance replacements or for service
of components affecting emission control,
such aftermarket parts should be
equivalent to our genuine parts in
performance and durability.
Illumination of the service engine soon
indicator, charging system warning light or
the temperature warning light, fluid leaks,
strange odors, smoke or loss of engine
power could indicate that the emission
control system is not working properly.
An improperly operating or damaged
exhaust system may allow exhaust to
enter the vehicle. Have a damaged or
improperly operating exhaust system
inspected and repaired immediately.
Do not make any unauthorized changes to
your vehicle or engine. By law, vehicle
owners and anyone who manufactures,
repairs, services, sells, leases, trades
vehicles, or supervises a fleet of vehicles
are not permitted to intentionally remove
an emission control device or prevent it
from working. Information about your
vehicle
’s emission system is on the Vehicle
Emission Control Information Decal
located on or near the engine. This decal
also lists engine displacement.
Please consult your warranty information
for complete details.
On-Board Diagnostics (OBD-II)
Your vehicle has a computer known as the
on-board diagnostics system (OBD-II) that
monitors the engine ’s emission control
system. The system protects the
environment by making sure that your
vehicle continues to meet government
emission standards. The OBD-II system
also assists a service technician in properly
servicing your vehicle. When the service engine soon
indicator illuminates, the OBD-II
system has detected a
malfunction. Temporary malfunctions may
cause the service engine soon indicator to
illuminate. Examples are:
1. Your vehicle has run out of fuel —the
engine may misfire or run poorly.
2. Poor fuel quality or water in the fuel —the engine may misfire or run
poorly.
3. The fuel fill inlet may not have closed properly. See Refueling (page 150).
4. Driving through deep water —the
electrical system may be wet.
You can correct these temporary
malfunctions by filling the fuel tank with
good quality fuel, properly closing the fuel
fill inlet or letting the electrical system dry
out. After three driving cycles without these
or any other temporary malfunctions
present, the service engine soon indicator
should stay off the next time you start the
engine. A driving cycle consists of a cold
engine startup followed by mixed city and
highway driving. You do not require
additional vehicle service.
If the service engine soon indicator remains
on, have your vehicle serviced at the first
available opportunity. Although some
malfunctions detected by the OBD-II may
not have symptoms that are apparent,
continued driving with the service engine
soon indicator on can result in increased
emissions, lower fuel economy, reduced
engine and transmission smoothness and
lead to more costly repairs.
156
Ranger (TFG) Canada/United States of America, Vehicles Built From: 18-11-2019, LB3J 19A321 AB enUSA, Edition date: 202002, Second-Printing Engine Emission Control
Page 160 of 478
Readiness for Inspection and
Maintenance (I/M) Testing
Some state and provincial and local
governments may have
Inspection/Maintenance (I/M) programs
to inspect the emission control equipment
on your vehicle. Failure to pass this
inspection could prevent you from getting
a vehicle registration.
If the service engine soon
indicator is on or the bulb does
not work, your vehicle may need
service. See On-Board Diagnostics.
Your vehicle may not pass the I/M test if
the service engine soon indicator is on or
not working properly, for example, the bulb
does not work, or if the OBD-II system has
determined that some of the emission
control systems have not been properly
checked. In this case, the vehicle is not
ready for I/M testing.
If you have just serviced the vehicle ’s
engine or transmission or the battery has
recently run down or you have replaced it,
the OBD-II system may indicate that the
vehicle is not ready for I/M testing. To
determine if the vehicle is ready for I/M
testing, turn the ignition key to the on
position for 15 seconds without cranking
the engine. If the service engine soon
indicator blinks eight times, it means that
the vehicle is not ready for I/M testing; if
the service engine soon indicator stays on
solid, it means that your vehicle is ready
for I/M testing.
The OBD-II system checks the emission
control system during normal driving. A
complete check may take several days.
If the vehicle is not ready for I/M testing,
you can perform the following driving cycle
consisting of mixed city and highway
driving: 1. 15 minutes of steady driving on an
expressway or highway followed by 20
minutes of stop-and-go driving with at
least four 30-second idle periods.
2. Allow your vehicle to sit for at least eight hours with the ignition off. Then,
start the vehicle and complete the
above driving cycle. The vehicle must
warm up to its normal operating
temperature. Once started, do not turn
off the vehicle until the above driving
cycle is complete.
If the vehicle is still not ready for I/M
testing, you need to repeat the above
driving cycle.
157
Ranger (TFG) Canada/United States of America, Vehicles Built From: 18-11-2019, LB3J 19A321 AB enUSA, Edition date: 202002, Second-Printing Engine Emission Control
Page 165 of 478
PRINCIPLE OF OPERATION
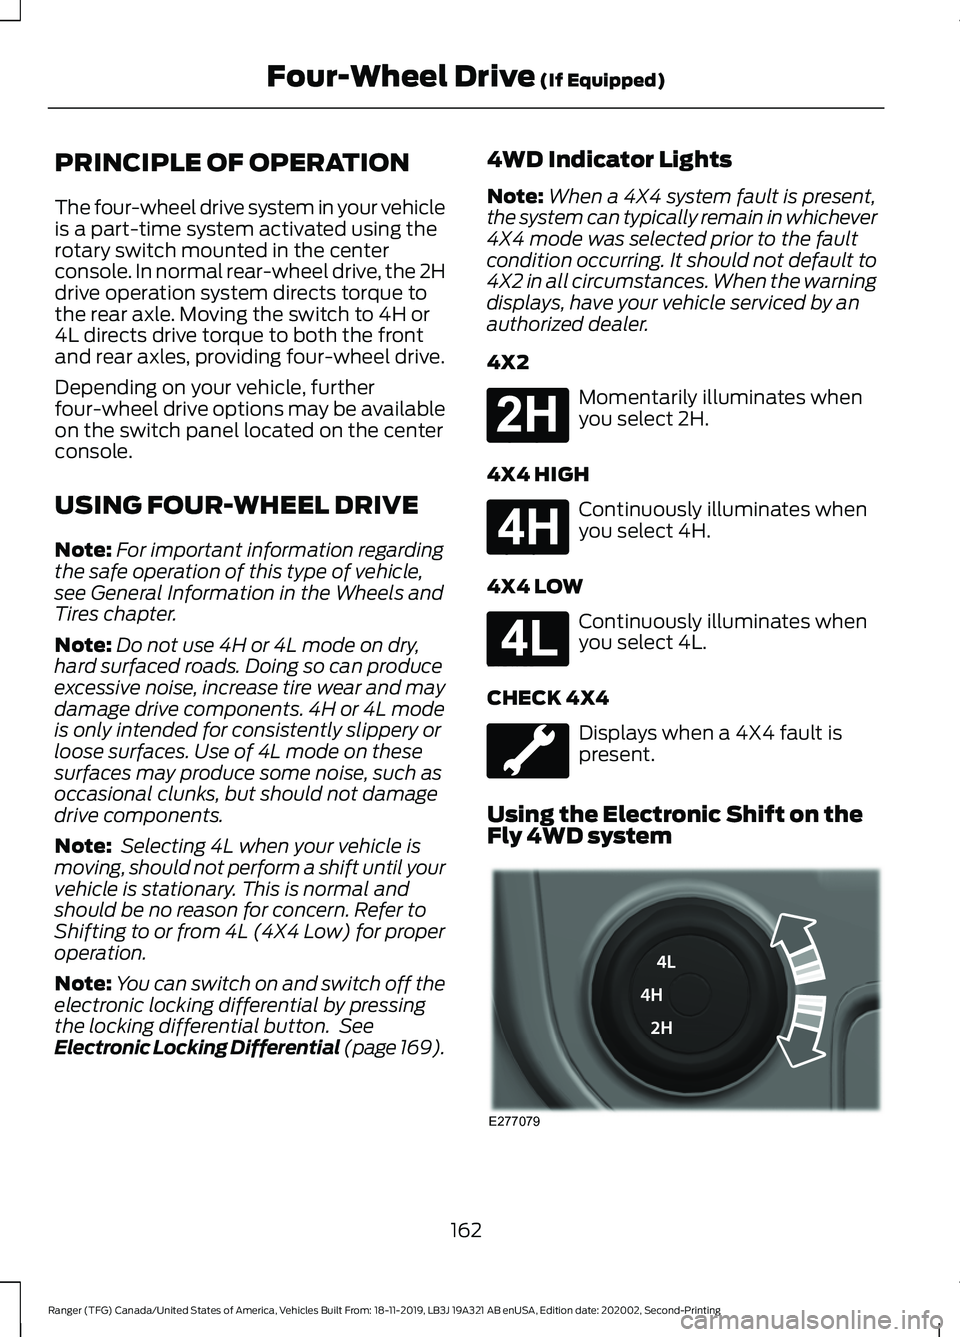
The four-wheel drive system in your vehicle
is a part-time system activated using the
rotary switch mounted in the center
console. In normal rear-wheel drive, the 2H
drive operation system directs torque to
the rear axle. Moving the switch to 4H or
4L directs drive torque to both the front
and rear axles, providing four-wheel drive.
Depending on your vehicle, further
four-wheel drive options may be available
on the switch panel located on the center
console.
USING FOUR-WHEEL DRIVE
Note:
For important information regarding
the safe operation of this type of vehicle,
see General Information in the Wheels and
Tires chapter.
Note: Do not use 4H or 4L mode on dry,
hard surfaced roads. Doing so can produce
excessive noise, increase tire wear and may
damage drive components. 4H or 4L mode
is only intended for consistently slippery or
loose surfaces. Use of 4L mode on these
surfaces may produce some noise, such as
occasional clunks, but should not damage
drive components.
Note: Selecting 4L when your vehicle is
moving, should not perform a shift until your
vehicle is stationary. This is normal and
should be no reason for concern. Refer to
Shifting to or from 4L (4X4 Low) for proper
operation.
Note: You can switch on and switch off the
electronic locking differential by pressing
the locking differential button. See
Electronic Locking Differential (page 169). 4WD Indicator Lights
Note:
When a 4X4 system fault is present,
the system can typically remain in whichever
4X4 mode was selected prior to the fault
condition occurring. It should not default to
4X2 in all circumstances. When the warning
displays, have your vehicle serviced by an
authorized dealer.
4X2 Momentarily illuminates when
you select 2H.
4X4 HIGH Continuously illuminates when
you select 4H.
4X4 LOW Continuously illuminates when
you select 4L.
CHECK 4X4 Displays when a 4X4 fault is
present.
Using the Electronic Shift on the
Fly 4WD system 162
Ranger (TFG) Canada/United States of America, Vehicles Built From: 18-11-2019, LB3J 19A321 AB enUSA, Edition date: 202002, Second-Printing Four-Wheel Drive (If Equipped)E181778 E181779 E181780 E277079
Page 177 of 478
PRINCIPLE OF OPERATION
The traction control system helps avoid
drive wheel spin and loss of traction.
If your vehicle begins to slide, the system
applies the brakes to individual wheels
and, when needed, reduces engine power
at the same time. If the wheels spin when
accelerating on slippery or loose surfaces,
the system reduces engine power in order
to increase traction.
USING TRACTION CONTROL
WARNING: The stability and
traction control light illuminates steadily
if the system detects a failure. Make sure
you did not manually disable the traction
control system using the information
display controls or the switch. If the
stability control and traction control light
is still illuminating steadily, have the
system serviced by an authorized dealer
immediately. Operating your vehicle with
the traction control disabled could lead
to an increased risk of loss of vehicle
control, vehicle rollover, personal injury
and death.
The system automatically turns on each
time you switch the ignition on.
If your vehicle is stuck in mud or snow,
switching traction control off may be
beneficial as this allows the wheels to spin.
Note: When you switch traction control off,
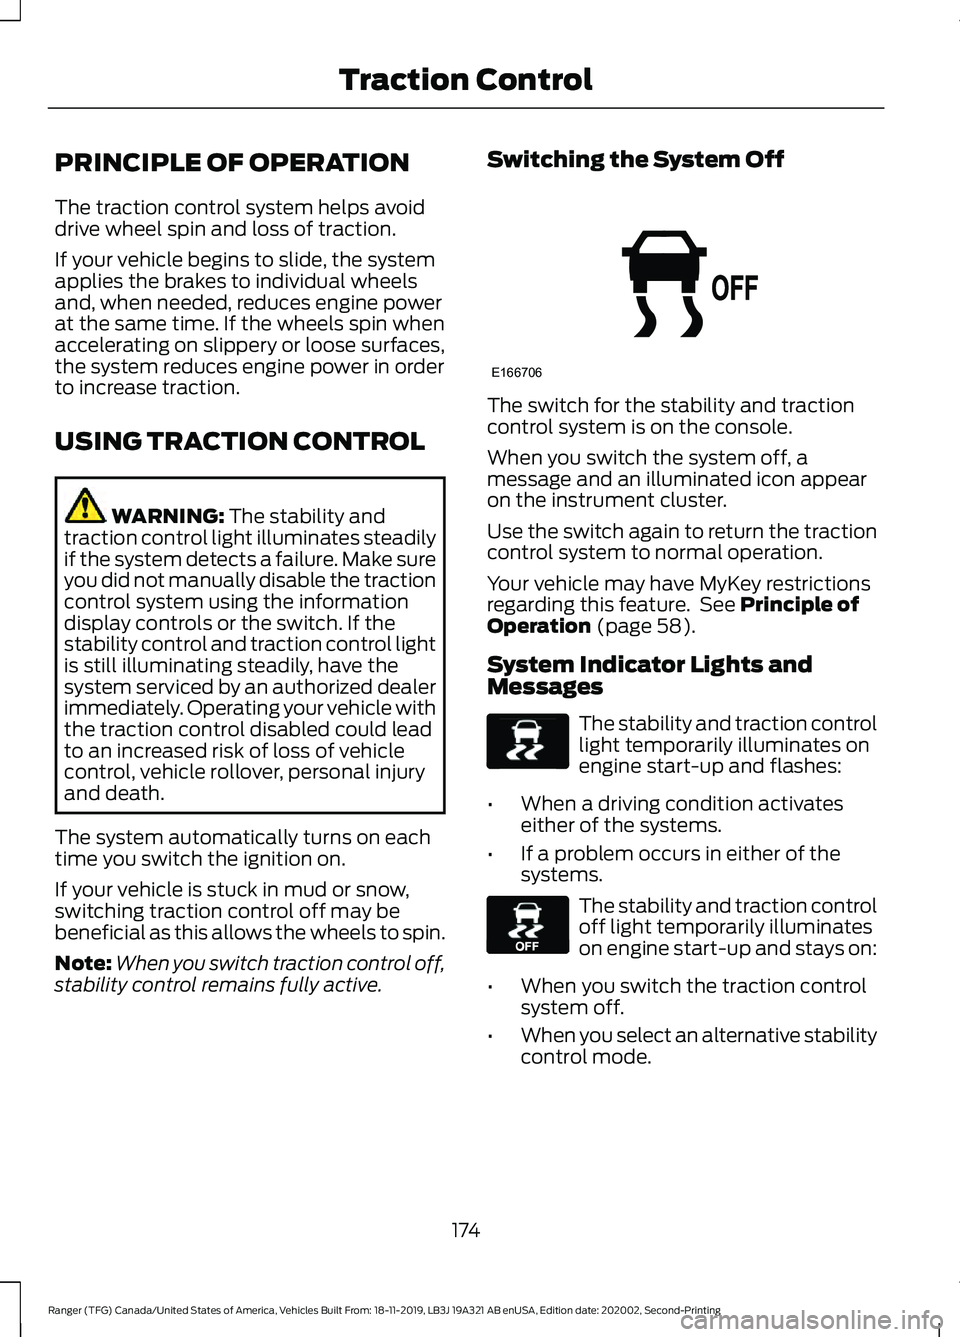
stability control remains fully active. Switching the System Off The switch for the stability and traction
control system is on the console.
When you switch the system off, a
message and an illuminated icon appear
on the instrument cluster.
Use the switch again to return the traction
control system to normal operation.
Your vehicle may have MyKey restrictions
regarding this feature. See
Principle of
Operation (page 58).
System Indicator Lights and
Messages The stability and traction control
light temporarily illuminates on
engine start-up and flashes:
• When a driving condition activates
either of the systems.
• If a problem occurs in either of the
systems. The stability and traction control
off light temporarily illuminates
on engine start-up and stays on:
• When you switch the traction control
system off.
• When you select an alternative stability
control mode.
174
Ranger (TFG) Canada/United States of America, Vehicles Built From: 18-11-2019, LB3J 19A321 AB enUSA, Edition date: 202002, Second-Printing Traction ControlE166706 E138639 E130458