gearbox FORD SIERRA 1991 2.G Introduction Workshop Manual
[x] Cancel search | Manufacturer: FORD, Model Year: 1991, Model line: SIERRA, Model: FORD SIERRA 1991 2.GPages: 18, PDF Size: 0.5 MB
Page 3 of 18

REPAIRS AND OVERHAUL
Engine and Associated Systems
SOHC enginesPage2A•1
DOHC enginesPage2B•1
CVH enginesPage2C•1
Cooling, heating and air conditioning systemsPage3•1
Fuel/exhaust systems - carburettor modelsPage4A•1
Fuel/exhaust systems - fuel injection modelsPage4B•1
Engine electrical systemsPage5•1
TRANSMISSION
ClutchPage6•1
Manual gearboxPage7A•1
Automatic transmissionPage7B•1
Propellor shaftPage8•1
Final drive and driveshaftsPage9•1
BRAKES AND SUSPENSION
Braking systemPage10•1
Suspension and steeringPage11•1
BODY EQUIPMENT
Bodywork, trim and fittingsPage12•1
Body electrical systemsPage13•1
Wiring DiagramsPage13•22
Reference
General dimensions and weightsPageREF•1
Buying spare parts and vehicle identificationPageREF•3
General repair proceduresPageREF•4
Tools and working facilitiesPageREF•5
MOT test checks PageREF•7
Fault findingPageREF•11
Glossary of technical termsPageREF•18
IndexPageREF•23
Contents
Page 6 of 18

0•6
The jack supplied with the vehicle tool kit
should only be used for changing roadwheels.
When carrying out any other kind of work,
raise the vehicle using a trolley jack, and
always supplement the jack with axle stands
positioned under the vehicle jacking points.
To change a roadwheel, first remove the
spare wheel and jack from their stowage
positions. On Saloon, Hatchback and Estate
models, the jack and spare wheel are located
in the luggage compartment. On P100
models, the jack is located behind the
passenger seat, and the spare wheel is
located under the rear of the cargo area.
Firmly apply the handbrake and engage first
gear on manual gearbox models or “P” onautomatic transmission models. Place chocks
at the front and rear of the wheel diagonally
opposite the one to be changed.
Where applicable, remove the wheel trim
and slacken the wheel nuts using the wheel
brace provided in the vehicle tool kit. Position
the jack head under the jacking point nearest
to the wheel to be changed. Raise the jack
until the wheel is clear of the ground, then
remove the wheel nuts and the wheel. Fit the
spare wheel and secure it with the wheel nuts.
Lower the jack until the wheel is just touching
the ground, and tighten the wheel nuts
moderately tight. Now lower the jack fully and
tighten the wheel nuts securely in a diagonal
sequence. Where applicable, refit the wheeltrim , then withdraw the jack and stow the
wheel and jack in thier respective locations.
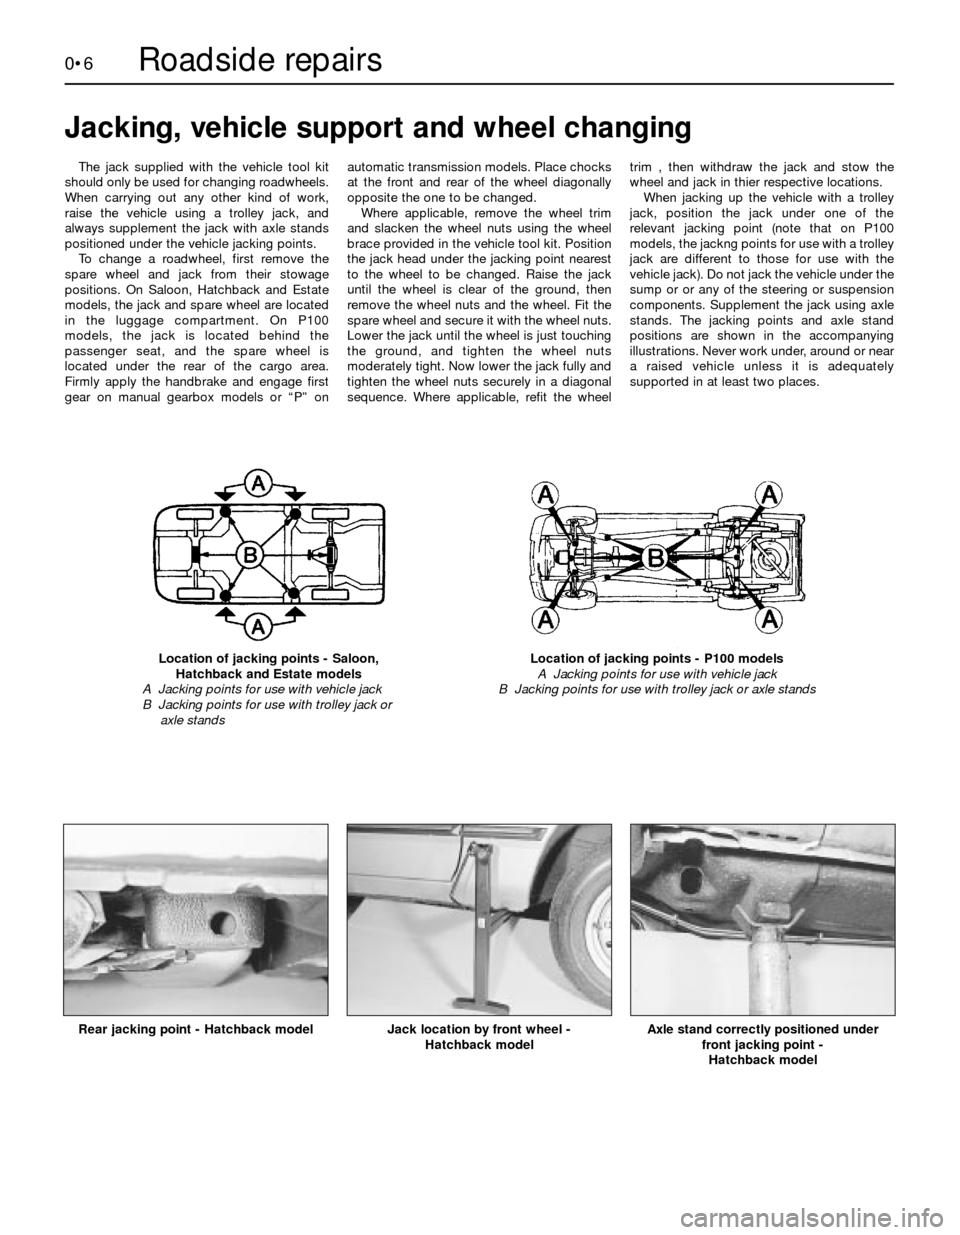
When jacking up the vehicle with a trolley
jack, position the jack under one of the
relevant jacking point (note that on P100
models, the jackng points for use with a trolley
jack are different to those for use with the
vehicle jack). Do not jack the vehicle under the
sump or or any of the steering or suspension
components. Supplement the jack using axle
stands. The jacking points and axle stand
positions are shown in the accompanying
illustrations. Never work under, around or near
a raised vehicle unless it is adequately
supported in at least two places.
Jacking, vehicle support and wheel changing
Location of jacking points - Saloon,
Hatchback and Estate models
A Jacking points for use with vehicle jack
B Jacking points for use with trolley jack or
axle standsLocation of jacking points - P100 models
A Jacking points for use with vehicle jack
B Jacking points for use with trolley jack or axle stands
Rear jacking point - Hatchback model
Jack location by front wheel -
Hatchback modelAxle stand correctly positioned under
front jacking point -
Hatchback model
Roadside repairs
Page 8 of 18

0•8Roadside repairs
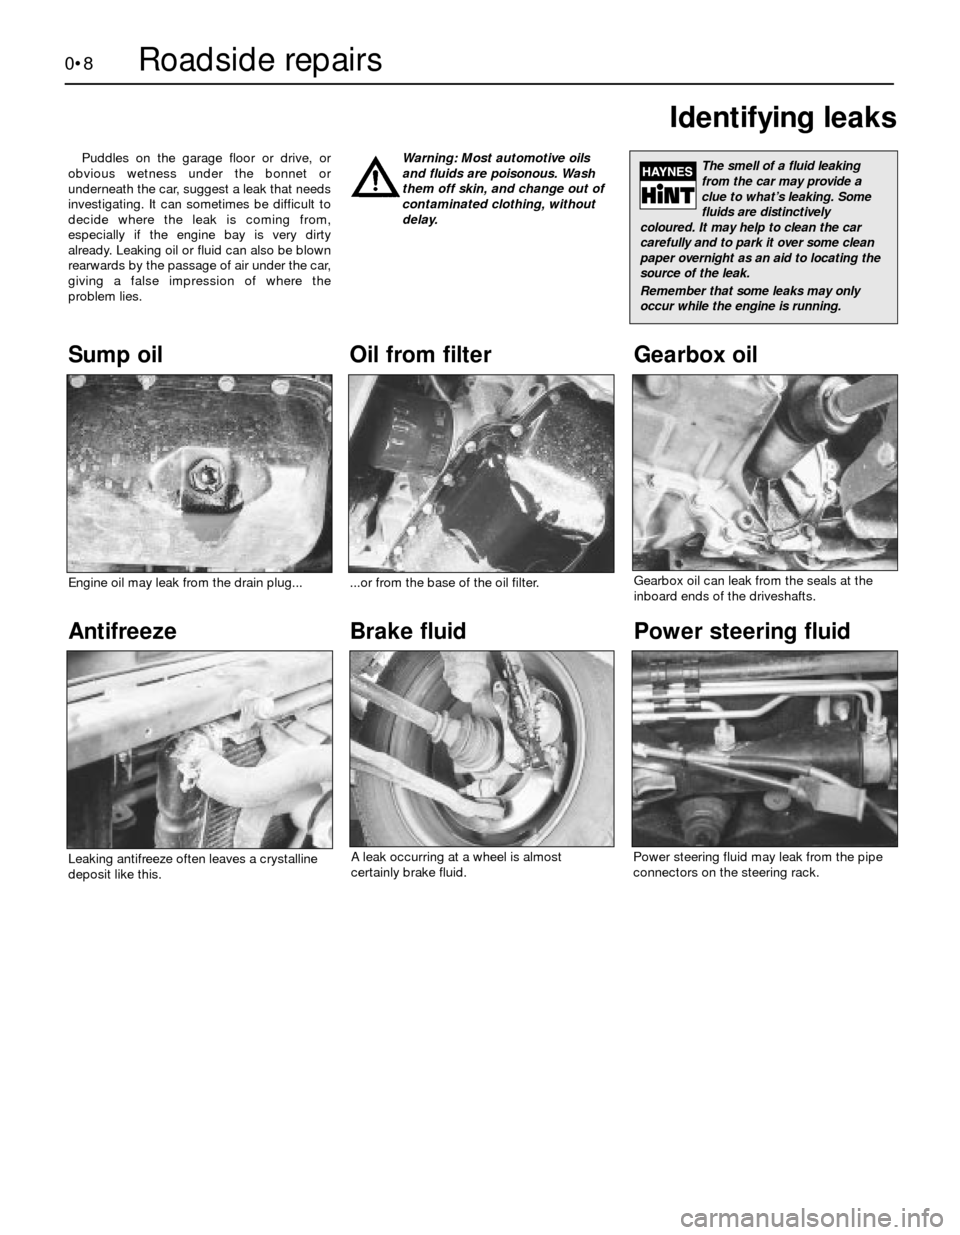
Puddles on the garage floor or drive, or
obvious wetness under the bonnet or
underneath the car, suggest a leak that needs
investigating. It can sometimes be difficult to
decide where the leak is coming from,
especially if the engine bay is very dirty
already. Leaking oil or fluid can also be blown
rearwards by the passage of air under the car,
giving a false impression of where the
problem lies.Warning: Most automotive oils
and fluids are poisonous. Wash
them off skin, and change out of
contaminated clothing, without
delay.
Identifying leaks
The smell of a fluid leaking
from the car may provide a
clue to what’s leaking. Some
fluids are distinctively
coloured. It may help to clean the car
carefully and to park it over some clean
paper overnight as an aid to locating the
source of the leak.
Remember that some leaks may only
occur while the engine is running.
Sump oilGearbox oil
Brake fluidPower steering fluidOil from filter
Antifreeze
Engine oil may leak from the drain plug......or from the base of the oil filter.
Leaking antifreeze often leaves a crystalline
deposit like this.Gearbox oil can leak from the seals at the
inboard ends of the driveshafts.
A leak occurring at a wheel is almost
certainly brake fluid.Power steering fluid may leak from the pipe
connectors on the steering rack.
Page 17 of 18

0•17Weekly checks
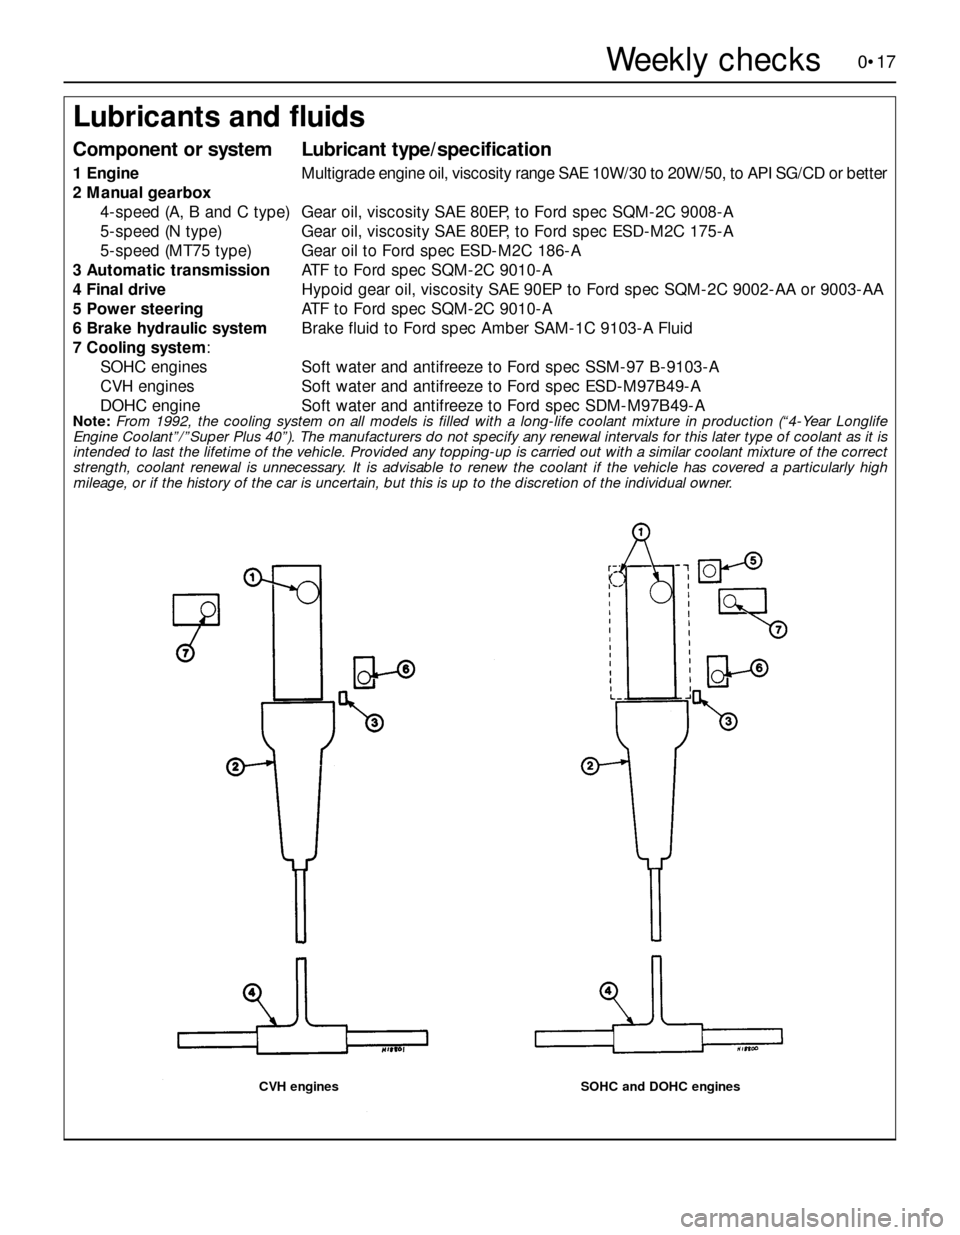
Lubricants and fluids
Component or systemLubricant type/specification
1EngineMultigrade engine oil, viscosity range SAE 10W/30 to 20W/50, to API SG/CD or better
2Manual gearbox
4-speed (A, B and C type)Gear oil, viscosity SAE 80EP, to Ford spec SQM-2C 9008-A
5-speed (N type)Gear oil, viscosity SAE 80EP, to Ford spec ESD-M2C 175-A
5-speed (MT75 type)Gear oil to Ford spec ESD-M2C 186-A
3Automatic transmissionATF to Ford spec SQM-2C 9010-A
4Final driveHypoid gear oil, viscosity SAE 90EP to Ford spec SQM-2C 9002-AA or 9003-AA
5Power steeringATF to Ford spec SQM-2C 9010-A
6Brake hydraulic systemBrake fluid to Ford spec Amber SAM-1C 9103-A Fluid
7Cooling system:
SOHC enginesSoft water and antifreeze to Ford spec SSM-97 B-9103-A
CVH enginesSoft water and antifreeze to Ford spec ESD-M97B49-A
DOHC engineSoft water and antifreeze to Ford spec SDM-M97B49-A
Note:From 1992, the cooling system on all models is filled with a long-life coolant mixture in production (“4-Year Longlife
Engine Coolant”/”Super Plus 40”). The manufacturers do not specify any renewal intervals for this later type of coolant as it is
intended to last the lifetime of the vehicle. Provided any topping-up is carried out with a similar coolant mixture of the correct
strength, coolant renewal is unnecessary. It is advisable to renew the coolant if the vehicle has covered a particularly high
mileage, or if the history of the car is uncertain, but this is up to the discretion of the individual owner.
CVH enginesSOHC and DOHC engines