jacking FORD SIERRA 1992 2.G Braking System User Guide
[x] Cancel search | Manufacturer: FORD, Model Year: 1992, Model line: SIERRA, Model: FORD SIERRA 1992 2.GPages: 22, PDF Size: 1.11 MB
Page 19 of 22

Removal
1Chock the front wheels, jack up the rear of
the vehicle and support on axle stands (see
“Jacking and Vehicle Support”).
2The load apportioning valve is located on
the right-hand side of the vehicle underbody
above the axle.
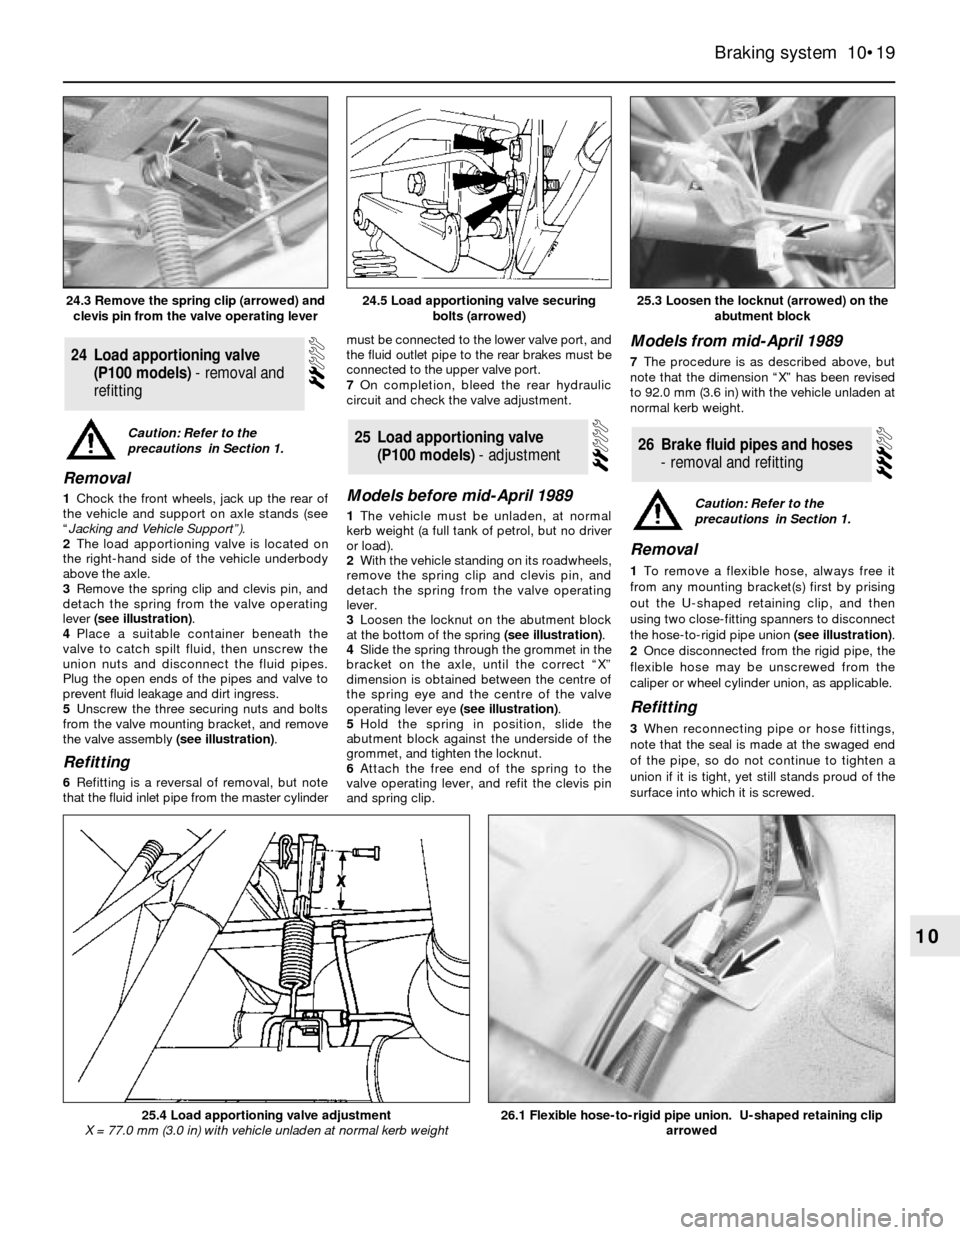
3Remove the spring clip and clevis pin, and
detach the spring from the valve operating
lever (see illustration).
4Place a suitable container beneath the
valve to catch spilt fluid, then unscrew the
union nuts and disconnect the fluid pipes.
Plug the open ends of the pipes and valve to
prevent fluid leakage and dirt ingress.
5Unscrew the three securing nuts and bolts
from the valve mounting bracket, and remove
the valve assembly (see illustration).
Refitting
6Refitting is a reversal of removal, but note
that the fluid inlet pipe from the master cylindermust be connected to the lower valve port, and
the fluid outlet pipe to the rear brakes must be
connected to the upper valve port.
7On completion, bleed the rear hydraulic
circuit and check the valve adjustment.
Models before mid-April 1989
1The vehicle must be unladen, at normal
kerb weight (a full tank of petrol, but no driver
or load).
2With the vehicle standing on its roadwheels,
remove the spring clip and clevis pin, and
detach the spring from the valve operating
lever.
3Loosen the locknut on the abutment block
at the bottom of the spring (see illustration).
4Slide the spring through the grommet in the
bracket on the axle, until the correct “X”
dimension is obtained between the centre of
the spring eye and the centre of the valve
operating lever eye (see illustration).
5Hold the spring in position, slide the
abutment block against the underside of the
grommet, and tighten the locknut.
6Attach the free end of the spring to the
valve operating lever, and refit the clevis pin
and spring clip.
Models from mid-April 1989
7The procedure is as described above, but
note that the dimension “X” has been revised
to 92.0 mm (3.6 in) with the vehicle unladen at
normal kerb weight.
Removal
1To remove a flexible hose, always free it
from any mounting bracket(s) first by prising
out the U-shaped retaining clip, and then
using two close-fitting spanners to disconnect
the hose-to-rigid pipe union (see illustration).
2Once disconnected from the rigid pipe, the
flexible hose may be unscrewed from the
caliper or wheel cylinder union, as applicable.
Refitting
3When reconnecting pipe or hose fittings,
note that the seal is made at the swaged end
of the pipe, so do not continue to tighten a
union if it is tight, yet still stands proud of the
surface into which it is screwed.
26Brake fluid pipes and hoses
- removal and refitting25Load apportioning valve
(P100 models) - adjustment
24Load apportioning valve
(P100 models) - removal and
refitting
Braking system 10•19
10
25.3 Loosen the locknut (arrowed) on the
abutment block
26.1 Flexible hose-to-rigid pipe union. U-shaped retaining clip
arrowed25.4 Load apportioning valve adjustment
X = 77.0 mm (3.0 in) with vehicle unladen at normal kerb weight
24.5 Load apportioning valve securing
bolts (arrowed)24.3 Remove the spring clip (arrowed) and
clevis pin from the valve operating lever
Caution: Refer to the
precautions in Section 1.
Caution: Refer to the
precautions in Section 1.
Page 21 of 22

Note: Where fitted, the adjuster locking pin
must be renewed on completion of
adjustment.
Conventional braking system
(except P100 models)
1The handbrake cable is normally
self-adjusting in use, however adjustment
may be required to compensate for cable
stretch over a long period, and is also
necessary after fitting a new cable.
2Chock the front wheels, jack up the rear of
the vehicle and support on axle stands (see
“Jacking and Vehicle Support”).Release the
handbrake.
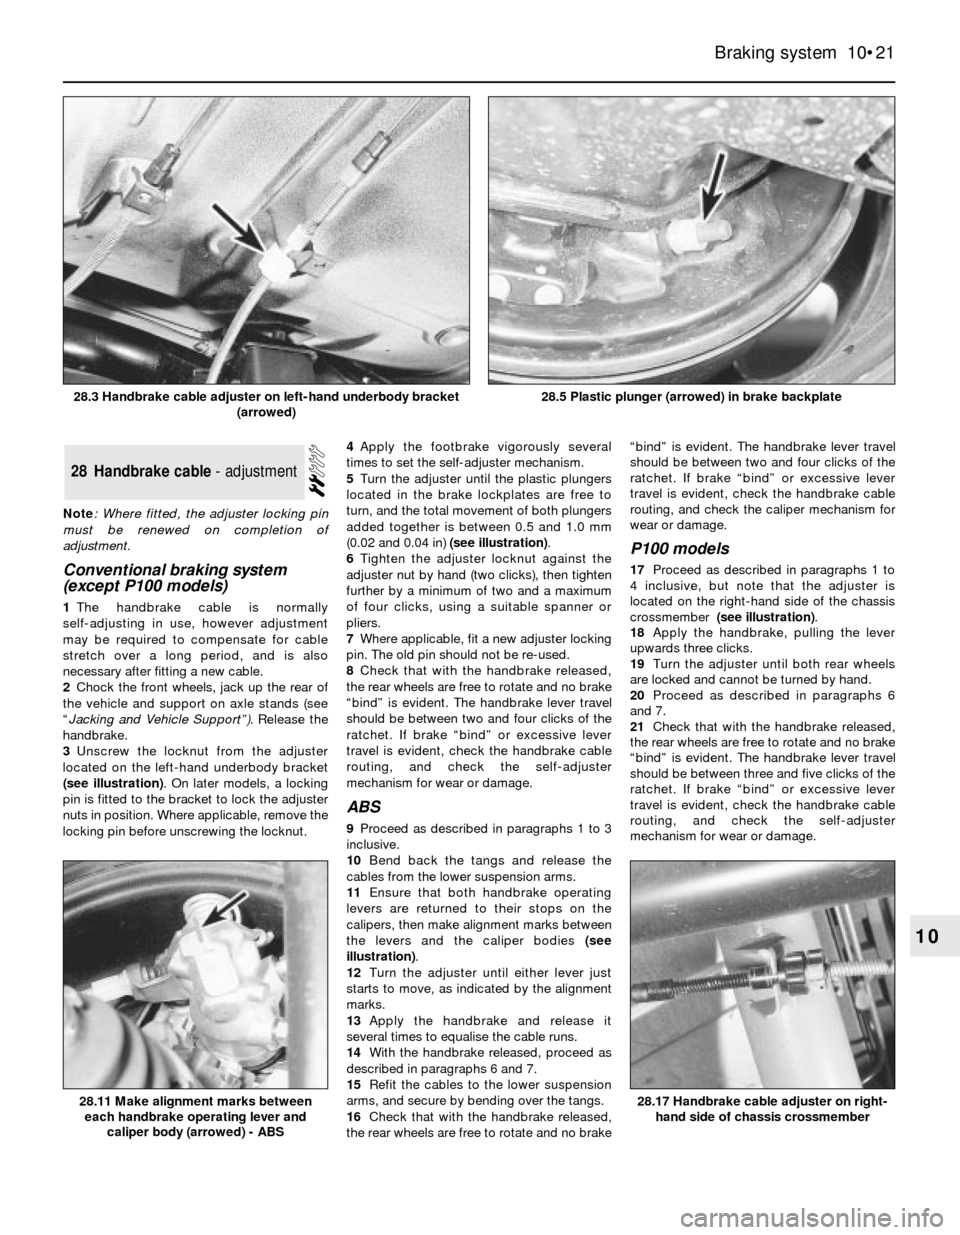
3Unscrew the locknut from the adjuster
located on the left-hand underbody bracket
(see illustration). On later models, a locking
pin is fitted to the bracket to lock the adjuster
nuts in position. Where applicable, remove the
locking pin before unscrewing the locknut.4Apply the footbrake vigorously several
times to set the self-adjuster mechanism.
5Turn the adjuster until the plastic plungers
located in the brake lockplates are free to
turn, and the total movement of both plungers
added together is between 0.5 and 1.0 mm
(0.02 and 0.04 in) (see illustration).
6Tighten the adjuster locknut against the
adjuster nut by hand (two clicks), then tighten
further by a minimum of two and a maximum
of four clicks, using a suitable spanner or
pliers.
7Where applicable, fit a new adjuster locking
pin. The old pin should not be re-used.
8Check that with the handbrake released,
the rear wheels are free to rotate and no brake
“bind” is evident. The handbrake lever travel
should be between two and four clicks of the
ratchet. If brake “bind” or excessive lever
travel is evident, check the handbrake cable
routing, and check the self-adjuster
mechanism for wear or damage.
ABS
9Proceed as described in paragraphs 1 to 3
inclusive.
10Bend back the tangs and release the
cables from the lower suspension arms.
11Ensure that both handbrake operating
levers are returned to their stops on the
calipers, then make alignment marks between
the levers and the caliper bodies (see
illustration).
12Turn the adjuster until either lever just
starts to move, as indicated by the alignment
marks.
13Apply the handbrake and release it
several times to equalise the cable runs.
14With the handbrake released, proceed as
described in paragraphs 6 and 7.
15Refit the cables to the lower suspension
arms, and secure by bending over the tangs.
16Check that with the handbrake released,
the rear wheels are free to rotate and no brake“bind” is evident. The handbrake lever travel
should be between two and four clicks of the
ratchet. If brake “bind” or excessive lever
travel is evident, check the handbrake cable
routing, and check the caliper mechanism for
wear or damage.
P100 models
17Proceed as described in paragraphs 1 to
4 inclusive, but note that the adjuster is
located on the right-hand side of the chassis
crossmember (see illustration).
18Apply the handbrake, pulling the lever
upwards three clicks.
19Turn the adjuster until both rear wheels
are locked and cannot be turned by hand.
20Proceed as described in paragraphs 6
and 7.
21Check that with the handbrake released,
the rear wheels are free to rotate and no brake
“bind” is evident. The handbrake lever travel
should be between three and five clicks of the
ratchet. If brake “bind” or excessive lever
travel is evident, check the handbrake cable
routing, and check the self-adjuster
mechanism for wear or damage.
28Handbrake cable - adjustment
Braking system 10•21
10
28.5 Plastic plunger (arrowed) in brake backplate
28.17 Handbrake cable adjuster on right-
hand side of chassis crossmember28.11 Make alignment marks between
each handbrake operating lever and
caliper body (arrowed) - ABS
28.3 Handbrake cable adjuster on left-hand underbody bracket
(arrowed)