ECO mode FORD SIERRA 1992 2.G CVH Engines Workshop Manual
[x] Cancel search | Manufacturer: FORD, Model Year: 1992, Model line: SIERRA, Model: FORD SIERRA 1992 2.GPages: 24, PDF Size: 1.09 MB
Page 7 of 24

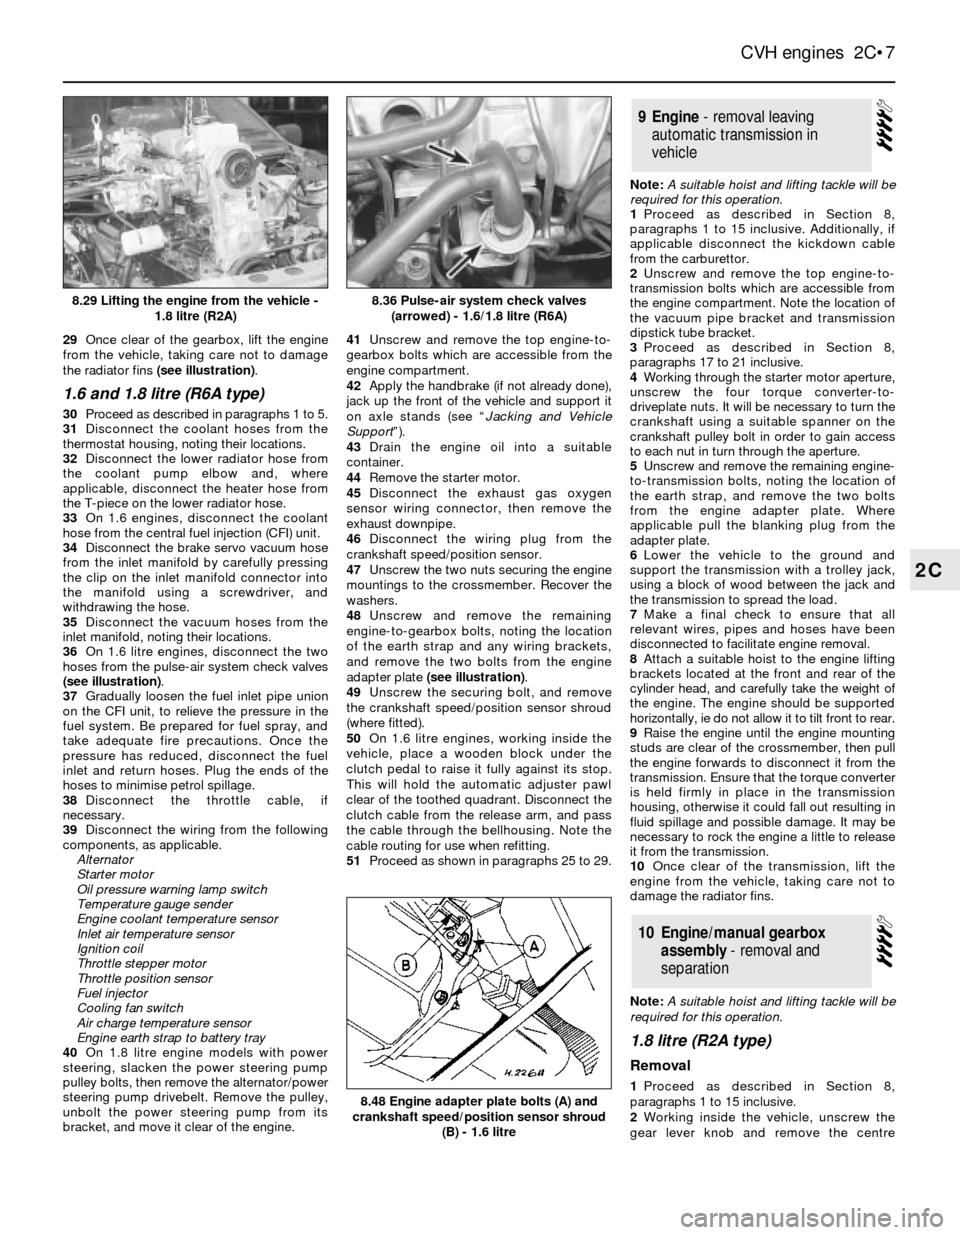
29Once clear of the gearbox, lift the engine
from the vehicle, taking care not to damage
the radiator fins (see illustration).
1.6 and 1.8 litre (R6A type)
30Proceed as described in paragraphs 1 to 5.
31Disconnect the coolant hoses from the
thermostat housing, noting their locations.
32Disconnect the lower radiator hose from
the coolant pump elbow and, where
applicable, disconnect the heater hose from
the T-piece on the lower radiator hose.
33On 1.6 engines, disconnect the coolant
hose from the central fuel injection (CFI) unit.
34Disconnect the brake servo vacuum hose
from the inlet manifold by carefully pressing
the clip on the inlet manifold connector into
the manifold using a screwdriver, and
withdrawing the hose.
35Disconnect the vacuum hoses from the
inlet manifold, noting their locations.
36On 1.6 litre engines, disconnect the two
hoses from the pulse-air system check valves
(see illustration).
37Gradually loosen the fuel inlet pipe union
on the CFI unit, to relieve the pressure in the
fuel system. Be prepared for fuel spray, and
take adequate fire precautions. Once the
pressure has reduced, disconnect the fuel
inlet and return hoses. Plug the ends of the
hoses to minimise petrol spillage.
38Disconnect the throttle cable, if
necessary.
39Disconnect the wiring from the following
components, as applicable.
Alternator
Starter motor
Oil pressure warning lamp switch
Temperature gauge sender
Engine coolant temperature sensor
Inlet air temperature sensor
Ignition coil
Throttle stepper motor
Throttle position sensor
Fuel injector
Cooling fan switch
Air charge temperature sensor
Engine earth strap to battery tray
40On 1.8 litre engine models with power
steering, slacken the power steering pump
pulley bolts, then remove the alternator/power
steering pump drivebelt. Remove the pulley,
unbolt the power steering pump from its
bracket, and move it clear of the engine.41Unscrew and remove the top engine-to-
gearbox bolts which are accessible from the
engine compartment.
42Apply the handbrake (if not already done),
jack up the front of the vehicle and support it
on axle stands (see “Jacking and Vehicle
Support”).
43Drain the engine oil into a suitable
container.
44Remove the starter motor.
45Disconnect the exhaust gas oxygen
sensor wiring connector, then remove the
exhaust downpipe.
46Disconnect the wiring plug from the
crankshaft speed/position sensor.
47Unscrew the two nuts securing the engine
mountings to the crossmember. Recover the
washers.
48Unscrew and remove the remaining
engine-to-gearbox bolts, noting the location
of the earth strap and any wiring brackets,
and remove the two bolts from the engine
adapter plate (see illustration).
49Unscrew the securing bolt, and remove
the crankshaft speed/position sensor shroud
(where fitted).
50On 1.6 litre engines, working inside the
vehicle, place a wooden block under the
clutch pedal to raise it fully against its stop.
This will hold the automatic adjuster pawl
clear of the toothed quadrant. Disconnect the
clutch cable from the release arm, and pass
the cable through the bellhousing. Note the
cable routing for use when refitting.
51Proceed as shown in paragraphs 25 to 29.Note: A suitable hoist and lifting tackle will be
required for this operation.
1Proceed as described in Section 8,
paragraphs 1 to 15 inclusive. Additionally, if
applicable disconnect the kickdown cable
from the carburettor.
2Unscrew and remove the top engine-to-
transmission bolts which are accessible from
the engine compartment. Note the location of
the vacuum pipe bracket and transmission
dipstick tube bracket.
3Proceed as described in Section 8,
paragraphs 17 to 21 inclusive.
4Working through the starter motor aperture,
unscrew the four torque converter-to-
driveplate nuts. It will be necessary to turn the
crankshaft using a suitable spanner on the
crankshaft pulley bolt in order to gain access
to each nut in turn through the aperture.
5Unscrew and remove the remaining engine-
to-transmission bolts, noting the location of
the earth strap, and remove the two bolts
from the engine adapter plate. Where
applicable pull the blanking plug from the
adapter plate.
6Lower the vehicle to the ground and
support the transmission with a trolley jack,
using a block of wood between the jack and
the transmission to spread the load.
7Make a final check to ensure that all
relevant wires, pipes and hoses have been
disconnected to facilitate engine removal.
8Attach a suitable hoist to the engine lifting
brackets located at the front and rear of the
cylinder head, and carefully take the weight of
the engine. The engine should be supported
horizontally, ie do not allow it to tilt front to rear.
9Raise the engine until the engine mounting
studs are clear of the crossmember, then pull
the engine forwards to disconnect it from the
transmission. Ensure that the torque converter
is held firmly in place in the transmission
housing, otherwise it could fall out resulting in
fluid spillage and possible damage. It may be
necessary to rock the engine a little to release
it from the transmission.
10Once clear of the transmission, lift the
engine from the vehicle, taking care not to
damage the radiator fins.
Note: A suitable hoist and lifting tackle will be
required for this operation.
1.8 litre (R2A type)
Removal
1Proceed as described in Section 8,
paragraphs 1 to 15 inclusive.
2Working inside the vehicle, unscrew the
gear lever knob and remove the centre
10Engine/manual gearbox
assembly - removal and
separation
9Engine - removal leaving
automatic transmission in
vehicle
CVH engines 2C•7
2C
8.48 Engine adapter plate bolts (A) and
crankshaft speed/position sensor shroud
(B) - 1.6 litre
8.36 Pulse-air system check valves
(arrowed) - 1.6/1.8 litre (R6A)8.29 Lifting the engine from the vehicle -
1.8 litre (R2A)
Page 12 of 24

16Where applicable, refit the timing belt
tensioner and coolant pump, locate the timing
belt backplate over the studs, then fit the
camshaft sprocket and the distributor rotor
shaft.
17The camshaft sprocket bolt must be
coated with sealant before installation. The
manufacturers recommend Loctite 74 or 274,
or Omnifit 30M blue. With the sealant applied,
insert the bolt, hold the camshaft sprocket
stationary as during removal, and tighten the
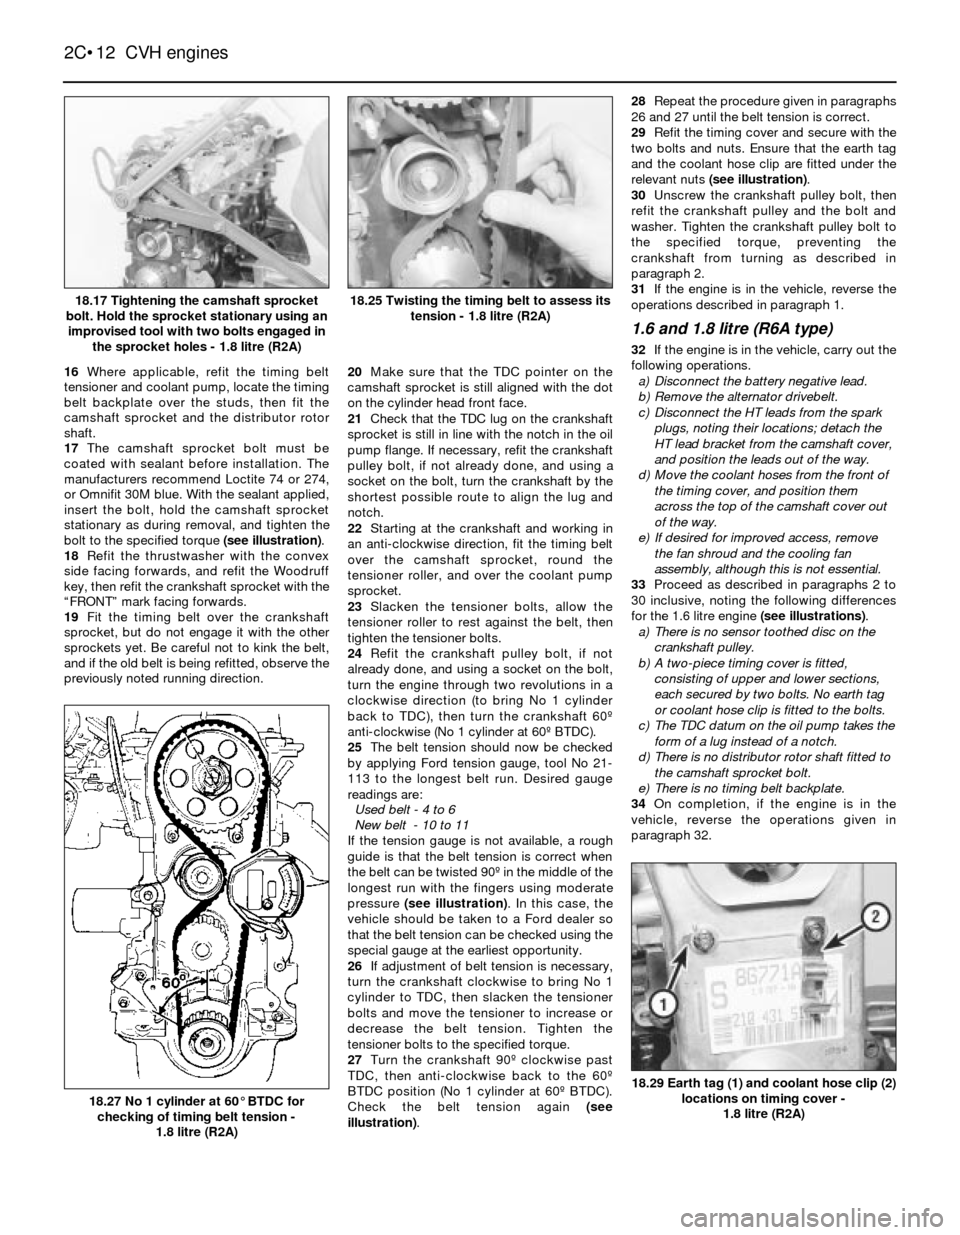
bolt to the specified torque (see illustration).
18Refit the thrustwasher with the convex
side facing forwards, and refit the Woodruff
key, then refit the crankshaft sprocket with the
“FRONT” mark facing forwards.
19Fit the timing belt over the crankshaft
sprocket, but do not engage it with the other
sprockets yet. Be careful not to kink the belt,
and if the old belt is being refitted, observe the
previously noted running direction.20Make sure that the TDC pointer on the
camshaft sprocket is still aligned with the dot
on the cylinder head front face.
21Check that the TDC lug on the crankshaft
sprocket is still in line with the notch in the oil
pump flange. If necessary, refit the crankshaft
pulley bolt, if not already done, and using a
socket on the bolt, turn the crankshaft by the
shortest possible route to align the lug and
notch.
22Starting at the crankshaft and working in
an anti-clockwise direction, fit the timing belt
over the camshaft sprocket, round the
tensioner roller, and over the coolant pump
sprocket.
23Slacken the tensioner bolts, allow the
tensioner roller to rest against the belt, then
tighten the tensioner bolts.
24Refit the crankshaft pulley bolt, if not
already done, and using a socket on the bolt,
turn the engine through two revolutions in a
clockwise direction (to bring No 1 cylinder
back to TDC), then turn the crankshaft 60º
anti-clockwise (No 1 cylinder at 60º BTDC).
25The belt tension should now be checked
by applying Ford tension gauge, tool No 21-
113 to the longest belt run. Desired gauge
readings are:
Used belt - 4 to 6
New belt - 10 to 11
If the tension gauge is not available, a rough
guide is that the belt tension is correct when
the belt can be twisted 90º in the middle of the
longest run with the fingers using moderate
pressure (see illustration). In this case, the
vehicle should be taken to a Ford dealer so
that the belt tension can be checked using the
special gauge at the earliest opportunity.
26If adjustment of belt tension is necessary,
turn the crankshaft clockwise to bring No 1
cylinder to TDC, then slacken the tensioner
bolts and move the tensioner to increase or
decrease the belt tension. Tighten the
tensioner bolts to the specified torque.
27Turn the crankshaft 90º clockwise past
TDC, then anti-clockwise back to the 60º
BTDC position (No 1 cylinder at 60º BTDC).
Check the belt tension again (see
illustration).28Repeat the procedure given in paragraphs
26 and 27 until the belt tension is correct.
29Refit the timing cover and secure with the
two bolts and nuts. Ensure that the earth tag
and the coolant hose clip are fitted under the
relevant nuts (see illustration).
30Unscrew the crankshaft pulley bolt, then
refit the crankshaft pulley and the bolt and
washer. Tighten the crankshaft pulley bolt to
the specified torque, preventing the
crankshaft from turning as described in
paragraph 2.
31If the engine is in the vehicle, reverse the
operations described in paragraph 1.
1.6 and 1.8 litre (R6A type)
32If the engine is in the vehicle, carry out the
following operations.
a)Disconnect the battery negative lead.
b)Remove the alternator drivebelt.
c)Disconnect the HT leads from the spark
plugs, noting their locations; detach the
HT lead bracket from the camshaft cover,
and position the leads out of the way.
d)Move the coolant hoses from the front of
the timing cover, and position them
across the top of the camshaft cover out
of the way.
e)If desired for improved access, remove
the fan shroud and the cooling fan
assembly, although this is not essential.
33Proceed as described in paragraphs 2 to
30 inclusive, noting the following differences
for the 1.6 litre engine (see illustrations).
a)There is no sensor toothed disc on the
crankshaft pulley.
b)A two-piece timing cover is fitted,
consisting of upper and lower sections,
each secured by two bolts. No earth tag
or coolant hose clip is fitted to the bolts.
c)The TDC datum on the oil pump takes the
form of a lug instead of a notch.
d)There is no distributor rotor shaft fitted to
the camshaft sprocket bolt.
e)There is no timing belt backplate.
34On completion, if the engine is in the
vehicle, reverse the operations given in
paragraph 32.
2C•12CVH engines
18.17 Tightening the camshaft sprocket
bolt. Hold the sprocket stationary using an
improvised tool with two bolts engaged in
the sprocket holes - 1.8 litre (R2A)
18.27 No 1 cylinder at 60°BTDC for
checking of timing belt tension -
1.8 litre (R2A)
18.29 Earth tag (1) and coolant hose clip (2)
locations on timing cover -
1.8 litre (R2A)
18.25 Twisting the timing belt to assess its
tension - 1.8 litre (R2A)