display FORD SUPER DUTY 2010 2.G Navigation System Manual
[x] Cancel search | Manufacturer: FORD, Model Year: 2010, Model line: SUPER DUTY, Model: FORD SUPER DUTY 2010 2.GPages: 194, PDF Size: 1.94 MB
Page 73 of 194
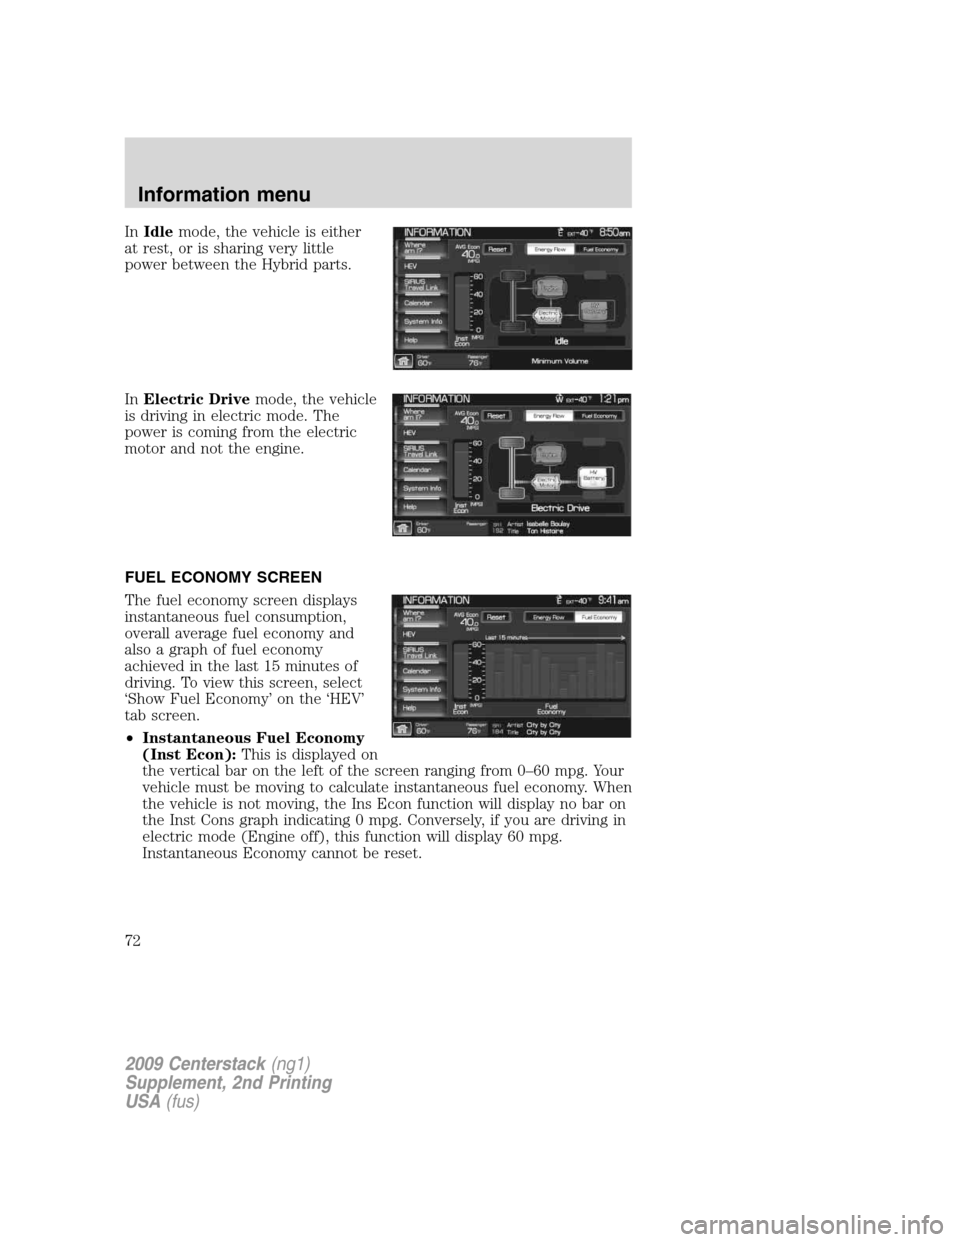
InIdlemode, the vehicle is either
at rest, or is sharing very little
power between the Hybrid parts.
InElectric Drivemode, the vehicle
is driving in electric mode. The
power is coming from the electric
motor and not the engine.
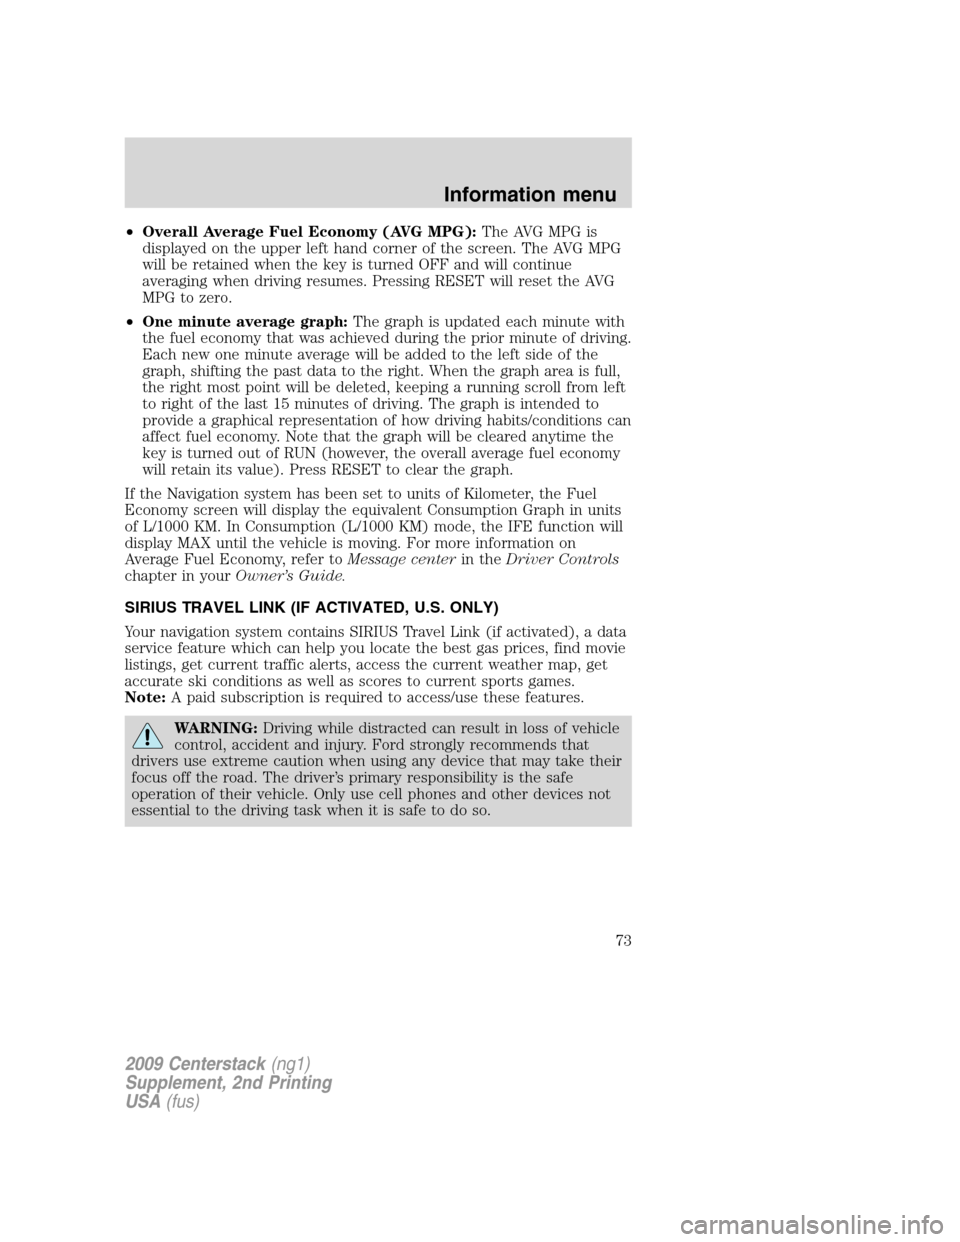
FUEL ECONOMY SCREEN
The fuel economy screen displays
instantaneous fuel consumption,
overall average fuel economy and
also a graph of fuel economy
achieved in the last 15 minutes of
driving. To view this screen, select
‘Show Fuel Economy’ on the ‘HEV’
tab screen.
•Instantaneous Fuel Economy
(Inst Econ):This is displayed on
the vertical bar on the left of the screen ranging from 0–60 mpg. Your
vehicle must be moving to calculate instantaneous fuel economy. When
the vehicle is not moving, the Ins Econ function will display no bar on
the Inst Cons graph indicating 0 mpg. Conversely, if you are driving in
electric mode (Engine off), this function will display 60 mpg.
Instantaneous Economy cannot be reset.
2009 Centerstack(ng1)
Supplement, 2nd Printing
USA(fus)
Information menu
72
Page 74 of 194
•Overall Average Fuel Economy (AVG MPG):The AVG MPG is
displayed on the upper left hand corner of the screen. The AVG MPG
will be retained when the key is turned OFF and will continue
averaging when driving resumes. Pressing RESET will reset the AVG
MPG to zero.
•One minute average graph:The graph is updated each minute with
the fuel economy that was achieved during the prior minute of driving.
Each new one minute average will be added to the left side of the
graph, shifting the past data to the right. When the graph area is full,
the right most point will be deleted, keeping a running scroll from left
to right of the last 15 minutes of driving. The graph is intended to
provide a graphical representation of how driving habits/conditions can
affect fuel economy. Note that the graph will be cleared anytime the
key is turned out of RUN (however, the overall average fuel economy
will retain its value). Press RESET to clear the graph.
If the Navigation system has been set to units of Kilometer, the Fuel
Economy screen will display the equivalent Consumption Graph in units
of L/1000 KM. In Consumption (L/1000 KM) mode, the IFE function will
display MAX until the vehicle is moving. For more information on
Average Fuel Economy, refer toMessage centerin theDriver Controls
chapter in yourOwner’s Guide.
SIRIUS TRAVEL LINK (IF ACTIVATED, U.S. ONLY)
Your navigation system contains SIRIUS Travel Link (if activated), a data
service feature which can help you locate the best gas prices, find movie
listings, get current traffic alerts, access the current weather map, get
accurate ski conditions as well as scores to current sports games.
Note:A paid subscription is required to access/use these features.
WARNING:Driving while distracted can result in loss of vehicle
control, accident and injury. Ford strongly recommends that
drivers use extreme caution when using any device that may take their
focus off the road. The driver’s primary responsibility is the safe
operation of their vehicle. Only use cell phones and other devices not
essential to the driving task when it is safe to do so.
2009 Centerstack(ng1)
Supplement, 2nd Printing
USA(fus)
Information menu
73
Page 75 of 194
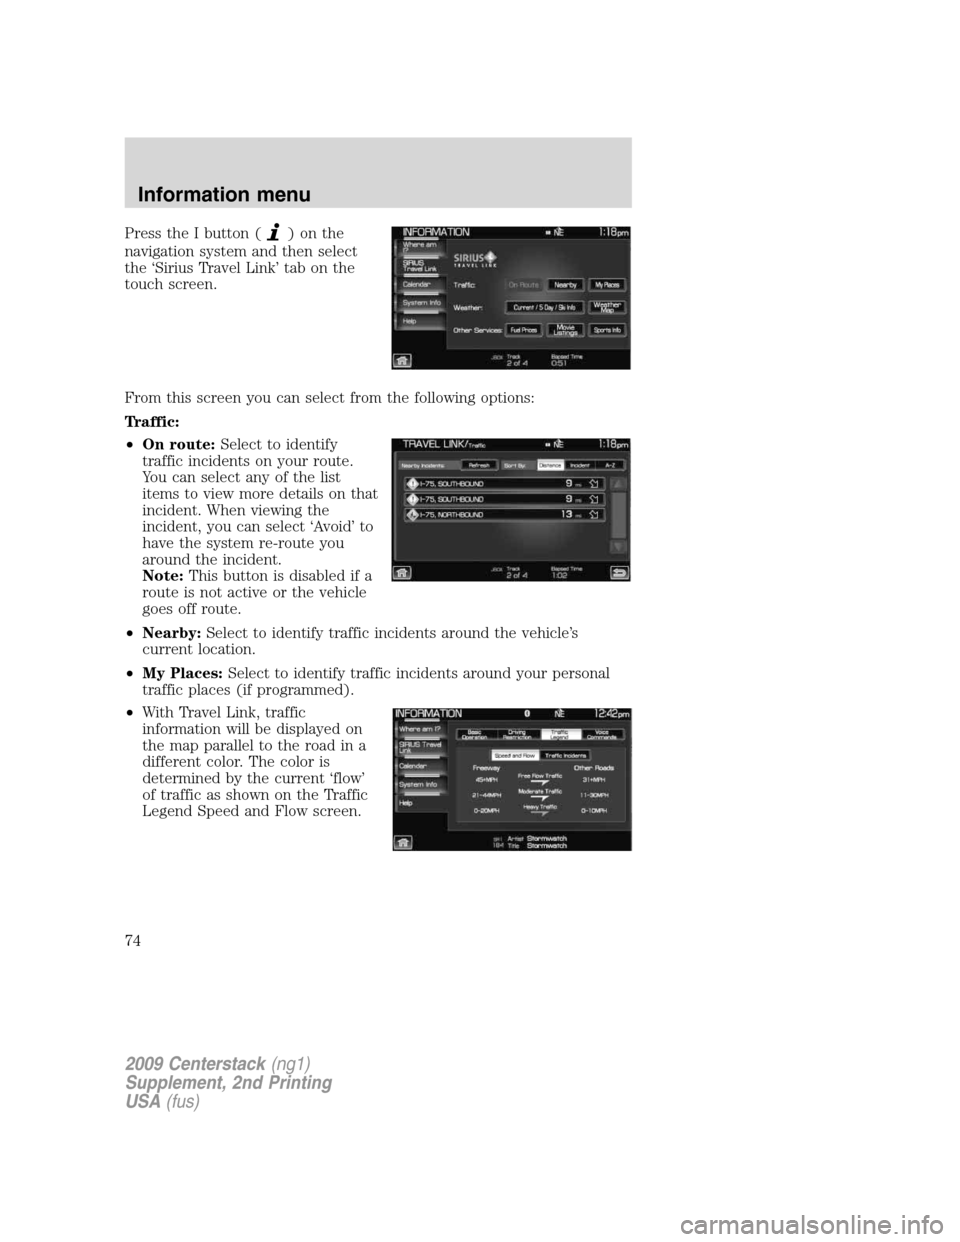
Press the I button ()onthe
navigation system and then select
the ‘Sirius Travel Link’ tab on the
touch screen.
From this screen you can select from the following options:
Traffic:
•On route:Select to identify
traffic incidents on your route.
You can select any of the list
items to view more details on that
incident. When viewing the
incident, you can select ‘Avoid’ to
have the system re-route you
around the incident.
Note:This button is disabled if a
route is not active or the vehicle
goes off route.
•Nearby:Select to identify traffic incidents around the vehicle’s
current location.
•My Places:Select to identify traffic incidents around your personal
traffic places (if programmed).
•With Travel Link, traffic
information will be displayed on
the map parallel to the road in a
different color. The color is
determined by the current ‘flow’
of traffic as shown on the Traffic
Legend Speed and Flow screen.
2009 Centerstack(ng1)
Supplement, 2nd Printing
USA(fus)
Information menu
74
Page 77 of 194
as well as 5 favorite ski locations
from the location selection screen.
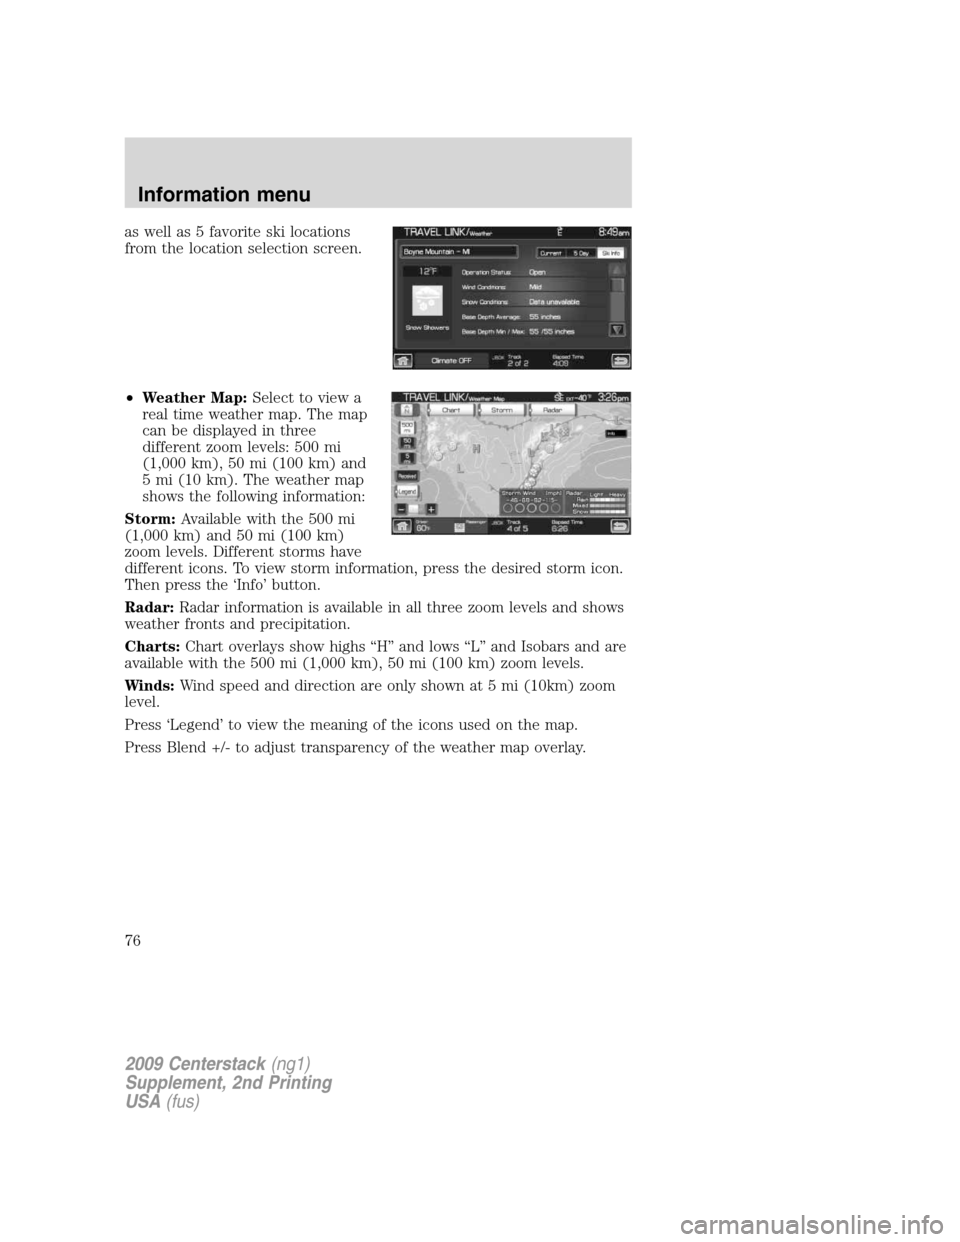
•Weather Map:Select to view a
real time weather map. The map
can be displayed in three
different zoom levels: 500 mi
(1,000 km), 50 mi (100 km) and
5 mi (10 km). The weather map
shows the following information:
Storm:Available with the 500 mi
(1,000 km) and 50 mi (100 km)
zoom levels. Different storms have
different icons. To view storm information, press the desired storm icon.
Then press the ‘Info’ button.
Radar:Radar information is available in all three zoom levels and shows
weather fronts and precipitation.
Charts:Chart overlays show highs “H” and lows “L” and Isobars and are
available with the 500 mi (1,000 km), 50 mi (100 km) zoom levels.
Winds:Wind speed and direction are only shown at 5 mi (10km) zoom
level.
Press ‘Legend’ to view the meaning of the icons used on the map.
Press Blend +/- to adjust transparency of the weather map overlay.
2009 Centerstack(ng1)
Supplement, 2nd Printing
USA(fus)
Information menu
76
Page 78 of 194
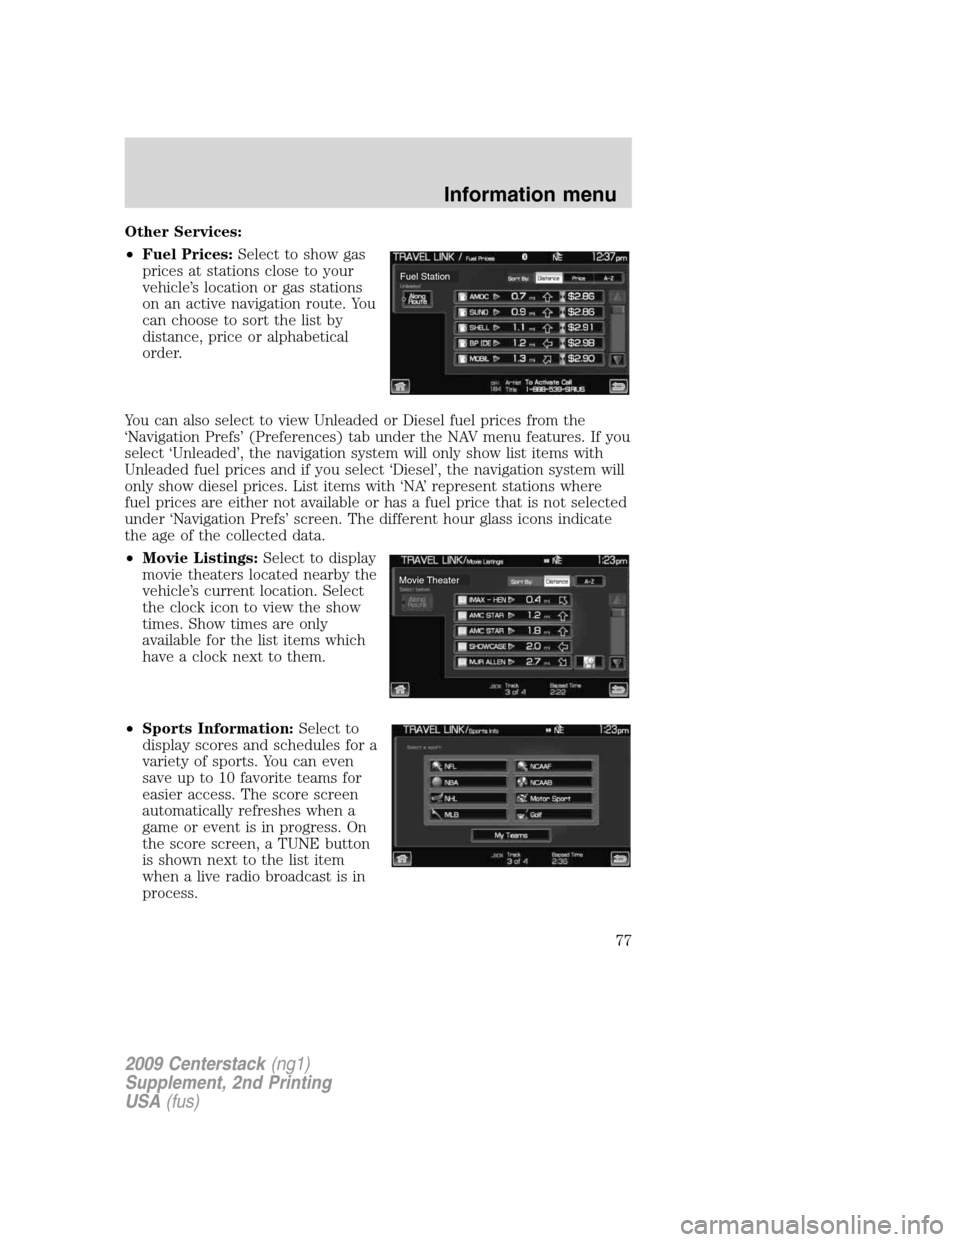
Other Services:
•Fuel Prices:Select to show gas
prices at stations close to your
vehicle’s location or gas stations
on an active navigation route. You
can choose to sort the list by
distance, price or alphabetical
order.
You can also select to view Unleaded or Diesel fuel prices from the
‘Navigation Prefs’ (Preferences) tab under the NAV menu features. If you
select ‘Unleaded’, the navigation system will only show list items with
Unleaded fuel prices and if you select ‘Diesel’, the navigation system will
only show diesel prices. List items with ‘NA’ represent stations where
fuel prices are either not available or has a fuel price that is not selected
under ‘Navigation Prefs’ screen. The different hour glass icons indicate
the age of the collected data.
•Movie Listings:Select to display
movie theaters located nearby the
vehicle’s current location. Select
the clock icon to view the show
times. Show times are only
available for the list items which
have a clock next to them.
•Sports Information:Select to
display scores and schedules for a
variety of sports. You can even
save up to 10 favorite teams for
easier access. The score screen
automatically refreshes when a
game or event is in progress. On
the score screen, a TUNE button
is shown next to the list item
when a live radio broadcast is in
process.
Fuel Station
Movie Theater
2009 Centerstack(ng1)
Supplement, 2nd Printing
USA(fus)
Information menu
77
Page 83 of 194
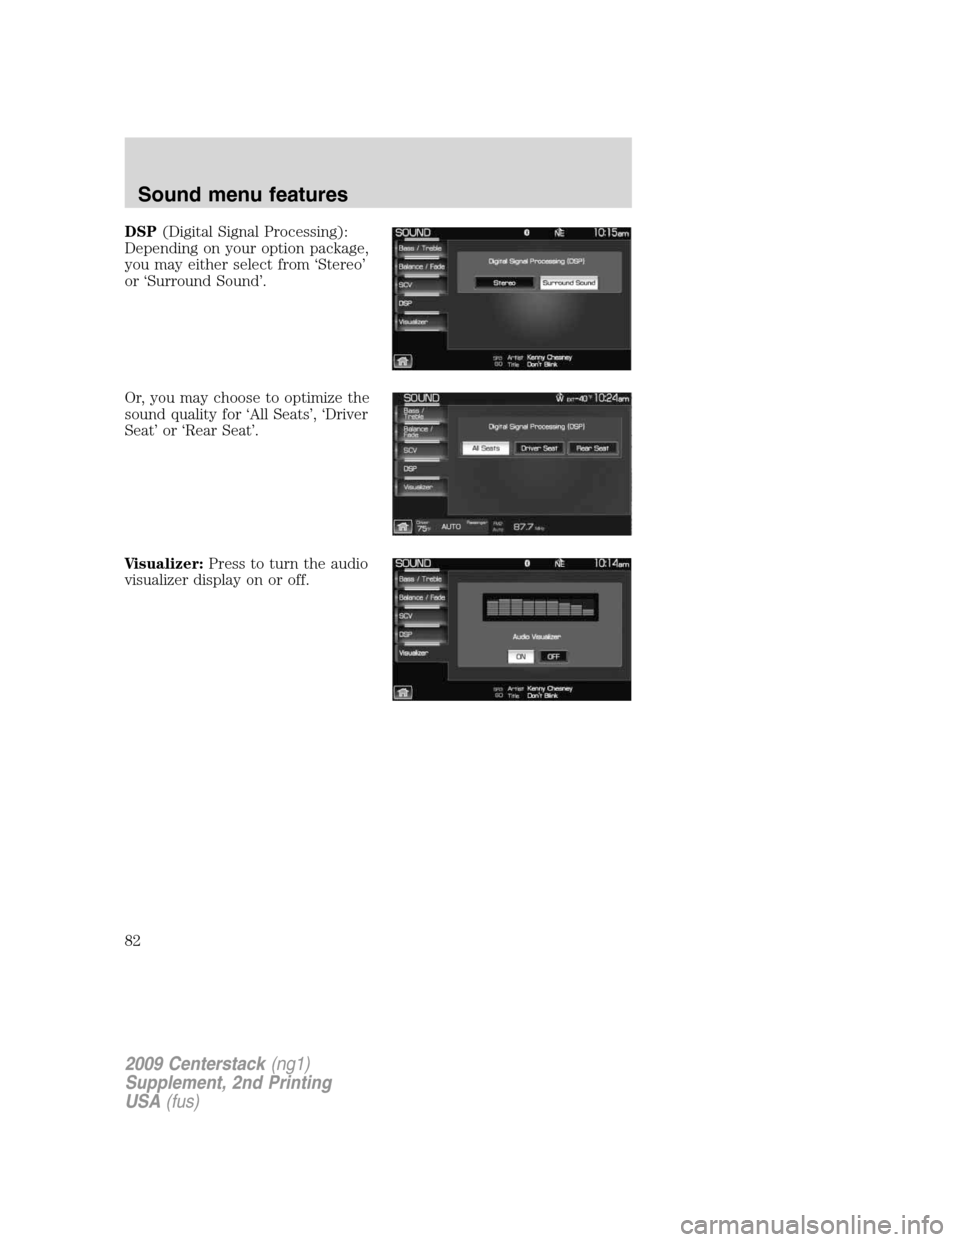
DSP(Digital Signal Processing):
Depending on your option package,
you may either select from ‘Stereo’
or ‘Surround Sound’.
Or, you may choose to optimize the
sound quality for ‘All Seats’, ‘Driver
Seat’ or ‘Rear Seat’.
Visualizer:Press to turn the audio
visualizer display on or off.
2009 Centerstack(ng1)
Supplement, 2nd Printing
USA(fus)
Sound menu features
82
Page 86 of 194
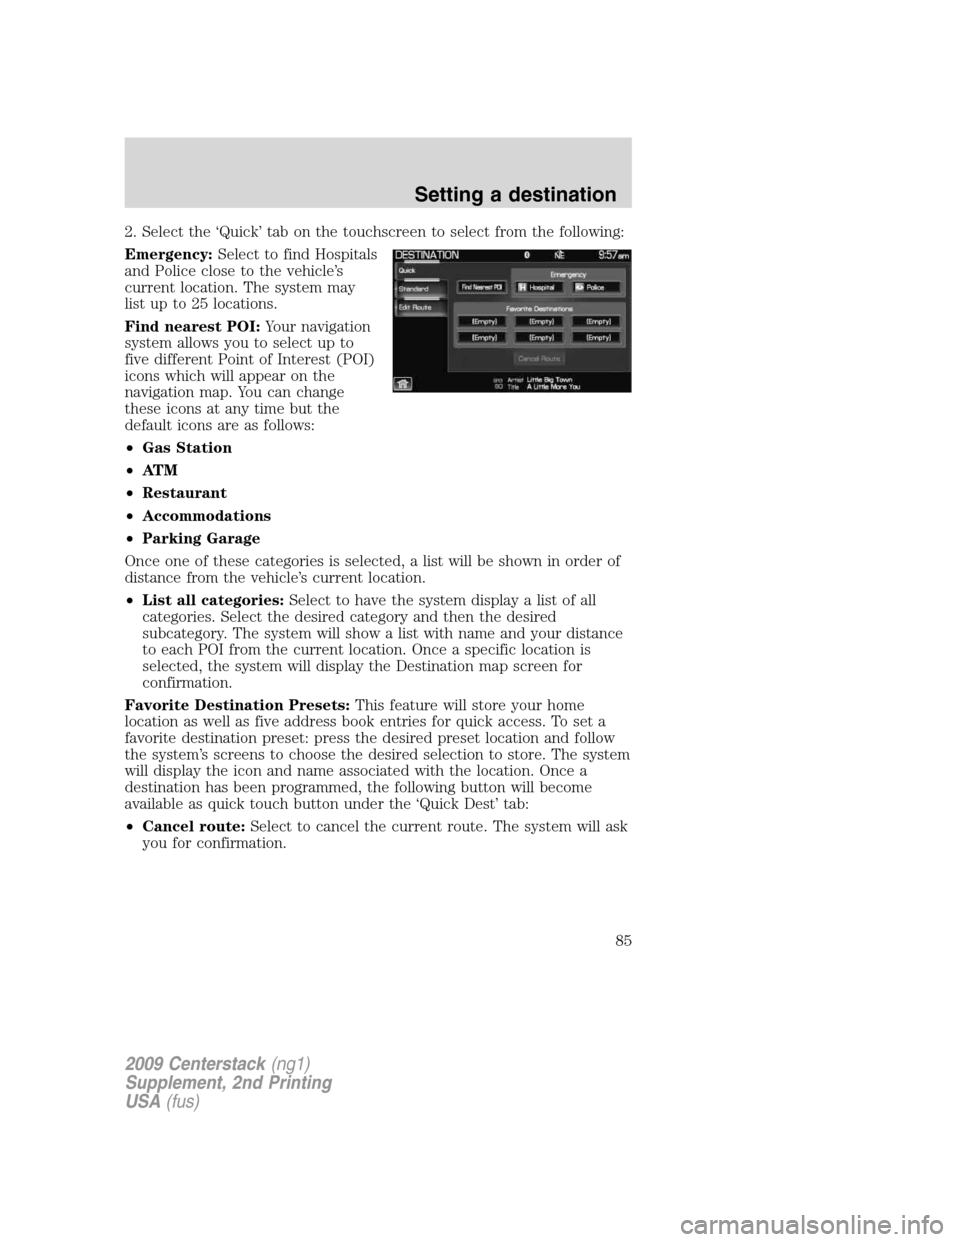
2. Select the ‘Quick’ tab on the touchscreen to select from the following:
Emergency:Select to find Hospitals
and Police close to the vehicle’s
current location. The system may
list up to 25 locations.
Find nearest POI: Your navigation
system allows you to select up to
five different Point of Interest (POI)
icons which will appear on the
navigation map. You can change
these icons at any time but the
default icons are as follows:
• Gas Station
• AT M
• Restaurant
• Accommodations
• Parking Garage
Once one of these categories is selected, a list will be shown in order of
distance from the vehicle’s current location.
• List all categories: Select to have the system display a list of all
categories. Select the desired category and then the desired
subcategory. The system will show a list with name and your distance
to each POI from the current location. Once a specific location is
selected, the system will display the Destination map screen for
confirmation.
Favorite Destination Presets: This feature will store your home
location as well as five address book entries for quick access. To set a
favorite destination preset: press the desired preset location and follow
the system’s screens to choose the desired selection to store. The system
will display the icon and name associated with the location. Once a
destination has been programmed, the following button will become
available as quick touch button under the ‘Quick Dest’ tab:
• Cancel route: Select to cancel the current route. The system will ask
you for confirmation.
2009 Centerstack (ng1)
Supplement, 2nd Printing
USA (fus)
Setting a destination
85
Page 87 of 194
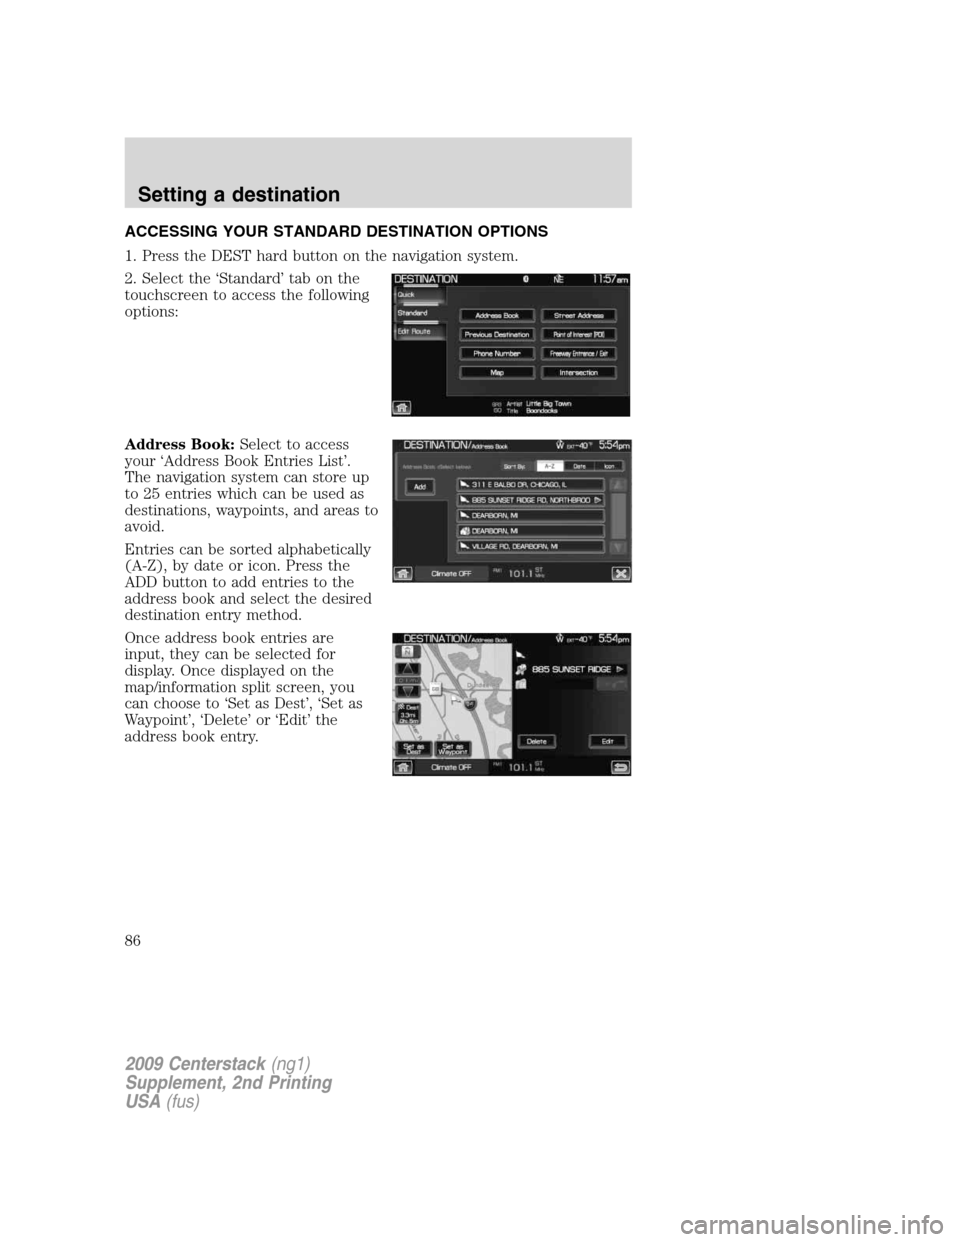
ACCESSING YOUR STANDARD DESTINATION OPTIONS
1. Press the DEST hard button on the navigation system.
2. Select the ‘Standard’ tab on the
touchscreen to access the following
options:
Address Book:Select to access
your ‘Address Book Entries List’.
The navigation system can store up
to 25 entries which can be used as
destinations, waypoints, and areas to
avoid.
Entries can be sorted alphabetically
(A-Z), by date or icon. Press the
ADD button to add entries to the
address book and select the desired
destination entry method.
Once address book entries are
input, they can be selected for
display. Once displayed on the
map/information split screen, you
can choose to ‘Set as Dest’, ‘Set as
Waypoint’, ‘Delete’ or ‘Edit’ the
address book entry.
2009 Centerstack(ng1)
Supplement, 2nd Printing
USA(fus)
Setting a destination
86
Page 88 of 194
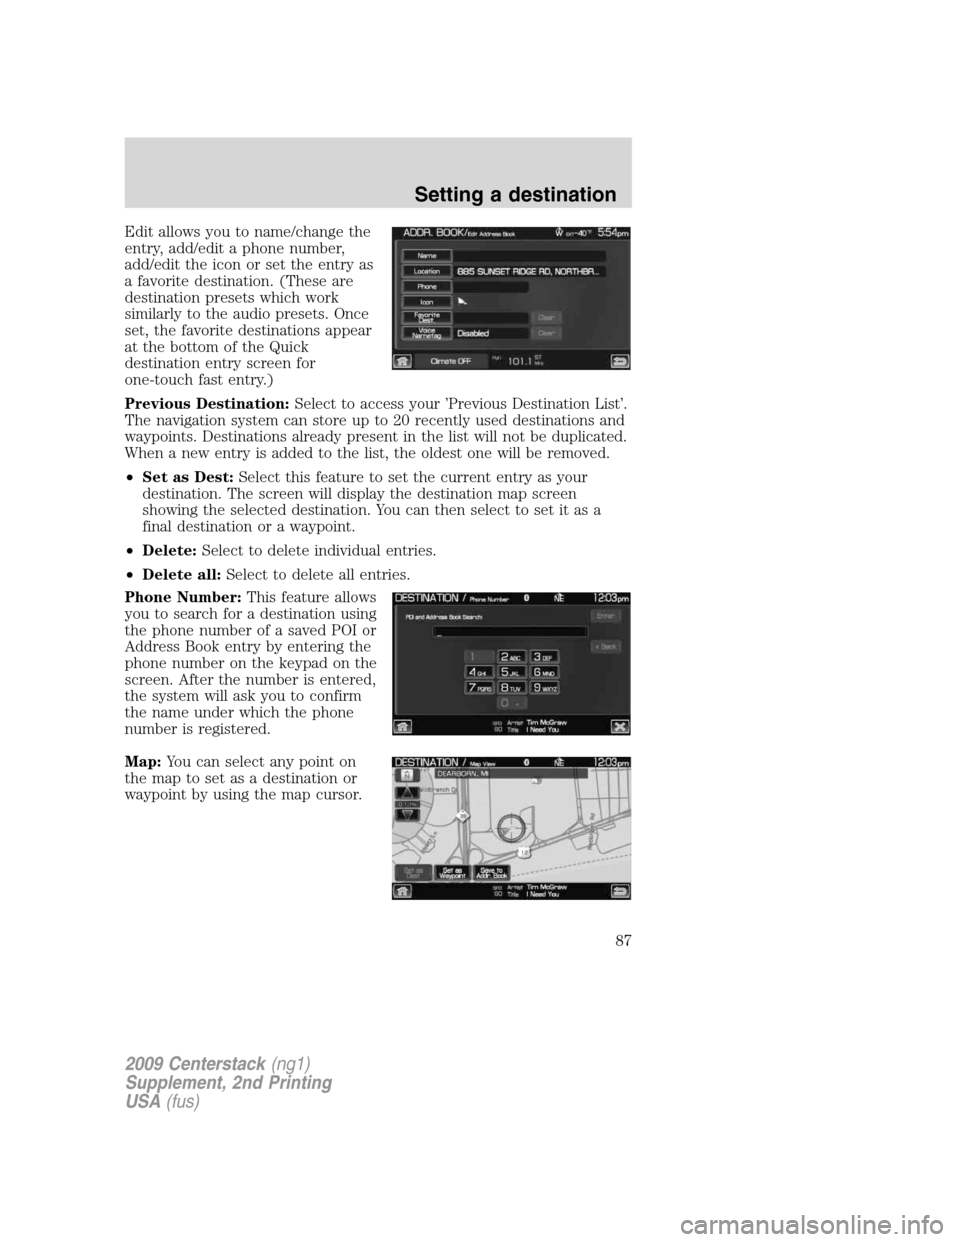
Edit allows you to name/change the
entry, add/edit a phone number,
add/edit the icon or set the entry as
a favorite destination. (These are
destination presets which work
similarly to the audio presets. Once
set, the favorite destinations appear
at the bottom of the Quick
destination entry screen for
one-touch fast entry.)
Previous Destination:Select to access your ’Previous Destination List’.
The navigation system can store up to 20 recently used destinations and
waypoints. Destinations already present in the list will not be duplicated.
When a new entry is added to the list, the oldest one will be removed.
•Set as Dest:Select this feature to set the current entry as your
destination. The screen will display the destination map screen
showing the selected destination. You can then select to set it as a
final destination or a waypoint.
•Delete:Select to delete individual entries.
•Delete all:Select to delete all entries.
Phone Number:This feature allows
you to search for a destination using
the phone number of a saved POI or
Address Book entry by entering the
phone number on the keypad on the
screen. After the number is entered,
the system will ask you to confirm
the name under which the phone
number is registered.
Map:You can select any point on
the map to set as a destination or
waypoint by using the map cursor.
2009 Centerstack(ng1)
Supplement, 2nd Printing
USA(fus)
Setting a destination
87
Page 96 of 194
Detour:Select to set an avoid area on the current route.
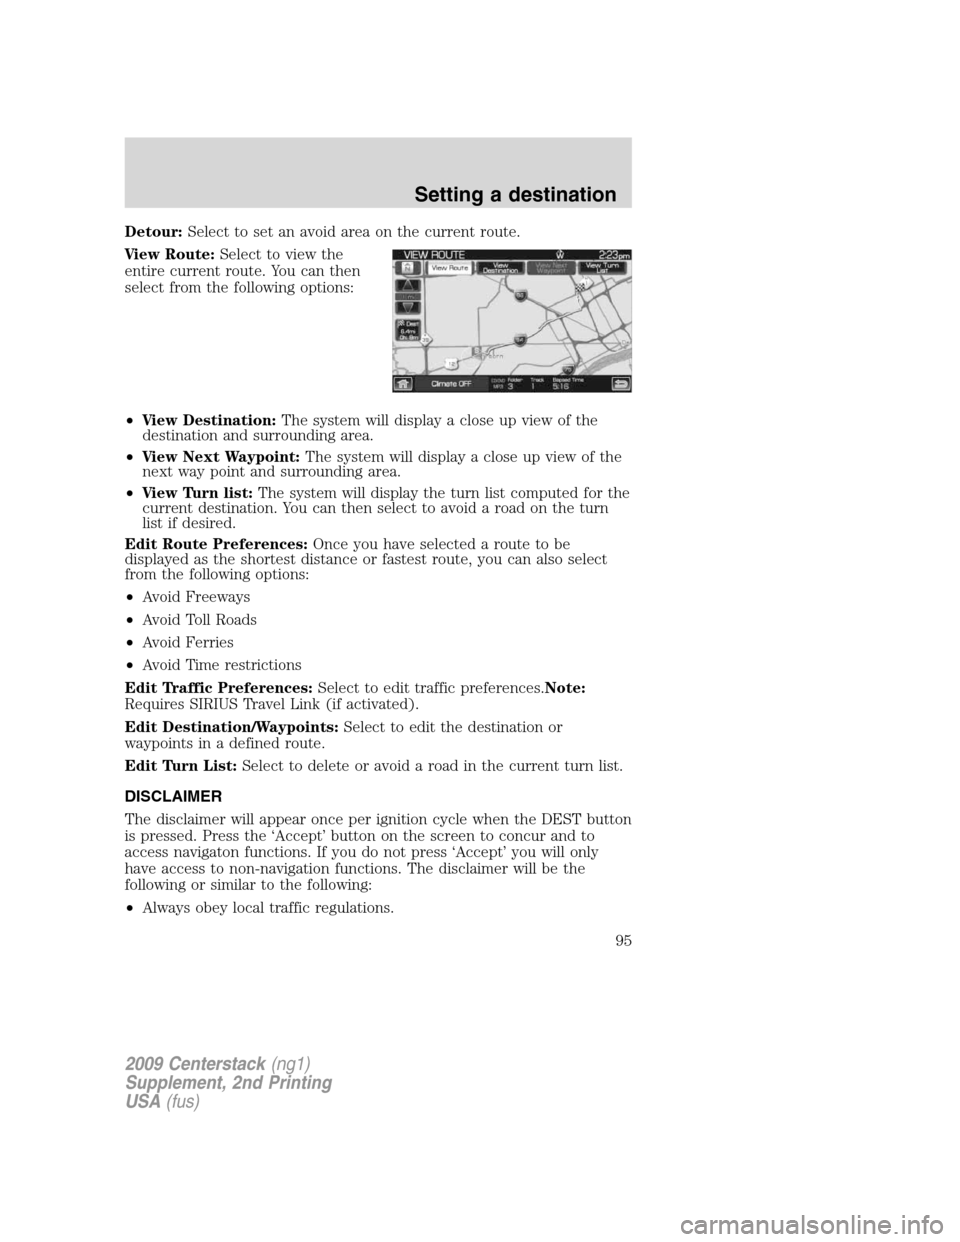
View Route:Select to view the
entire current route. You can then
select from the following options:
•View Destination:The system will display a close up view of the
destination and surrounding area.
•View Next Waypoint:The system will display a close up view of the
next way point and surrounding area.
•View Turn list:The system will display the turn list computed for the
current destination. You can then select to avoid a road on the turn
list if desired.
Edit Route Preferences:Once you have selected a route to be
displayed as the shortest distance or fastest route, you can also select
from the following options:
•Avoid Freeways
•Avoid Toll Roads
•Avoid Ferries
•Avoid Time restrictions
Edit Traffic Preferences:Select to edit traffic preferences.Note:
Requires SIRIUS Travel Link (if activated).
Edit Destination/Waypoints:Select to edit the destination or
waypoints in a defined route.
Edit Turn List:Select to delete or avoid a road in the current turn list.
DISCLAIMER
The disclaimer will appear once per ignition cycle when the DEST button
is pressed. Press the ‘Accept’ button on the screen to concur and to
access navigaton functions. If you do not press ‘Accept’ you will only
have access to non-navigation functions. The disclaimer will be the
following or similar to the following:
•Always obey local traffic regulations.
2009 Centerstack(ng1)
Supplement, 2nd Printing
USA(fus)
Setting a destination
95