height FORD SUPER DUTY 2010 2.G Owners Manual
[x] Cancel search | Manufacturer: FORD, Model Year: 2010, Model line: SUPER DUTY, Model: FORD SUPER DUTY 2010 2.GPages: 407, PDF Size: 3.36 MB
Page 110 of 407
Vertical and horizontal aim adjustment (sealed beam headlamps)
The headlamps on your vehicle are intended to be aimed using
mechanical aimers. If mechanical aimers are used and the cross-car sight
line is in any way blocked, set the legs of the universal adaptor all to the
same setting, such that the cross-car sight line is no longer blocked, per
the instructions for the brand of mechanical aimer used. You can also
aim the headlamps visually using the procedure below.
To adjust the headlamps:
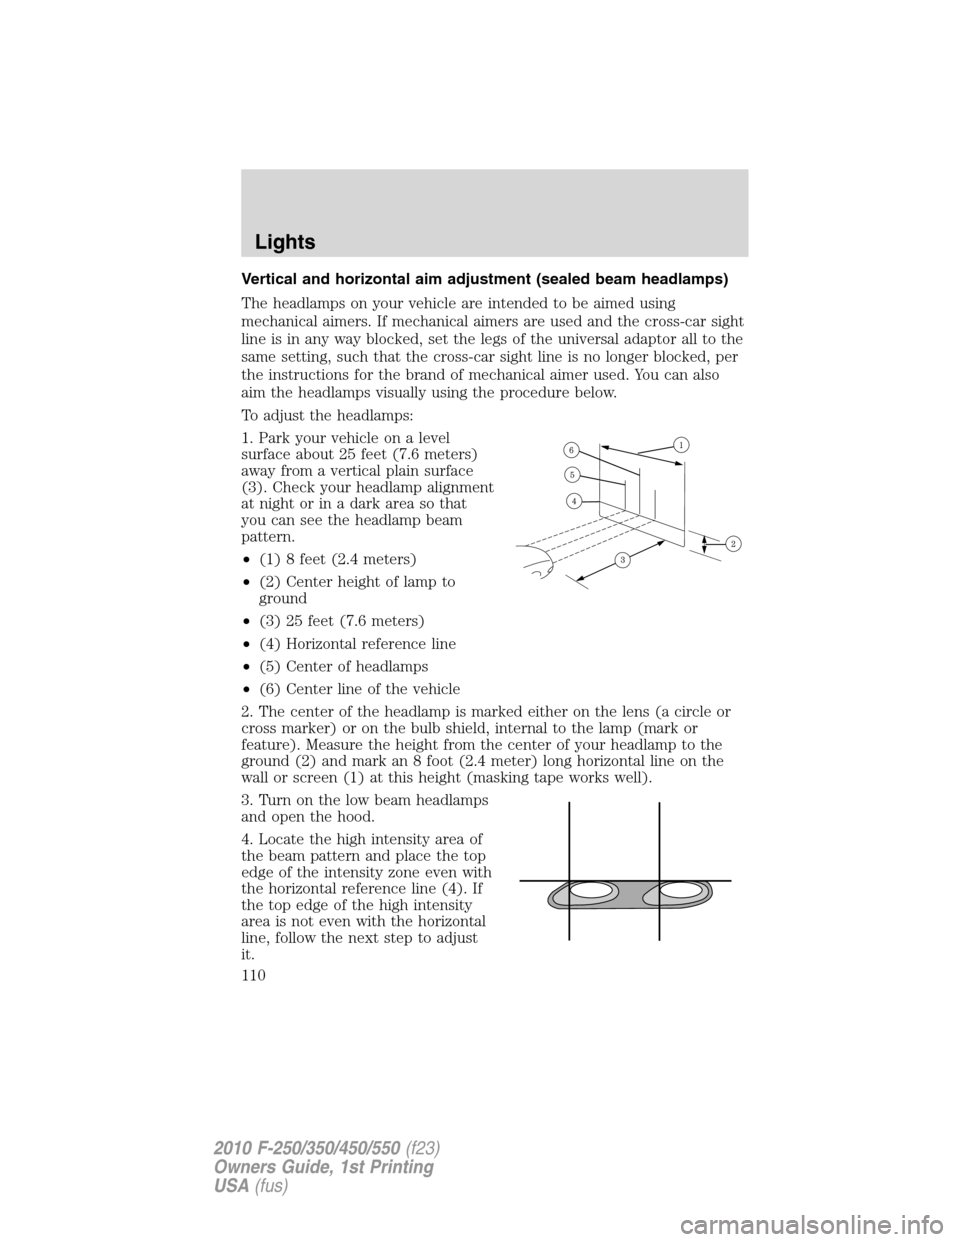
1. Park your vehicle on a level
surface about 25 feet (7.6 meters)
away from a vertical plain surface
(3). Check your headlamp alignment
at night or in a dark area so that
you can see the headlamp beam
pattern.
•(1) 8 feet (2.4 meters)
•(2) Center height of lamp to
ground
•(3) 25 feet (7.6 meters)
•(4) Horizontal reference line
•(5) Center of headlamps
•(6) Center line of the vehicle
2. The center of the headlamp is marked either on the lens (a circle or
cross marker) or on the bulb shield, internal to the lamp (mark or
feature). Measure the height from the center of your headlamp to the
ground (2) and mark an 8 foot (2.4 meter) long horizontal line on the
wall or screen (1) at this height (masking tape works well).
3. Turn on the low beam headlamps
and open the hood.
4. Locate the high intensity area of
the beam pattern and place the top
edge of the intensity zone even with
the horizontal reference line (4). If
the top edge of the high intensity
area is not even with the horizontal
line, follow the next step to adjust
it.
Lights
110
2010 F-250/350/450/550(f23)
Owners Guide, 1st Printing
USA(fus)
Page 111 of 407
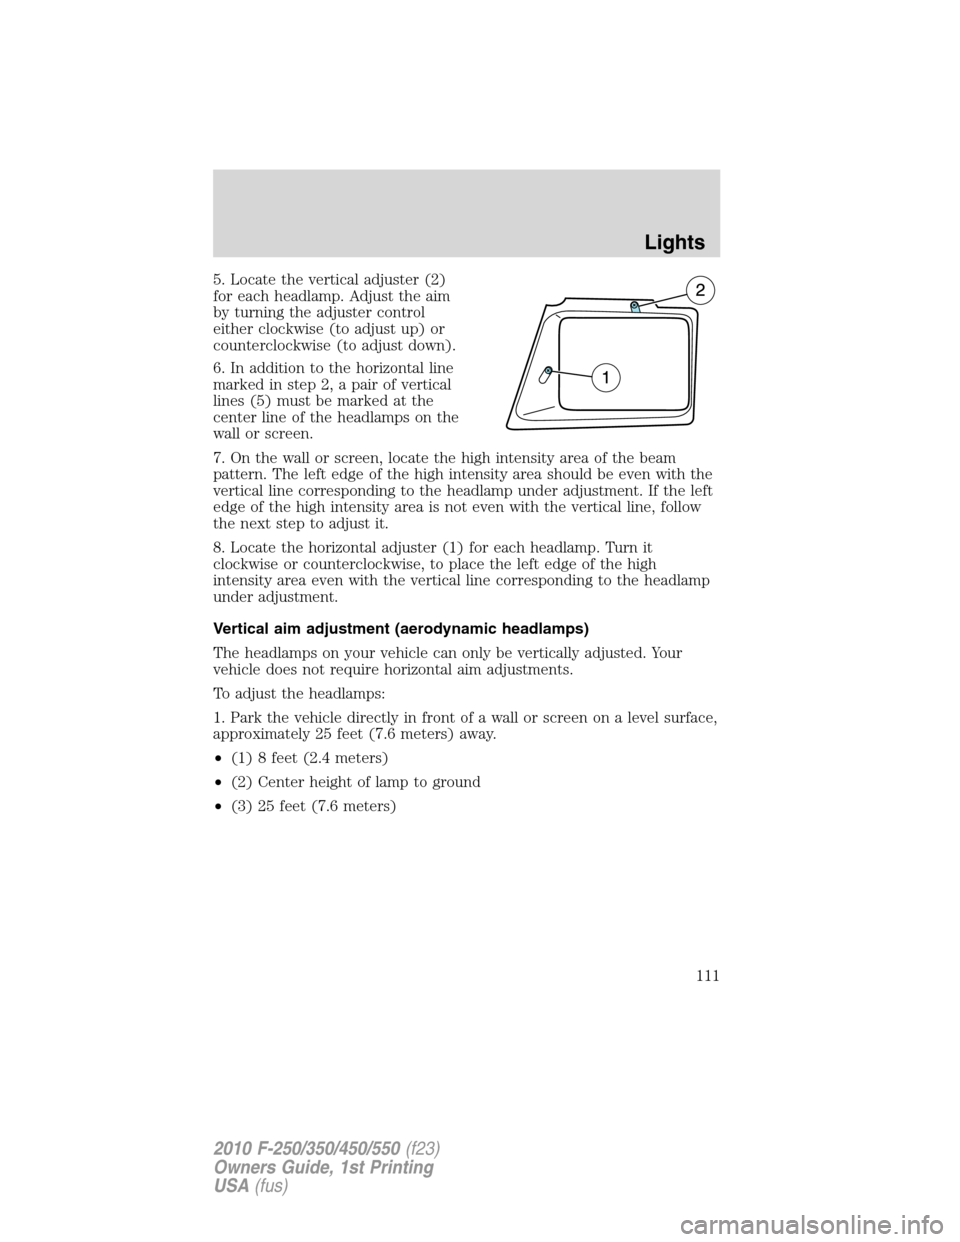
5. Locate the vertical adjuster (2)
for each headlamp. Adjust the aim
by turning the adjuster control
either clockwise (to adjust up) or
counterclockwise (to adjust down).
6. In addition to the horizontal line
marked in step 2, a pair of vertical
lines (5) must be marked at the
center line of the headlamps on the
wall or screen.
7. On the wall or screen, locate the high intensity area of the beam
pattern. The left edge of the high intensity area should be even with the
vertical line corresponding to the headlamp under adjustment. If the left
edge of the high intensity area is not even with the vertical line, follow
the next step to adjust it.
8. Locate the horizontal adjuster (1) for each headlamp. Turn it
clockwise or counterclockwise, to place the left edge of the high
intensity area even with the vertical line corresponding to the headlamp
under adjustment.
Vertical aim adjustment (aerodynamic headlamps)
The headlamps on your vehicle can only be vertically adjusted. Your
vehicle does not require horizontal aim adjustments.
To adjust the headlamps:
1. Park the vehicle directly in front of a wall or screen on a level surface,
approximately 25 feet (7.6 meters) away.
•(1) 8 feet (2.4 meters)
•(2) Center height of lamp to ground
•(3) 25 feet (7.6 meters)
Lights
111
2010 F-250/350/450/550(f23)
Owners Guide, 1st Printing
USA(fus)
Page 112 of 407
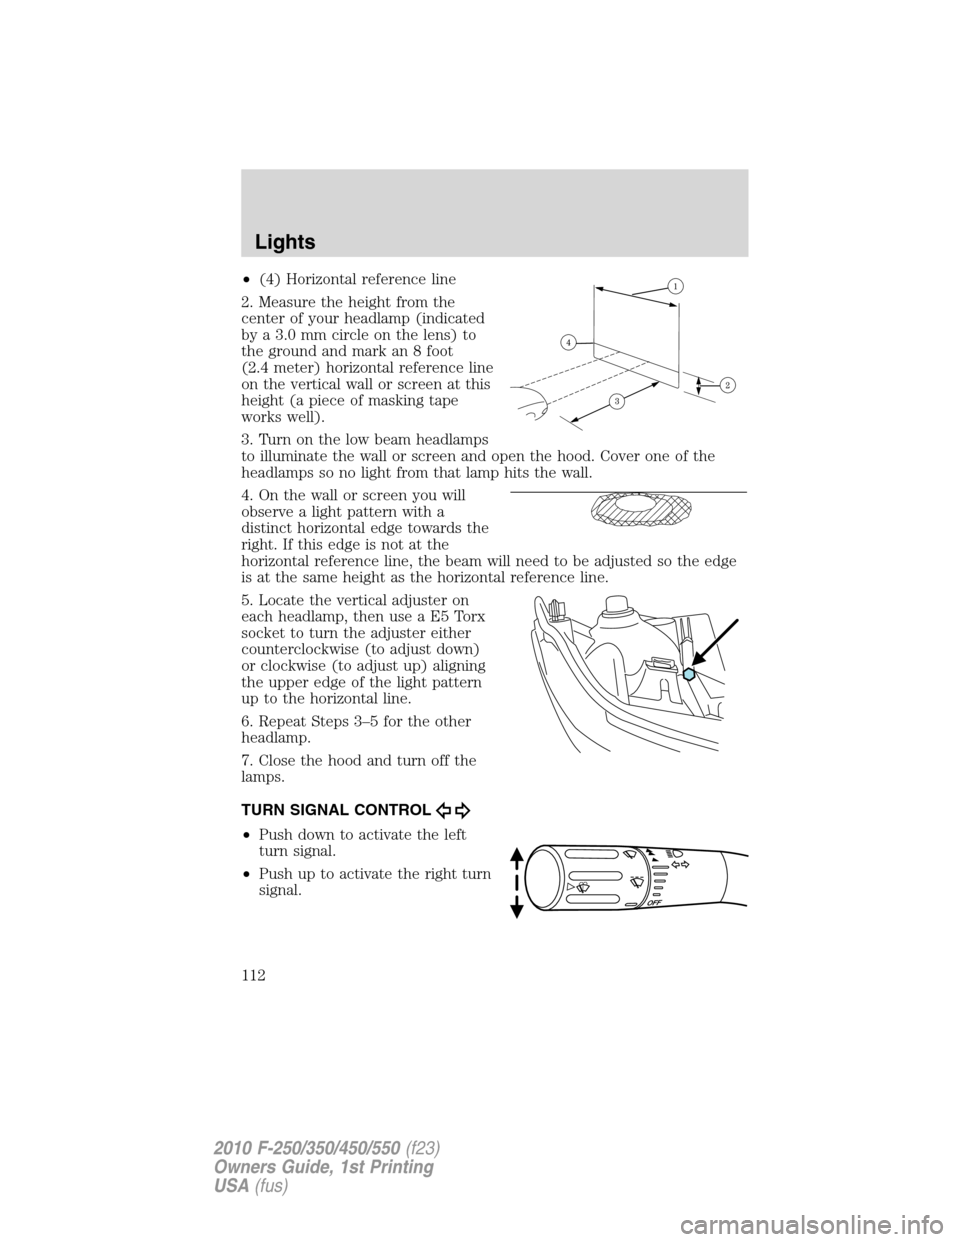
•(4) Horizontal reference line
2. Measure the height from the
center of your headlamp (indicated
by a 3.0 mm circle on the lens) to
the ground and mark an 8 foot
(2.4 meter) horizontal reference line
on the vertical wall or screen at this
height (a piece of masking tape
works well).
3. Turn on the low beam headlamps
to illuminate the wall or screen and open the hood. Cover one of the
headlamps so no light from that lamp hits the wall.
4. On the wall or screen you will
observe a light pattern with a
distinct horizontal edge towards the
right. If this edge is not at the
horizontal reference line, the beam will need to be adjusted so the edge
is at the same height as the horizontal reference line.
5. Locate the vertical adjuster on
each headlamp, then use a E5 Torx
socket to turn the adjuster either
counterclockwise (to adjust down)
or clockwise (to adjust up) aligning
the upper edge of the light pattern
up to the horizontal line.
6. Repeat Steps 3–5 for the other
headlamp.
7. Close the hood and turn off the
lamps.
TURN SIGNAL CONTROL
•Push down to activate the left
turn signal.
•Push up to activate the right turn
signal.
Lights
112
2010 F-250/350/450/550(f23)
Owners Guide, 1st Printing
USA(fus)
Page 176 of 407
WARNING:BELT AND RETRACTOR ASSEMBLY MUST BE
REPLACED if the safety belt assembly “automatic locking
retractor” feature or any other safety belt function is not operating
properly when checked by an authorized dealer. Failure to replace the
belt and retractor assembly could increase the risk of injury in
collisions.
Energy management feature
•This vehicle has a safety belt system with an energy management
feature at the front outboard seating positions to help further reduce
the risk of injury in the event of a head-on collision.
•The front outboard safety belt systems have a retractor assembly that
is designed to pay out webbing in a controlled manner. This feature is
designed to help reduce the belt force acting on the occupant’s chest.
Safety belt pretensioner
Your vehicle is equipped with safety belt retractor pretensioners at the
driver and front outboard passenger seating positions.
The driver and front outboard passenger safety belt pretensioners are
designed to activate only during certain frontal or near-frontal collisions
with sufficient longitudinal deceleration. A safety belt pretensioner is a
device which tightens the webbing of the lap and shoulder belts during
some collisions in such a way that they fit more snugly against the body.
The driver and front outboard passenger safety belt system (including
retractors, buckles and height adjusters) must be replaced if the vehicle
is involved in a collision that results in the activation of the safety belt
pretensioners. Refer to theSafety belt maintenancesection in this
chapter.
WARNING:Failure to replace the safety belt assembly under
the above conditions could result in severe personal injuries in
the event of a collision.
Seating and Safety Restraints
176
2010 F-250/350/450/550(f23)
Owners Guide, 1st Printing
USA(fus)
Page 177 of 407
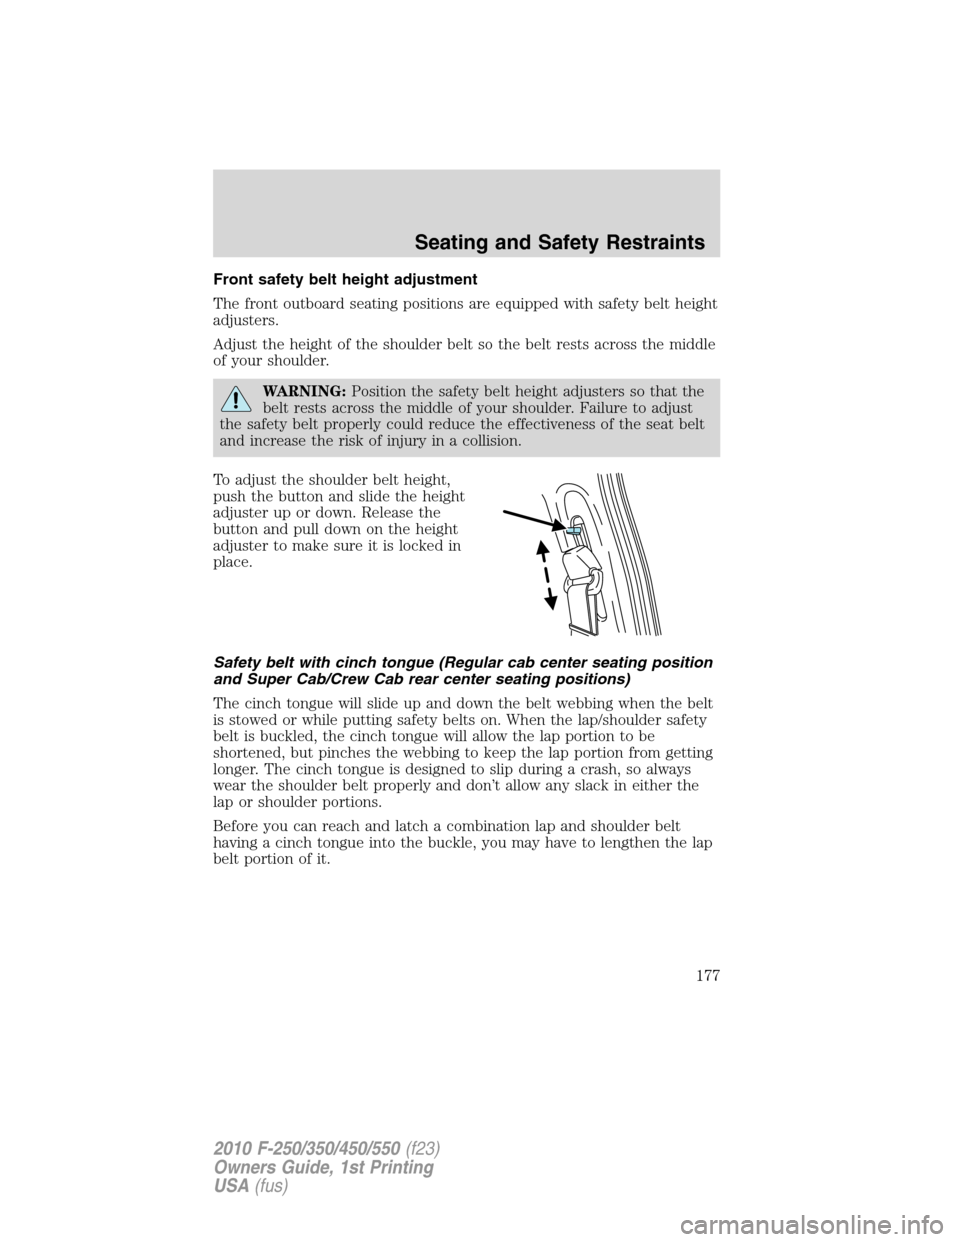
Front safety belt height adjustment
The front outboard seating positions are equipped with safety belt height
adjusters.
Adjust the height of the shoulder belt so the belt rests across the middle
of your shoulder.
WARNING:Position the safety belt height adjusters so that the
belt rests across the middle of your shoulder. Failure to adjust
the safety belt properly could reduce the effectiveness of the seat belt
and increase the risk of injury in a collision.
To adjust the shoulder belt height,
push the button and slide the height
adjuster up or down. Release the
button and pull down on the height
adjuster to make sure it is locked in
place.
Safety belt with cinch tongue (Regular cab center seating position
and Super Cab/Crew Cab rear center seating positions)
The cinch tongue will slide up and down the belt webbing when the belt
is stowed or while putting safety belts on. When the lap/shoulder safety
belt is buckled, the cinch tongue will allow the lap portion to be
shortened, but pinches the webbing to keep the lap portion from getting
longer. The cinch tongue is designed to slip during a crash, so always
wear the shoulder belt properly and don’t allow any slack in either the
lap or shoulder portions.
Before you can reach and latch a combination lap and shoulder belt
having a cinch tongue into the buckle, you may have to lengthen the lap
belt portion of it.
Seating and Safety Restraints
177
2010 F-250/350/450/550(f23)
Owners Guide, 1st Printing
USA(fus)
Page 194 of 407
SAFETY RESTRAINTS FOR CHILDREN
See the following sections for directions on how to properly use safety
restraints for children. Also seeAirbag supplemental restraint system
(SRS)in this chapter for special instructions about using airbags.
Important child restraint precautions
WARNING:Always make sure your child is secured properly in
a device that is appropriate for their height, age and weight.
Child safety restraints must be purchased separately from the vehicle.
Failure to follow these instructions and guidelines may result in an
increased risk of serious injury or death to your child.
WARNING:All children are shaped differently. The
Recommendations for Safety Restraints are based on probable
child height, age and weight thresholds from NHTSA and other safety
organizations or are the minimum requirements of law. Ford
recommends checking with a NHTSA Certified Child Passenger Safety
Technician (CPST) and your pediatrician to make sure your child seat
is appropriate for your child, and is compatible with and properly
installed in the vehicle. To locate a child seat fitting station and CPST
contact the NHTSA toll free at 1-888-327-4236 or on the internet at
http://www.nhtsa.dot.gov. Failure to properly restrain children in safety
seats made especially for their height, age, and weight may result in an
increased risk of serious injury or death to your child.
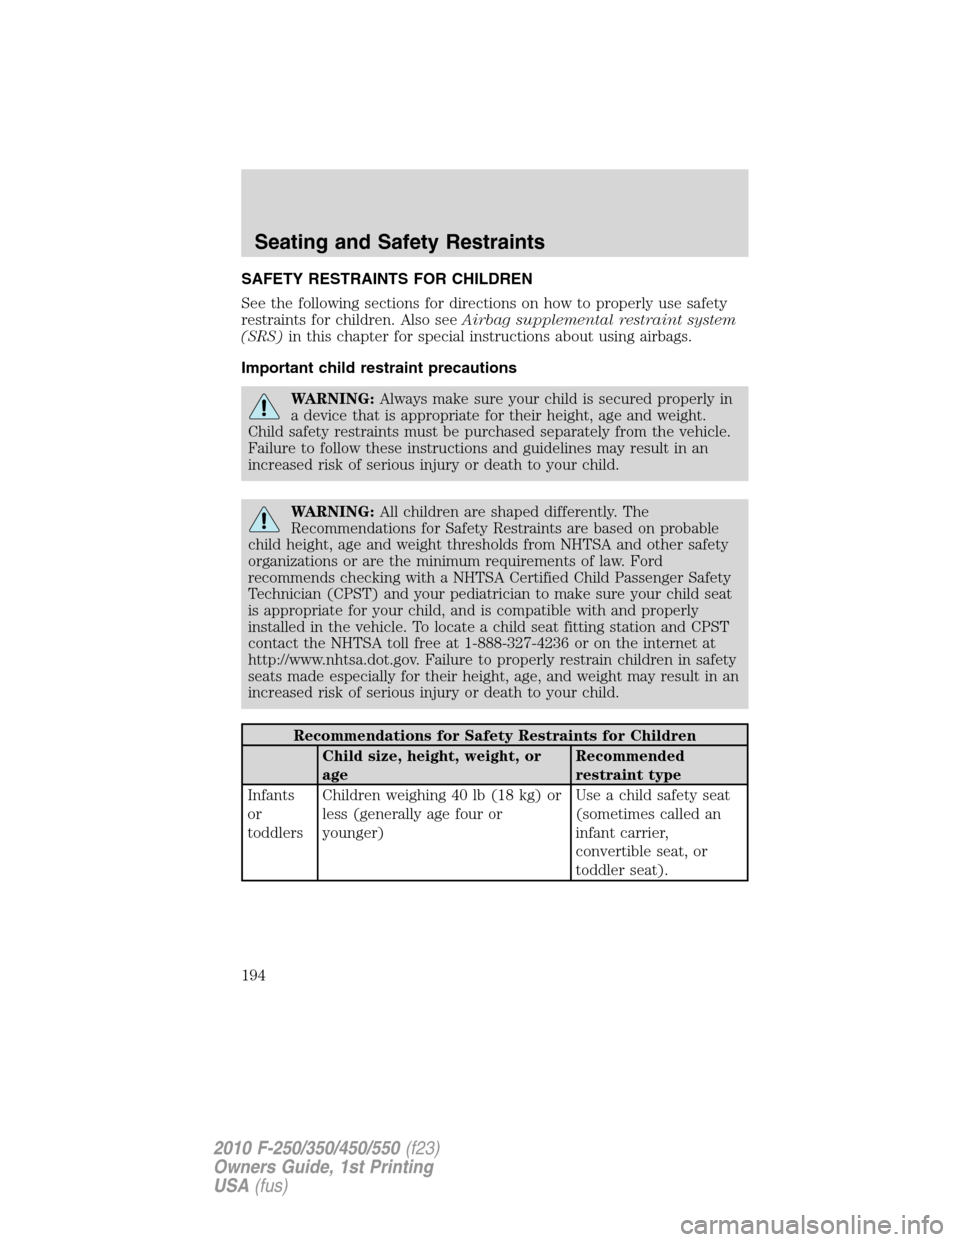
Recommendations for Safety Restraints for Children
Child size, height, weight, or
ageRecommended
restraint type
Infants
or
toddlersChildren weighing 40 lb (18 kg) or
less (generally age four or
younger)Use a child safety seat
(sometimes called an
infant carrier,
convertible seat, or
toddler seat).
Seating and Safety Restraints
194
2010 F-250/350/450/550(f23)
Owners Guide, 1st Printing
USA(fus)
Page 195 of 407
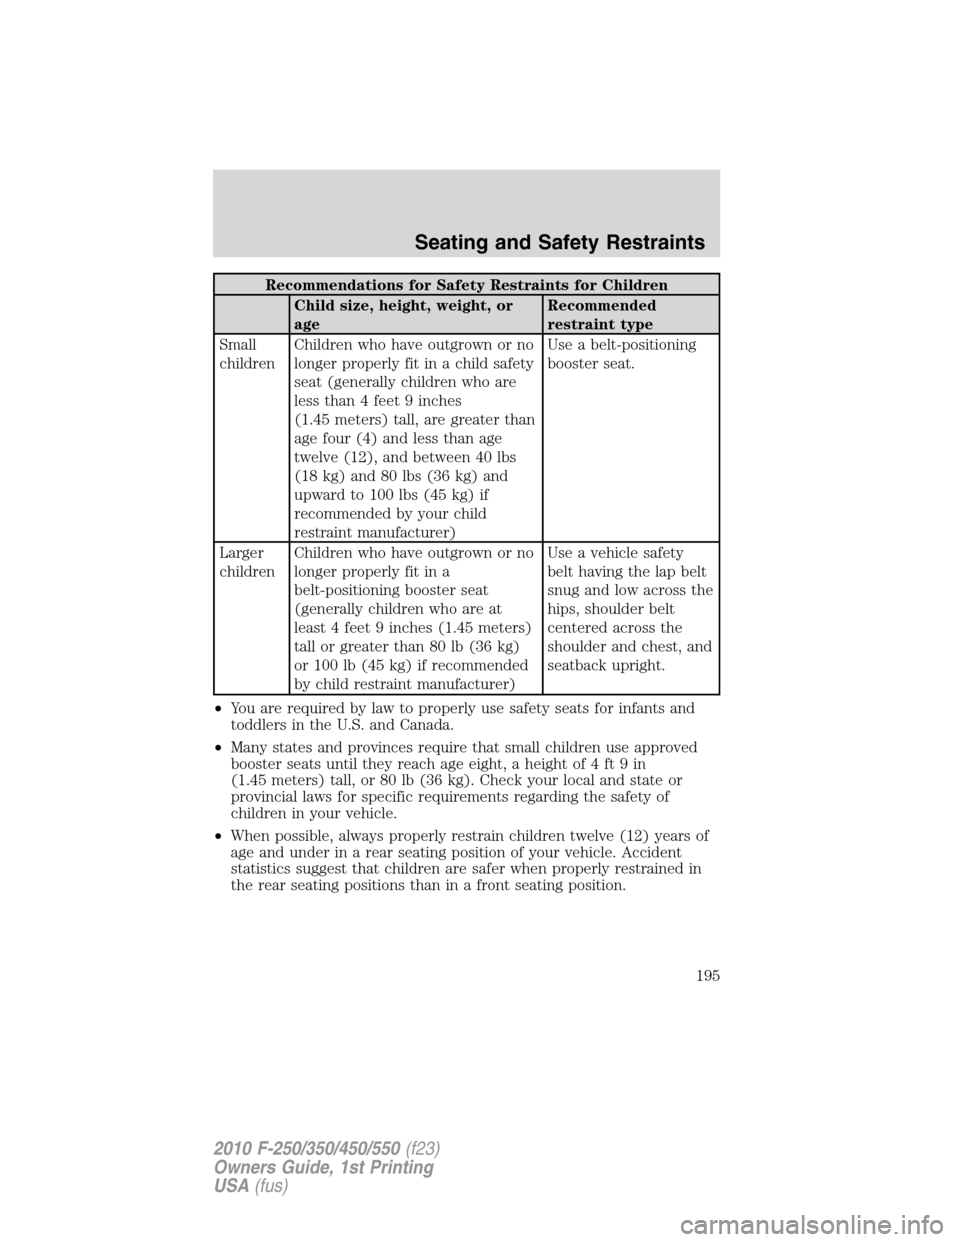
Recommendations for Safety Restraints for Children
Child size, height, weight, or
ageRecommended
restraint type
Small
childrenChildren who have outgrown or no
longer properly fit in a child safety
seat (generally children who are
less than 4 feet 9 inches
(1.45 meters) tall, are greater than
age four (4) and less than age
twelve (12), and between 40 lbs
(18 kg) and 80 lbs (36 kg) and
upward to 100 lbs (45 kg) if
recommended by your child
restraint manufacturer)Use a belt-positioning
booster seat.
Larger
childrenChildren who have outgrown or no
longer properly fit in a
belt-positioning booster seat
(generally children who are at
least 4 feet 9 inches (1.45 meters)
tall or greater than 80 lb (36 kg)
or 100 lb (45 kg) if recommended
by child restraint manufacturer)Use a vehicle safety
belt having the lap belt
snug and low across the
hips, shoulder belt
centered across the
shoulder and chest, and
seatback upright.
•You are required by law to properly use safety seats for infants and
toddlers in the U.S. and Canada.
•Many states and provinces require that small children use approved
booster seats until they reach age eight, a height of 4 ft 9 in
(1.45 meters) tall, or 80 lb (36 kg). Check your local and state or
provincial laws for specific requirements regarding the safety of
children in your vehicle.
•When possible, always properly restrain children twelve (12) years of
age and under in a rear seating position of your vehicle. Accident
statistics suggest that children are safer when properly restrained in
the rear seating positions than in a front seating position.
Seating and Safety Restraints
195
2010 F-250/350/450/550(f23)
Owners Guide, 1st Printing
USA(fus)
Page 197 of 407
WARNING:Always carefully follow the instructions and
warnings provided by the manufacturer of any child restraint to
determine if the restraint device is appropriate for your child’s size,
height, weight, or age. Follow the child restraint manufacturer’s
instructions and warnings provided for installation and use in
conjunction with the instructions and warnings provided by the vehicle
manufacturer. A safety seat that is improperly installed or utilized, is
inappropriate for your child’s height, age, or weight or does not
properly fit the child may increase the risk of serious injury or death.
WARNING:Never let a passenger hold a child on his or her lap
while the vehicle is moving. The passenger cannot protect the
child from injury in a collision, which may result in serious injury or
death.
WARNING:Never use pillows, books, or towels to boost a child.
They can slide around and increase the likelihood of injury or
death in a collision.
WARNING:Always restrain an unoccupied child seat or booster
seat. These objects may become projectiles in a collision or
sudden stop, which may increase the risk of serious injury.
WARNING:Never place, or allow a child to place, the shoulder
belt under a child’s arm or behind the back because it reduces
the protection for the upper part of the body and may increase the risk
of injury or death in a collision.
WARNING:Do not leave children, unreliable adults, or pets
unattended in your vehicle.
Transporting children
Always make sure your child is secured properly in a device that is
appropriate for their age, height and weight. All children are shaped
differently. The child height, age and weight thresholds provided are
recommendations or the minimum requirements of law. The National
Highway Traffic Safety Administration (NHTSA) provides education and
Seating and Safety Restraints
197
2010 F-250/350/450/550(f23)
Owners Guide, 1st Printing
USA(fus)
Page 198 of 407
training to ensure that all children ages 0 to 16 are properly restrained in
the correct restraint system. Ford recommends checking with a NHTSA
Certified Child Passenger Safety Technician (CPST) and your
pediatrician to make sure your seat is appropriate for your child and
properly installed in the vehicle. To locate a child seat fitting station and
CPST contact the NHTSA toll free at1-888-327-4236or on the internet
at http://www.nhtsa.dot.gov.
Follow all the safety restraint and airbag precautions that apply to adult
passengers in your vehicle.
If the child is the proper height, age, and weight (as specified by your
child safety seat or booster manufacturer), fits the restraint and can be
restrained properly, then restrain the child in the child safety seat or
with the belt-positioning booster. Remember that child seats and
belt-positioning boosters vary and may be designed to fit children of
different heights, ages and weights. Children who are too large for child
safety seats or belt-positioning boosters (as specified by your child safety
seat manufacturer) should always properly wear safety belts.
SAFETY SEATS FOR CHILDREN
Infant and/or toddler seats
Use a safety seat that is recommended for the size and weight of the child.
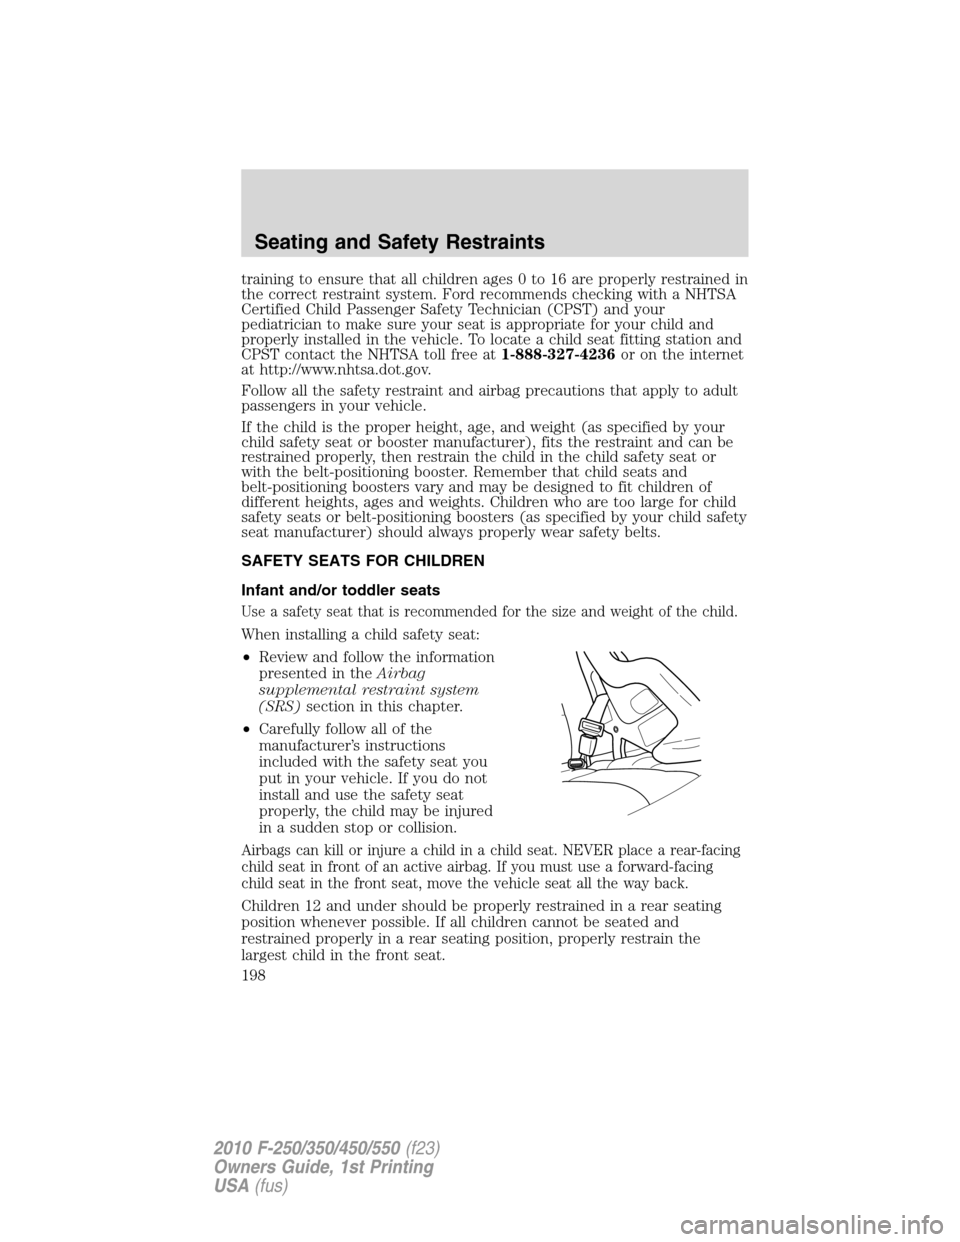
When installing a child safety seat:
•Review and follow the information
presented in theAirbag
supplemental restraint system
(SRS)section in this chapter.
•Carefully follow all of the
manufacturer’s instructions
included with the safety seat you
put in your vehicle. If you do not
install and use the safety seat
properly, the child may be injured
in a sudden stop or collision.
Airbags can kill or injure a child in a child seat. NEVER place a rear-facing
child seat in front of an active airbag. If you must use a forward-facing
child seat in the front seat, move the vehicle seat all the way back.
Children 12 and under should be properly restrained in a rear seating
position whenever possible. If all children cannot be seated and
restrained properly in a rear seating position, properly restrain the
largest child in the front seat.
Seating and Safety Restraints
198
2010 F-250/350/450/550(f23)
Owners Guide, 1st Printing
USA(fus)
Page 211 of 407
Child booster seats
The belt-positioning booster (booster seat) is used to improve the fit of
the vehicle safety belt. Children outgrow a typical child seat (e.g.,
convertible or toddler seat) when they weigh about 40 lb (18 kg) and are
around four (4) years of age. Consult your child safety seat owner guide
for the weight, height, and age limits specific to your child safety seat.
Keep your child in the child safety seat if it properly fits the child,
remains appropriate for their weight, height and age AND if properly
secured to the vehicle.
Although the lap/shoulder belt will provide some protection, children
who have outgrown a typical child seat are still too small for lap/shoulder
belts to fit properly, and wearing an improperly fitted vehicle safety belt
could increase the risk of serious injury in a crash. To improve the fit of
both the lap and shoulder belt on children who have outgrown child
safety seats, Ford Motor Company recommends use of a belt-positioning
booster.
Booster seats position a child so that vehicle lap/shoulder safety belts fit
better. They lift the child up so that the lap belt rests low across the hips
and the knees bend comfortably at the edge of the cushion, while
minimizing slouching. Booster seats may also make the shoulder belt fit
better and more comfortably. Try to keep the belt near the middle of the
shoulder and across the center of the chest. Moving the child closer (a
few centimeters or inches) to the center of the vehicle, but remaining in
the same seating position, may help provide a good shoulder belt fit.
When children should use booster seats
Children need to use booster seats from the time they outgrow the
toddler seat until they are big enough for the vehicle seat and
lap/shoulder belt to fit properly. Generally this is when they reach a
height of at least 4 feet 9 inches (1.45 meters) tall (around age eight to
age twelve and between 40 lb (18 kg) and 80 lb (36 kg) or upward to
100 lb (45 kg) if recommended by your child restraint manufacturer).
Many state and provincial laws require that children use approved
booster seats until they reach age eight, a height of 4 feet 9 inches
(1.45 meters) tall, or 80 lb (36 kg).
Seating and Safety Restraints
211
2010 F-250/350/450/550(f23)
Owners Guide, 1st Printing
USA(fus)