light FORD SUPER DUTY 2017 4.G Repair Manual
[x] Cancel search | Manufacturer: FORD, Model Year: 2017, Model line: SUPER DUTY, Model: FORD SUPER DUTY 2017 4.GPages: 636, PDF Size: 10.56 MB
Page 194 of 636
Continued driving without refilling results
in the following actions as required by the
California Air Resources Board (CARB) and
the U.S. Environmental Protection Agency
(EPA):
•
Within a preset distance to empty,
speed is limited upon vehicle restart.
Prior to this occurring a message
appears in the information display.
• Further vehicle operation without
refilling the diesel exhaust fluid tank
causes the engine to enter an idle-only
condition. This only occurs upon vehicle
refueling or at an extended idle. A
message indicates the required actions
to resume normal operation. It is
required to add a minimum of 1.0 gal
(3.8 L) of diesel exhaust fluid to the
tank to exit the idle-only condition, but
your vehicle is still in the speed-limiting
mode until you refill the tank
completely.
Note: For either vehicle speed limiting or
idle-only condition, normal vehicle operation
resumes when you refill the diesel exhaust
fluid tank.
Note: When filling the diesel exhaust fluid
tank from empty, there may be a short delay
before detecting the increased level of fluid.
The increased level detection must occur
before your vehicle returns to full power.
Diesel Exhaust Fluid Guidelines
and Information
• Use only diesel exhaust fluid that
carries the American Petroleum
Institute (API) certified diesel exhaust
fluid trademark or ISO 22241.
• Do not put diesel exhaust fluid in the
diesel fuel tank.
• Do not overfill the diesel exhaust fluid
tank.
• Diesel exhaust fluid is corrosive.
• Do not re-use the diesel exhaust fluid
container once it is emptied. •
Avoid spilling diesel exhaust fluid on
painted surfaces, carpeting or plastic
components. Immediately wipe away
any diesel exhaust fluid that has spilled
with a damp cloth and water. If it has
already crystallized, use warm water
and a sponge.
• Store diesel exhaust fluid out of direct
sunlight and in temperatures between
23°F (-5°C)
and 68°F (20°C).
• Diesel exhaust fluid freezes below 12°F
(-11°C)
.
• Do not store the diesel exhaust fluid
bottle in your vehicle. If it leaks it could
cause damage to interior components
or release an ammonia odor inside your
vehicle.
• Diesel exhaust fluid is non-flammable,
non-toxic, colorless and water-soluble
liquid.
• The system has a diesel exhaust fluid
quality sensor. Dilution of diesel
exhaust fluid or use of any other liquid
in the SCR system leads to a diesel
exhaust fluid system fault, eventually
leading to the vehicle only operating in
idle-only mode.
• Do not dilute diesel exhaust fluid with
water or any other liquid.
• An ammonia odor may be smelled
when the cap is removed or during
refill. Refill diesel exhaust fluid in a well
ventilated area.
191
Super Duty (TFE) Canada/United States of America, enUSA, First Printing Fuel and Refueling
Page 196 of 636
Use the following guidelines to avoid
electrostatic charge build-up when filling
an ungrounded fuel container:
•
Place approved fuel container on the
ground.
• Do not fill a fuel container while it is in
the vehicle (including the cargo area).
• Keep the fuel pump nozzle in contact
with the fuel container while filling.
• Do not use a device that would hold
the fuel pump handle in the fill position.
Fuel Filler Cap WARNINGS
The fuel system may be under
pressure. If you hear a hissing sound
near the fuel filler door, do not refuel
until the sound stops. Otherwise, fuel may
spray out, which could cause serious
personal injury. If you do not use the proper fuel filler
cap, excessive pressure or vacuum
in the fuel tank may damage the fuel
system or cause the fuel cap to disengage
in a collision, which may result in possible
personal injury. Note:
If you must replace the fuel filler cap,
replace it with a fuel filler cap that is
designed for your vehicle. The customer
warranty may be void for any damage to the
fuel tank or fuel system if the correct
genuine Ford, Motorcraft or other certified
fuel filler cap is not used.
Your fuel tank filler cap has an indexed
design with a 1/4th turn on and off feature.
When fueling your vehicle:
1. Put your vehicle in park (P).
2. Switch the engine off.
3. Carefully turn the filler cap counterclockwise until it spins off.
4. Pull to remove the cap from the fuel filler pipe. 5.
To install the cap, align the tabs on the
cap with the notches on the filler pipe.
6. Turn the filler cap clockwise 1/4 of a turn clockwise until it clicks at least
once.
If the Check Fuel Cap light or a Check Fuel
Cap message appears in the instrument
cluster and stays on after you start the
engine, you may not have installed the fuel
filler properly.
If the fuel cap light remains on, at the next
opportunity, safely pull off of the road,
remove the fuel filler cap, align the cap
properly and reinstall it. The check fuel cap
light or Check fuel cap message may not
reset immediately. It may take several
driving cycles for the indicators to turn off.
A driving cycle consists of an engine
start-up (after four or more hours with the
engine off) followed by normal city and
highway driving.
REFUELING - DIESEL WARNINGS
Read and follow all the instructions
on the pump island.
Stay outside your vehicle and do not
leave the fuel pump unattended
when refueling your vehicle.
Keep children away from the fuel
pump. Never let children pump fuel.
Wait at least 10 seconds before
removing the fuel pump nozzle to
allow any residual fuel to drain into
the fuel tank. Do not remove the fuel pump nozzle
from its fully inserted position when
refueling.
193
Super Duty (TFE) Canada/United States of America, enUSA, First Printing Fuel and Refueling
Page 198 of 636
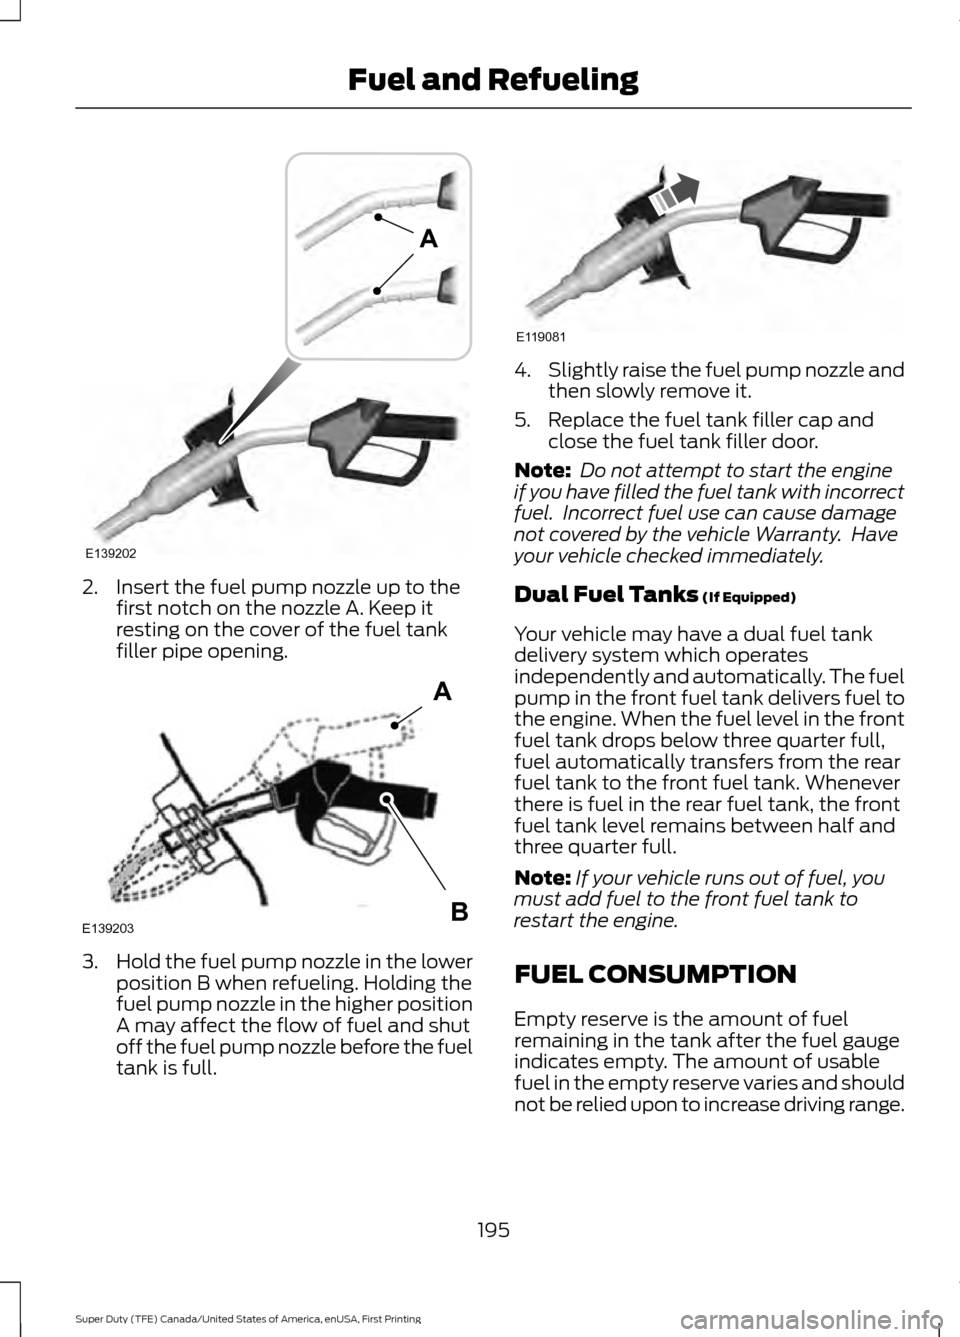
2. Insert the fuel pump nozzle up to the
first notch on the nozzle A. Keep it
resting on the cover of the fuel tank
filler pipe opening. 3.
Hold the fuel pump nozzle in the lower
position B when refueling. Holding the
fuel pump nozzle in the higher position
A may affect the flow of fuel and shut
off the fuel pump nozzle before the fuel
tank is full. 4.
Slightly raise the fuel pump nozzle and
then slowly remove it.
5. Replace the fuel tank filler cap and close the fuel tank filler door.
Note: Do not attempt to start the engine
if you have filled the fuel tank with incorrect
fuel. Incorrect fuel use can cause damage
not covered by the vehicle Warranty. Have
your vehicle checked immediately.
Dual Fuel Tanks (If Equipped)
Your vehicle may have a dual fuel tank
delivery system which operates
independently and automatically. The fuel
pump in the front fuel tank delivers fuel to
the engine. When the fuel level in the front
fuel tank drops below three quarter full,
fuel automatically transfers from the rear
fuel tank to the front fuel tank. Whenever
there is fuel in the rear fuel tank, the front
fuel tank level remains between half and
three quarter full.
Note: If your vehicle runs out of fuel, you
must add fuel to the front fuel tank to
restart the engine.
FUEL CONSUMPTION
Empty reserve is the amount of fuel
remaining in the tank after the fuel gauge
indicates empty. The amount of usable
fuel in the empty reserve varies and should
not be relied upon to increase driving range.
195
Super Duty (TFE) Canada/United States of America, enUSA, First Printing Fuel and RefuelingE139202
A E139203
A
B E119081
Page 199 of 636
•
The usable capacity of the fuel tank is
the amount of fuel that you can add to
the fuel tank when the fuel gauge
indicates empty, before the first fuel
filler nozzle automatic shutoff event.
• The advertised capacity is equal to the
volumetric difference between actual
fuel fill before the first fuel filler nozzle
automatic shutoff event and the fuel
quantity when the fuel gauge indicates
empty. See Capacities and
Specifications (page 411). It is the
usable capacity minus the empty
reserve.
• Due to the empty reserve, you may be
able to add more fuel than the
advertised capacity of the fuel tank
when the fuel gauge indicates empty.
Filling the Fuel Tank
For consistent results when refueling:
• Turn the ignition off before fueling; an
inaccurate reading results if the engine
is left running.
• Use the same fill rate
(low-medium-high) each time the tank
is filled.
• Allow no more than one automatic
shut-off when refueling.
Results are most accurate when the filling
method is consistent.
Calculating Fuel Economy
Do not measure fuel economy during the
first
1,000 mi (1,600 km) of driving (this is
your engine ’s break-in period). A more
accurate measurement is obtained after
2,000 mi (3,200 km)
to 3,000 mi
(4,800 km). Also, fuel expense, frequency
of fill ups or fuel gauge readings are not
accurate ways to measure fuel economy.
1. Fill the fuel tank completely and record
the initial odometer reading. 2. Each time you fill the fuel tank, record
the amount of fuel added.
3. After at least three fill ups, fill the fuel tank and record the current odometer
reading.
4. Subtract your initial odometer reading from the current odometer reading.
To calculate L/100 km (liters per 100
kilometers) fuel consumption, multiply the
liters used by 100, then divide by kilometers
traveled. To calculate MPG (miles per
gallon) fuel consumption, divide miles
traveled by gallons used.
Keep a record for at least one month and
record the type of driving (city or highway).
This provides an accurate estimate of your
vehicle ’s fuel economy under current
driving conditions. Keeping records during
summer and winter will show how
temperature impacts fuel economy.
Conditions
• Heavily loading your vehicle reduces
fuel economy.
• Carrying unnecessary weight in your
vehicle may reduce fuel economy.
• Adding certain accessories to your
vehicle such as bug deflectors, rollbars
or light bars, running boards and ski
racks may reduce fuel economy.
• Using fuel blended with alcohol may
lower fuel economy.
• Fuel economy may decrease with lower
temperatures.
• Fuel economy may decrease when
driving short distances.
• You will get better fuel economy when
driving on flat terrain than when driving
on hilly terrain.
196
Super Duty (TFE) Canada/United States of America, enUSA, First Printing Fuel and Refueling
Page 200 of 636
EMISSION CONTROL SYSTEM
- GASOLINE
WARNINGS
Do not park, idle or drive your vehicle
on dry grass or other dry ground
cover. The emission system heats up
the engine compartment and exhaust
system, creating the risk of fire. Exhaust leaks may result in entry of
harmful and potentially lethal fumes
into the passenger compartment. If
you smell exhaust fumes inside your
vehicle, have your vehicle inspected
immediately. Do not drive if you smell
exhaust fumes. Your vehicle has various emission control
components and a catalytic converter that
enables it to comply with applicable
exhaust emission standards.
To make sure that the catalytic converter
and other emission control components
continue to work properly:
•
Use only the specified fuel listed.
• Avoid running out of fuel.
• Do not turn off the ignition while your
vehicle is moving, especially at high
speeds.
• Have the items listed in scheduled
maintenance information performed
according to the specified schedule.
The scheduled maintenance items listed
in scheduled maintenance information are
essential to the life and performance of
your vehicle and to its emissions system.
If you use anything other than Ford,
Motorcraft or Ford-authorized parts for
maintenance replacements or for service
of components affecting emission control,
such non-Ford parts should be equivalent
to genuine Ford Motor Company parts in
performance and durability. Illumination of the service engine soon
indicator, charging system warning light or
the temperature warning light, fluid leaks,
strange odors, smoke or loss of engine
power could indicate that the emission
control system is not working properly.
An improperly operating or damaged
exhaust system may allow exhaust to
enter the vehicle. Have a damaged or
improperly operating exhaust system
inspected and repaired immediately.
Do not make any unauthorized changes to
your vehicle or engine. By law, vehicle
owners and anyone who manufactures,
repairs, services, sells, leases, trades
vehicles, or supervises a fleet of vehicles
are not permitted to intentionally remove
an emission control device or prevent it
from working. Information about your
vehicle
’s emission system is on the Vehicle
Emission Control Information Decal
located on or near the engine. This decal
also lists engine displacement.
Please consult your warranty information
for complete details.
On-Board Diagnostics (OBD-II)
Your vehicle has a computer known as the
on-board diagnostics system (OBD-II) that
monitors the engine ’s emission control
system. The system protects the
environment by making sure that your
vehicle continues to meet government
emission standards. The OBD-II system
also assists a service technician in properly
servicing your vehicle. When the service engine soon
indicator illuminates, the OBD-II
system has detected a
malfunction. Temporary malfunctions may
cause the service engine soon indicator to
illuminate. Examples are:
1. Your vehicle has run out of fuel —the
engine may misfire or run poorly.
197
Super Duty (TFE) Canada/United States of America, enUSA, First Printing Fuel and Refueling
Page 204 of 636
•
Park your vehicle 10– 15 ft (3–5 m)
away from any obstructions and away
from materials that can easily combust
or melt, for example paper, leaves,
petroleum products, fuels, plastics and
other dry organic material.
• Make sure there is a minimum of 1/8
tank of fuel.
• Make sure all fluids are at proper levels.
How to Start Operator Commanded
Regeneration WARNING
Stay clear of the exhaust tailpipe
during regeneration. Hot exhaust
gases can burn you badly.
Note:
You cannot use the operator
commanded regeneration until the diesel
particulate filter load percentage has
reached 100%. The diesel particulate filter
load percentage fluctuates up and down
when driving your vehicle due to active and
passive regenerations.
Note: During the use of operator
commanded regeneration, you may observe
a light amount of white smoke. This is
normal. You may not be able to use
operator commanded
regeneration if the service engine
soon warning lamp appears in the
information display
Information Display Procedure
Start with your vehicle engine and when it
has reached the normal operating
temperature, press the information display
control button on the steering wheel. See
General Information
(page 111). If a
message advising that the exhaust filter is
full appears in the information display,
press the
OK button to set the display to
Y. Answer yes to this prompt and then follow the next prompts regarding exhaust
position required to initiate operator
commanded regeneration. Be sure to
understand each prompt. If you are not
sure what is being asked by each prompt,
contact an authorized dealer. The display
confirms the operation has started and
when it has finished.
If the diesel particulate filter is near or at
saturation, a message requesting
permission to initiate filter cleaning
appears in the information display. See
Information Messages
(page 128).
Answer yes to this prompt and then follow
the next prompts regarding exhaust
position required to initiate operator
commanded regeneration. Be sure to
understand each prompt. If you are not
sure what is being asked by each prompt,
contact an authorized dealer. The display
confirms the operation has started and
when it has finished. You can also drive to
clean the filter. When the system is at the point
of oversaturation, the service
engine warning lamp illuminates
and a message appears in the information
display. You cannot initiate filter cleaning.
You must have your vehicle checked as
soon as possible.
Once operator commanded regeneration
starts, engine speed increases to
approximately 2000– 2500 rpm and the
cooling fan speed increases. You will hear
a change in audible sound due to engine
speed and cooling fan speed increases.
It is not necessary to open the hood on the
engine compartment. Once operator
commanded regeneration completes, the
engine speed returns to normal idling. The
exhaust system remains very hot for
several minutes even after regeneration is
complete. Do not reposition the vehicle
over materials that could burn until the
201
Super Duty (TFE) Canada/United States of America, enUSA, First Printing Fuel and Refueling
Page 205 of 636
exhaust system has had sufficient time to
cool. Depending on the amount of soot
collected by the diesel particulate filter,
ambient temperature and altitude,
operator commanded regeneration lasts
approximately 30 minutes.
Operator Commanded Regeneration
with Automatic Regeneration Control
(If Equipped)
If your vehicle is operated with significant
stationary operation, low speed drive
cycles less than 25 mph (40 km/h), short
drive cycles, drive time less than 15 minutes
or the vehicle does not fully warm up,
passive and active regeneration may not
sufficiently clean the diesel particulate
filter system. You can switch off automatic
regeneration until better driving conditions
are available, for example steady high
speed driving. You can then switch
automatic regeneration back on to clean
the diesel particulate filter.
Switching Automatic Regeneration
Control On and Off
To switch operator commanded
regeneration on and off, use the
information display control on the steering
wheel. See
General Information (page
111). Scroll to the exhaust cleaning
message and then select Y or N to switch
it On or Off.
How to Interrupt or Cancel Operator
Commanded Regeneration
If you need to cancel the operator
commanded regeneration, pressing the
brake, accelerator or switching the engine
off stops the procedure. Depending on the
amount of time you allowed the operator
commanded regeneration to operate, soot
may not have had sufficient time to be fully
eliminated, but the exhaust system and
exhaust gas may still be hot. If you shut your vehicle off during operator
commanded regeneration, you may notice
turbo flutter. This is a normal consequence
caused by shutting off a diesel engine
during boosted operation and is considered
normal.
Filter Service and Maintenance
Over time, a slight amount of ash builds
up in the diesel particulate filter, which is
not removed during the regeneration
process. The filter may need to be removed
for ash cleaning at approximately
120,000 mi (190,000 km)
or it may need
to be replaced with a new or
remanufactured part. Actual mileage
varies depending on engine and vehicle
operating conditions. The filter may need
to be replaced with a new or
remanufactured part at approximately
250,000 mi (400,000 km)
. Actual
mileage varies depending on engine and
vehicle operating conditions. If filter service is required, the
engine control system warning
lamp illuminates in the
information display. If there are any issues with the
diesel particulate filter system,
the engine control system
warning lamp and a service
engine soon warning lamp
illuminate to inform you that
your vehicle requires service. Have your
vehicle checked as soon as possible.
202
Super Duty (TFE) Canada/United States of America, enUSA, First Printing Fuel and Refueling
Page 209 of 636
Forced downshifts
•
Allowed in drive (D) with the tow/haul
feature on or off.
• Press the accelerator to the floor.
• Allows transmission to select an
appropriate gear.
Tow/Haul Mode WARNING
Do not use the tow/haul feature
when driving in icy or slippery
conditions as the increased engine
braking can cause the rear wheels to slide
and your vehicle to swing around with the
possible loss of vehicle control. To activate tow/haul, press the
button on the gearshift lever
once. The TOW HAUL indicator
light illuminates in the instrument cluster.
The tow/haul feature:
• Delays upshifts to reduce the frequency
of transmission shifting.
• Provides engine braking in all forward
gears, which slows your vehicle and
assists you in controlling your vehicle
when descending a grade.
• Depending on driving conditions and
load conditions, may downshift the
transmission, slow your vehicle and
control your vehicle speed when
descending a hill, without pressing the
accelerator pedal. The amount of
downshift braking provided will vary
based upon the amount you press the
brake pedal.
The tow/haul feature improves
transmission operation when towing a
trailer or a heavy load. All transmission
gear ranges are available when using
tow/haul. Note:
If your vehicle is equipped with the
Adaptive Steering System, enabling the
tow/haul feature will adjust the steering
response. In tow/haul mode the Adaptive
Steering system reduces vehicle sensitivity
to steering inputs at higher vehicle speeds
while maintaining the ease of parking and
maneuverability at low speeds. See
Steering (page 256).
To deactivate the tow/haul feature and
return to normal driving mode, press the
button on the gearshift lever when
tow/haul is active. The TOW HAUL light
deactivates. Tow/haul also deactivates
when you power down your vehicle.
Understanding your SelectShift
Automatic ™ transmission (If Equipped) Your vehicle is equipped with a SelectShift
Automatic
™ transmission gearshift lever.
The SelectShift Automatic transmission
gives you the ability to change gears up or
down (without a clutch) as desired.
206
Super Duty (TFE) Canada/United States of America, enUSA, First Printing TransmissionE161509 E163184
Page 212 of 636
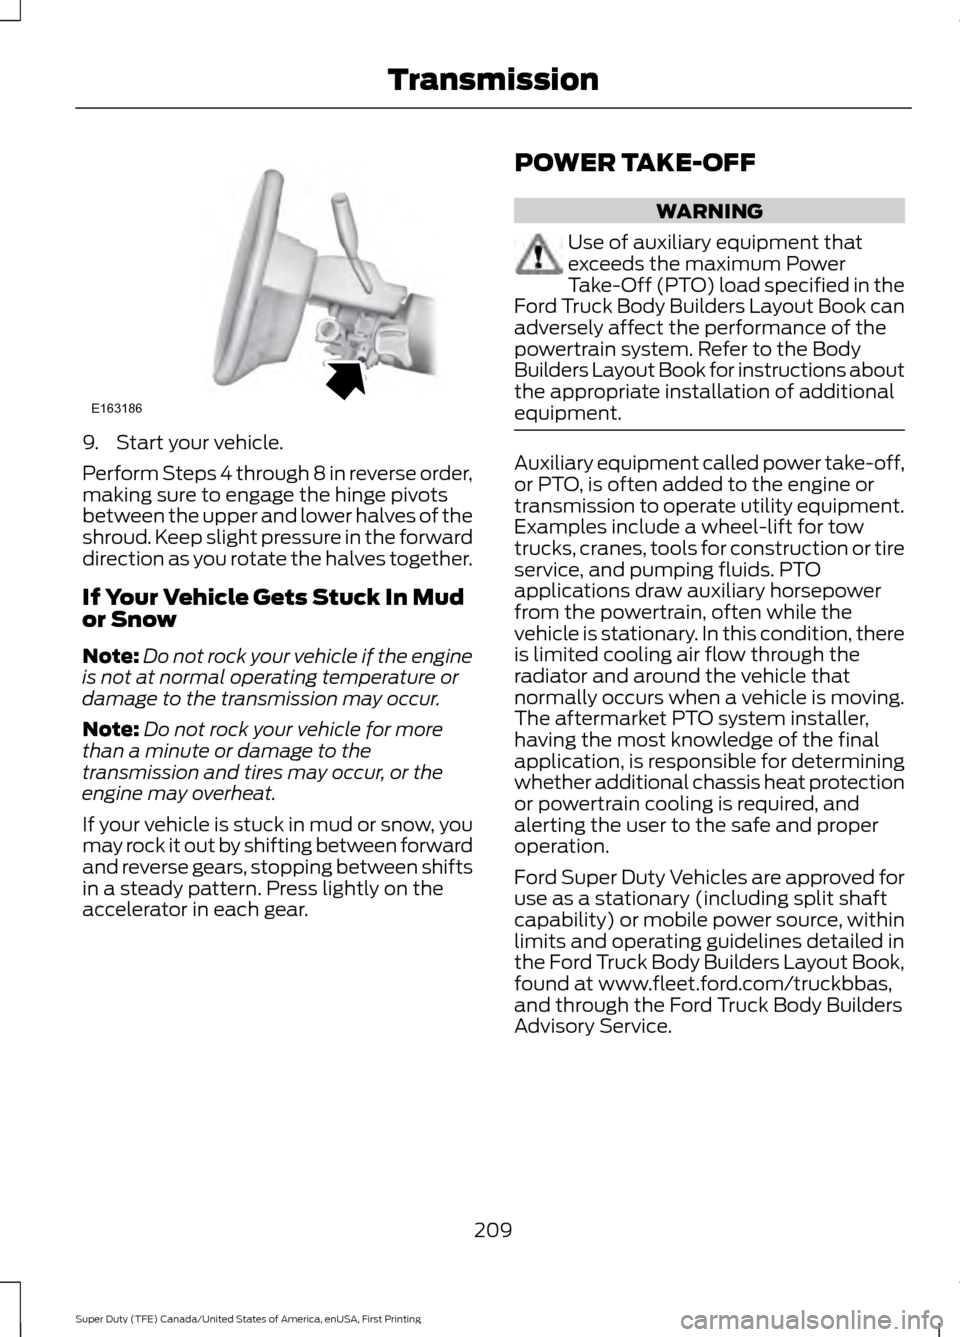
9. Start your vehicle.
Perform Steps 4 through 8 in reverse order,
making sure to engage the hinge pivots
between the upper and lower halves of the
shroud. Keep slight pressure in the forward
direction as you rotate the halves together.
If Your Vehicle Gets Stuck In Mud
or Snow
Note:
Do not rock your vehicle if the engine
is not at normal operating temperature or
damage to the transmission may occur.
Note: Do not rock your vehicle for more
than a minute or damage to the
transmission and tires may occur, or the
engine may overheat.
If your vehicle is stuck in mud or snow, you
may rock it out by shifting between forward
and reverse gears, stopping between shifts
in a steady pattern. Press lightly on the
accelerator in each gear. POWER TAKE-OFF WARNING
Use of auxiliary equipment that
exceeds the maximum Power
Take-Off (PTO) load specified in the
Ford Truck Body Builders Layout Book can
adversely affect the performance of the
powertrain system. Refer to the Body
Builders Layout Book for instructions about
the appropriate installation of additional
equipment. Auxiliary equipment called power take-off,
or PTO, is often added to the engine or
transmission to operate utility equipment.
Examples include a wheel-lift for tow
trucks, cranes, tools for construction or tire
service, and pumping fluids. PTO
applications draw auxiliary horsepower
from the powertrain, often while the
vehicle is stationary. In this condition, there
is limited cooling air flow through the
radiator and around the vehicle that
normally occurs when a vehicle is moving.
The aftermarket PTO system installer,
having the most knowledge of the final
application, is responsible for determining
whether additional chassis heat protection
or powertrain cooling is required, and
alerting the user to the safe and proper
operation.
Ford Super Duty Vehicles are approved for
use as a stationary (including split shaft
capability) or mobile power source, within
limits and operating guidelines detailed in
the Ford Truck Body Builders Layout Book,
found at www.fleet.ford.com/truckbbas,
and through the Ford Truck Body Builders
Advisory Service.
209
Super Duty (TFE) Canada/United States of America, enUSA, First Printing TransmissionE163186
Page 214 of 636
For proper operation, make sure that each
hub is fully engaged and that both hub
locks are set to the same position (both
set to LOCK or both set to AUTO). To
engage LOCK, turn the hub locks
completely clockwise; to engage AUTO,
turn the hub locks completely
counterclockwise.
The ESOF 4WD system:
•
provides 4x4 High engagement and
disengagement while the vehicle is
moving.
• is operated by a rotary control located
on the instrument panel that allows
you select 4x2, 4x4 High or 4x4 Low
operation.
• uses auto-manual hub locks that can
be engaged and disengaged
automatically based on the 4x4 mode
selected.
• will increase fuel economy when used
in the hub lock's recommended AUTO
mode.
4WD Indicator Lights
Note: When a 4X4 system fault is present,
the system will typically remain in whichever
4X4 mode was selected prior to the fault
condition occurring. It will not default to 4X2
in all circumstances. When this warning is
displayed, have your vehicle serviced by an
authorized dealer.
4X2 Momentarily illuminates when
2H is selected.
4X4 HIGH Continuously illuminates when
4H is selected. 4X4 LOW Continuously illuminates when
4L is selected.
CHECK 4X4 Displays when a 4X4 fault is
present.
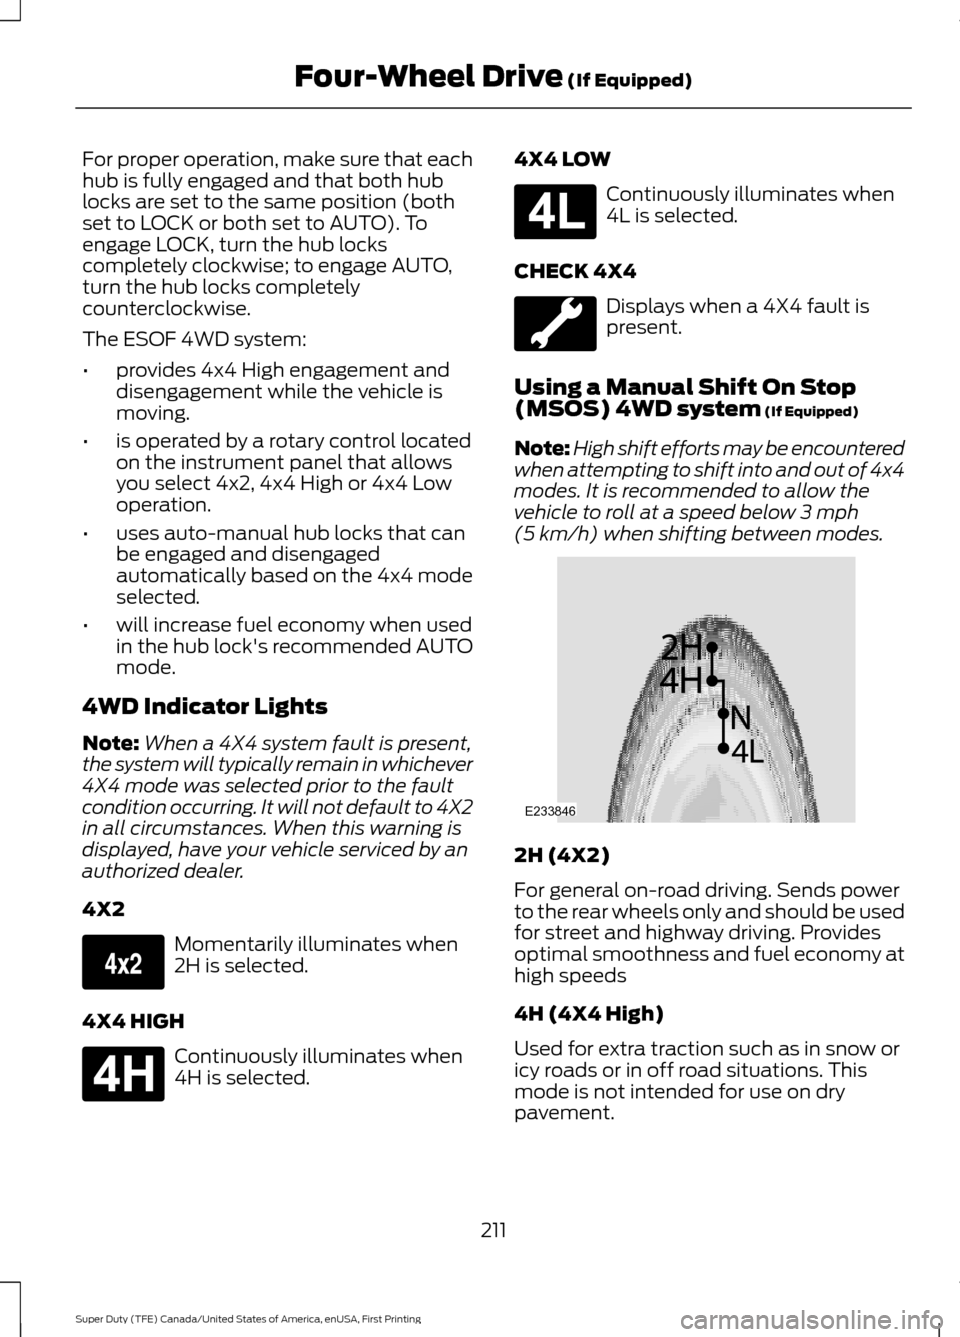
Using a Manual Shift On Stop
(MSOS) 4WD system (If Equipped)
Note: High shift efforts may be encountered
when attempting to shift into and out of 4x4
modes. It is recommended to allow the
vehicle to roll at a speed below
3 mph
(5 km/h) when shifting between modes. 2H (4X2)
For general on-road driving. Sends power
to the rear wheels only and should be used
for street and highway driving. Provides
optimal smoothness and fuel economy at
high speeds
4H (4X4 High)
Used for extra traction such as in snow or
icy roads or in off road situations. This
mode is not intended for use on dry
pavement.
211
Super Duty (TFE) Canada/United States of America, enUSA, First Printing Four-Wheel Drive
(If Equipped)E163173 E181779 E181780 E233846