tow FORD TAURUS 1998 3.G User Guide
[x] Cancel search | Manufacturer: FORD, Model Year: 1998, Model line: TAURUS, Model: FORD TAURUS 1998 3.GPages: 192, PDF Size: 1.66 MB
Page 57 of 192
Press the other side of the control to adjust
softness.
REAR SEATS
2nd seat/Split-folding rear seat (if equipped)
One or both rear seatbacks can be folded down to
provide additional cargo space.
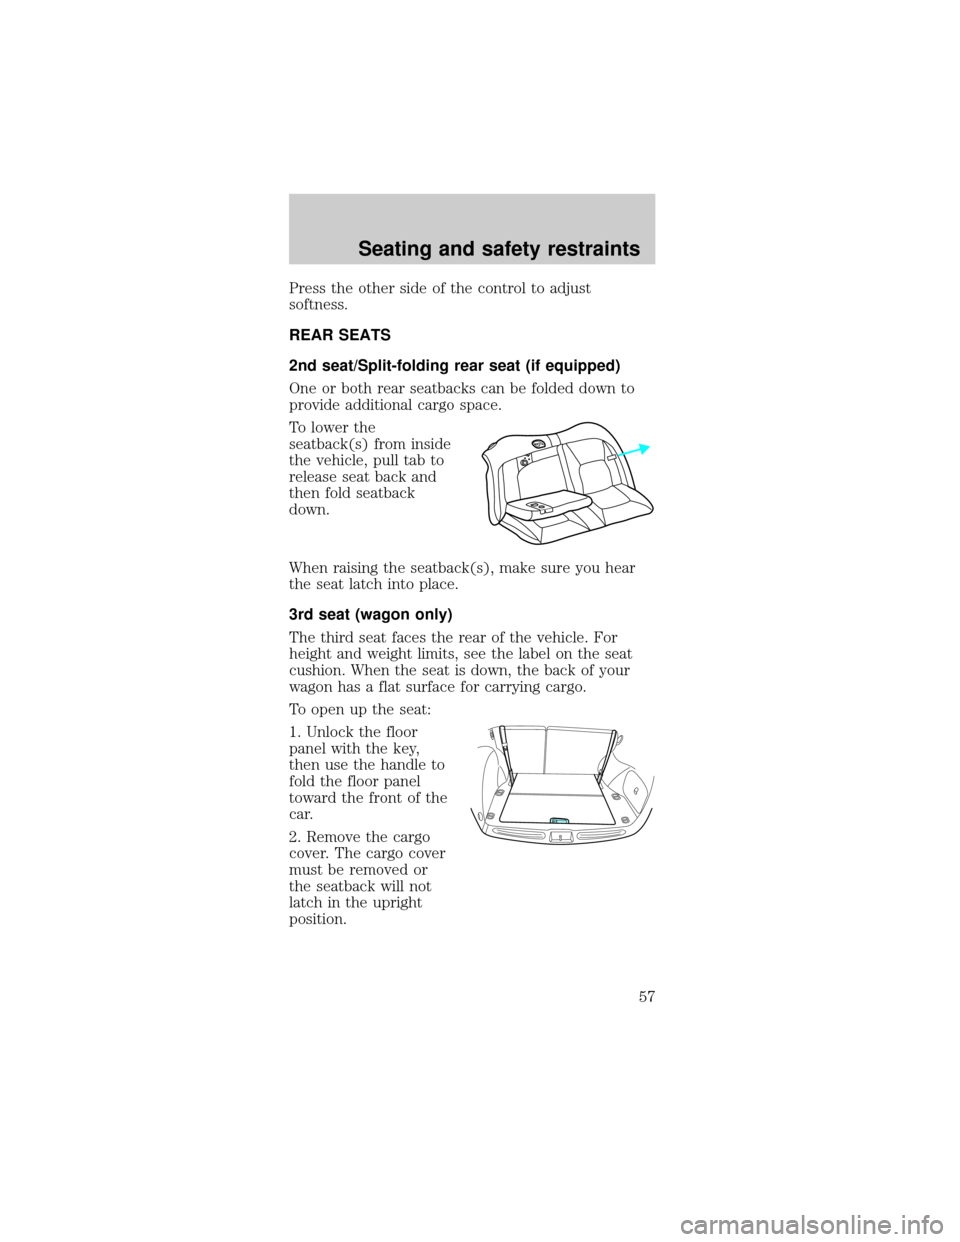
To lower the
seatback(s) from inside
the vehicle, pull tab to
release seat back and
then fold seatback
down.
When raising the seatback(s), make sure you hear
the seat latch into place.
3rd seat (wagon only)
The third seat faces the rear of the vehicle. For
height and weight limits, see the label on the seat
cushion. When the seat is down, the back of your
wagon has a flat surface for carrying cargo.
To open up the seat:
1. Unlock the floor
panel with the key,
then use the handle to
fold the floor panel
toward the front of the
car.
2. Remove the cargo
cover. The cargo cover
must be removed or
the seatback will not
latch in the upright
position.
Seating and safety restraints
57
Page 58 of 192
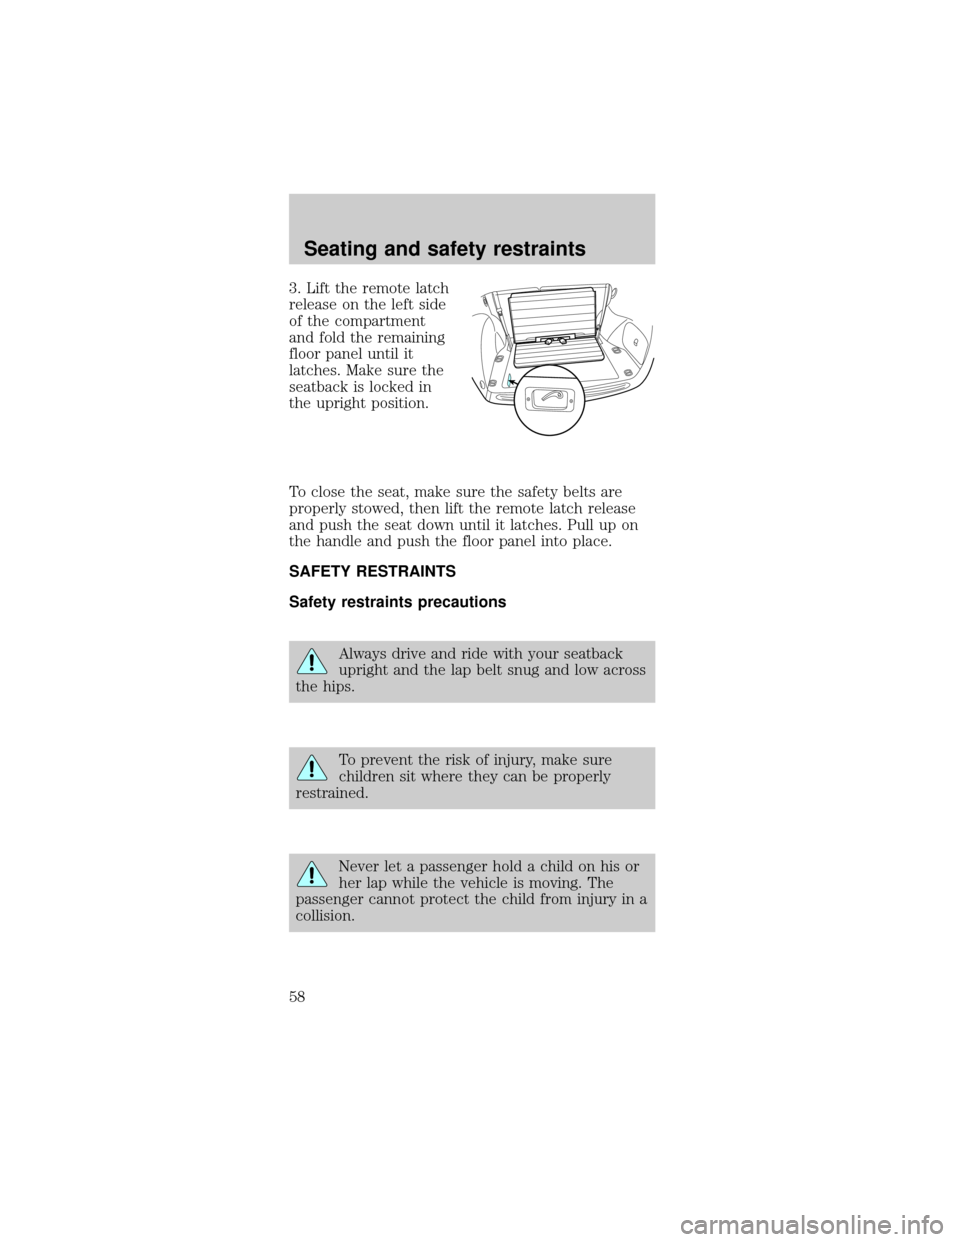
3. Lift the remote latch
release on the left side
of the compartment
and fold the remaining
floor panel until it
latches. Make sure the
seatback is locked in
the upright position.
To close the seat, make sure the safety belts are
properly stowed, then lift the remote latch release
and push the seat down until it latches. Pull up on
the handle and push the floor panel into place.
SAFETY RESTRAINTS
Safety restraints precautions
Always drive and ride with your seatback
upright and the lap belt snug and low across
the hips.
To prevent the risk of injury, make sure
children sit where they can be properly
restrained.
Never let a passenger hold a child on his or
her lap while the vehicle is moving. The
passenger cannot protect the child from injury in a
collision.
Seating and safety restraints
58
Page 65 of 192
Due to folding rear seats, sometimes the buckles and
tongues toward the center of the vehicle may be
hidden by the rear edge of the seat cushion. Pull
them out so they will be accessible.
While you are fastened in the seat belt, the shoulder
belt adjusts to your movement. However, if you
brake hard, turn hard or your vehicle receives an
impact of 8 km/h (5 mph) or more, the safety belt
will become locked and help reduce your forward
movement.
To unfasten the belt, push the red release button on
the end of the buckle. This allows the tongue to
unlatch from the buckle. While the belt retracts,
guide the tongue to its original position to prevent it
from striking you or the vehicle.
Safety belt extension assembly
If the safety belt assembly is too short, even when
fully extended, 20 cm (8 inches) can be added to
the safety belt assembly by adding a safety belt
extension assembly (part number 611C22). Safety
belt extension assemblies can be obtained from your
dealer at no cost.
Use only extensions manufactured by the same
supplier as the safety belt. Manufacturer
identification is located at the end of the webbing on
the label. Also, use the safety belt extension only if
the safety belt is too short for you when fully
extended. Do not use extensions to change the fit of
the shoulder belt across the torso.
Safety belt warning light and indicator chime
The seat belt warning light illuminates in the
instrument cluster and a chime sounds to remind
the occupants to fasten their safety belts.
Seating and safety restraints
65
Page 78 of 192
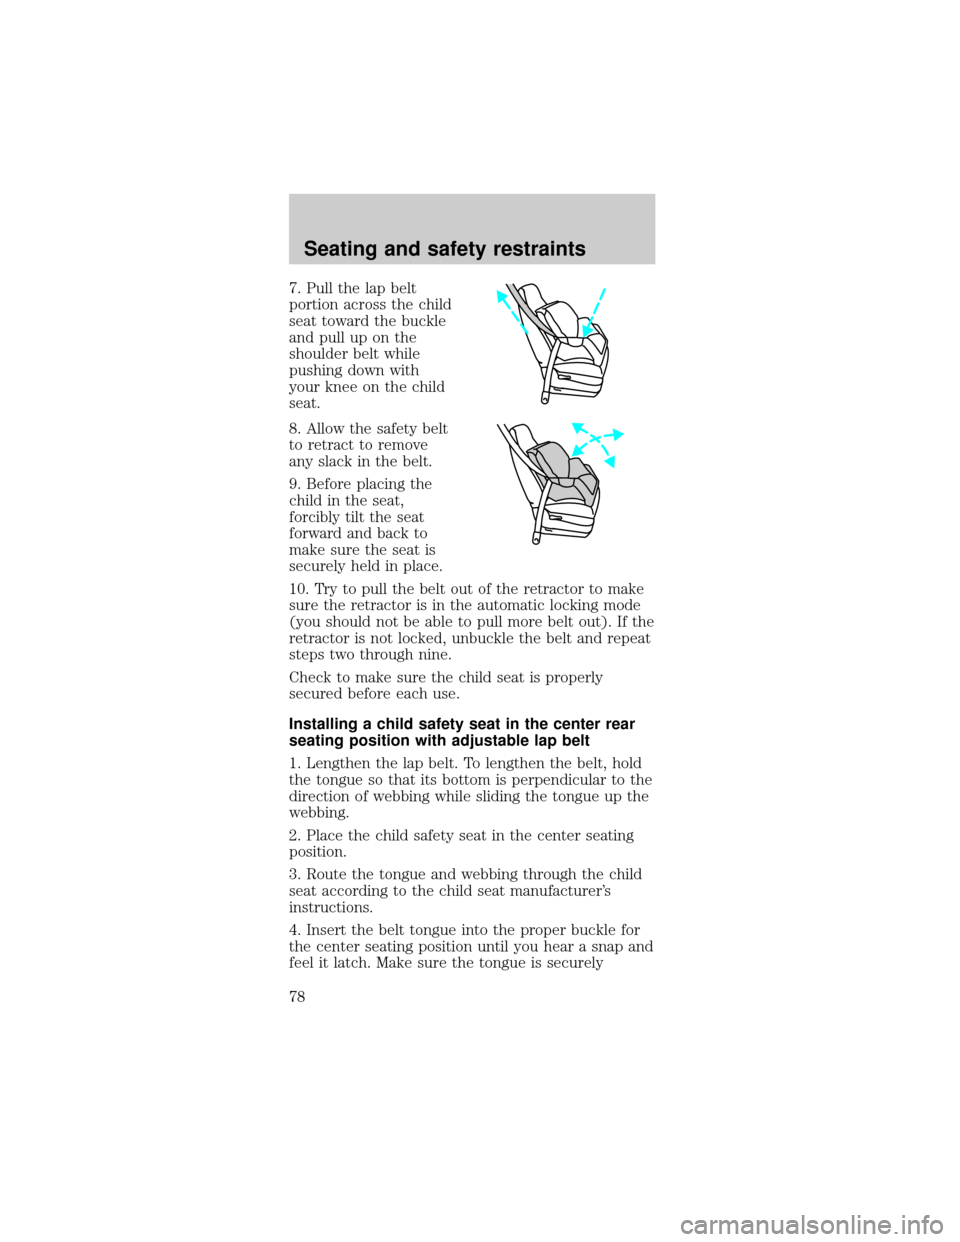
7. Pull the lap belt
portion across the child
seat toward the buckle
and pull up on the
shoulder belt while
pushing down with
your knee on the child
seat.
8. Allow the safety belt
to retract to remove
any slack in the belt.
9. Before placing the
child in the seat,
forcibly tilt the seat
forward and back to
make sure the seat is
securely held in place.
10. Try to pull the belt out of the retractor to make
sure the retractor is in the automatic locking mode
(you should not be able to pull more belt out). If the
retractor is not locked, unbuckle the belt and repeat
steps two through nine.
Check to make sure the child seat is properly
secured before each use.
Installing a child safety seat in the center rear
seating position with adjustable lap belt
1. Lengthen the lap belt. To lengthen the belt, hold
the tongue so that its bottom is perpendicular to the
direction of webbing while sliding the tongue up the
webbing.
2. Place the child safety seat in the center seating
position.
3. Route the tongue and webbing through the child
seat according to the child seat manufacturer's
instructions.
4. Insert the belt tongue into the proper buckle for
the center seating position until you hear a snap and
feel it latch. Make sure the tongue is securely
Seating and safety restraints
78
Page 83 of 192
5. Place the child on the child seat and position the
shoulder belts over each shoulder.
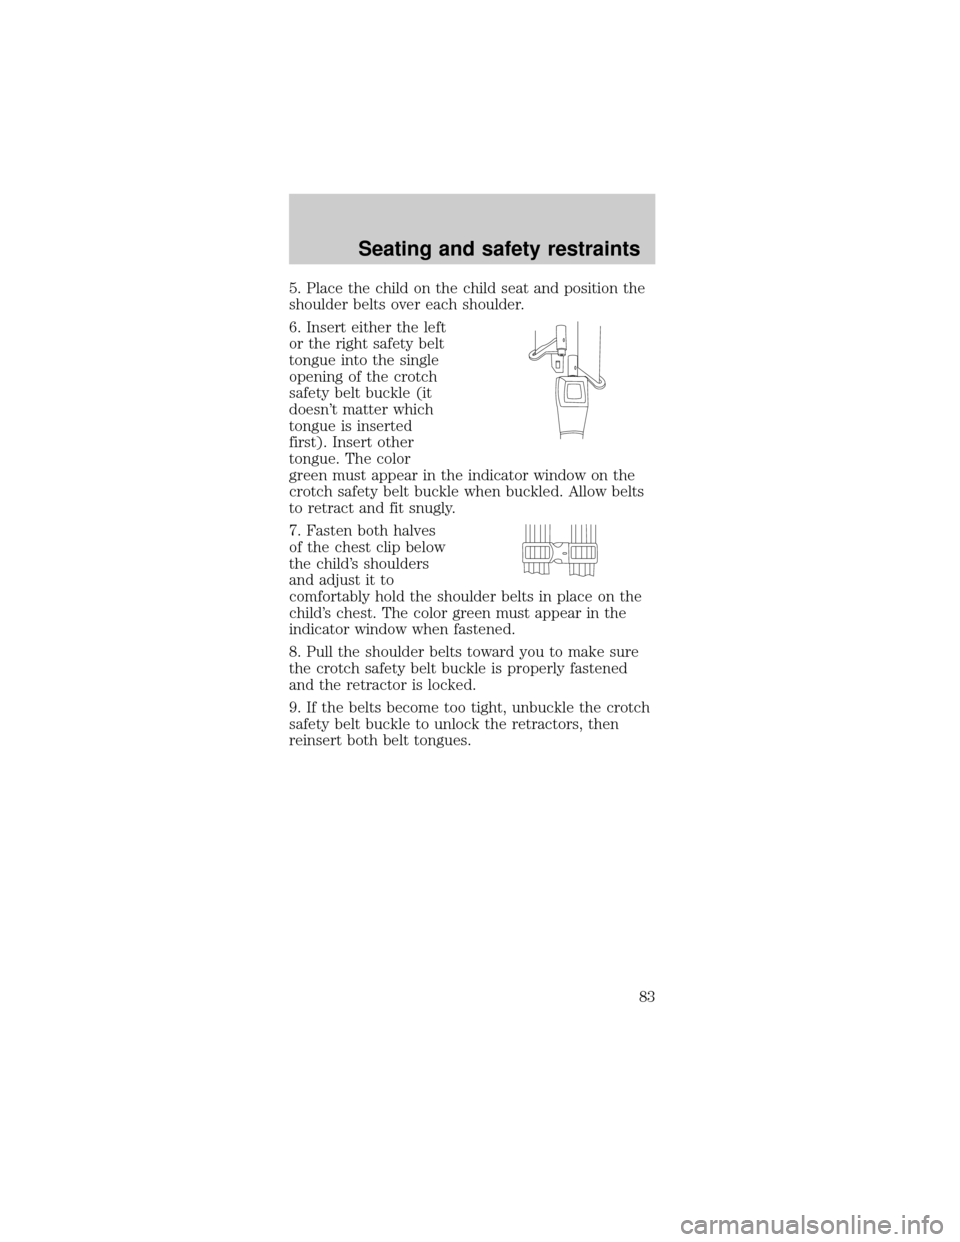
6. Insert either the left
or the right safety belt
tongue into the single
opening of the crotch
safety belt buckle (it
doesn't matter which
tongue is inserted
first). Insert other
tongue. The color
green must appear in the indicator window on the
crotch safety belt buckle when buckled. Allow belts
to retract and fit snugly.
7. Fasten both halves
of the chest clip below
the child's shoulders
and adjust it to
comfortably hold the shoulder belts in place on the
child's chest. The color green must appear in the
indicator window when fastened.
8. Pull the shoulder belts toward you to make sure
the crotch safety belt buckle is properly fastened
and the retractor is locked.
9. If the belts become too tight, unbuckle the crotch
safety belt buckle to unlock the retractors, then
reinsert both belt tongues.
Seating and safety restraints
83
Page 84 of 192
Removing your child from the built-in child seat
1. Squeeze the tabs on the top and the bottom of
the chest clip and pull the halves apart to open the
chest clip.
2. Press the release button on the crotch safety belt
buckle.
3. Slide the shoulder belts off the child's shoulders
and remove the child.
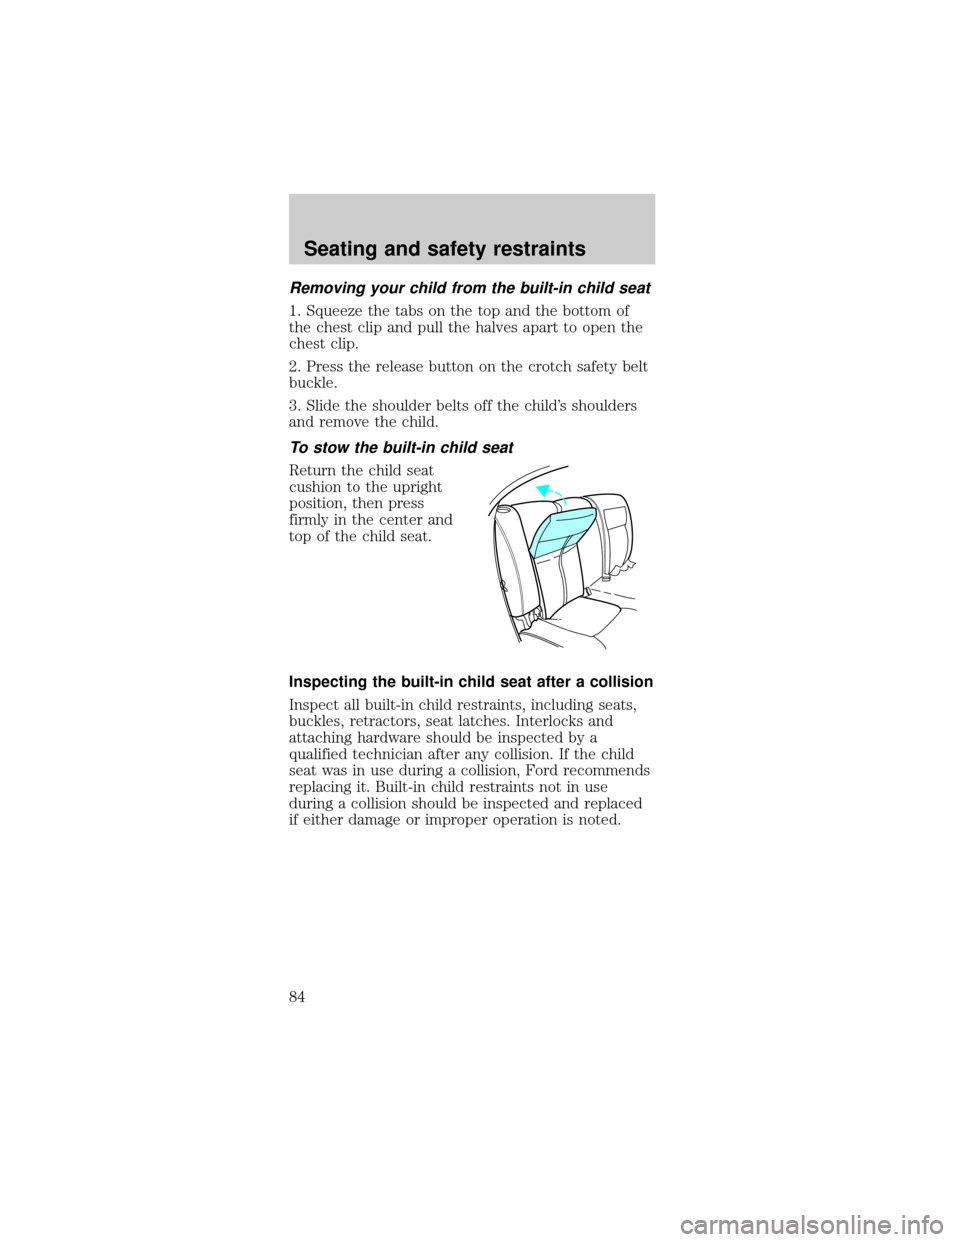
To stow the built-in child seat
Return the child seat
cushion to the upright
position, then press
firmly in the center and
top of the child seat.
Inspecting the built-in child seat after a collision
Inspect all built-in child restraints, including seats,
buckles, retractors, seat latches. Interlocks and
attaching hardware should be inspected by a
qualified technician after any collision. If the child
seat was in use during a collision, Ford recommends
replacing it. Built-in child restraints not in use
during a collision should be inspected and replaced
if either damage or improper operation is noted.
Seating and safety restraints
84
Page 102 of 192
²GCWR (Gross Combined Weight Rating):
Maximum combined weight of towing vehicle
(including passengers and cargo) and the trailer.
The GCWR indicates the maximum loaded weight
that the vehicle is designed to tow.
²Maximum Trailer Weight Rating: Maximum
weight of a trailer the vehicle is permitted to tow.
The maximum trailer weight rating is determined
by subtracting the vehicle curb weight for each
engine/transmission combination, any required
option weight for trailer towing and the weight of
the driver from the GCWR for the towing vehicle.
²Maximum Trailer Weight: maximum weight of
a trailer the loaded vehicle (including passengers
and cargo) is permitted to tow. It is determined
by subtracting the weight of the loaded trailer
towing vehicle from the GCWR for the towing
vehicle.
²Trailer Weight Range: Specified weight range
that the trailer must fall within that ranges from
zero to the maximum trailer weight rating.
Remember to figure in the tongue load of your
loaded trailer when figuring the total weight.
Do not exceed the GVWR or the GAWR
specified on the Safety Compliance
Certification Label.
Do not use replacement tires with lower load
carrying capacities than the originals because they
may lower the vehicle's GVWR and GAWR
limitations. Replacement tires with a higher limit
than the originals do not increase the GVWR and
GAWR limitations.
Driving
102
Page 103 of 192

DRIVING THROUGH WATER
Do not drive quickly through standing water,
especially if the depth is unknown. Traction or brake
capability may be limited and if the ignition system
gets wet, your engine may stall. Water may also
enter your engine's air intake and severely damage
your engine.
If driving through deep or standing water is
unavoidable, proceed very slowly. Never drive
through water that is higher than the bottom of the
hubs (truck)/wheel rims (car).
Once through the water, always try the brakes. Wet
brakes do not stop the vehicle as effectively as dry
brakes. Drying can be improved by moving your
vehicle slowly while applying light pressure on the
brake pedal.
TRAILER TOWING
Your vehicle is classified as a light duty towing
vehicle. The amount of weight you can safely tow
depends on the type of engine you have in your
vehicle. Your vehicle does not come from the factory
fully equipped to tow. No towing packages are
available through Ford or Mercury/Lincoln dealers.
Do not tow a trailer until your vehicle has been
driven at least 800 km (500 miles). If towing with a
station wagon, inflate the rear tires to 35 psi.
Towing a trailer places an additional load on your
vehicle's engine, transaxle, brakes, tires and
suspension. Inspect these components carefully after
towing.
The amount of weight that you can tow depends on
the type of engine in your vehicle. See the following
charts:
Driving
103
Page 105 of 192
Towing trailers beyond the maximum
recommended gross trailer weight exceeds
the limit of the vehicle and could result in engine
damage, transaxle damage, structural damage, loss
of control, and personal injury.
Preparing to tow
Use the proper equipment for towing a trailer, and
make sure it is properly attached to your vehicle.
See your dealer or a reliable trailer dealer if you
require assistance.
Hitches
Do not use hitches that clamp onto the vehicle
bumper. Use a load carrying hitch. You must
distribute the load in your trailer so that 10 ± 15%
of the total weight of the trailer is on the tongue.
Safety chains
Always connect the trailer's safety chains to the
vehicle. To connect the trailer's safety chains, cross
the chains under the trailer tongue and allow slack
for turning corners.
If you use a rental trailer, follow the instructions that
the rental agency gives to you.
Driving
105
Page 106 of 192
Trailer brakes
Electric brakes and manual, automatic or surge-type
brakes are safe if installed properly and adjusted to
the manufacturer's specifications. The trailer brakes
must meet local and Federal regulations.
Do not connect a trailer's hydraulic brake
system directly to your vehicle's brake
system. Your vehicle may not have enough braking
power and your chances of having a collision
greatly increase.
The braking system of the tow vehicle is rated for
operation at the GVWR not GCWR.
Trailer lamps
Trailer lamps are required on most towed vehicles.
Make sure your trailer lamps conform to local and
Federal regulations. See your dealer or trailer rental
agency for proper instructions and equipment for
hooking up trailer lamps.
Driving while you tow
Do not drive faster than 88 km/h (55 mph) when
towing a trailer. Do not drive faster than 72 km/h
(45 mph) with any weight on the trailer while
towing on a hot day or in hilly country.
Speed control may shut off if you are towing on
long, steep grades.
When towing a trailer:
²Use D (Drive) or a lower gear when towing up or
down steep hills. This will eliminate excessive
downshifting and upshifting for optimum fuel
economy and transaxle cooling.
²Anticipate stops and brake gradually.
Driving
106