instrument cluster FORD TAURUS 1998 3.G Owners Manual
[x] Cancel search | Manufacturer: FORD, Model Year: 1998, Model line: TAURUS, Model: FORD TAURUS 1998 3.GPages: 192, PDF Size: 1.66 MB
Page 4 of 192
EFC HFUEL DOOR>
SERVICE
ENGINE
SOONLOW
COOLANTTHEFT102030405060
70
80
90
100
1202060100
140
180P R N D 2 1MPH km/h0000000000P!
BRAKE
+ –
110CRUISE
RPMx1000
ABSO/D
OFFREAR
LAMP
OUTPREMIUM UNLEADED
FUEL RECOMMENDED0 1234
5
6
78
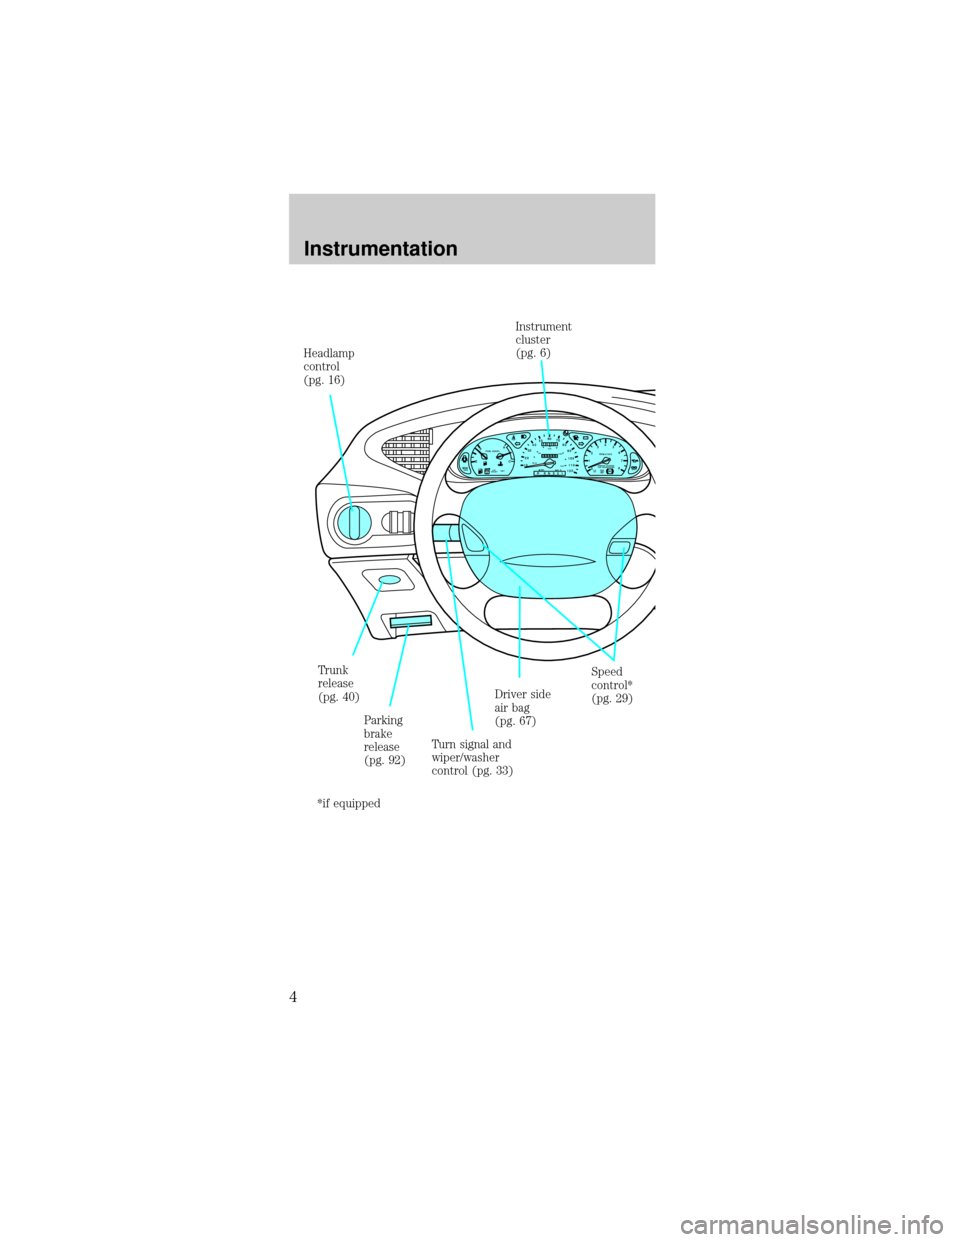
Parking
brake
release
(pg. 92) Headlamp
control
(pg. 16)
Speed
control*
(pg. 29) Driver side
air bag
(pg. 67) Trunk
release
(pg. 40)
Turn signal and
wiper/washer
control (pg. 33)Instrument
cluster
(pg. 6)
*if equipped
Instrumentation
4
Page 6 of 192
WARNING LIGHTS AND CHIMES
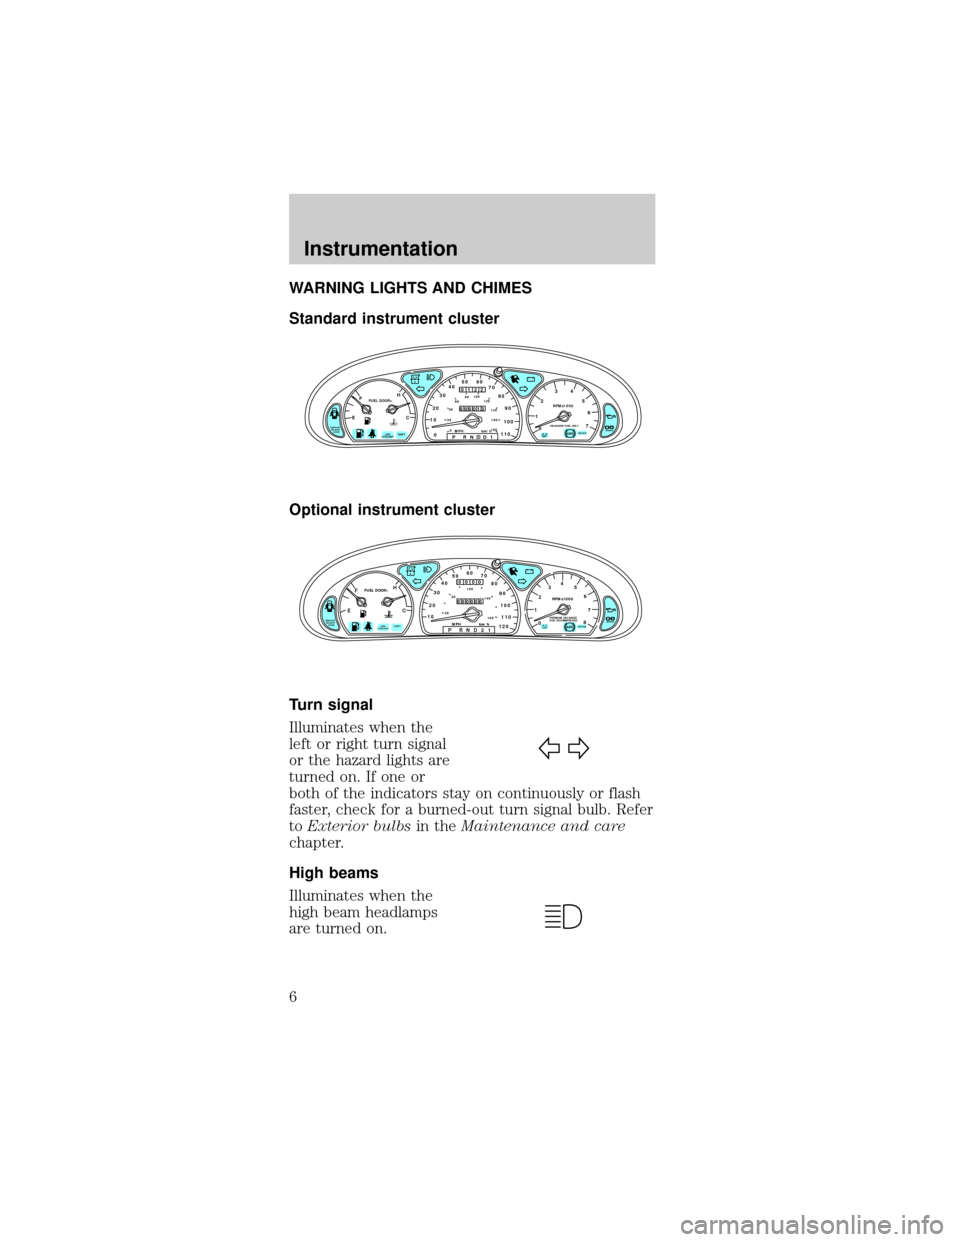
Standard instrument cluster
Optional instrument cluster
Turn signal
Illuminates when the
left or right turn signal
or the hazard lights are
turned on. If one or
both of the indicators stay on continuously or flash
faster, check for a burned-out turn signal bulb. Refer
toExterior bulbsin theMaintenance and care
chapter.
High beams
Illuminates when the
high beam headlamps
are turned on.
CRUISE
RPMx1000
0 1234
5
6
7EFC H
FUEL DOOR>
SERVICE
ENGINE
SOON1020304050 60
70
80
90
100
110
00 20406080100
120
140
160
180P R N D D 1MPH km/h
00
122
00013
P!
BRAKEABS
+ –
UNLEADED FUEL ONLY
THEFT LOW
COOLANTO/D
OFF
EFC H
FUEL DOOR>
SERVICE
ENGINE
SOON
THEFT102030405060
70
80
90
100
1202060100
140
180
P R N D 2 1MPH km/h
00
000
00000
P!
BRAKELOW
COOLANT
+ –
110CRUISE
RPMx1000
ABSO/D
OFFPREMIUM UNLEADED
FUEL RECOMMENDED0 1234
5
6
78
Instrumentation
6
Page 12 of 192
Key-in-ignition warning chime
Sounds when the key is left in the ignition in the
OFF/LOCK or ACC position and either front door is
opened.
Headlamps on warning chime
Sounds when the headlamps or parking lamps are
on, the ignition is off (and the key is not in the
ignition) and either front door is opened.
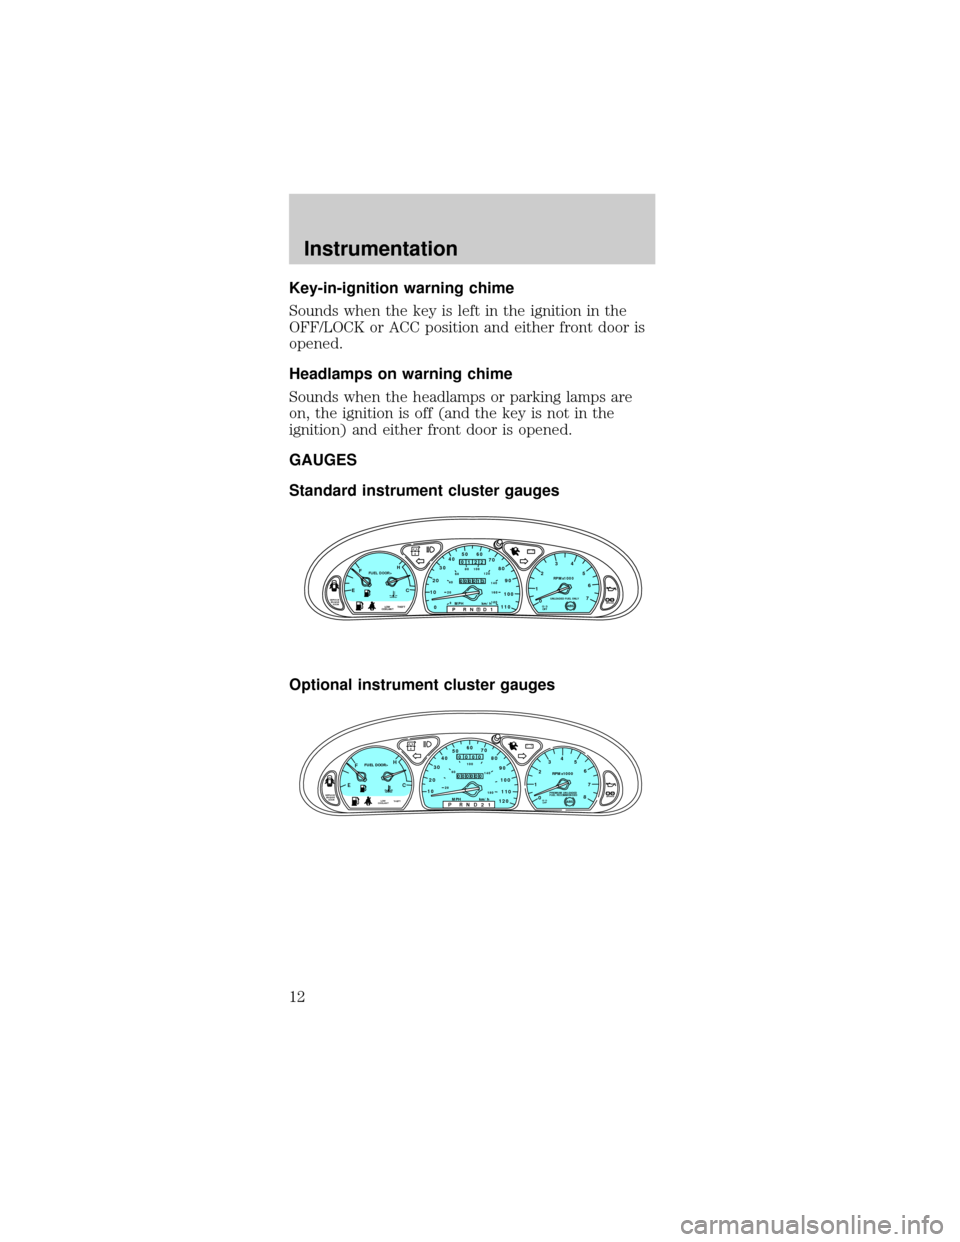
GAUGES
Standard instrument cluster gauges
Optional instrument cluster gauges
CRUISE
RPMx1000
0 1234
5
6
7EFC H
FUEL DOOR>
SERVICE
ENGINE
SOON1020304050 60
70
80
90
100
110
00 20406080100
120
140
160
180P R N D D 1MPH km/h
00
122
00013
P!
BRAKEABS
+ –
UNLEADED FUEL ONLY
THEFT LOW
COOLANTO/D
OFF
EFC H
FUEL DOOR>
SERVICE
ENGINE
SOON
THEFT102030405060
70
80
90
100
1202060100
140
180
P R N D 2 1MPH km/h
00
000
00000
P!
BRAKELOW
COOLANT
+ –
110CRUISE
RPMx1000
ABSO/D
OFFPREMIUM UNLEADED
FUEL RECOMMENDED0 1234
5
6
78
Instrumentation
12
Page 13 of 192

Speedometer
Indicates the current vehicle speed.
²Standard instrument
cluster
²Optional instrument
cluster
Tachometer
Indicates the engine speed in revolutions per
minute.
²Standard instrument
cluster
²SHO instrument
cluster (if equipped)
Driving with your tachometer pointer in the red
zone may damage the engine.
1020304050 60
70
80
90
100
110
0
0 20406080100
120
140
160
180P R N D D 1MPH km/h
00
000
00000
102030405060
70
80
90
100
1202060100
140
180
P R N D 2 1MPH km/h
00
000
00000
110
RPMx1000
0 1234
5
6
7UNLEADED FUEL ONLY
RPMx1000
PREMIUM UNLEADED
FUEL RECOMMENDED0 1234
5
6
78
Instrumentation
13
Page 48 of 192
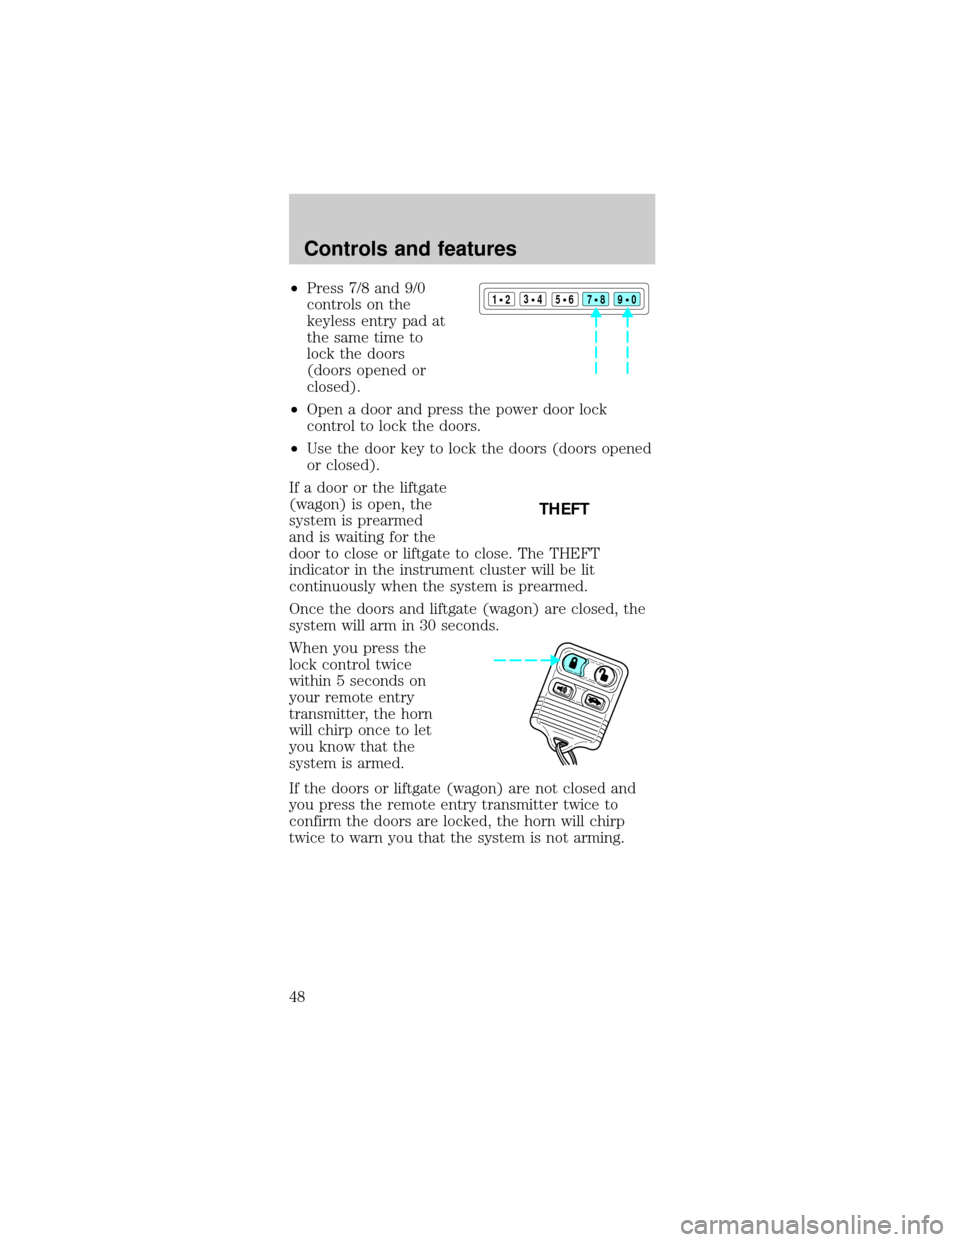
²Press 7/8 and 9/0
controls on the
keyless entry pad at
the same time to
lock the doors
(doors opened or
closed).
²Open a door and press the power door lock
control to lock the doors.
²Use the door key to lock the doors (doors opened
or closed).
If a door or the liftgate
(wagon) is open, the
system is prearmed
and is waiting for the
door to close or liftgate to close. The THEFT
indicator in the instrument cluster will be lit
continuously when the system is prearmed.
Once the doors and liftgate (wagon) are closed, the
system will arm in 30 seconds.
When you press the
lock control twice
within 5 seconds on
your remote entry
transmitter, the horn
will chirp once to let
you know that the
system is armed.
If the doors or liftgate (wagon) are not closed and
you press the remote entry transmitter twice to
confirm the doors are locked, the horn will chirp
twice to warn you that the system is not arming.123
45678
90
THEFT
Controls and features
48
Page 65 of 192

Due to folding rear seats, sometimes the buckles and
tongues toward the center of the vehicle may be
hidden by the rear edge of the seat cushion. Pull
them out so they will be accessible.
While you are fastened in the seat belt, the shoulder
belt adjusts to your movement. However, if you
brake hard, turn hard or your vehicle receives an
impact of 8 km/h (5 mph) or more, the safety belt
will become locked and help reduce your forward
movement.
To unfasten the belt, push the red release button on
the end of the buckle. This allows the tongue to
unlatch from the buckle. While the belt retracts,
guide the tongue to its original position to prevent it
from striking you or the vehicle.
Safety belt extension assembly
If the safety belt assembly is too short, even when
fully extended, 20 cm (8 inches) can be added to
the safety belt assembly by adding a safety belt
extension assembly (part number 611C22). Safety
belt extension assemblies can be obtained from your
dealer at no cost.
Use only extensions manufactured by the same
supplier as the safety belt. Manufacturer
identification is located at the end of the webbing on
the label. Also, use the safety belt extension only if
the safety belt is too short for you when fully
extended. Do not use extensions to change the fit of
the shoulder belt across the torso.
Safety belt warning light and indicator chime
The seat belt warning light illuminates in the
instrument cluster and a chime sounds to remind
the occupants to fasten their safety belts.
Seating and safety restraints
65
Page 72 of 192

Determining if the system is operational
The SRS uses a readiness light in the instrument
cluster or a tone to indicate the condition of the
system. Refer to theAir bag readinesssection in
theInstrumentationchapter. Routine maintenance
of the air bag is not required.
A difficulty with the system is indicated by one or
more of the following:
²The readiness light
will either flash or
stay lit.
²The readiness light
will not illuminate immediately after ignition is
turned on.
²A series of five beeps will be heard. The tone
pattern will repeat periodically until the problem
and light are repaired.
If any of these things happen, even intermittently,
have the SRS serviced at your dealership or by a
qualified technician immediately. Unless serviced,
the system may not function properly in the event of
a collision.
Disposal of air bags and air bag equipped
vehicles
For disposal of air bags or air bag equipped vehicles,
see your local dealership or qualified technician. Air
bags MUST BE disposed of by qualified personnel.
SAFETY RESTRAINTS FOR CHILDREN
See the following sections for directions on how to
properly use safety restraints for children. Also see
Air Bag Supplemental Restraint System (SRS)in
this chapter for special instructions about using air
bags.
Seating and safety restraints
72
Page 91 of 192

an ABS equipped vehicle (on bottom) to a non-ABS
equipped vehicle (on top) during hard braking with
loss of front braking traction.
ABS warning lamp
The
ABSwarning lamp
in the instrument
cluster momentarily
illuminates when the
ignition is turned on and the engine is off. If the
light does not illuminate momentarily at start up,
remains on or continues to flash, the ABS needs to
be serviced. With the ABS light on, the anti-lock
brake system is disabled and normal braking is still
effective unless the brake warning light also remains
illuminated with parking brake released. (If your
brake warning lamp illuminates, have your vehicle
serviced immediately).
Using ABS
²In an emergency or when maximum efficiency
from the ABS is required, apply continuous full
force on the brake. The ABS will be activated
immediately, thus allowing you to retain full
steering control of your vehicle and, providing
there is sufficient space, will enable you to avoid
obstacles and bring the vehicle to a controlled
stop.
²The Anti-Lock system does not decrease the time
necessary to apply the brakes or always reduce
stopping distance. Always leave enough room
between your vehicle and the vehicle in front of
you to stop.
²We recommend that you familiarize yourself with
this braking technique. However, avoid taking any
unnecessary risks.P!
BRAKE
Driving
91
Page 92 of 192
Parking brake
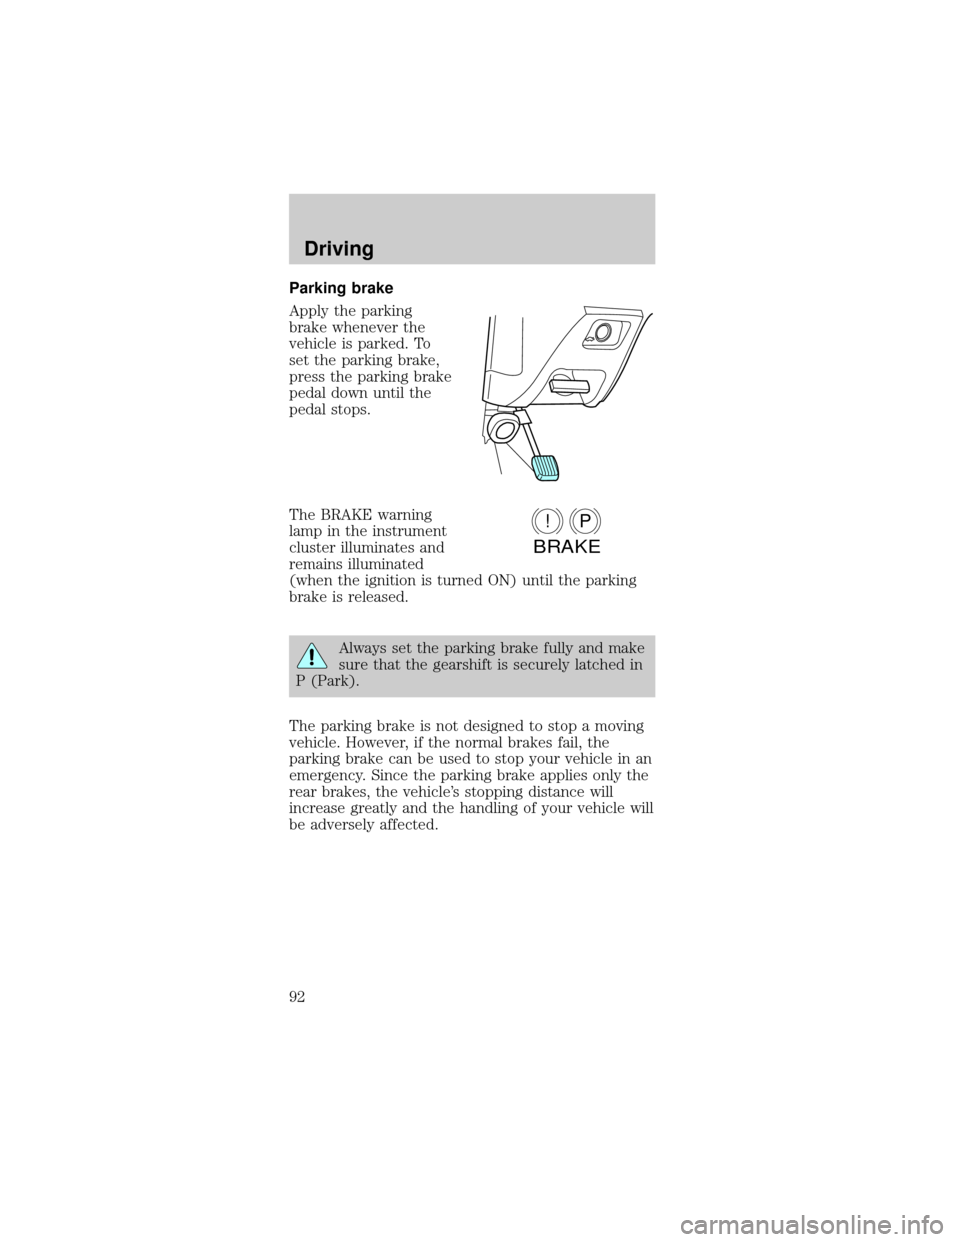
Apply the parking
brake whenever the
vehicle is parked. To
set the parking brake,
press the parking brake
pedal down until the
pedal stops.
The BRAKE warning
lamp in the instrument
cluster illuminates and
remains illuminated
(when the ignition is turned ON) until the parking
brake is released.
Always set the parking brake fully and make
sure that the gearshift is securely latched in
P (Park).
The parking brake is not designed to stop a moving
vehicle. However, if the normal brakes fail, the
parking brake can be used to stop your vehicle in an
emergency. Since the parking brake applies only the
rear brakes, the vehicle's stopping distance will
increase greatly and the handling of your vehicle will
be adversely affected.
P!
BRAKE
Driving
92
Page 99 of 192
If the O/D OFF indicator light (if equipped) is
flashing on and off when the vehicle is started or
does not come on when the O/D OFF switch is
pressed, it means there is a malfunction in your
transaxle's electronic system. Contact your dealer as
soon as possible or damage to the transaxle may
occur.
Each time the vehicle is started, the transaxle will
automatically return to normal overdrive mode.
When to use D (Drive) or press the O/D OFF
switch (if equipped)
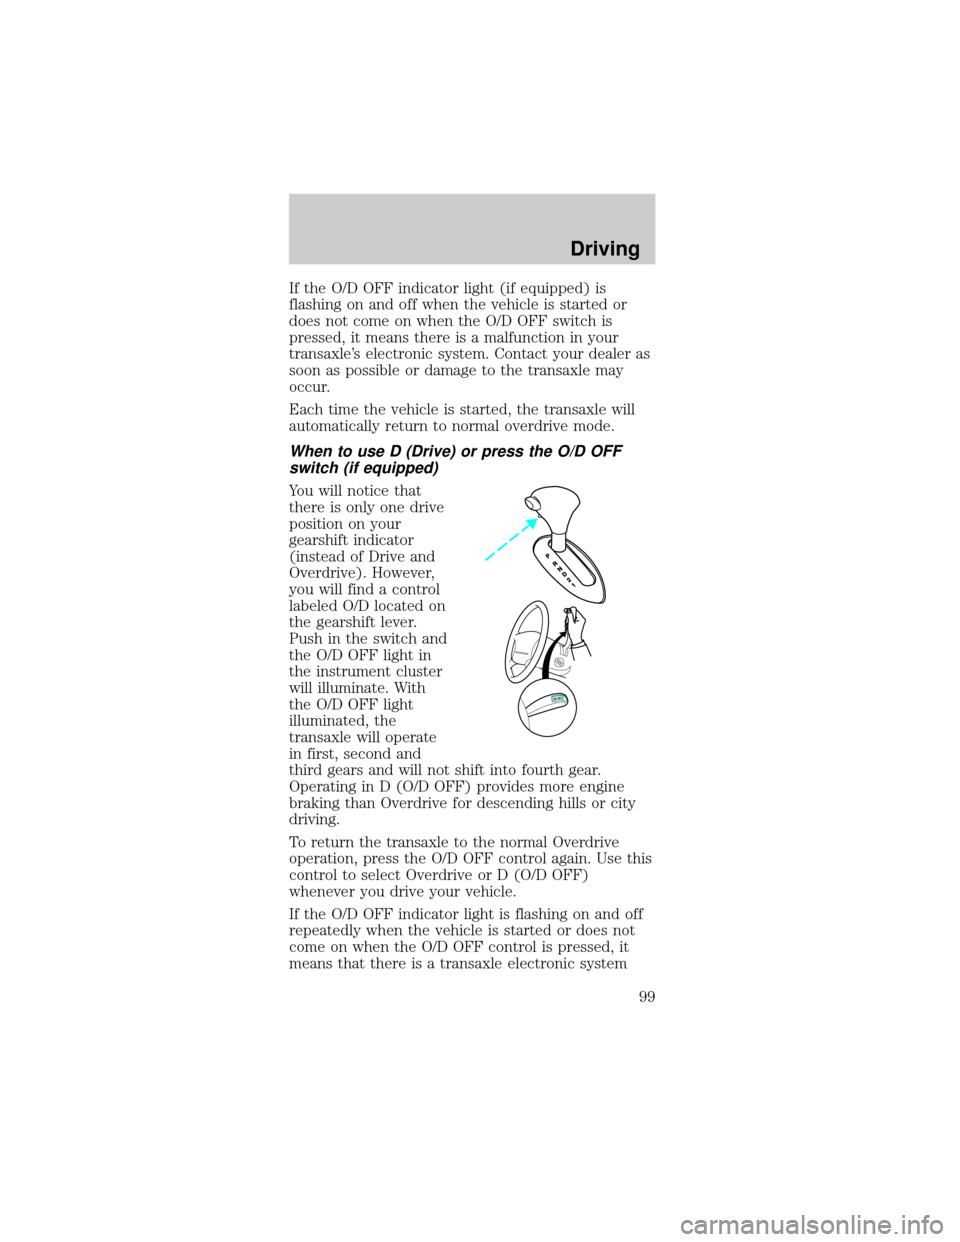
You will notice that
there is only one drive
position on your
gearshift indicator
(instead of Drive and
Overdrive). However,
you will find a control
labeled O/D located on
the gearshift lever.
Push in the switch and
the O/D OFF light in
the instrument cluster
will illuminate. With
the O/D OFF light
illuminated, the
transaxle will operate
in first, second and
third gears and will not shift into fourth gear.
Operating in D (O/D OFF) provides more engine
braking than Overdrive for descending hills or city
driving.
To return the transaxle to the normal Overdrive
operation, press the O/D OFF control again. Use this
control to select Overdrive or D (O/D OFF)
whenever you drive your vehicle.
If the O/D OFF indicator light is flashing on and off
repeatedly when the vehicle is started or does not
come on when the O/D OFF control is pressed, it
means that there is a transaxle electronic system
Driving
99